Sticky Anchor Chain
For our Brewer 12.8 I recently bought new galvanized chain for the electric windlass. The galvanizing made the chain quite rough, causing it to stick in the tube leading it below. In addition, if it didnt stick it would pyramid as it piled up below and choked the tube and jammed the winch. Now, I keep a small plastic bottle of low suds dish detergent (Dawn) topside and as the chain is being retracted I add 1 to 2 jiggers of detergent. Amazingly, 100′ of 3/8″ chain slides through the tube like greased lightning and there is no pyramid pile-up below.
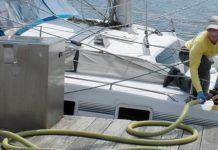
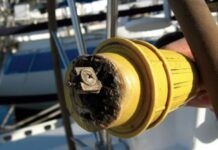
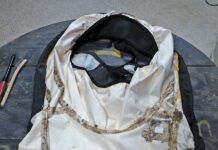
The photograph shows a small funnel I adapted to the lead tube on deck by drilling a small hole. This permits the detergent to go directly onto the chain without spilling on deck. Incidentally, the detergent helps keep the bilge sweet and clean.
Harold and Jill Oldak
Naples, Florida
Beneteau Boats
Great review of the new Beneteau Oceanis 36CC (July 1, 1998). A couple of thoughts: Beneteaus Oceanis line of boats are all available with classic non-furling masts from the factory, usually as a no cost option, and mostly with full battens and lazy jacks. This can significantly improve the performance of the boats, albeit at a small cost in convenience.
Many of the latest Beneteaus are now fitted with lead keels, including the new Oceanis 352, which is an aft-cockpit design also based on the same hull as the OC36CC. I have one on order and carefully considered the 36CC. One of my decision factors was that the 36CC has nearly no outside stowage-perhaps enough for the dock fenders, but thats it. Beneteaus aft-cabin boats (except those with dual aft cabins) all feature enormous cockpit lockers for dinghies, sails, etc.
The OC352 does have some design quirks of its own, however, such as having only two winches that are located on the aft part of the cabin top behind a large bank of clutches. (An additional pair is an option, but are side-by-side with the others, which would not allow two people to work them separately, or allow the fitting of a dodger.) So I am engaged in a redesign and fabrication project to mount conventionally placed primaries alongside the cockpit.
Tim Dick
San Francisco, California
Holes in Molded Keels
Regarding the item on encapsulated keels in the July 1, 1998 PS Advisor: Our boat is a 1966 Pearson Coaster Hull #11. From the patches on the lower leading edge of the keel it would appear when I bought the boat that it had had several encounters with hard objects about 4′ below the surface. I drilled 1/4″ holes in the lower portion of the keel and let it drain over the winter. I found funny, dark brown stuff coming out on the drill. It took awhile for me to realize that Pearson had apparently cast slabs of lead and then secured it in place with end-grain balsa.
The next spring I drilled larger holes and pulled out some more of the balsa using wire hooks. I armed myself with a 1-1/4″ hole saw and started poking staggered holes about 10″ apart on both sides of the keel up about 15″ from the bottom of the keel. Then using wire hooks made from coat hangers I pulled out every scrap of balsa that I could reach and then let it set through the summer and the next winter to dry. The following spring I managed to pull out some additional balsa only to find that it was still wet. I then proceeded to duct tape most of the lower holes and flush the keel with freshwater several times and then let it dry for a week. For this rinsing I made up a device out of a short length of 1/4″ copper tubing and one 90 1/4″ elbow soldered on the end so that I could direct the water into places I could not reach with the hooks. I did have to flatten the end of the elbow a bit as the gap between the inside of the fiberglass and the lead was, in most places, less than a 1/4″. At the end of an additional week I managed to reach some balsa and found that it was starting to dry, at last. I then purchased a gallon of acetone and squirted that in with a plastic syringe. Acetone will carry water away with it as it evaporates. After waiting another week and using a fan to force air through the keel, I managing to hook some additional balsa, which was much drier. I felt that at this point I had done all I could.
The final step was to fill the area that had been occupied by the balsa. I chose a penetrating epoxy similar to Git Rot. This material was poured in about 1-quart quantities. I duct taped over the lowest holes and then backed the tape with plywood clamped in place. I poured from first one side of the keel and then other, checking that the epoxy was getting to the other side of the keel. I had also ground away all of the patches on the lower leading edge and taped over this area, leaving some gaps just to make sure that the epoxy flowed into this area. I put in about 5 gallons of epoxy by the time I reached the uppermost holes. This process did produce a lot of heat as the epoxy kicked off. I tried to make each successive pour before the prior pour started to cool.
To the best of my knowledge I have not had any more water in the keel in the area of the encapsulated ballast.
I also have not hit any more hard objects!
Fred Cornford
Mansfield, Massachusetts
I read with great interest Randall Tumblins encapsulated keel woes. On our 1984 Irwin, I faced a similar problem that delaminated and water-logged the keel. The hull-to-keel joint on ours had opened up and allowed rainwater to enter, freeze, expand, and then repeat the cycle for six seasons when the boat was abandoned on the hard. We resolved the problem by tapping on the capsule and locating the voids. We then began drilling 3/8″ holes at the top and bottom extremes of each void. We also opened the hull-to-keel joint with a Dremel tool. We let these vent for the winter and provided a skirt to prevent water from entering.
In the early spring we used Raka Epoxy (slow cure) and filled hollow caulking tubes. We began filling from the bottom and flooded each void. When epoxy came out the hole we stuck a cork into the bottom hole and moved on to the next hole at the same level.
When all were filled on both sides of the keel we had used approximately 4 gallons of resin. The plugged holes were sealed with epoxy and high density filler. The hull-to-keel joint was filled with high density filler, fiberglass mat, high density filler, glass cloth, high density filler and finally faired with low density fairing filler. The entire bottom was then given a new epoxy barrier coat. I now feel that the keel is strong enough with the new joint that I could remove the keel bolts and sail away. (I wont but I could, I think?)
Jim McGuire
Warwick, Rhode Island
Note that unlike most boats with encapsulated ballast, McGuires keel is not molded as part of the hull.
My boat has an encapsulated keel and it has been punctured at least once.
To repair it, our boatyard baked the keel to dry it out. This went on for several days with heat lamps. The resulting repair has lasted for six years. This kind of a keel on a boat that has otherwise given me enormous pleasure (Whitby 42) has inhibited my gunkholing. I am forever afraid of puncturing it again.
I did not have this much fear when I had a boat with an exposed lead keel. It was occasionally hit but the damage was not that great if we were moving slowly.
I have wondered and discussed with a number of people whether a sacrificial piece of wood could be glued on the outside of an encapsulated keel. With epoxy, it should hold pretty well. Naturally, it would have to be faired so it would not spoil the keels dynamics. Do you know anyone who has tried this sort of thing, and if so, did it work?
William Saltsonstall
Boston, Massachusetts
We have not heard of using wood on the outside of the keel, though as we mentioned in the July 1 PS Advisor, we wedged a reinforcing block of hardwood between the lead and the inside of the fiberglass keels leading edge. Also, a decade ago we met the owner of a Pearson Vanguard who, having had similar problems, proceeded to add several inches of fiberglass to the lower leading edge of his keel. He was off to the South Sea and didnt want to worry about coral heads.
The last paragraph of your reply to Randall Tumblin states, We do not like concrete, which tends to get mushy after prolonged immersion in water.
About 50 years ago, I had a college course in concrete structures and there was no hint that such structures get mushy when wet. It seems unlikely that concrete has become more subject to mushiness in the intervening time. Mushiness of concrete would seem more likely due to improper materials, improperly mixed and cured during construction.
There are many common uses of concrete in which it stays wet. For instance, dams, bridge abutments, ships in WWI and WWII, electrical power transmission poles set underwater, and probably many others.
It would be unfortunate if your comment on mushiness of concrete caused it to be rejected as a useful structural material for applications where it might be the optimum choice.
R.E. Gorton
Bloomfield, Connecticut
Well, youre right about concrete structures surviving in water. We don’t know why the concrete ballast we saw was mushy. Weve always figured that it was used by some builders because it was inexpensive . Beyond this issue, concrete is not very dense, so if used in any quantity, allowances would have to be made by the yacht designer in making stability calculations.
Modify the tip of a wet-dry vacuum so it can suck a little air. Do this by drilling small poles through the plastic nozzle. Put the tip up to the offending weep and suck, suck, suck. It sped up the process on my keel repair.
Michael Schreiner
Bay City, Michigan
Rusty Cable Clamps
As I was installing new instruments onto my Edson pedestal on my Catalina 30, I noted the steering cables were loose. I started to tighten the eye bolts and the cables got looser. I peeked into the 1″ crevice above the quadrant and discovered the cable clamps were just clumps of rust.
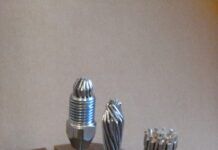
After about eight hours of labor I had two new stainless steel clamps on each cable and a disaster was diverted. I called Edson to find out if the steel clamps were a substitution by the installer or if they are stock items. The response I received was, You are supposed to inspect the clamps routinely. I take it from that that the clamps supplied are mild steel. Why would anyone put such a weak link in such an impossible place to inspect?
Mark Coughenour
Bothell, Washington
Will Keene of Edson said galvanized clamps are standard, stainless optional. He recommends stainless for steering systems, such as yours, that are prone to getting wet. In any case, they should be checked regularly.


