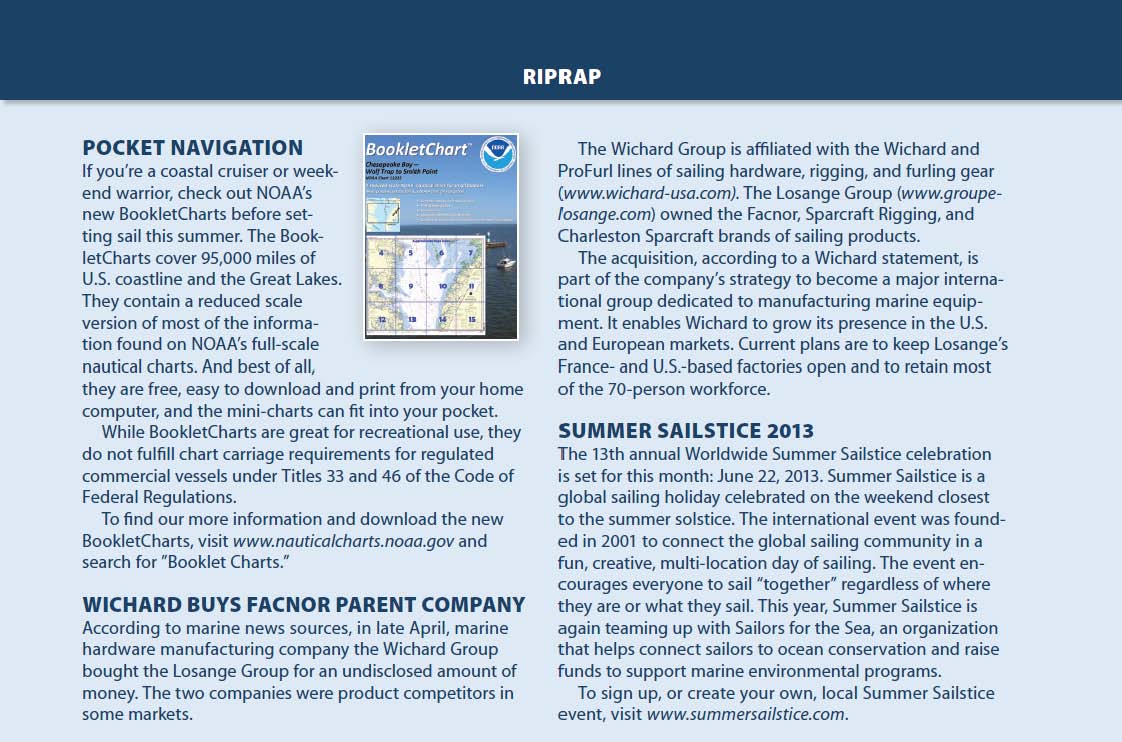
How thick is too thick for the buildup of old layers of bottom paint? This question arises because I have just finished painting the bottom of my boat. Even though I diligently sought out potential flaking spots with my knife, while rolling on the paint (Pettit Ultima Eco), I would frequently get a mess caused by the paint flaking off. I have only owned this boat for three years, so I really do not know how many layers there are. Each year, I have applied one, sometimes two coats, using a -inch nap roller. Have I prepared the surface each year inadequately, or are the previous layers just dead and thus allowing layers to flake off?
So those questions beg another: When does one strip all the old paint off, down to the barrier coat? What are the better, easier methods available to the do-it-yourselfer? Or is it more effective to have it done by a professional?
Clifford Kurz
Voyager, Tashiba 40 No. 173
Jamestown, R.I.
These are the problems commonly faced by owners of used boats with unknown bottom paint histories. We took your questions to our technical experts and Pettit Paints Tom Maellaro. The answers depend on the type of paint you have: hard or ablative. According to Maellaro, in a hard paint, anything around 20 mils of thickness (approximately 10 coats) will begin to lose adhesion. Having more layers on the outside of the coating will make the inner layers less flexible and more likely to lose adhesion. Excessive mil thickness must be removed mechanically with 60-grit sanding or soda blasting. Once a hard paint coating has used up its antifouling properties, the product left behind is no longer active and wont protect against growth. At most, one or two coats of hard paint is recommended. Any more than that, and you are wasting money, locking in antifouling agents that can’t do their work and bringing on the inevitable sanding or blasting job sooner than necessary.
In an ablative paint, anything around 15 mils of thickness will begin to lose adhesion-but since the coating ablates over time, it should not build up like a hard paint. Every time the product ablates, it is releasing fresh biocide, so as long as an ablative coating is on the hull, it should continue to combat hard growth. That said, in our tests, weve found that this protection, especially against slime, diminishes as time goes on. Two to three coats of ablative paint are recommended for multi-season use, while a single coat is adequate for single-season use. An initial signal coat of a different color helps you know when it is time to repaint.
If youve been applying two coats each year for the last three years, thats already six coats of paint for a total of 12 mils, not including the previous applications. If you arent using the boat often enough, those layers are building up, and a slow-moving sailboat will not ablate at the same rate as a powerboat.
Without seeing the vessel, it sounds like it may be time to strip the bottom. Stripping the bottom of a 40-foot boat is a large job for a DIYer.
Your paint removal options vary, and whats best will depend on how much old paint there is and your personal preference. If there arent that many layers of bottom paint, you can sand them off with an 8-inch, dual-action orbital sander and 60-grit sandpaper, but this is hard work and requires careful safety precautions. Overzealous sanding can lead to dings and divots in the gelcoat.
Another option is using a chemical paint stripper like Peel Away or Franmar Soy Strip (PS, March 2009 and October 2011). Chemical paint strippers break down the paints adhesive bond on the hull and make it easier to scrape down to clean substrate that can be repainted. This is messy and noxious work, but its less back-breaking than sanding. Weve found that the strippers performance varies by boat (and temperature), so review the articles on strippers to see which one best fits your scenario. And if youre not happy with one product, you might want to try another before giving up.
Both of these methods will be time-consuming on a 40-foot boat. Check out our October 2011 article, A Mathematical Decision Maker, which outlines a mathematical formula you can use to determine whether the DIY approach is right for you. On a boat of this size, we would recommend looking into having the hull soda-blasted (PS, October 2011).
For owners of older boats with unknown coatings, a tie coat can help with adhesion issues. The major bottom paint manufacturers-Interlux, Pettit, and Sea Hawk-all have priming/tie-coat products. One that weve recently used with success is Sea Hawks 1277 Barrier Coat Primer, a chlorinated rubber compound. Pettits version is called Tie Coat Primer 6627.
How long you wait to strip down the old paint depends on how bad the adhesion issue is and your tolerance for a rough bottom; work boats go years without stripping. Eventually, as you found, adhesion will suffer. The rough surface will also mean more drag in the water and slower boat speed.
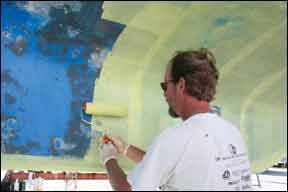
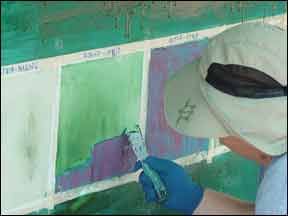
About eight years ago, I used Peel Away to strip the sloughing bottom paint on a Catalina 22, and while it wasnt fun, it worked pretty much as advertised, with some follow-up scraping and sanding. Now, I have a similar stripping job on an old Flying Scot, and based on the Sept. 1, 2000 Practical Sailor review, I thought using Franmar Soy Strip would be even better. Huge mistake!
Maybe the paint Im working with is different, but the stuff barely softens the paint. Im scraping like a mad man, and Ive still got a long way to go. Whats worse, is that it seems to soften the gelcoat under the paint, enough that the scraper digs easily into the under layer. At this point, Im considering a tub of Peel Away to remove the hardened Franmar. The customer service reps at Franmar were friendly, but their advice was to just use more and thicker.
Gordon Sell
Via www.practical-sailor.com
In the 13 years since that article, weve tested a wide range of high-strength chemical strippers, including Franmar Soy Strip, Dumond Chemicals Peel Away and Smart Strip, and even West Marines stripper, which is a re-branded version of the Smart Strip (PS, November 2006, April 2008, March 2009, and October 2011). Weve had varying results with each, depending on the job at hand (antifouling, epoxy barrier coat, a few layers, a decade of paint buildup, etc.), and have found that by experimenting with concentrations, dwell times, and ambient temperatures, we could greatly reduce the scope of a paint removal project. In the most recent test, we found that the Peel Away Marine Safety Strip-with its thick, creamy consistency-was the most effective for heavy-duty paint removal. The Franmar Soy Strip also worked, but not as quickly.
The February 2013 review of the new Lehr propane outboard motor had two sentences that caught my eye. The first was the claim that because of more complete fuel combustion, the motor has zero emissions. Complete combustion of one mole of propane yields four moles of water and three moles of carbon dioxide, both of which are important greenhouse gases. While we should all try to be green, claims of zero emissions for anything should be treated with skepticism. For example, zero emissions cars are a euphemism for emissions occur somewhere else and are not counted. Another point concerning the Lehr outboard: It uses disposable propane canisters; while it is possible in principle to recycle them, many will end up in landfills.
A second sentence, concerning environmental degradation in the North Sea, was right on the money: Our technologies are vastly more powerful than our environment. I could not agree more. The following bumper sticker recently appeared in Maine: Dont worry about the environment-it will go away.
Mark Van Baalen, Ph.D.
Harvard University
Cambridge, Mass.
I read with interest the May 2013 PS Advisor. You advised a reader to crimp a short, tinned, stranded copper wire stub onto the backstay using a Nicopress fitting, then attach to this stub with the high-voltage lead-in. While I am sure this will work, the Nicopress fitting is copper (albeit plated), and there is a potential for a galvanic reaction between it and the stainless stay. There is also the issue of what to do if the copper wire is allowed to flex excessively and breaks off, leaving no stub to attach to.
Heres a solution that has worked on two boats for me: Get a piece of stainless-steel coated lifeline sufficiently long to go from the attachment point through the deck-preferably all the way to the tuner. I chose the size that was closest to the diameter of RG-58, so it goes through a commonly available deck fitting. On the backstay, use two or three small, high-quality stainless hose clamps to attach the stripped end to the stay, and then tape over the joint with vinyl tape or better, rigging tape. Youre not trying to waterproof the joint, just make it unlikely to catch lines or anyones hand. On the other end, crimp a high-quality lug onto the stainless wire. In my case, for direct attachment to the tuner terminal, or you could make a joint as you described in your answer to a copper high-voltage lead. In either case, you do want to try and waterproof this joint, as you have copper and stainless in contact, and corrosion will happen if salt water finds it.
I was initially concerned that the voltages involved might punch through the plastic insulation on the lifeline wire, but Ive seen no evidence of it in almost 20 years and on two different boats, including several places where the lifeline lead-in was zip-tied directly to a grounded stay. On my current boat, Ive added some of that plastic clip-on shroud protector to the grounded lower portion of the stay underneath the lead-in, but thats mostly to reduce capacitive leakage by spacing the wire a bit further apart.
Hartley Gardner
Atsa, T48DS
Emeryville, Calif.
In regard to your comment about galvanic corrosion: Dissimilar metal corrosion would be minimal and not of much concern in this case.
What is the best shackle or connector to use to connect my anchor to my 5/16-inch chain? A 3/8-inch shackle screw wont fit through the chain, and the West Marine galvanized, 3/16-inch screw-pin shackle has a smaller diameter body than my chain. The West Marine shackle has a 1,500-pound working load limit (WLL).
Chris Hoinsky
89 Catalina 34
For anchor shackles, we recommend a drop-forged, hot galvanized bow shackle that meets the performance requirements of Federal Specification RR-C-271F Type IV, either Grade A or Grade B (high strength). The Class 2 shackle with a screw pin is the most practical for anchoring. Hamilton Marine (www.hamiltonmarine.com) and Defender Marine (www.defender.com) are two sources for high-quality anchor shackles. Both sell American-made Crosby red-pin Grade B 5/16-inch anchor shackles with a 1,500-pound working load limit stamped clearly on the shackle. You can seize the screw pin using seizing wire. Some foreign-made shackles advertise that they are designed to comply with RR-C-271F; that is not the same as actually meeting the standard.
Your blog post (March 26, 2013) about the relevance of the Americas Cup has motivated me to request that you review and evaluate the equipment and technologies used in this edition of the Vendee Globe (www.vendeeglobe.org). This fascinating race has much more relevance to the general sailing public than the Americas Cup. I would be very interested to learn what equipment and technologies performed flawlessly around the world, what didnt hold up, and why.
Ed Giles
Via email
We have touched on the Vendee boats and equipment in the past, most recently in September 2011. We agree that compared to the Americas Cup boats, the Vendee boats offer insight into racing gear and technologies that are more relevant to our readership.
I tried a new cleaning regimen this year that requires hardly any water and produced great results. I have been working on breezy, 50-degree days, and from a practical perspective, the last thing I wanted was to get wet or colder. First, I wiped the boat off with clean, white terry cloth; you would be amazed at how much dirt a little elbow grease and a clean towel can take off. Next, I applied Meguiars Water Spot Remover & Multi Surface Polish, which I believe contains a mild rubbing compound. It really did a great job of removing my water spots and brightening up the whole hull. Then I applied Awlgrip Awlcare, a protective polymer coating that provides a hard, long-lasting finish.
My Dufour 27 has a rubrail with stainless-steel trim that I frequently rub against the piling in my slip. I cleaned and polished the stainless with 3M Marine Metal Restorer & Polish; it does an amazing job of removing the dark rub marks and restored the original bright shine.
I had more difficulty getting my white waterline clean this year than in previous years. I washed the waterline with MaryKate On & Off Gel, which required a quick wet sponge rinse, and then I polished the waterline with Collinite Super Double Coat Auto Wax 476, a carnauba paste wax. This is the first year I thought of waxing the waterline; it looks the best it has since I had the boat re-painted in 2005
Richard Paden
Petite Cherie, 1974 Dufour 27
Severna Park, Md.
In regards to your porta-potty review in the March 2013 issue: I question the negatives attributed to the Thetford 550P, specifically, that its size renders it unwieldy and too heavy when full and that the amount of waste it contains at disposal potentially running afoul, as it were, of marina management. Yet these same negatives werent mentioned in the summations of the West Marine Cruiser and the Thetford Curve, each near-identical in size and capacity to the 550P, and both of which you recommend for folks desiring a larger platform who arent deterred by the extra weight when full.
Whatever the cause, I can attest to the 550Ps versatility and ease of use, having installed one in my 25-foot powerboat two seasons ago. All the positives you cited for its smaller sibling, the Thetford 260, are just as evident in this larger model. And at 16.5 inches tall, it makes for a much more comfortable platform when seated. While its very likely that some of your readers might be frail and/or physically challenged enough to make manhandling a full 5.5-gallon tank impossible (and for them, the 260 would be the way to go), its my belief that the average boater can deal easily enough with the 45 to 50 pounds of the 550s full tank.
As an aside: I believe that any porta-potty is a great solution to providing on-board facilities. The inherent complexity and aromatics of a plumbed MSD are virtually eliminated, while a portable unit is not subject to the mandatory Coast Guard inspection of installed systems. Yes, disposing of the waste is a slightly unpleasant chore, but a lot less so than opening the cabin door to that all-too-familiar acrid, nasty odor.
David Shepherd
Hard Tail, Sea Sport Explorer
Avondale, R.I.
PSs sensible research has come up with good arguments for using silica-gel fuel vent filters on gasoline-powered boats as opposed to the EPA-required carbon filters (PS, January 2013), but can you please explain where the politics come in? Did you write to the EPA to inform them about the research before the requirement was enacted, or was this your gotcha one-upmanship? Could it be that their funding was cut by an anti-environment Congress, and they were unable to do more research? Please stick to what you know rather than your own political conjectures.
Julius Feinleib
Via email
The Features table that accompanied the April 2013 review of mid-priced stereos incorrectly listed some of the test stereos as not having AM/FM receivers. All of the test stereos in that round of testing have AM/FM receivers.