


Polyester has long been the workhorse sail fabric; durable, easy to sew and handle, and relatively stretch resistant. It is also relatively easier to repair (see Sail Repair Tapes vs. Glues, PS November 2017). Racers needed something that was lighter and held an aerodynamic shape better, and so laminate sails were born, using Mylar films and non-stretch fibers such as carbon and Kevlar.
The new sails hold shape magnificently, but they experience entirely different failure modes, and the materials used to put them back together are more likely to be adhesives and tapes rather than thread and sewing machines. In fact, many of the repairs we performed originated at an unreinforced stitch line, where a line of holes created a tear-at-the-dotted-line seam. The word for the day is glue.
A new-to-us boat came with a large wardrobe of sails with every sort of damage imaginable: Tears parallel to the luff, tears along the leach, tears where a UV cover had been added, holes from sharp hardware, minor delamination, and old botched repairs. Our focus here is not on major seam failures that deserve a trip to the sailmaker or on resurrecting sails that have begun to delaminate and crack from age and are not repairable. The focus is on repairing small holes and even long tears in low stress areas; projects that the savvy sailor with the proper materials and basic skills can easily master.
What We Tested
Repairs varied from structural areas that require high-strength adhesive repairs supplemented with webbing and stitching, to tears in low stress areas that the proper tape could address in a permanent way. Sail repair tapes included Carbon Kevlar Repair Tape from Sailrite, Bainbridge Polyester Repair Tape, and Sail Bandage from Lifesafe. Adhesives included Dr. Sails, West Systems G-Flex, and Sika 291.
How We Tested
In the lab, we took samples of each adhesive and tape, applied them to laminate sail cloth, set them up in the same rig we used in PS November 2017, and tested them for shear strength and creep. We also placed test samples on our rooftop exposure rack to see how UV affected them.
For some real world feedback, we took products into the field and tested them on several common faults: luff and leach tears parallel to the fiber orientation, bolt rope tears, and small holes.
Observations
The polyester tape, carbon/Kevlar reinforced tape, and plain film all failed due to adhesive limitations in the same general range; about 55-75 pounds per inch of repair (this is tested with one-side taped-in practice the figure is double because you should tape both sides). They creep with sustained loads around 8-10 pounds/inch, depending on the temperature. Thus, tapes should only be used for non-structural repairs in low stress areas; punctures, luff tears, and tears that run parallel to the warp.
The stress on non-structural repairs, such as tears near the bolt rope or small holes in the body of the sail, is generally lower than the tapes adhesive strength, so tape will work here. However, structural repairs near the leach or foot require matching the original strength. Based on our findings, Dr. Sails and G-Flex are best suited for areas of high load, although other options, combined with reinforcing stitching, might work.
There was a 30 percent difference in strength between seams sewn with Bainbridge Kevlar reinforcing scrim and those sewn without. However, since all the major tears we repaired in the field were the result of seams sewn without reinforcement, we believe the difference becomes even greater over time, as the film flexes repeatedly.
After eight months of rooftop UV exposure-a long time for a laminate sail-the seam mended using G-Flex epoxy showed significant deterioration. Apparently UV penetrates right through the clear Mylar, causing the relatively rapid deterioration of materials that lack UV protection. UV resistance is obviously an important factor when selecting glue or sealant for any type of transparent material. The tape (polyester and Mylar/carbon) and Dr. Sails repairs remained like new.
Sail repair doesn’t stop at the sail itself. If the problem is abrasion or catching on something on the rigging or bowsprit, eliminate the problem. If thats not possible, a sacrificial wear patch can prevent the inevitable tear.
Although laminate cloth is probably the correct repair material for most holes, Sunbrella or polyester sailcloth patches glued on with polyurethane can make good wear covers near the tack. Polyurethane adhesives bond better to the cover and are more flexible, helping to compensate for the variation in elasticity between the Sunbrella and polyester sailcloth. Because polyurethanes are applied more thickly, they are more tolerant of wrinkles and poor clamping. They are also extremely messy to work with-be sure to carefully mask off the material surrounding the repair area.
If you must stitch through laminate, reinforce the area with either polyester repair tape or Bainbridge Kevlar stitching scrim. This will prevent the stitching from creating a tear here fault line.
The Laminate Sail Repair Tape sticks very well to fresh, unwrinkled Mylar, but not so well to polyester or heavily wrinkled, worn Mylar. It often peeled easily unless the edges were secured with a strip of Bainbridge Dacron (polyester) Sail Repair Tape. The bond of the thinner, more flexible Bainbridge tape seems to improve over time, holding the heavier tape in place. Tape works best in areas that don’t flog-jib leaches are a tough application.
Among adhesives, many hold, but there is no comparison in terms of making a fast strong, flexible repair: Dr. Sails is the leader. Polyurethanes and G-flex will work temporarily, but the result is much stiffer and epoxy is vulnerable to UV. Long curing times can make it difficult to create a good bond; clamping with weights (sand bags are best) is required and the sail wont be off the floor for days. Ordinary epoxies, including 5-minute epoxies, are too rigid and will result in a weak repair that will fail if the repair flexes too much. For laminate sails, were sold on Dr. Sails.
Delamination of the film from the fibers is another sign of aging, particularly on older sails and headsails that have flogged. This is a sure sign that the adhesive holding the skins together is no longer working. This type of failure, unfortunately, can’t be repaired, and will often progress into catastrophic delamination. This can happen quickly.
Glued repairs and tapes have nothing sound to adhere to. If the damage is restricted to one panel and the sail is not too old and otherwise sound, a few sail lofts, such as Sail Technologies (www.sailtechnologies.com) will remove the old film and apply a new film. This is outside the scope of our investigation.
Tapes
Although narrower polyester tapes can provide nearly the same strength as the wider laminate repair tapes, the film in laminate sails tends to suffer from fatigue. With new sails, the wider tapes better distribute the load and provide reinforcement that the laboratory pull-test numbers don’t reflect.
Sailrite Laminate Sail Repair Tape
Consisting of a heavy Mylar film with Kevlar and carbon fibers crisscrossing at 90 degrees, this material adheres well to films, so long as it is rubbed down hard in warm conditions. It does not stick so well to polyesters, so sew it down where it overlaps on polyester luff ropes and reinforcements, and cover the ends with Bainbridge Dacron Sail Repair Tape. A layer of tape is required under the stitching, and a Dacron tape strip should be applied over all edges to prevent peeling, especially when repairing older, weathered Mylar. We had some minor problems with peeling after 6-10 months in the field.
Bottom line: Sold in rolls four inches wide and 15 meters wide, Sailrite Laminate Repair Tape is an important addition for every laminate sail repair kit. Recommended.
Bainbridge Dacron Sail Repair Tape
While not quite as low-stretch as the Mylar/carbon tape, repairs often come down to adhesive grip, and the Bainbridge tape is tenacious if rubbed down hard. This is very useful for providing extra peel resistance at the ends of the heavier carbon fiber tape and for preventing tears anywhere stitching is required. It is also available in widths up to 5.7 inches, and sold as High Tack Insignia Cloth.
Bottom line: A roll of this tape is vital to every sail repair kit-laminate or polyester. Budget Buy.
Life Safe Bandage
Although unreinforced, this tape is relatively thick and has a tenacious adhesive. Used in low stress areas, or where the fibers are still good but the film is getting wrinkled and weak, it can add a few years of service.
Bottom line: Recommended for reinforcing tired film.
Adhesives
Cruisers have long been using polyurethane adhesive sealants for sail and canvas repairs, but the mess and time required is even more troublesome when working with laminated sails.
Dr. Sails
Testers liked this product on polyester sails in Part I. They liked it even more on laminates. The fast cure means you can roll up the sail and put it back in the air a lot sooner. The minimally permeable surface of the laminate means a little glue goes a long way and that it spreads and squeegees evenly. It is more flexible and stronger than other epoxy products. The motionless mixer and the tandem dispensing syringe made application neat, and can be especially helpful for repairs at sea, when cups, stir sticks and clean-up supplies are limited.
The syringe helps distribute the glue evenly, saving time at later stages in the job. A 10 ml syringe is good for about 100 square inches if you spread it well. However, it cures very quickly, so we recommend repairing no more than 50 square inches and using overlapping patches as needed (or use two workers).
Bottom Line: This is our Best Choice in laminate sail repair adhesives and belongs in every laminate sail repair kit.
West Systems G-Flex
Although much less flexible than Dr. Sails, G-Flex flexes just enough to remain strong and is compatible with working sails. However, spinnakers are out of the question. It is more widely available and less expensive, but the overnight cure time is a nuisance and clamping is a challenge. It is also vulnerable to UV damage, although this takes about 3-6 months of sun exposure to become apparent.
Bottom Line: Wed use it if Dr. Sails was not available, and the result would last at least 60 days. Budget Buy.
Sika 291 Polyurethane
Though not generally recommended for laminate sails, Sika 291 matched performance criteria of the more specialized products. It has good adhesion, good durability, good flexibility, and its cheap. The down sides are the mess, the long cure time (generally several days), and limited UV resistance. Still, we like it for gluing on Sunbrella wear patches, which helps protect other repair from UV damage.
Bottom line: Recommended for wear patches only.
Conclusions
Fixing laminate sails doesn’t have to be any more difficult than fixing polyester sails, and thats a good thing, since they seem to need minor fixes more often. Ignore them and a major failure looms.
Testers were impressed with the Sail Rite Laminate Sail Repair Tape combined with Bainbridge Dacron Sail Repair tape, for repairs in low-stress areas. So long as you have extra patch material on board, you can fix most tears using Dr. Sails. As for the luff tape and battens- a needle and palm is still the answer.


The luff is a relatively low-stress area, polyester sails rarely tear here. The cause in a laminate sail is the lack of fibers oriented at 90 degrees to the mast, compounded by a row of stitches holding the luff tape, creating a natural tear line.
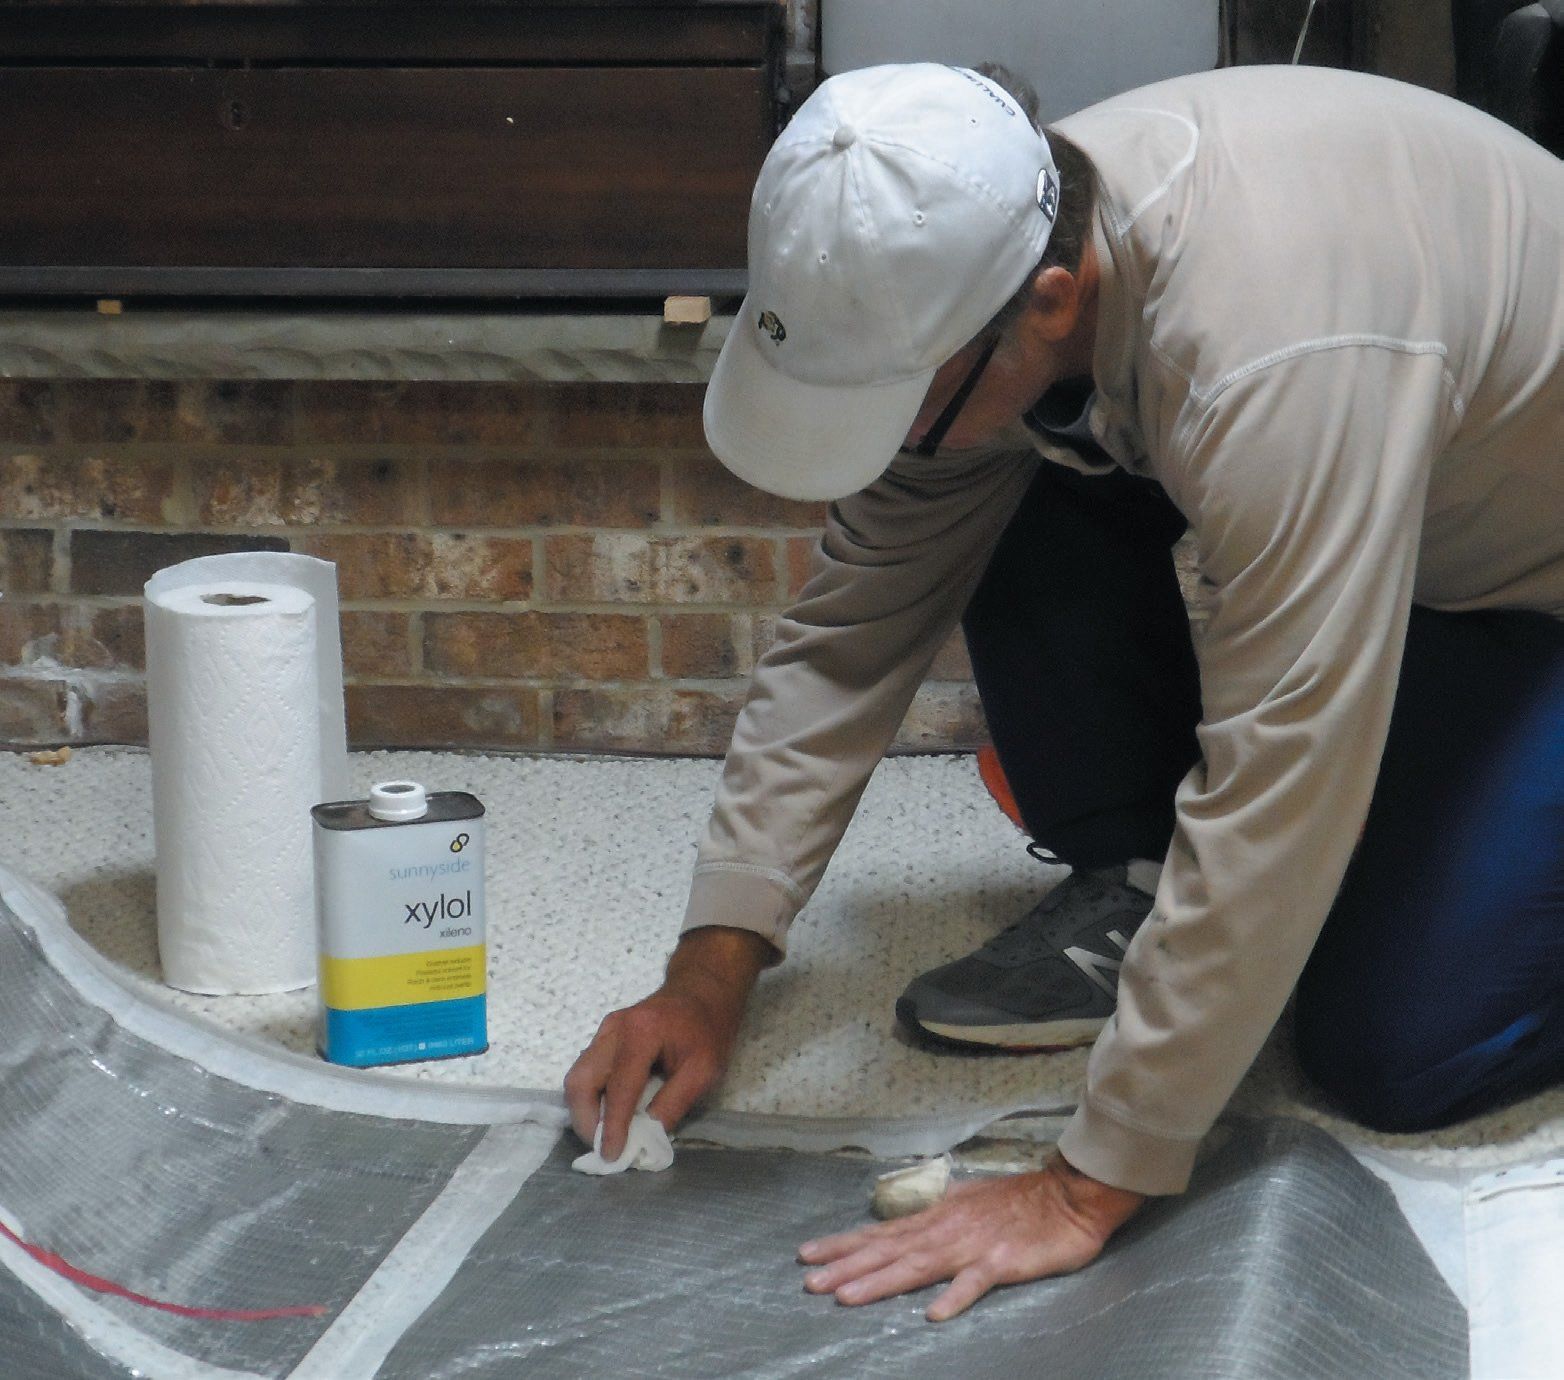
Because it is a low-stress area, the repair of even a long tear can be made with tape, but a few precautions are required: Wipe the area down several times with xylene. Most sailors use a dry film lubricant on the bolt rope or slugs, and this will prevent the tape from sticking.
- Align the edges using masking tape on the reverse side. Observe that the luff tape and sailcloth may have slightly different length, so this may require some careful work.
- Use a wide mylar tape, reinforced tape with fibers running in all directions. But keep your traditional sail repair tools handy; you’ll need them.
- Apply the repair tape above 70F. Rub down hard. Round the corners to prevent snags and hard spots. Stay ¼-inch away from the bolt rope to avoid hoisting problems. Run the tape 6 inches past the tear.
- Because the tape will not stick well to a Sailcote-soaked luff tape, a row of stitches is required. Apply a layer of polyester repair tape or insert a stitching scrim to prevent tearing along the stitch line.
- Reinforce all edges against peeling with a layer of polyester tape and rub down hard with a seam rubber (shown here). Repeat on the other side. Repeat on the other side (remove the masking tape).
Finally, to complete the repair you need to stitch along the center of the luff tape and rub down hard again. If the ambient temperature is below 70F, consider using a 90-120 F iron at the very lowest setting (keep it moving) to help activate the adhesive.

The best materials and adhesives will be of little use if you don’t take care during the repair process and carry out the required prep work. This true for older, dirty sails, as well as for newer sails with coatings that might prevent adhesion. Ideally, the repair should be made indoors on a flat surface at room temperature. We made the longest lasting repairs using both adhesives and tapes. We like tape for simple fixes in low stress areas, and adhesives when high loads and flogging demands something more resilient and durable.
-
- Even after six months in the field, the Sailrite carbon-Kevlar tape remains well adhered and will not peel.
- Testers used a stick to evenly apply an thin layer of Dr. Sails epoxy adhesive.
- Use a spreader to work the adhesive toward the edges of the repair area and remove air bubbles to ensure a good bond. Masking keeps it neat.
- The firm and steady pressure required to dispense Dr. Sails can be fatiguing, but the result is even distribution and lasting repairs.
- A board was clamped over waxed paper over night to ensure a tight bond and proper shape in this bolt-rope repair (G-Flex epoxy).


This was a great article! We just discovered a rip along our dacron genoa along a newly installed sacrificial uv cover.
You helped me think about what products might better apply to my repair needs. Thanks!
Glad we could help Matt. Just be aware of our caveat that some sailmakers are none to happy to re-repair sections of a sail that has polyurethane adhesive sealant on it because it can gum up the machine. Here is a related step-by-step video from the late Patrick Childress. If you find it useful, I’m sure Rebecca would appreciate a tip in the tip jar. https://www.youtube.com/watch?v=ge3FcEiYl4w
Also John Neal of Mahina Expeditions wrote about this for us as well. https://www.practical-sailor.com/sails-rigging-deckgear/simple-sail-repair