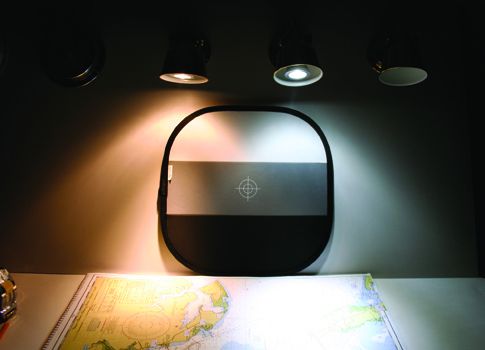
One of my projects this winter will be to upgrade the interior lights on my 1971 Yankee 30 Opal that I am restoring. The classic S&S design currently has some chintzy plastic LED lights made for the recreational vehicle market. The lights are effective, practical, and efficient, but when I came across a box of brass bell-type traditional bulkhead reading lights at a used gear chandlery, that was the nudge I needed to make a switch.
Initially, I thought I’d fit at least one of the lights with a red bulb to preserve night vision, but after reviewing a recent report by Practical Sailor Technical Editor Drew Frye on this topic, I decided a dimmer on a white light might be a better option. Based on a number of recent studies, Frye’s report “Are Chart Lights Steering Us Wrong?” questioned the traditional wisdom that red-tinted navigation lights will always better preserve the navigator’s night vision. Frye unearthed a great deal of recent research that showed how a dim white light can actually do a better job of preserving night vision.
According to Frye’s research, because of the way the light receptors in our eyes work, a dim white light does a better job of illuminating small chart details like soundings and channel marker numbers. Since we can more quickly distinguish the details we need, our eyes are exposed to less light, and this helps night vision to more quickly recover. Frye’s own experiments with various headlamps (both red and white) supported these findings.
It has been quite a while since we looked at interior lighting in depth. Since our last big report in January 2009, a wide range of dimmable LED lights have entered the market. Lighting experts Imtra Marine Products, for example, offer a huge selection of marine and RV lighting solutions, including dimmable LEDs, but they aren’t cheap. For my project, I was drawn to an inexpensive do-it-yourself upgrade described by reader Tom Wetherbee, in which he retrofitted a standard, brass bulkhead reading light with an LED Sensibulb and a dimmer for little more than the price of the bulb itself.
I’m reposting Tom’s article below along with his illustration below. A couple part numbers in his original report were no longer valid, but I was able to track down substitutes that were actually less expensive than when he wrote the article more than 14 years ago. (Inflation, it seems, has spared the DIY marine lighting market.)
Here’s Tom:
“The new Sensibulbs are so bright that I wanted to install a dimmer. With the dimmer described below, I am able to get half the light while using only one-sixth the power. (Editors note: Many LEDs are not dimmable. In our comparison, only Imtras GU4-21 bulbs were dimmable with this device.)
“Sailors Solutions offers a mini-dimmer for $23. Being cheap, I elected to build my own for about $5. The dimmer is a simple circuit and is easy for anyone with a little soldering experience to make.

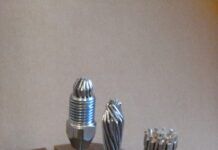
“As shown on the schematic below and the photo above, my dimmer circuit consists of three components: a transistor, a linear potentiometer with integral switch, and a self-reseting PTC over-current protection device. The protection device acts as a circuit breaker in the event of a short circuit. The switch on the potentiometer is used as a power switch. The potentiometer provides a variable voltage to the base of the transistor. The transistor serves as the power device and passes the voltage to the Sensibulb. This type of device is called a voltage-follower or emitter-follower circuit.
“Turning the dimmer knob clockwise clicks the switch on at the dimmest setting. Turning further increases the brightness. If you prefer to switch on full brightness and then dim, reverse the plus and minus wires connecting the potentiometer. Having the switch integrated with the dimmer makes it simple to use.

“The parts and sources I used are listed below, but you can substitute similar components. If you use a different potentiometer, make sure it will fit. If the shaft on the potentiometer is too long, it can be easily shortened with a hack saw. Snipping off or folding back the lugs on the potentiometer will give you a little more room.
“Once you have the parts, use the large photo above to guide placement, and the schematic below for electrical connections.

“I chose to solder the transistor and PTC protection device directly to the potentiometer. This saves space and makes for good vibration resistance.
“The transistor requires a small heat sink. By gluing it to the side of the potentiometer, you can use the case of the potentiometer. I used heat sink epoxy (amorphous gray material in photo) for better heat transfer, but ordinary epoxy is adequate.

“The older Sensibulbs, as shown in the schematic, have three wires. For 12-volt operation, the red and white wires are connected. If you have a newer Sensibulb, you can ignore the white wire in the schematic.
“Small pieces of insulation stripped from scrap wire can be used to insulate the modules leads and keep them from shorting. Also, leave slack in the wires for the lamp to swivel and rotate.
“Finally, be sure to test the dimmer before installing it into the lamp, just in case you have a faulty component or bad connection.”
Parts list:
Jameco (www.jameco.com):
286206 1/8W 10K linear potentiometer w/switch, $1.45
162499 1/4-inch shaft knob, $1.35
Digikey (www.digikey.com):
RXEF185-ND Polyswitch PTC protection device, 62 cents
2N4401BU transistor, 32 cents


Responding to the PS article on adding circuitry to dim led lights, I wonder what is the purpose of adding a transistor to the circuit. Also, might the added circuit cause an increase in radio transceiver communications?
Good questions.
The transistor acts as a valve to vary the current which flows through the LED.
This design will not cause RFI (Radio Frequency Interference). RFI can occur if you use a poorly designed PWM circuit to dim LED lights. This is not a PWM type circuit.