


Now, more than just about any time in my life, have I found sailing to be essential to maintaining a healthy body and happy outlook. But how do we keep active in sailing during the dead of the northern hemisphere winter?
In the middle of my annual trek to beautiful Marquette, MI, on the Upper Peninsula of Michigan to test cold weather gear and equipment, I’m reminded that “sailing” doesn’t necessarily require time on the water. No sailboats are out on this corner of Lake Superior in January. Even the Coast Guard cutter is hauled. The marina is skinning over with ice and will soon be thick and covered with snow. While hard water is best left for the ice-boaters, there is never any shortage of projects to keep sailors connected with their boats and to stay active through winter — like building a boot-dryer.
Although the appliance here is designed for home use, it can be used on board with dockside shorepower, or with an DC-AC inverter (provided you have ample battery power). Any electrical appliance designed to generate heat is going to be an energy hog, so this DIY boot dryer is mostly aimed at people like our intrepid tech editor Drew Frye, who never misses a winter season day-sailing on the Chesapeake.
Last year, Frye compared the various boot dryers on the market, ultimately deciding that his own design was just as effective (and less expensive). For those who are growing tired of slipping into soggy boots this winter, here’s the short version of Frye’s 2020 boot dryer report, focusing on the construction of the DIY boot dryer. Note: I’ve included links to components for illustrative purposes only, not as any specific recommendation. Everything you need can be found at the your local hardware store, and PS encourages supporting local businesses whenever possible.
Building a Boot Dryer
Described below is a simple drier Frye built for his use, and duplicated with minor variations for his daughter and for friends. The advantage of a home-built version is that you can make it fit any number of boots and gloves, and add extensions for drying foul weather gear, options that are not available on the retail market. It can also be used to dry your wetsuit or drysuit after going through the odor-removal regimen that Frye outlined in his December 2020 report on dry suit care and maintenance.
The fan. The local computer store or Amazon will have a 120 mm 120 volt muffin fan. This is mounted to the end board with long deck drywall screws. About $20.
Intake screen. Its good to have something to keep fingers and clothing out of the fan. A square of hardware cloth or window screen stapled over the fan will do the trick.
Heat. A 60-watt light incandescent (not LED) bulb mounted in an incandescent lamp holder (any hardware store) provides all the heat you need. The drier will work without it, but it speeds things up and warm shoes feel nice. Wire this in parallel to the fan. Note: This needs to be an old-school 60-watt incandescent bulb.
Switch. Salvage a cord. Buy a single box, single wall switch and cover plate, and install this in the side of the box. Connect the hot side of the cord to one side of the switch, the positive leads of the light and fan to the other side. Join the cord neutral to the neutral of the fan and light with a wire nut (tape the nuts for extra security). Total wiring costs are about five dollars. For tips on making small wire connections of any kind, see our report
“Small Wire Connections Part II.”
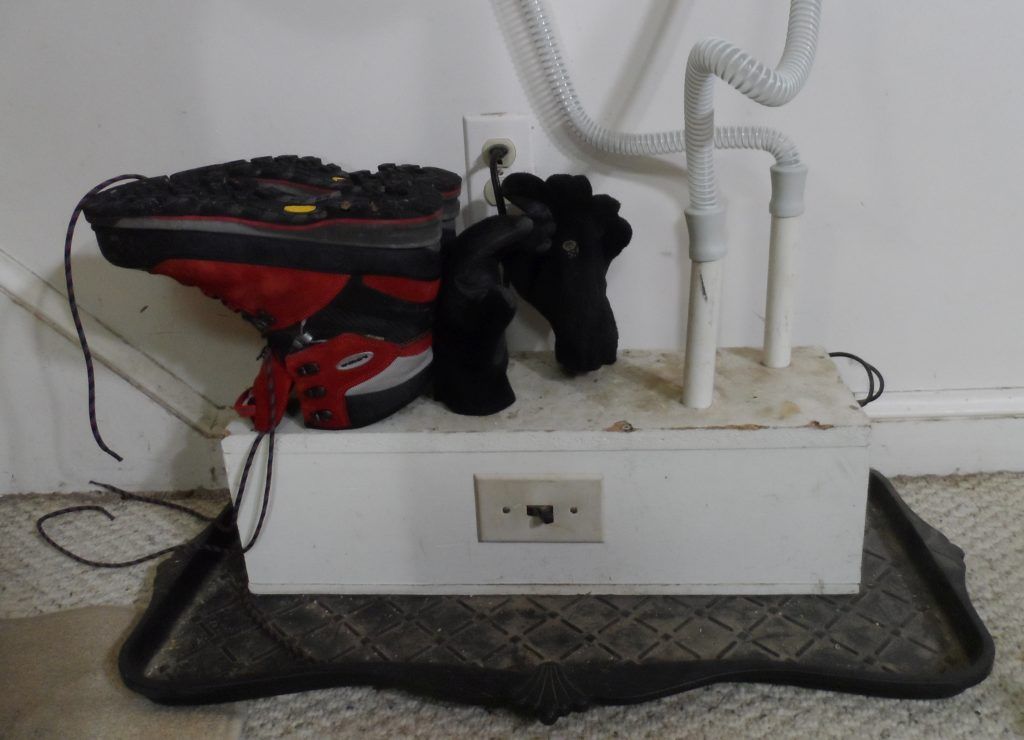
The box. A plain pine box made from 3/4-inch scraps, about 5- by 5- by 12-inch provides room for the fan at the end, the switch on the side, and the riser pipes on the top. It also provides enough weight to keep it stable even with boots piled on. Assemble with deck screws so that it can be taken apart to replace the bulb.
Risers. The risers can be 1-inch PVC pipe stubs long enough to hold the tallest boot, with outlet holes drilled sideways so that the insole of the boot can’t block the airflow. Drill holes to tightly fit the PVC tubes fit and secure them in place with 3M 5200 or a similar adhesive sealant that will bond to PVC and wood. Another option is to use PVC flanges to secure them, but they are not necessary.
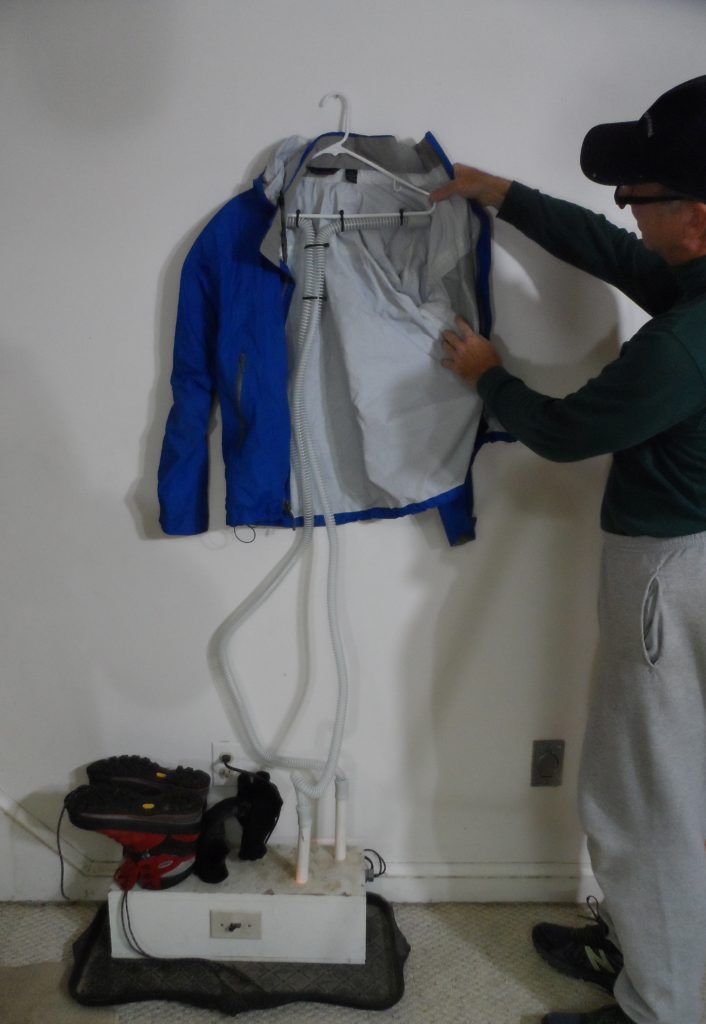
Got wet foul weather gear or a dry suit that gets stuffy? Extend a pair of the risers with hoses lashed to a clothes hanger. We used retired CPAP (sleep aid device) hoses, but anything 1-inch ID will do. Voila! Instant jacket drier.
Too busy to build your own boot dryer? See Frye’s original report on boot dryers which included a comparison of several boot dryers on the market, including the top-rated PEET Advantage 4-boot Dryer. For more tips on winter sailing, see Frye’s broad report on cold-weather sailing apparel, which includes links to various archive tests of essential clothing such as gloves, socks, and base layers.


")
A nice upgrade is a switch with a timer built-in. I have built one similar that we use for wetsuits in the winter.
Years ago I lived in a 35′ 5th wheel camper. LP heat was provided by two 30 lbs bottles. The problem was that on the coldest winter nights (-10f to -20f range) the propane would not evaporate fast enough to keep up with the furnace and the bottles and pressure regulator would be covered with thick ice. To counter that I built a box not that much different in concept from the dryer described here except that I used two 40 watt bulbs, one under each propane bottle. It worked well. The furnace was no longer starving for gas and the bottles and regulator were free of ice. Maybe a week passed, maybe less, and I checked the arrangement more carefully to see how it was doing and discovered that the 40 watt bulbs had scorched the wood box I had built; it was a fire waiting to happen. I replaced the 40 watt bulbs with 7 watt bulbs which turned out to be adequate heat for the propane bottles and no further scorching occurred. I was lucky.