


This is Part V, the final installment of a five-part series on rebuilding and modifying our Cape Dory 36 from a bare hull into a capable offshore voyaging sailboat. Part I described the steps we took to best insure our rebuild would be successful. In Part II, I described gutting the interior and rebuilding in a manner more suited for voyaging. In Part III, I described building a new taller mast and the many changes we made to the deck layout to make the boat stronger and less complex. In Part IV, I describe the simple systems we use on our boat to improve reliability, keep the cost down, and reduce maintenance and repair hassles and expenses.
Our philosophy, which is reflected in how we designed and completed the rebuild, has been described in detail in the preceding articles. Our end-state was a simple, yet elegant sailboat that is reasonably fast, well mannered, strong, seaworthy, affordable, and easy to maintain. We launched her in May 2015 and she has since carried me safely from NC to the Virgin Islands and back, via the offshore route, three times or about 11,000 nautical miles. Five of the six legs were singlehanded.
So, after many miles and seven years of sailing how has the rebuild worked out? What changes have I made? What changes am I considering? Knowing what I know now what would I do differently if I were to do it again? This final article will attempt to answer these questions.
Overall, the rebuild was an unqualified success. We have a boat we could never have afforded had we not done the work ourselves. It was a long, challenging, and demanding rebuild, But, I could not be happier with the boat. I am as smitten with the Far Reach today as I was on launch day in 2015 and I still get a thrill every time I sheet in the sails and feel the deck heel under my feet. Since we launched her, we have refined our systems, upgraded a few things, and made a couple of major changes.
STRUCTURAL CHANGES
The glassed-over hull-deck joint. This was a major project but a fantastic success. The boat is stronger and the hull-deck joint absolutely water tight. Even after sailing 1,300 miles to the Caribbean in a rough December upwind passage I arrived in the Virgin Islands with a dry bilge.
Bulwarks. These were a superb addition. I give thanks for them every time I sail offshore. You can’t appreciate the security enhancement bulwarks provide until you have sailed with them under adverse conditions.
INTERIOR
We have been delighted with the interior layout. We gained significant storage capacity. The boat simply swallows everything we bring aboard from six months of provisions to all kinds of tools, awnings, clothing, outboard engine, batteries, books, spare anchors and ground tackle, snorkel gear, etc. When we sail, nothing is adrift in the boat so the settees and berths remain available for use as intended. With the interior moved inward it is safe to move through the boat in rough offshore conditions.
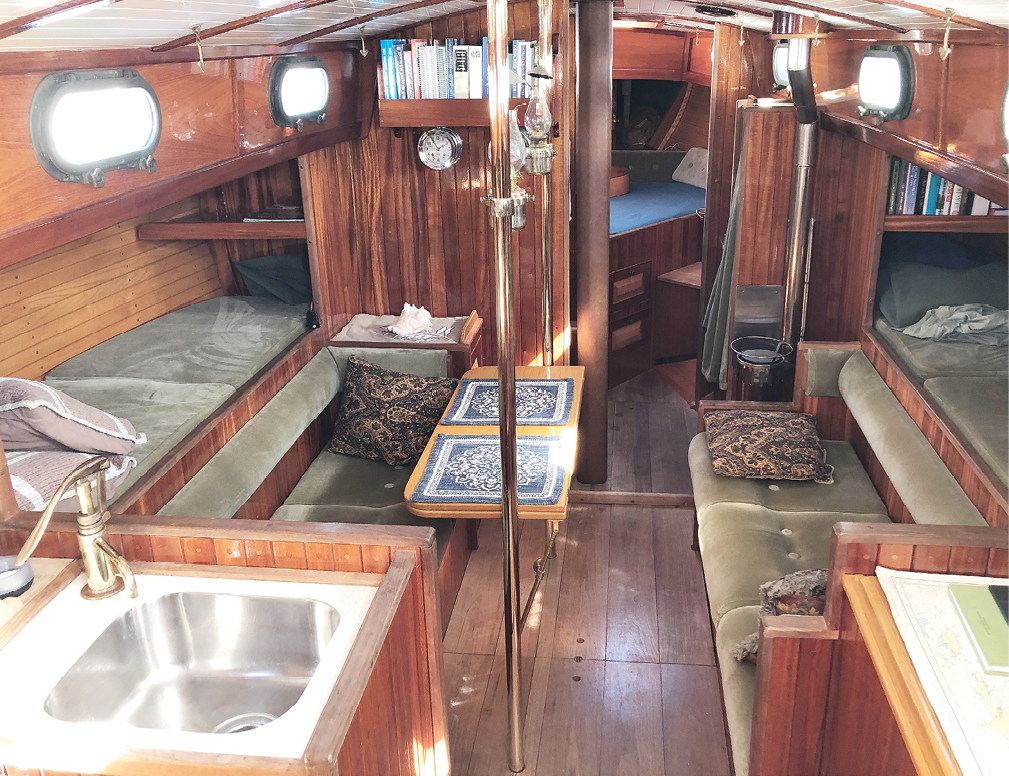
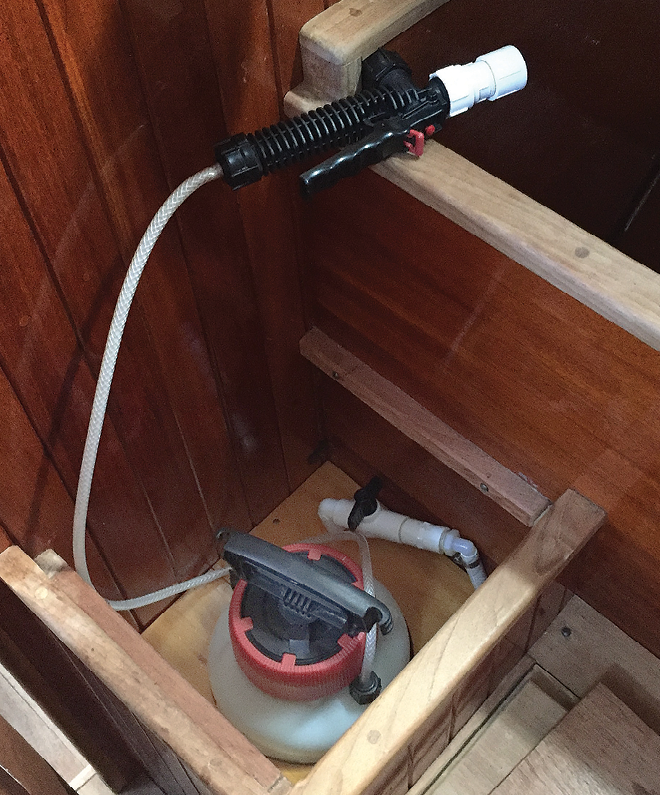
The sitz tub. It has worked perfectly eliminating a damp, smelly and confining shower/head. I have safely showered offshore without issue. The pump-up spray bottle, gravity fed from a dedicated 20-gallon tank, with a hot kettle of water added, has worked very well. In fact, it is easy to make the water too hot. I hang wet foulies in the tub to dry instead of hanging them where they will drip all over the interior.
Sink handpumps. Fyn-Spray hand pumps have been reliable. Next time around, I would consider a foot pump to free my hands. Otherwise no complaints.
The bucket and chuck-it system. It’s funny how squeamish people can be about waste, but I think everyone who has used our set up comments that it wasn’t such a big deal after all. Not having any black water plumbing or holding tanks has been a blessing. The boat always smells fresh and clean. We use US Forest Service approved wag bags inshore and they work fine. The reality is we are more “green” than any of the boats I have run across in the Caribbean. We never pump over the side inshore. Never.
Refleks Heater/Hull Insulation. I have sailed and overnighted on the boat at or below freezing without discomfort. It takes about 40 minutes to bring the boat temp up from 32F to 70F. While in the heat of the Caribbean, the boat stays cooler than non-insulated fiberglass boats I have been aboard.
Icebox. The icebox works exceptionally well. On my third voyage to the Virgin Islands I started with 60 pounds of block ice (we made ourselves) and 10 pounds of cube ice. When I arrived 12 days later I still had ice, which ultimately lasted 15 days. Cube ice typically will last 8-9 days.
Fixed mount propane stove/oven. We never missed a gimbal stove. We cook offshore without issue. We use deeper pots and sometimes prop a skillet or pot handle up to keep it level, but we have always been able to cook what we want. I had the fiddle on one side of the stove increased in height to better grip the pots, especially the coffee percolator.
EXTERIOR
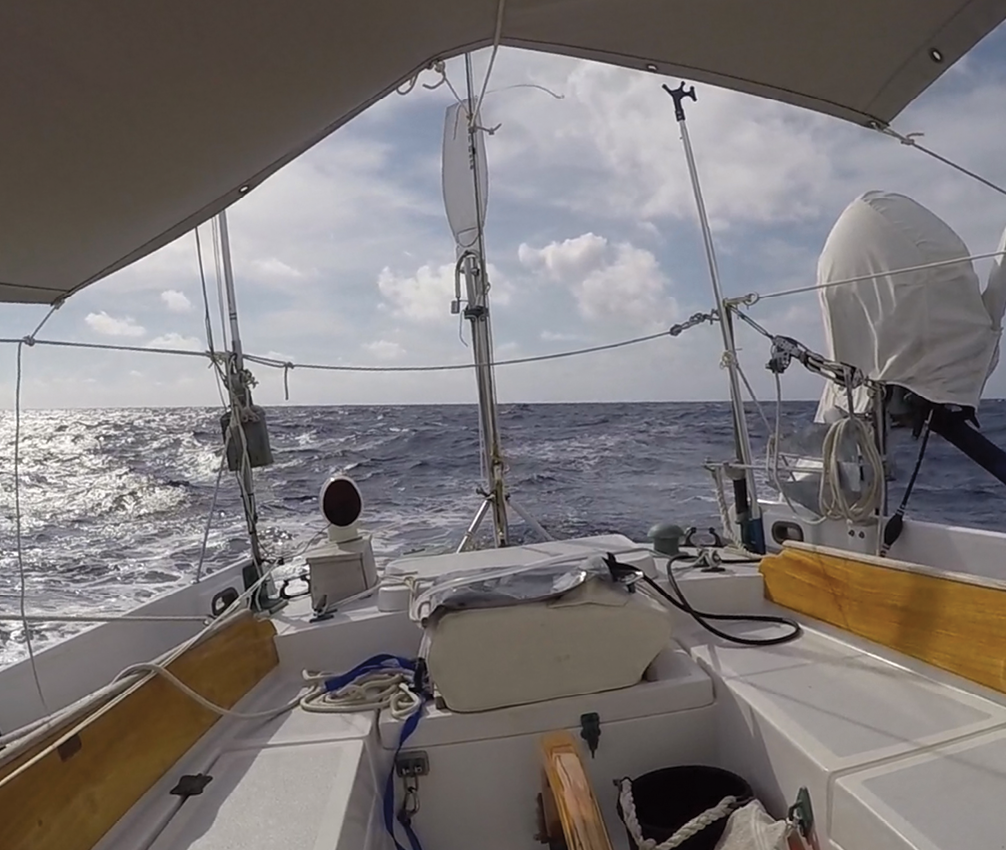
New Rig. The taller mast and longer bowsprit have worked well. The boat is fast and comfortable in light or heavy air. We have had many 140 nm+ days singlehanded, usually incorporating night-time sail reduction. The reefing system and Tides Marine Strong-Track are superb. I have spent many days close reaching in winds 25 to 35 knots with a reefed staysail only and the boat in perfect control.
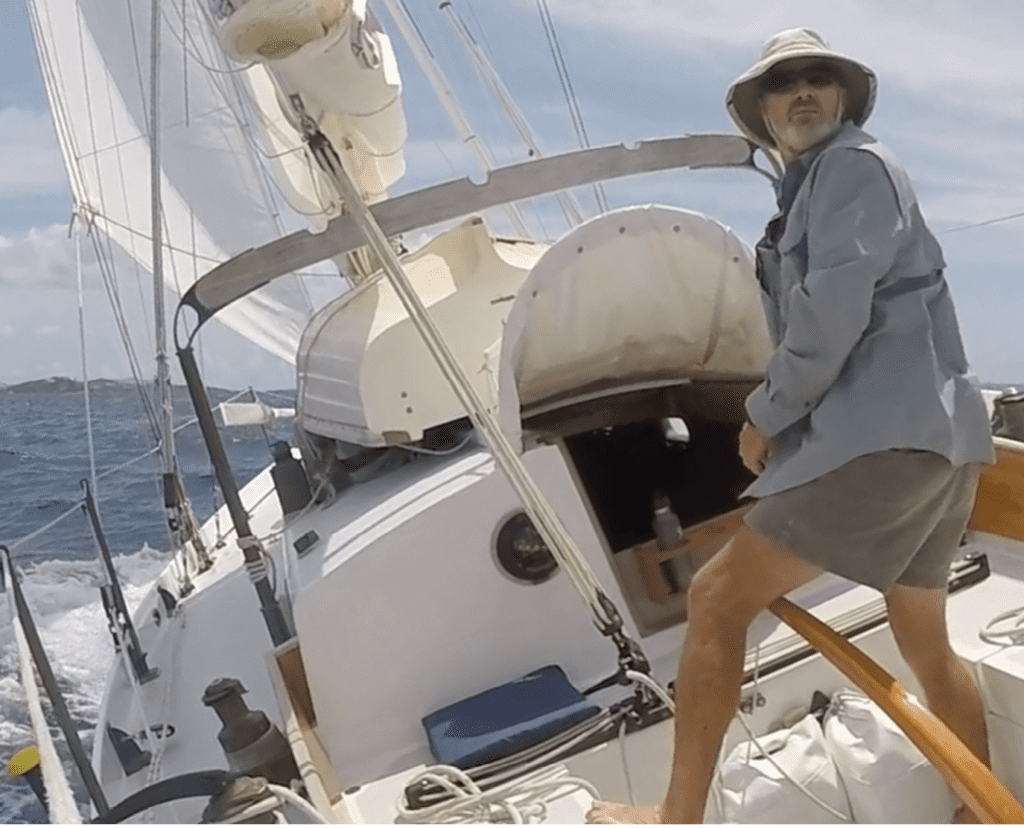
Wheel-to-tiller conversion. This is an unqualified success. A tiller is the best way for the boat to communicate with the helmsman. It integrates with a self-steering windvane more easily than wheel steering. It also simplifies single-hand sailing by improving access to the winches during tacking.
Filled in Prop Aperture. The elimination of the propeller aperture and reduction in the number of through hulls dramatically improved light air performance and maneuverability. There is no vibration in the rudder at any speed because there is no turbulence from the aperture or propeller over the rudder.
Cape Horn Windvane. This windvane has proven to be highly capable,though we had a few hiccups. The servo rudder (Cape Horn calls it a steering oar) detached often in high density Sargasso when we were sailing above 6 knots. I had a couple scary events when the rudder suddenly kicked up. I solved this by deepening the retaining notches and more frequently replacing an essential ¼-inch shock cord that held it in place. I also found the vane would not steer well in light air, but this was because teak servo-rudder had warped because I left it bare. I planed it flat and it worked perfectly again. I now apply varnish and it has retained its proper shape. Overall, the vane impresses me for its accurate steering and ability to hold course even downwind in very light wind. It is the most important piece of equipment on the boat.
Deck Layout. Other than the dinghy and trysail, we have no gear strapped to the cabin top or the side decks. We chose to have an uncluttered interior and topsides decks/cockpit to enhance safety offshore. I find this uncluttered and clean aesthetic approach psychologically soothing in addition to just making it safer and less frustrating to move about the boat. However, this philosophy seems rare in the modern cruising scene. What I most often see are boats jammed with gear and equipment—huge dodgers, cockpit biminis and sometimes full enclosures. Side decks are blocked with fuel and water cans. The aft end of boats are cluttered with solar arrays, barbecues, fenders, davits carrying big RIBs and large outboard engines, radar, and wind generators. etc.
Pram-hood. We liked our first one so much we built a new more robust one with windows. On deck, our view is unobstructed, improving visibility around the boat. The boat has less windage when anchored thus less likely to drag. However, a pram-hood does not contribute much to staying dry in the cockpit. Off-shore I often sit on the bridge-deck or stand on the companionway ladder under the pram hood looking out the windows. Good foul weather gear is important when you minimize cockpit enclosures.
Awnings. What we lack in dodger and bimini protection we make up for with canvas awnings. We carry four of different sizes and shapes. We have an awning to cover the foredeck hatch when anchored which allows up to keep the hatch open except in the worst squall. A small awning is used over the cockpit when sailing to provide shade. We have a larger awning we use over the cockpit at anchor. We catch rainwater with these awnings. Lastly, we have a very large awning with telescopic poles we can use to create maximum shade if there isn’t much wind.
Halyard and reefing lines at the mast. I have no regrets about terminating them at the mast and have never thought once about running them aft to the cockpit. The bulwarks, taller stanchions, and clear decks make going to the mast uneventful even in adverse weather.
Hard dinghy. Our 9-foot Fatty Knees is a work horse. It carries an incredible amount of weight. It rows and sails well. We have the launch and recovery system worked out so it’s simple. Although we have a small easy-to-stow two-stroke outboard on board, we row her 95 percent of the time. Our late afternoon rows around the anchorages are enjoyable and soothing. Rowing has proven to be a great way to meet other sailors who often hail us. Often, we are invited aboard and make new friends. Rowing is relaxing, calming, and good exercise. The sailing community has lost something by over reliance on loud fast outboard powered inflatables/RIBs which can be hazardous to swimmers.
Sculling Oar. The sculling oar is effective but there are obvious limitations as it works only in calm conditions. My average speed is 1.5 knots with a sprint to 2 knots. You have to think ahead and really understand what you are doing. It’s easier to use a sculling oar when double-handing than single-handing. An outboard on a dinghy as a yawl-boat is a huge help if you rely on a sculling oar.
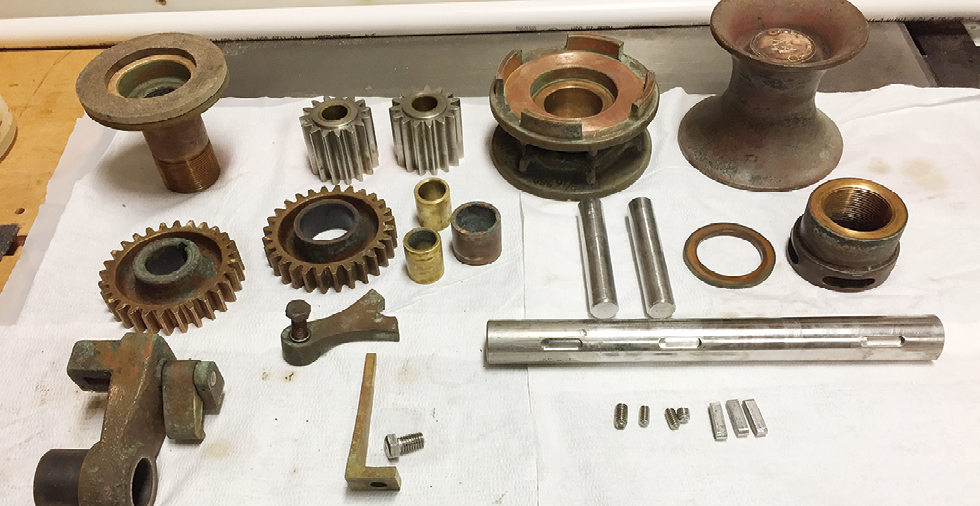
ABI manual windlass. The windlass has worked flawlessly. It is simple to maintain. A manual windlass requires no additional battery bank or wiring. It takes a while to haul in 120-feet of chain, but it is not strenuous. I usually take my coffee up to the foredeck and work the handle while taking in the surroundings. Never had a desire for an electric windlass.
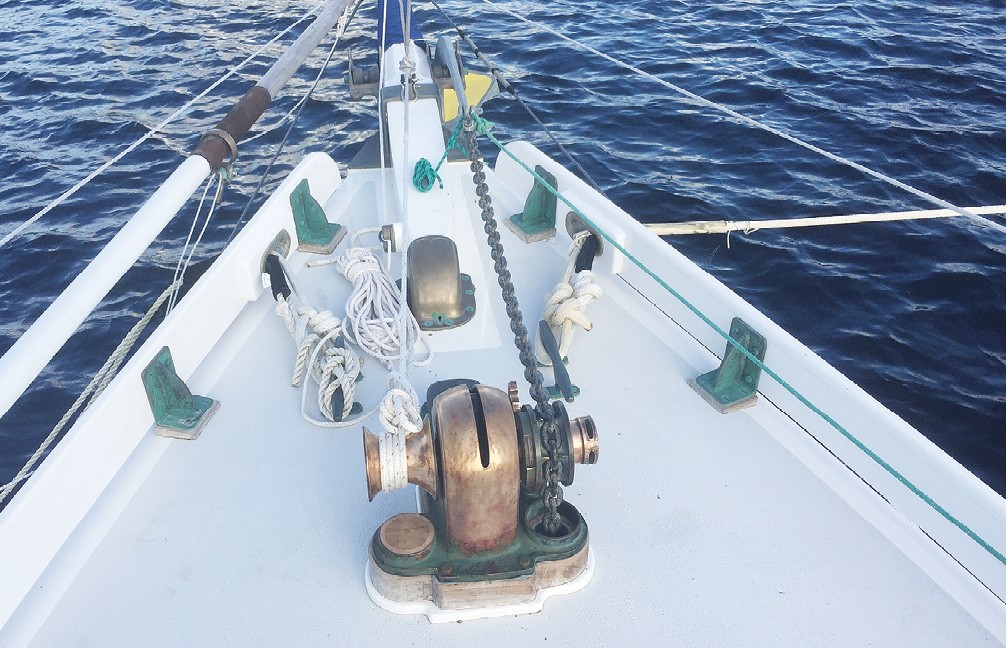
Removing the Staysail Boom. The foredeck is safer without it. I made our forestay out of Dyneema. When we want to clear the foredeck especially for short tacking or handling ground tackle, we simply release the forestay and pull the staysail back to the mast. So simple. Tacking a staysail is almost instantaneous since the lateral movement of the clew from one tack to the other is short and quick.
Hank-On Jib with Zippered Bonnet. As I expected, this worked without fail. It offered great sail shape. However, the large bag we zip around the jib when it’s on deck takes up a lot of deck space.
Boom gallows. A rigid vang will keep a boom from falling on your head, but it does not immobilize the boom. An unsecured boom is a killer. When the boom is dropped into the gallows and strapped down it is as rigid and secure as if it is part of the superstructure. The gallows and the boom become a secure hand hold in the cockpit or moving along the deck when the weather is at its worst.
The Tides Marine Strong Track. This proved to be superb piece of equipment, as we described in detail in Part IV.
7×7 spliced rigging. I have seen no signs of fatigue. The splices look new. The rigging is in perfect condition. I have great confidence in it.
Lead line. This worked fine. It never failed to give me the info I needed. I enjoyed casting the lead.
Sony GR7600SW. It has provided reliable reception for seven years. We connected it to an external DIY antenna we haul up the back stay to improve reception. I download WX Faxes onto an iPad. We saved about $4,500 by not buying an SSB transceiver. Plus, we get by with a smaller battery bank, which keeps the boat less complicated, and provides more interior storage.
Edson #117 Bilge Pump. This manual bilge pump was reliable and easy to use. We have never thought about installing an electric pump.
Honda 9.9 hp. Power Thrust four-stroke outboard. The Honda worked well. It was capable of powering the 17,000-pound Far Reach at 5 knots at 4,500 RPM and 6 knots at wide open throttle on flat water. With pull start it was simple and reliable. My only complaint is the engine, hanging off the stern quarter, detracted from the boat’s lovely lines.
THINGS WE UPGRADED OR CHANGED.
Adding Alpenglow LED interior lights. After the first voyage we added the white/red dome light over the galley and white light bunk lights. After the second voyage we added the red/white dome light over the chart table/icebox. We are slowly entering the 20th century. We like having the LED lights, though we still use our kerosene interior lights almost every night. Nothing creates the ambiance and soothing feel inside a varnished interior like oil lights.
Solar. The 30-watt Gantz semi flex panel made adequate electricity to keep up with our meager electrical demands on our first two voyages, but the Gantz panels are no longer available. The first Gantz panel failed after two years when the wire shorted at the point of connection to the panel. The second panel still works though it’s no longer on the boat. The Genasun MPPT controller is still working perfectly. We have since upgraded our solar panel to two low-profile 45-watt Zamp Obsidian glass panels. They are both moveable on 10-foot cords and each run to its own Genasun MPPT controller. Because I can move the panels around to keep them in the sun, they are as efficient as a larger array.

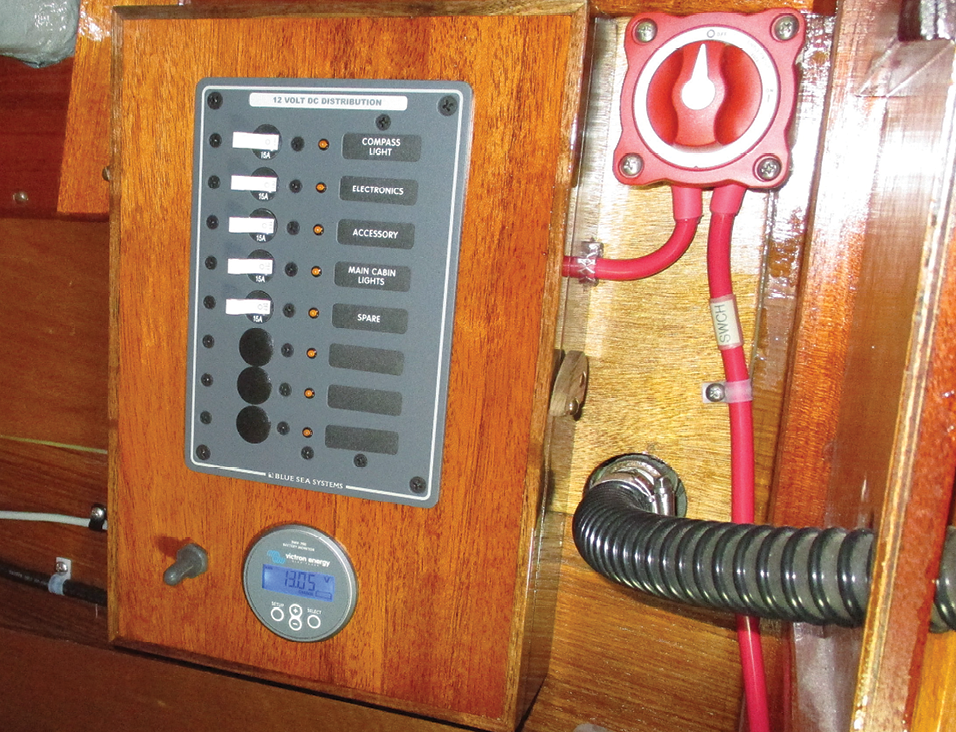
Battery System. We upgraded the single 100 amp-hour Lifeline AGM to two Trojan T105 6v deep cycle batteries wired in series to deliver 12-volts. They are inexpensive, reliable, easy to maintain, and simple to charge with a standard automotive alternator. We don’t need a technician in a lab coat to troubleshoot our electrical system. Keeping our boat simple and easy to maintain is liberating.
Inboard Diesel. We installed an inboard diesel after our second voyage to the Caribbean. This was the biggest project since we relaunched the Far Reach in 2015. We thought about this project a long time. I wrote extensively about the pro/cons of an inboard diesel on my website. The bottom line is it was not the limited capabilities of the outboard that drove the decision as much as my inability to reconcile the unsightliness of the outboard hanging off the stern.
If we had access to a mooring (private moorings are generally not permitted in NC) and easier access to the ocean I would probably not have installed the inboard. But we are based in a marina and we have a 20-mile trip in a narrow canal to access the Atlantic. After much thought we installed a 25 hp Beta Marine diesel with a two blade FlexOFold folding propeller. We kept the aperture filled in. The planning and execution of the diesel install will be the subject of a future report in Practical Sailor.
LED Navigation Lights. The kerosene navigation lamps worked perfectly for 8,000 nm. Had I not installed an inboard diesel engine I would have kept the kerosene lights.
Depth Sounder. There was no great need for an electronic depth sounder. In five years of sailing both skinny and deep water we ran aground lightly one time on a muddy bottom. Interestingly, since we installed the depth sounder via we have run aground twice in one year by failing to pay attention. I think there is a tendency to get complacent when relying on technology. However, the depth sounder works well, when I pay attention to it, and was a simple decision to upgrade when we installed the engine.
Future changes. With some reluctance, I’ll install a jib furler to more easily handle sail changes at night while single-handing offshore. I have researched refrigeration as ice gets more expensive and more difficult to come by. However, for the time being I am unwilling to complicate our simple reliable battery system to support the energy required by refrigeration.
What would we do differently? This is a difficult question to answer. One can argue I should have installed the LED lights, depth sounder, and engine during the rebuild and for most people that is clearly the right answer. But I am glad I had the experience of sailing the boat in its most minimal configuration. There is a certain magic that comes with sailing such a simple boat. And, though the changes are mostly positive, they came with a cost—increased complexity. Time will tell if those changes were worth it.
CONCLUSION
The total rebuild and modification of our nearly 40-year-old Cape Dory 36 took six years. When we launched her in 2015, she was better than a new boat because she was stronger, faster, and safer than a stock boat. Additionally, she had many custom upgrades as described in this series. This was my first rebuild and took me longer (I estimate about 6,000 hours) than it would have taken had I had more experience. I did not include the labor in the cost of the refit. It’s time I would have wasted doing something else. At $100 an hour I would have $600K in labor alone!
I budgeted $35K and spent about $40K on the rebuild. That’s about $7,000 a year X 6 years. I paid nothing to store the boat in my backyard saving about $3,000 a year over the average cost of storing a boat on the hard in a boatyard. That’s a net loss of about $4,000 a year during the rebuild, not including the expense and time invested in driving back and forth to a boatyard. Seems pretty reasonable to me.
I sold 90 percent of the hardware/systems I took off the boat and returned that money back into the boat fund. Additionally, I gained an immeasurable degree of confidence and skill to repair and maintain any component on my boat saving me untold amount of money in the future. Lastly, I have immense confidence in the boat which has been invaluable to me during the voyages I have made as well as those yet to come.
The purpose of this series of articles was not to describe how someone else should plan and execute a boat rebuild or to convince them what their priorities should be if they decide to undertake such project, or even to convince someone it is the best option for acquiring a voyaging boat. Rather, the purpose was to illustrate how one person with modest skills, but an abundance of commitment and determination, successfully researched and rebuilt a used sailboat into an affordable offshore voyaging machine. If you can dream it, with hard work, planning, and commitment, you can achieve it.


Inspirational series. Thanks John.
Your welcome. Glad you found it useful. It was fun to write. Glad all that rebuild work is behind me though. LOL.