

A smooth tack can be a thing of beauty, until a sheet hangs up and ruins it. A crew member must run forward to free it, which can be challenging if you are sailing alone and especially daunting in bad weather.
Every boat I’ve owned had some sheet snag issues that needed solving. Stays are the usual culprit, but I’ve had to deal with a rotating mast, mast-mounted cleats and winches, cowl vents, heater stacks, and so on. Sailors will argue over the best solution, but rest assured, whatever the problem, there is a solution. If you’re still struggling to bring that jib smartly around during each tack, I encourage you to try some of the well-tested solutions I’ve found helpful.
How We Tested
Over the years, we’ve tested various methods to prevent jib snags on four different test boats, each with its own unique set of problems. After settling on a few favorite modifications (typically to the sheets or clew attachment) we set up a spinnaker halyard to create a mock snag point and observed as our modifications were put to the test.
Sheet Guards
One line of defense is to fence off the offending hardware snagging the sheet. Bungee cords, lanyards and short lengths of line are our allies here. These are the areas and situations where a bungee fix might work:
Rotating Masts
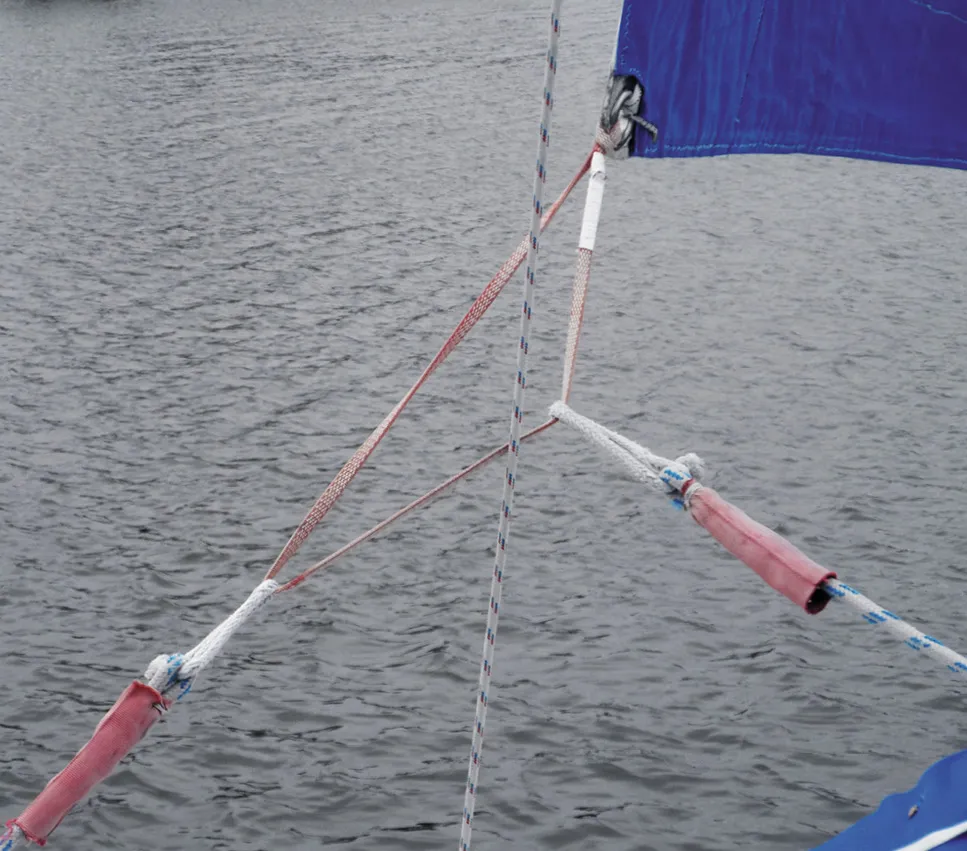
Sheets love to sneak into the space between the deck and a rotating mast. To stop this, a simple and proven solution is to create a bungee sheet-guard. Secure a 5/16- to 3/8-inch bungee cord to each side of the mast about 12- to 16-inches above the deck. Now attach the other ends to deck padeyes—or some existing hardware—forward and to the side of the mast.
The bungees will deflect the sheets but still allow the mast to easily rotate. The bungees will only last a few seasons, depending on the grade, but much longer if you cover them with an old rope cover or webbing (see “Shock Cord Test Looks at Long Life”).
Cleats on the Mast
Designed to easily secure a line under load, cleats on your mast are also susceptible to catching headsail sheets. You can cover mast cleats with boots, which look like two-slotted chocks joined by a shock cord that pulls them tight against the horns of the cleat. Store-bought boots are expensive, but you can make your own. We find sheet boots, including the ones we make ourselves, fiddly to use and prone to getting lost.
Another option is to eliminate the snag by cleating a line or some scrap rope around the offending cleat. Better, consider eliminating the mast cleat by rerouting the line it serves to a cleat on deck or replacing the cleat with a line clutch. We’ve done all of these with varying degrees of success.
Mast Winches
Shrouds generally prevent sheets from snagging on the front of the mast, but not if the jib is sheeted inside the shrouds for windward work, as is often the case on some wider boats. My PDQ catamaran had sheets inside the shrouds and the sheets would snag on nearly every tack. We tried various combinations of low angle covers and deflector lines designed to protect only the winches. No luck.
The final solution was a set of mock “shrouds” made from Dyneema. Like the bungee used in the previous example, the Dyneema created a fence between the mast and deck that prevented lines from getting near the offending winch. These “mini shrouds” were not part of the mast support rigging. Firmly attached at the deck and mast, they could also be used as clip-in points for our safety tether when working at the mast.
Deck Cargo
When lashing cargo, think not only in terms of security, but also how the lashing lines can prevent sheets from becoming trapped. A few lines over the object at low angles can serve a dual purpose: supplying low-angle bracing and providing sheet deflection. This approach will work with dinghies stored on deck and jerry jugs stored along the rail.
We once had a portable Dometic hatch-mounted AC unit that we kept lashed over the foredeck port when we were daysailing. While you aren’t supposed to sail with these in place, the unit was fitted to a cruising catamaran with a high cabin, so waves and splash were seldom a problem. Also, we firmly lashed it so it wouldn’t budge. The main problem was that our sheets would snag under the handles at the base of the AC unit. Again, we used several angled lines to prevent the jib sheets from snagging.
Clew Knots
Even if we’ve eliminated obvious snag points, the sheet or clew attachment could become prone to snagging. Over the years, we’ve experimented with all kinds of ways to ensure the clew and sheets slip easily around the shrouds.
Knots
The advantages of knots are their simplicity and the ability to trim the end of the line to adjust for wear. On many boats, the first point of wear is probably at a rope clutch or jammer, or, during long tradewind passages, at the genoa lead block. In either case, trimming the clew-end will move the point of chafe. To prevent or delay chafe at trouble-spots, you can also coat the lines (see “Liquid Chafe Prevention”).
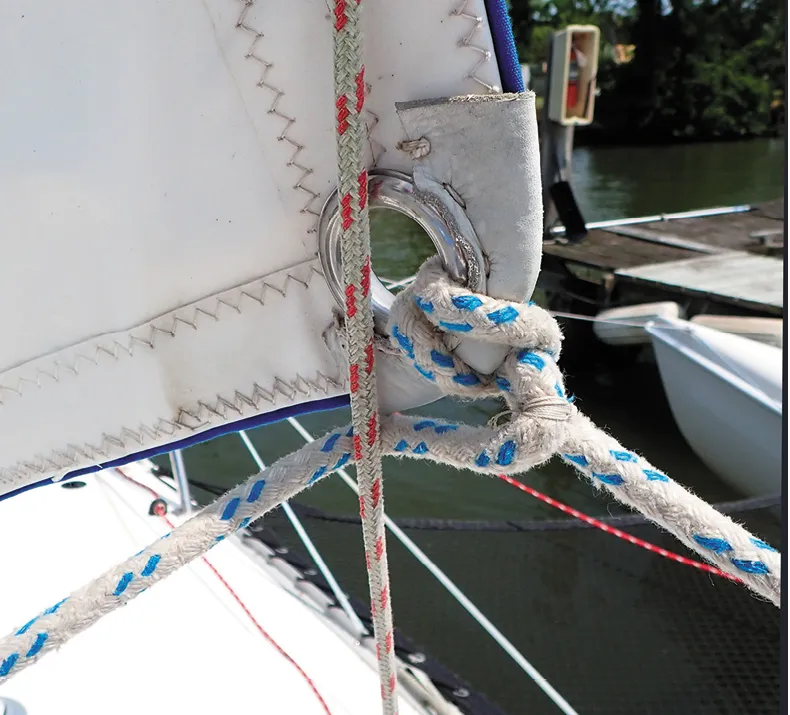
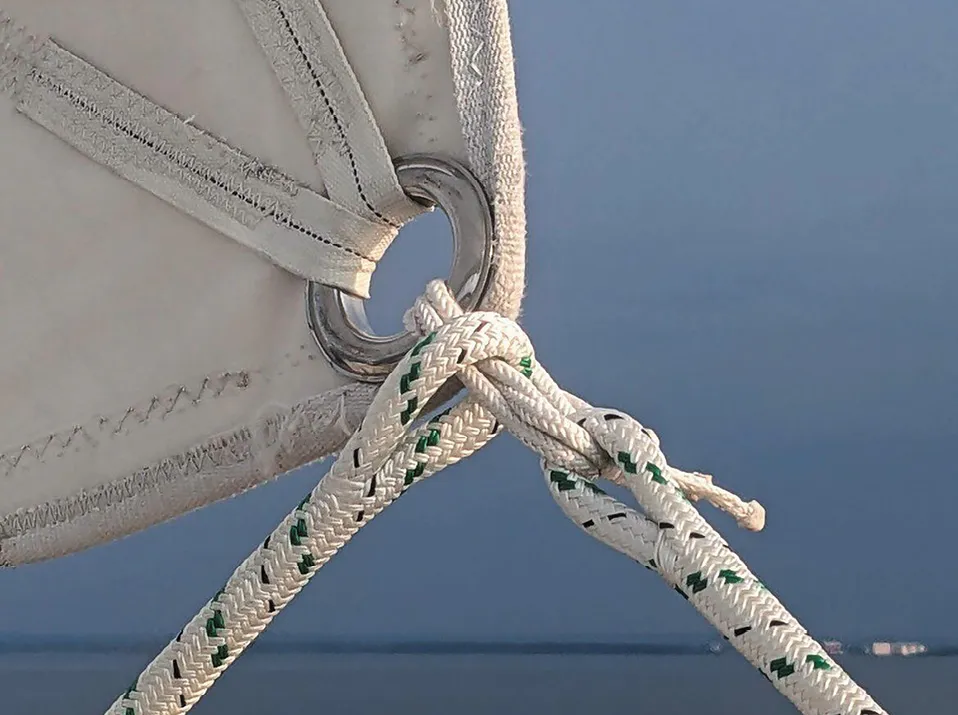
Bowline
Tying a bowline knot at the clew is a time-honored practice. The knot is quick and secure, and you can easily untie it. But several precautions are required. Tie the knot correctly, with a tail, or working end, at least 12 rope diameters long and ending inside the finished loop. A bowline tied with the working end outside the loop is called a “cowboy bowline,” and in my opinion, it’s slightly stronger when cross loaded (with one side of the loop carrying more load). However, the exposed tail of the cowboy bowline makes it prone to snagging, and thus less desirable for sheets.
Additionally, any bowline can shake loose if the tail is too short and it’s flogged excessively, an undesirable consequence of using a knot that is so easy to untie after hard loading. But a bowline shaking loose happens very rarely, and it can be prevented by seizing the working end (or tail) to the loop. It doesn’t need to be your best seizing, just enough to keep the tail from loosening or snagging.
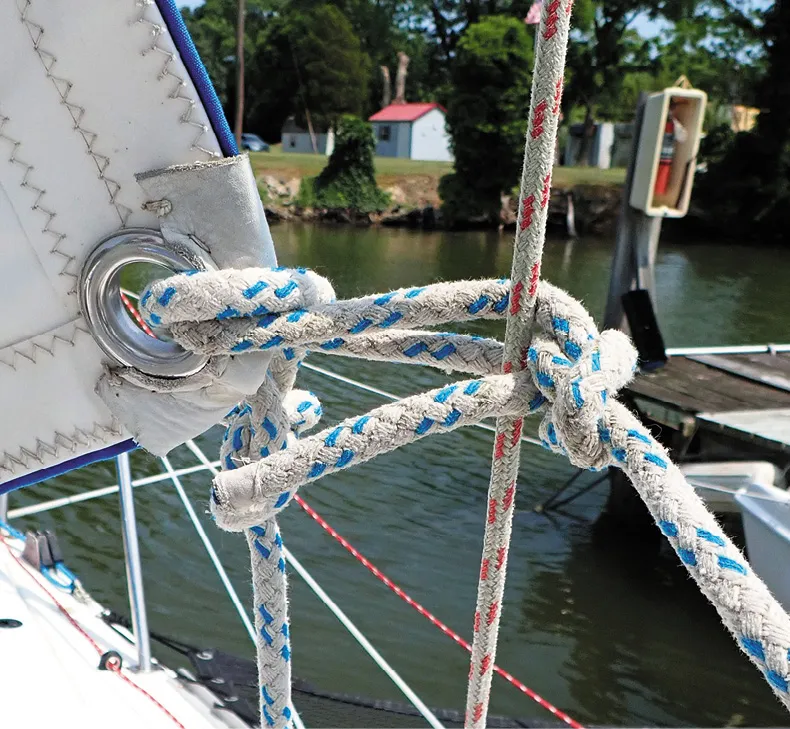
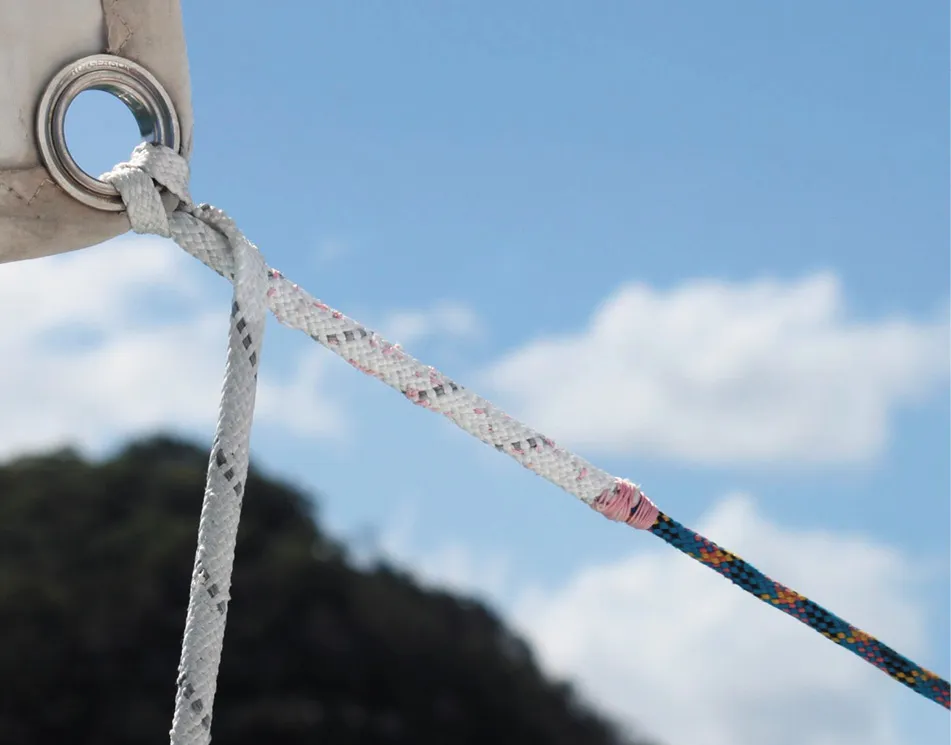
Luggage Tag (also called a lark’s head)
A luggage tag knot is simple, light and streamlined, but can slip if tied with Dyneema. To prevent untying, seize the legs together. Do this inside the knot (before tightening), rather than after they exit, to avoid creating a stiff Y at the seizing point.
This knot has an undesirable feature, it concentrates the flexing of the rope at the exit of the knot when the sail flogs. If using sheets with high molecular weight polyethylene (HWMPE) cores like Dyneema or Kevlar, check for crimping. The Kevlar-core genoa sheet on our PDQ test boat failed (Kevlar hates flexing), but unbelievably, the sunburned polyester cover still held.
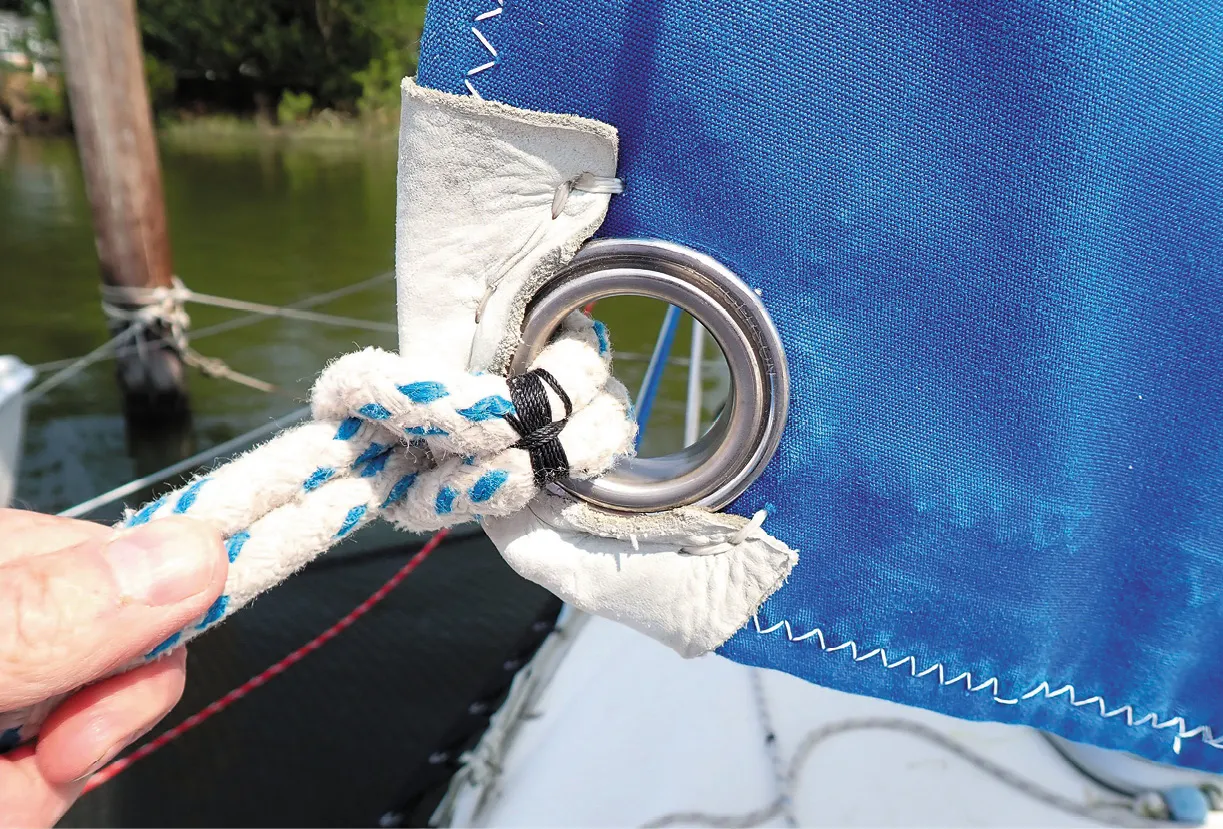
An improved version of the luggage tag involves sewing hollow Dyneema webbing or Dyneema rope cover over the ends of the sheets and luggage-tagging the webbing-sheathed line through the clew grommet or ring. The Dyneema is slippery and the flat profile of the webbing or rope cover makes the connection almost snag-proof.
An advantage to using rope cover instead of webbing is that it contracts over the rope like a splice, reinforcing the stitching. For security, the tail of the luggage tag knot can be seized or spliced to the standing part of the sheet.
One downside to the luggage tag is that it forms a very tight knot. On larger boats with higher loads you might need a marline spike to loosen the sheet. A luggage tag is also the simplest way to attach continuous sheeting.
Soft Shackles and Slings
One solution that has worked well for us is to is to replace the knot with a soft shackle. For even quicker tacks, you can add a short sling made out of webbing or Dyneema between the clew and the sheet as described below.
Soft Shackles
We know there are sailors who happily use Tylaska J-lock shackles on their jib sheets. Having felt the sting of a clew grommet alone whipping around the foredeck, we’re not fans of adding any more metal at the clew. A heavy metal shackle whipping around the foredeck at the end of your genoa clew is the last thing any crew wants to deal with.
Soft shackles are gentler, no more dangerous than a knot. Eye-splicing the end of each sheet and then using a soft shackle to join to the clew is less bulky than two bowlines, so it will be less prone to snagging.
When the Kevlar core crimped and failed on the PDQ sheet, we made stitched eyes instead of spliced eyes at the end of each sheet. Our experience with testing stitched eyes gave us confidence that the splices would easily hold (see “Stitching Instead of Splicing”). For easy detachment and adjustment, we used soft shackles to attach the sheet to the genoa.
with toggles are easier to make than soft shackles with knotted ends. We’ve used these for several seasons and they’ve never come loose.
Will a soft shackle slip? We’ve all heard of a screw-shackle that rattled open, which is why we use locking shackles or seize our shackles whenever practical. Anchor shackles, for example, should always be seized.
Soft shackles are different. In our experience, a well-made soft shackle is unlikely to come loose under flogging. Riggers and respected gear vendors like Landfall Navigation recommend soft shackles for attaching sheets. Unlike many DIY soft shackles that you can buy on the internet, high-quality purpose-built soft shackles from Marlow and others have a cinch line to pull the noose tight. We’ve used soft shackles without this feature, but the cinch line offers added security.
You will want to inspect soft shackles for chafe. A clew grommet with a sharp edge will cut through Dyneema. If you see chafe, check the clew. We have seen this happen.
A soft shackle with a toggle instead of a knot will be easier to connect and disconnect, and we use them for situations where the sheets are frequently changed or taken off. For example, we use toggled soft shackles on our lightweight reaching jib because we remove the sheets when we are finished with it. A soft shackle with a toggle may be more prone to catching on lifelines, possibly come loose, but it depends on the application, and the quality of the soft shackle (see “Testing the DIY Dogbone Shackle”). We’ve used toggle shackles extensively for this purpose and never had one open.
Slings
Our cruising cat had a wonderful Quantum genoa with a padded luff that would set well even when roller-reefed down to a handkerchief. Originally, the sheets were luggage-tagged to the clew and routed outside the catamaran-style cap shrouds, rigged far outboard. The genoa didn’t snag, but the sheeting angle was too broad for effective windward sailing.
I added an inner track and sheet, and converted to sewn eye splices and a soft shackle so that I could detach the lazy sheet. Combined with keel modifications, this greatly improved my pointing ability. However, the new sheets ran along the mast and snagged on the winches on nearly every tack.
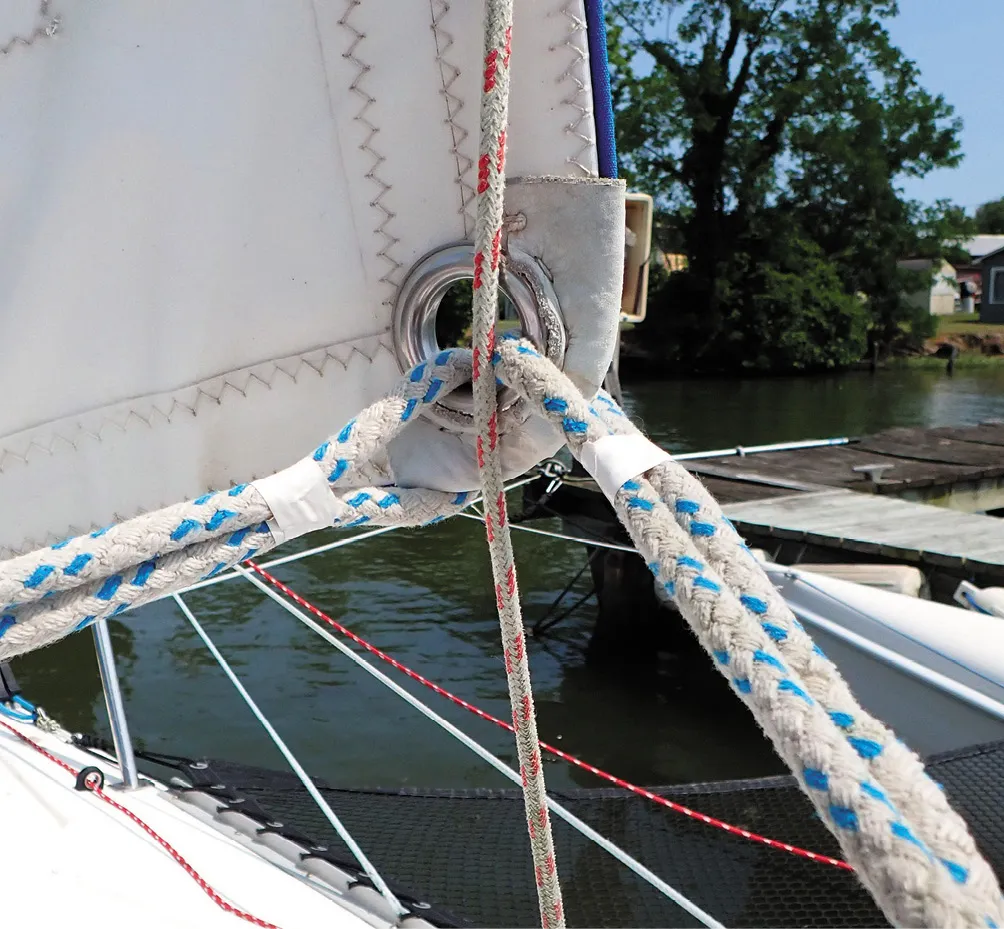
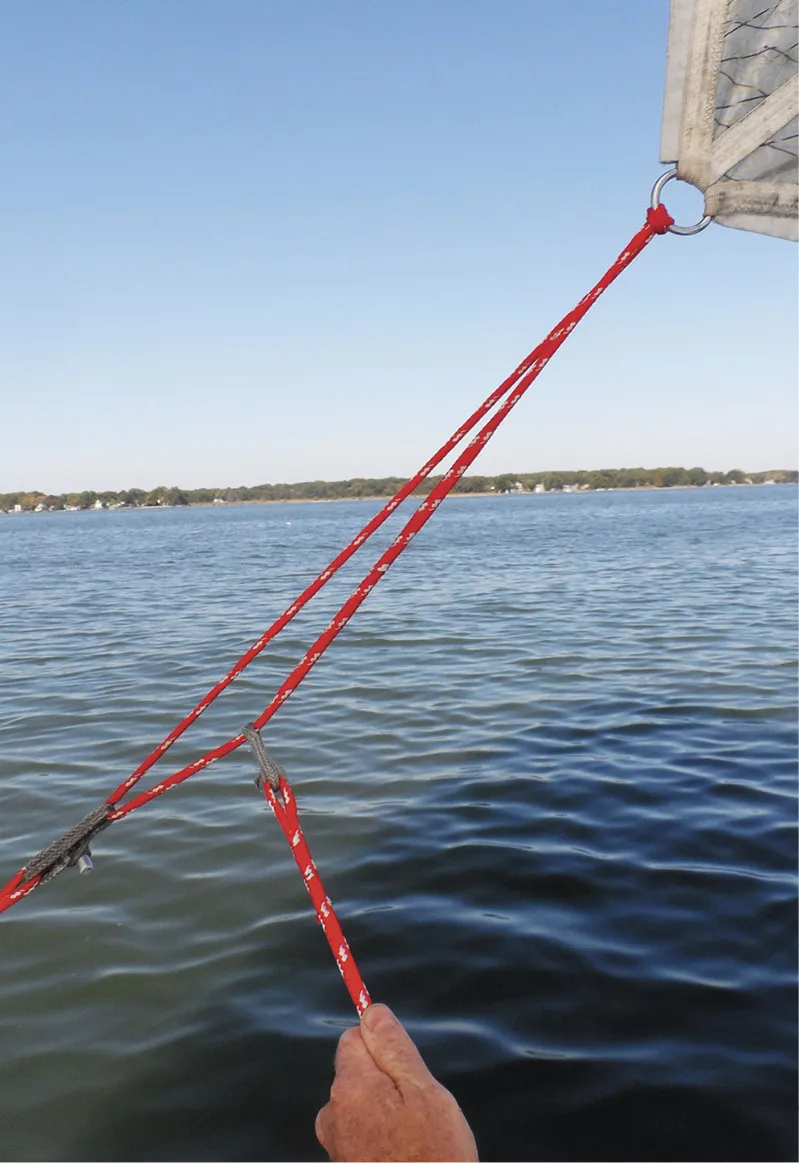
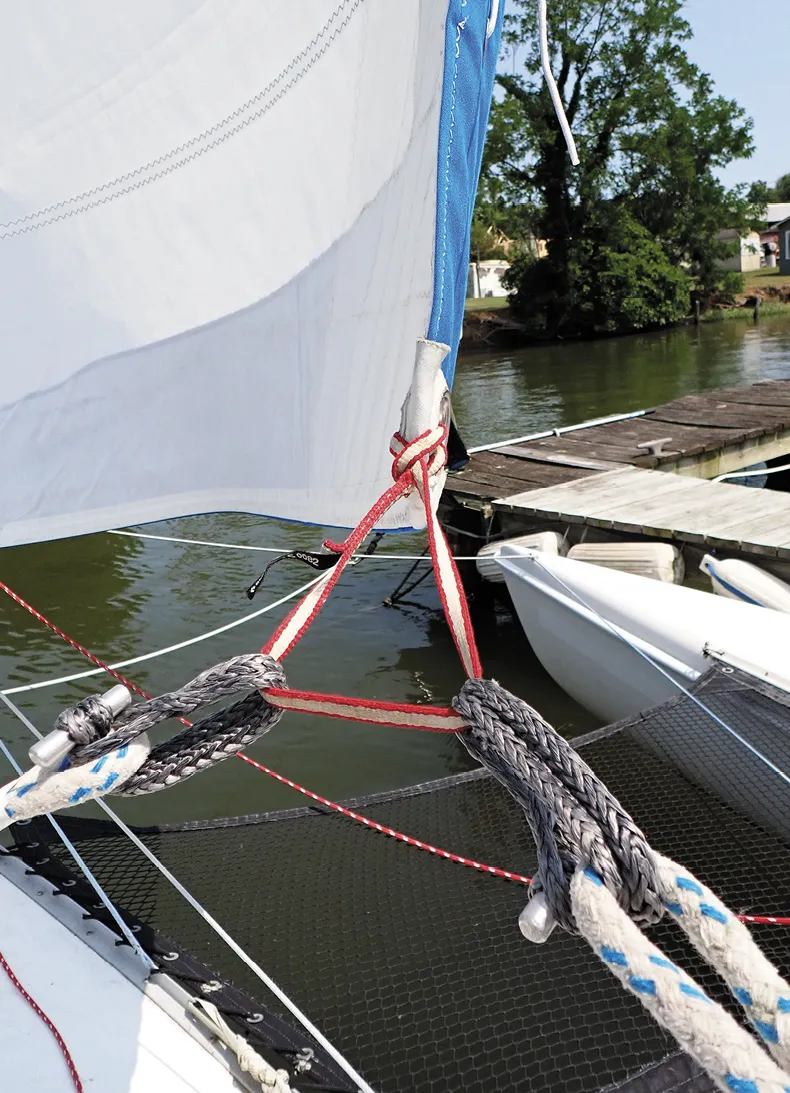
Even after I added some vertical lines between the mast and deck to prevent snagging, the clew grommet still occasionally hung up on the new shrouds. To fix this, I luggage-tagged a Dyneema climbing sling (5,000-pound breaking strength) to the clew, which allowed the clew to float forward of the soft-shackle connection, solving the snagging problem. Chafe was nonexistent, because there is no movement under load and because Dyneema against Dyneema is very slippery. With these changes, I finally achieved reliable tacking and good windward ability.
A variation involves sewing the sling flat into the shape of a “Y” with an eye at each end, one for each sheet and one for the clew. In our experience, performance is identical to the simple sling. The sheet ends can also be threaded inside the hollow webbing and stitched to it, creating a very smooth transition, but this is not much smoother than webbing with spliced ends.
We’ve also seen the Y formed using a simple Brummell-splice at the clew and spliced eyes at each end. This is a bad idea. A Brummell splice is a weak construction that can shift when it is not loaded and it is prone to chafe every time you tack.
Clew Types and Splices
While we’ve found that the above suggestions solved all of our own problem snags, other modifications might be helpful in certain situations.
Clew Design
Some clew designs will snag less than others. We’ve had several sails with clew rings instead of pressed or sewn grommets, and they slid more smoothly over wire stays. Clews with rings are also easier to repair, but there is more exposed metal to whip around the deck and chip the paint off your mast. If you plan to fix your own sails, a D-ring is easy to replace or reinforce with hand-sewing. A traditional sewn grommet can also be fitted or repaired by hand using a heavy-duty sailmaker’s needle and sewing palm. Sewn grommets are also softer than a D-ring.
Splicing
Splicing your sheets directly to the jib will provide a smooth connection, but removing the sheets or changing the length to adjust for chafe is impossible without a knife. You can hitch the eye-splice to the clew, but then you will increase the bulk. Splicing old line is nearly impossible, so you’ll need to use a sewn splice to resplice your sheets after adjustment.
For a smooth, durable transition, cover the sewn splice with rope cover or Dyneema (see “Sewn Splices Two Year Follow-up“). While a spliced end presents a slightly lower profile, attaching the spliced ends with soft shackles makes more sense to us.
Tacking Technique
Part of the reason sheets snag is that the working sheet is suddenly released all at once. The jib flogs, the loose sheet goes everywhere, and if there is enough wind, hockles and knots can form. A better practice in all but the lightest wind is to maintain light tension when easing the sheet.
Routing Lines
Eliminating piles of line always helps reduce snags (see “Sailboat Safety on Deck”). If you can pull tight the slack tail of an outhaul, do it. Often, you can run a line under a deck or lead it close to the cabin using a bungee cord, turning block, low friction ring, or a combination of all three. These tweaks seem like something only racers would do, but collectively they make any boat more relaxing and less cluttered.
Low Friction Tape
While your sheets won’t snag on a bare mast, anything that helps the jib slide across the mast helps. We wrapped the front of the mast with Nautos Anti-Chafe tape, which is a very low friction polyethylene tape. Although it only lasts about two years in the sun, it helps the jib slide across the mast while preventing dings and scrapes (see “Chafe Tape Plan”).
Continuous Sheets
A single line serving as two sheets, a continuous sheet is commonly used on dinghies and beach cats. This reduces tangles and ensures you can always reach the lazy sheet without going to the leeward side to fetch it. The total amount of rope is slightly reduced. The downside to this approach is that it creates a pile of line underfoot that you can’t easily stow in a bin or sheet bag.
Single-handed sailors often favor a continuous sheet, since they can easily control the lazy sheet and working sheet at the same time when tacking. Tangles are less likely, because there is no loose end to form knots, and twists naturally work themselves out.
Self-Tacking Jibs
Most self-tacking jibs include a block at the clew, allowing the sheet to be tensioned without moving the traveler first. There is no way for a self-tacking jib to snag, because the clew stays forward of the mast and the deck. It can still flog while tacking, though, so you still want to avoid using heavy metal shackles at the clew and keep the sail under control as you tack.
Conclusion
On any new-to-me boat, eliminating snags is one of the first steps toward getting the boat dialed in for efficient sailing. One of the easiest ways to reduce flogging lines is by managing slack. While tacking in your local waters, observe what snags your sail or sheets and eliminate it by changing sheet attachment methods, moving the hardware, or line deflectors.
This is a process of trial and error, but there’s always a bit of pleasure in solving puzzles like this. Keep tweaking until you can stay in the cockpit for each tack, confident that the sail will slip easily from side to side.
This article was first published on 19 January 2024 and has been updated.


We have a cutter rigged trimaran, and for over 30 years… to prevent the headsail sheets from hanging up on the staySL wire, we eye splice the sheets directly through the clew grommet, with a leather chafe protection, sewn into each eye.
This lasts about 10 years, and works GREAT, except when re sewing the sun protection strip on the sail, or making repairs, the sheets are a bit in the way.