

Owning and using a boat is all about maintenance. While maintenance is not fun—it can be filthy and arduous—it must be done if you own a boat, and it’s incredibly satisfying. I promise you, that if you follow this easy and pragmatic maintenance program, there will be a time at some point in your boating life when you say, “Thank you Pamela!”—You’re welcome!
My maintenance epiphany took place well into my boating life. I had already owned and operated my own sailing charter business in northern British Columbia, including Alaska. I had my captain’s 60-ton license, sailed over 100,000 ocean miles (including circumnavigating the Pacific by sextant in the 1980s), and owned seven boats. So, I knew how to sail, navigate, dock the boat, identify weather etc., but I always hired people to help me fix things. I didn’t know what I didn’t know.
It occurred to me on an ocean passage from Victoria, Canada to Mexico that I had to learn to do the repairs and maintenance on my own. “Pamela, if you’re truly going to sail this 50,000-lb., 50-ft. beast Precious Metal anywhere in the world, solo, then you’re first going to have to learn every inch of her: how to maintain her.”
Learning Your Boat’s Needs
For the following two years, as I sailed throughout Mexico I was a sponge for information on everything mechanical, electrical, and what I consider “blue” (what I refer to as traditionally male roles). Whenever another boater had mechanical/electrical/rigging issues aboard, I would ask to attend to their repairs and then figure out how they applied to Precious Metal. I am forever grateful to everyone who supported this valuable apprenticeship in my boating career.
That’s when the epiphany occurred:
- If I do the maintenance thoroughly in port on a regular basis, there’s a really good chance that I won’t have to repair things at sea.
- If I sacrifice time in port twice a year, I will enjoy the entire following six months cruising season maintenance-free and probably repair-free.
- Furthermore, by doing a comprehensive maintenance routine every six months, I will know all the parts of my boat, I will have all the right tools (coded), I will know how to use the tools, and I will have a proper and thorough inventory of spare parts.
- I will be a master of my own ship! It goes without saying that I will also save a lot of money if I do things myself.
It’s important to also emphasize that maintenance programs should take place twice a year. I commonly witness boaters dock their boat for the season, put on the canvas and walk away when so much can easily be done to maintain the boat properly for the following season.
Note: Every boat is different and each boat owner has a varied background in “blue” tasks. Therefore, it’s important to note that this maintenance program is the one that I developed and followed, and is specific to my 50-ft., 50,000 lb. steel cutter Precious Metal. I believe that this program is comprehensive and covers most aspects of every boat; however, it should eventually be tailored to you and your boat as you progress through each of the tasks.
Preparation For My Maintenance Program
Preparation is the key to an orderly, practical maintenance program. Once you’ve laid out the initial preparations, your subsequent maintenance sessions will be systematic, easy and time efficient.
1. Identify All of the Systems Aboard Your Boat
Create a spreadsheet that lists every system on your boat so you can keep track of maintenance and repairs in a log-style format.
Gather all the manuals that apply to your systems (mechanical, plumbing, wiring electronics etc.) and file them in a systematic binder/electronic folder. I’m an old salt and prefer to have hard copies of every manual in a file as well as online.
As you’re discovering and identifying each system, label as much as you can. I use a label printer with some heavy-duty invisible tape to secure labels on flat areas and thin/flexible wiring to hang tags on hoses and obscure places.
Record the serial numbers and other types of identification for easy referencing when investigating a system and ordering parts. Take photos.
I also keep an updated inventory parts list on the spreadsheet that is continuously updated as I replace parts for each system.
2. Find a Coach
Find someone who either knows boats or specializes in mechanics/electronics/rigging (if applicable) who is keen to guide you in this learning stage. Boaters love to offer advice. I’ve never met anyone who denies other boaters brainstorming advice on boating systems.
YouTube is also a terrific resource, as well as a huge number of boating links online. I don’t follow any specific YouTube channels, rather I simply Google whatever task I’m trying to solve. There are also a lot of WhatsApp and Facebook groups in local boating areas that can be tremendous resources.
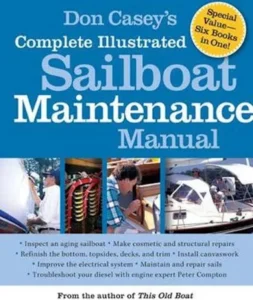
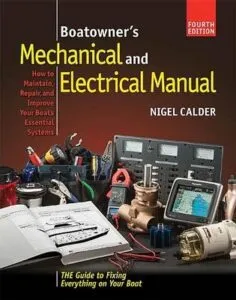
I also still reference the two best boating maintenance books: “Don Casey’s Complete Illustrated Sailboat Maintenance Manual” by Don Casey and Nigel Calder’s “Boatowner’s Mechanical and Electrical Manual.” Calder’s book is now in its third edition and has updated details, whereas Casey’s book is more dedicated to sailors. So I refer to both. There are many other specific books on weather, batteries, electronics etc.
3. Learn to do Everything Yourself
It’s tempting to let the experts do the work—especially if you’re paying them a lot of money. However, I only learn a task fully if I do it myself. When I request assistance with a task, I understand that the expert will guide me, but I have to complete the entire task hands on. I not only take photos of repairs and maintenance operations, but I also describe how I did it via hand-written notes in a manual for future reference. My own hand-written drawings and descriptions were incredibly valuable during this maintenance apprenticeship.
I also find that if I tighten the part myself—versus a stronger person doing it—I will also be able to loosen it when I need to.
4. Tools
I am so proud of my tool kit. Learning about tools was a huge learning curve because I wasn’t socialized in that environment as a child. Having the correct tool, and knowing how to use it, was a big eye-opener for me.
I color-code all of my tools for specific use(s) with colored masking tape. The red tools are used for the fuel system, blue for alternator, yellow for rigging, and so on. If a tool has several applications then it will have all the colors for each system.
I also have a separate tool bag for the rigging and engine room. It’s so convenient to be able to instantly reach for the right tool and size. Having the tools color-coded also helps when you have an assistant insofar as they can automatically reach for the correct tool.
Screw heads are three general types: Phillips, Robertson and straight (Robertsons are common in Canada). I make every attempt to have consistency whenever possible by using the same one for as many applications.
Keep in mind that tools as well as screws and bolts etc. come in metric and universal sizes so I needed to become adept in fractions. Easy measurements such as 1/4”, 1/2”, 3/4” also come in eighths and sixteenths millimeters—and a great variety of combinations.
Hose Clamps
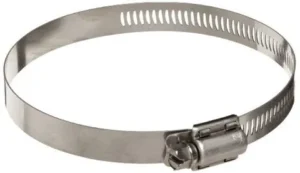
Never underestimate the importance of hose clamps. Hose clamps are an important part of a boater’s tool kit. Marine air corrodes easily so be sure to buy stainless clamps. Because I want to ensure I’m buying stainless hose clamps, and some stores, especially in developing countries sell non-stainless and valuations of metals, I carry a magnet with me. Stainless is not magnetic so I know for sure that I’m buying pure stainless if the magnet doesn’t connect.
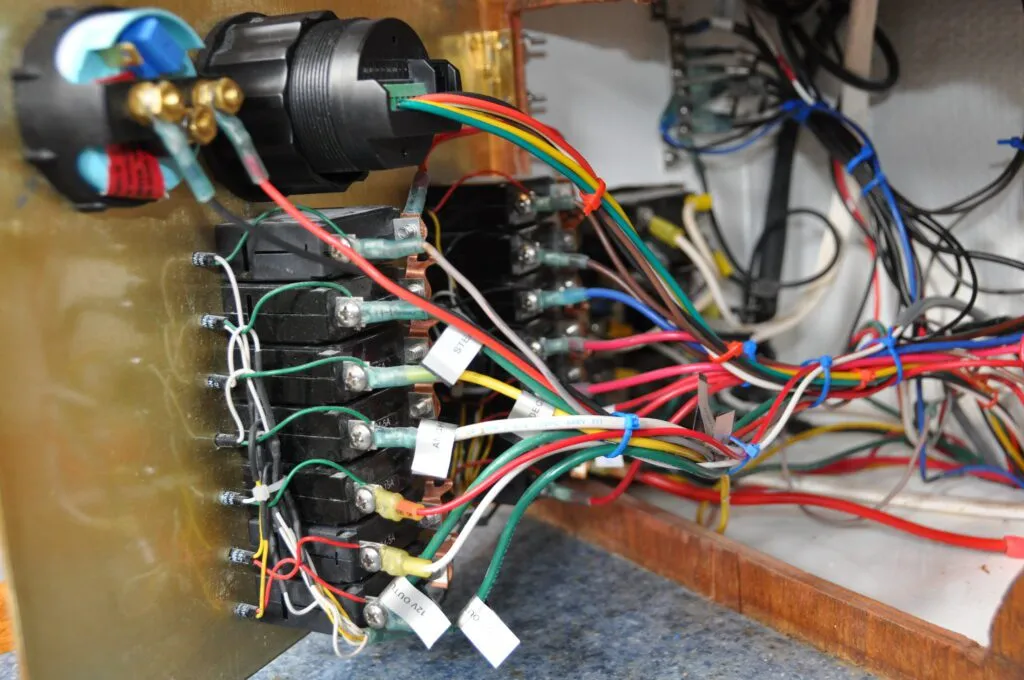
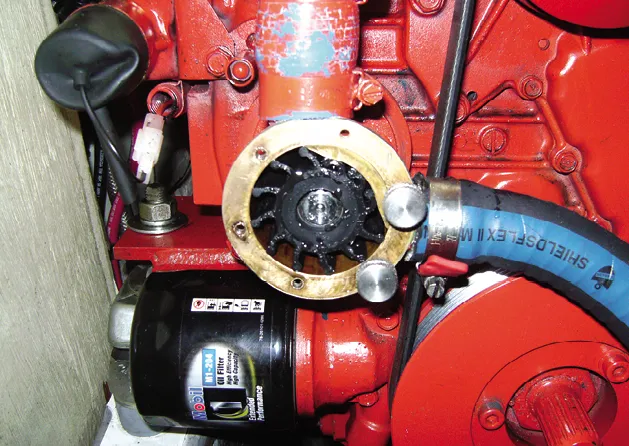
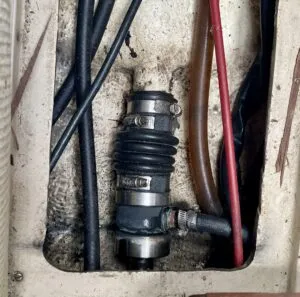
Cleaners and Lubricants: An ideal maintenance kit requires a full component of lubricants and cleaners. The first day of every maintenance session begins with hose clamp day. Hose clamps tighten the lines and hoses onto a part. I do this because hose clamps take me to most of the far-reaching interior areas of my boat. I take a clip board and not only check whether any of the hose clamps have loosened or rusted (and tighten or change them), but I also look around at all of the other systems. For instance, I may be in the anchor locker checking the hose clamps on the anchor wash-down hose and find rust on the electric anchor switch or one of the electrical wires loose. I record everything that looks suspicious for a second look another day. Hose clamps have tiny teeth/grooves that allow the clamp to dig into the hose. I always use two clamps with the teeth in opposite directions to ensure optimum security. It took me a long time to become proficient and confident with the electrical component of the “blue” jobs. The learning curve was steep but eventually it began to make sense. Begin by labelling all the electrical systems aboard the boat. My boat has a wiring diagram for every system. Be sure to update the diagrams when you install and/or remove a new part. Using the electrical contact cleaner, I systematically remove each wire on the electrical panel and spray a tiny bit on each connection and then tighten back on the post. It’s a good time to check for any wire corrosion throughout the boat. I also ensure that the battery cables and terminals are clean. These tasks can all be completed in one day. It’s easier to change a fuel filter than a diaper. Seriously. Engines have a fuel filter mounted on the engine and a separate Raycor fuel filter system. I also have a separate fuel filter between fuel tanks so that I can clean the fuel when I move it between tanks. Air and dirt can cause serious issues in the fuel system. Air can be caused from something as simple as a loose hose clamp, break or block in the fuel line, and/or dirt in the system. The tiniest amount of dirt can create enormous challenges to the fuel system. I keep my fuel system spotless. I take the top off the Raycor unit and inspect it for any sign of dirt or air. If there’s any concern about either dirt or air I take apart the entire bowl and change the filter (using diesel as the cleaner), all gaskets and o-rings, then clean out the entire bowl. I always use a Baja filter when I put fuel into the tanks. It’s important to bleed the system once the filter has been changed and everything is put together. Then run the engine for 20 minutes. The injectors should be professionally checked every 1,000 hours. The rule that I use for changing the oil and filter is every 100 engine hours. It can be a messy job, but I have become really slick with this procedure. I wrap a baggie around the filter and wear gloves when I unscrew the filter and there’s rarely a drop of oil leaking out. Again, run the engine for 20 minutes after changing the filter. Always run the engine between mechanical procedures. If you work on two systems consecutively without running the engine in between you won’t know which system is the culprit if the engine fails. I also place absorbent pads beneath the engine so that I can see if there are any leaks. I tend to check my alternator belts whenever I’m in the engine room. I check for any fraying, blackness beneath the belts (sign of wear), any odd squealing sounds, and that they are tight or at most a quarter inch of depression when I touch with my finger. The big job for me involving the alternator belts is the impeller, which is inside the raw water pump and not as easy to access on my boat. Just do it. It’s not complex, but it can be messy taking off the raw water pump. Impellers are important for keeping the engine cool and if one of the tiny parts breaks off it will end up in the heat exchanger and cause untold challenges to the engine. I’ve had two occasions over the years where my impeller was a show-stopper simply due to laziness. I simply keep an eye on the coolant level indicator and top off as necessary. I also eyeball the raw water filter whenever I’m in the area for any particles that have been trapped in the filter, and clean it out. I have switched to a Lithium battery system; however, if the boat has lead-acid batteries then each battery cell needs to be topped with distilled water. It’s commonly recognized that water-maker water is also suitable for batteries and that’s what I used to use. I check the fluid level but have never had the need to change it. Many stuffing boxes are supposedly drip-less; however, I have had to re-stuff my drip-less boxes several times over the years. The stuffing box essentially keeps the drive shaft lubricated and is packed with a seal that allows a few drips every minute. More than six drops a minute is too much and the box needs to be stuffed. This is a job that I hire people to do. Several boats that I’ve owned have had hydraulic steering; however, most sailboats have manual steering. In the case of hydraulic steering, it needs to be checked and topped during each maintenance cycle and then air bled out of the system by pumping the steering back and forth until the bubbles stop. I can’t emphasize enough the importance of doing on deck maintenance on a regular basis. All of the moving parts on the deck are exposed to salt water and air and corrode easily. I always plan my on-deck maintenance during a week that is hot, dry and sunny. Precious Metal is steel and therefore requires a week of anti-rust maintenance in addition to all of the other tasks. Treating rust became a labor of love for me once I learned all of the tricks: grinding, acid, filler, epoxy and paint. Winches must be maintained in port and in calm seas because there are so many parts that could easily be misplaced or fall overboard. I always take photos of every stage. See “Simple Tips on Servicing Your Sailboat Winches.” Steel standing and running rigging that supports the mast is a specialty that it best left for a proper professional rigger. There are too many aspects of rigging that are unique to the boat and impossible for an untrained eye to capture. Failure in rigging can result in an unhappy end to your voyage because the mast can fall causing extreme consequences. See “Pacific Dismasting: Lessons Learned from 100 Days at Sea” where John Jones, who recently crossed the Pacific, endured a dismasting due to failed chain plates. The rigger will climb the mast(s) and check for any weakness in the steel wiring as well as treat the materials with protection and tweaking whatever is necessary. The rigger will also check the stays and make any necessary adjustments. This is also the time to check the chain plates, stanchions, lifelines, tackle and all supporting deck apparatus, including solar structures. All halyards, sheets, painters, jack lines and other types of lines should be examined and replaced if necessary during this maintenance program. New types of rigging are replacing traditional stainless. Dyneema rope is a high-performance, braided synthetic rope known for its exceptional strength-to-weight ratio, and is being used in many types of applications on sailboats. I replaced my lifelines with Dyneema which eliminated any rust hidden beneath the lifeline coating. Many sailors are replacing their steel. It was definitely advantageous to work with; however, there needs to be an allowance for stretching, especially when it is initially installed. Naturally, there are a lot of other systems aboard a boat that require maintenance but aren’t what I call “show-stoppers” to the performance of a boat at sea. The water systems, head systems, water-maker and more have pumps, lines and specific idiosyncrasies. The propeller, exhaust systems and bottom cleaning are also critical to a ship-shape boat—including zincs. We just replaced our vac-flush head with a composting head (which we love), which also needs attending. In conclusion, one of the greatest highlights of boating is that after 45 years, I still don’t know it all, and I never will. There are so many compelling aspects of boating that keep me curious and learning. One thing I do know is that maintenance is the key to a well-functioning boat and seaworthy boat. Just do it! Have fun and best wishes. Let us know in the comments what ways you streamline your maintenance program.
The Maintenance Routine
Engine Room
Hose Clamp Day
Electrical Day
Filters, Alternators, Coolant, Batteries and Transmission Day
Fuel Filter
Oil Filter
Alternator (Fan) Belts
Radiator Coolant
Lead-Acid Battery Top Up
Transmission Fluid
Stuffing Box
Hydraulic Steering
On Deck
Winches
Rigging
Conclusion


This is really helpful. I hadn’t thought to undo the electrical and spray with cleaner. Making my physical checklist now.
Very good overview. I especially like “hose clamp day”, “electrical day”, etc. A great way to focus and not skip items. There are a few more screwdriver types, especially that can be confused with Philips: Frearson, and Posi-drive. Frearson are common with bronze wood screws, as found in more traditional boats. Posi-drive is common in NZ and Aus and UK. I found Posi-drive machine screws on the caps of old Lewmar winches.
Really nice article. I need to be more diligent about keeping records. It helps so much with getting the correct parts, especially when you live far from your boat.