

If you haven’t serviced your winches in a couple years, or you notice squeaks, groans or slips as you grind, it is high time to tackle this project. We like to inspect our jib-sheet winches every year, but we sail our boats hard and they are exposed to some pretty harsh freeze and thaw cycles.
Fortunately, winch servicing is a pretty easy, and for the wanna-be watchmaker who marvels at moving parts, it’s fun—until you start dropping parts overboard. Thus, our first bit of advice: Make sure you have the right winch servicing kit, including pawls and springs, before you start pulling your winches apart. Not only will you be happy you did this when a precious pawl springs start bounces down your cockpit drain (cover them before disassembly!), you will need the kit to determine the level of wear in your existing pawls. Pawls are the essential, spring-loaded stops that prevent a winch from rotating backward—see image above.
When to Service Your Winch
While using the right winch grease is important, servicing the winch before the grease turns to gum, washes out, or the pawls start to hang up is more important. Makers recommend annual servicing, but racers and full-time cruisers may go one to three years, and weekend sailors might stretch it a bit further. Three years really would be the max, unless you can live with increased wear. If you go any longer, you risk increased wear and even damage. If the pawls hang up and the drum releases, parts can break, and people can get hurt as the winch handle whips around.
Winch Servicing Basics
Here is a quick review of the basics of winch servicing. Most major manufacturers offer handy videos and guides like this Harken winch servicing video that can help guide the project. We highly recommend you refer to those before taking apart your winch:
1. Read the instructions.
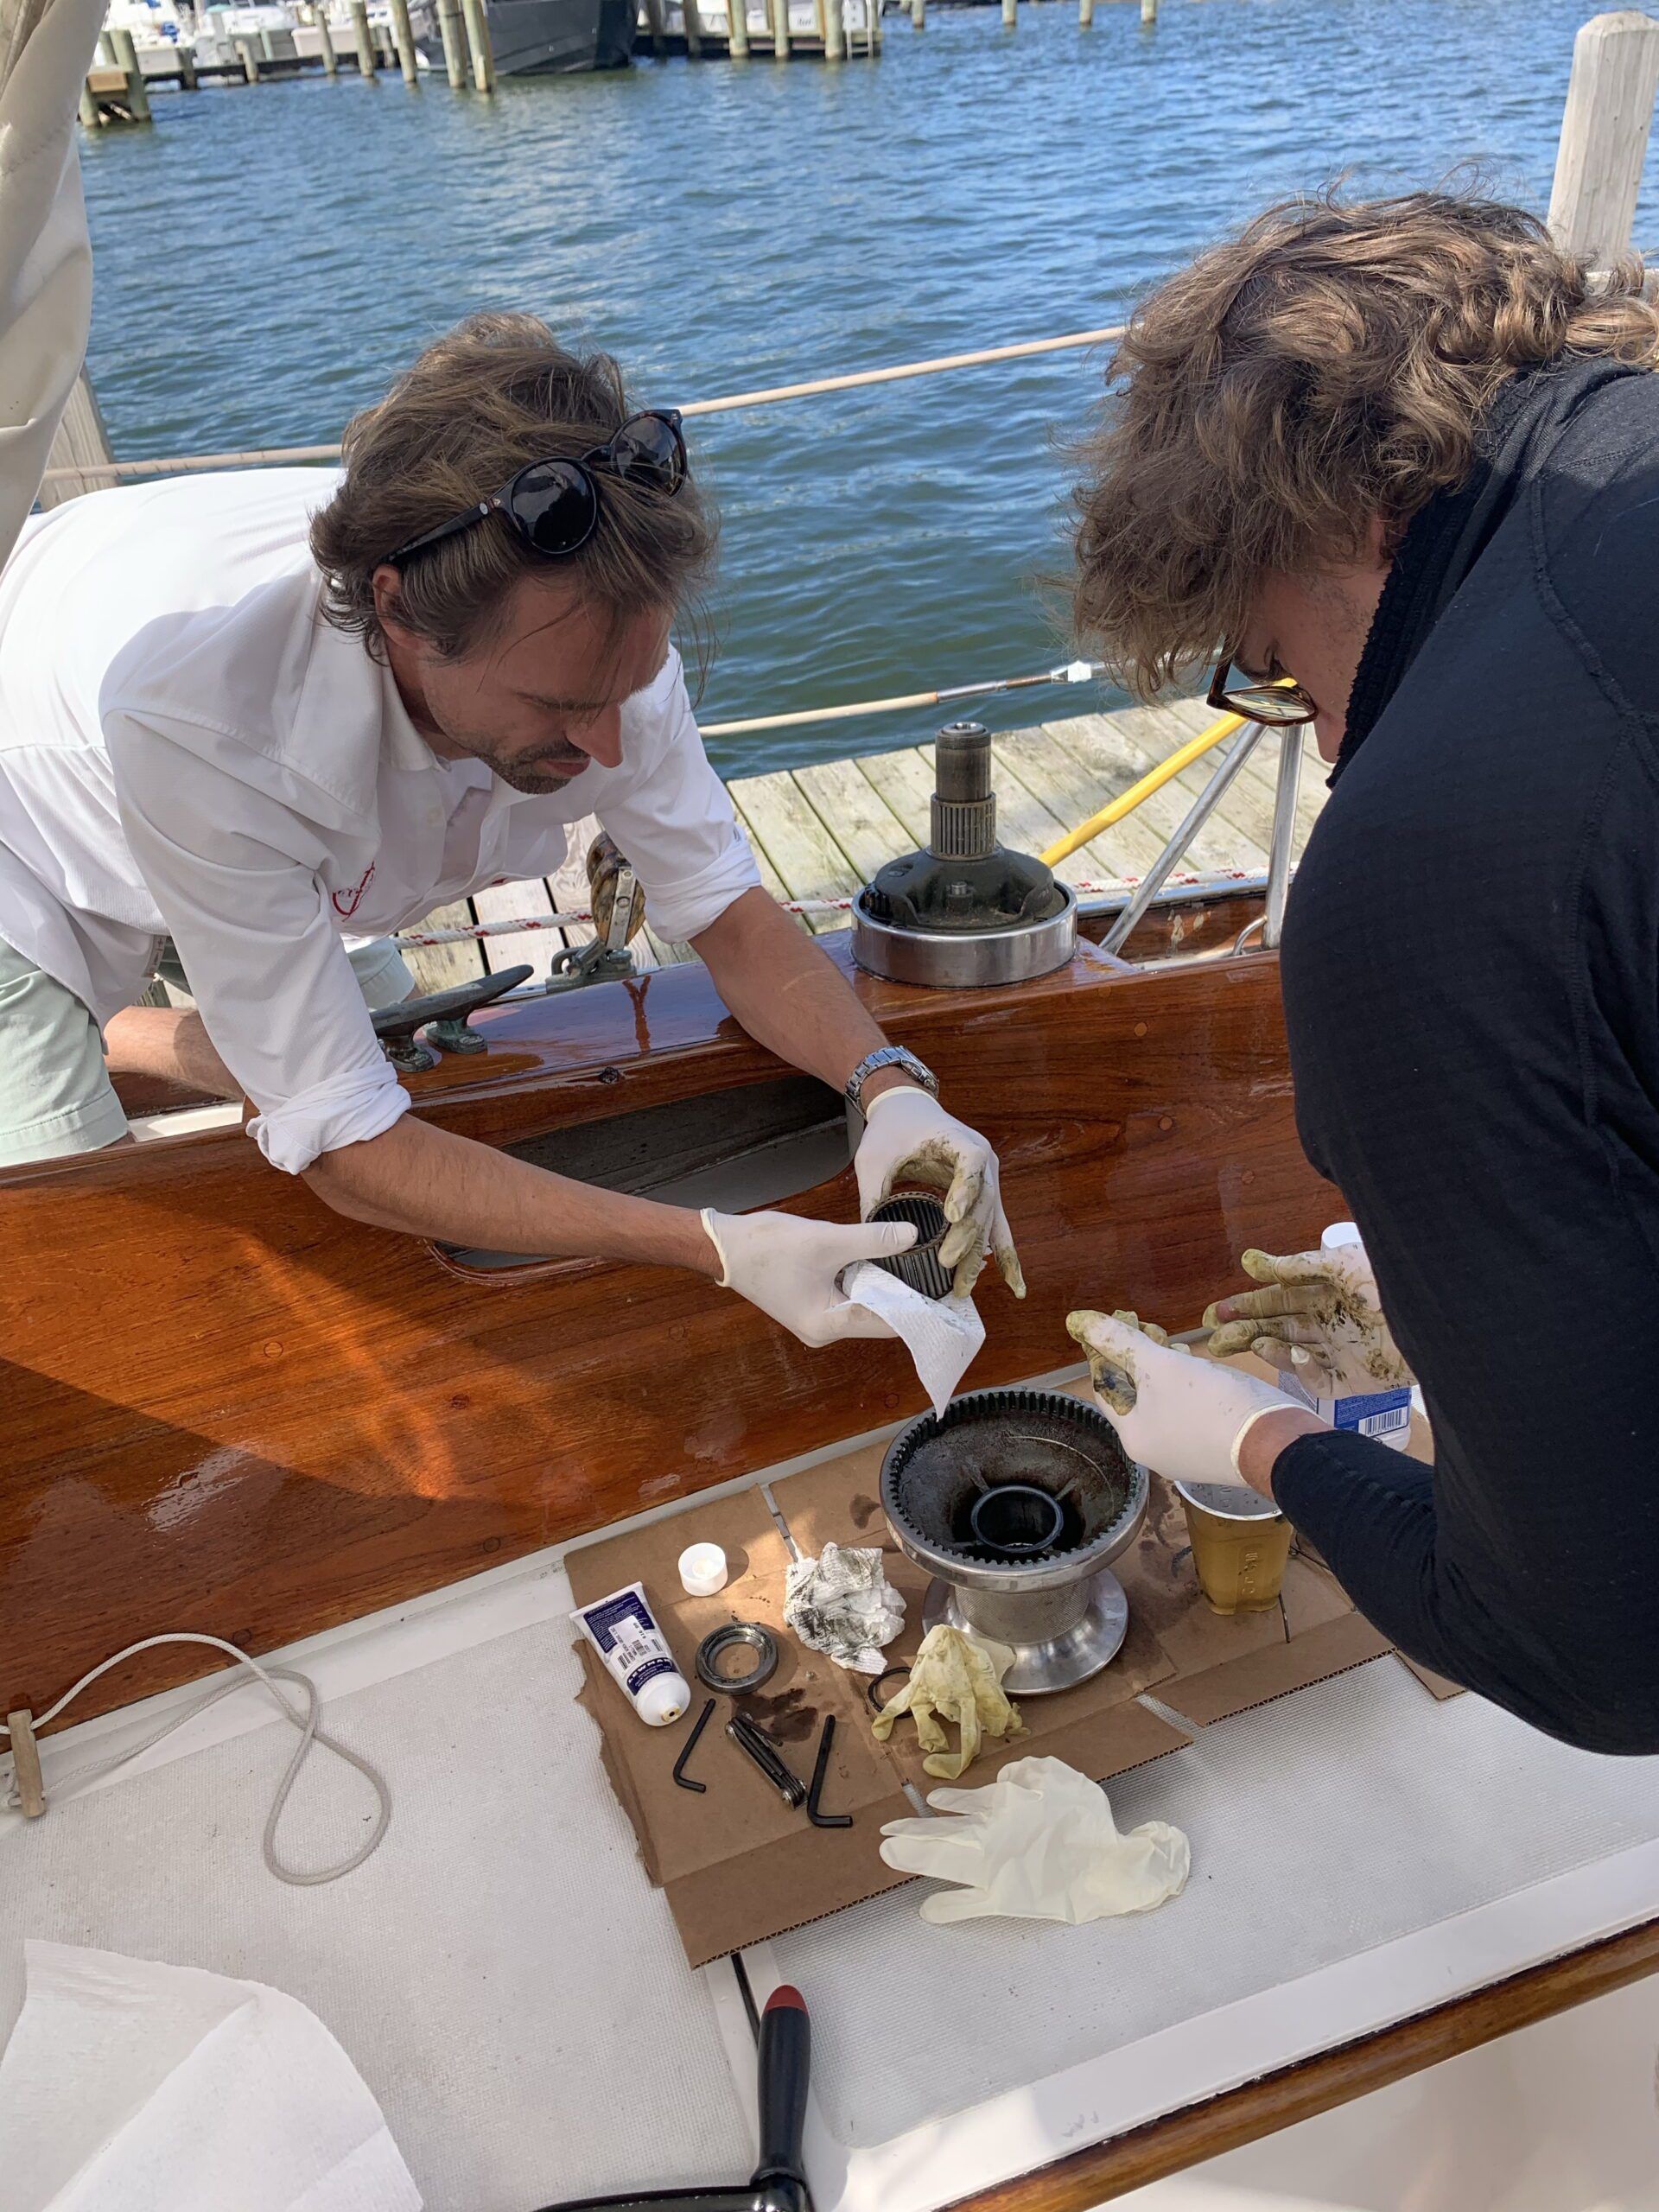
Most winches come apart by loosening a single screw or removing a clip, with little risk of losing important parts. If in doubt, tape a cardboard box around the winch to catch any strays; the caged bearings can stick to the drum and fall out when it is removed. Note the orientation of the line stripper. Move the parts to a safe work area.
2. Work on one winch at a time.
Double check that you have the right service kit for each one. Seemingly identical winches that were manufactured just a few years apart in age can have significantly different parts.
3. When disassembling the winch, keep track of the order you take things apart in.
A phone camera can be helpful for this. Specifically, watch out for the pawls and pawl springs. If you are working on the boat, a cafeteria tray (or similar) is very handy.
4. Degrease the winch parts with mineral spirits.
A paintbrush, tooth brush, and lots of rags are helpful.
5. Replace the pawls and springs if they have seen more than a few rebuilds, if they seem worn, or if the motion is not crisp.
These are lubricated with pawl oil, not grease, since grease can thicken and cause them to hang up. A manufacturers winch-servicing kit may contain special oil, but motor oil works well, too. A past Practical Sailor test highlighted several pawl oils for penny pinchers.
6. Grease all of the gears and bearings before assembly.
They don’t need to be generously packed the way vehicle bearings are, since excess can run down into the pawls; they just need to be lightly coated with good surface coverage. Wipe a very thin coat of grease on all internal parts to prevent corrosion.
Sure, you can run out to your local chandlery and shell out a dozen clams for that fancy-brand winch grease that the maker insists is best for the job. But you could also do a little research, or check out our report on budget priced winch greases, and learn that in the wide, wide world of lubricants there’s probably half a dozen products that will do the job just as well, if not better, than some brand-name greases.
7. When reassembling the winch, be certain to face the line stripper in the correct direction.
Ideally, the line should spill off of the stripper and drop right into the cockpit.
8. Add canvas winch covers.
Many people think that winches don’t need protection, but most self-tailing winches have plastic components that are vulnerable to ultraviolet rays. Covers should help prevent lubes and greases from washing out, and we know they will protect vulnerable plastic parts.
Improving Grip
If you think you are in need of new winches, or have questions about how winch performance is impacted when you upgrade to halyards or sheets that incorporate high-tech fibers like Dyneema, see “Better Winch Grip.” In that article, we look at simple measures you can take to make sure you are getting the maximum performance out of your existing winches without spending a fortune on new ones.
If you are married to the idea of upgrading your winches, Practical Sailor’s winch test evaluates the major brands on the market today, and looks at some innovative new features. Although a few newer models have been introduced since that report, winch designs evolve slowly, so most of the observations from that test are still valid today.
Guidance for Upgrading Sail Handling Gear
Finally, if you are looking at completely updating your sail handling gear—travelers, genoa tracks, boom vangs, etc.—to accommodate new sails, Volume Two of our sail buying guide “A Look at Sails” provides the essential information you’ll need when deciding which products will best meet your needs—whether you are cruising, racing, or doing a little of both.
This article was first published on 25 January 2023 and has been updated.


I degrease with kerosine, it’s less volatile and a bit easier on the hands than mineral spirits.
I prefer to take my winches off and service my winches in my home workshop. I try to service them in the off season when my boat is on the hard.
When overhauling a winch that can’t be easily removed and must be rebuilt in place, I start with a small cardboard box about 16″ x 16″ x 6″ or so.
I cut a hole in the middle of the box the diameter of the winch, place the box over the winch and tape it in position.
Then when a pawl falls out, as it often does, or a spring flies out, as it usually does, there’s a good chance the box will catch it.
I’ll also note that overhaul time is a good opportunity to examine the installation of the winch. They are not symmetrical devices, and there is a correct rotational orientation for placement. This is a good time to check it and correct it.
I’ve found the hardest part is the initial clean, particularly if it is the first time servicing a new-to-me boat. Being light on grease application also helps minimize cleanup on the next service. WD40 is another alternative for removing tough grease and dirt. Doing the clean up in a paint roller tray helps drain and dry parts. Take pictures during disassembly as some winches can be a puzzle to put back together! I’ll second the advice for taking a look at winch installation as I’ve learned at least for Harkin winches the orientation of line entry and gear placement is important for proper operation.
I do my winches every two years when the boat is on the hard. It is easier to chase loose parts that way. Use a blanket or sheet to line your deck and lifelines for containment. I use diesel to degrease and two buckets. I disassmble one winch and put all the parts in a bucket. My wife degreases them with a parts brush (Auto store) and while she is doing one winch, I am doing the next winch in the second bucket. we swap buckets and so goes the process… I have 11 whinches to do. Harken springs fit most winch pawls. I tried gasoline once but the residue was not compatable with my grease. I have used Harkin, Anderson and Lewmar winch grease and that is the order I like them in. There are others, but heat and seawater are the enemies and for the effort I try and get the best grease I can.
After about 40 years of doing winch maintenance, I got smart. I bought an inexpensive parts washer online and use it to degrease the parts. I use Zep 505 degreaser and a brush attachment on the parts washer. A dunk in fresh water to rinse then Lewmar grease and their pawl oil. I have 17 winches that I do annually. Saves a bunch of time.
My favorite winch pawl lube is Boeshield T-9 bicycle chain oil. Light oil, paraffin based, designed to shed water, salts, and dirt. Handy eye-dropper container. Petroleum based oils and greases can absorb salt and harden.