
 (1)")
I doubt there is a sailmaker out there who doesn’t have a few shop-built tools in daily use. Here are five of my favorites: sailmaker’s knife, wire pulling fid, seam rubber, wooden board and a sailmakers’ finishing bench.
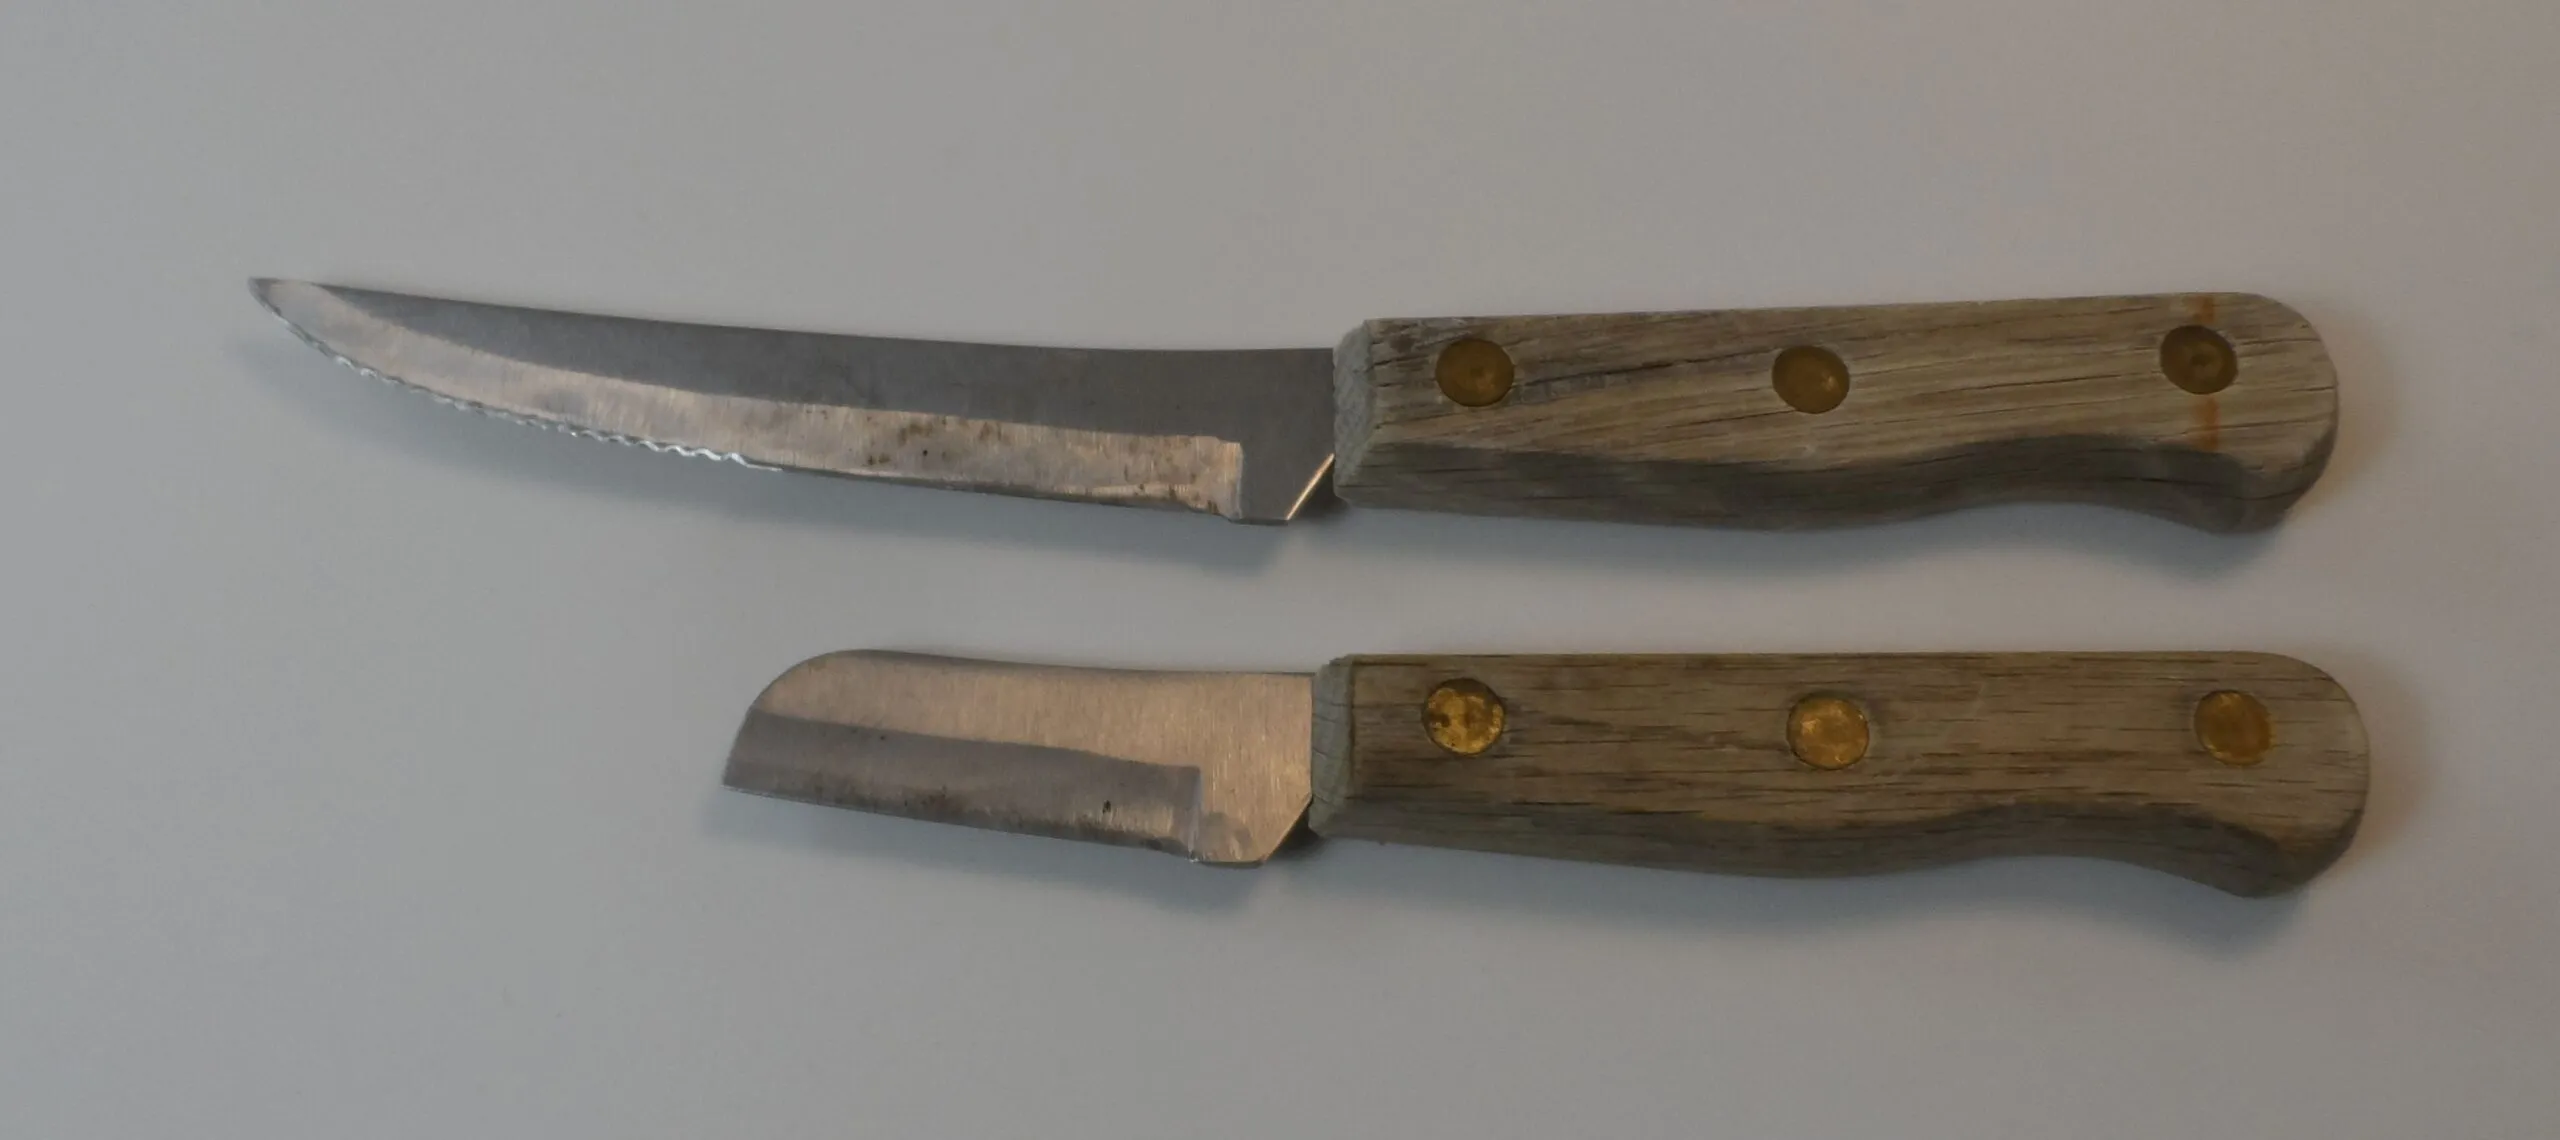
Sailmaker’s Knife
Simplicity itself. Take a quality kitchen knife that your partner has rejected from the kitchen that has a feel you like. Cut at least half the blade off by scoring with a grinder or a cut-off wheel and snapping the end off. Reshape the tip to a blunt, sheep’s foot profile, being careful to use a light touch and dipping it in water every few seconds to prevent overheating. Sharpen to a razor’s edge. A folding knife doesn’t have the same feel and you aren’t carrying it in your pocket. The shorter blade provides better leverage for cutting line and tapering strands, and is generally handier for ripping seams (the tip does not catch). Make several while you are at it.
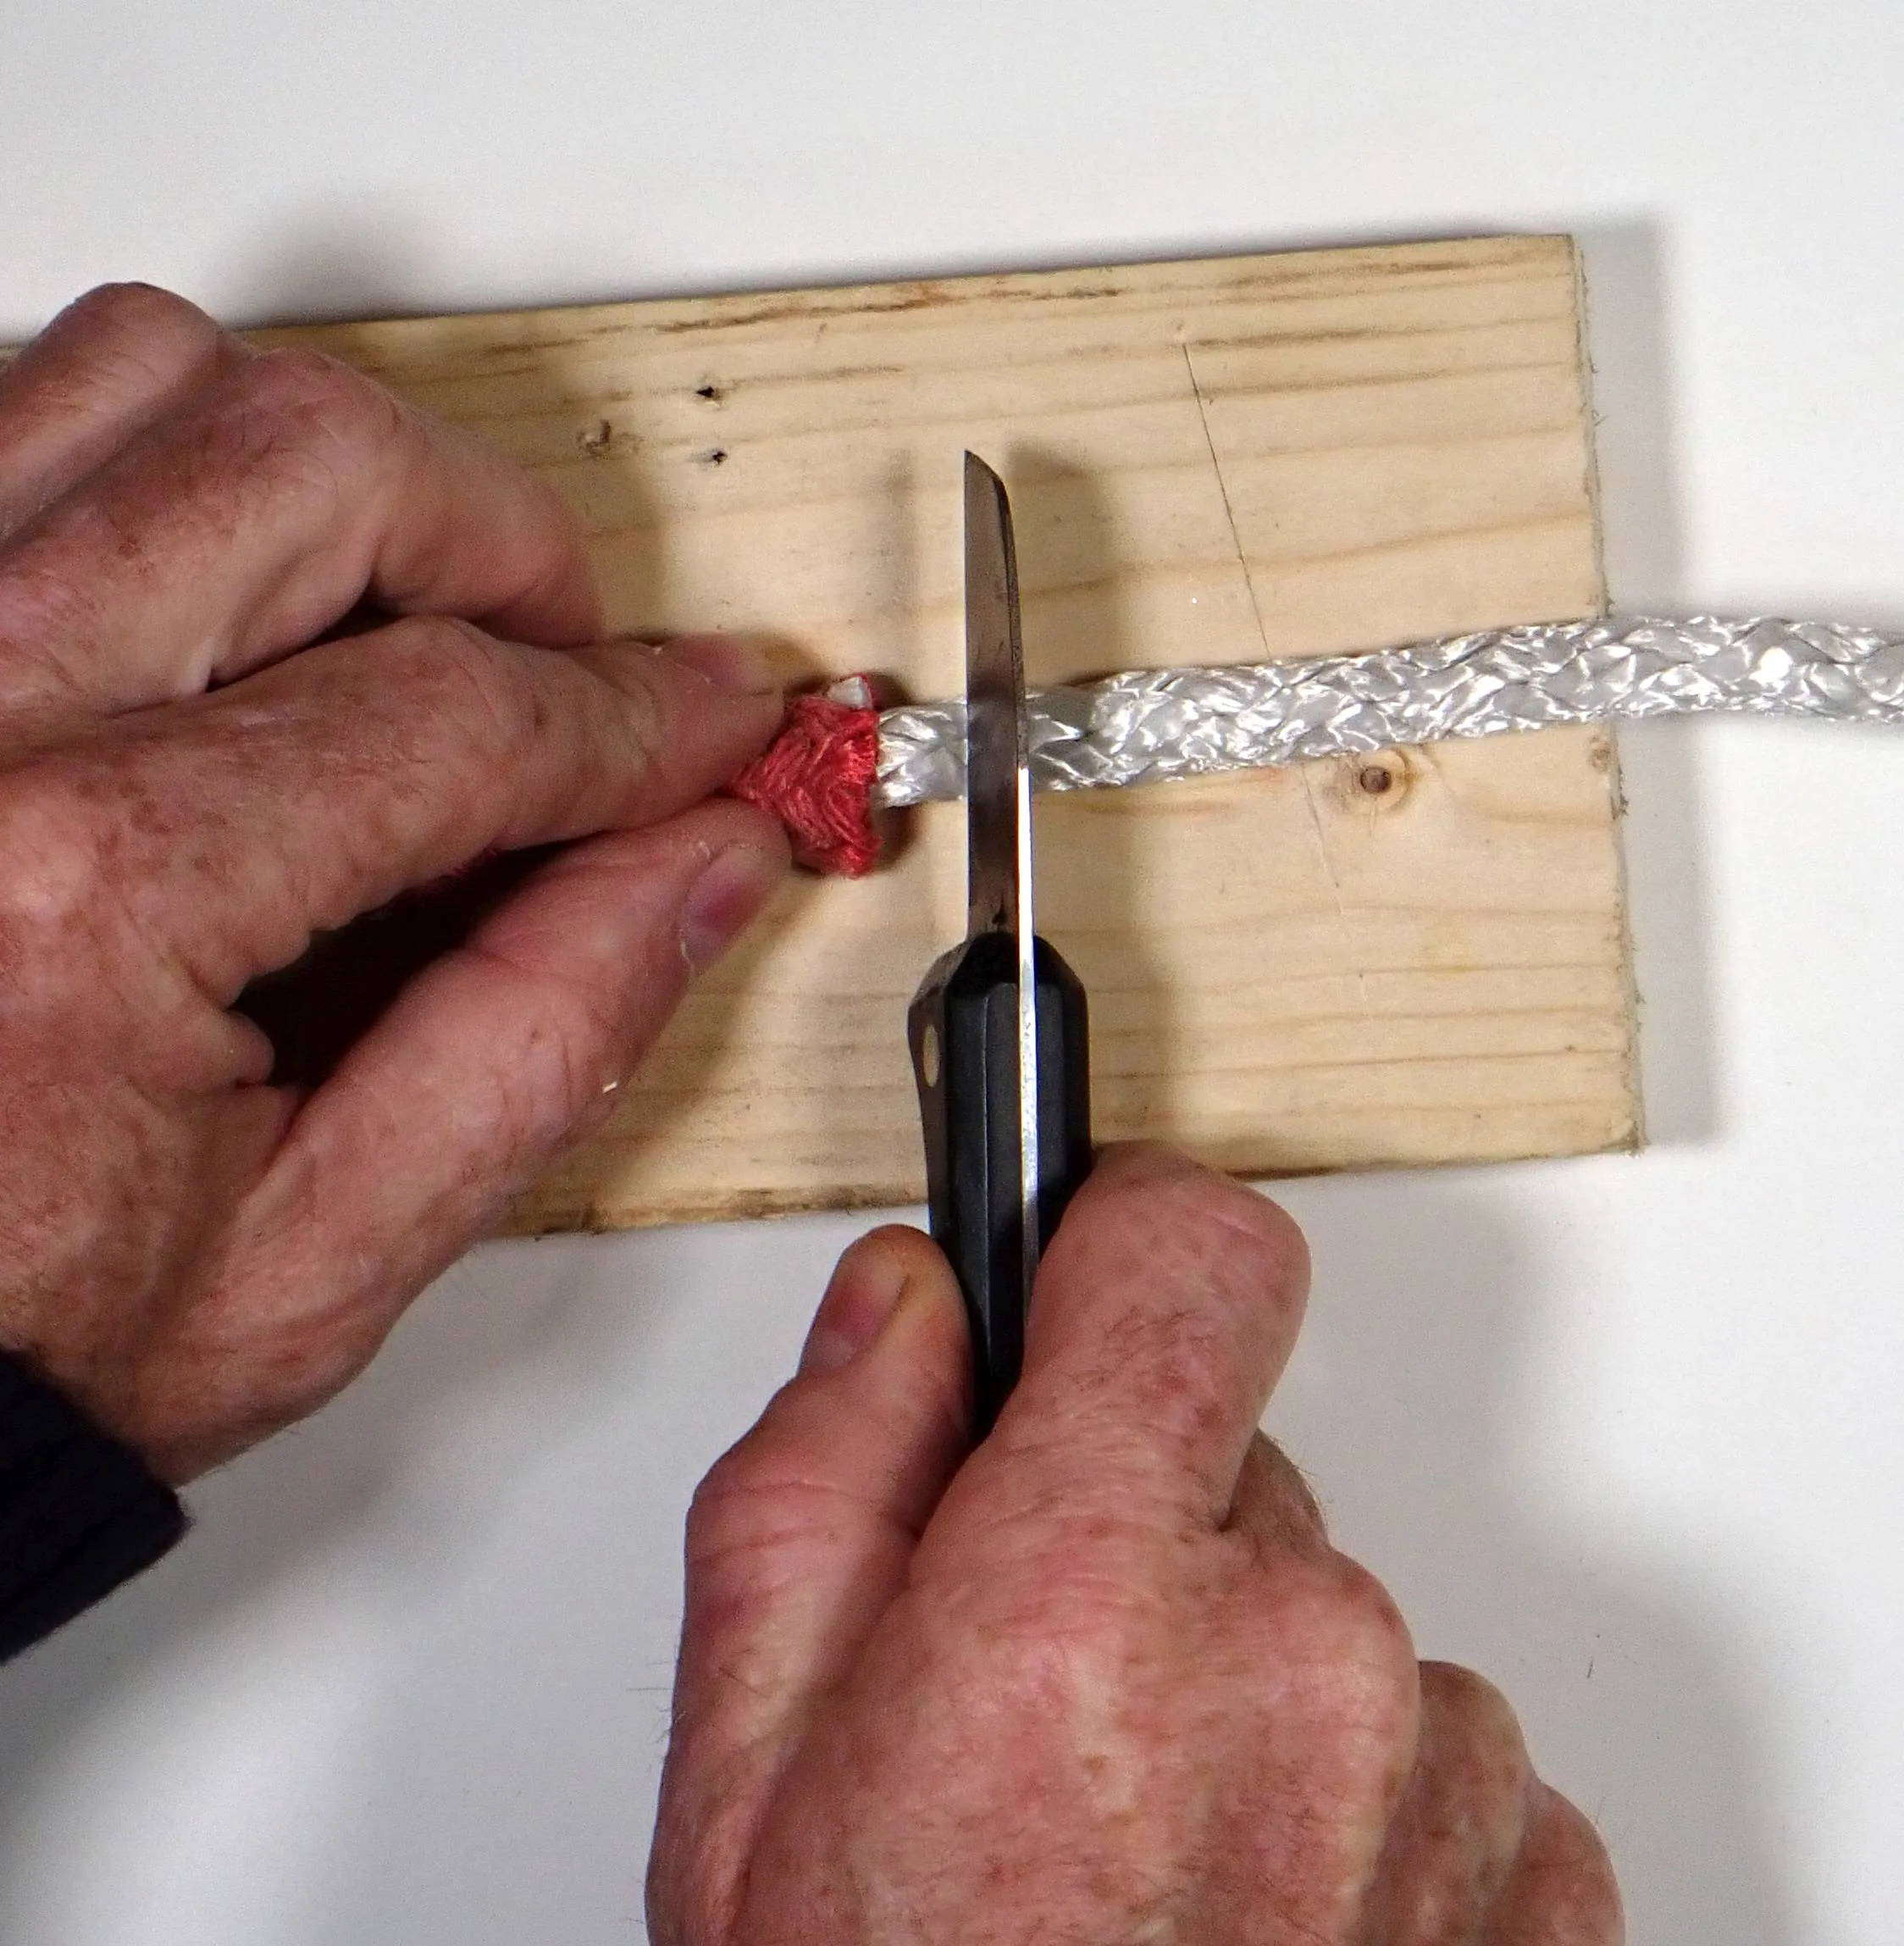
Wire Pulling Fid
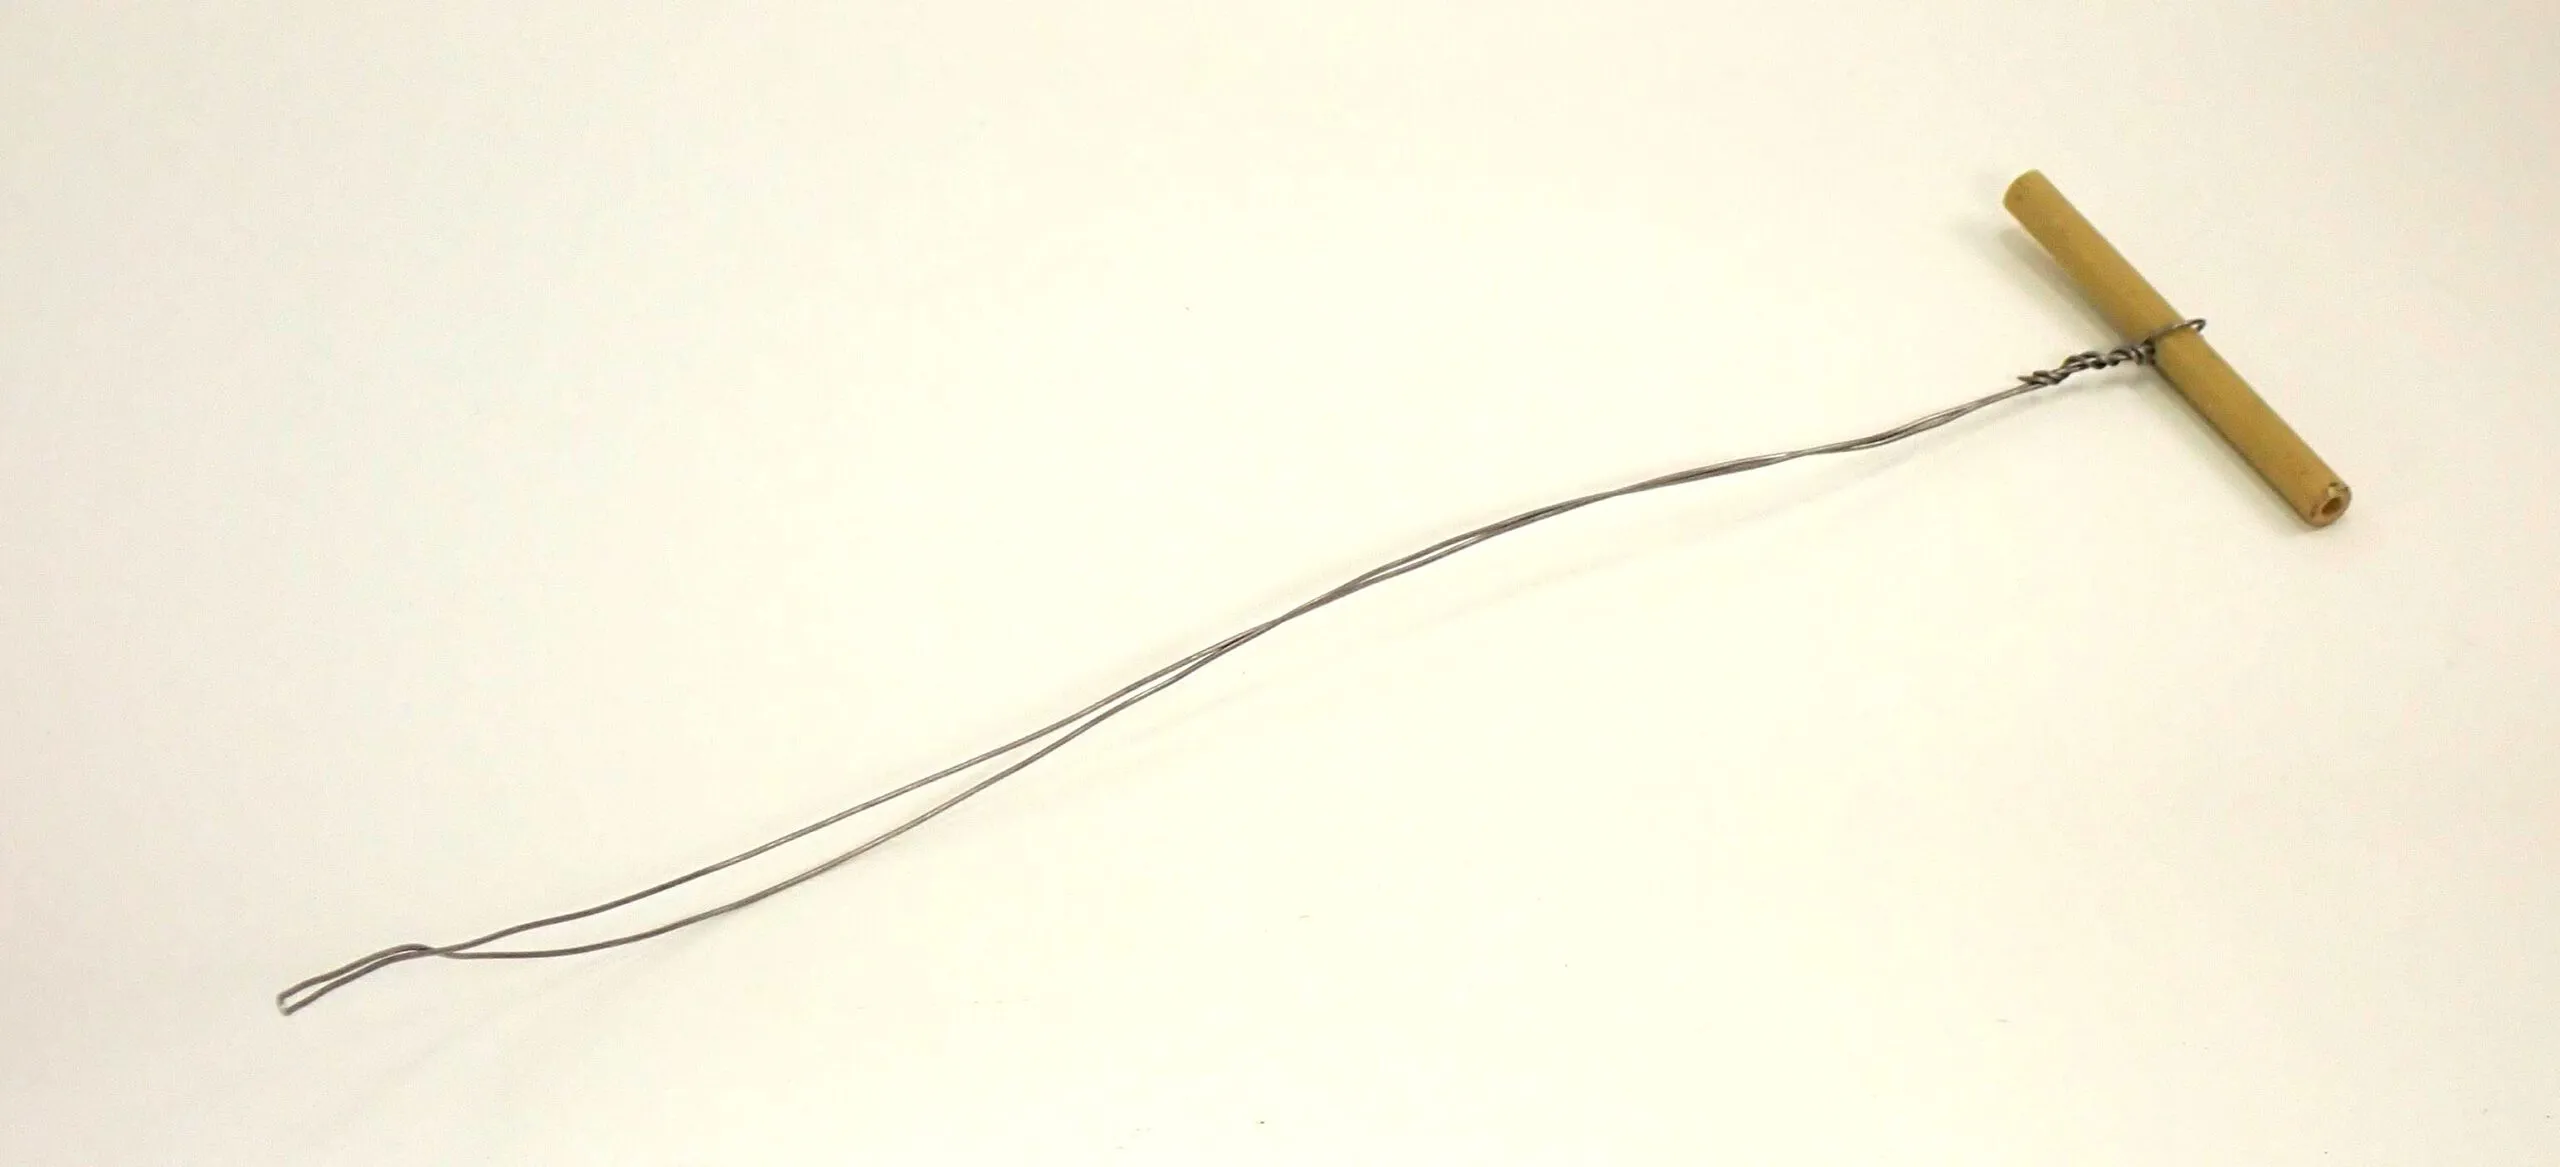
I’ve spliced a lot of Dyneema with just a length of rigging wire but adding a handle makes it more comfortable.
- Take about 36 inches of 0.040-inch stainless seizing wire (I prefer monel for safety wire, but you need the stiffness of stainless wire for this) and double it over. Don’t pinch the bend too tight; you will adjust that to the line in use.
- Take a 2- to 3-inch length of 3/8-inch or ½-inch dowel and drill a 3/32-inch hole in the center and two 1/16-inch holes ¼-inch to each side.
- Thread a few inches of the wire through the center hole, wrap them in opposite directions around the dowel and up through the smaller holes, and then twist the ends together and trim.
- Wrap with athletic tape to cover the sharp ends.
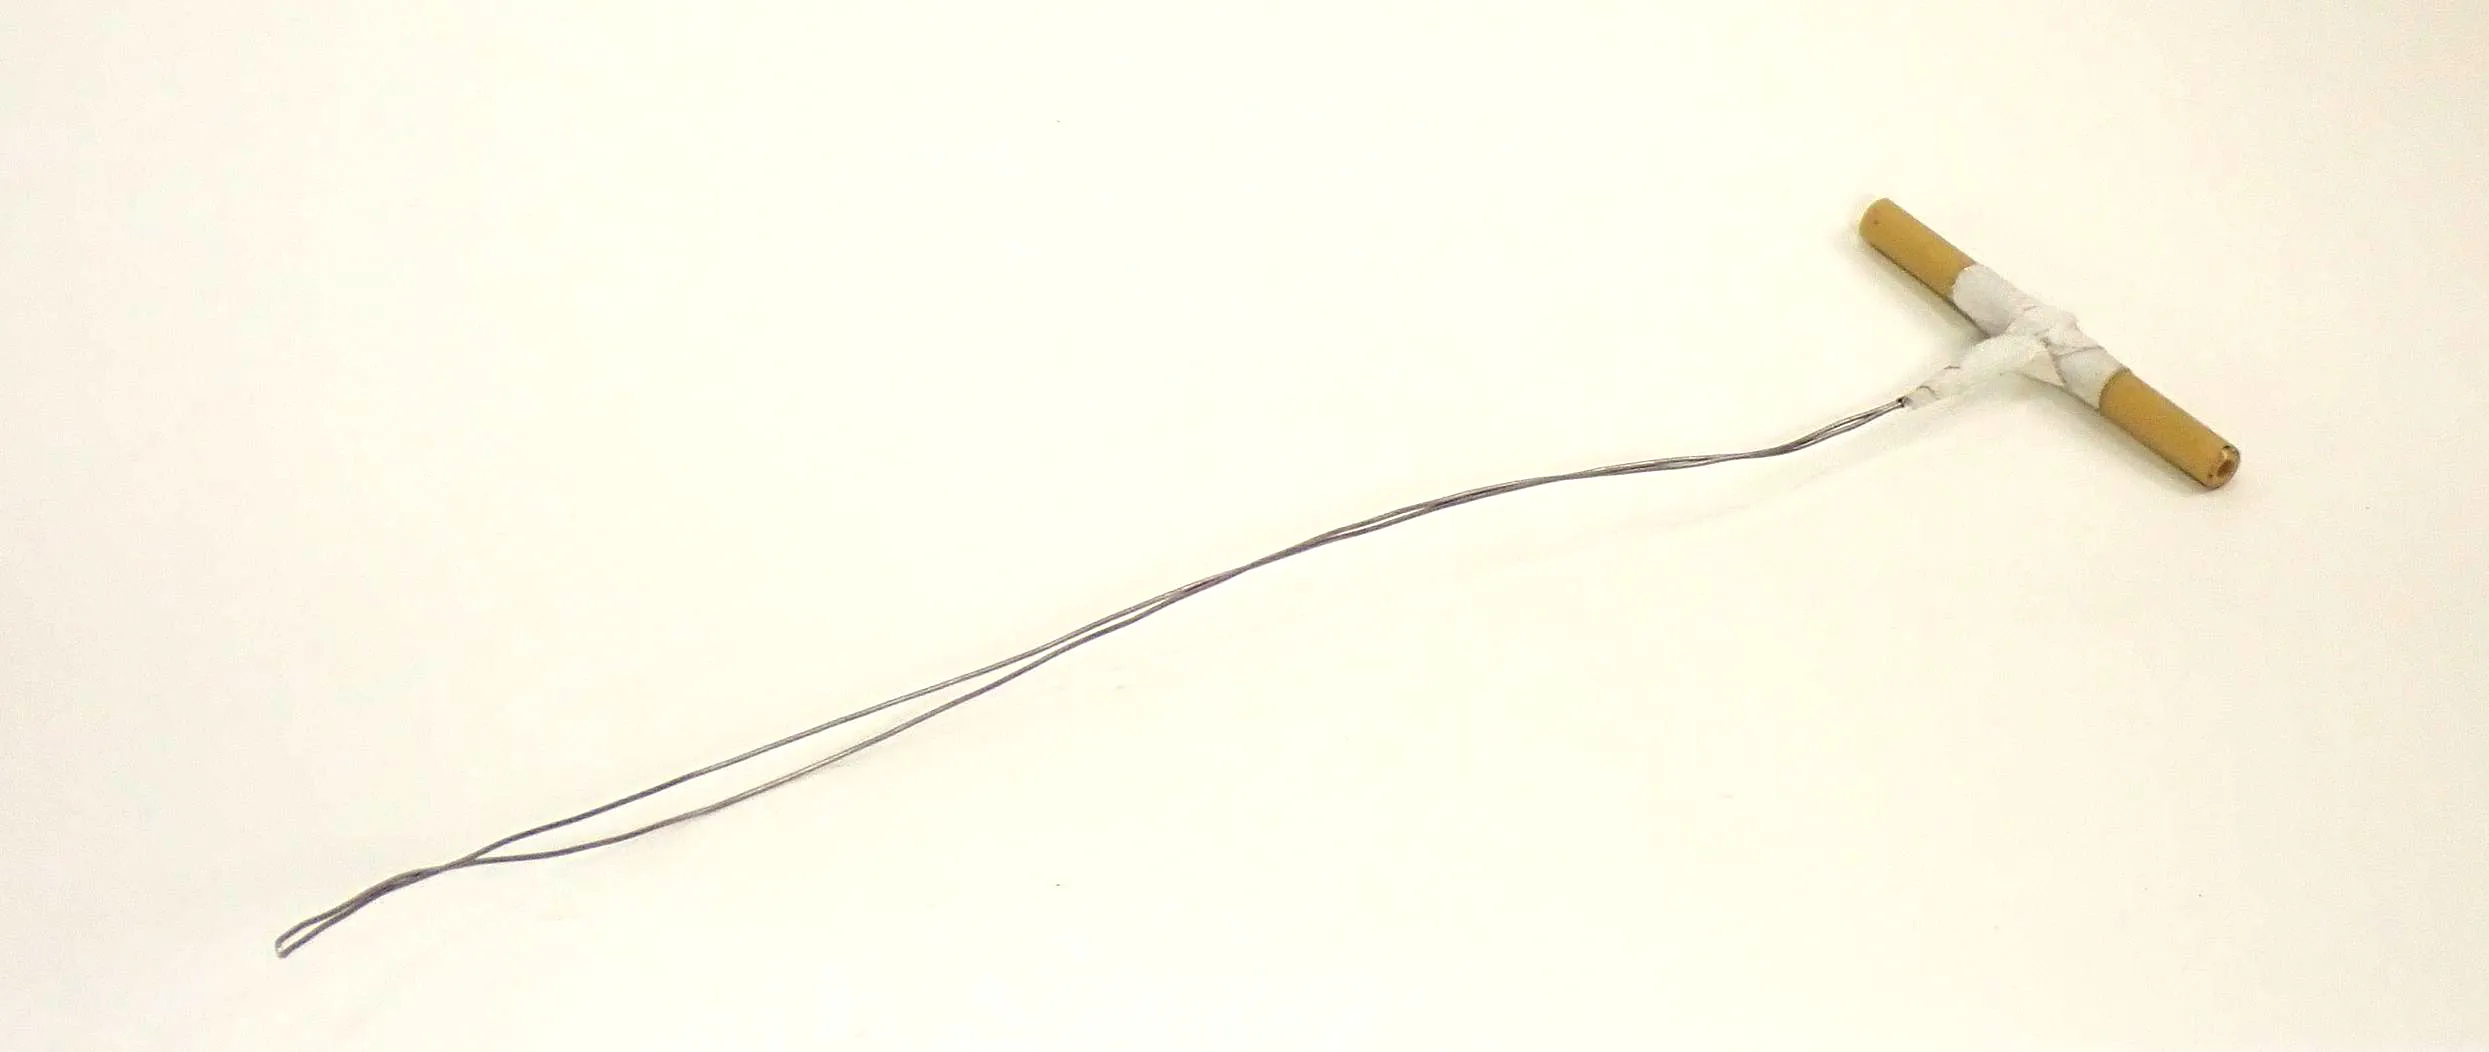
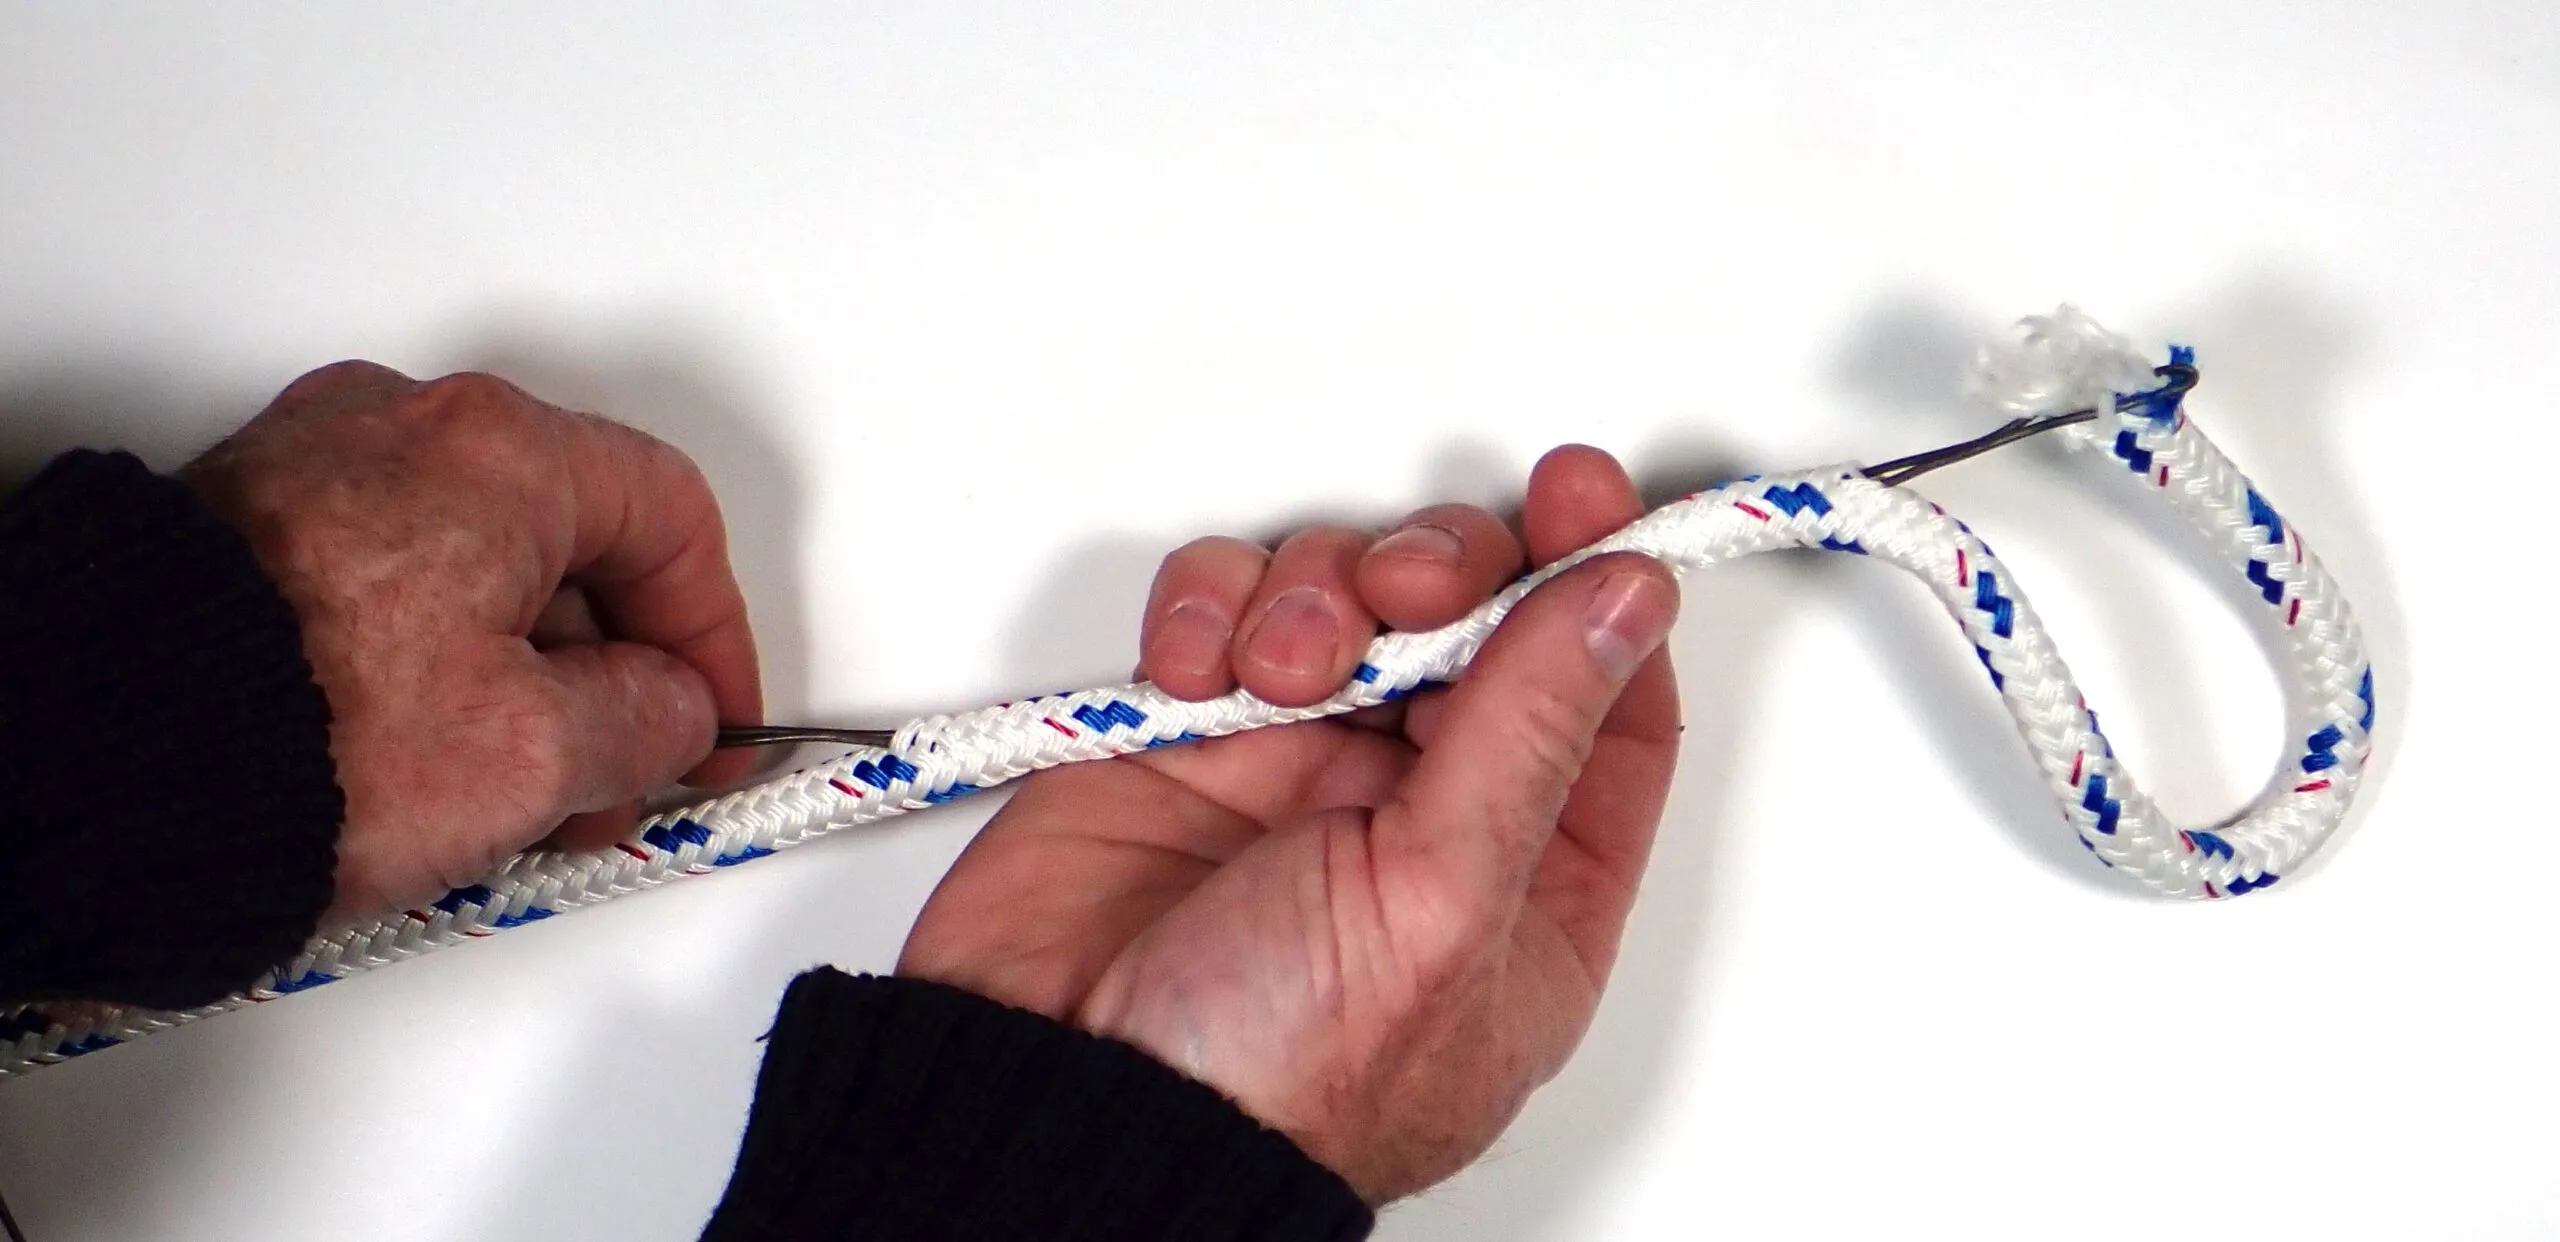
There are many variations on how the handle is made. Many times, splicing Amsteel, I have used wire with no handle, but with larger ropes and double braid, the handle makes it more comfortable. To use, insert the fid from what will be the exit point, feed it through to where the line will enter, and pinch the end of the line into the end of the fid about ½-inch from the end. Milk the cover open and pull the line through. This is very effective for splicing Dyneema single braid.
I use a Swedish fid for 3-strand, and for chain-to-rope and long splices of both 3-strand and 8-plait.
I also have homemade wooden fids (easily made on a drill press from hardwood dowels and sandpaper) and Swedish fids for splicing 3-strand. But new textiles require new tools.
Seam Rubber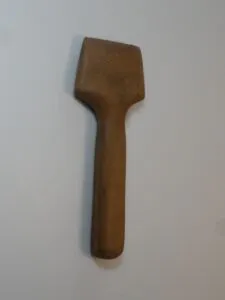
Named for rubbing down seams to create a sharp fold but it’s just as useful for rubbing down self-adhesive sail repair tape. I made mine from a walnut plaque I got at some trade association meeting. I drilled two holes to define the start of the handle and the end of the paddle (you don’t want a sharp corner). Then I cut it out with a hand saw and sanded it with disk and random orbit sanders until it fit well in my hand. The paddle must be very smooth.
Wooden Board
A cutting board is needed of course, but you will also need a small board to use in place of a thimble when stitching eyes in line. Instead of pushing the needle with a palm, it is simpler and easier to push the rope into the needle by pressing against a small board. Maybe not really a tool … but isn’t it?
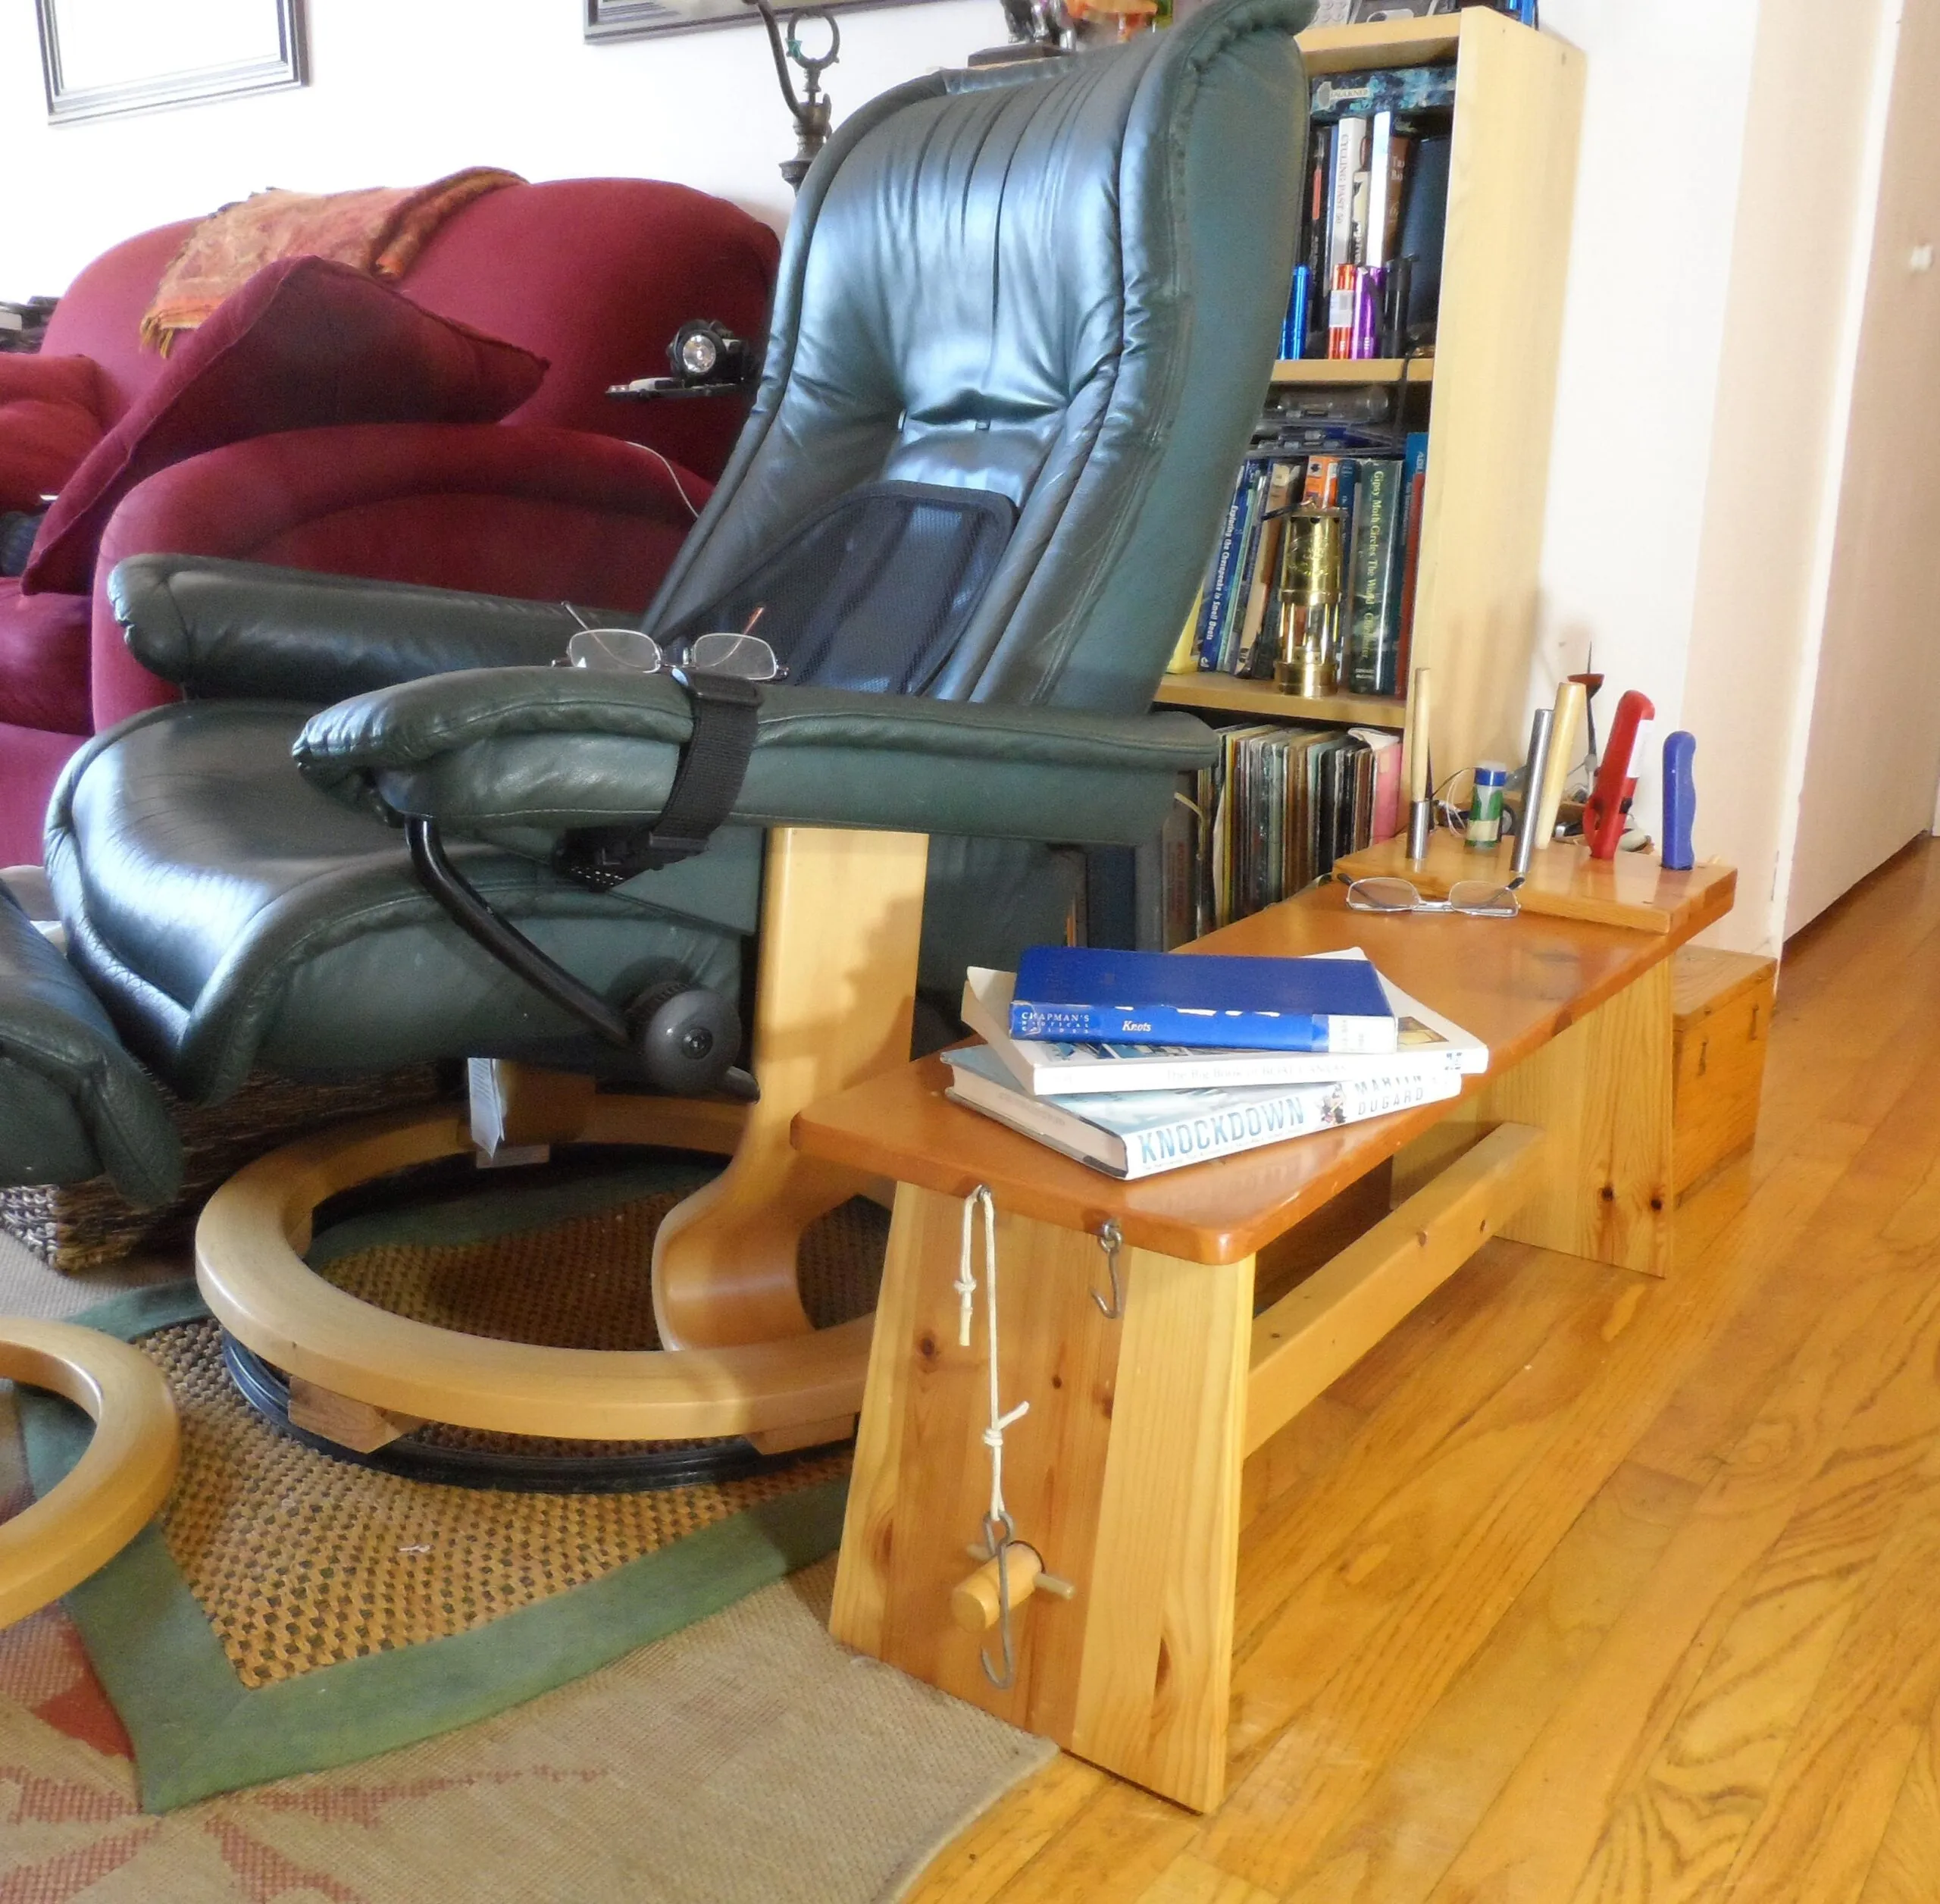
Sailmaker’s Finishing Bench

A sewing machine is the thing for making a sail, but most repairs are handwork, and nothing is more efficient than a traditional finishing bench. Mine sits by my living room reading chair where it holds books, eyeglass and a favorite beverage. But the far end holds my ditty bags, various holes organize some handwork essentials, and when it’s time for periodic repairs to my sails, I carry it out in the yard or down to the basement and set up shop.
Bottom Line
Some of these tools you can buy, but some you really can’t. Go old school and make your own.


Hi Drew – would love to see more about your bench. Have dimensions or a plans that could be used to replicate?