

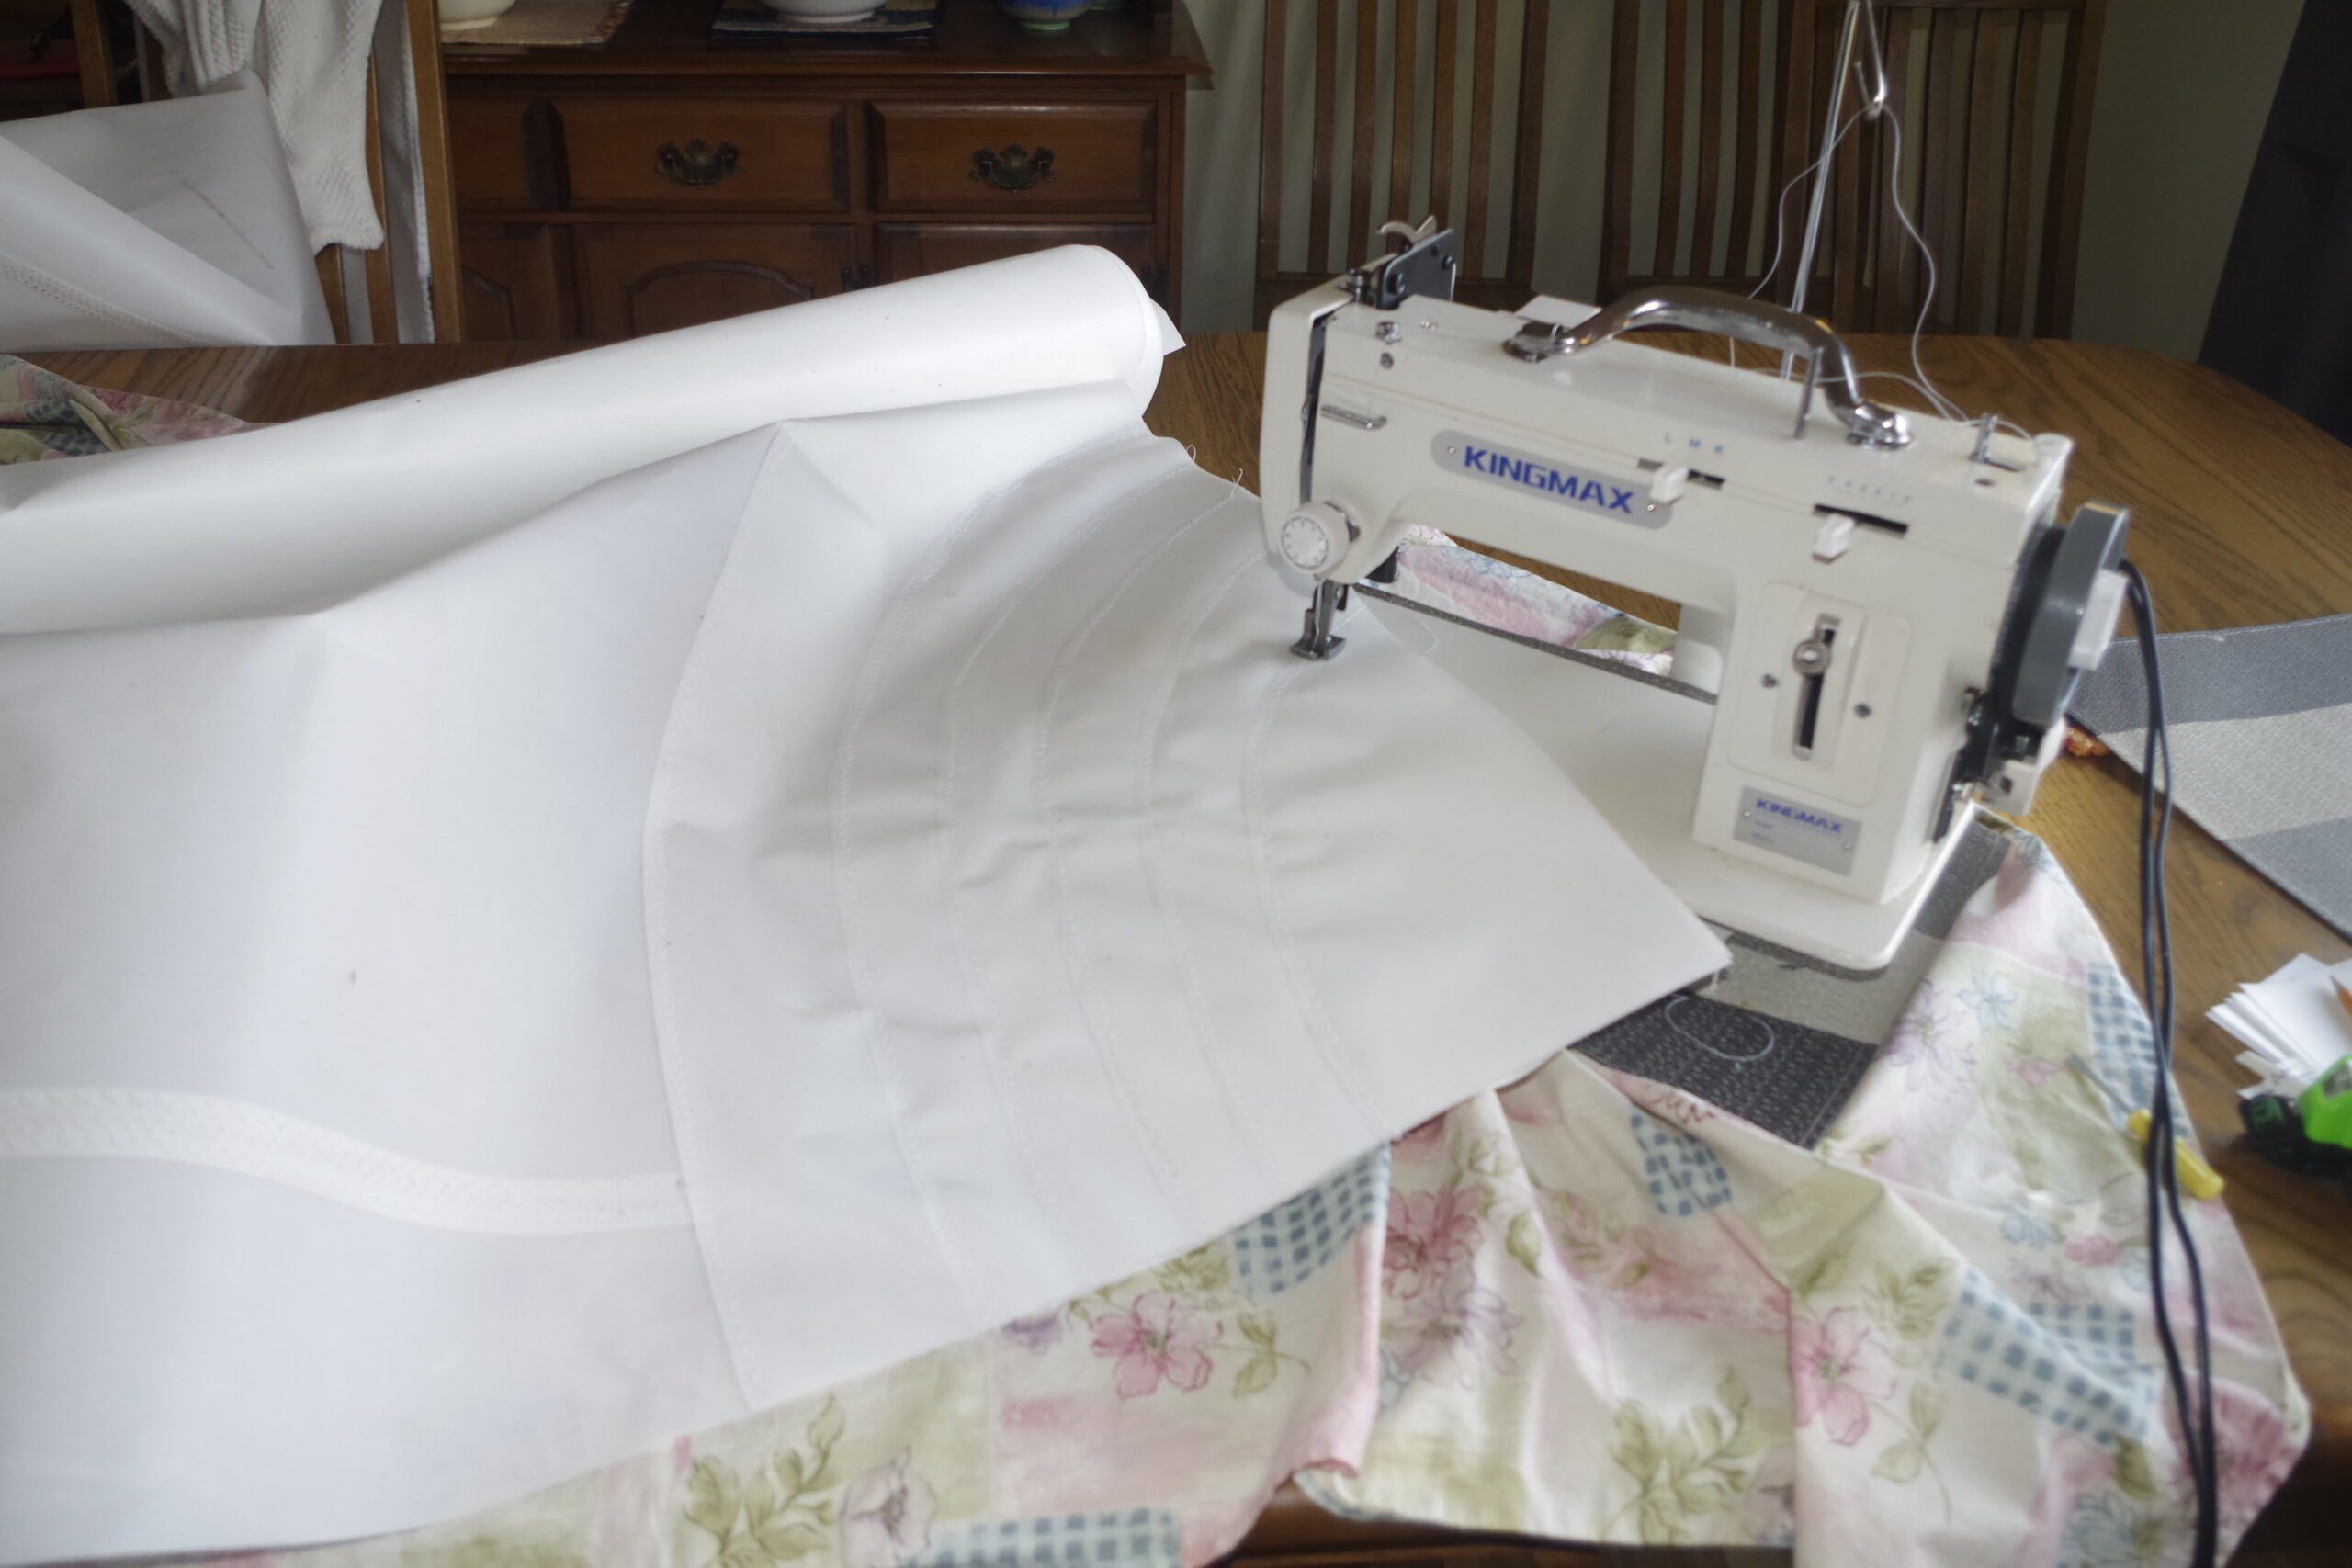
One of the most satisfying experiences I have had is looking up at the sails and knowing I created what is powering my boat from some bits of cloth. With a specialized sewing machine, sail kit and basic materials, you can make your own sails as well.
However, before getting into how to make a sail I want to talk about expectations. A professional sailmaker has a purpose-built floor and access to a range of sewing machines and other equipment that costs thousands of dollars. They are also doing this all day, every day.
As DIYers, we have one portable machine and will probably be working on the living-room floor or whatever space we have. That does not mean we cannot make perfectly serviceable sails. I have sailed across the Atlantic and ridden out gales with sails I built myself. What it does mean is that your seams will probably not be perfectly straight and the cosmetic finish will not be as clean and neat as the professionals can get. If you are okay with that, let’s get started.
What You Need
You cannot make a sail without a sewing machine. I suppose you could, but most people don’t have half a year to spend on the project. What sort of machine do you need? For sail-making you need a machine designed for the job. It has to have enough power to go through several layers of cloth, for example. Typically sails for boats in the 30 to 45-ft. range will have three to six layers of reinforcing at the corners depending on the weight of the sail. That is upwards of 28 oz of cloth.
You also need to be able to work round corners and step up and down layers, all at slow speeds. Most heavy-duty standard machines are designed to sew no more than a couple of layers and have much too high a speed.
Sails are sewn with a zigzag stitch. The reason for this is that the sailcloth stretches in use—if you use a straight stitch the tread cannot absorb this movement. A zigzag stitch works like a concertina so however much the sail stretches it cannot load the thread.
Walking Foot
The final and most important thing that distinguishes a sail-maker’s machine is the foot and mechanism for moving the cloth through the machine. On a standard machine, the foot stays still and simply puts downward pressure on the work. The cloth is moved by a set of teeth that move the work back between each stitch griping the cloth from underneath. This is fine with most cloth at there is considerable friction between the layers. It is not the case with sailcloth. This stuff is hard and shiny; with a standard machine you will always find the bottom layer moves faster than the top one, leading to a horrible buckled seam. Sail-making machines have what is called a walking foot where both the teeth underneath and the foot move back together to ensure a flat seam.
Throat Size
For a Dacron cruising sail with cross-cut panels, it can be made on a small machine by rolling the material that passes through the “throat.” The throat is the gap between the pedestal that connects the machine to its base. A machine with a 7- or 9-in. throat is sufficient for the sort of sails we are talking about, and these can be bought for between about $800 to $1,500. This is still a hefty machine weighing more than 50 lb. and very solidly built.
Price Considerations
This may sound like a big expense but a typical custom offshore sail of 250 sq ft will cost anywhere from $2,500 to $3,500. Making the same sail from a kit is around $1,000 so you are going to save the cost of the machine making one sail. Now you also have the machine for making the covers and other canvas work, as well as for running repairs onboard. Many long-distance cruisers consider a sail-making machine an essential just for running repairs.
Which Sail-making Machine to Buy?
The “Rolls-Royce” Option
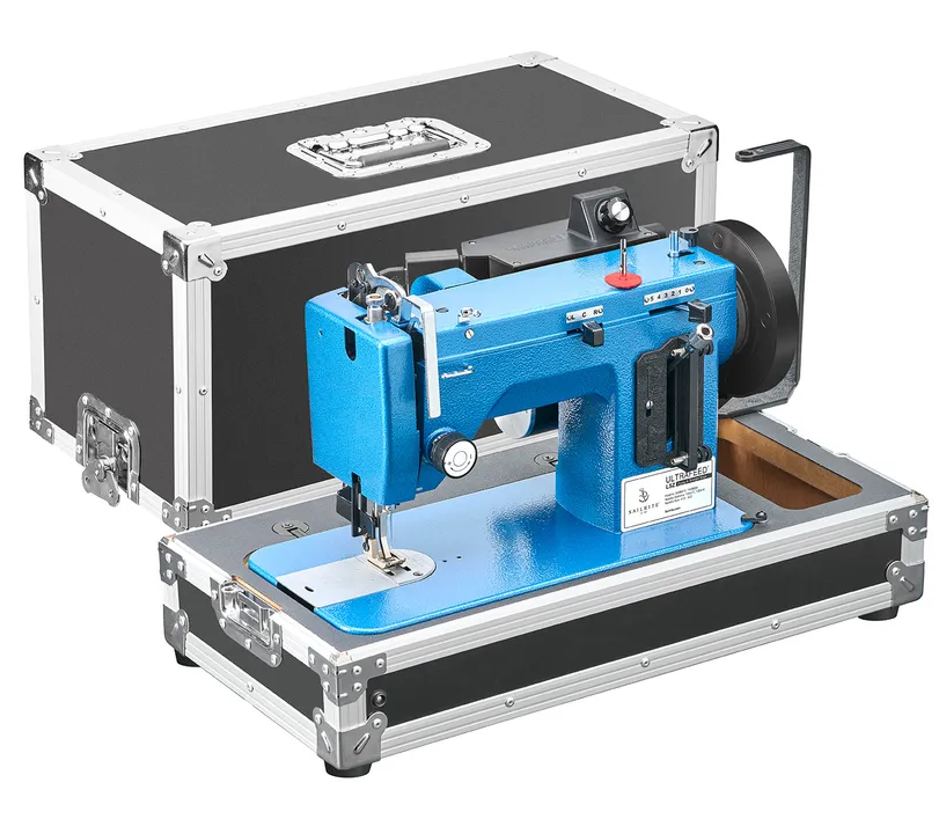
The Sailrite Ultrafeed is without a doubt the ultimate machine. They work “out of the box,” have the best warrantee and after sales service, but also command a premium price. The big advantages with the Ultrafeed are a more powerful motor with excellent slow speed control that will sew anything that will go under the foot. They also do a heavyweight flywheel as an option. If you are getting one I would definitely recommend it as it makes slow speed work even better. They also come with a nice case.
Lower-Priced Options
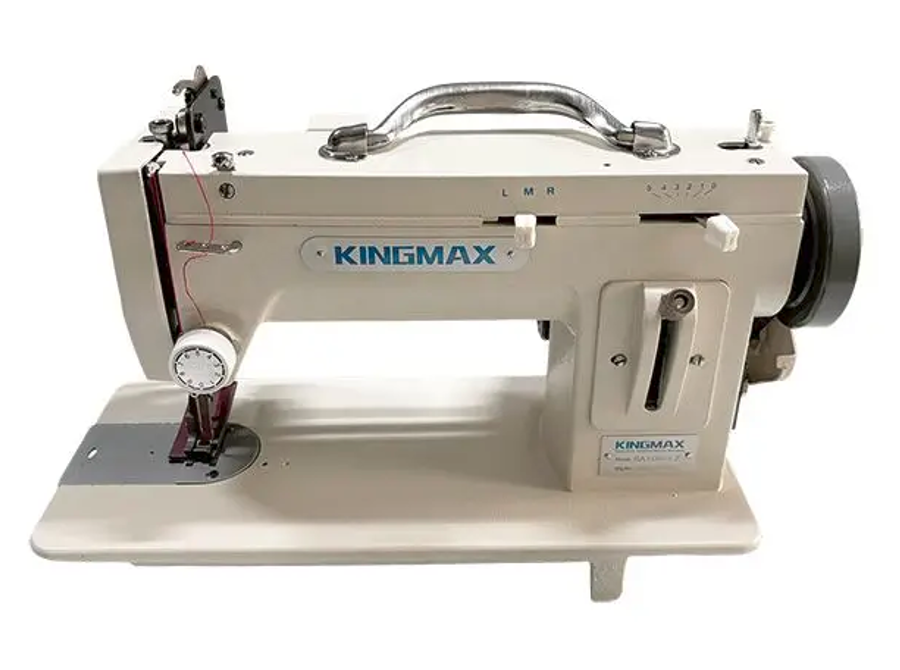
There are other options that will do the job at about half the price, however, you don’t get the warrantee or after sales support that Sailrite provides. You may find that they also need some tuning and oiling before they are ready to use. I have used an Ultrafeed but the machine I now have is a Kingmax that I ordered from China. It is not quite as good as the Sailright machine at slow speed, mainly because it has a lighter flywheel. It also has a friction clutch whereas the Ultrafeed has a locking one that uses a breakable pin.
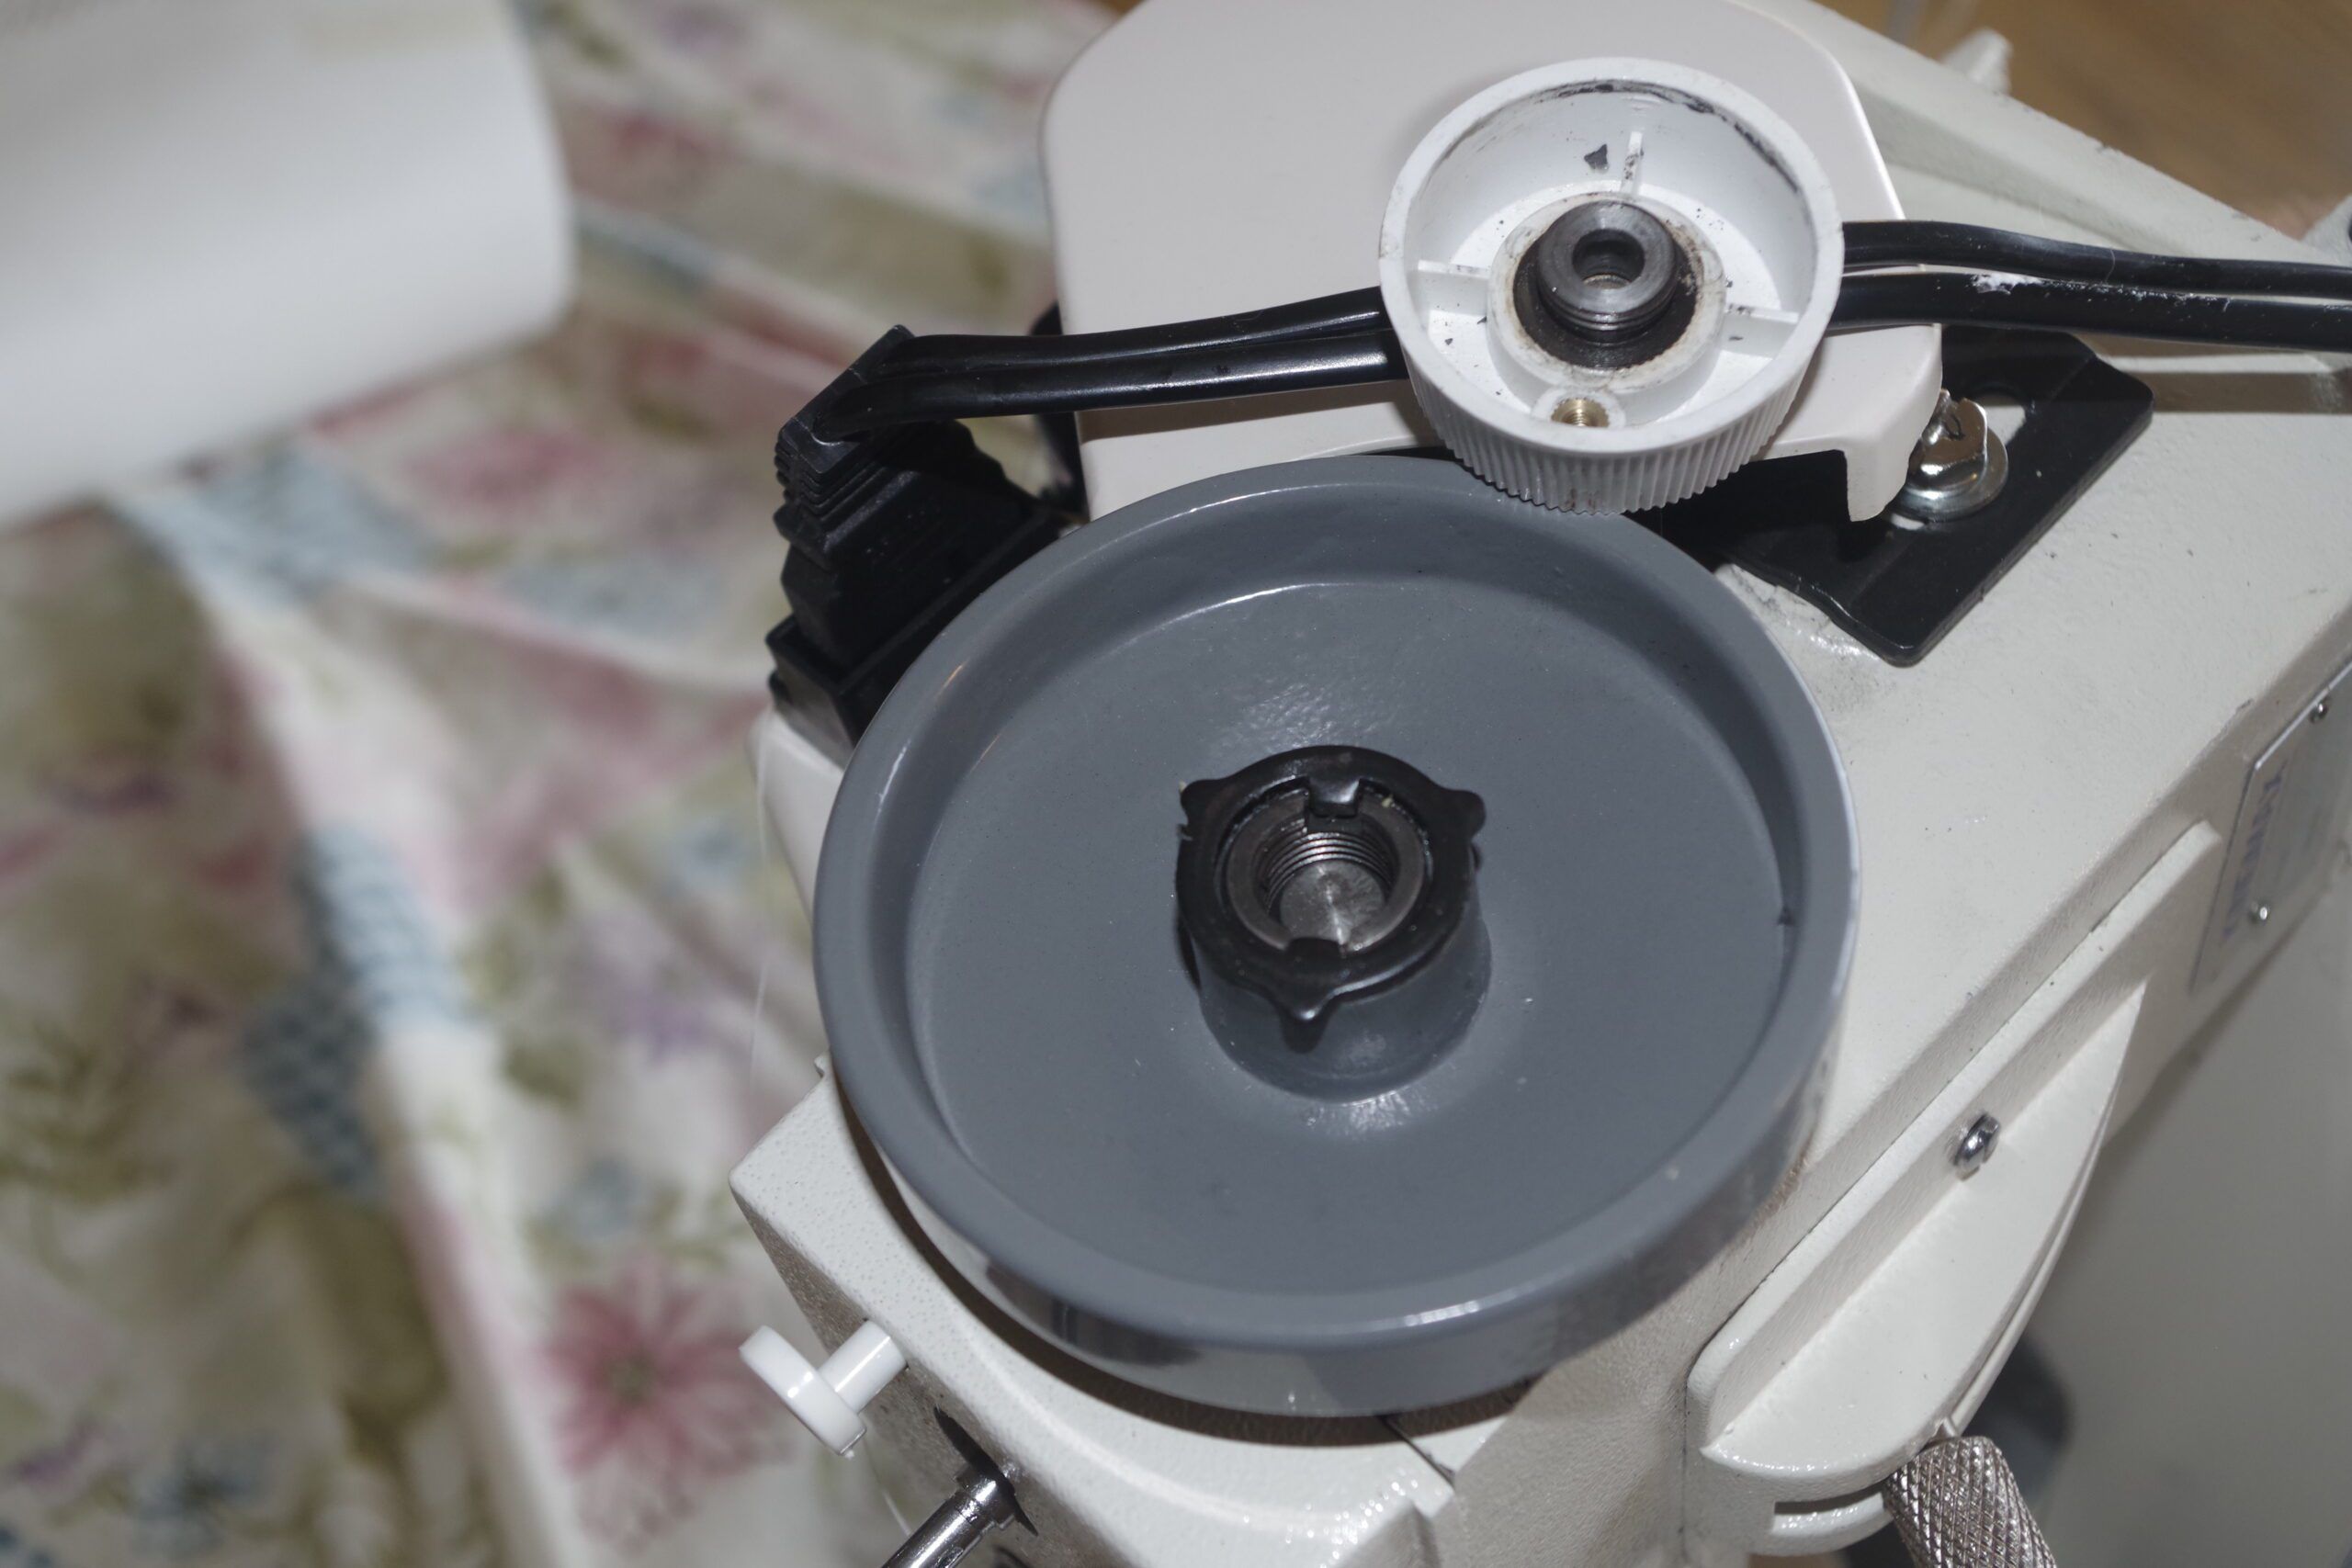
Both systems are built into the wheel at the back of the machine and designed so that if you overload the machine the clutch will slip or the pin on the Ultrafeed will shear rather than something else breaking. The friction clutch on the Kingmax works, but for sewing multiple layers I found you need to tighten this with a pair of grips. The positive lock on the Ultrafeed is one of the main reasons you may want to spend the extra money on one.
The other thing I like is that this machine has a 9-in. throat rather than the 7-in. one on the Ultrafeed. This makes it easier when working with large panels.
There are other options but if you do want to order one from China do you research to make sure it is a reliable company and check the shipping costs which can be as much as the machine itself.
Essential Materials
Thread and Needles
Using the right thread and needle is critical and one of the reasons for getting a specialized machine is that it will handle the thread size required. A small sail-maker’s machine can usually accommodate up to #90 thread and matching needles.
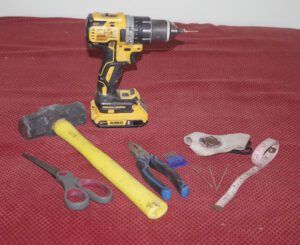
There are two options for thread when sewing sailcloth or synthetic canvas, either plain polyester or PTFE thread. PTFE has a higher tolerance to UV and will run more smoothly, but it is about twice the price. I have used plain polyester stitched sails in the Caribbean and not noticed a problem. There are places where I think it would be worth the extra cost. I would use it for sail covers and UV strips on furling sails for a boat based below 30 degrees.
Thread comes on spools, not cotton reels, and is sold by the pound. Thread size needs to match the weight of cloth and that determines the needle size. If you are borderline, or the machine seems to be working too hard and thread is breaking, try going to the bigger needle size. This will make a bigger hole, so the thread runs more easily.
These are the thread sizes recommended by Sailrite and I have found they work well:
Sail Type Thread Type/ Needle Size
Spinnakers and light canvas up to 1.5 oz Tex 45 or 50 with a 14 or 16 needle
Small light sail canvas up to 4 oz Tex 70 or 75 with a 16 or 18 needle
Heavier sails and storm-sails 6 oz + Tex 90 with an 18 or 20 needle
Leather
For leather patches, use Tex 90 with a leather point needle. Leather point needles have a blade-shaped point that cuts instead of a round sharp point. You can machine sew leather patches, but generally this is hand sewn with waxed thread. Make sure needs are sharp, plus you want some spare machine needles and hand sewing ones.
Scissors, Sewing Palm, Etc.
You will need a decent pair of scissors, as well as a leather sewing palm to push needles through the cloth when hand sewing. This is essential for safety. It takes a lot of force to push a needle through sailcloth or leather and without a proper palm there is a good chance of driving the needle into your hand.
Also, for hand stitching I find a pair of pliers is the best way to pull the needle through. I can stitch about three layers of 6.4 oz cloth with a leather palm but beyond that my hands are not strong enough.
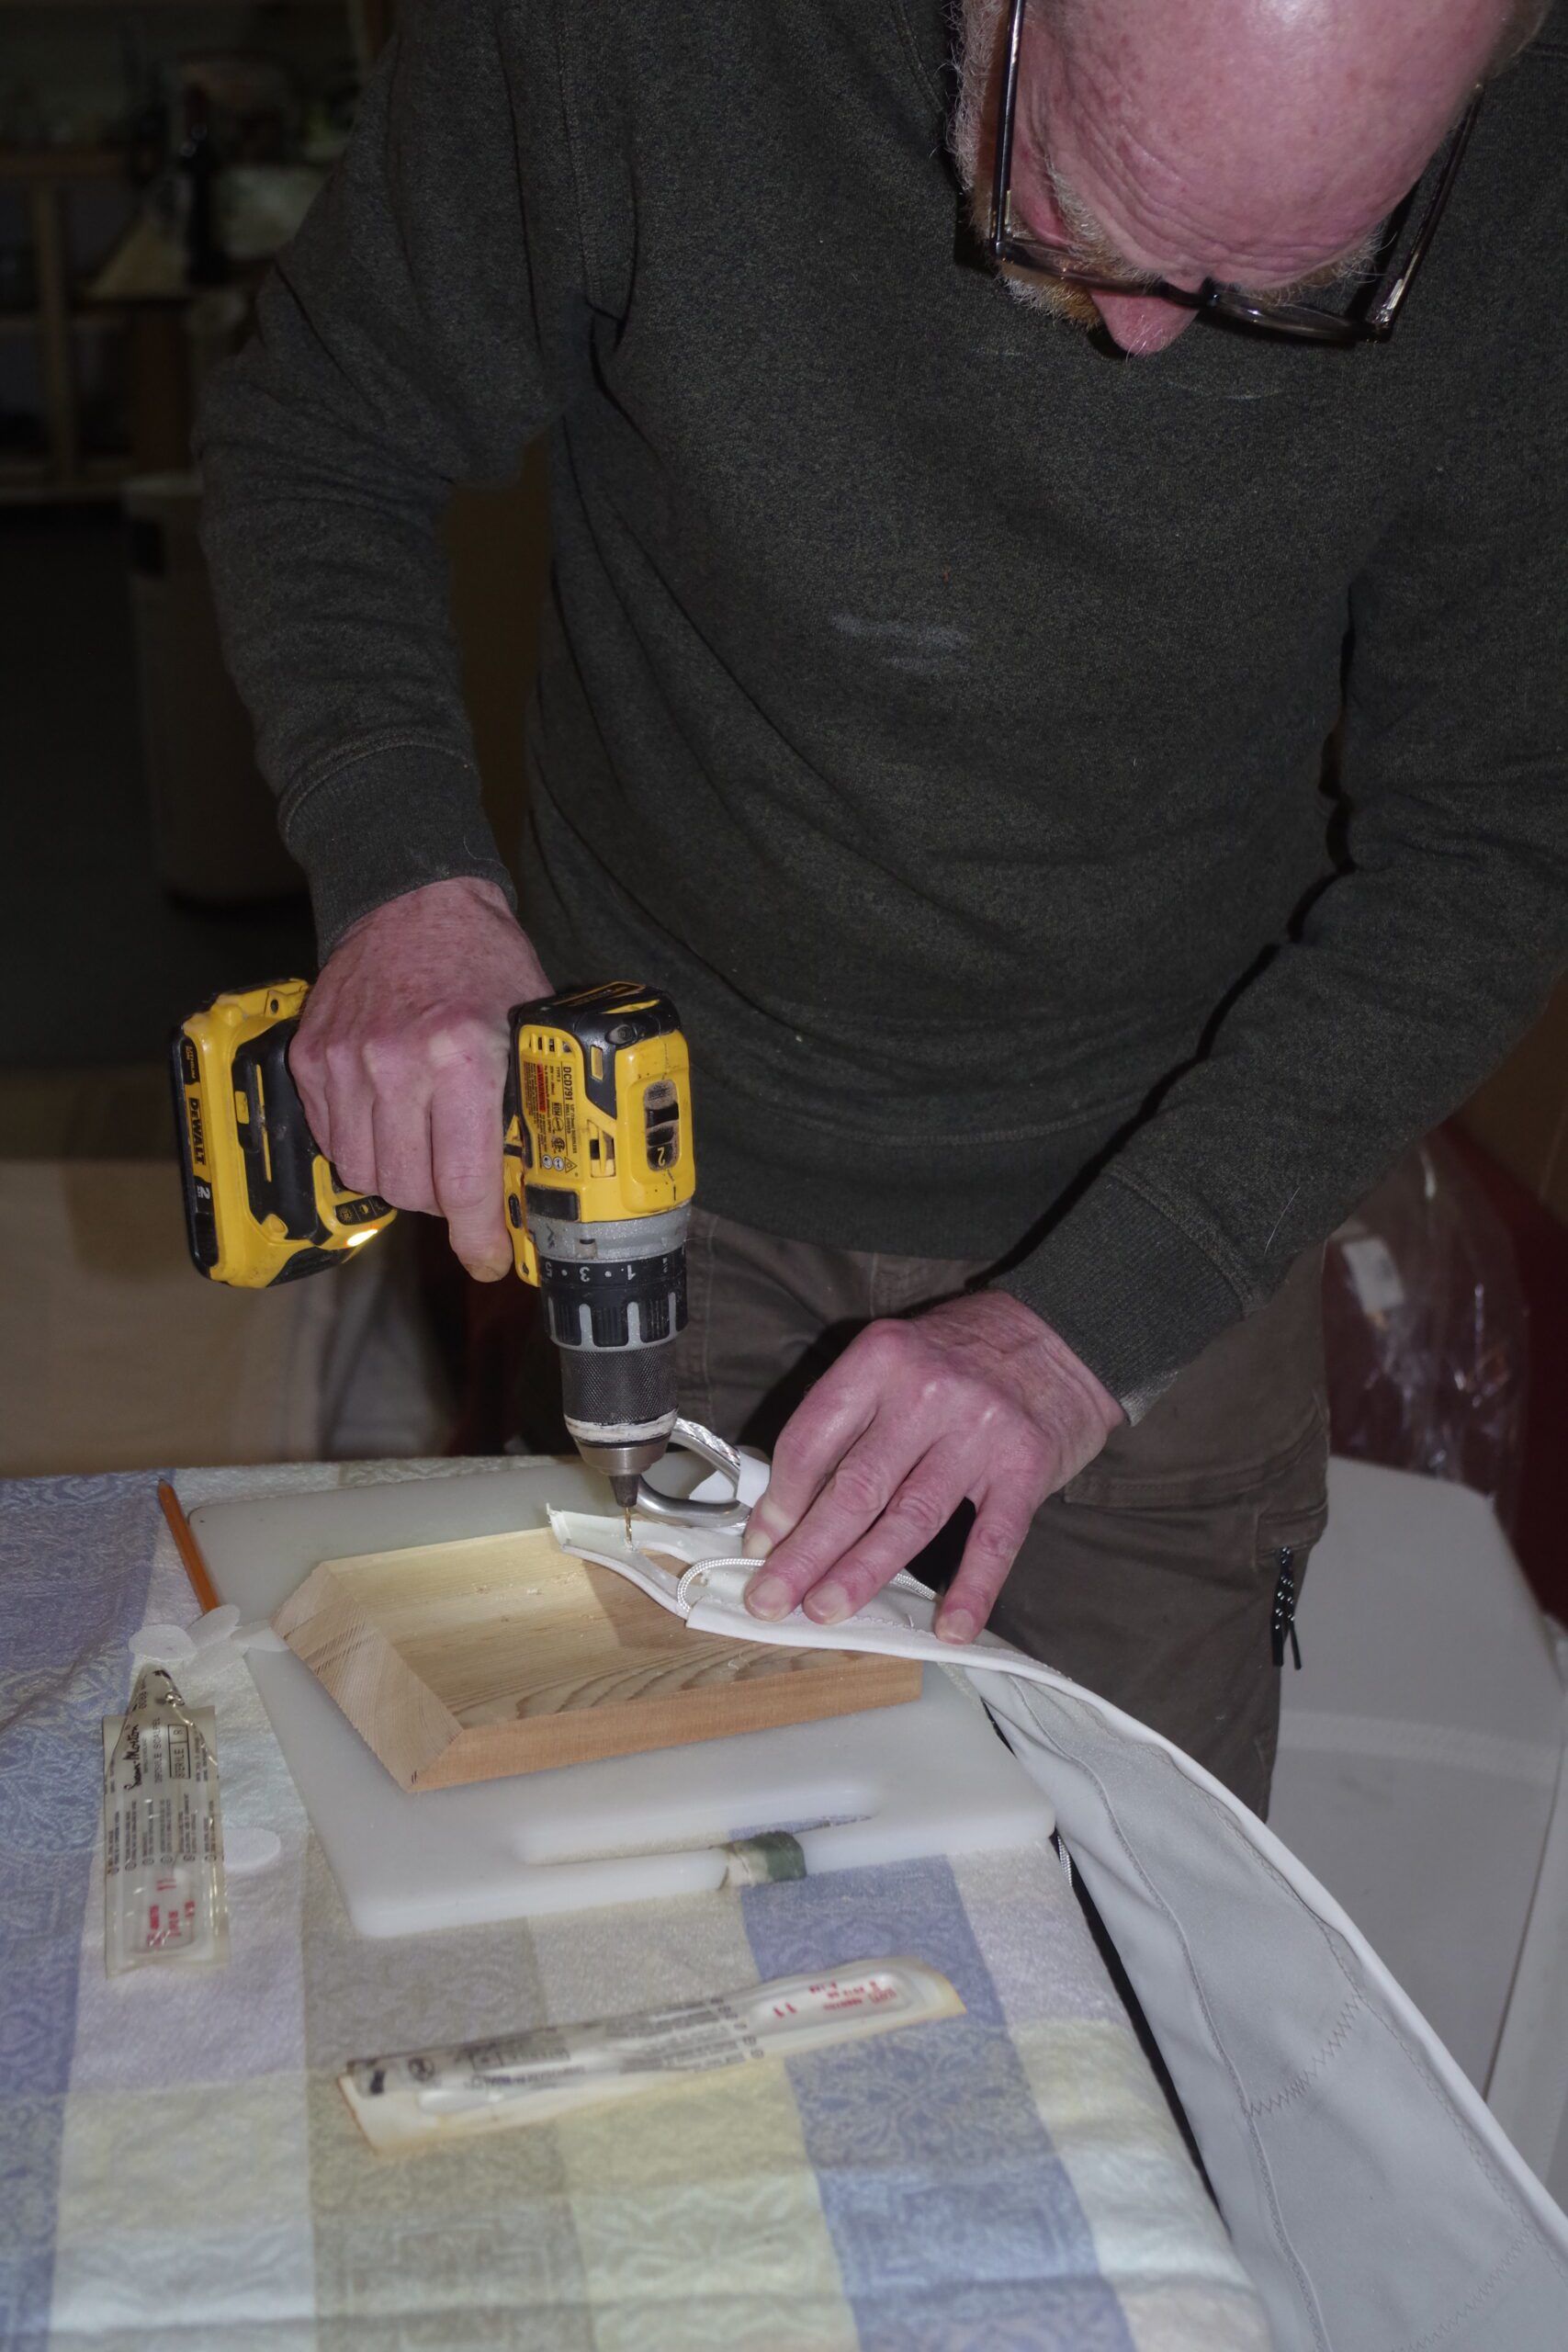
For stitching in rings and other places where I am sewing lots of layers I use a drill to make the holes before sewing. Use a bit that is slightly smaller than the needle. This makes the job much easier on the hands.
Finally, you need decent mallet. The brass inserts for reefing points require a good hard clout to form them.
Where to Work
You need a big clean workspace. I am sure somebody has built a sail working on the saloon table, but it is going to make life significantly more difficult. A table where you can sit comfortably and control the foot pedal that operates the machine is great for doing reinforcing patches and other small areas, but for sewing panels you need to work on the floor.
You don’t need much width as you can roll the cloth up. Ideally you need twice the length of the sail’s foot as clear space. This enables you to run a seam without folding the cloth which makes it much easier to get neat straight seams. If the works snags while running a seam it will throw of both the direction and the stich length.
When you go to the Sailrite webpage and click on “custom sails,” it takes you to a form where you can request a quote. If you have a production boat and want to replace the standard sails, this can be as easy as simply telling them which sail you want and the make, model and year of the boat. Next is a page where you specify the details depending on the sail you are ordering. This includes how many reef points and battens you want for mainsails. For headsails, it will include the type of sail, genoa, jib, staysail and whether you want it hanked on or for roller furling. The final page includes a space to upload a sail plan if you have one and to add comments. For non-standard sails, i.e., if it is not a production boat, or you want something other than the standard sails, this is where you give them the specifications. For non-standard sails they will need to know the length of each side as a minimum. It is a good idea to tell them what you will be doing with the sail. A sail for sheltered waters or short inshore passages can be lighter and needs less reinforcement than one for ocean crossing. The other significant factor is maximum wind speed. All sails are built to perform best at a particular wind speed. One optimized for light airs between 10 and 15 kn will not work well in 35 kn and may not even survive. Typically, a mainsail will be good for anything up to 35 kn. Headsails do not cover as large a range. For the main, adjusting the halyard and outhaul tension will create more or less depth allowing it to provide power in light winds, or to flatten it and reduce drag in stronger winds. This is because the weight of the mainsail is supported on two sides by the mast and boom. A headsail is only supported at the luff and relies on the wind to fill it and lift it into shape. If the sail is too heavy for the wind speed it will not fill properly and will keep collapsing. It will also not have enough depth to produce the drive you need in light weather. At the other end of the wind range a headsail that is too light for the conditions it will have too much depth. This increases drag and reduces pointing ability. Ultimately any sail will be permanently stretched out of shape if it is used beyond its wind range. The last point is cost and ease of building the sail. A heavier sail uses more materials and there is more work is involved in building it. This is pointless if you are only going to be using it for coastal sailing but essential for offshore or ocean crossings if the sail is to last. The example I use in this article is a heavyweight staysail that can be used in winds up to 35 kn. It is a hanked on sail with a single reef point and heavily reinforced. This is for a cutter rig and is paired with a lighter roller furling genoa.Non-standard Sails
How You Will Use the Sail
Sail Weight
Setting Up Your Sewing Machine
This is advice for anyone new to sewing heavy canvas:
It is important to get the tensions set right—this changes every time you move to a new thread size or a different canvas. Take a couple of pieces of scrap canvas and sew a straight seam across it. What you are looking for is in the diagram below.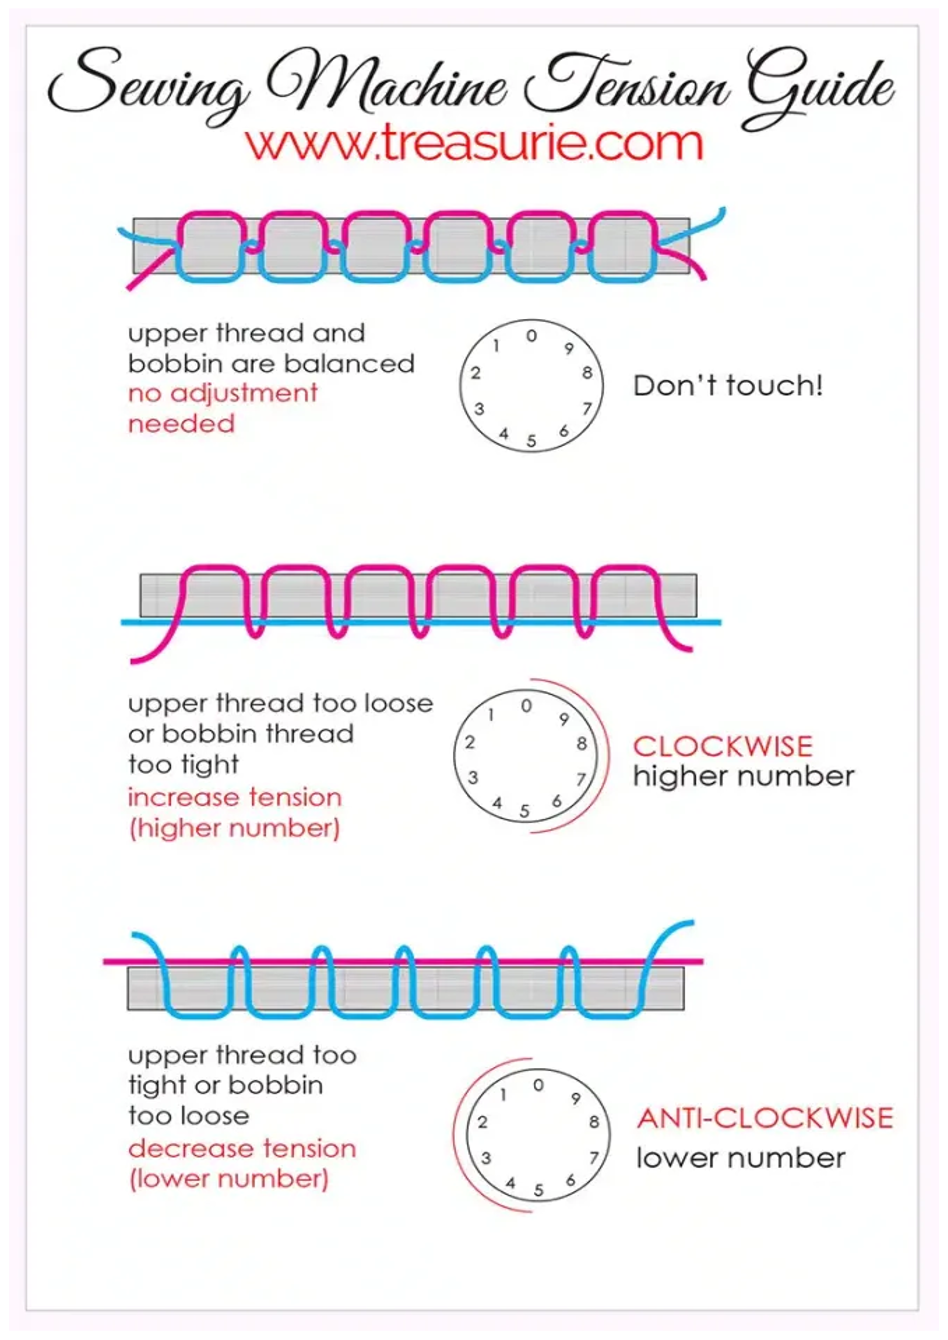
The tension is right if, when you pull on the thread you cannot move it or “pucker” the seam. What you are looking for is that the threads cross within the seam. This locks the stitches in place. As shown in the top picture. The bottom two pictures show the effect of too much or two little tension.
Normally this is adjusted with the tension dial on the top thread feed. If that does not work, there is a small screw on the bobbin which can adjust the bottom thread tension.
The other adjustment, which is specific to sail-maker’s machines, is that the top thread usually goes through a small ladder with three holes in it before going down to the tension adjuster. This is for coarse tension adjustment. If you cannot get the tension correct using the dial you can use more or less of the holes in the ladder.
Check your machine’s instruction manual to understand how to set the tension on your particular machine as they are all a bit different.
Once the tension seems right, double check by running some zigzag with everything set to how you intend to sew the seam. Sometimes you may need a further fin adjustment.
DIY Sailmaking Process
The staysail illustrated in the slideshow below is for Brigid, a custom built 32-ft. cutter in cedar/epoxy. She is designed by Bill Garden and based on the Westsail 32. She is almost identical to the Westsail but with a slightly wider beam and a bit taller rig. Total sail area is 650 sq ft. The jib on Brigid is 200 sq ft mounted on a roller-furler at the end of a 5-ft. bowsprit.
This sail is 158 sq ft and reefs down to about 100 sq ft. This gives three reefing steps for the headsails of 50 sq ft each that match the three reefs in the main. Since the sail is designed to work with a triple reefed main it was important to build it to stand up to 35 kn or more when hove too, hence the hefty reinforcements.
The cost of the kit was from Sailrite was $893 USD plus shipping and taxes. It is quite a big hefty package so shipping is significant but it depends where you are. Sailrite ships from the USA.
Check out the 13-step sailmaking slideshow below to learn the process.
1. Unpack Your Sail Kit
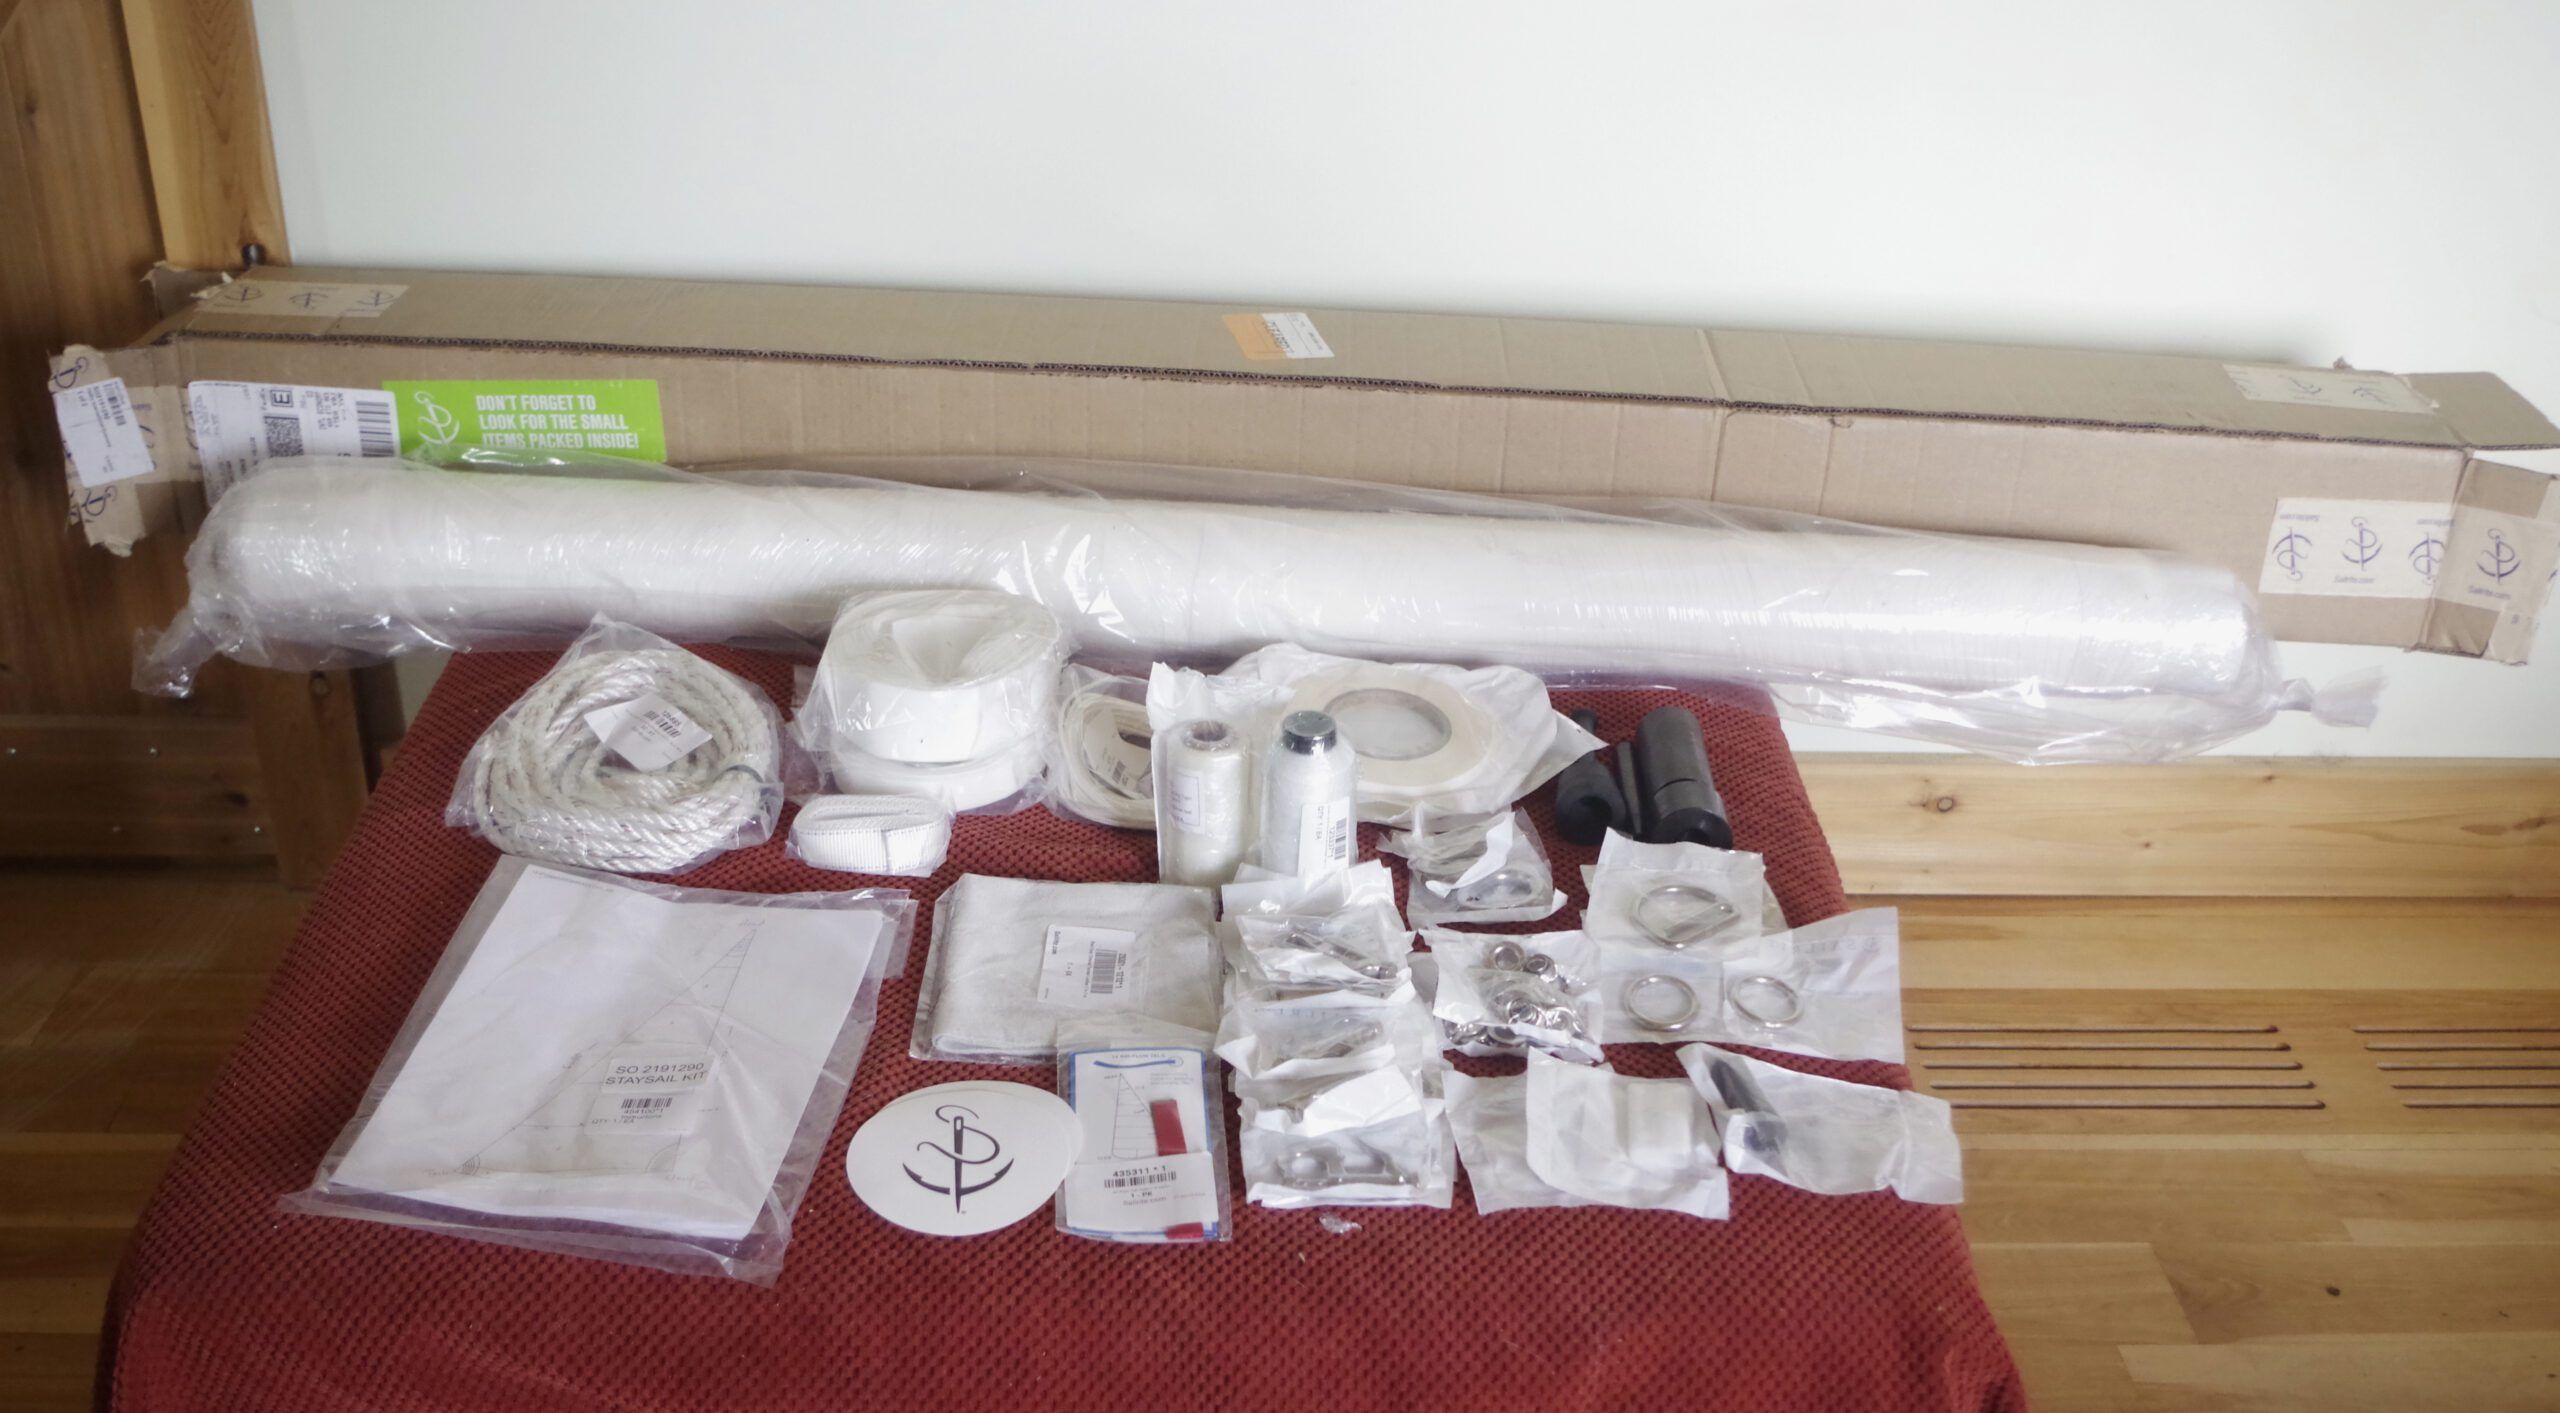
These are the materials you get with the sail kit. It includes everything you need to build you sail, including the dies and punch for the hardware. There is also some spare sail cloth which you can keep for repairs. I used this to make a sail bag.
2. Sew First Panels Together
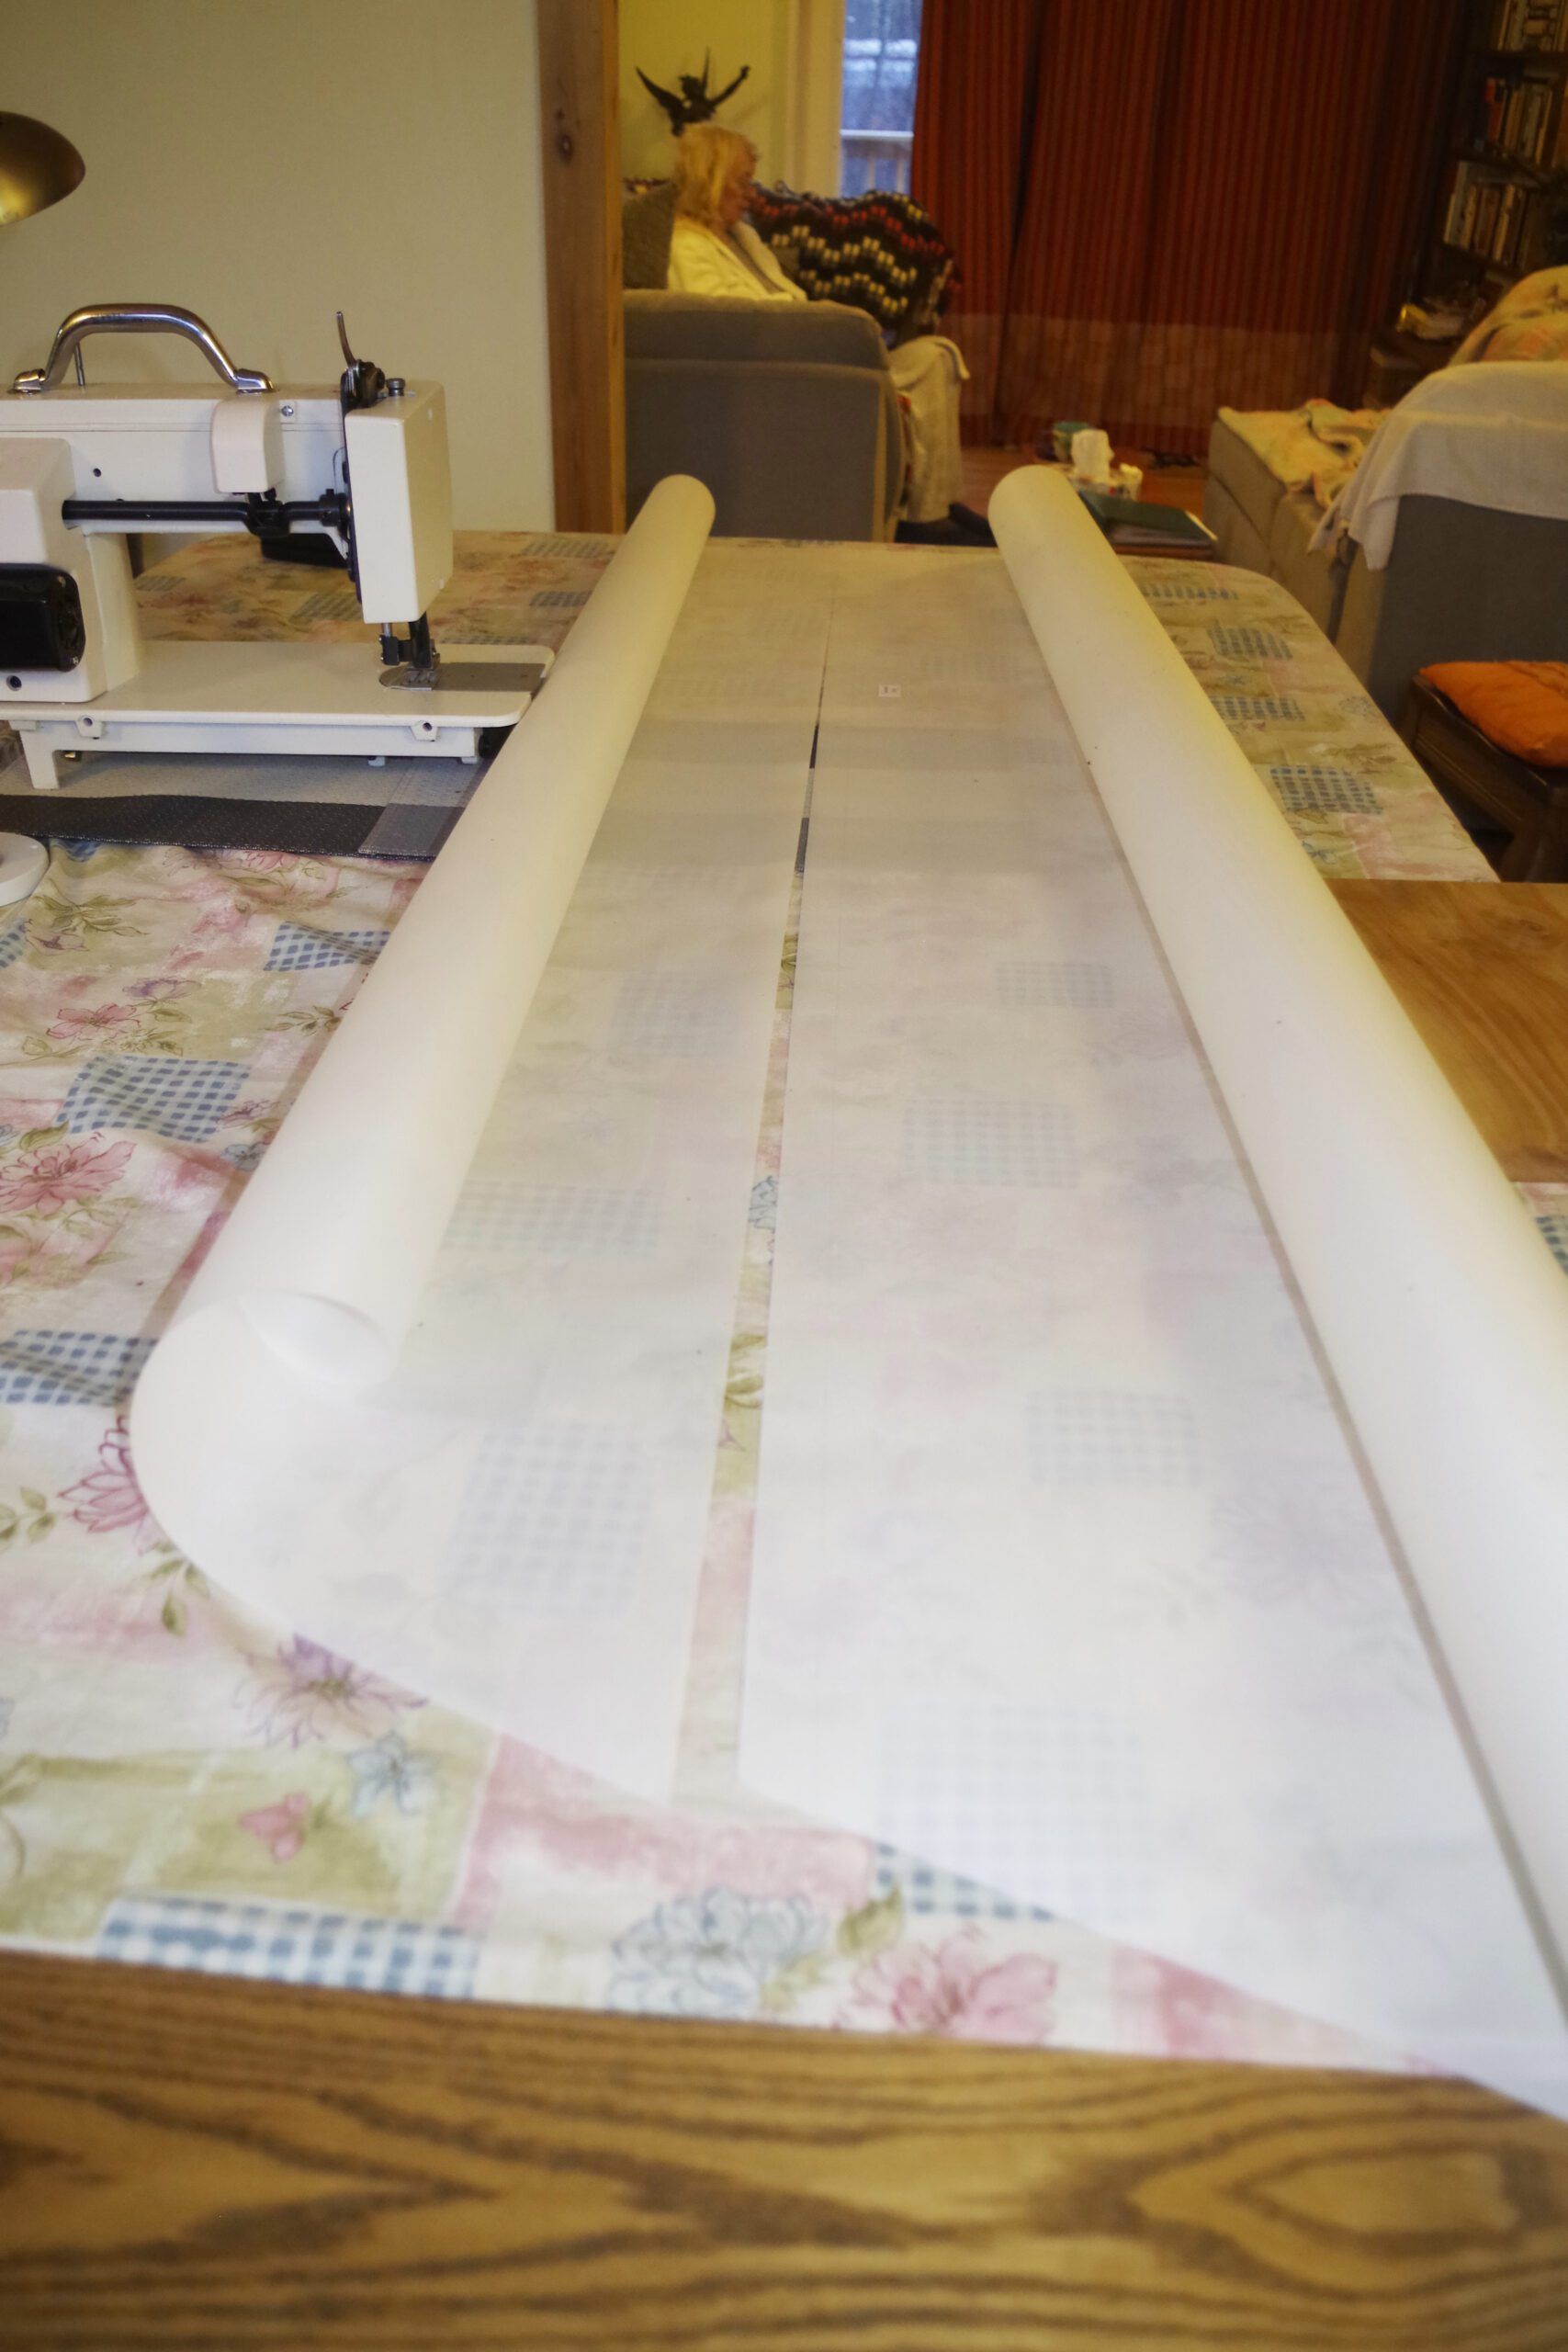
You start by sewing some panels together. Note that the sail shape is created by the curve cut into the edge of each panel. They look straight but they are not! You can see the amount of curve from this picture. Accuracy is very important when putting the panels together. You stick the panels together using the double-sided tape provided. Make sure you follow the seam line marked on the panel and work in short sections.
3. Line Up Panels
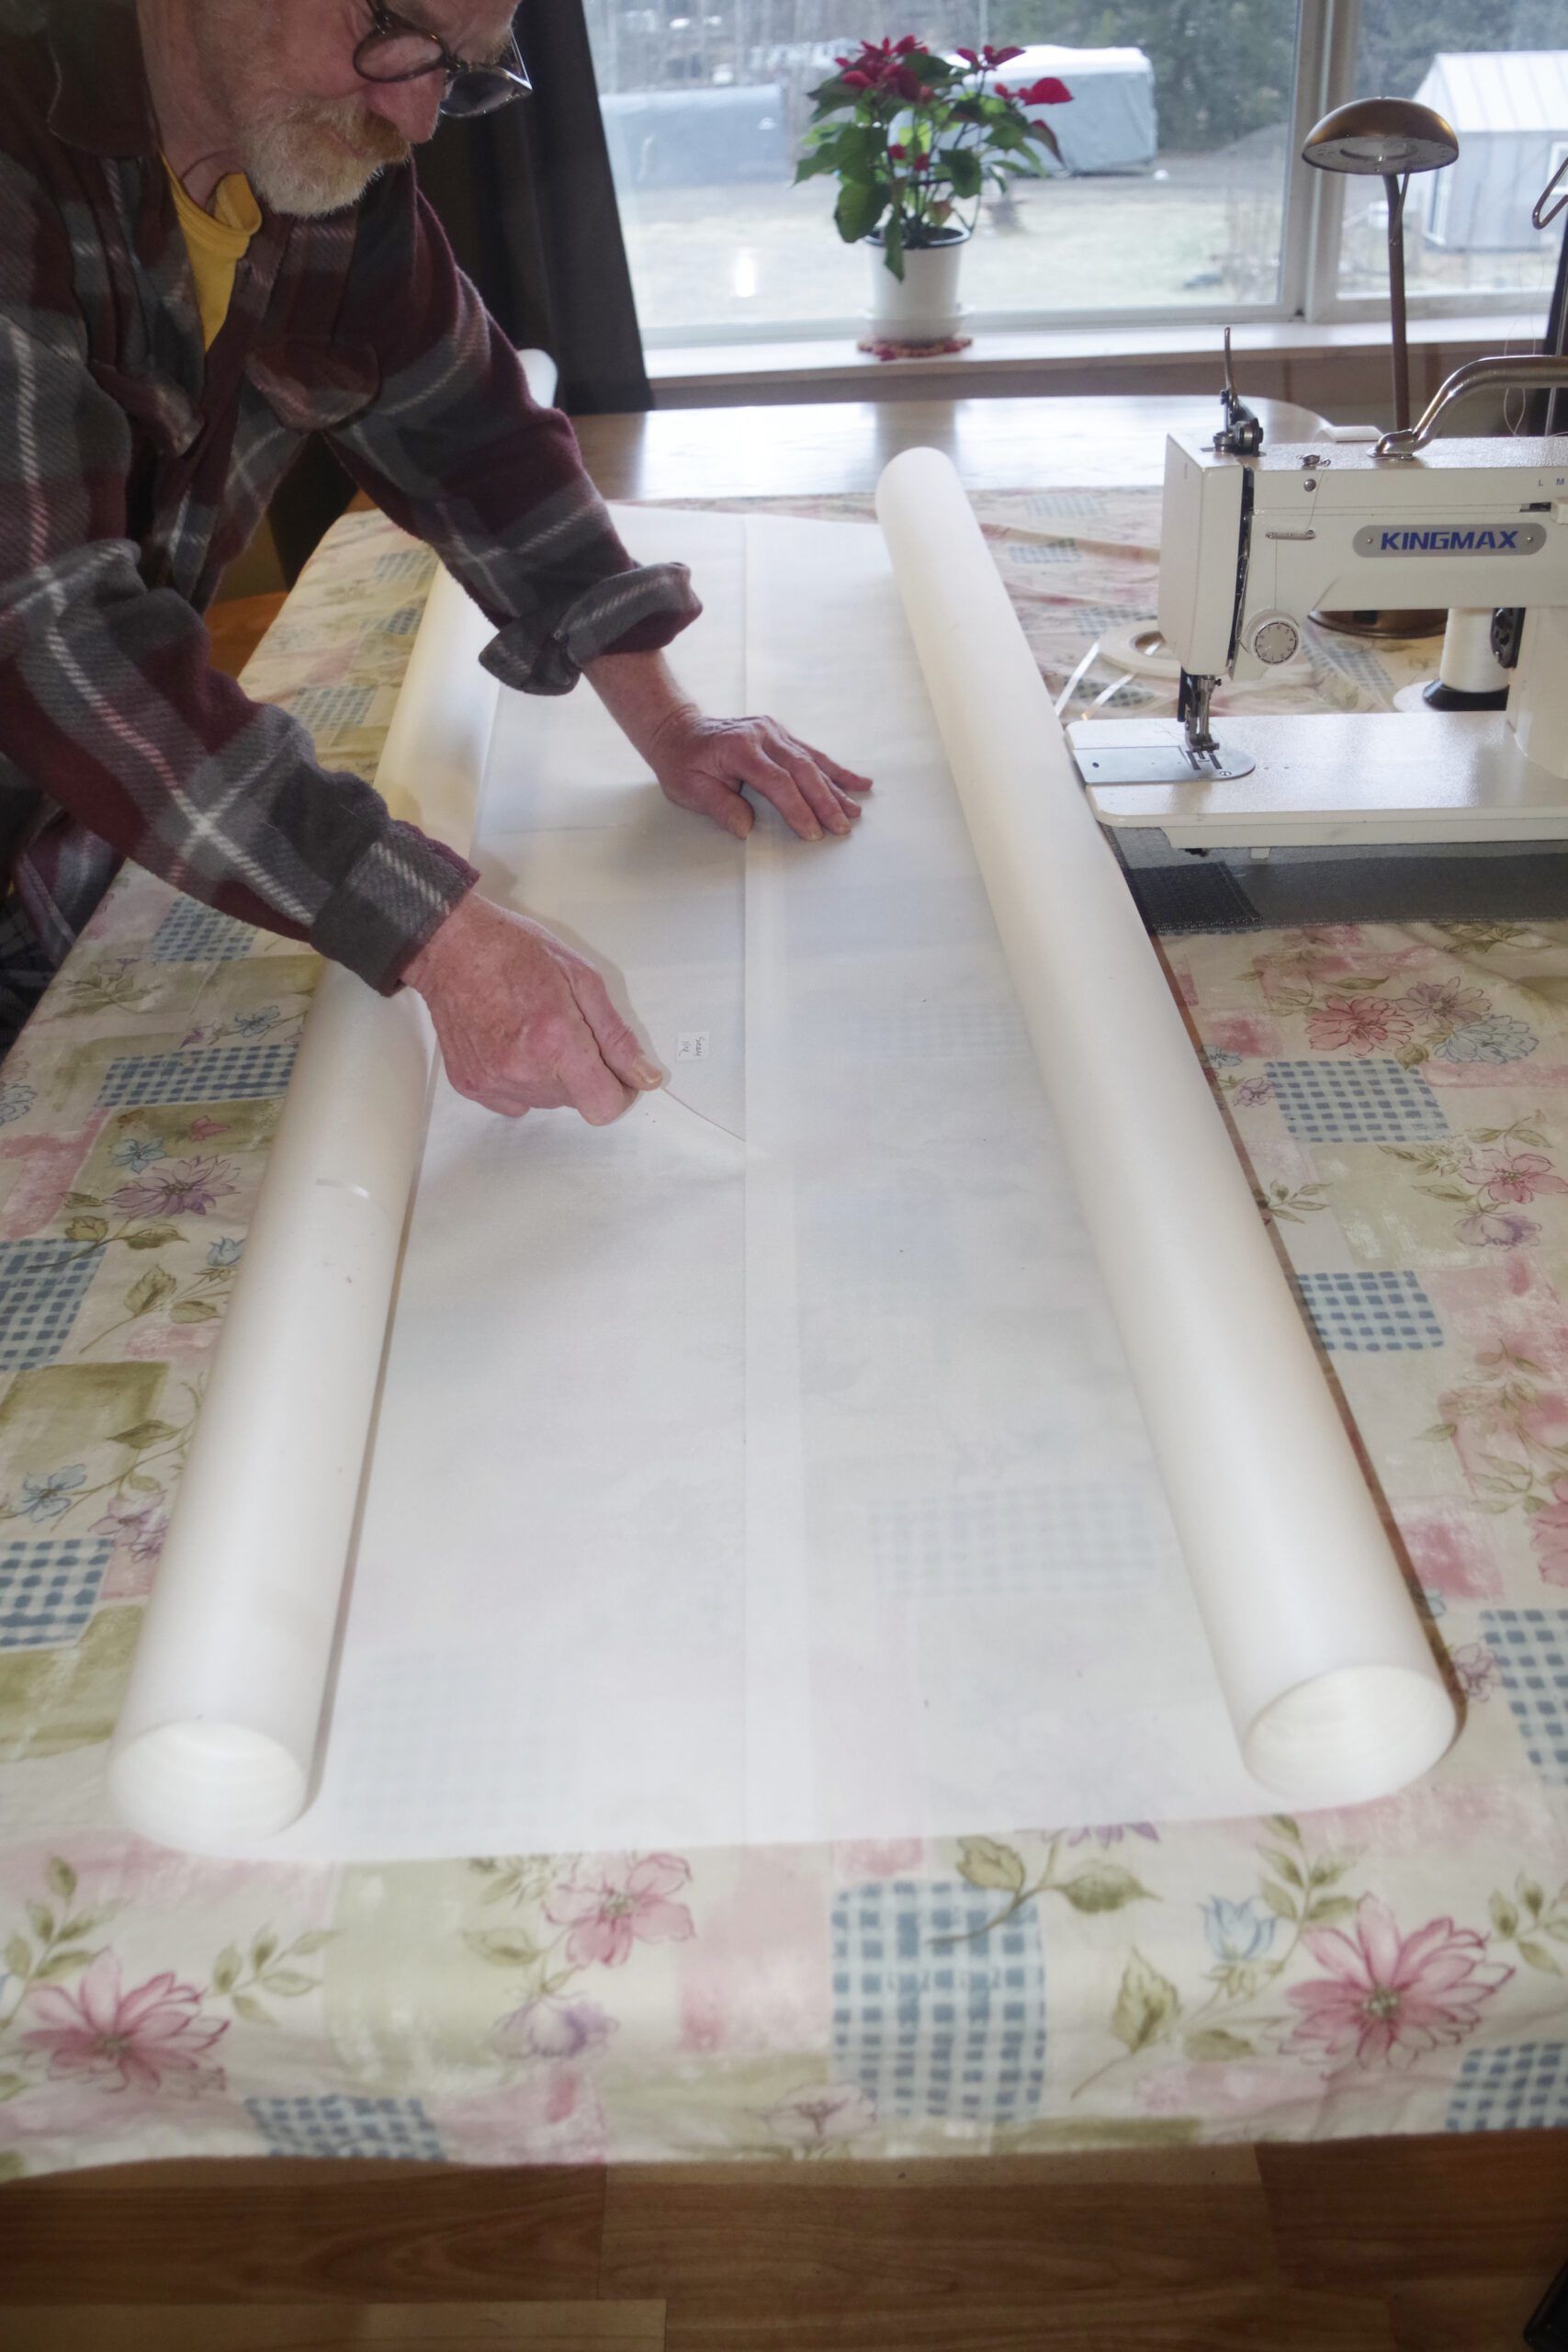
Place the double-sided tape near the edge of the seam line, peal a short length of the cover off and fold it to one side. Starting at the straightest edge, firmly press the first few inches of the panels together. Now line up the next section. While holding it in place pull about six inches of the backing cover out and press this section together. Work across the seam in this way until you get to the other side. This ensures you line the panels up accurately.
4. Stitch Panels Together Before Adding Reinforcing Panels
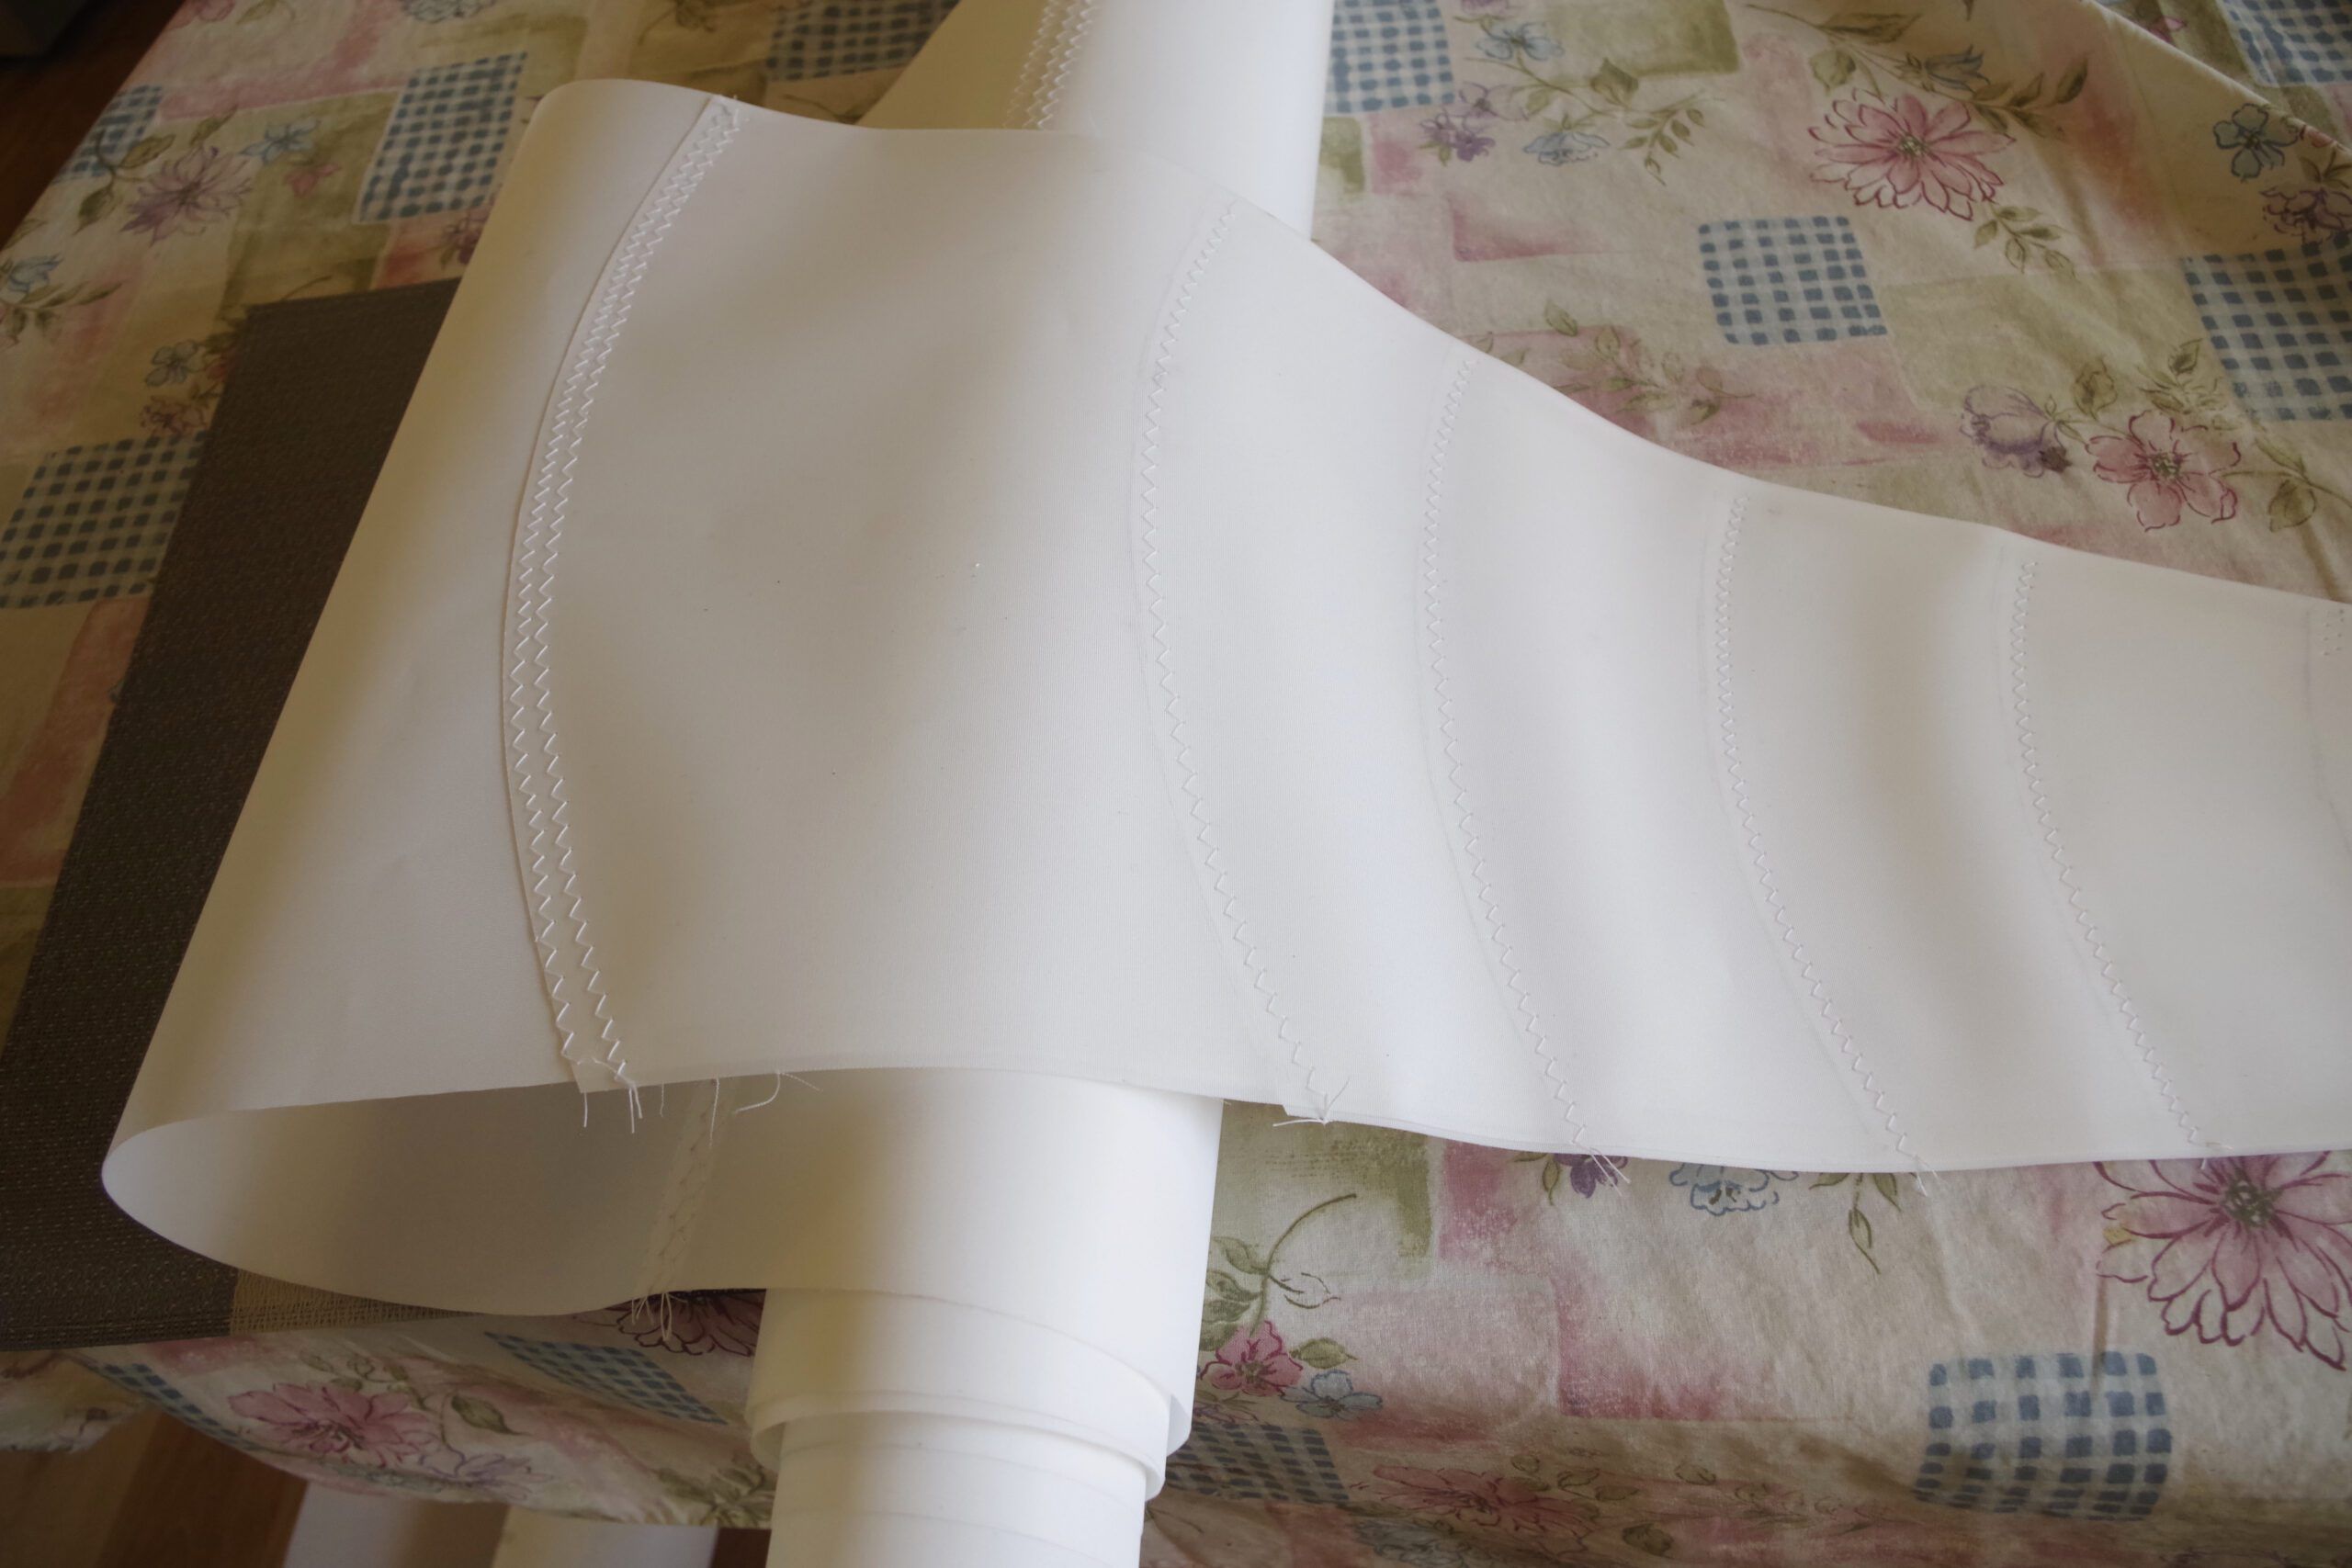
The instructions recommend you stitch the main panels together first before adding the reinforcing panels. There is a reason for this. In some cases, reinforcing patches cross more than one panel so obviously you need to stitch them together first. The other reason is that the patches become quite stiff so you cannot roll them up to pass through the throat. With some sails it may work to complete the top and bottom halves, leaving one seam to complete the sail. The slide shows the reinforcing patches on my headsail. There are six patches plus the sail in 6.4 oz cloth so a total of almost 45 oz, you can barely bend it.
5. How To Sew a Seam
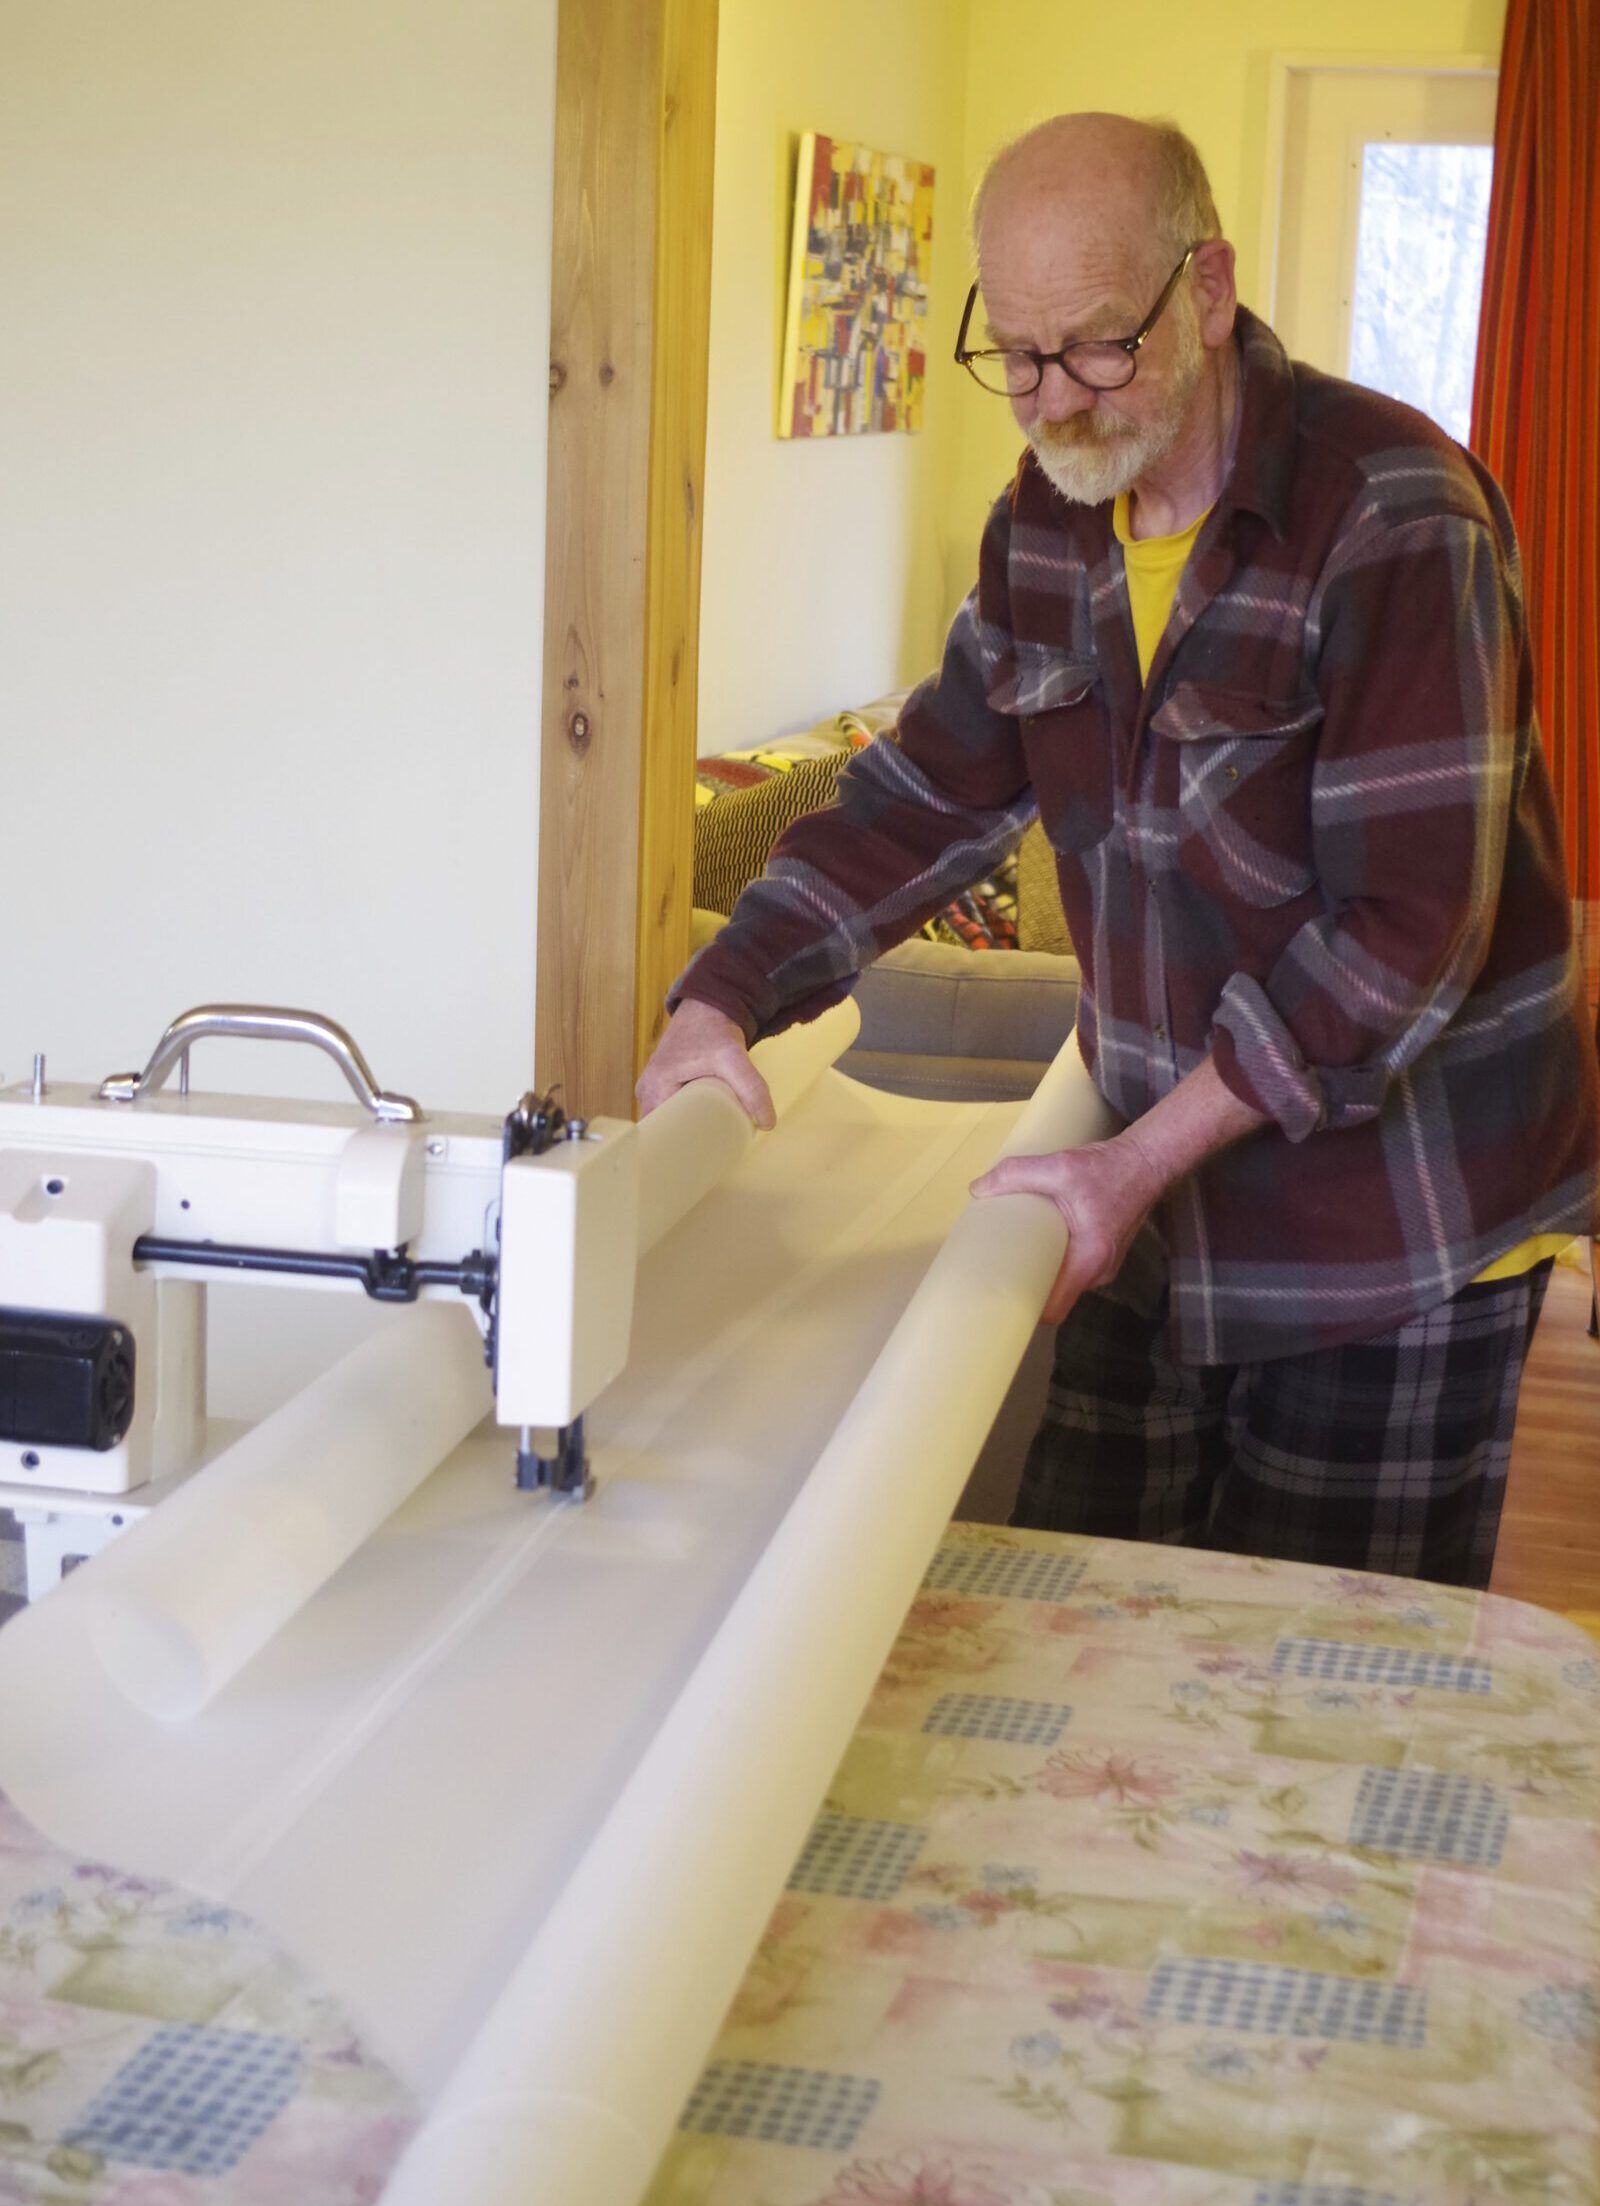
To sew the seam, roll both panels towards the seam. This enables you to hold the material and feed it through the machine. The rolls are stiff enough to allow you to steer the seam through the machine. If you are doing three rows of stitching, start with the center one and then place the other two close to the edges. For two rows of stitching, each one should be close to the edge, about 1/8- to ¼-in. clear of the edge.
6. Sew the Patches
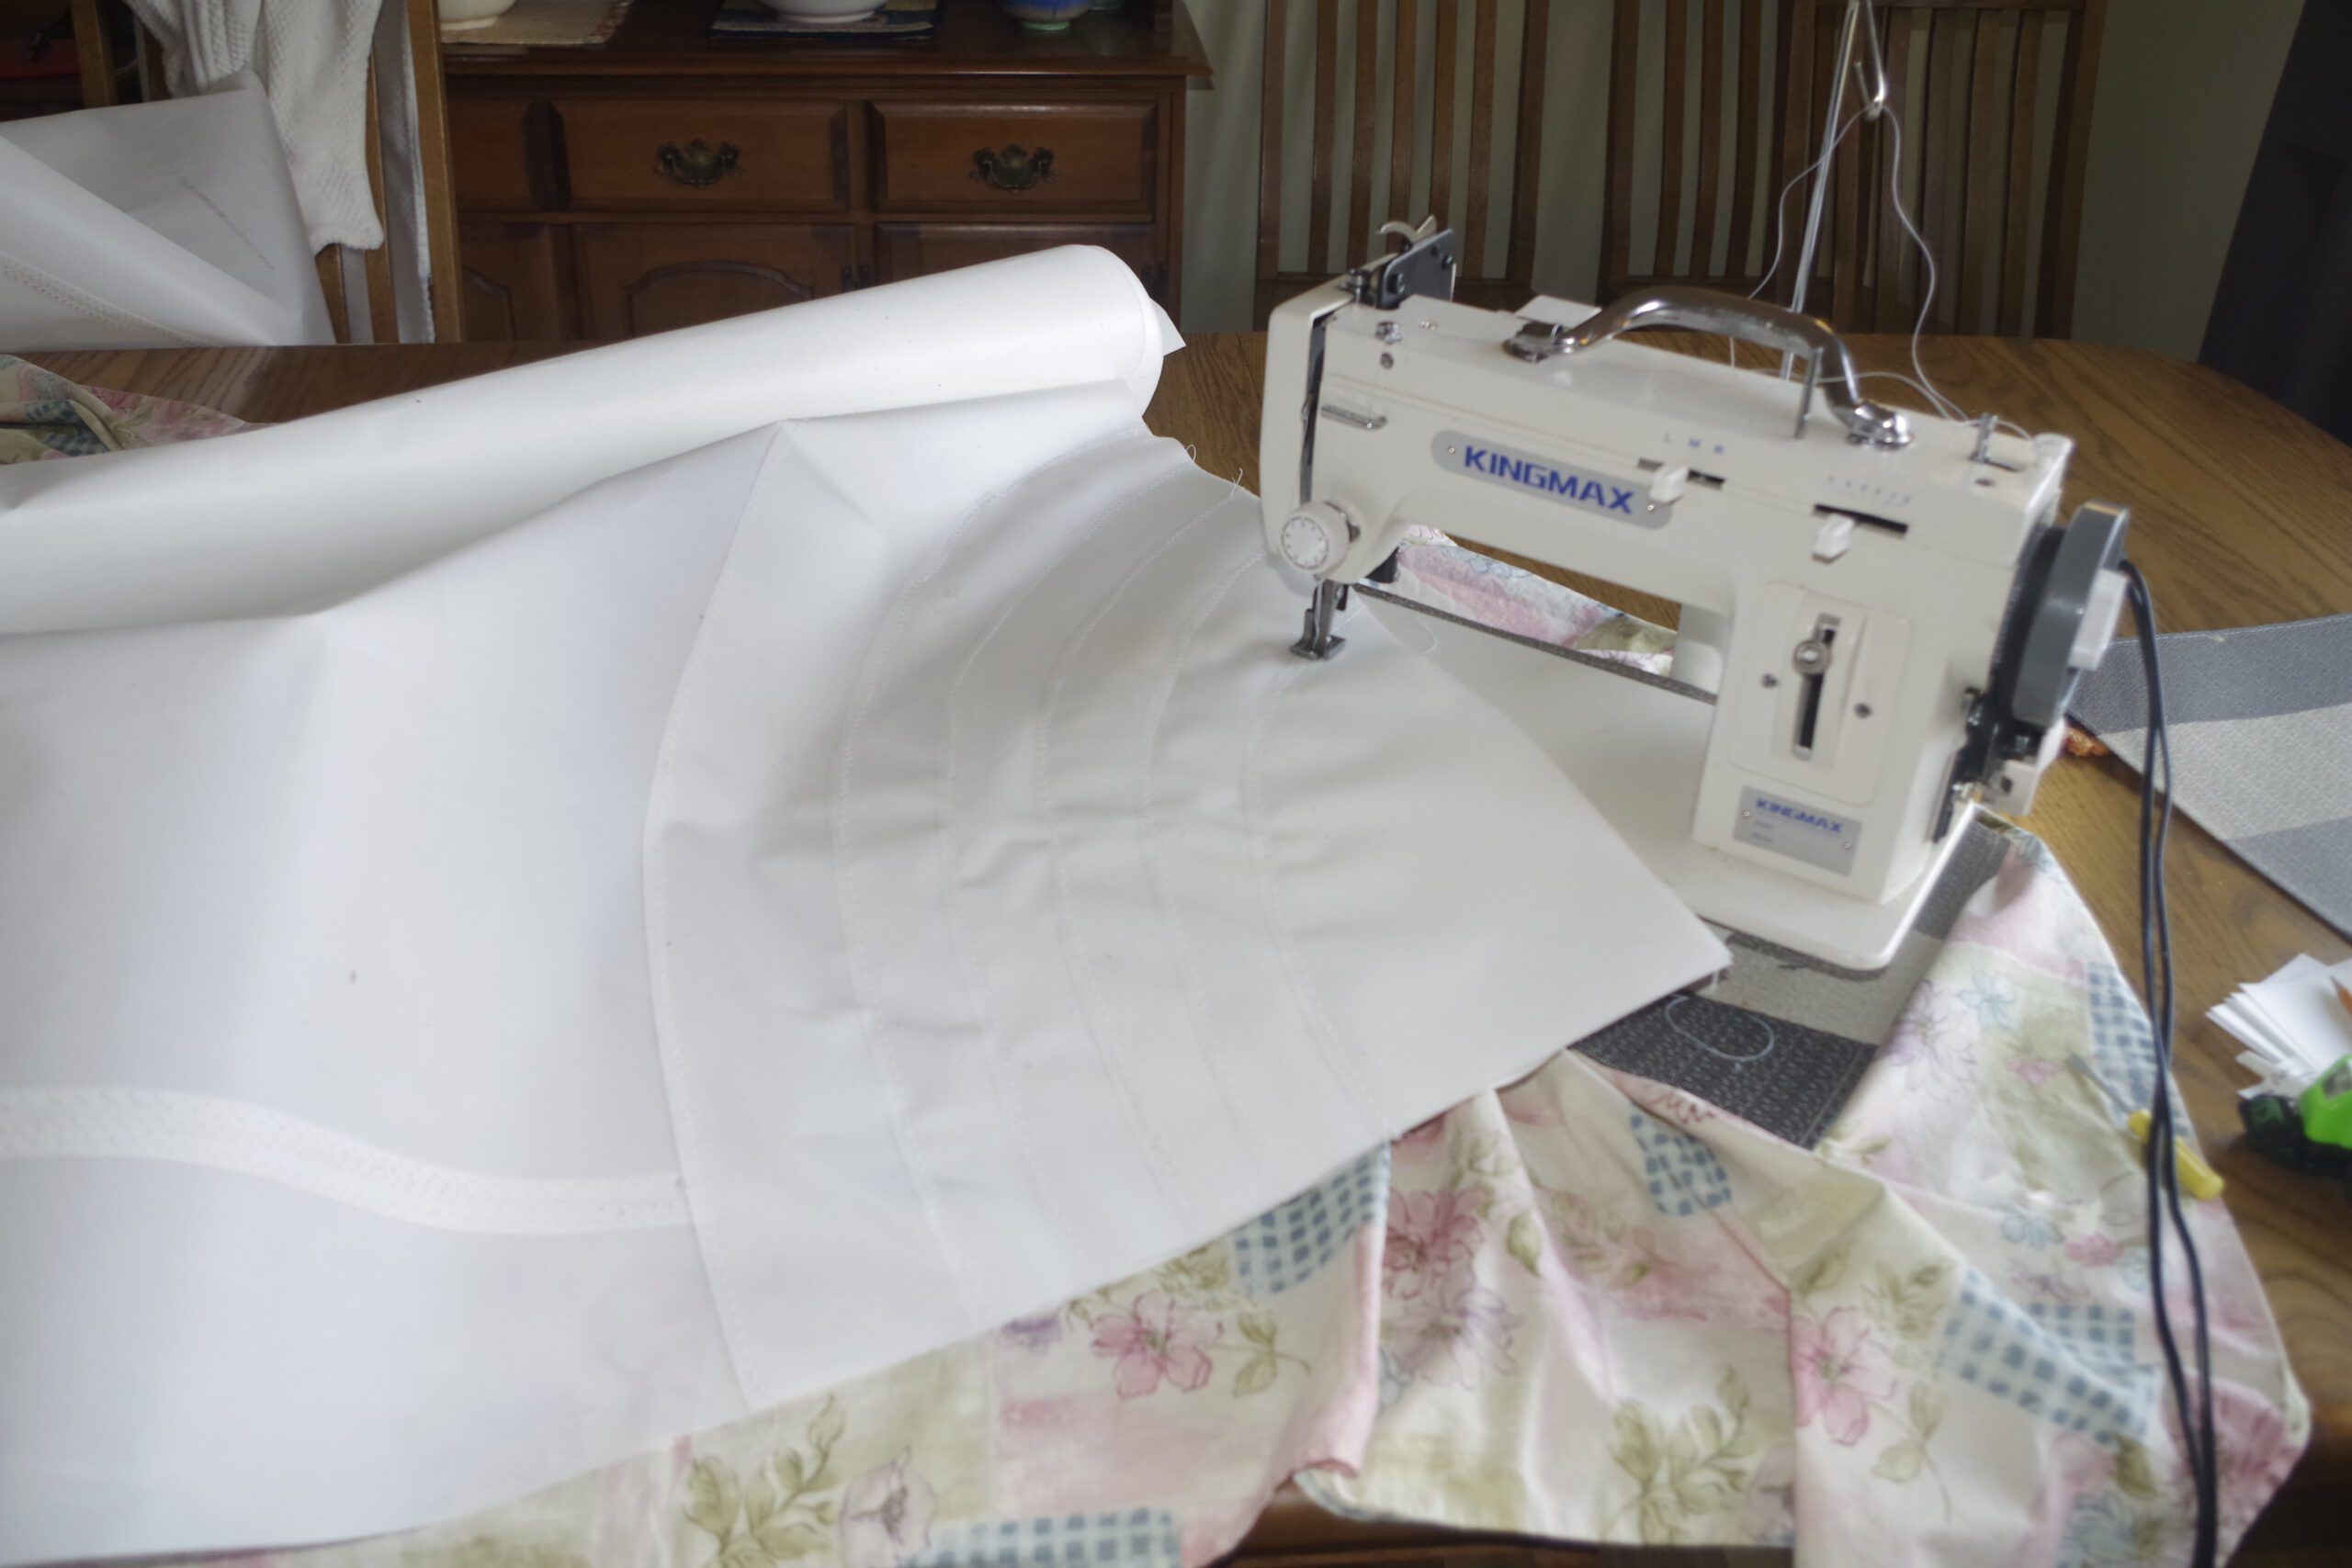
Sewing the patches. For the head and tack stick all the patches together with the double-sided tape then stick the complete assembly to the sail. Now run a single row of stitches along the edge of each patch and a double row on the largest one. It is hard to see where the edges of the patches are. Using bright light behind the sail will show them up then mark the edge with a soft pencil to guide your stitching. The other issue is that at this point you have at least half the sail put together and that is difficult to maneuver. I found it easier to put the machine on a couple of pads so that I could swing the machine rather than having to move the sail.
7. Check Your Stitching
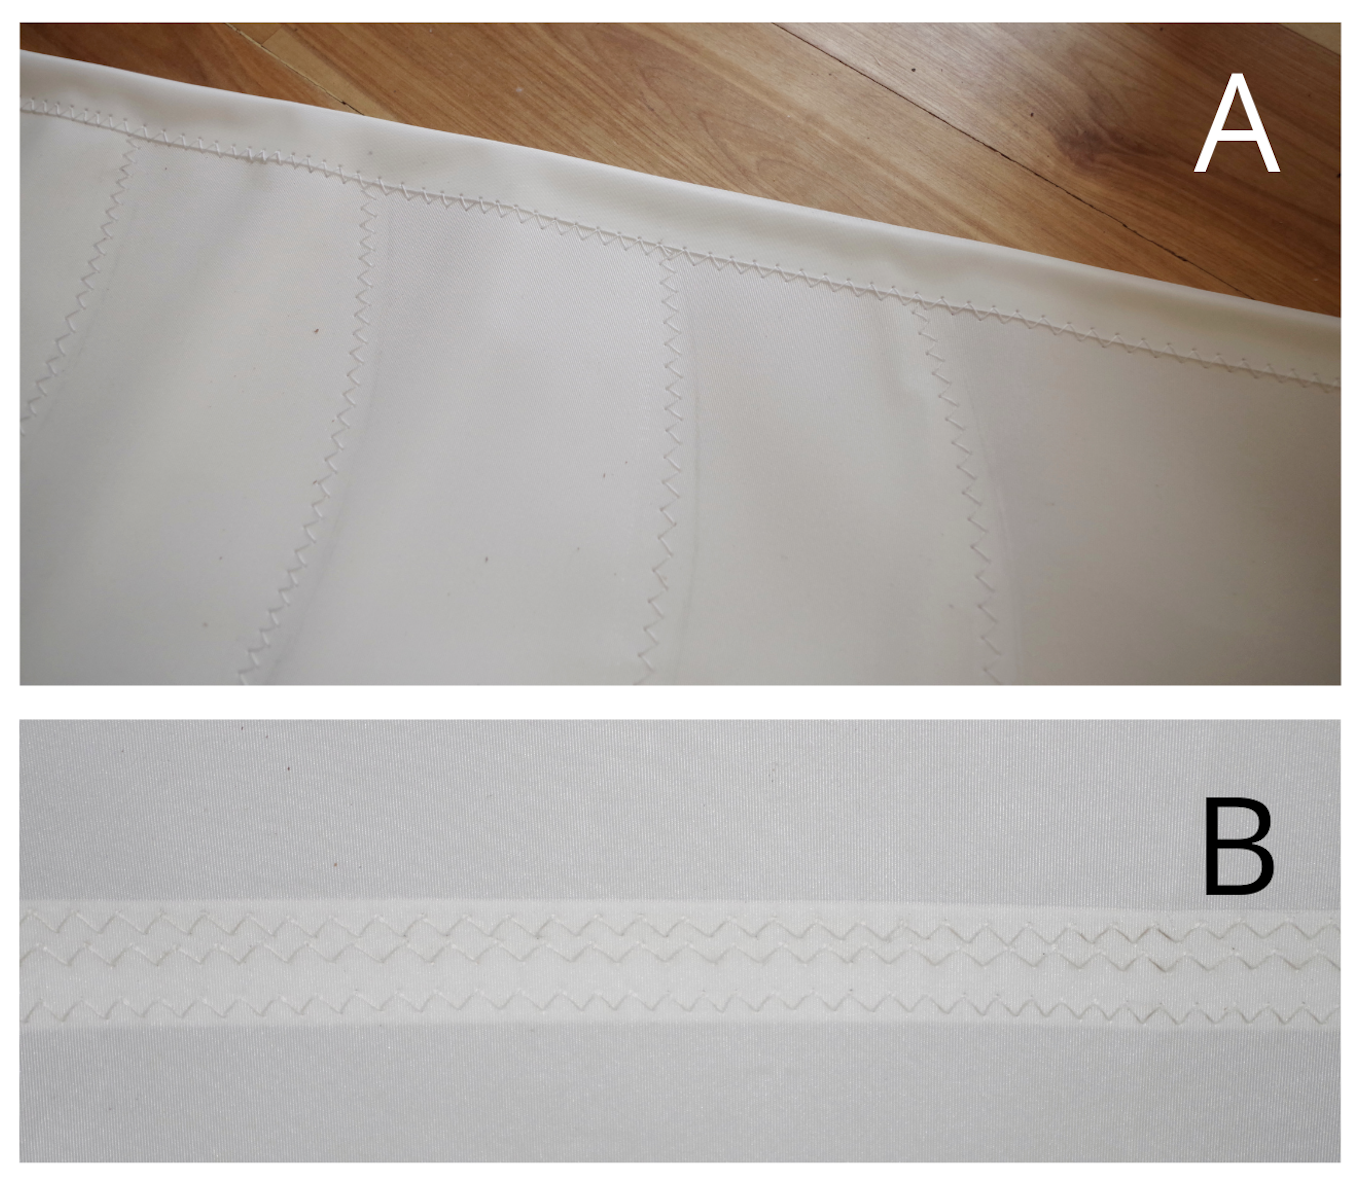
This shows what you are looking for when stitching. A. show single rows of stitching on patches and the stitching on the edge tape. For the edge tape I have run the stitches with one row in the edge tape and one row in the sail to capture the edge. B. shows a triple stitched seam joining two panels. Don’t worry if they are not exactly evenly spaces as is shown here. This shows about a 3/16 gap between the cloth edge and the stitching. For these seams do not take the stitches over the edge, keep all three rows within the seam overlap for maximum strength. These stitches are about 3/8 wide and long.
8. How To Sew Wider Seams
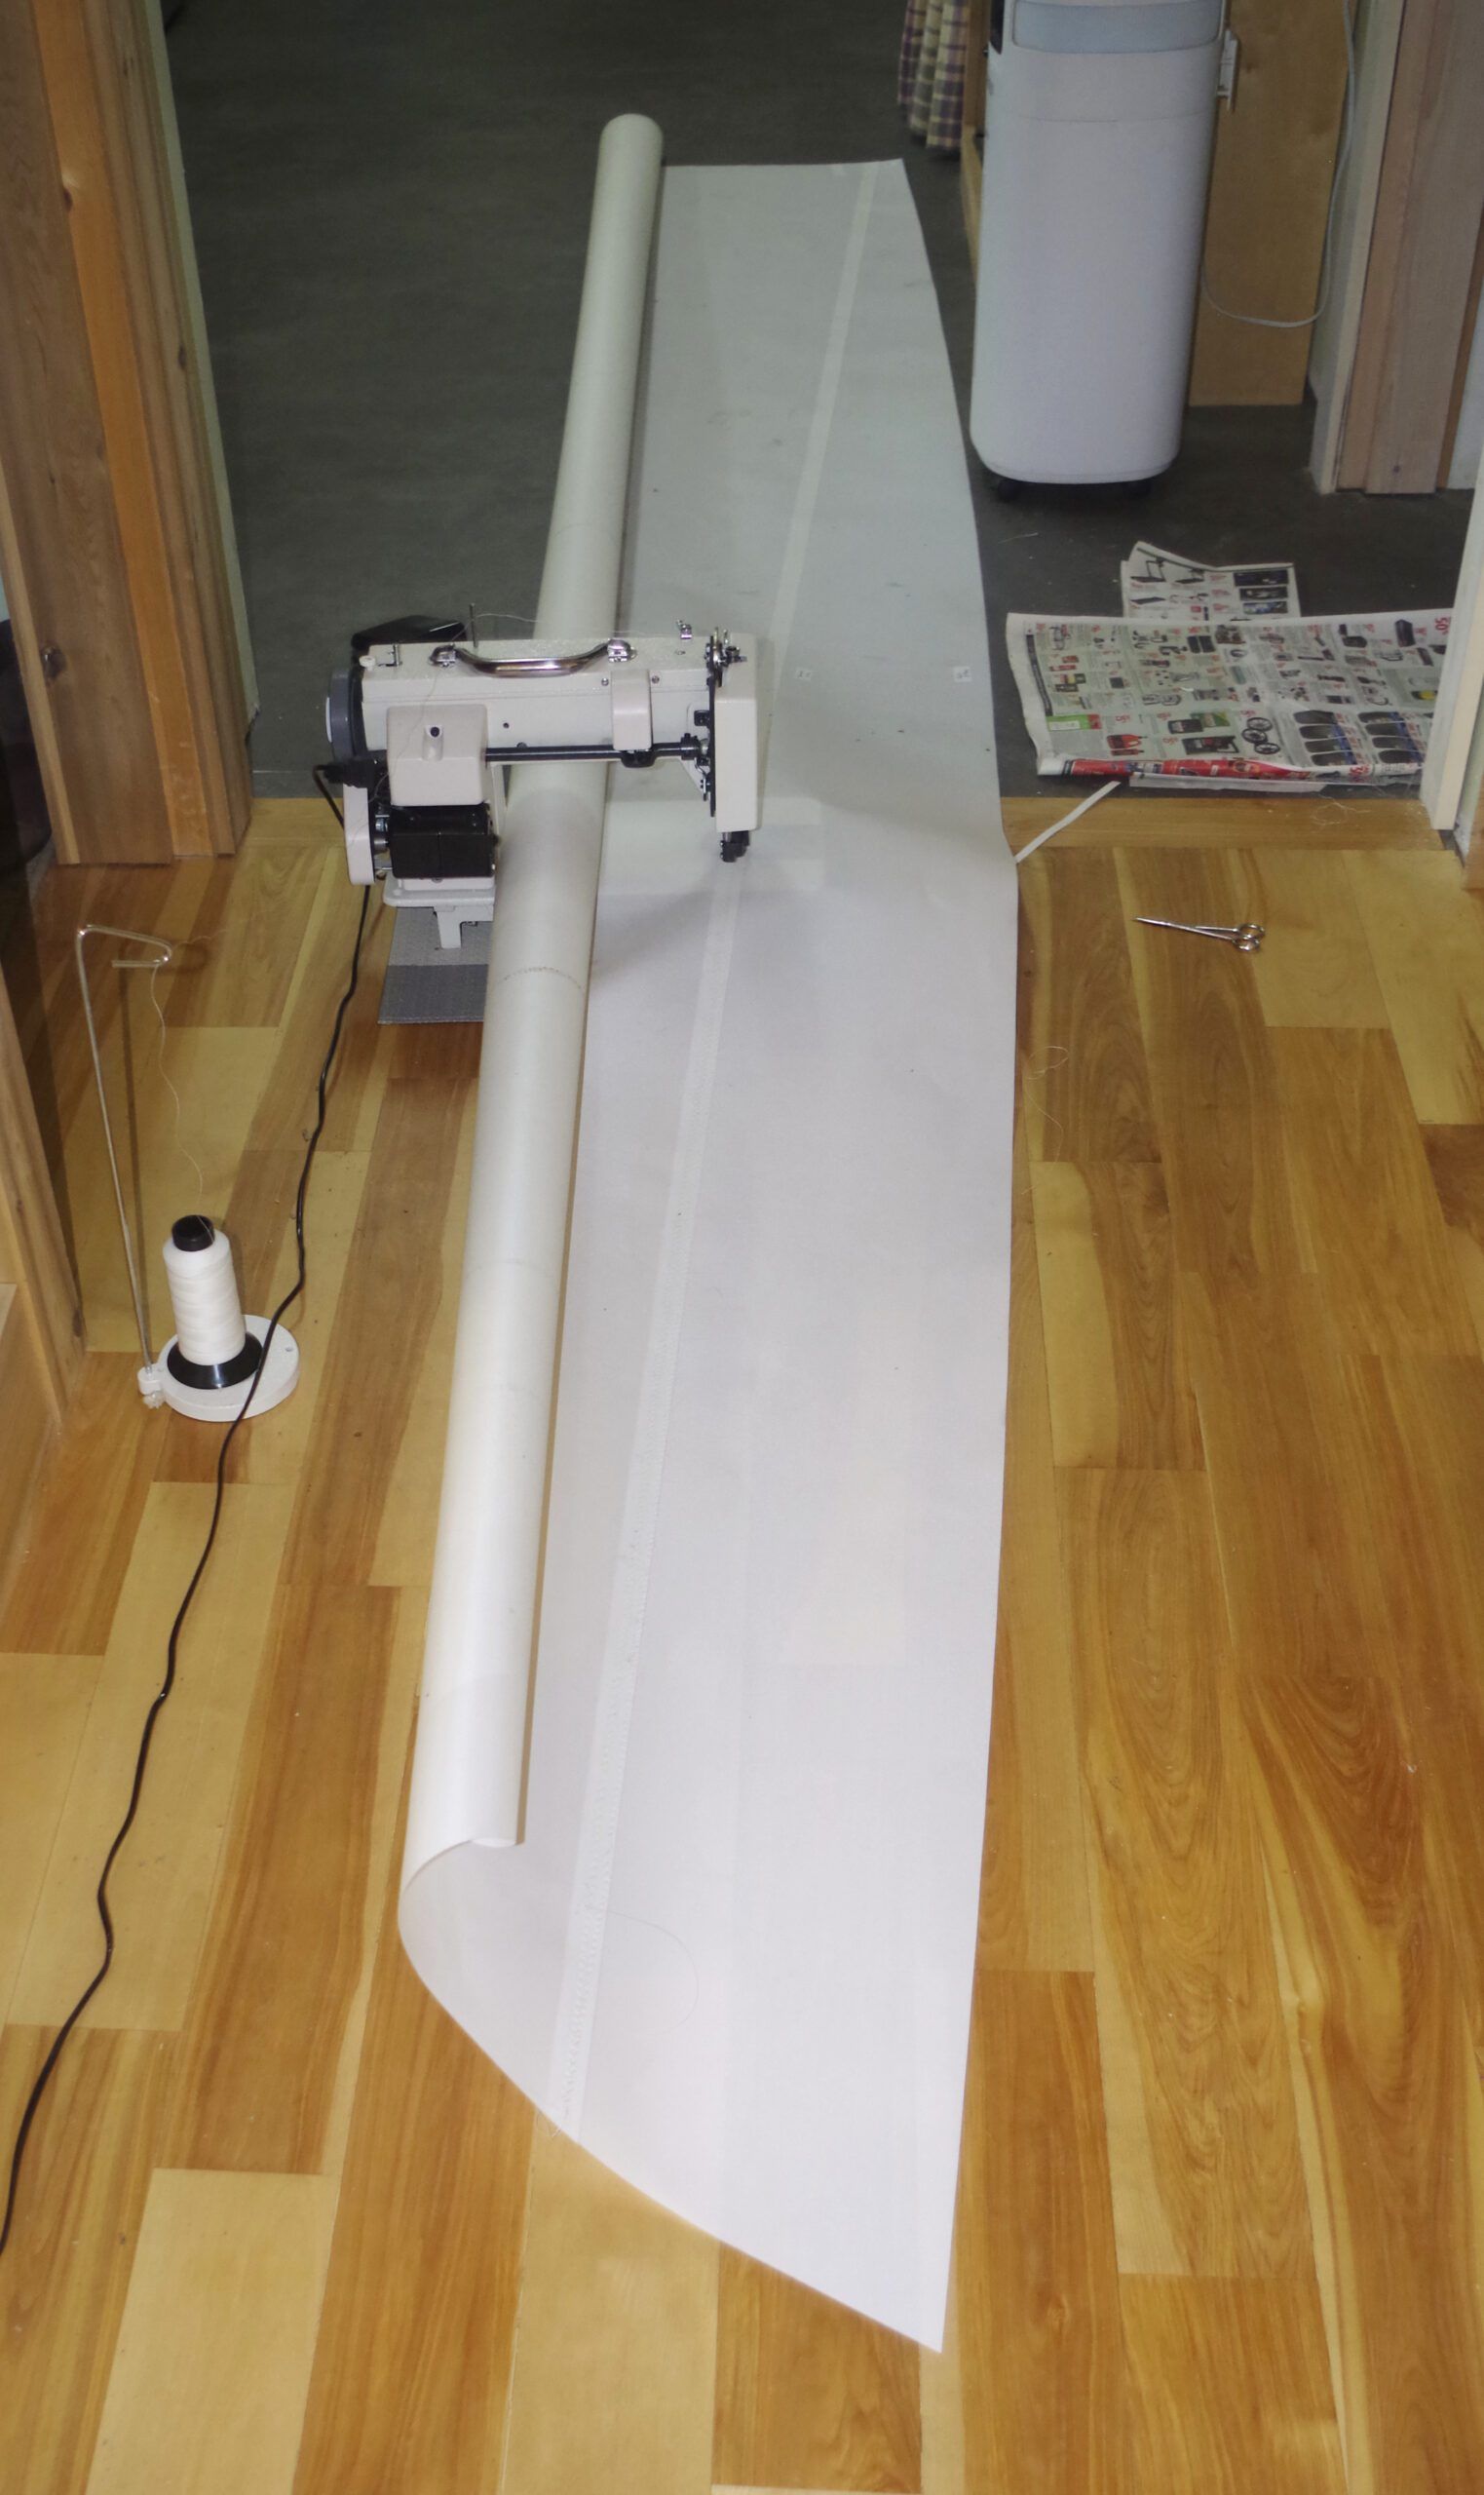
When sewing wider seams you need to work in the floor. A hard floor is ideal as it allows the sail to move easily. On carpet, you will need a steady push as the machine will not be able to pull the cloth through and your stich length will come out too short. Here I am sewing the foot piece which is the longest cross seam. You need a clear space twice the length of the seam.
9. How To Sew Longer Seams
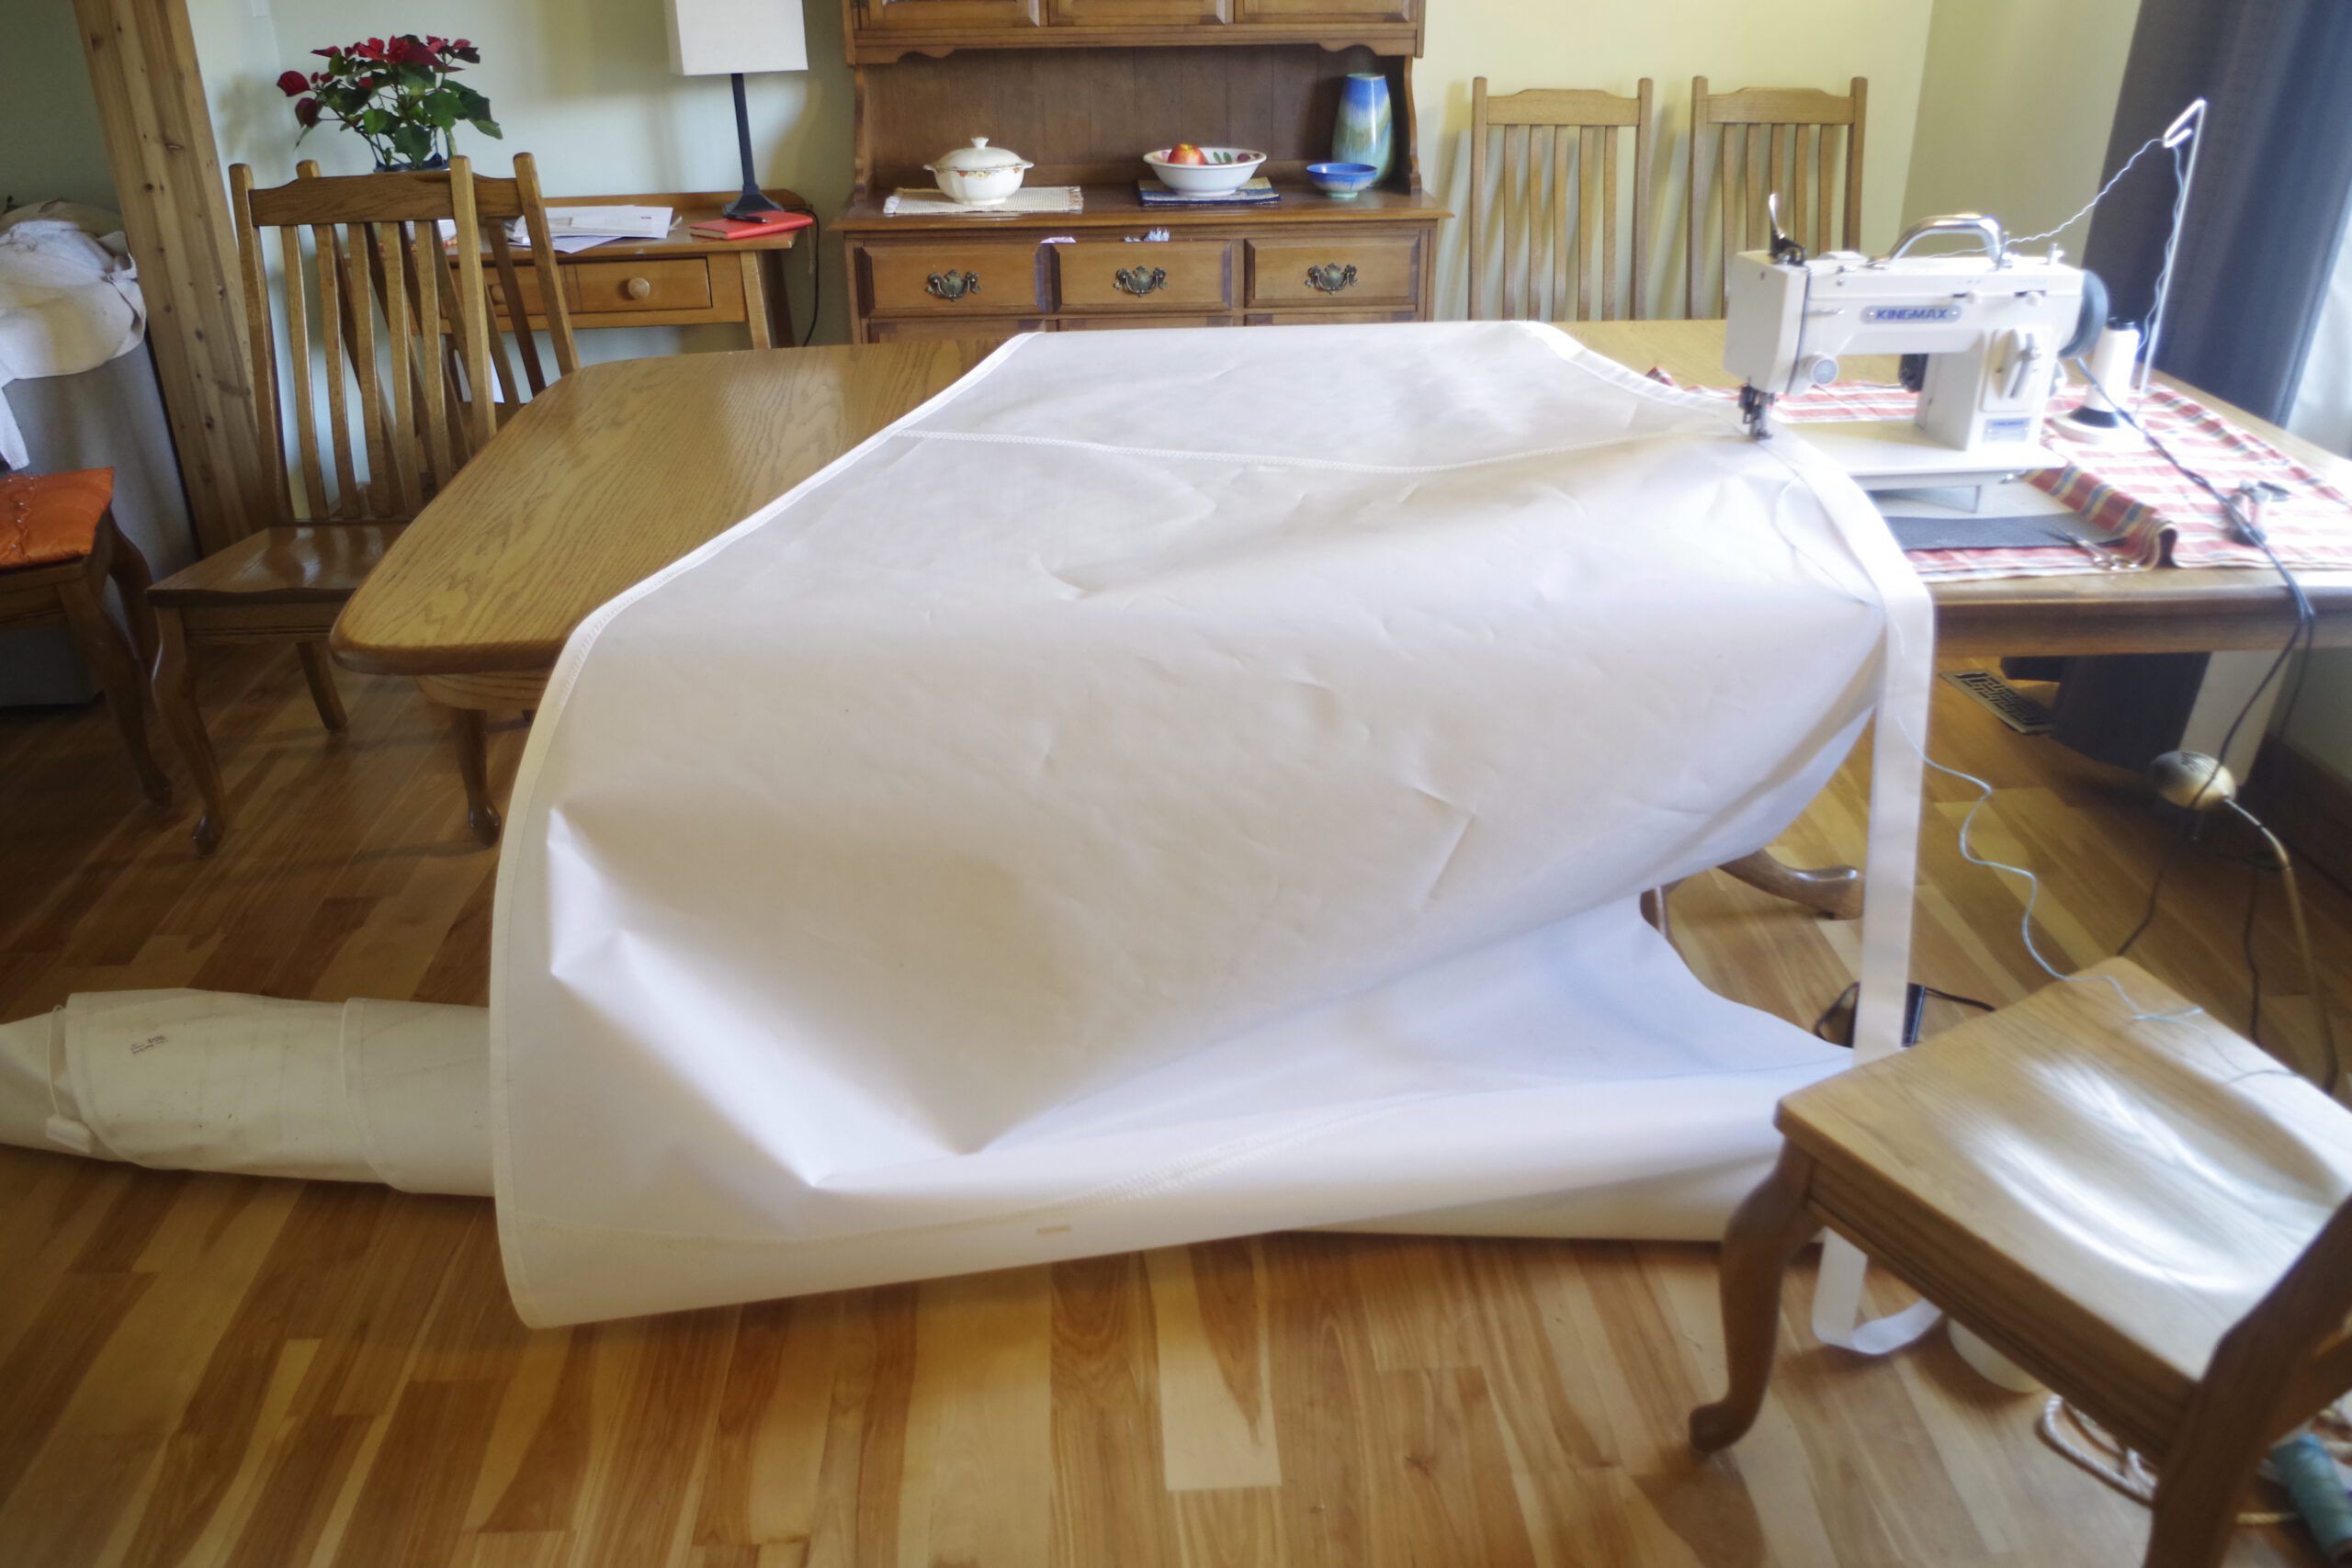
The longest seams are the edges. You can do these by running the sail over the table as you do not need to roll the cloth on the side that is passing through the throat. The sail is rolled crossways so that one side is unrolling, and the opposite side is rolling up. Just make sure the cloth does not snag as it moves across the table. You could do this on the floor as well, but it is much more comfortable to work sitting at a table when you can.
10. Hand Finishing the Head and Tack
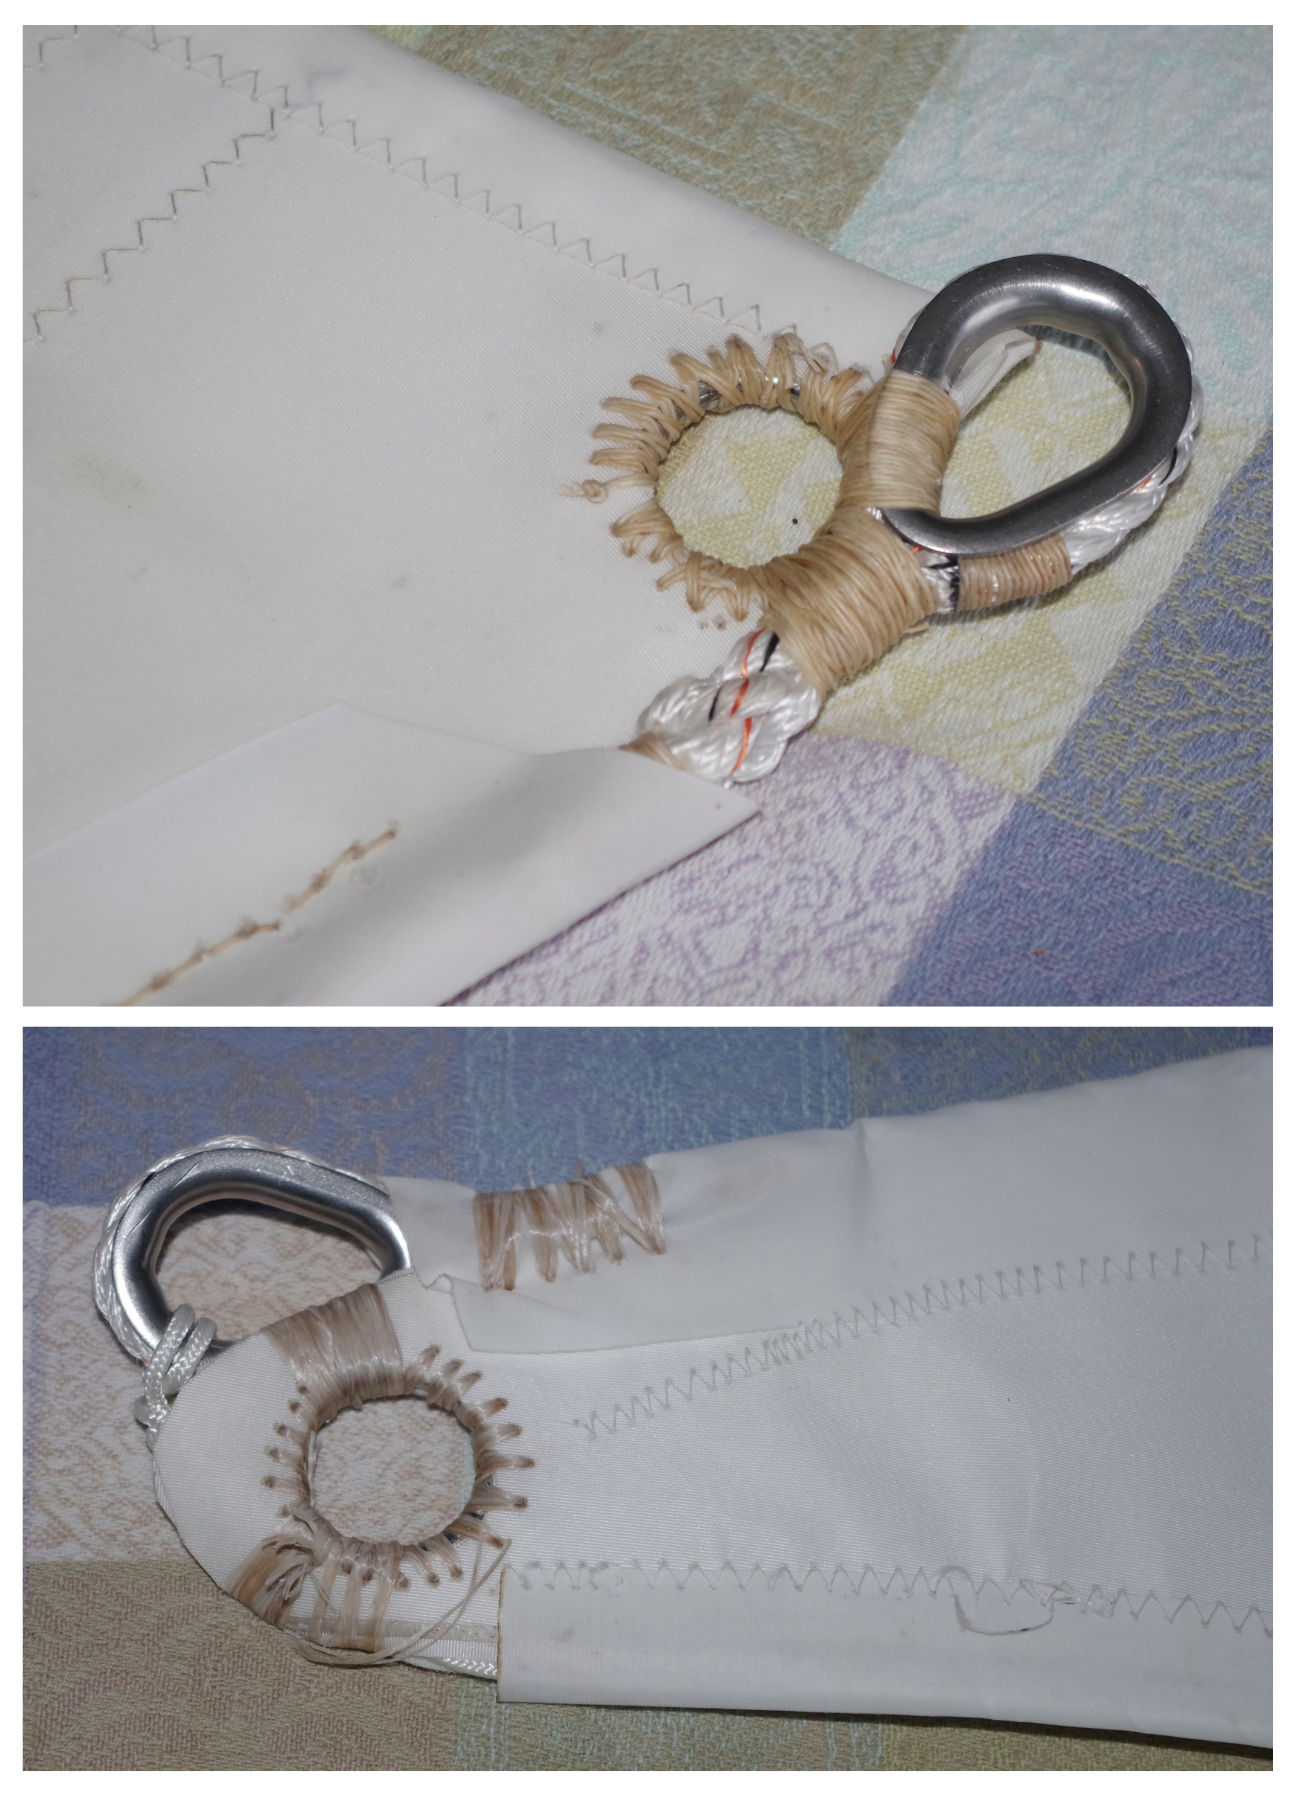
All sails will have a bolt rope at the luff and a leach line. For hanked sails the bolt rope is sized to fit the luff grove. On a hanked sail it can be more substantial.
This is a heavyweight sail for offshore work in winds up to 35 kn, so there are six reinforcing patches plus the sail. The bolt rope is 6 mm and spliced to a solid eye. The ring sewn in as a stainless-steel ring and assists in transferring the load from the halyard into the sail. It also ensures the bolt rope cannot move. This ring may be omitted on a lighter sail.
All of this is hand work done work a strong waxed thread. You need to do at least two rounds of stitches and should need to use pliers to pull the needle through on the last round. If you don’t go round again! Waxed thread should fill the holes in the cloth very tightly to be secure. When stitching rings in you need to pull the stitched very tight to bed everything in. I find the best way to get enough tension is to wind the tread around something three or four times and use it as a handle—I use the handle of the scissors, but a piece of dowel works well.
11. Cover Head and Tack With Leather
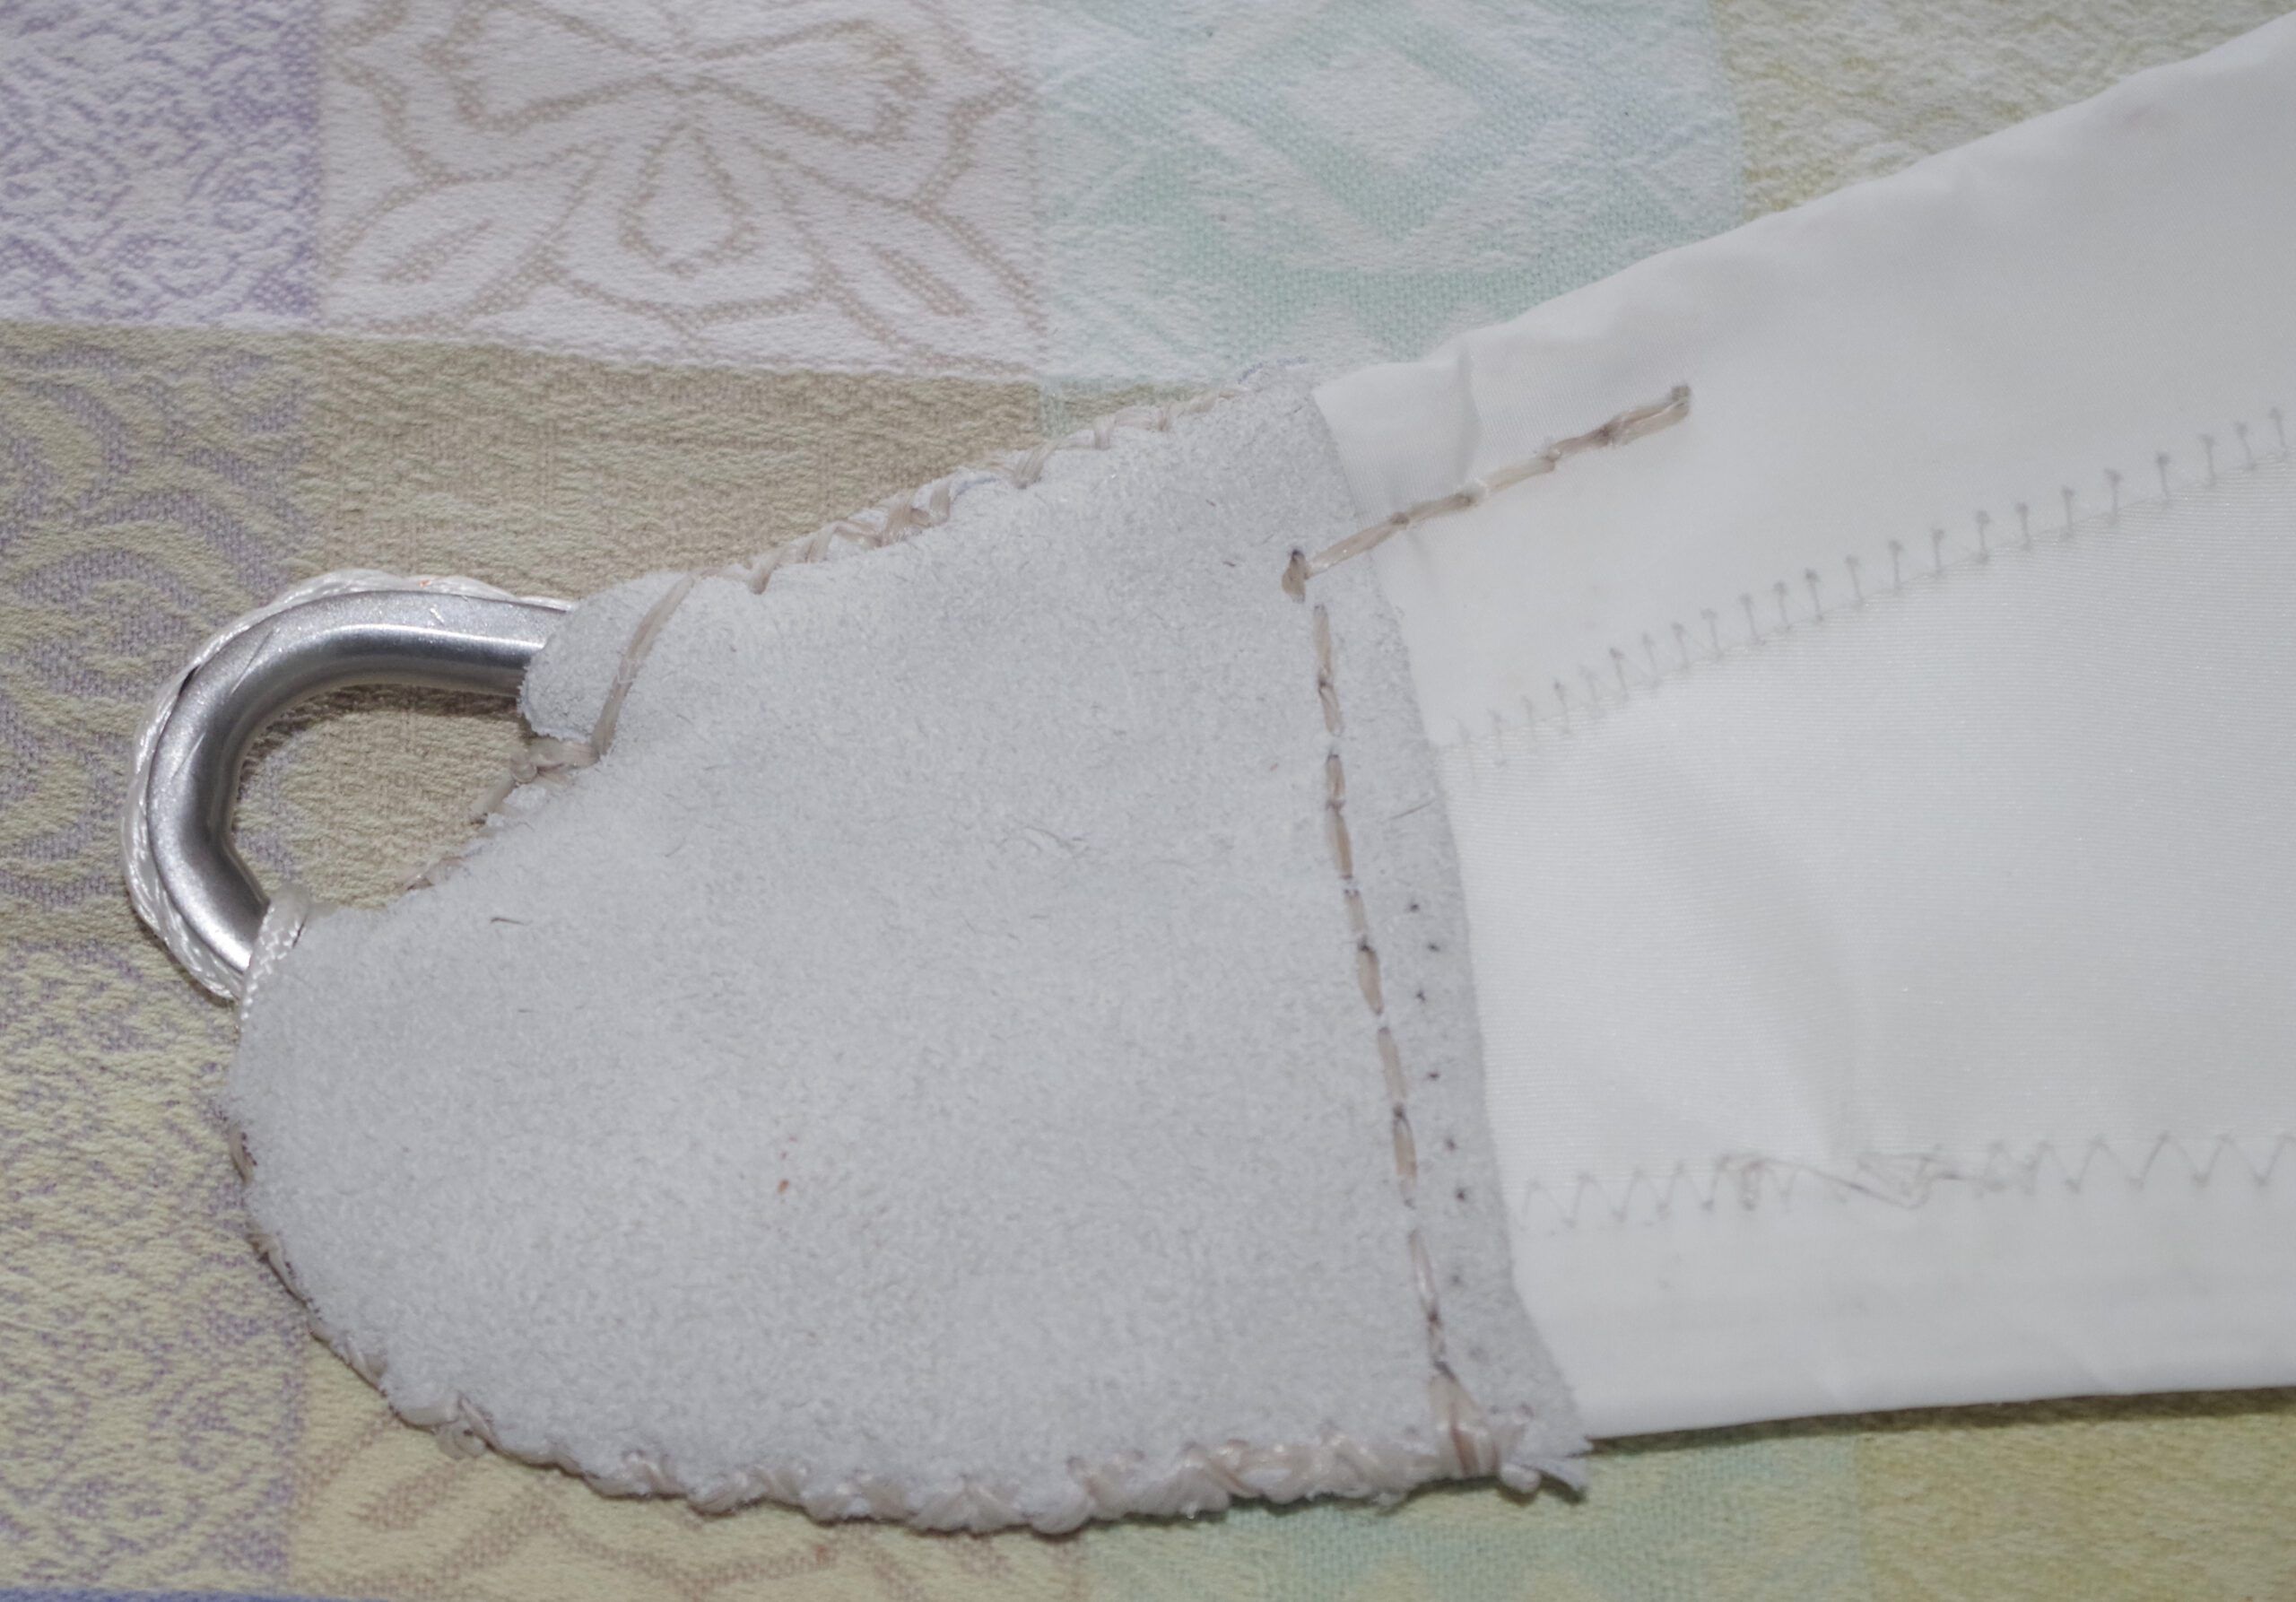
Once you have finished all the stitching the head and tack are covered with soft leather. It looks neat but more importantly protects the stitching underneath. The edges are done with cross stitching. The line across the bottom of the leather is done with a saddle stitch.
12. Pre-Drill Holes
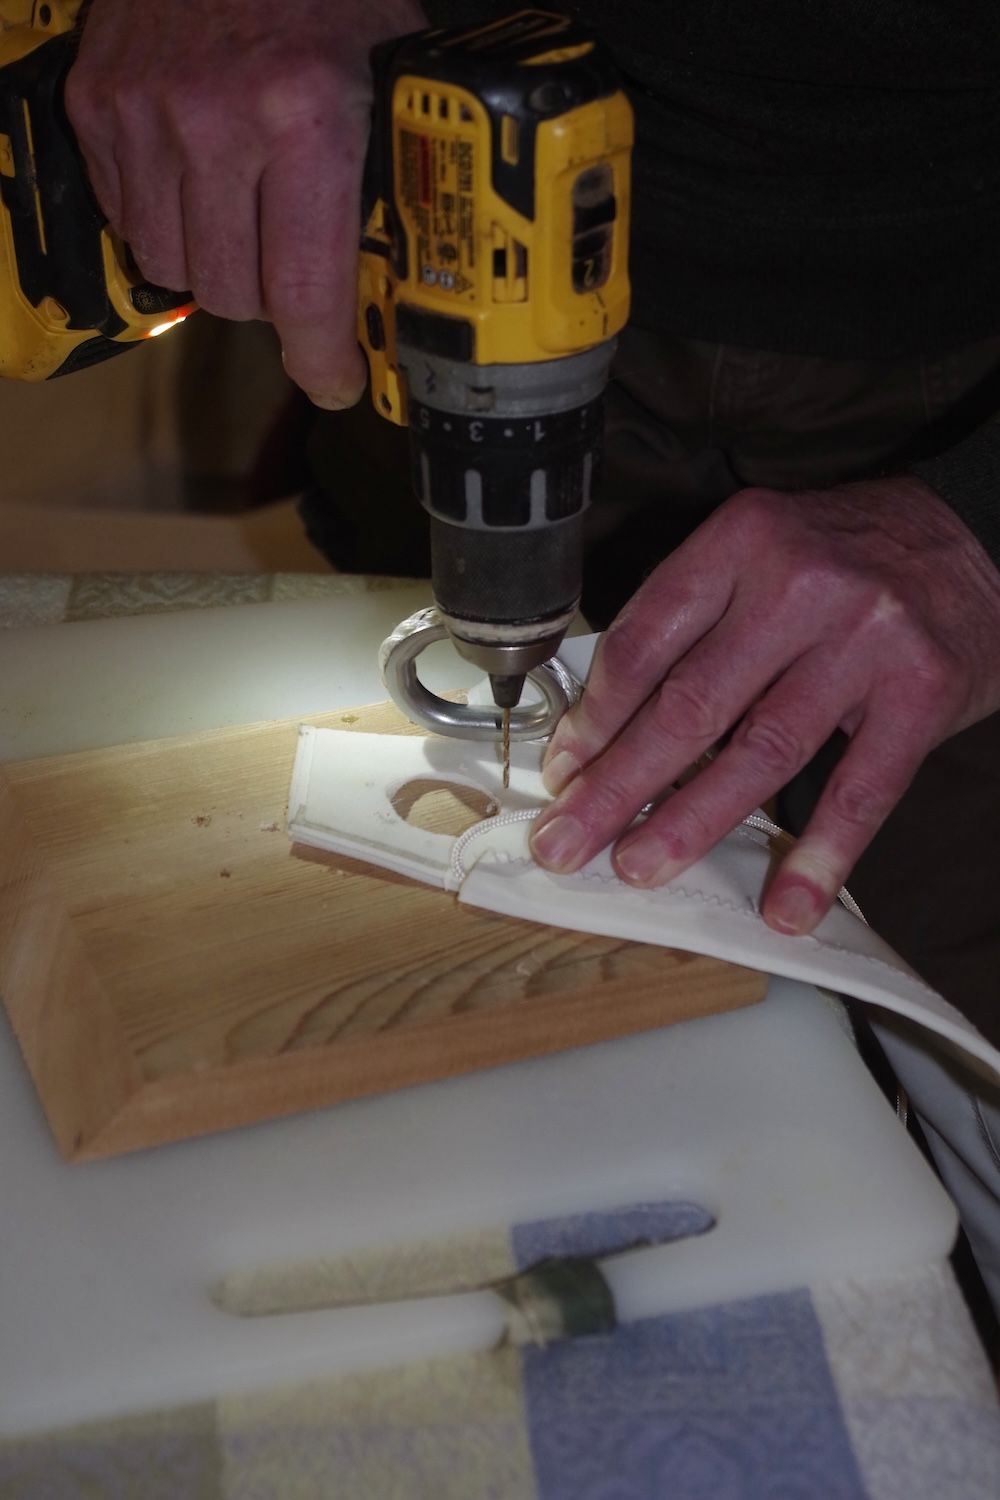
I can push a needle through about three or four layers of 6.4 oz cloth. This sail has seven so no chance, my hands are not strong enough and if they were, I would probably break the needle. The answer is to drill the holes before sewing. Here I am using a 3/16 drill bit which gives a tight grip wen passing two rounds of doubled waxed thread. The instructions say to place the ring on top of the sail and pull it in with the stitches. I prefer to slip the ring in between the layers of reinforcement.
13. Fitting the Hardware
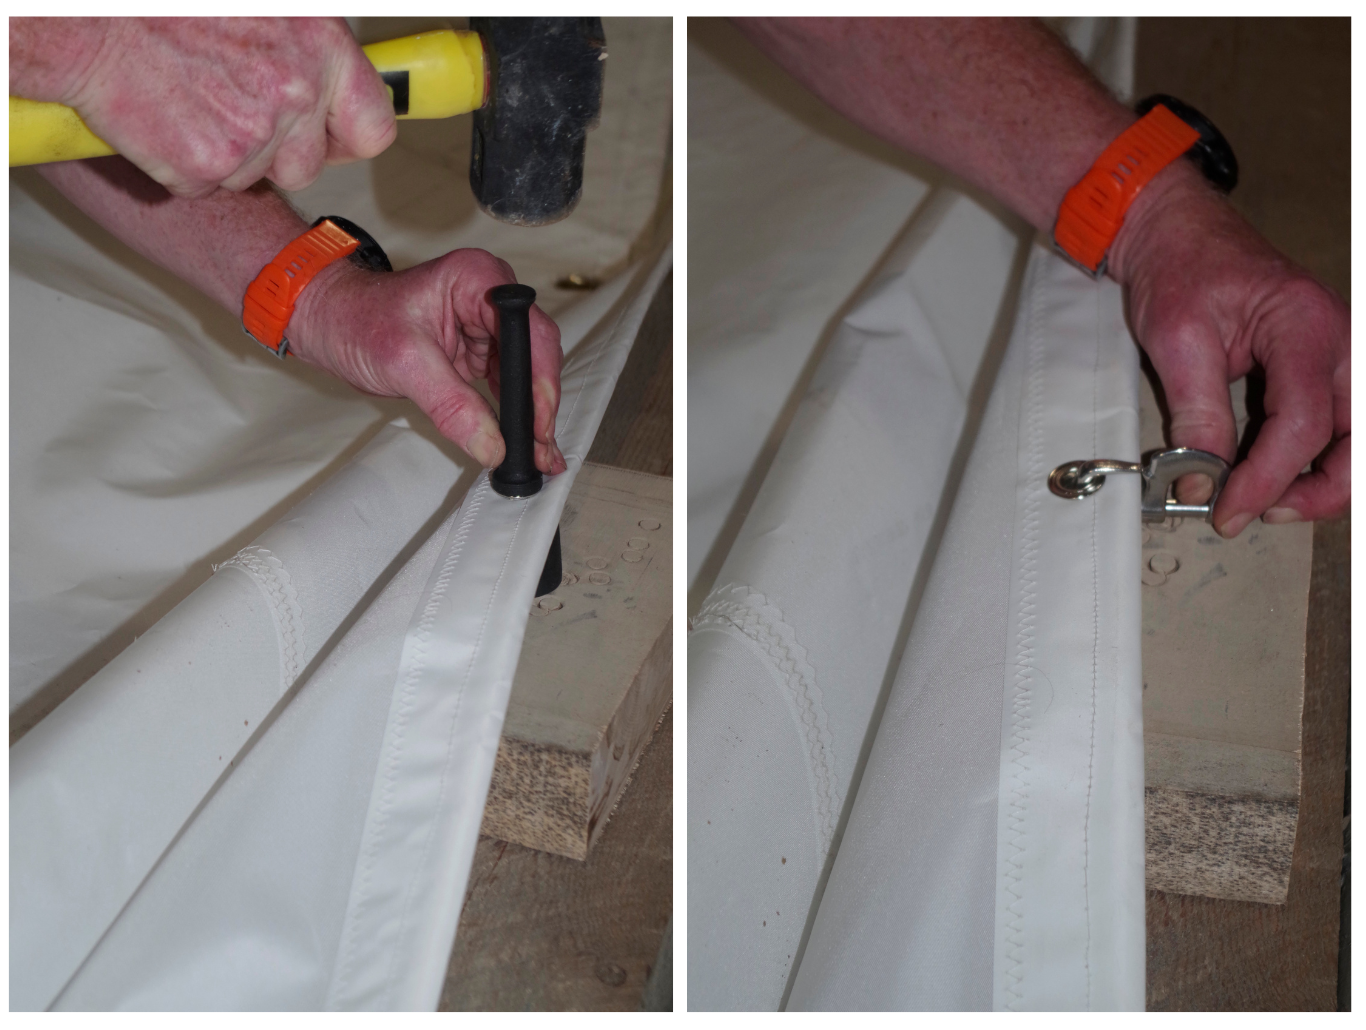
There are two types of grommets to fit. Small ones for reef points and hanks (if fitted) and large ones where the sheets attach at any reef points. The kit comes with the dies for these grommets. The small ones are quite easy to do, simply punch a hole insert the two grommet halves and give it a couple of firm smacks. The large ones are more of a challenge. This is a fairly solid brass fitting that creates a liner to protect the stitching on the ring you previously sowed in. This takes quite a lot of pressure to form. You need to work on a solid floor and it takes repeated blows with a heavy hammer. I found a 3 lb. lump hammer works well.












Which model Kingmax machine do you show in the article?
Thanks for asking, I should have included it. The Kingmax is a GA106-22Z