

Many of the fiberglass sailboats constructed during the 1970s and 1980s are still in existence, though often in varying states of disrepair. These vessels can be acquired inexpensively and restored with minimal cost but significant effort. I am nearing completion of an extensive restoration of a 1978 O’Day 23. If you’re considering restoring an older boat, you may likely discover weaknesses in the bulkheads. Chainplates often leak, and when anchored to a wooden bulkhead, rot, mold and mildew are common. Since bulkheads are crucial for providing structural integrity and support to the hull and deck of a boat, repairing or replacing them is essential.
Signs of Bulkhead Damage
- Visible Cracks and Splits: These indicate structural stress and require immediate attention.
- Discoloration and Soft Spots: Indicate water damage, often with a musty smell.
- Loose or Corroded Fasteners: Suggest compromised structural integrity.
- Mold and Mildew: Result from prolonged moisture exposure.
Tools and Materials Needed
The tent and workbench cost about $250.
Tools
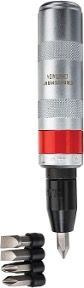
I worked with inexpensive basic tools. You probably have some already, but a full set can be purchased from Amazon or Harbor Freight for roughly $300.
- Electric jigsaw
- Cordless drill and bits
- Rotary tool and bits
- Orbital sander and sandpaper
- Microfiber cloths
- Various pliers and wrenches
- Screwdrivers (manual and cordless)
- Measuring tape and square
- Drill alignment guide
- Contour tool
- Safety Note: Wear gloves, a respirator, and goggles for protection from dust and debris.
Materials
Total cost was approximately $400.
- Marine-grade plywood
- Nylon block
- Stainless steel screws
- Marine varnish or paint
- Wood filler and sealant
- Solvent for cleanup
How to Replace a Rotted Bulkhead
1. Assessment and Preparation

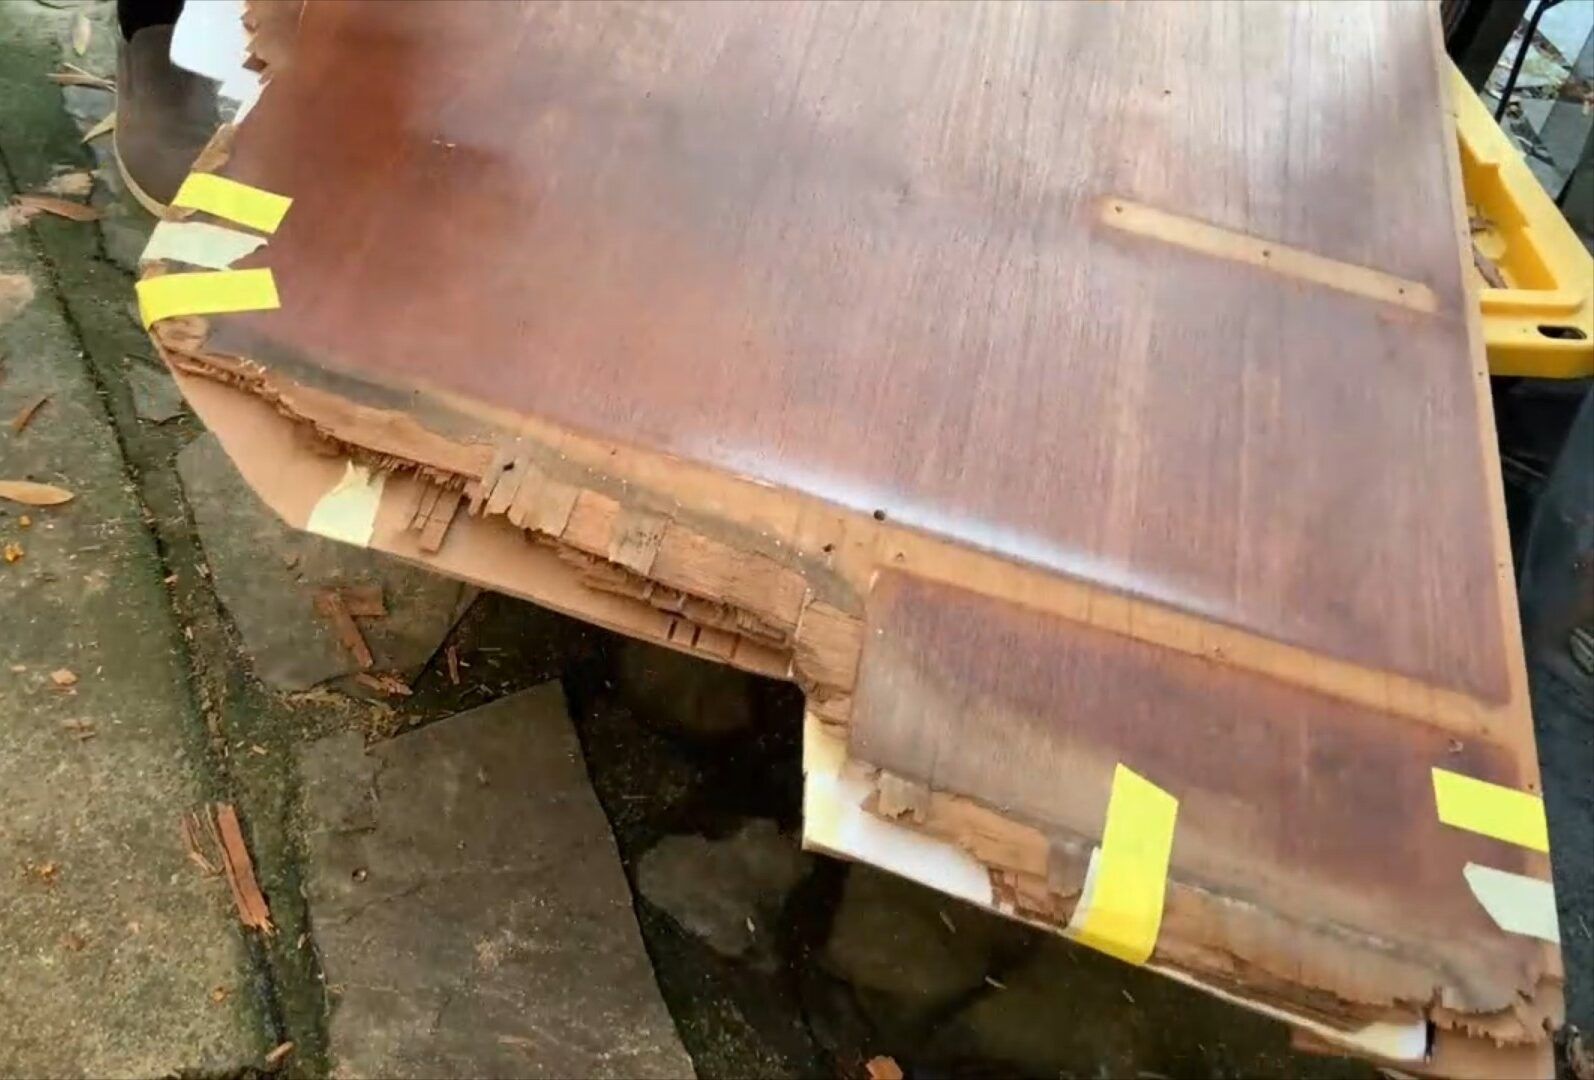
I began with a thorough inspection of the bulkheads. There was extensive rot and mildew, evidently from leaking chainplates. Tip: I took many reference photos of the damaged areas during and after the repair.
2. Removing the Damaged Bulkhead
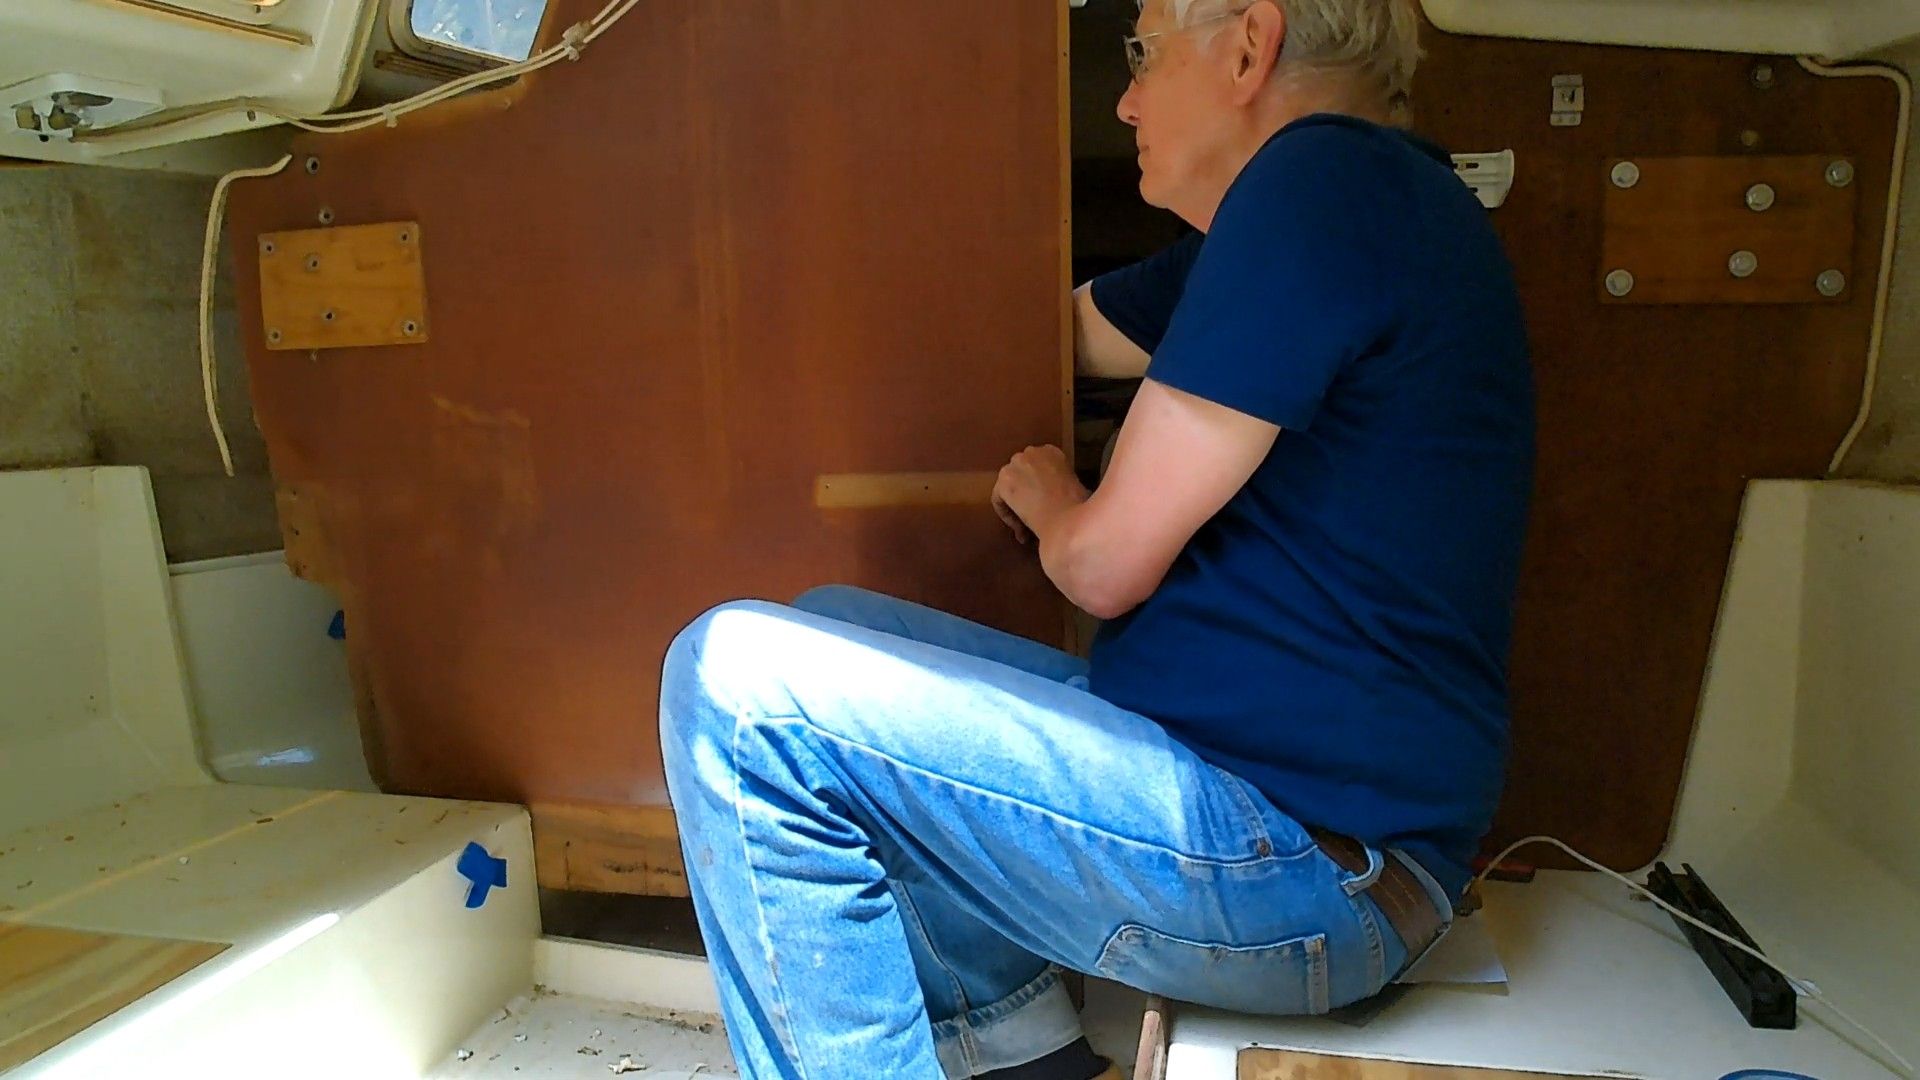
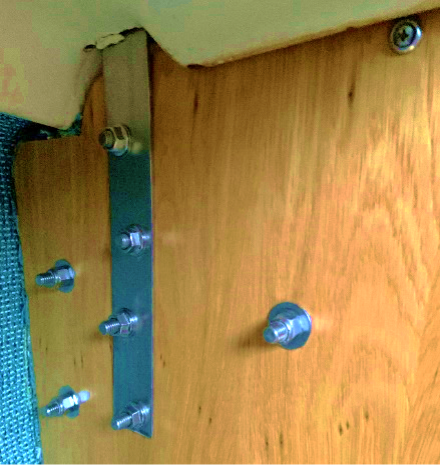
Repairs are easier if you can remove the bulkheads from the boat. On my O’Day 23, the bulkheads are attached to a plastic hull liner with stainless screws—around fifty #8 and #10 oval head wood screws. The inboard edge of the port bulkhead is screwed to a wooden compression post. I removed the screws and used a rubber mallet to detach the compression post.
As expected with old parts, some screws were easy to remove with an electric driver, while others were difficult—some required quite a bit of cursing. A tool that helped greatly was a hand impact driver. Set the bit securely in the screw slot and strike the end of the driver with a hammer. Each blow turns the screw 1/8 of a turn. Once the screw is loosened, use a screwdriver to finish the job.

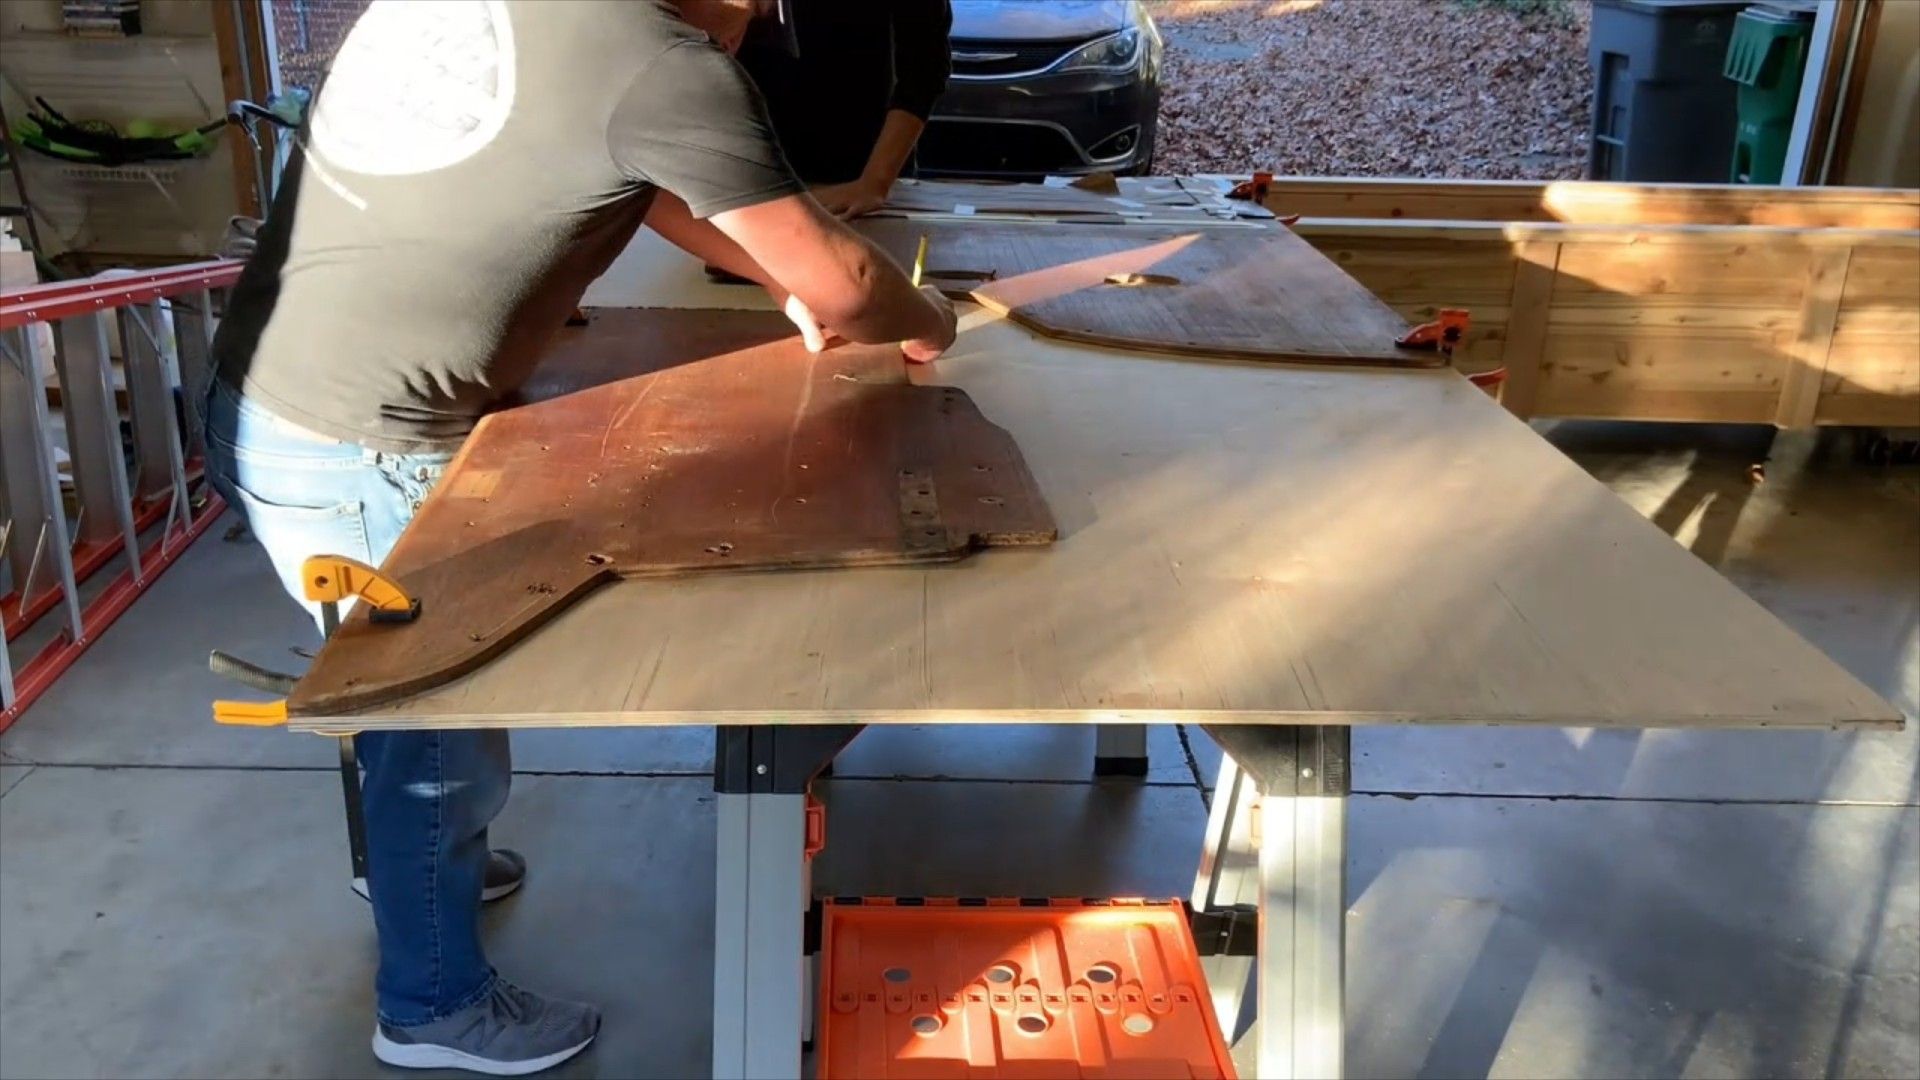
Fortunately, no adhesive was used to secure the bulkhead to the liner, so once all the screws were removed, I could slide the bulkhead out and take it to a workbench. Without a garage or special tools, I managed with just hand tools. I purchased an inexpensive tent and made a workbench using sawhorses and 5/8-in. plywood, supported by 2 x 4s.
3. Creating a Template
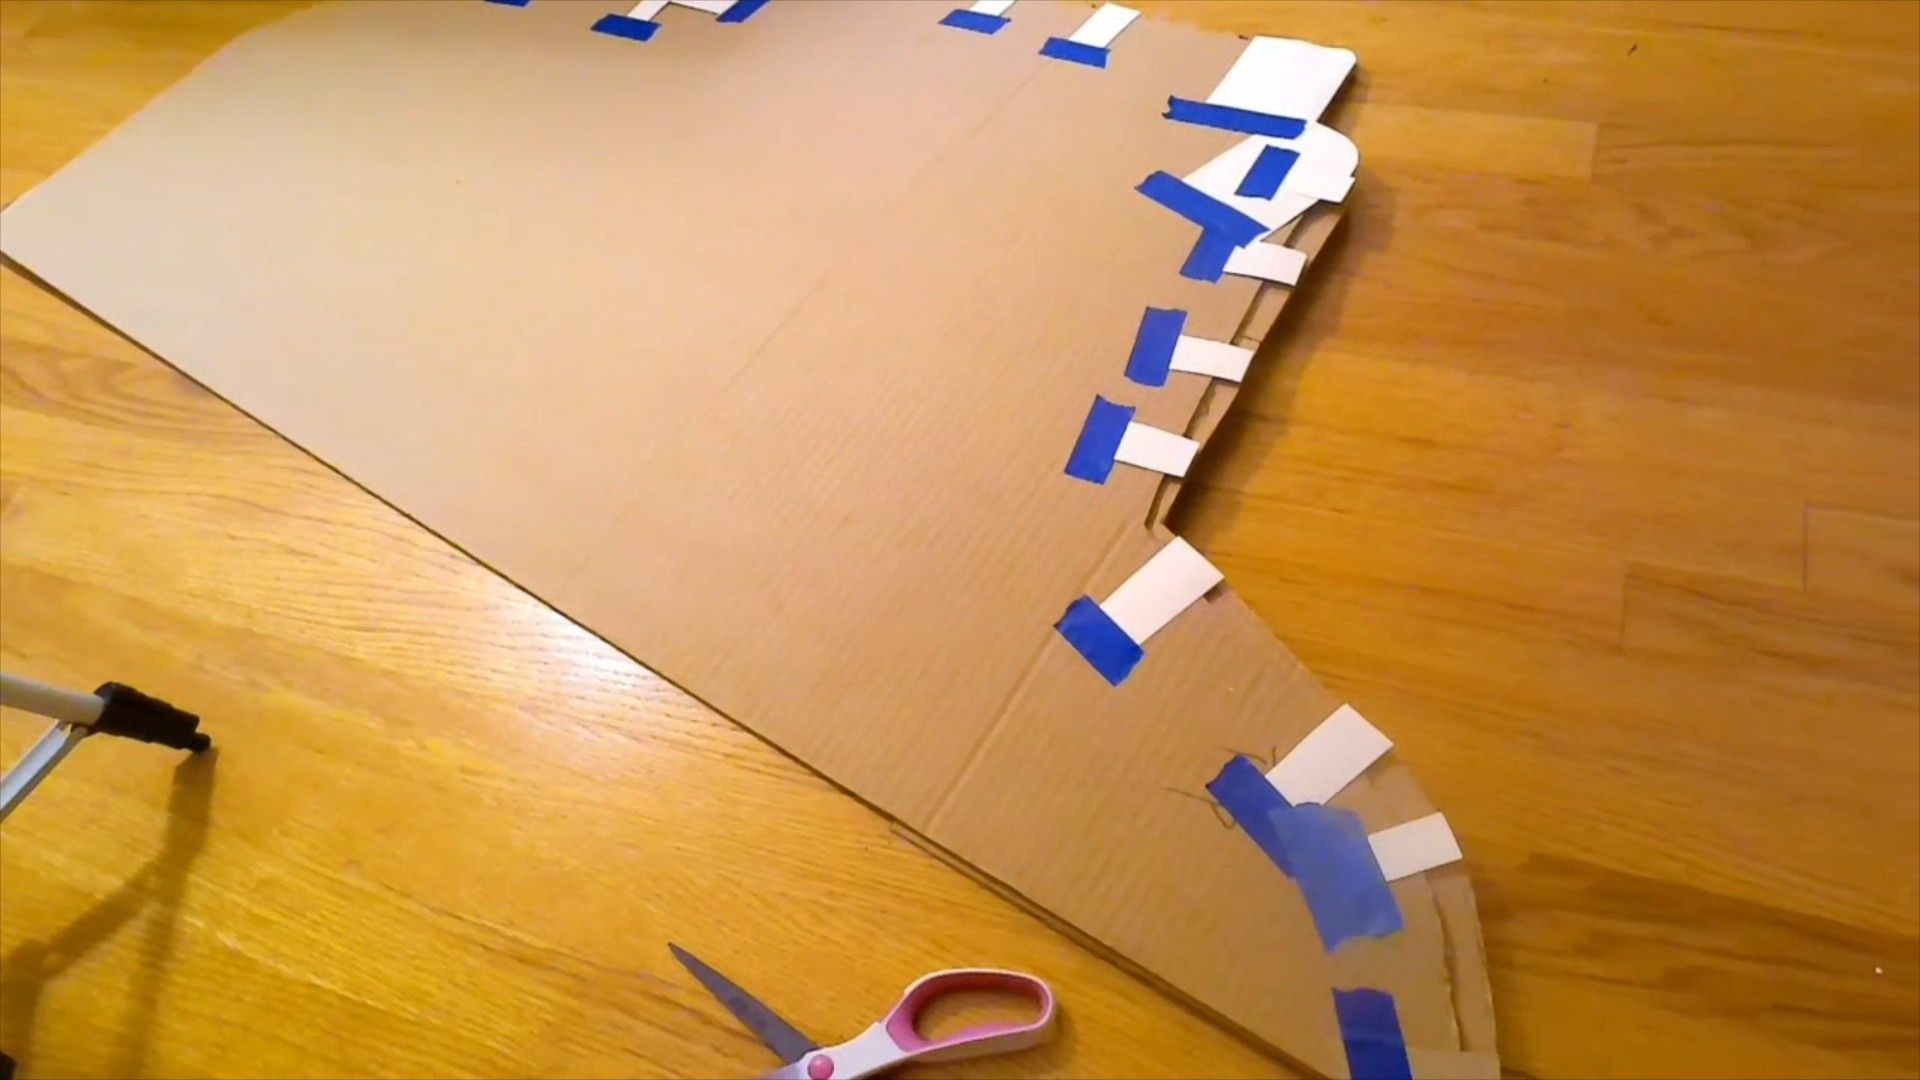
I used the original bulkhead as a template for the new one. In some areas, it was entirely rotted away, so before transferring the shape to plywood, I extended the template to fill in the missing sections. Using trial and error, I cut and fitted cardboard pieces. A contour gauge would have made this task easier.

Lay the damaged piece on a sheet of marine-grade plywood and trace its outline, ensuring you account for any curves or angles specific to your sailboat’s design.
4. Cutting the New Bulkhead
The original bulkheads were made from 1/2-in. plywood with a dark stain. I wanted something stronger and brighter, so I bought two 4-ft. x 8-ft. pieces of 5/8-in. marine plywood with a white oak surface.
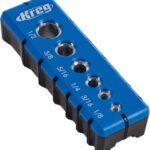
I used a jigsaw to cut the outline, leaving some excess in the rotted areas. Sand the edges smooth, and test-fit to ensure a snug fit within the hull. Make necessary adjustments for a perfect fit. I used the old bulkhead as a pattern for the chainplate bolts’ location. A drill guide was essential to keep the holes straight.
For final fit-up, I reinstalled the bulkheads and trimmed excess material until the gap was within 1/8-in. I didn’t copy the old screw holes since they would not align perfectly.

I reused the original compression post but had to repair a rotted section on the bottom, which had been exposed to standing moisture for years. I cut away 1-in. and replaced it with a nylon piece, which I epoxied and screwed into place. Finally, I sanded the nylon outline to match the compression post profile.
5. Sealing and Finishing the New Bulkhead
To finish the bulkheads, I applied eight coats of Minwax Fast-Drying Polyurethane in Warm Gloss. I thinned the initial coat 50 percent with mineral spirits and applied it with a soft cloth. It dried quickly in the summer heat, allowing two coats per day. Successive coats were thinned less until the final coat was full-strength.

Working in a tent, I fought bugs, dust, and pollen, so I sanded between coats, starting with 320 grit and ending with 1200 grit.
To protect against future moisture damage, I sealed all cut edges with full-strength polyurethane.
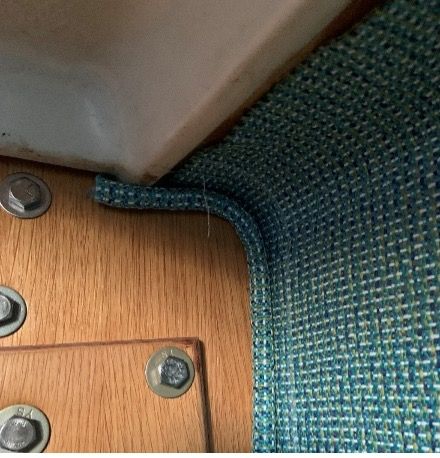
The original fit-up used plastic extrusions as gap fillers against the hull liner, but they were in poor condition. I discarded them and made replacements using fabric (leftover from refinishing the hull liner) wrapped around 3/8-in. cordage. I glued and stapled this to the edge of the new bulkhead.
6. Installing the New Bulkhead
I began installation using a few #10 self-tapping screws to temporarily hold the bulkheads in place, checking the fit with the liner. I tapped the compression post into place, put in a couple of screws, and ensured the opening between the bulkheads was parallel and correctly spaced. I checked the chainplates’ alignment through the deck and installed a couple of bolts to maintain position.
Next came the tedious process of drilling and installing new screws. An electric screwdriver was invaluable.
With the bulkheads in place, I finalized the chainplate installation using the original bolts and backing plates.
Lastly, I devised a (hopefully) ingenious chainplate seal by gluing a rubber grommet to the deck around the chainplate and filled it with non-hardening roofing adhesive, providing a flexible, large sealing area. It survived summer heat and fall rains with the boat on the hard.
7. Finishing Touches
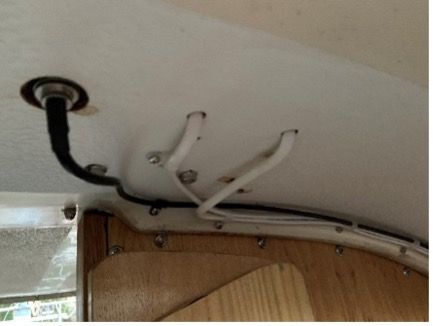
The original mast wiring was visible in the main cabin, which was unsightly, so I rerouted it to the head area.
The original medicine cabinet remained in good condition, so I reinstalled it.
Finally, I thoroughly inspected the repaired bulkhead to ensure it was securely fastened and defect-free.


I have never heard of a bulkhead attacked only with screws.
Good point nfgjr1. Not ideal, undoubtedly cost-driven, but it worked for many years. Many small boats of this era have only a partial bulkhead. It’s a small boat, and I think they were counting on the heavy hull liner for rigidity. The compression post carries the mast loading. The bulkhead does carry the chainplate loading – it seems plenty strong, and would probably have been OK except for the poor chainplate seal causing leaks and rot.
A missed opportunity to upgrade the bulkhead. But I suspect the rest of the boat is of modest quality as well.
I would not consider this boat to be a safe vessel for where I sail in summer, Flathead Lake, Montana. I have upgraded my Cape Dory Typhoon for the lake.
In winter I have an old Baba 40 and I try to be in the Bahamas. It’s pretty bullet proof.
Casey, thanks for your opinions on sailboat design. All of the boats I owned had pros and cons. The O’Day is an affordable trailer sailor that sleeps 4, with a full galley and head.
When I started this project, i set out to restore everything to original condition. As the project progressed, i began upgrading to modern components and systems.
Just curious – how would you have changed the bulkhead design?