

Many coastal cruising production sailboats designed during the heyday of the 70s and 80s emerged from the factory with plexiglass cabin windows. These larger-than-standard portlights allowed copious amounts of light into the cabin. Plexiglass windows were inexpensive, easy to install, and safe for boats not constructed for the rigors of ocean sailing. Different manufacturers mounted these windows in a variety of ways. Molded plastic frames as a one-piece unit or assembled aluminum frames were a favorite, or they were simply set into a shallow recess in the cabin trunk with an adhesive/sealant.
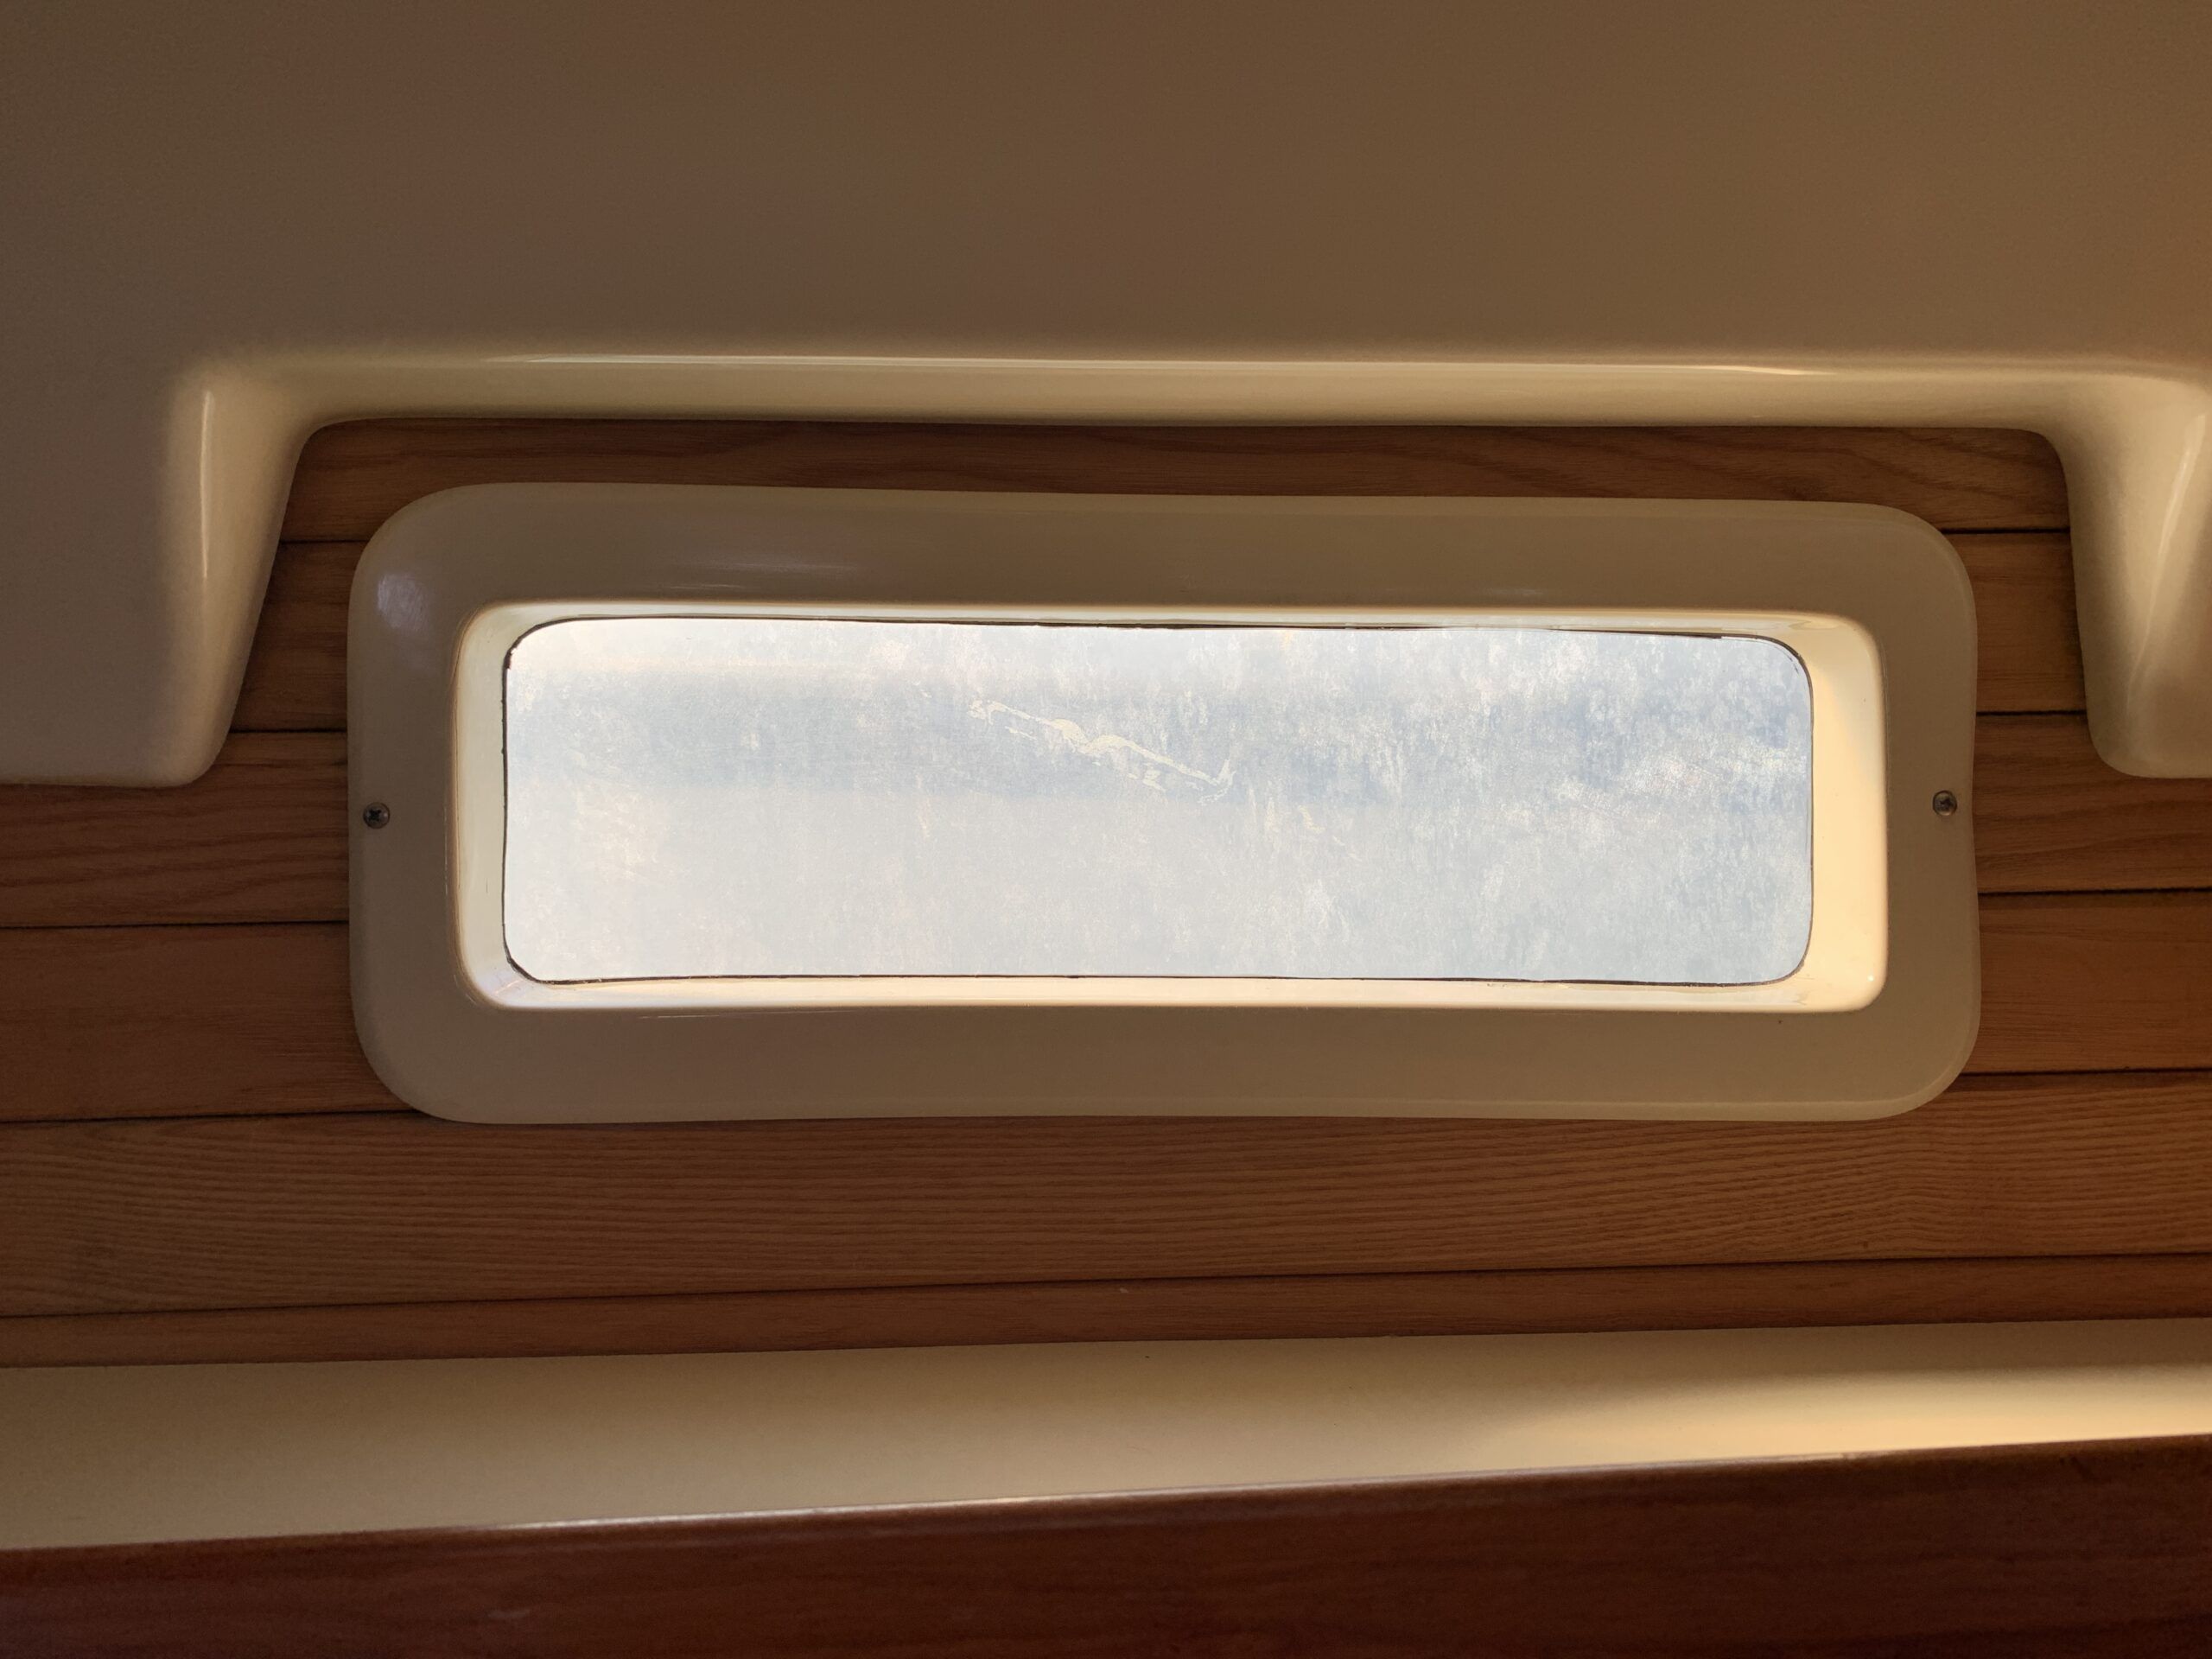
As boats age, the plexiglass suffers internal crazing from sun damage and the usual wear and tear of sailing. On our boat, a nearly opaque window was difficult to see out of and blocked a surprising amount of light coming into what was usually a dark teak cabin. Although cost effective, the standard plexiglass material did not last forever.
Plexiglass vs. Lexan
Note: Plexiglass is an acrylic plastic, not to be confused with the polycarbonate commonly known as Lexan. Plexiglass, although not as strong as polycarbonate, has better optical clarity, is easier to work with and a bit more resistant to surface scratching. Since it is less expensive than Lexan, plexiglass was another choice made to keep production costs down. For the purposes of this article, I will refer to an adhesive/sealant as simply a sealant.
Safety Glass
A few boats were constructed with safety glass set in either a plastic or metal frame, or simply set onto the gelcoat. This could only work if the mounting surface was flat. Any curvature in the cabin trunk would eliminate that option unless specialized, molded glass was incorporated. This glass was not adversely affected by the sun and, unless damaged by sailing activities, would probably never have to be replaced.
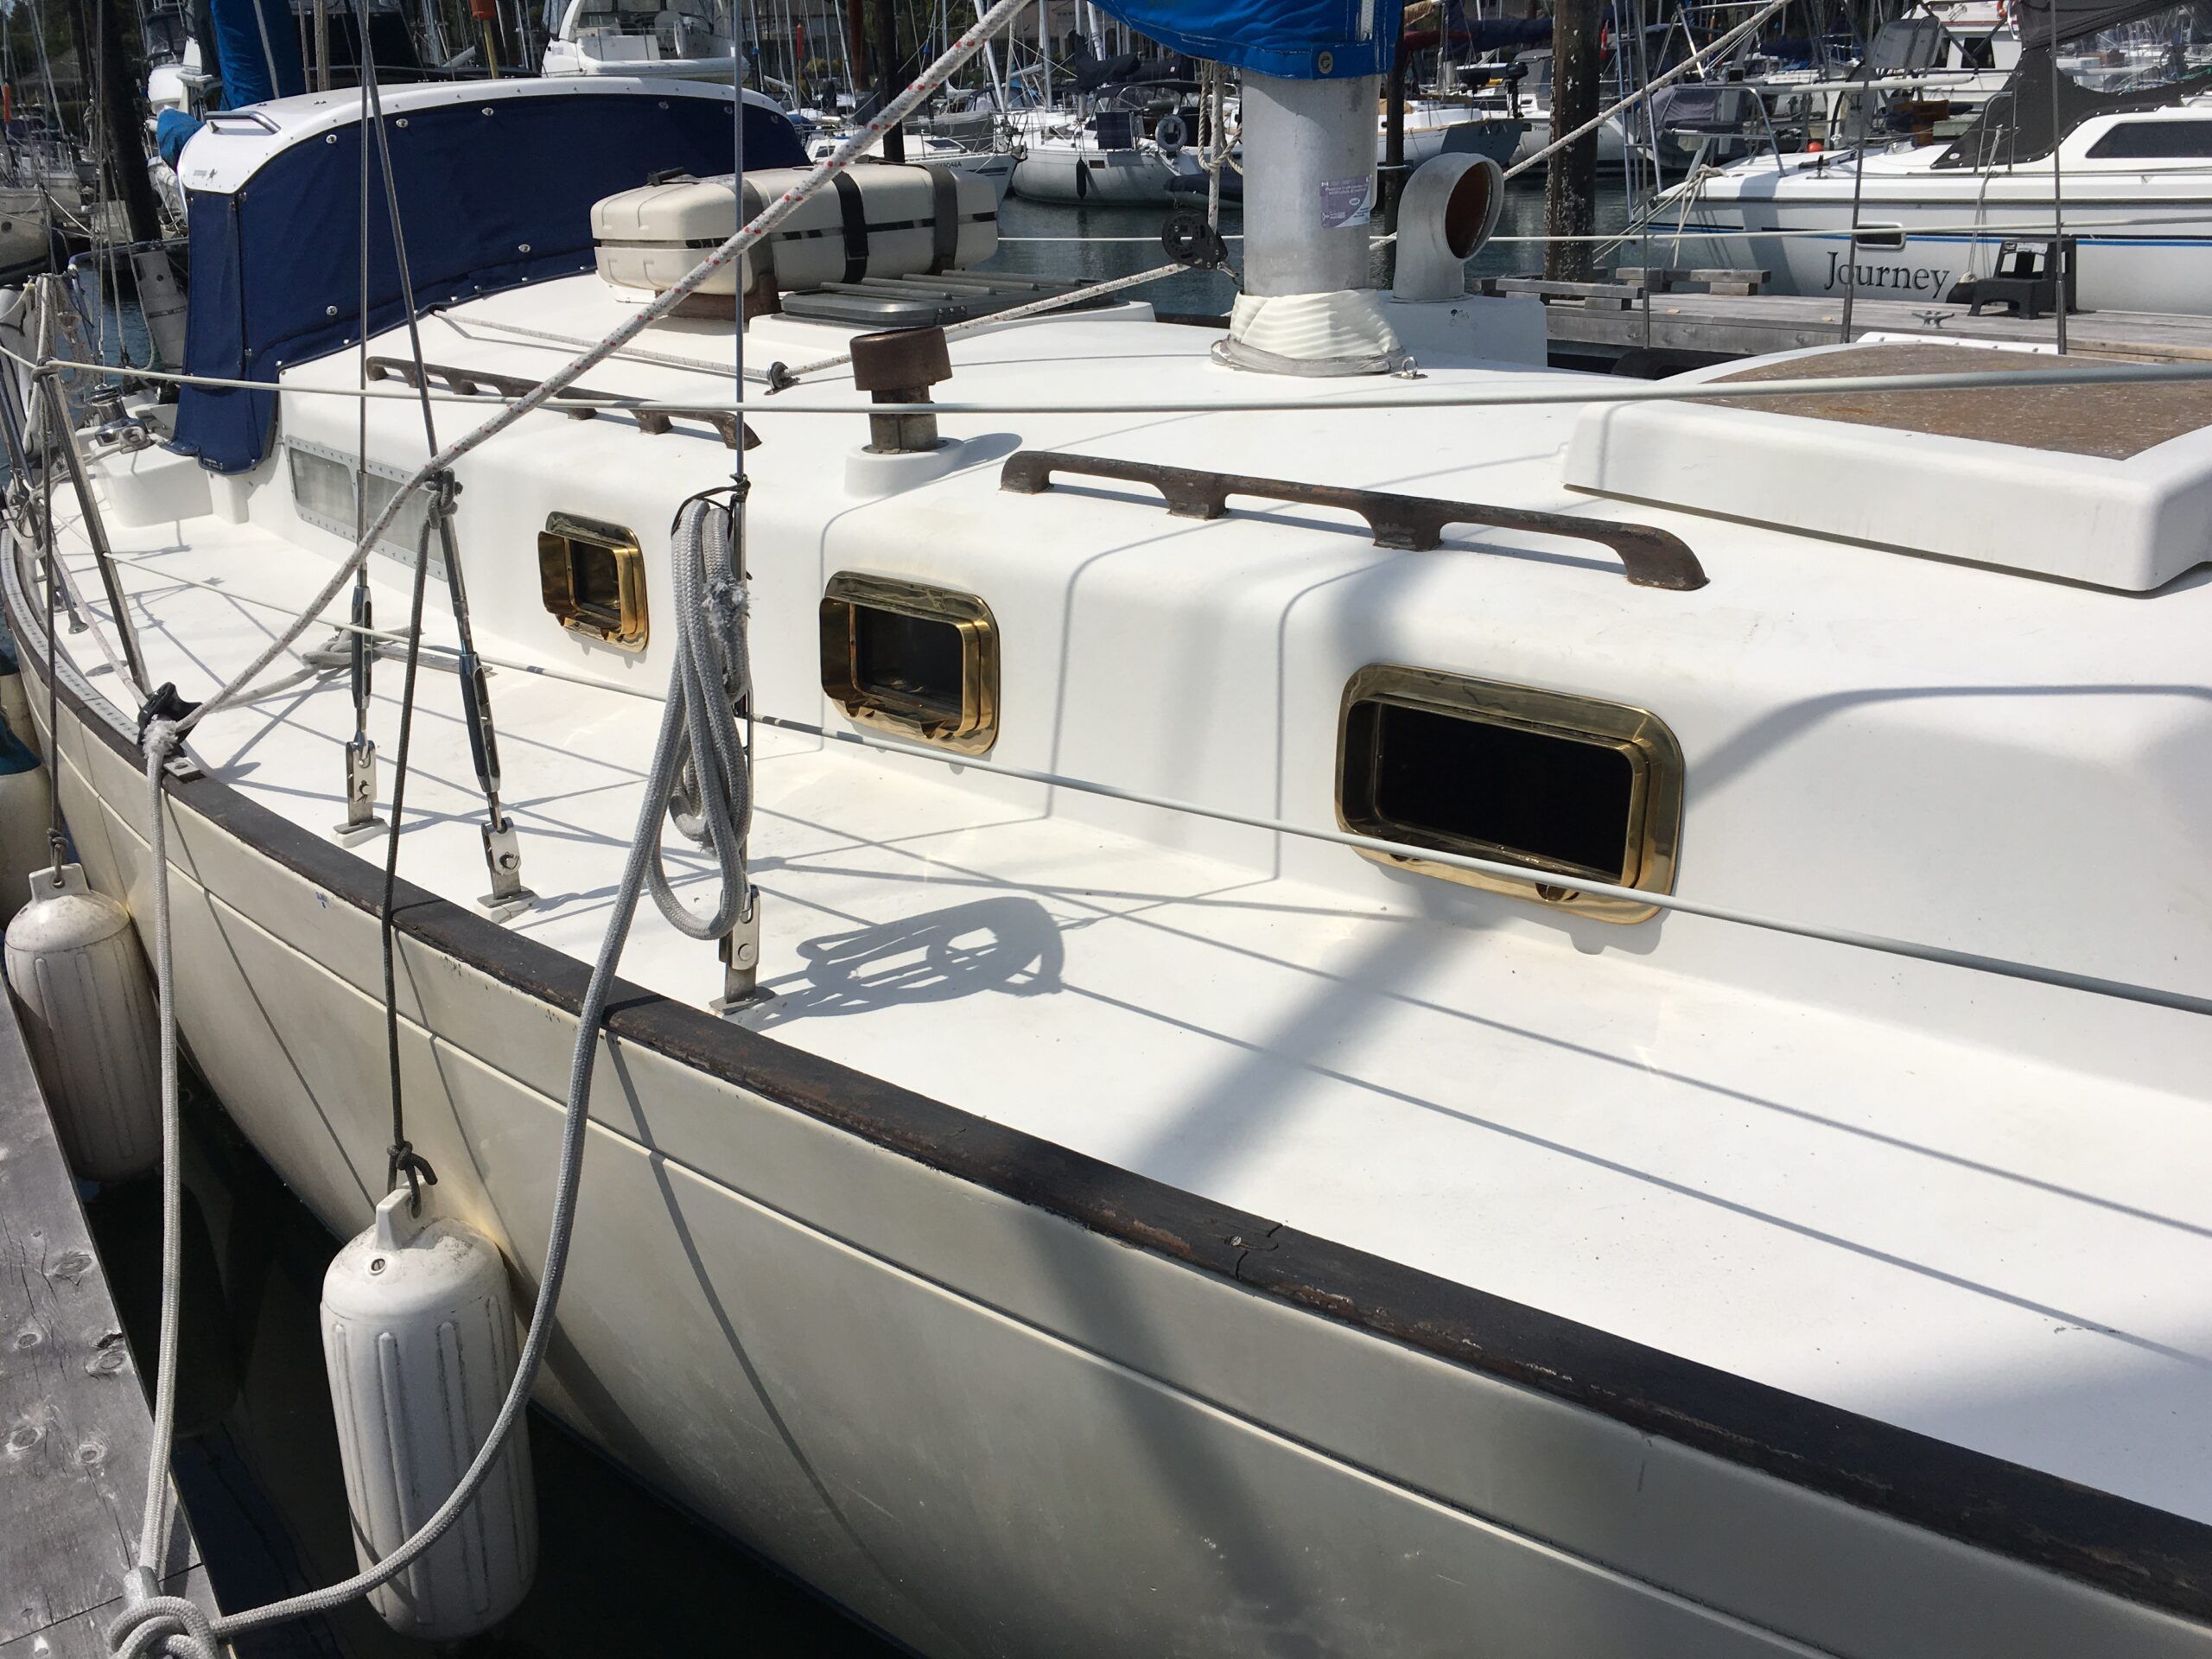
Framed Windows
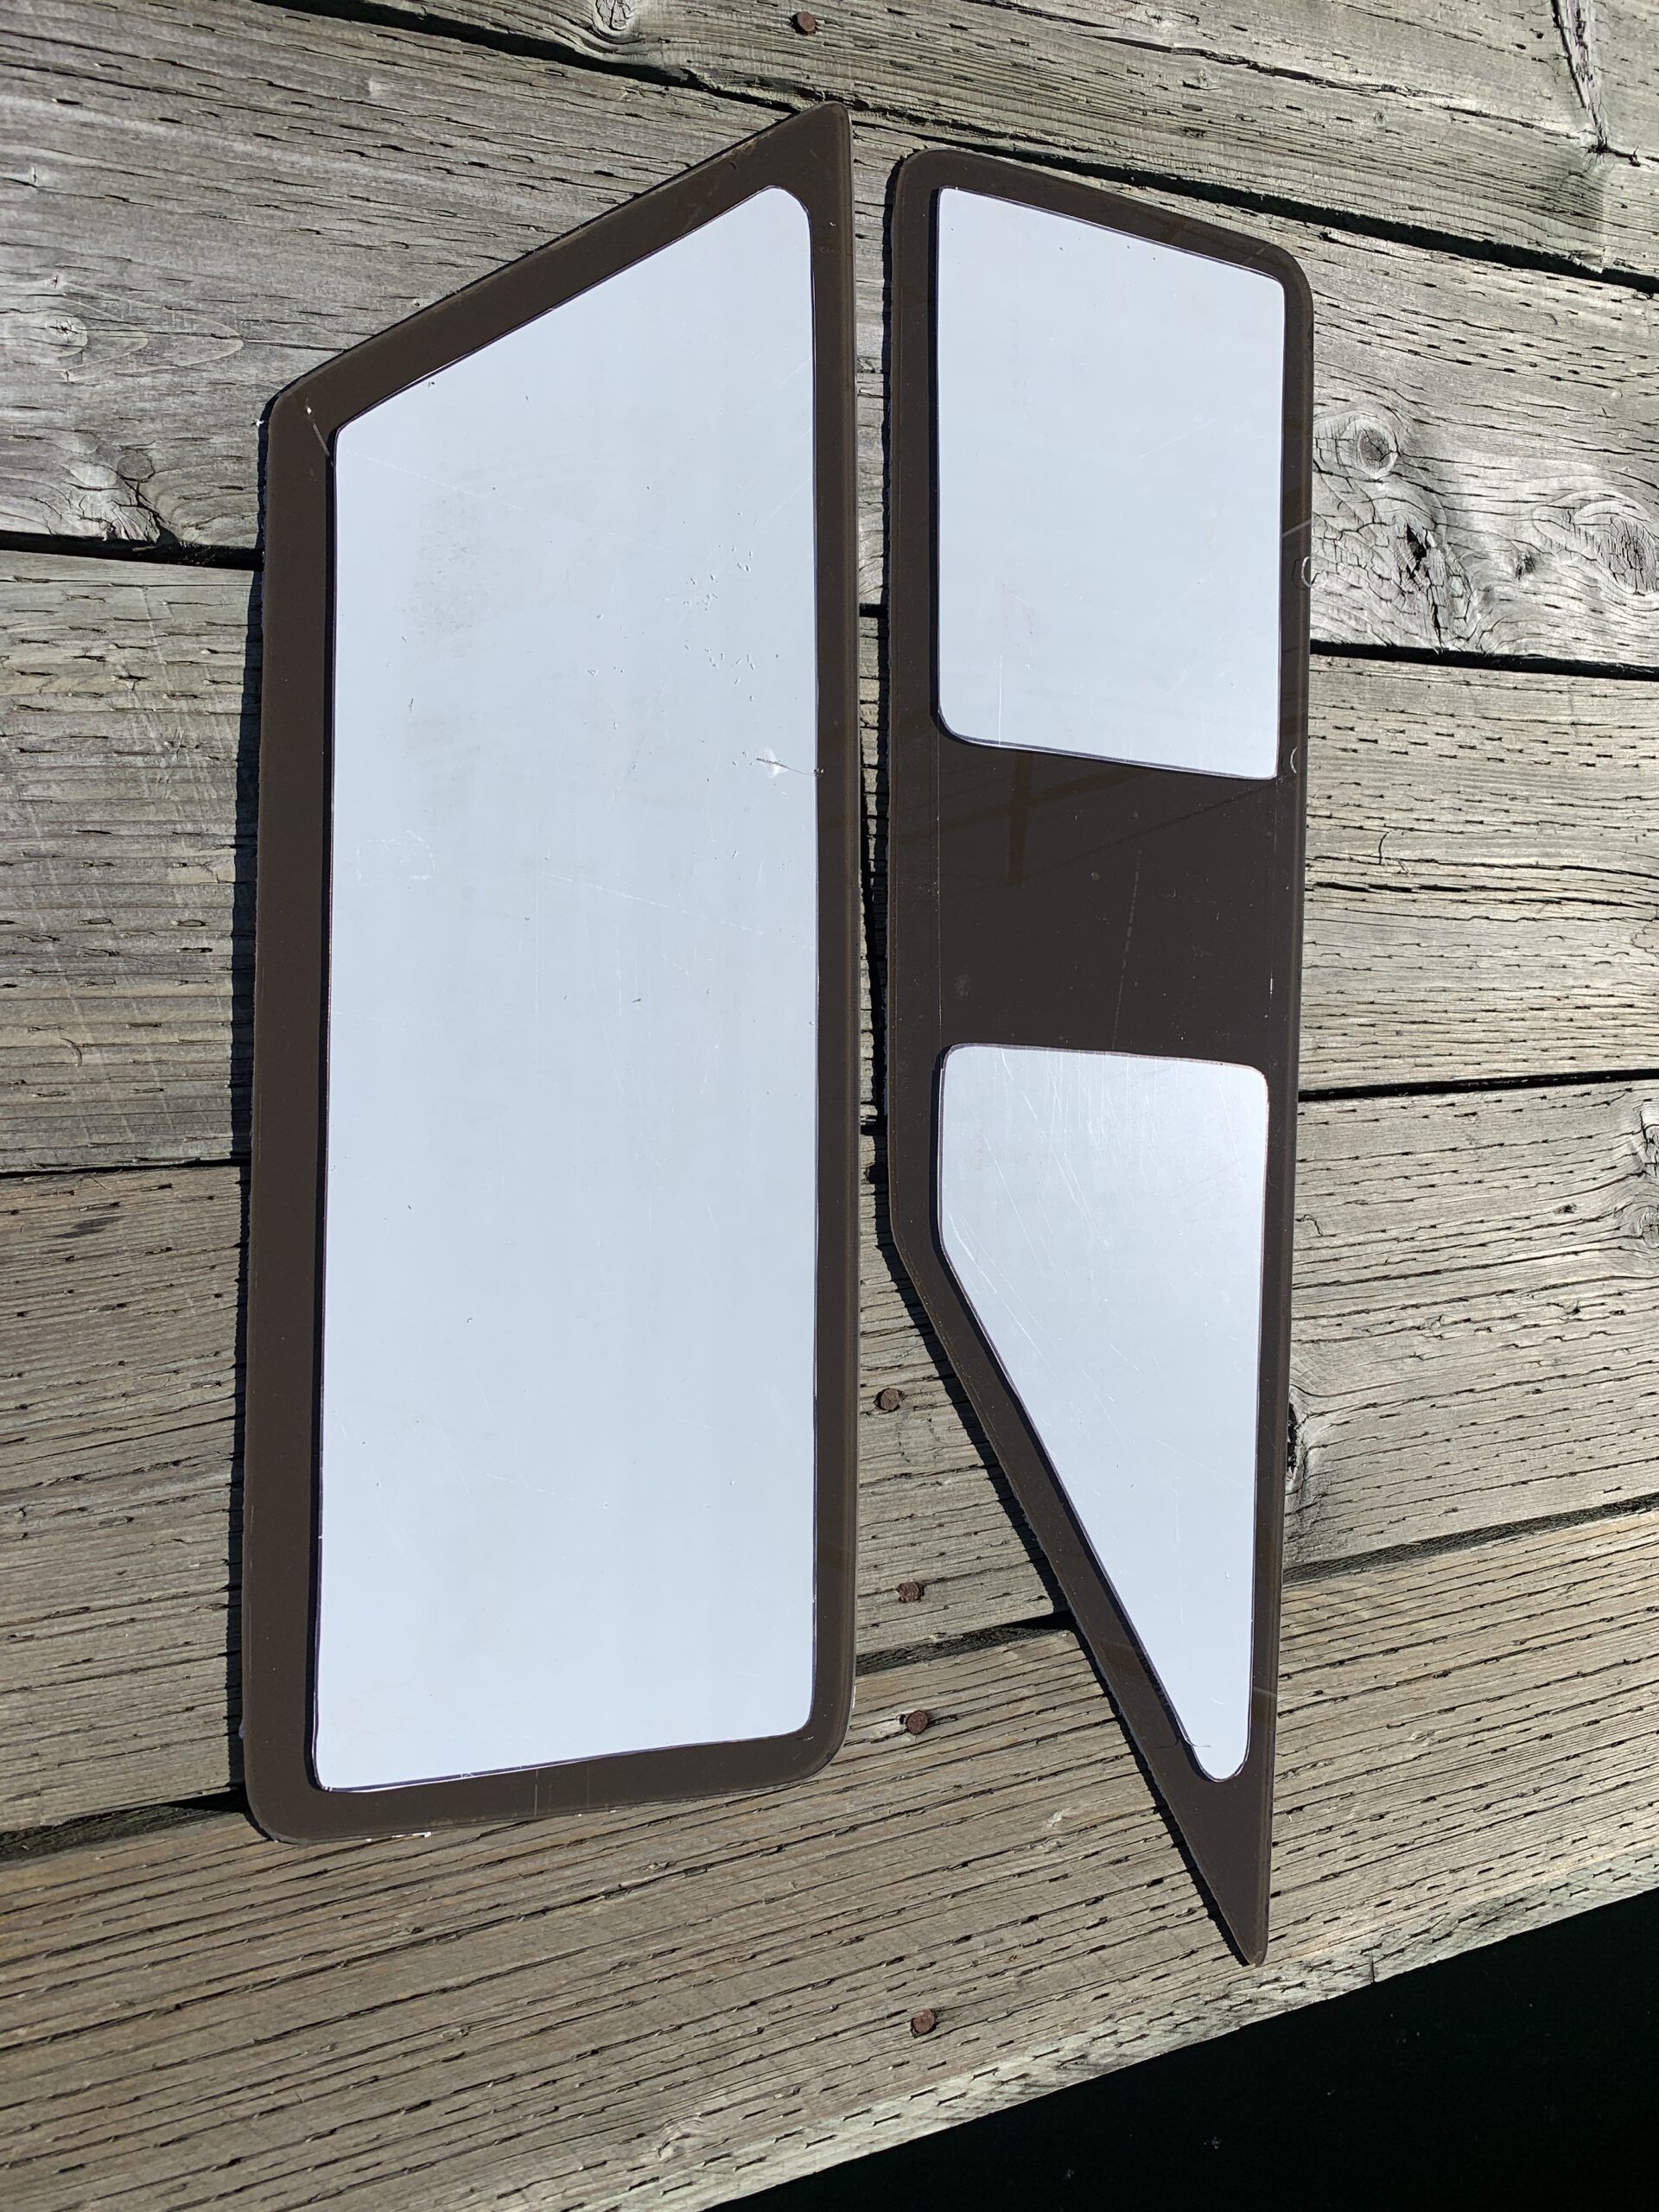
Pearson, Cal, Catalina, Hunter and a host of other sailboats emerged from the factories with plexiglass windows set in molded plastic frames as a one-piece unit. The molded frames had the plexiglass set into the outside portion of the frame with a plastic trim ring on the inside. The outside portion was simply attached to the cabin trunk gelcoat with a sealant, then the trim ring screwed into the inside of the frame to hold it in place while the sealant cured.
Although some manufacturers created their own windows and frames in-house, most ordered plastic framed windows from an independent company, Mark Plastics of Corona, California. This company, with a name change to Maritech Industries, still has the molds for many original windows. Find the list of available frames below. Custom made plexiglass/plastic frame windows are also available from this company, you can find the order form here.
O’day, Nauset, Ranger, Islander, Santana, Newport, Downeast, Fisherman by Vega Marine, Gulf, Cal, Catalina Boats, Hunter, Buccaneer 220/250, US 35 and 42 by Bayliner, Don Blackman Boats, Pacific Seacraft, Balboa, North American, Fortier Boats, Bruno and Stillman, Lancer, Force Marine, Kadey Krogen, Willard Marine, Crystaliner, Laguna, Yachcraft, Columbia, Casco Bay, Helms, Stringari Seacraft, Windrose, Bahama, Freeport, Sisu Boats, Radon, Hampton Shipyard Columbias, Harris, Cape Dory, N.H.B.B. Provincetowns, Columbia, Luhrs, Radovcich, Davis Boats, Farallon, American.
Replacement Window Options
Maritech Industries offers options for direct replacement windows, including oversizing (to allow for cutting back damaged cabin-trunk plywood due to water leaks), frame color, and plexiglass tint. Another option is to replace the plexiglass with tempered glass—the frame ends are thicker than the middle to account for the curvature of the cabin trunk. Many years ago, I called up Mark Plastics and spoke to Mark himself—who answered all the order questions—and four weeks later the windows were delivered exactly as ordered. It was amazing, considering the boat was over 20 years old at the time.
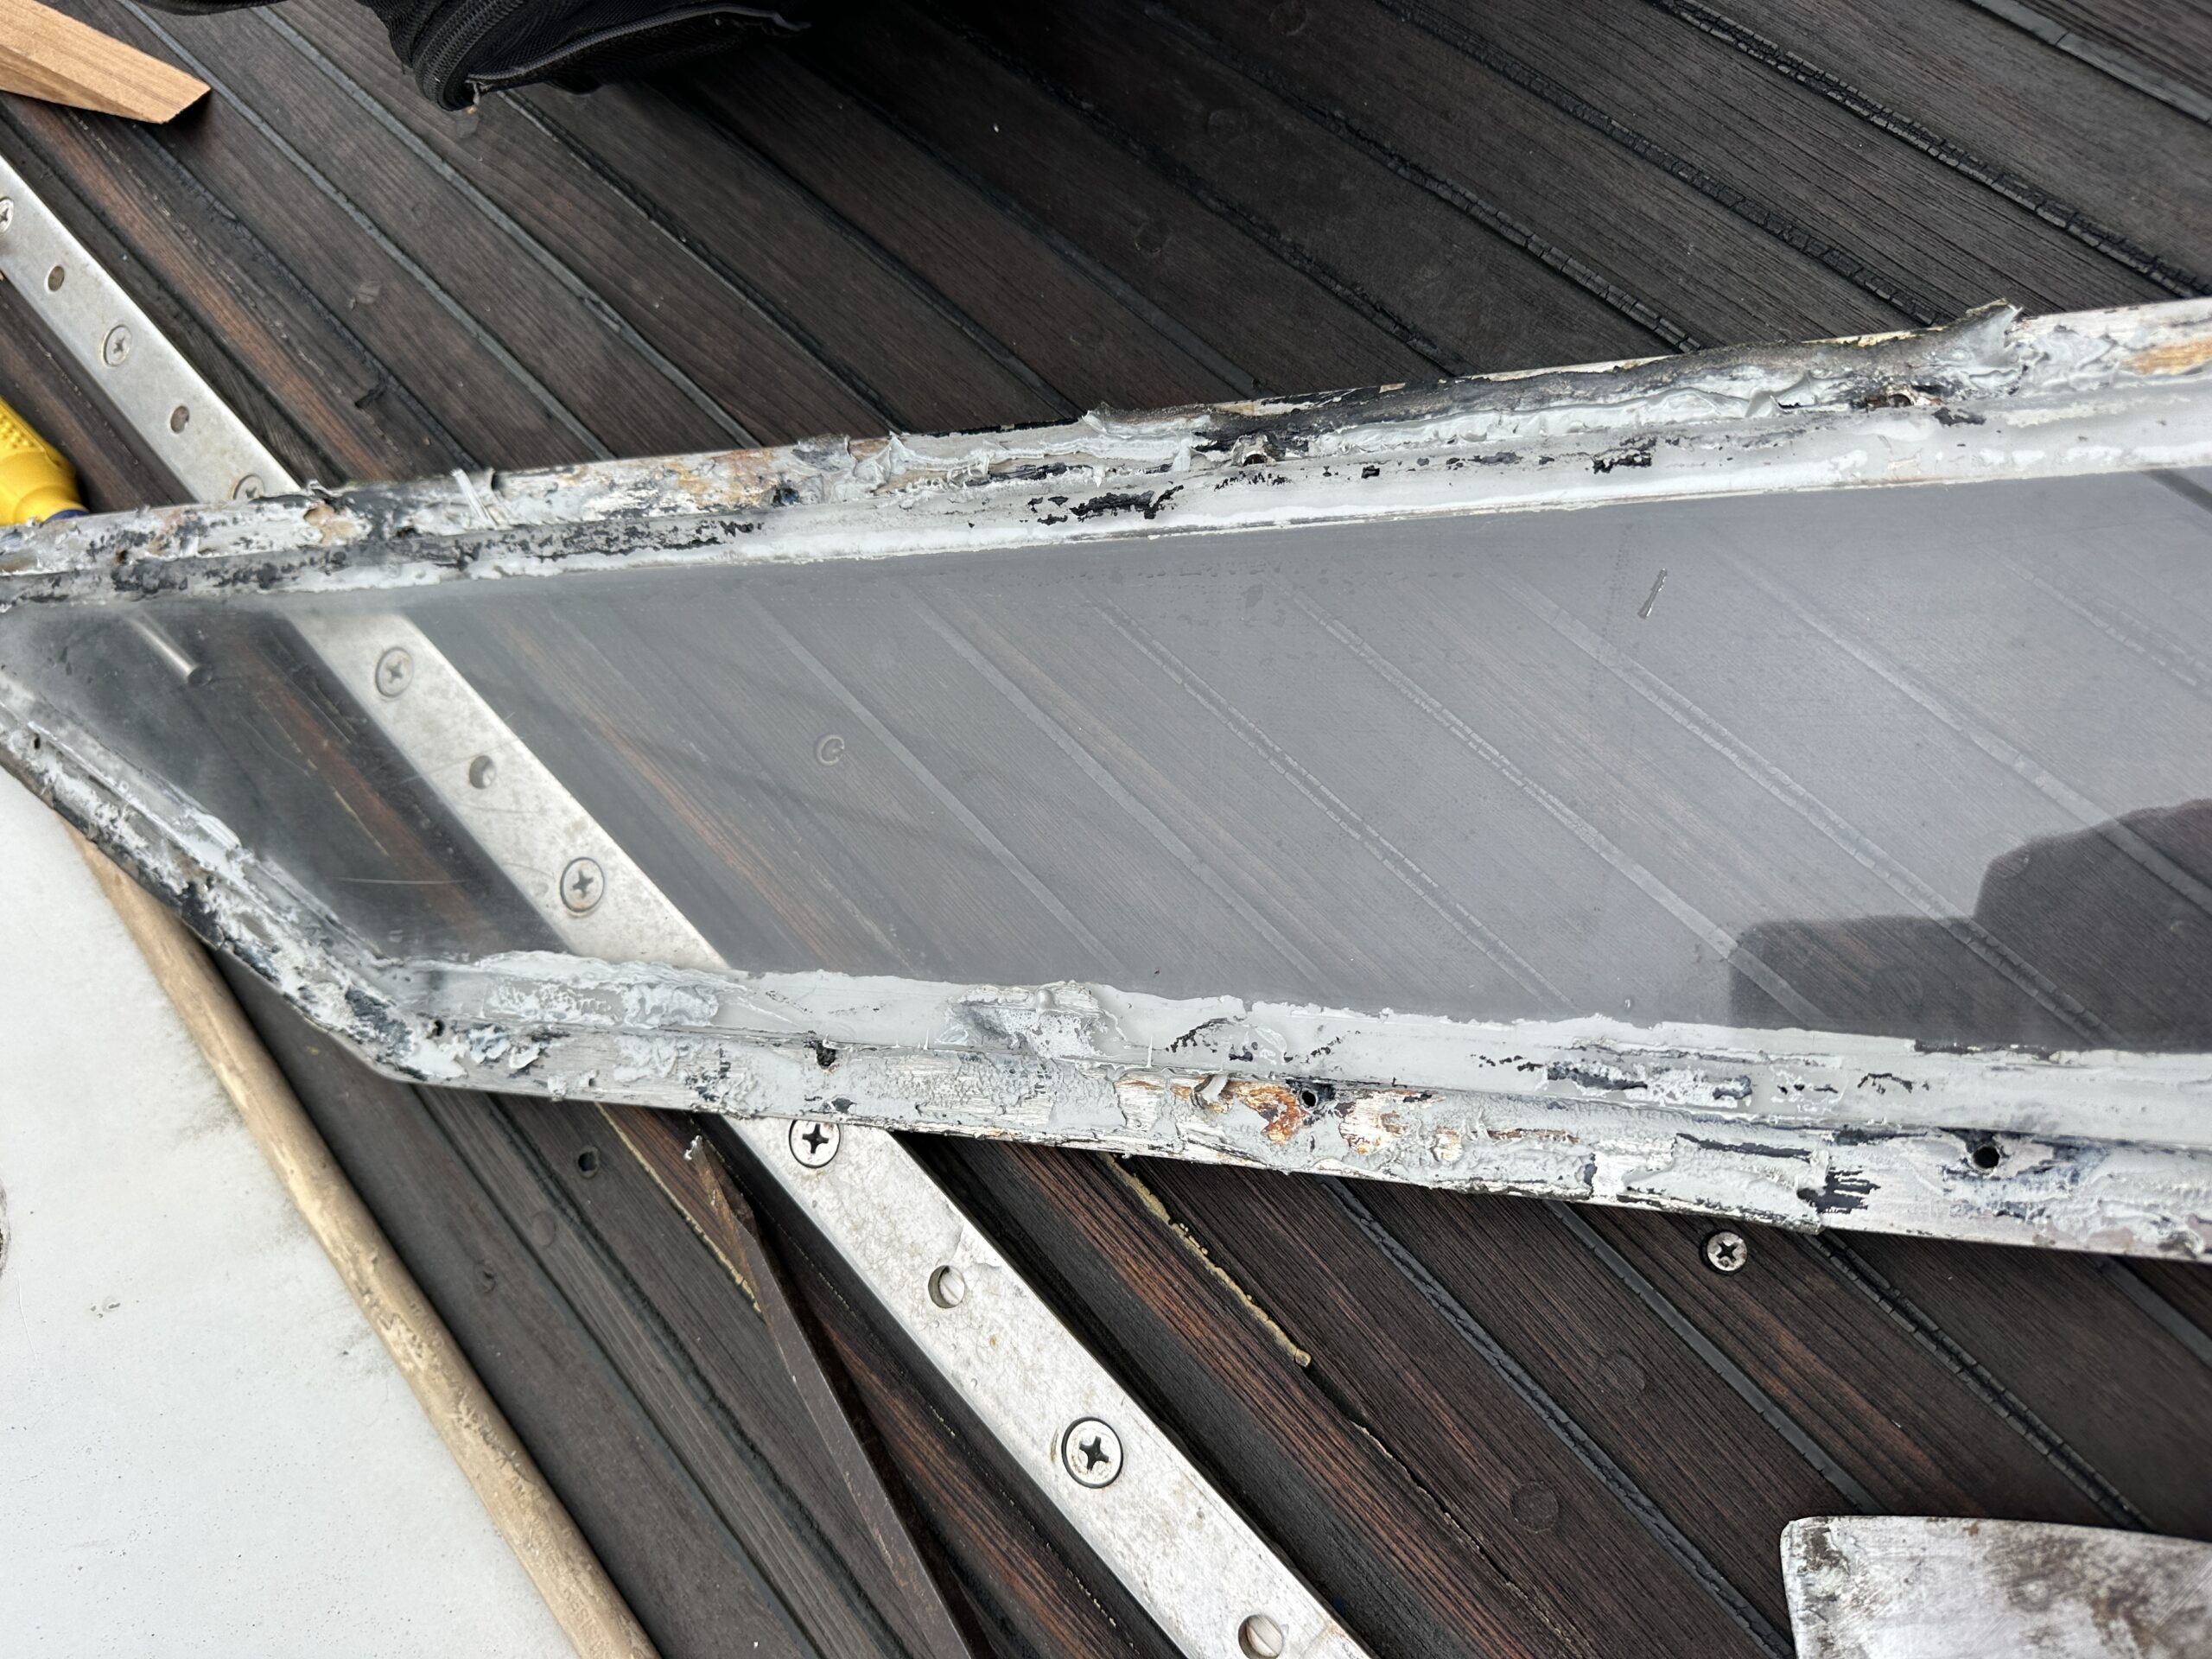
Factory aluminum frames, and occasionally stainless-steel frames, were assembled on the cabin trunk with the plexiglass set onto the gelcoat—sandwiched between an inner and outer metal frame. I will explain more about the removal and installation process later. Over the years the anodized aluminum frame probably corroded to the point of appearing unsightly. While some owners painted the aluminum, it eventually started to flake. For the most part, these frames can be saved and, with the plexiglass replaced, the result is a like-new window.
Gelcoat Preparation
Whether you have framed or unframed windows, a sealant of some kind is going to be used to install the replacements. Have a look at the gelcoat around the window. If it’s faded, it will also be porous. To avoid absorbing the sealant into the gelcoat where it’s not wanted, particularly black sealant, give the gelcoat a good coat of wax before you take the old windows out. This will save a great deal of anxiety and frustration later.
Whether the window to be removed is framed or unframed, be prepared to have debris inside the cabin from the removal—make sure to move cushions out of the way.
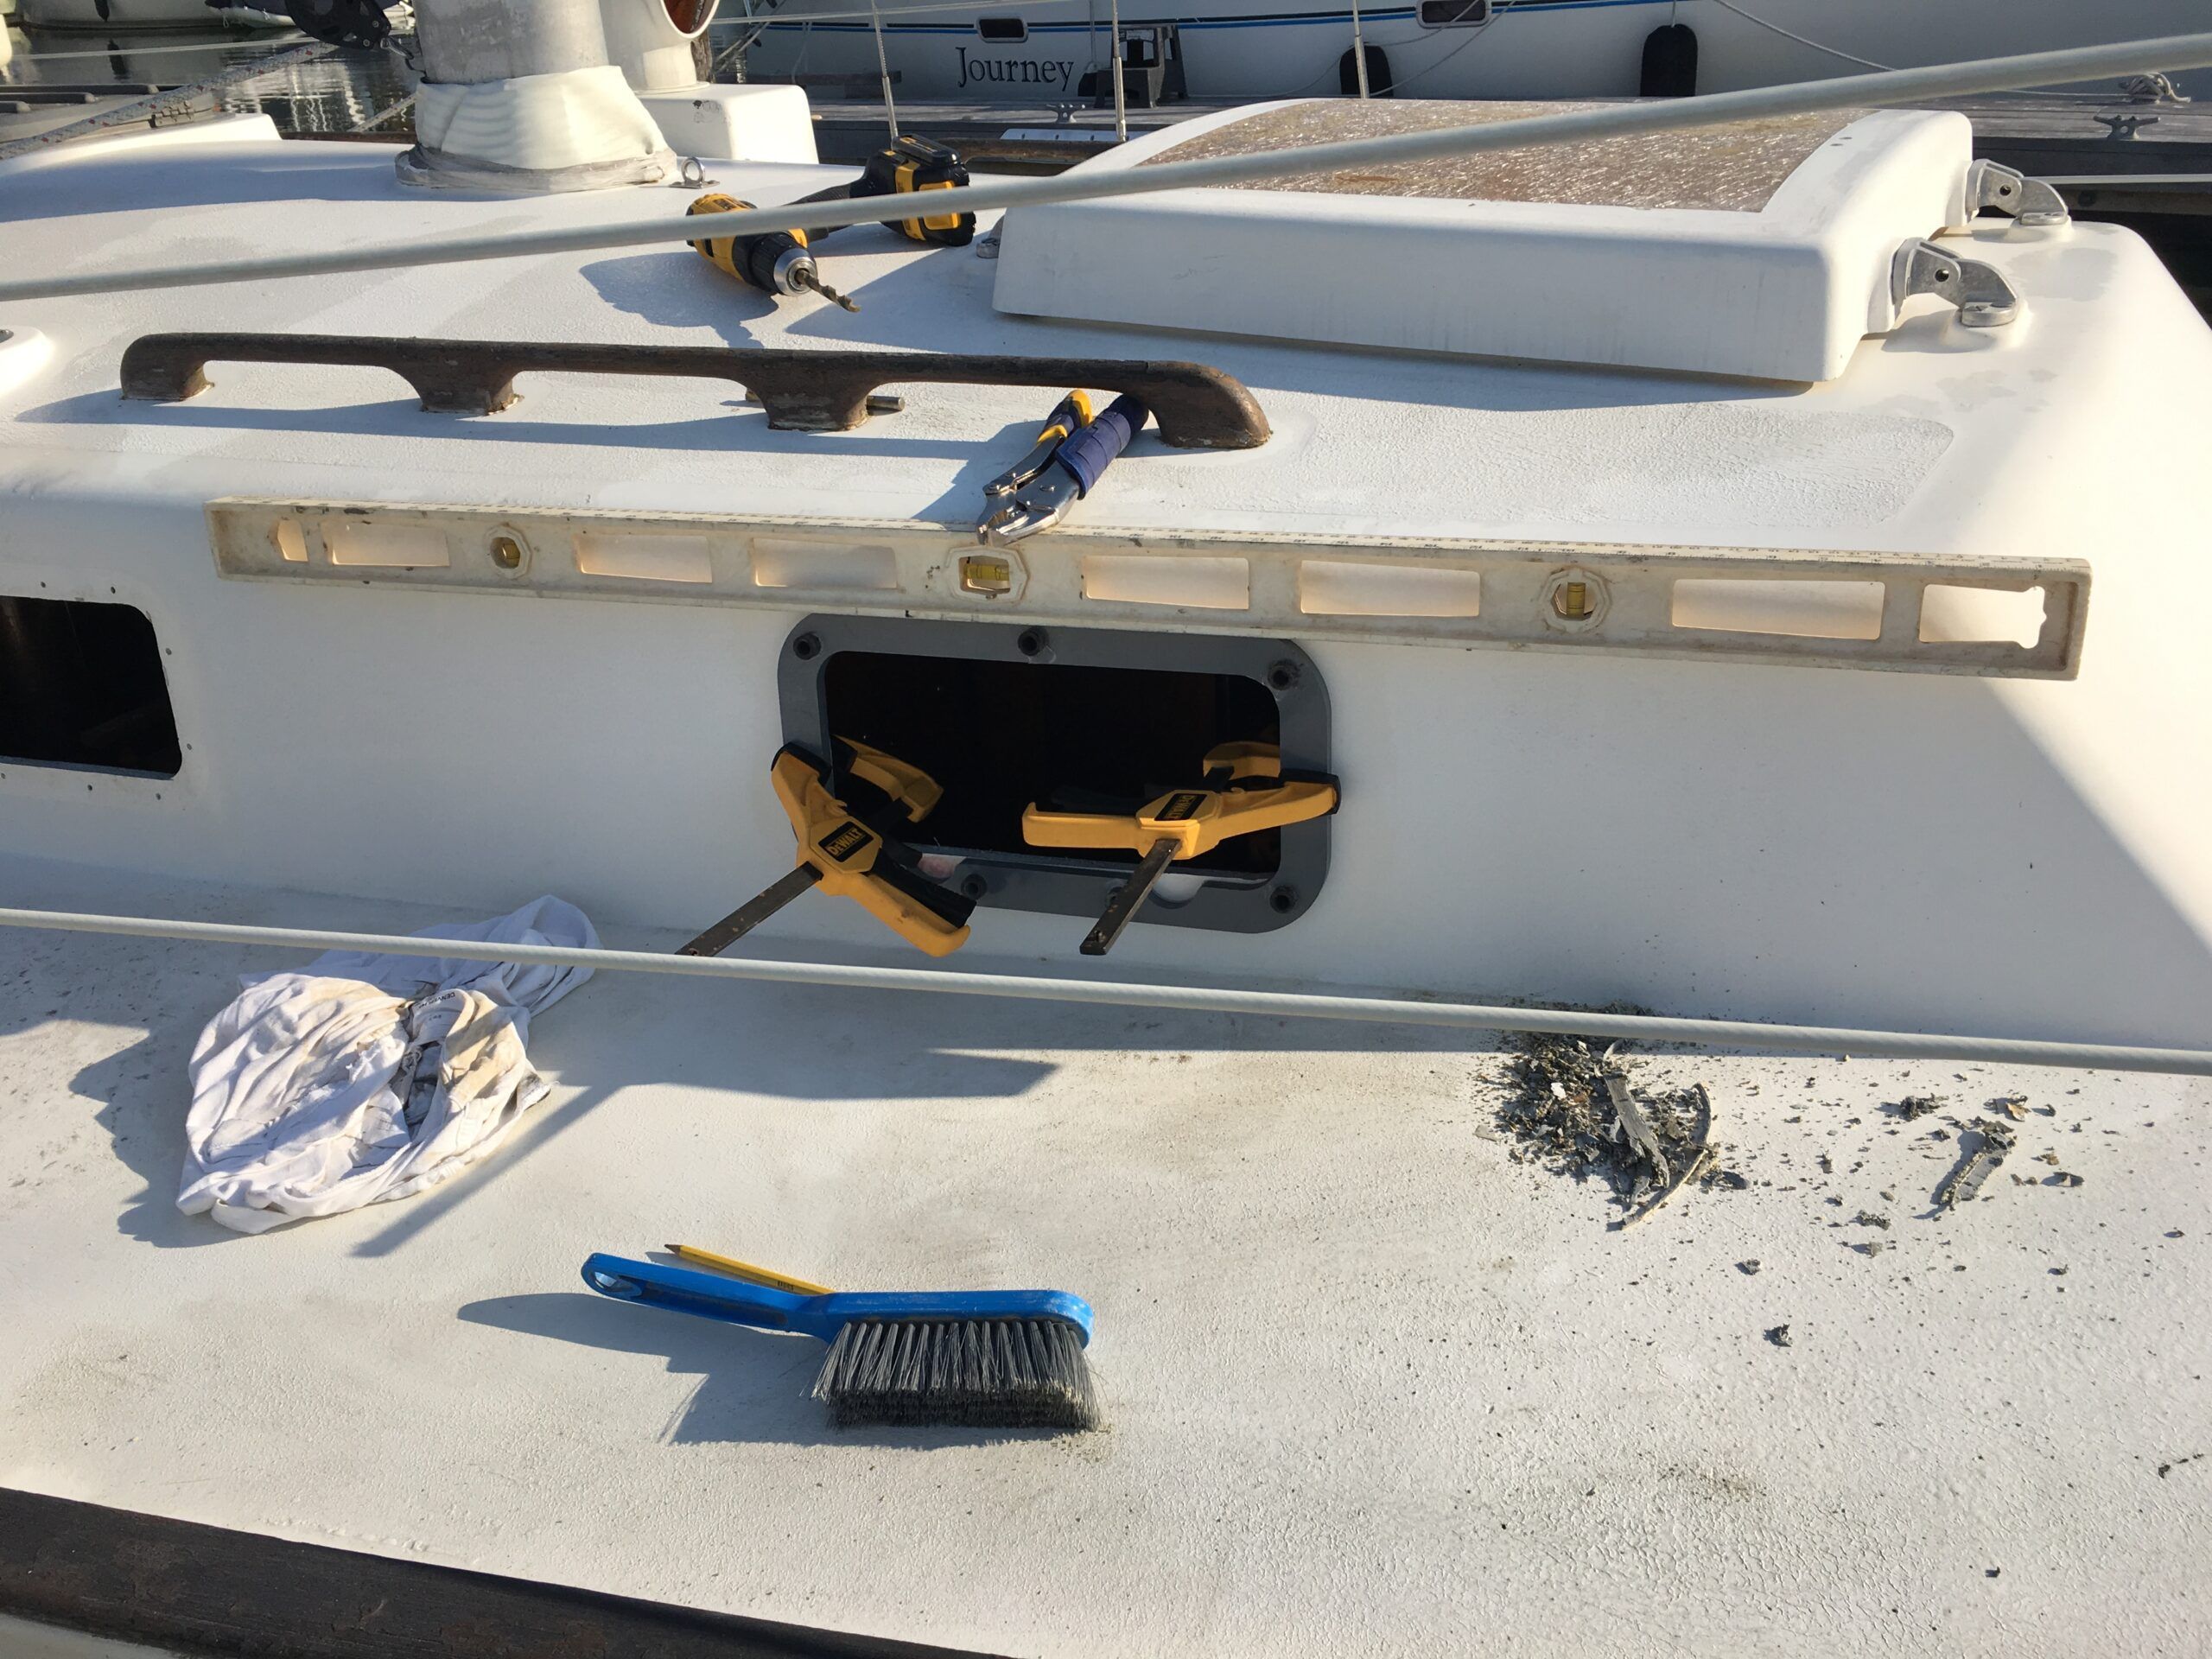
Framed Window Removal
Removing the old windows can be simple, or very difficult. It is simple if you’re dealing with an original factory installed window—either plastic or metal frame—with crazed or broken plexiglass. It is difficult, however, if a previous owner has fixed leaks with an adhesive that just won’t let go—3M 5200 adhesive comes to mind. In that case, the gelcoat will tear apart before this adhesive lets go.
1. Apply Tape To Outline the Window Frame
The first step in removal of the window is on deck. Apply masking tape to the outline of the frame. This will be a handy reference once the window is out. It will also offer a degree of protection to the gelcoat surrounding the frame.
2. Remove All Screws And/Or Bolts
For outside metal frames, there are probably screws holding the frame in place. Most will be wood screws set into the cabin trunk through the plexiglass. Some will be barrel bolts through the plexiglass into an inside trim frame. Remove all the screws and/or bolts.
3. Remove Inside Trim Ring
For plastic frames remove the inside trim ring. As there will be a lot of screws, I would recommend a power driver.
4. Push Out Window
With the inner ring removed the window can be pushed out from the inside, which is easier said than done. Since replacing the window and frame is the goal, preserving the old brittle plastic frame is not a priority. The plastic may very well break. Getting a pry bar into the frame from inside may cause damage to the window and adjoining fiberglass or wood, but that damage won’t be visible behind the replacement trim ring. Prying from on deck risks damage to the surrounding gel coat.
If the window or frame shatter, it’s not a problem. It’s going to be replaced anyway. Remove as much as you can and, once the actual window is out you can attack the remaining broken pieces still stuck to the gelcoat within the edges of the frame outline.
Note: Take care not to bend the outside frame of aluminum or stainless steel windows in attempts to remove them. A box cutter type knife may be needed to separate the metal from the plexiglass and surrounding gelcoat. Try not to fracture the plexiglass as it will be needed as a template for the replacement. If it does crack/shatter, fear not. Simply tape the larger pieces together and use that as the template.
Preparation
1. Clean-Up Remaining Sealant
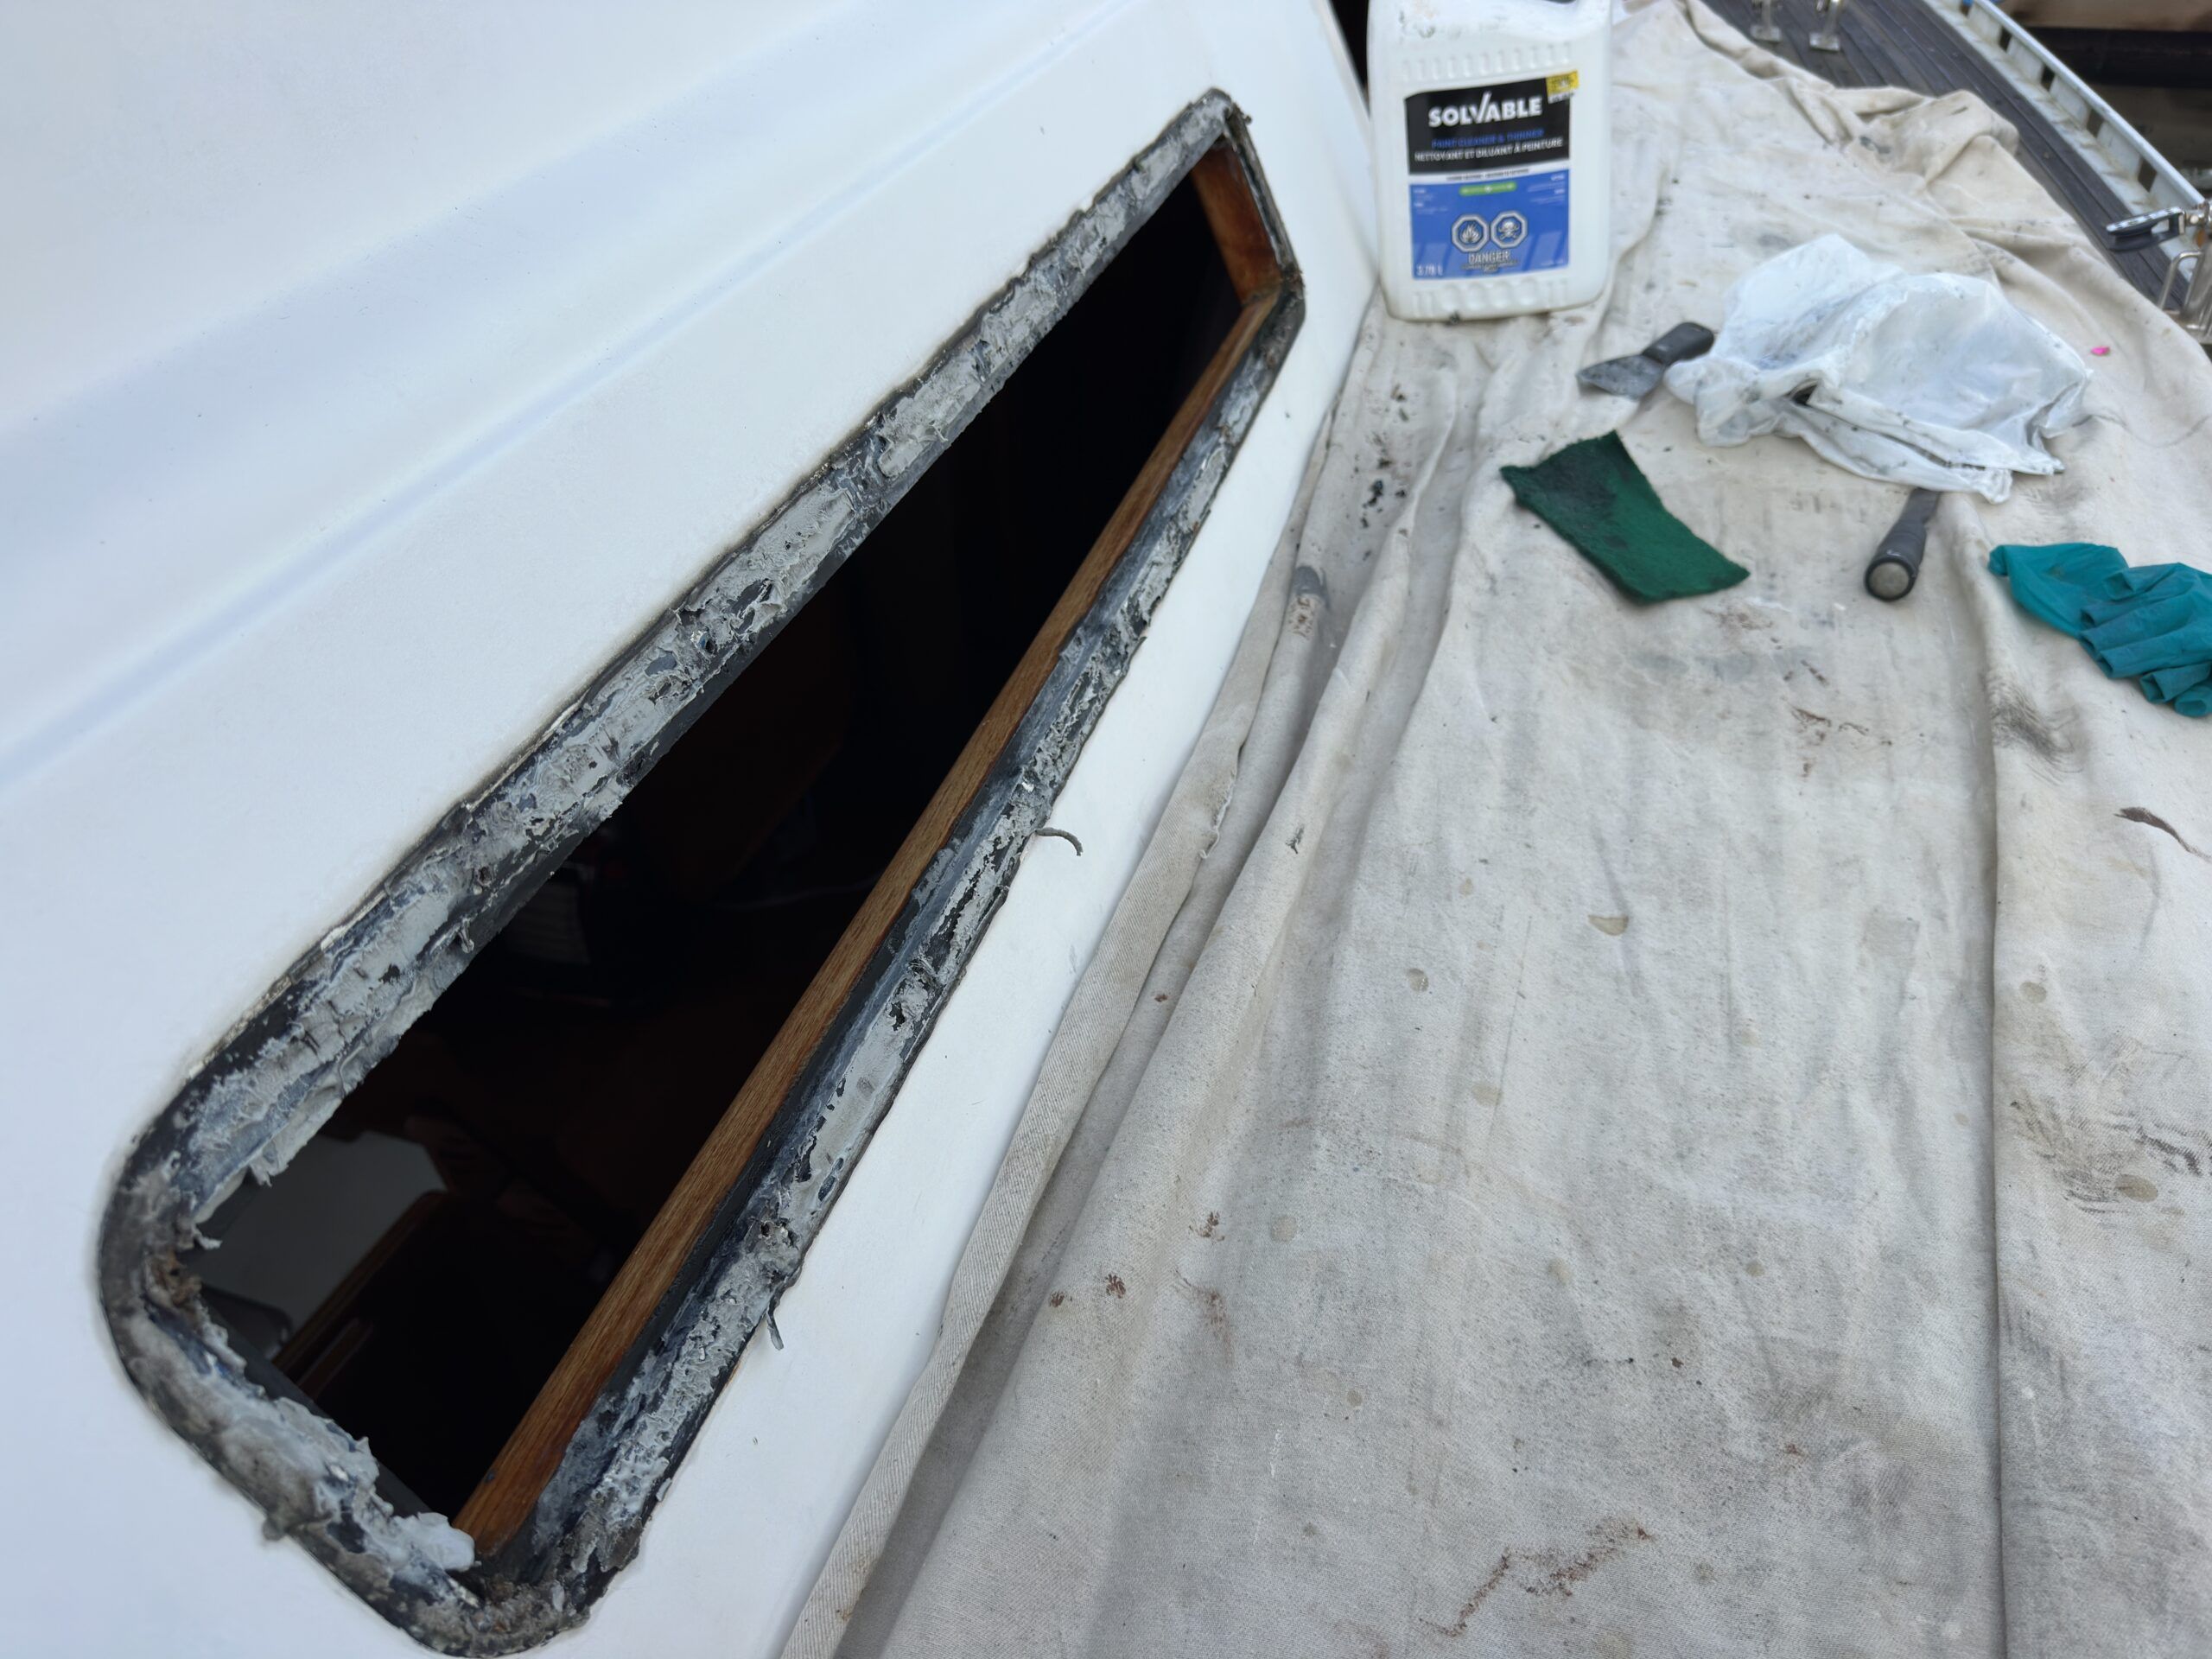
Once all the parts of the window and frame are removed it’s time to clean up the remaining sealant still on the gelcoat. A scraper, putty knife or wood chisel along with sandpaper will probably be needed. This is where the masking tape outlining the old frame is handy. Take care not to tear through the masking tape to the underlying gelcoat.
2. Wipe With Solvent
Once all the old sealant has been removed, wipe with a solvent to remove any contamination. The gelcoat is ready for the replacement window.
Installing the Replacement
The replacement window will have a paper or plastic covering on the plexiglass—leave it on. It will protect the plexiglass from any inadvertent damage.
1. Clean Inside of Window Frame
An important next step is to clean the back side (inside) of the window frame. The plastic frame comes from the factory with mold release agent still on that plastic. Sealants do not stick to this agent. When I replaced the windows on our Islander Bahama 30, all of the windows leaked after the first heavy rain. I was already out cruising by that time—not good. When the inner trim ring was removed, I could push the windows out with a pinky finger. The sealant was stuck to the gelcoat very well, but not the window. It was time to do it all over again—learn from my mistake.
Scrub the inside lip of the plastic frame thoroughly with a solvent or wax remover like hardware store TSP. Let it dry completely.
2. Test Window Placement
Set the window into the opening in the cabin trunk and note any gaps between the actual window (not the lip) and opening. I have yet to see a perfect fit. There won’t be a need to fill this gap, just ensure that when the sealant is applied in the next step there is an overlap between the two parts. If there is a measurable gap between the top and bottom, measure how much spacer is needed to center the frame vertically. I’ve used stacked coins very successfully, easy to remove once the window is secured in place.
3. Protect Boat and Yourself From Sealant Mess
Now comes the messy part. Working with white sealant isn’t that bad, it will get everywhere but at least it won’t stain the gelcoat. Black sealant is another matter. Protect the deck with a painters drop-cloth or taped down plastic sheet. If you’re concerned about your clothing, I would highly recommend a disposable “bunny suit.” Have plenty of disposable gloves available, you will be changing them regularly. A garbage bag is also handy for the contaminated material.
4. Apply Sealant to the Window Frame
Apply the sealant (usually white for framed windows) to the inside of the frame in an even bead. It’s helpful to have the sealant at room temperature or slightly above, it will flow out of the tube better than when it’s cold.
Apply an even bead to the outside cabin trunk on the lip next to the window cutout, inside of where the masking tape is still attached. The idea is to have both beads meet to create a positive seal when the window is pushed in.
5. Push Window Into Frame
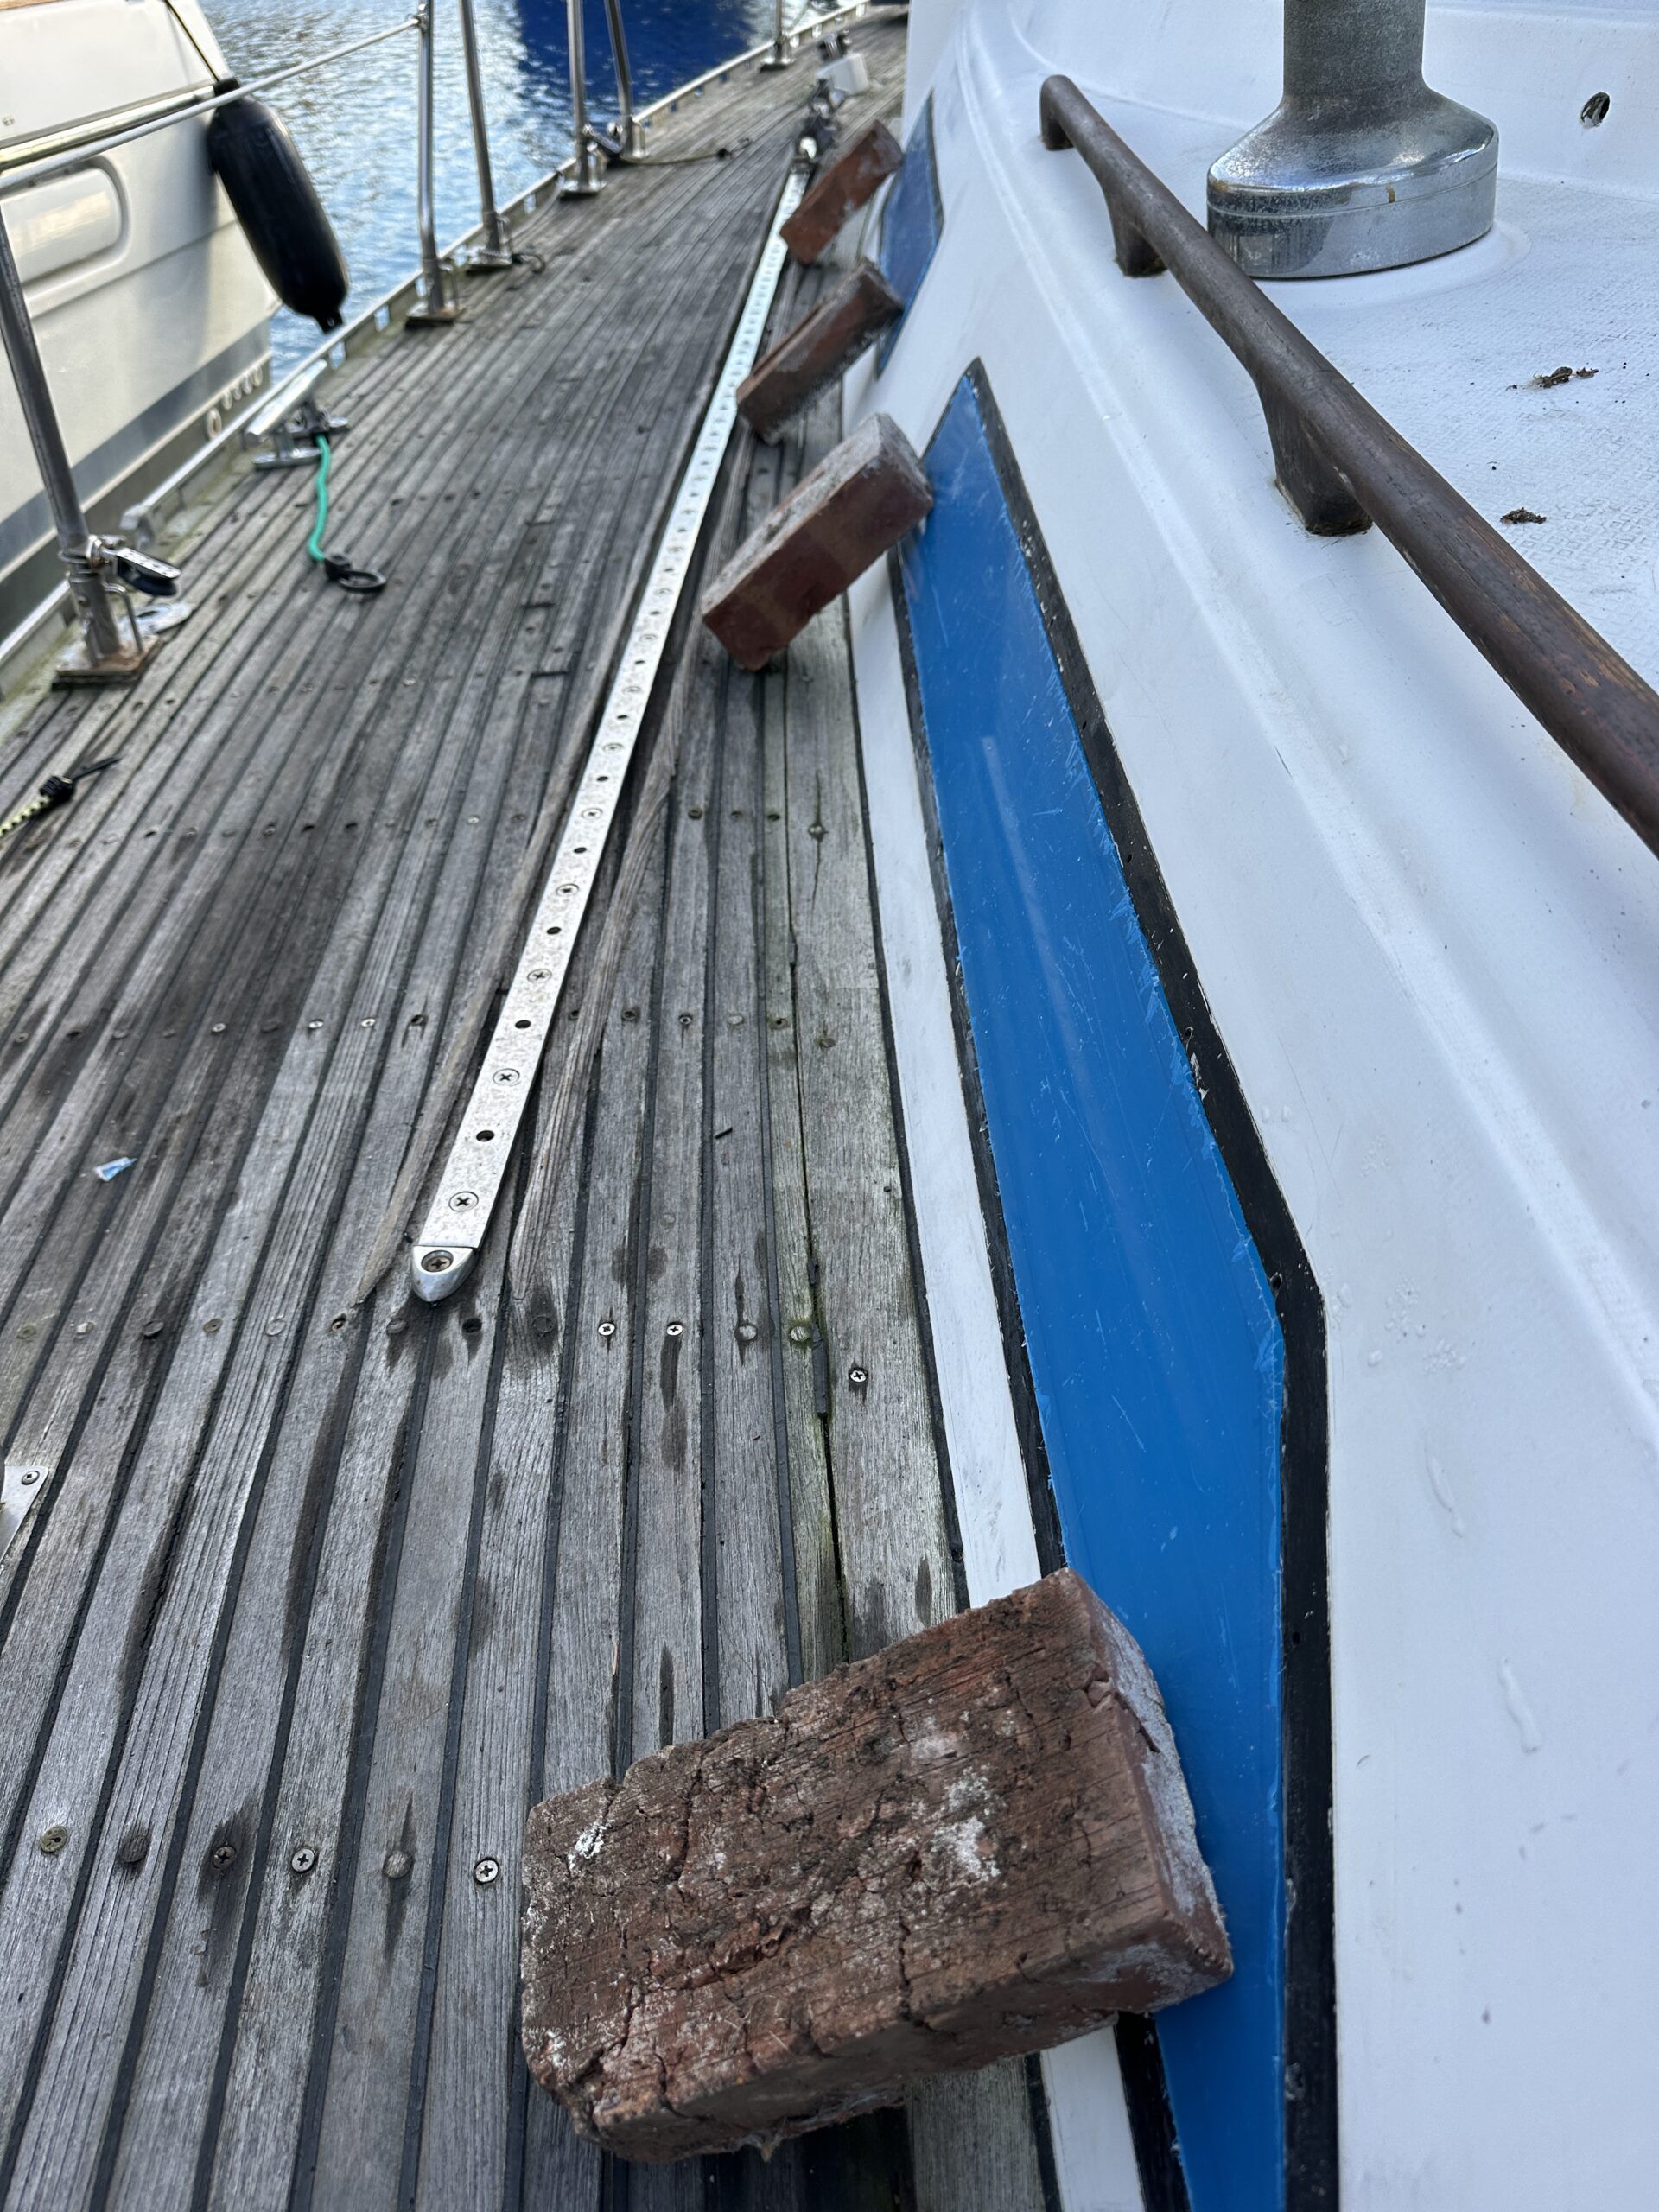
Once pushed in, screw on the inner trim ring to hold it in place. It’s handy to have two people for this task, one to hold the window in place, the other inside the cabin attaching the trim ring. However, it can be done singlehanded. I’ve used everything from planks cut to the reach the toe rail, to cinder blocks or bricks. Use anything that can be leaned against the still protected plexiglass to hold the window in place. Be sure that the window is set into the opening with even spacing top and bottom as well as side to side.
6. Apply Sealant to Screws
On rare occasions where the frame comes with screw holes, or where previous owners have drilled holes through the plastic frame to fasten the frame to the outside of the cabin trunk, be sure to seal the screws with sealant on the threads. Each screw is a potential leak. Where the previous owner has modified the plastic frame with a screw hole, you could ignore them with the new frame install. Simply fill the holes in the cabin trunk with sealant or epoxy and attach the new frame without any screws.
Note: For windows with metal frames, attaching the plexiglass to the gelcoat is more like installing frameless windows. See details below in the Frameless Windows section.
7. Install Outside and Inside Frames
Once the plexiglass is in place, the outside and inside frames are installed. Occasionally the screws or barrel bolts holding the frame in place go through the plexiglass. Be cautious when drilling the plexiglass. Use a sharp bit and light pressure to keep from cracking the plexiglass. Make sure to seal the screws or bolts with a dab of sealant on the threads or barrel as well.
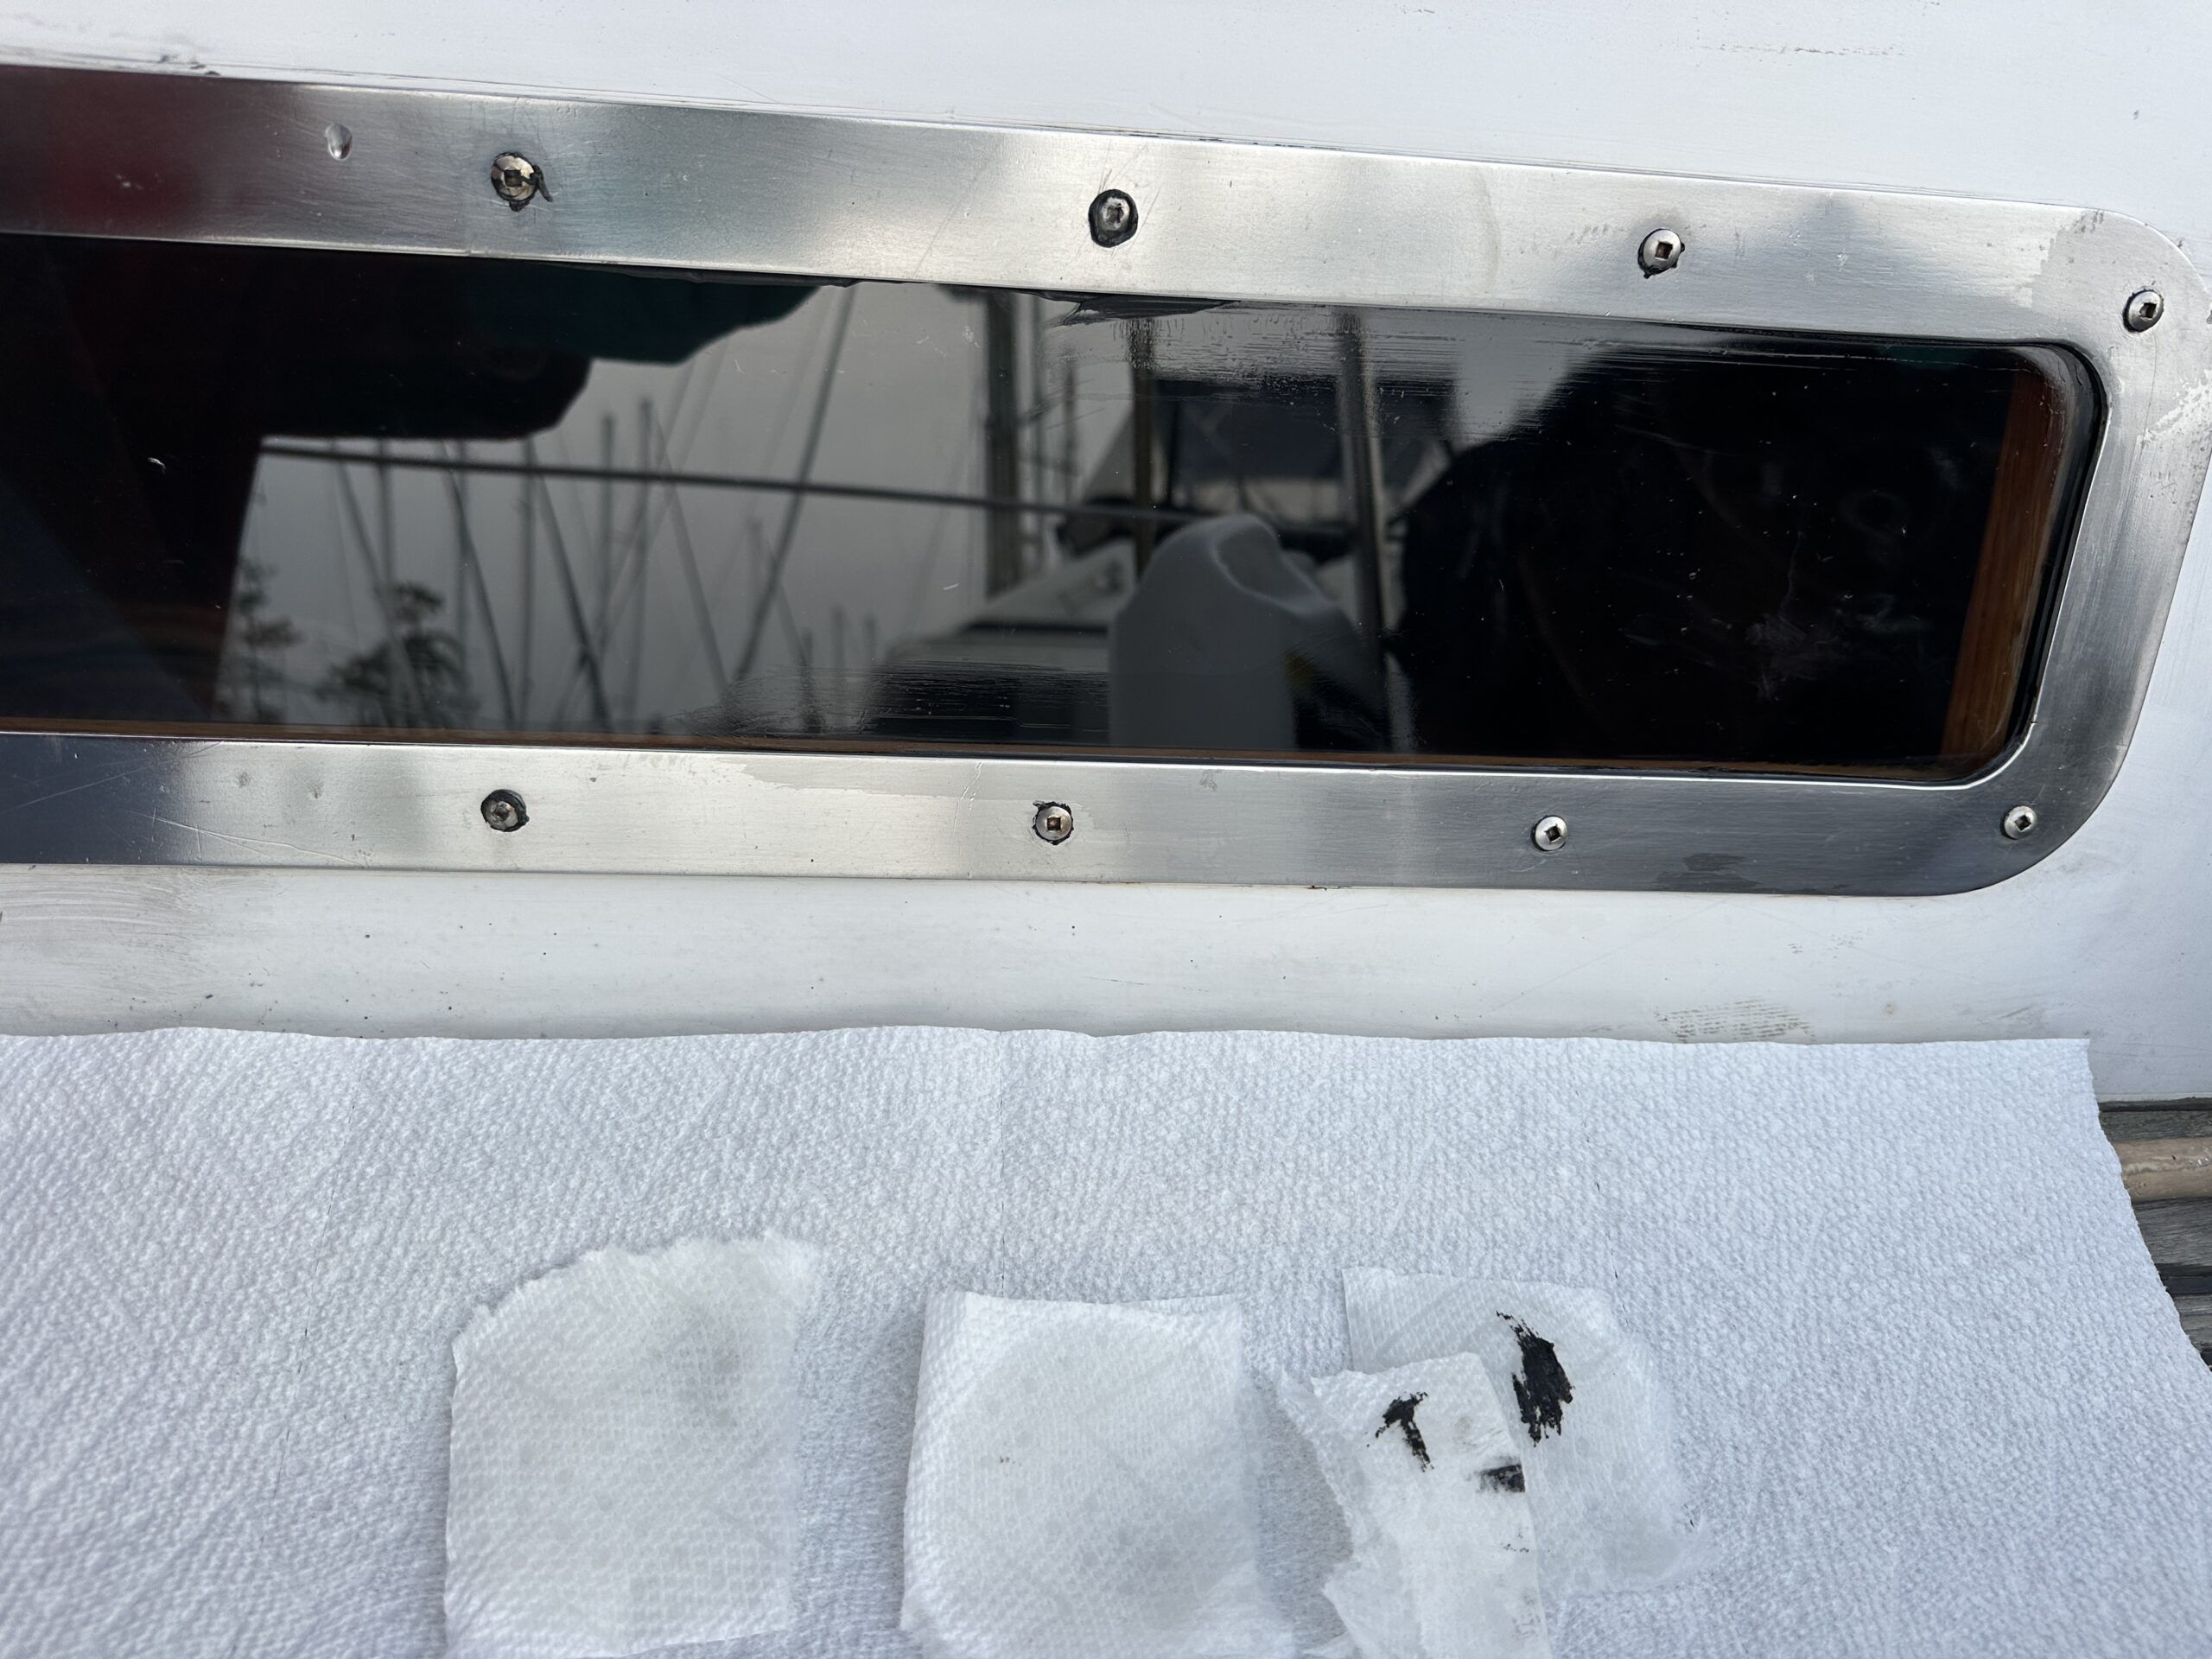
8. Clean the Sealant
Some of the sealant may have squeezed out from behind the outside of the frame. If the masking tape was close enough to the old window frame it will come off with the tape. There still may be some residue and that’s easy to remove with a paper towel dampened with solvent. I use very small pieces of paper towel, wipe a small section and dispose of that piece without a second wipe. Less risk of spreading the sealant around.
9. Remove Protective Film
Once the trim ring is secure and you’re pleased with the installation, then comes the real satisfaction of taking the protective film off the window and gazing out the perfectly clear plexiglass. Nicely done!
Portlights
Once the framed windows are replaced and looking good, you may be tempted to replace crazed or leaking portlights that also adorn the cabin trunk. The same removal and installation instructions apply, only on a smaller scale.
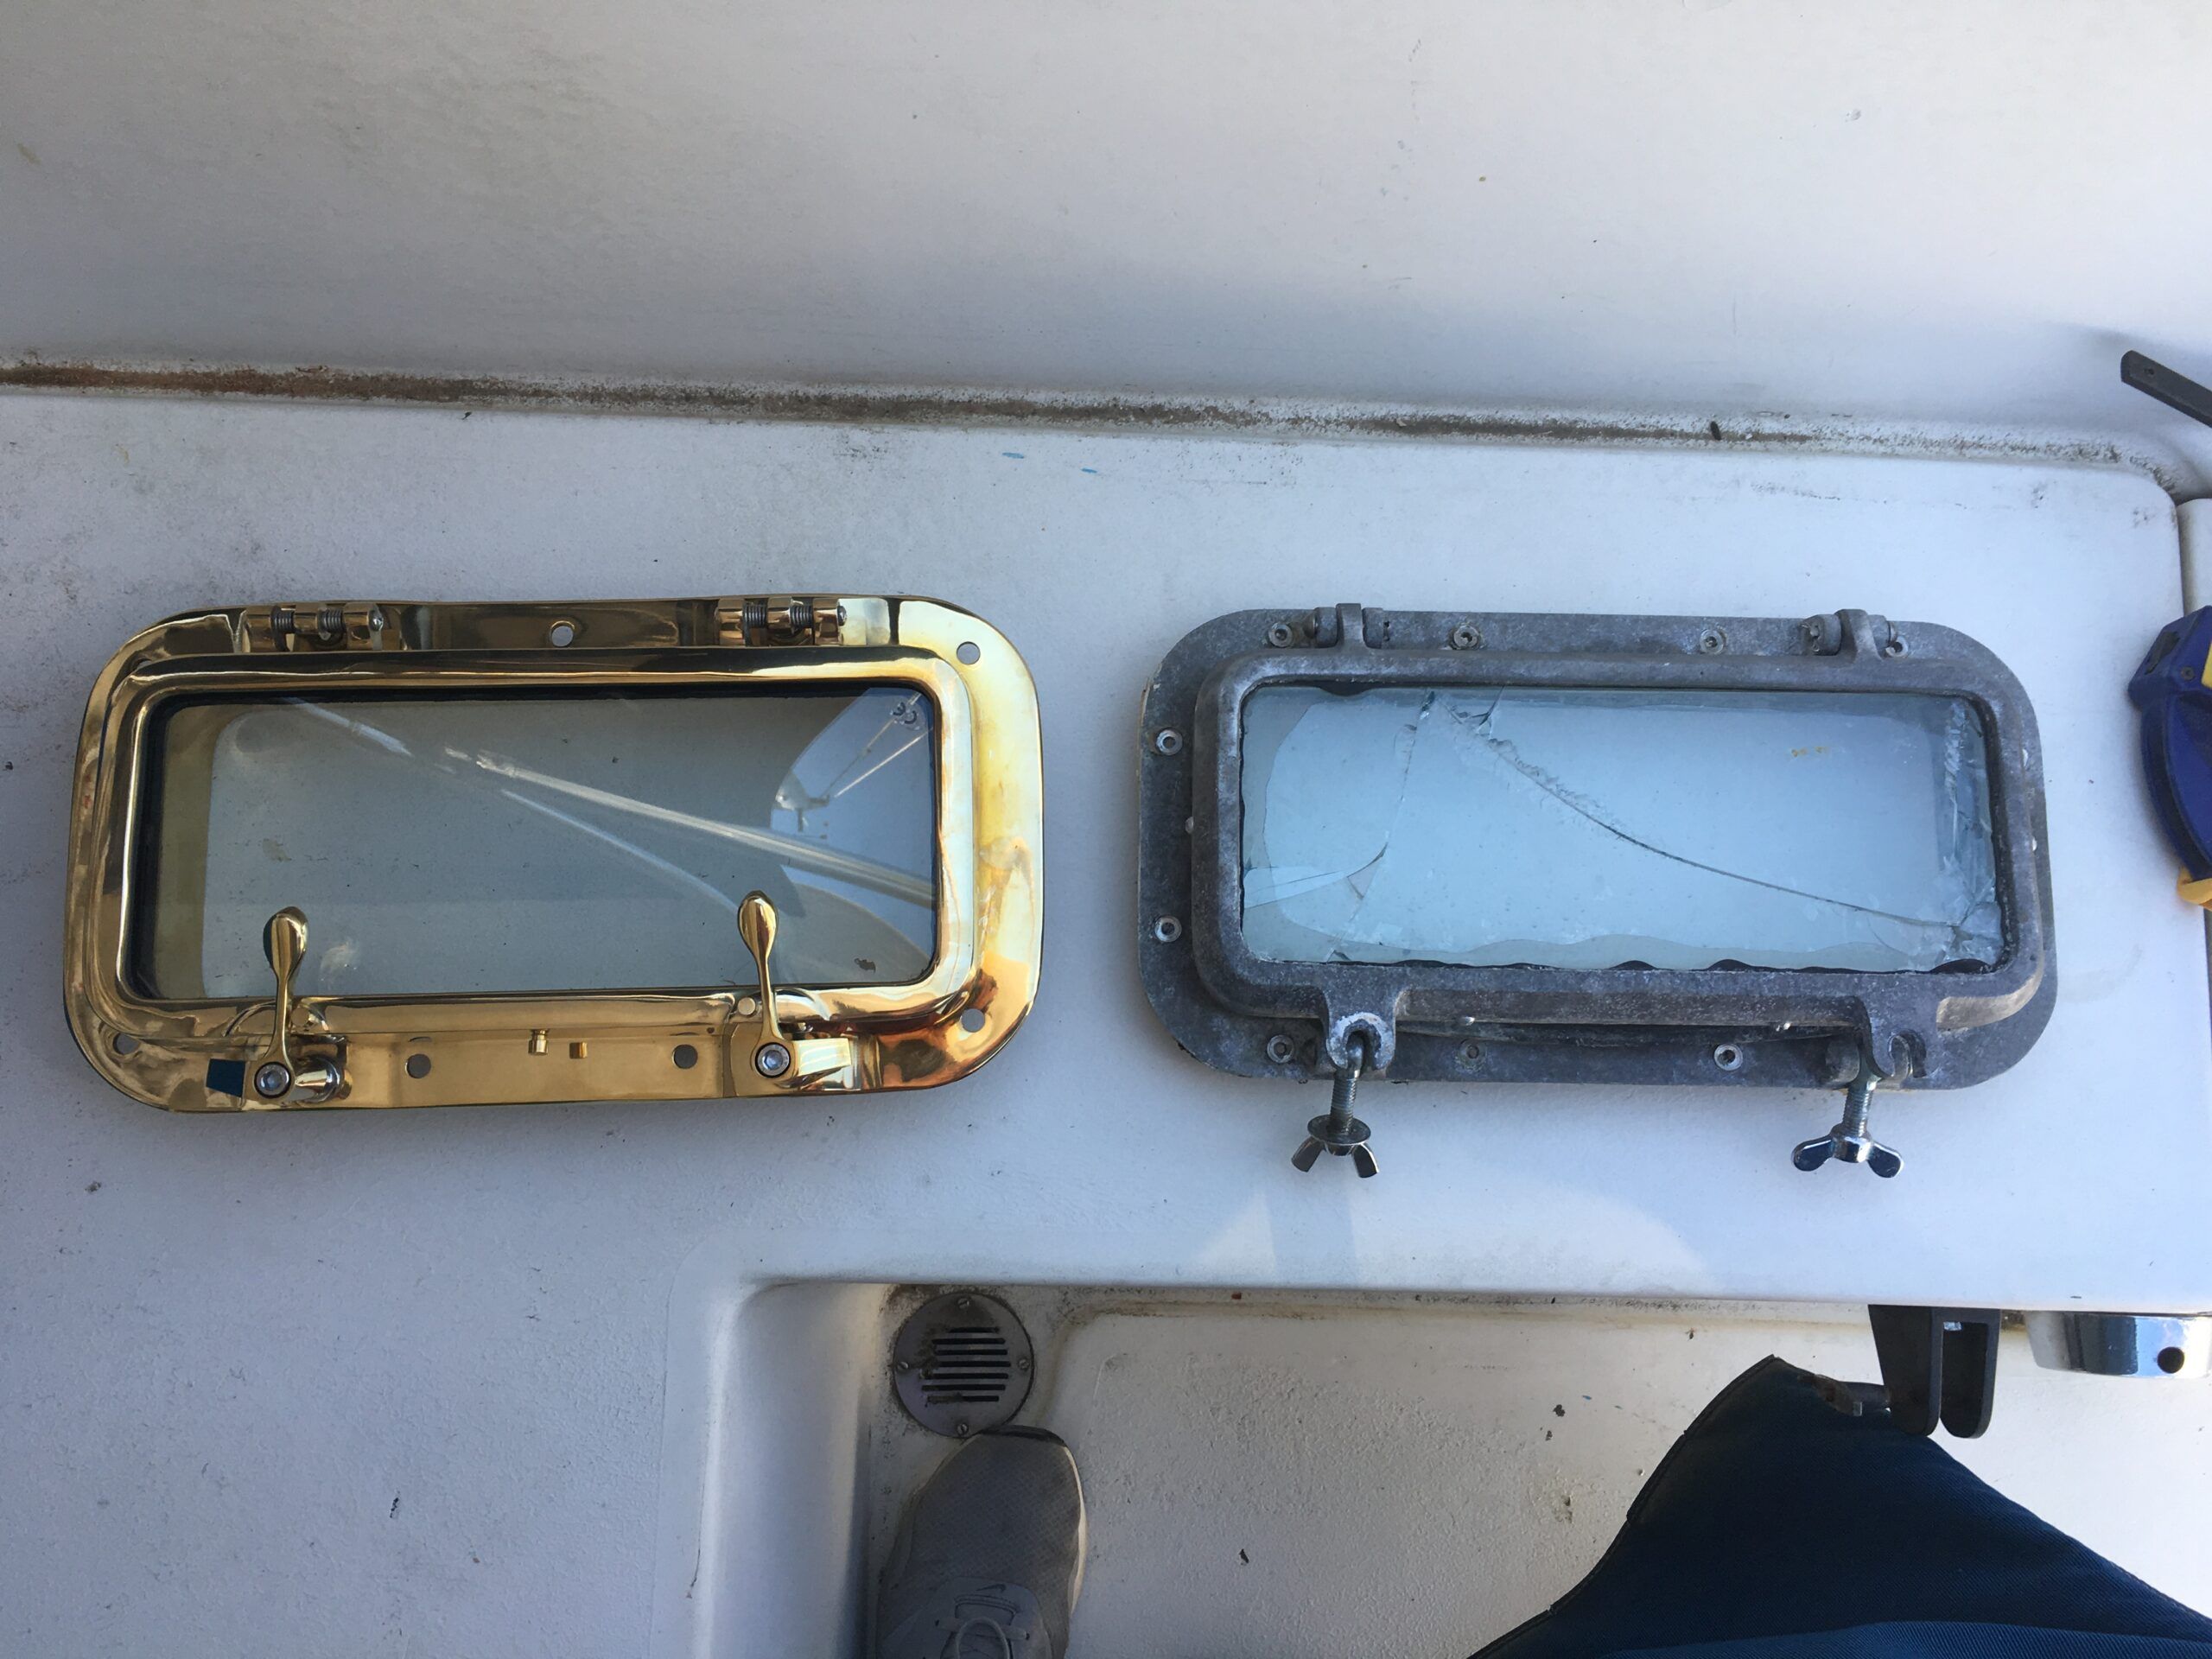
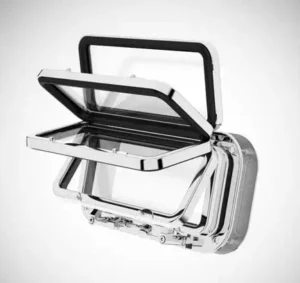
Opening portlights—metal or plastic—are notorious for developing leaks between the opening lens and the frame. Manufacturers such as Beckson and Lewmar provide gasket repair kits that will resolve the leaking issue. They can also replace the crazed plexiglass lens. But at some point, particularly if the frame itself is corroded aluminum or cracked plastic, the cost of repair is about the same as replacement.
There is also the option to upgrade to stainless steel or bronze opening ports. A company called New Found Metals manufactures jewel-like opening portlights that would do any boat proud. Although they are a bit more difficult to install than a direct replacement, the template and instructions accompanying the portlights make it all attainable for a competent owner.
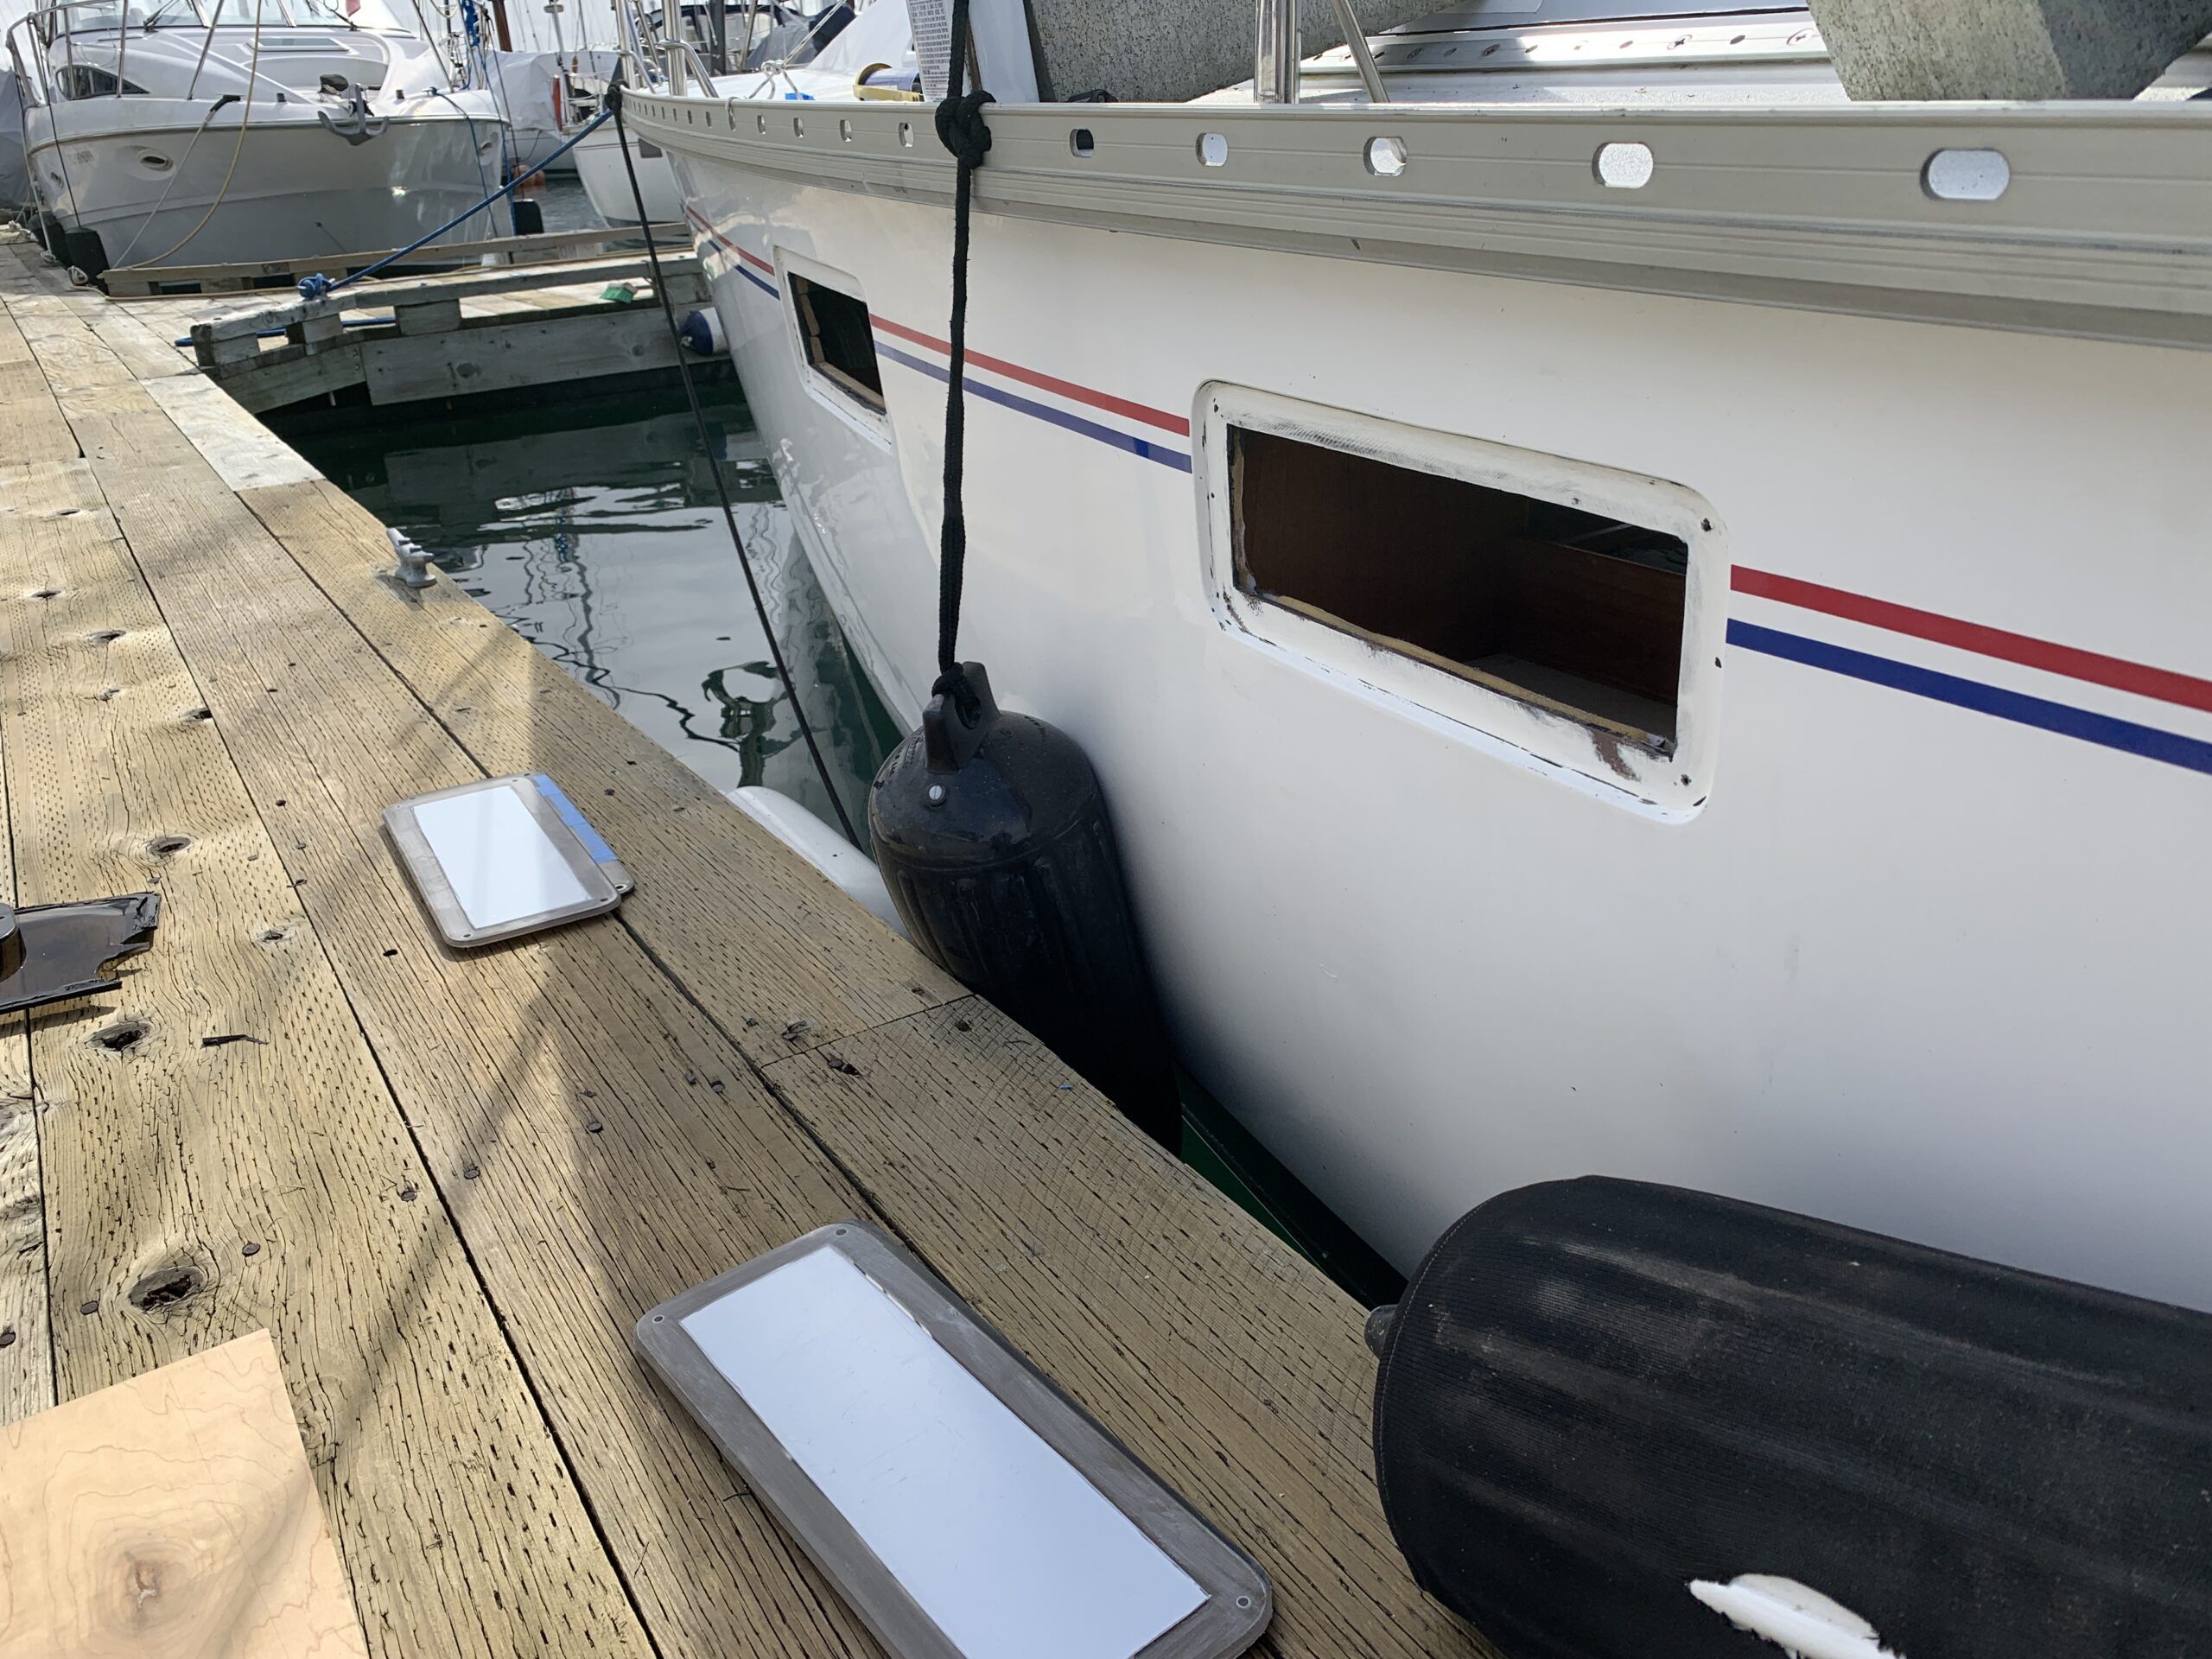

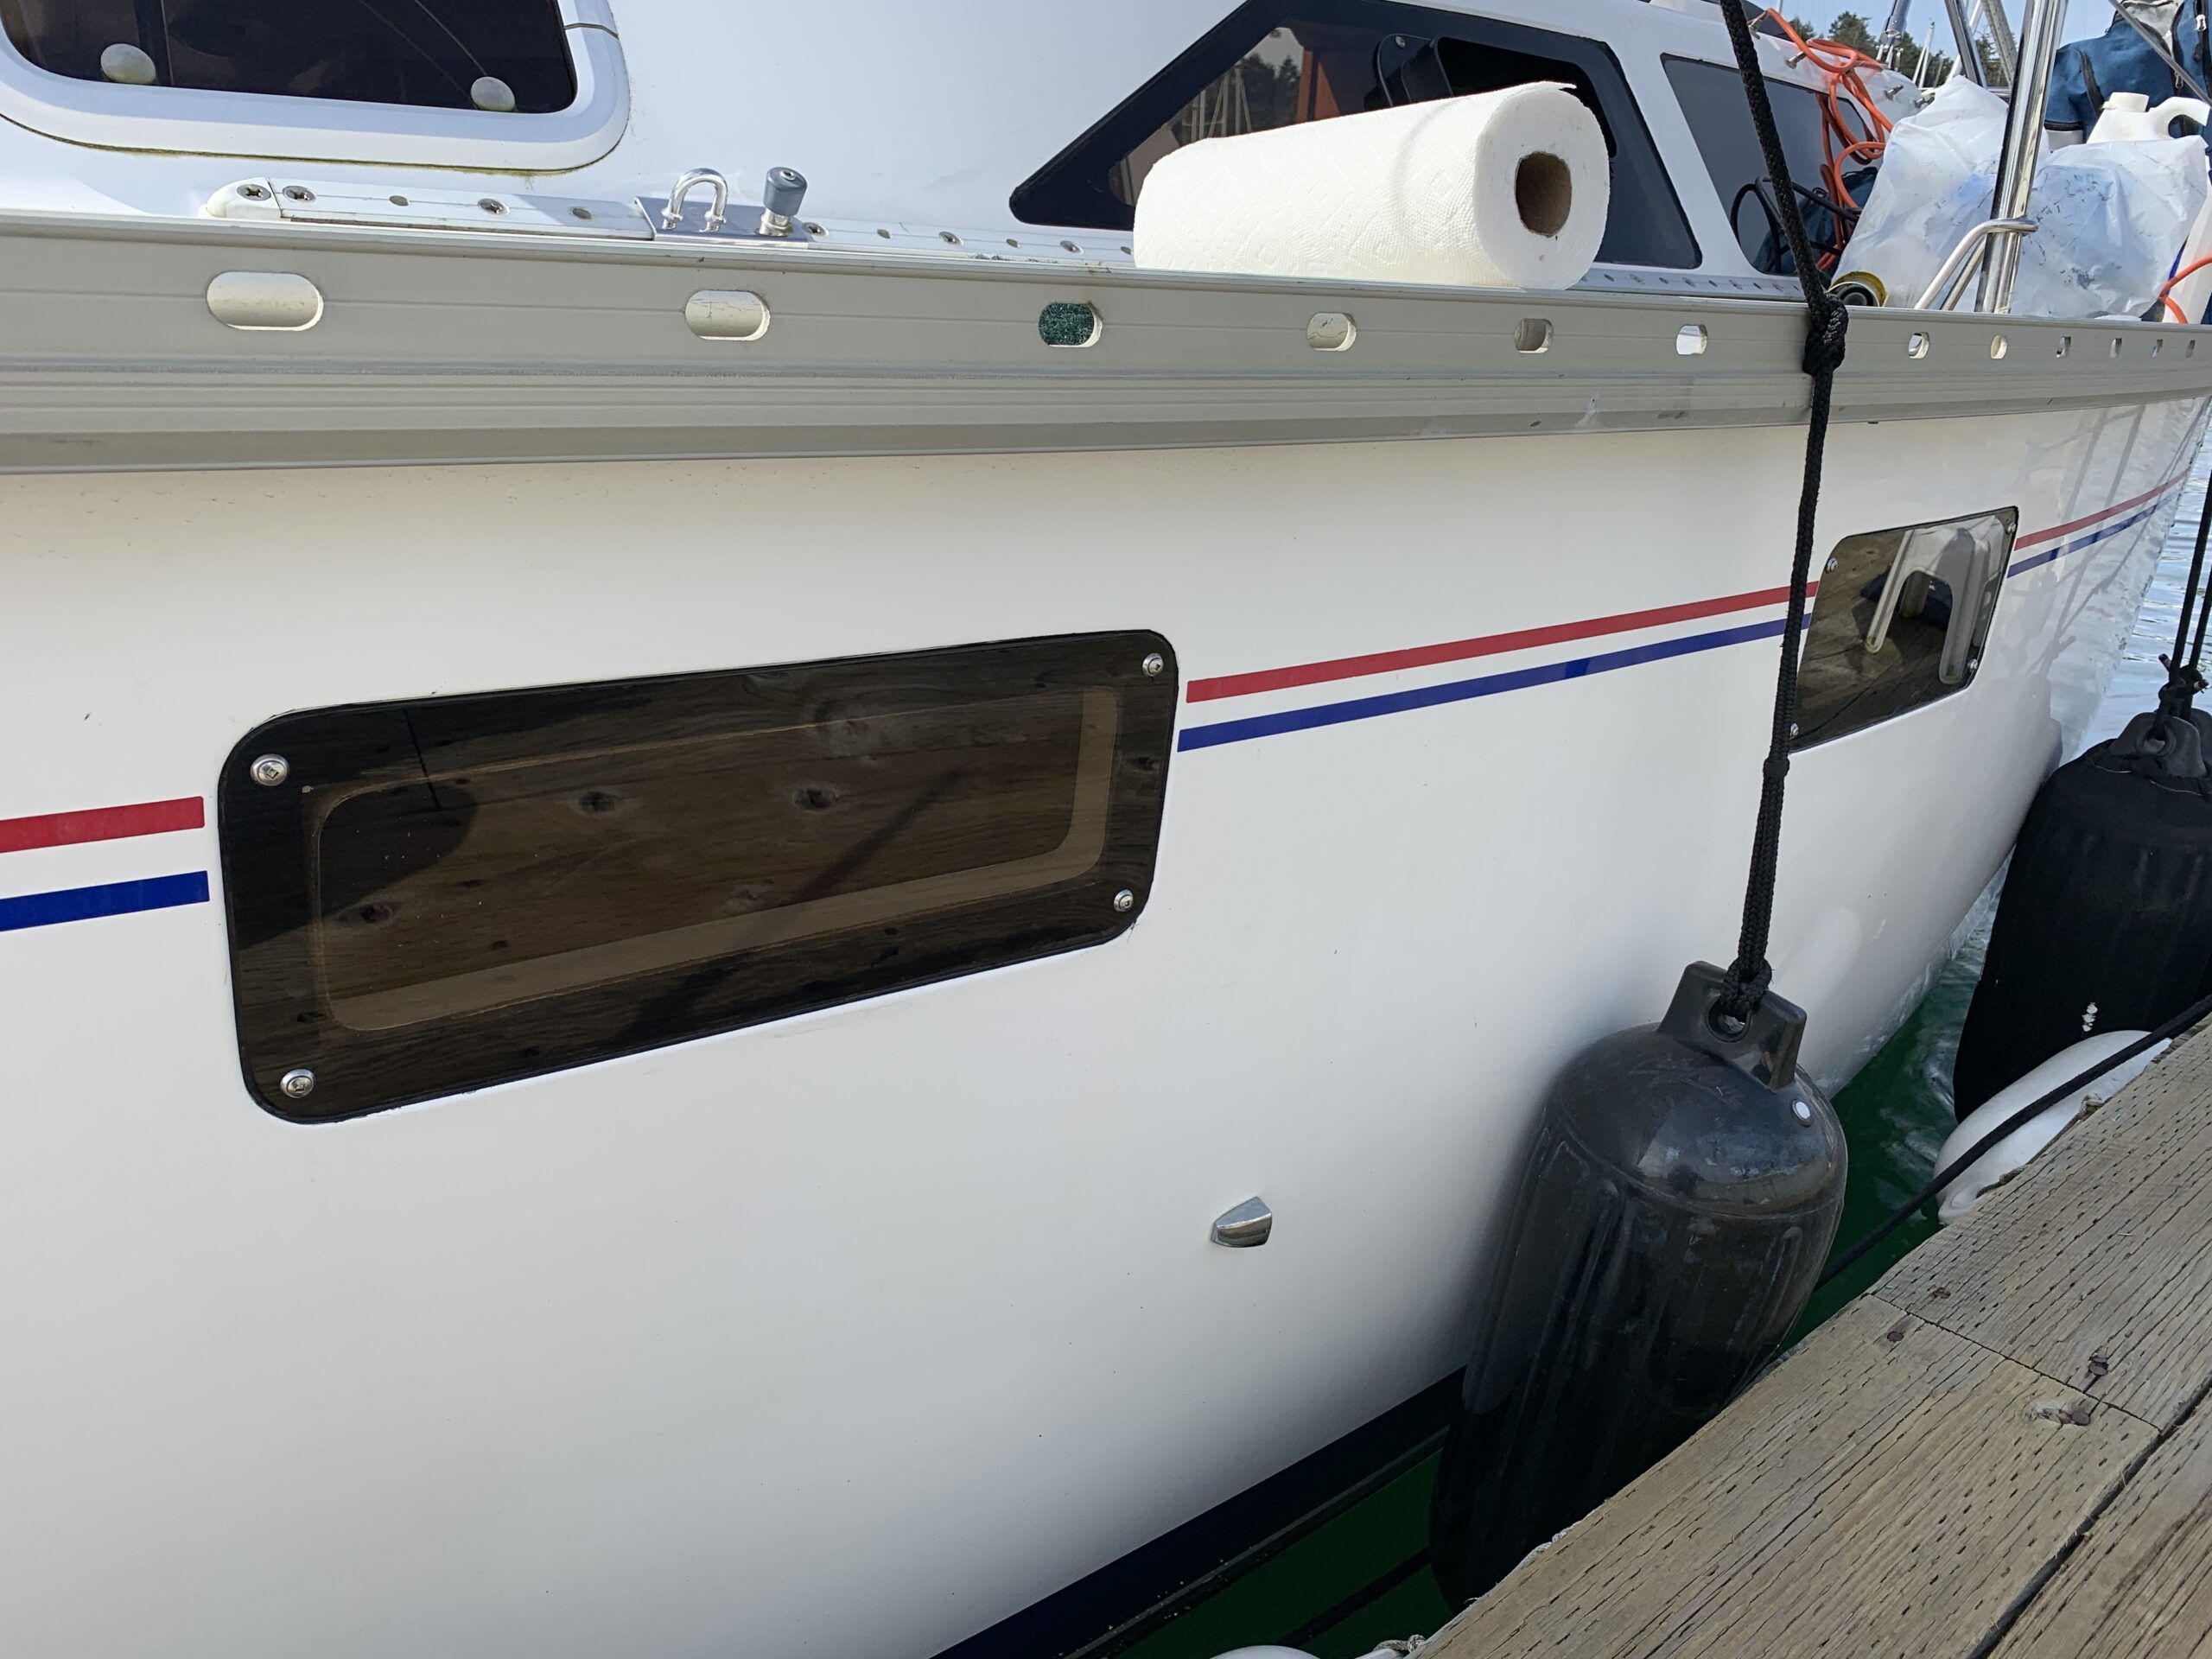
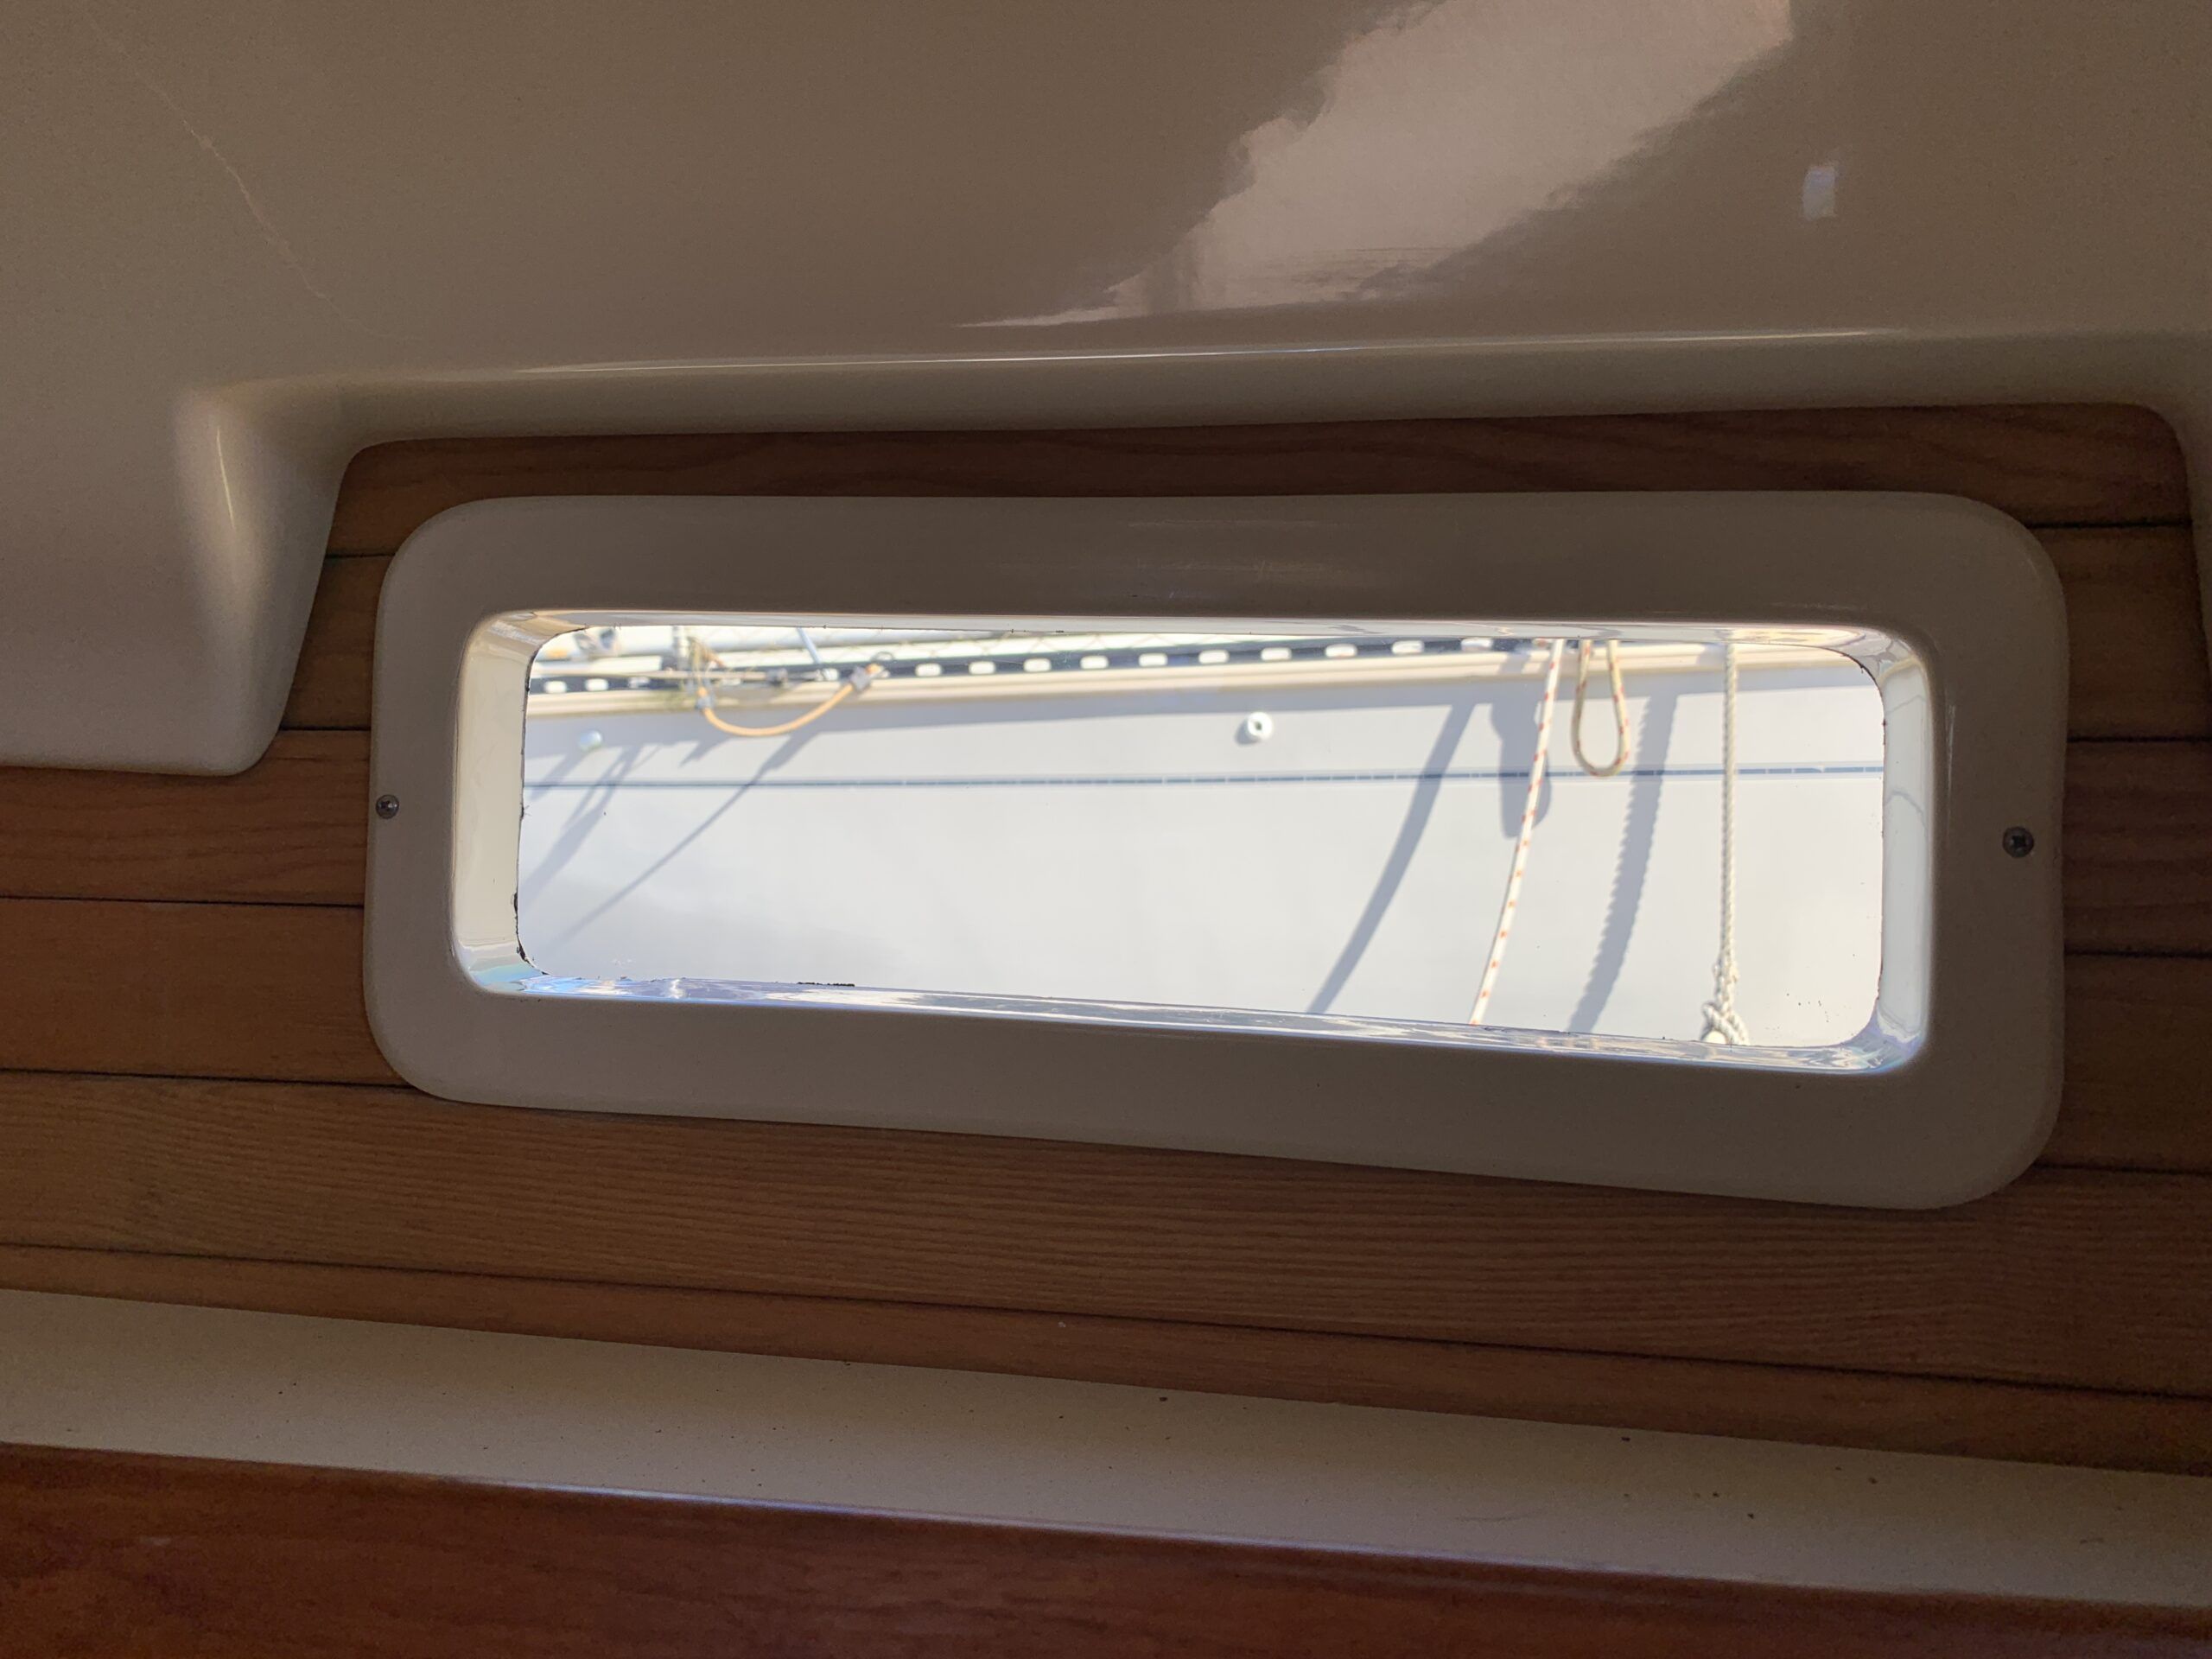
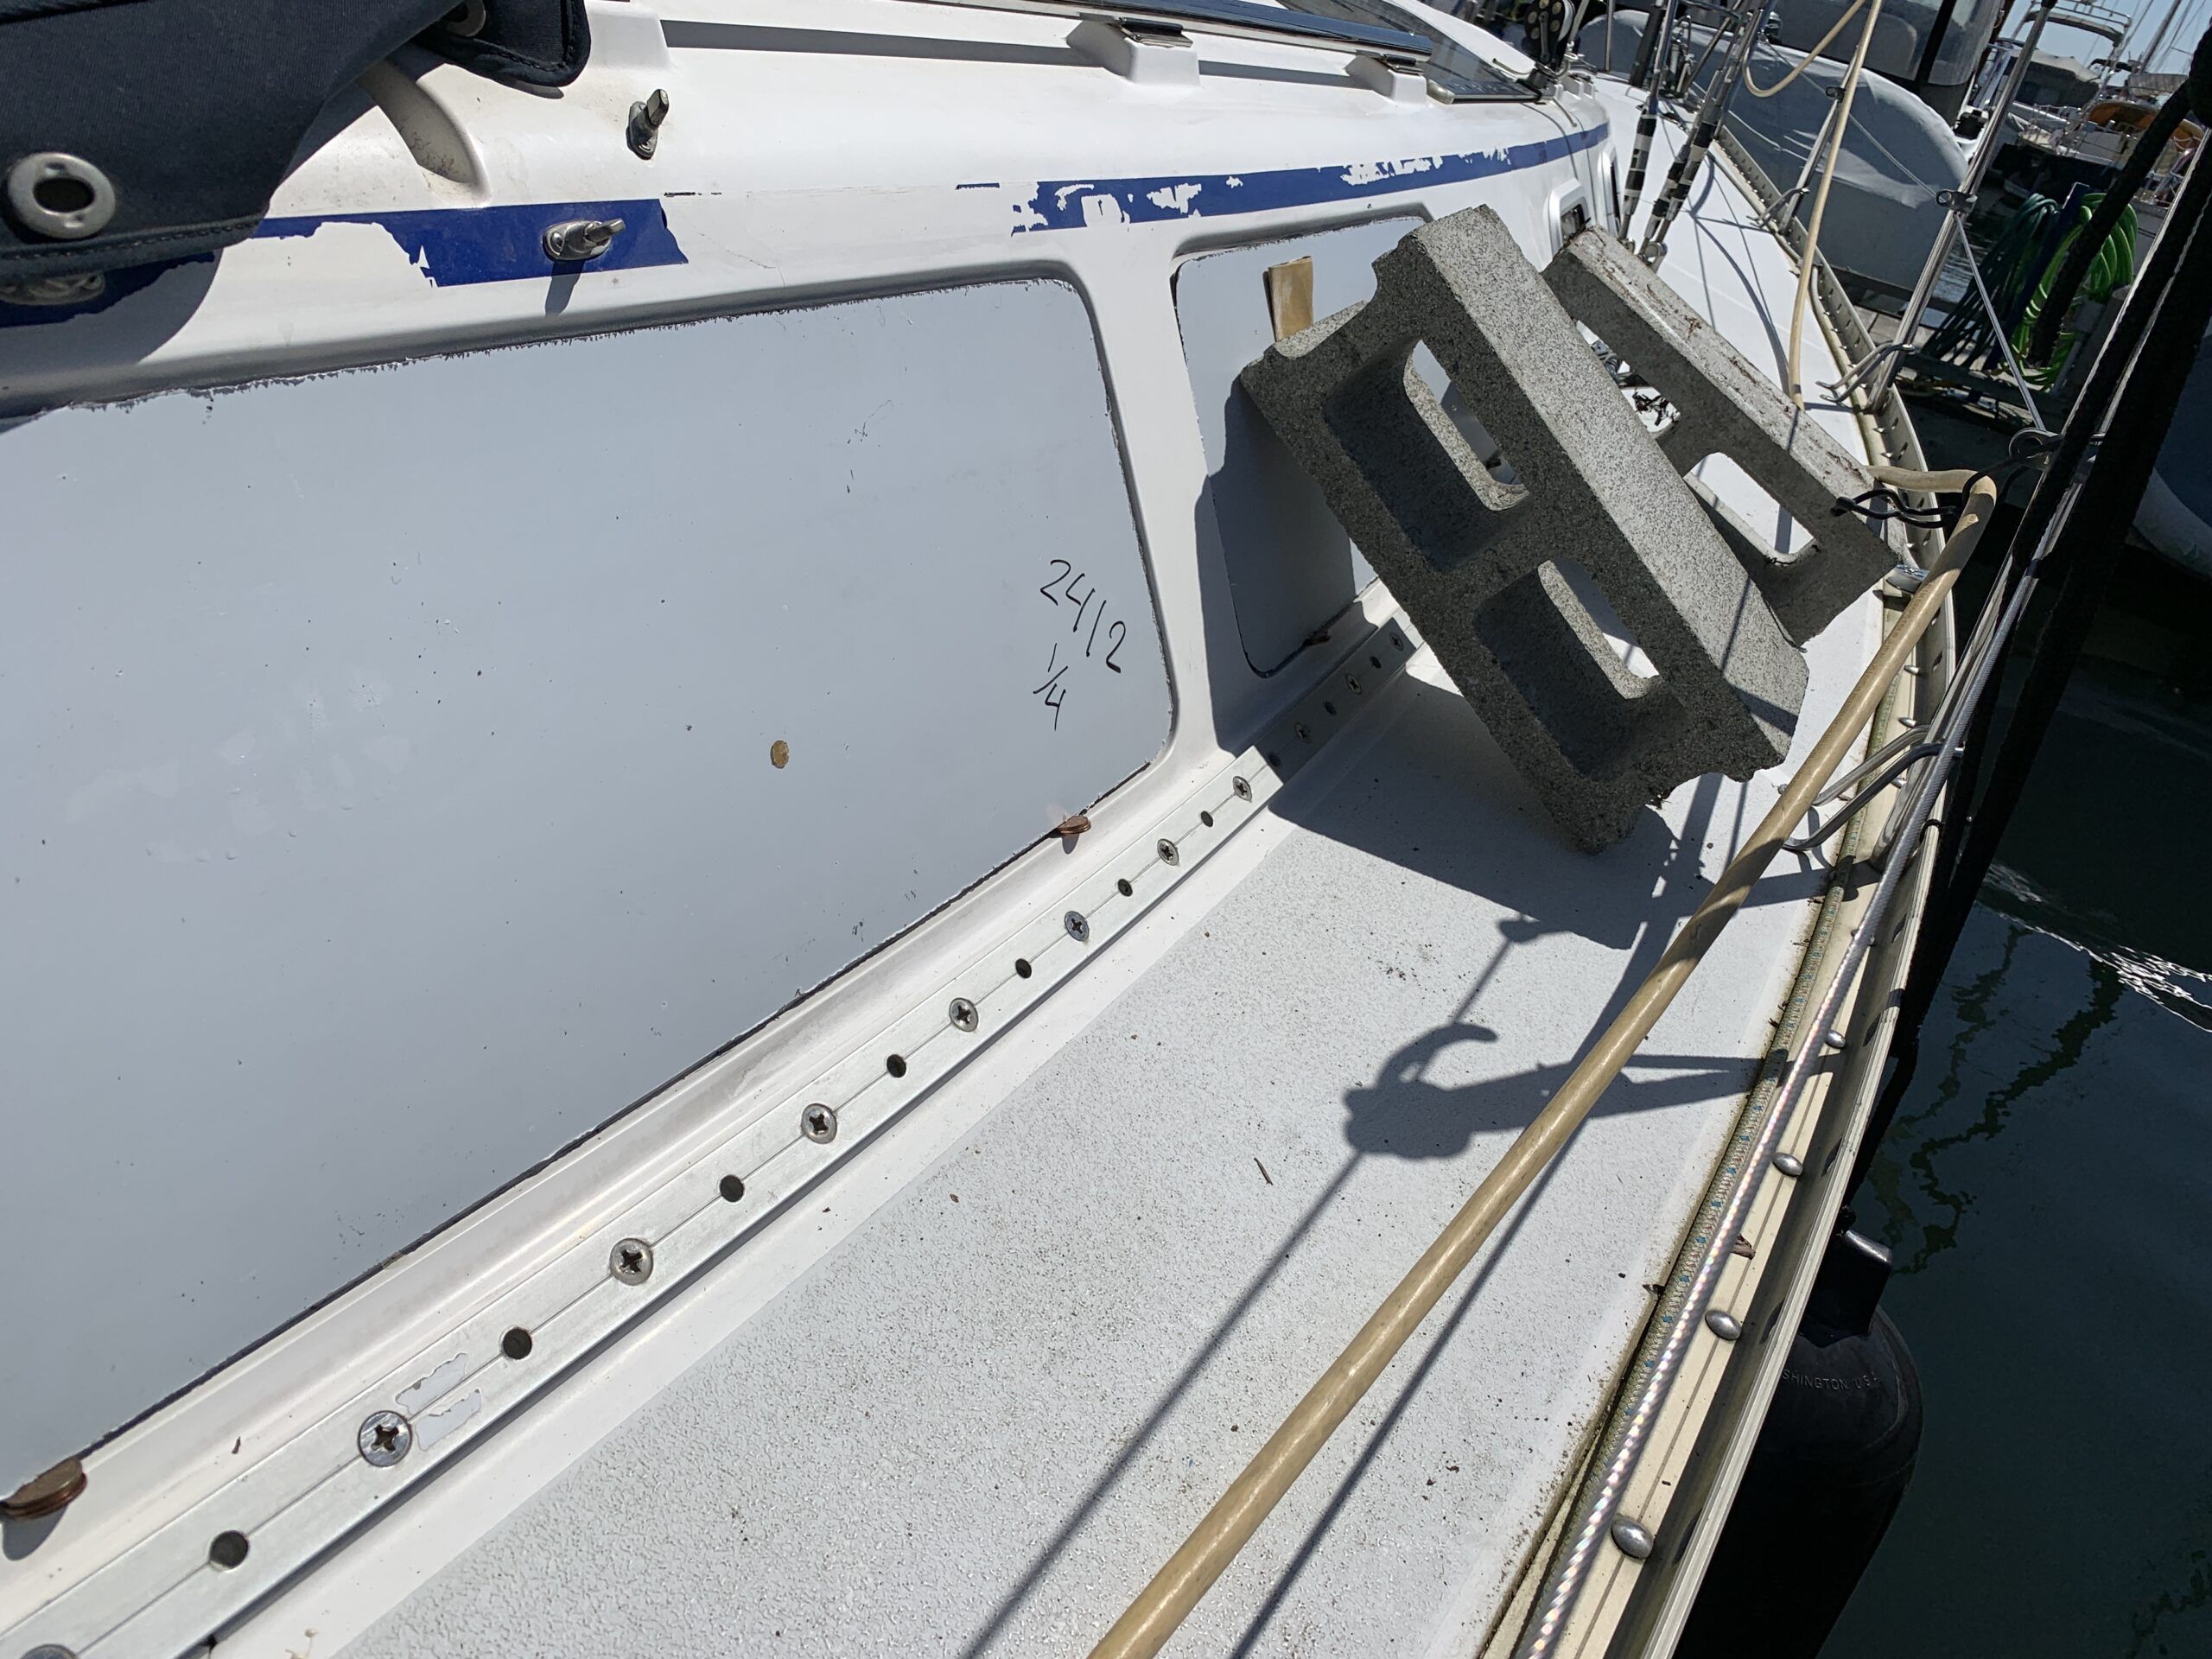
Frameless Windows
Manufactures such as Hunter, C&C and some models of Jeanneau and Beneteau opted for the frameless window set into a shallow recess in the cabin trunk. The installed plexiglass was usually flush or slightly proud of the surrounding gelcoat. The clean, uncluttered appearance was attractive and cost effective. But again, the wear and tear of sailing along with deterioration from the sun has probably caused crazing to the point of obscuring any clear view through them. When it is time to replacement them, it is a bit more difficult than a framed window.
Note: To avoid absorbing the sealant into the gelcoat where it’s not wanted, particularly black sealant, give the gelcoat a good coat of wax before you take the old windows out.
Frameless Window Removal
1. Check For Replacement Plexiglass
Before beginning the removal of the old windows determine availability of replacement plexiglass. Is the correct plexiglass still available from the factory? This is particularly true for those sailboats with curved overhead windows like the Beneteau Oceanis series. If a factory replacement is not available, can it be sourced locally? Can it be cut at the plastics shop? If not, do you have the equipment and skills to shape the window to the correct dimensions? A table saw and jig saw are really all that’s needed, but cutting plexiglass is a somewhat risky process because cracking and chipping can occur if too much force is used.
2. Create a Pattern
If a factory direct replacement window is not available, then the installation process begins with creating a pattern of the old plexiglass while it’s still in place. Any thin paper will do. Simply place it over the window, tape the corners to hold the paper in place, and trace the edges of the window. Do that for each window. Don’t assume port and starboard windows are the same. Now you have a pattern for cutting the replacement plexiglass. The thickness of the plexiglass will still have to be determined once the old window is removed. The reason I suggest a paper pattern is that the current window may be reluctant to come out. In many cases that plexiglass will shatter when being pried.
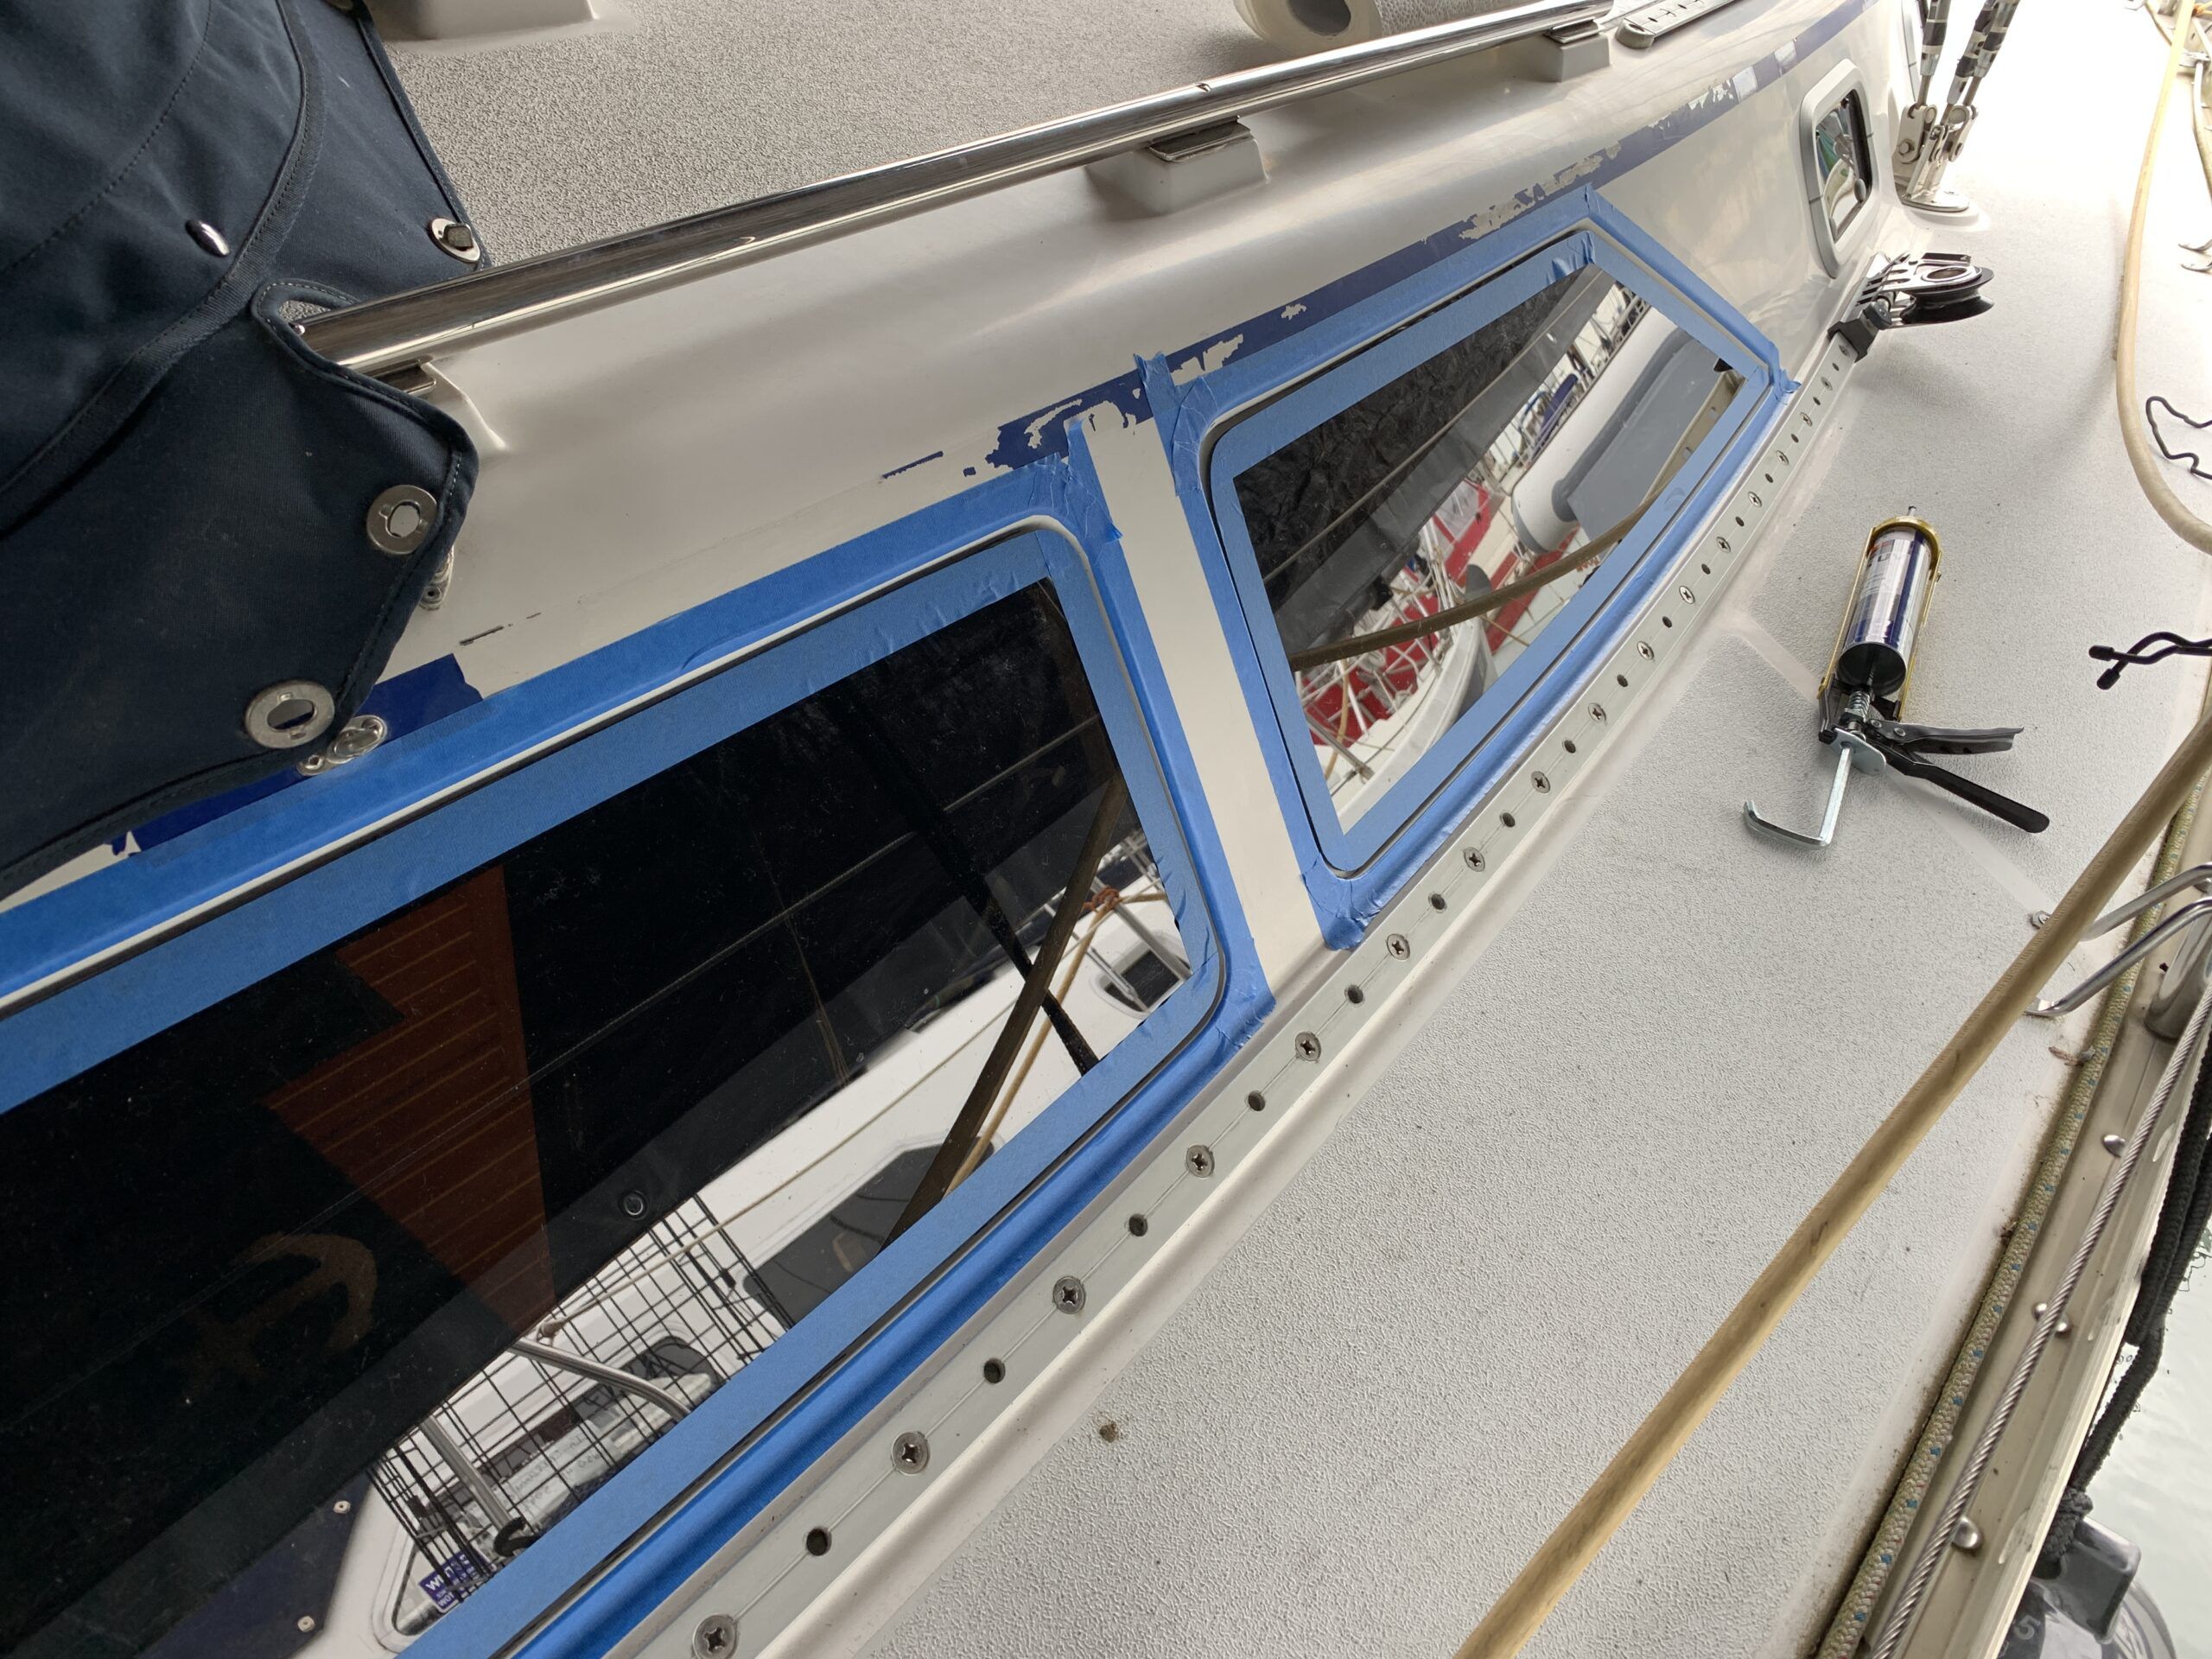
3. Tape the Gelcoat
Once a paper pattern has been created, apply protective tape to the gelcoat surrounding the window. I usually use something heavier than traditional masking tape. Something like duct or vinyl tape provides better protection from the tools you’ll be using.
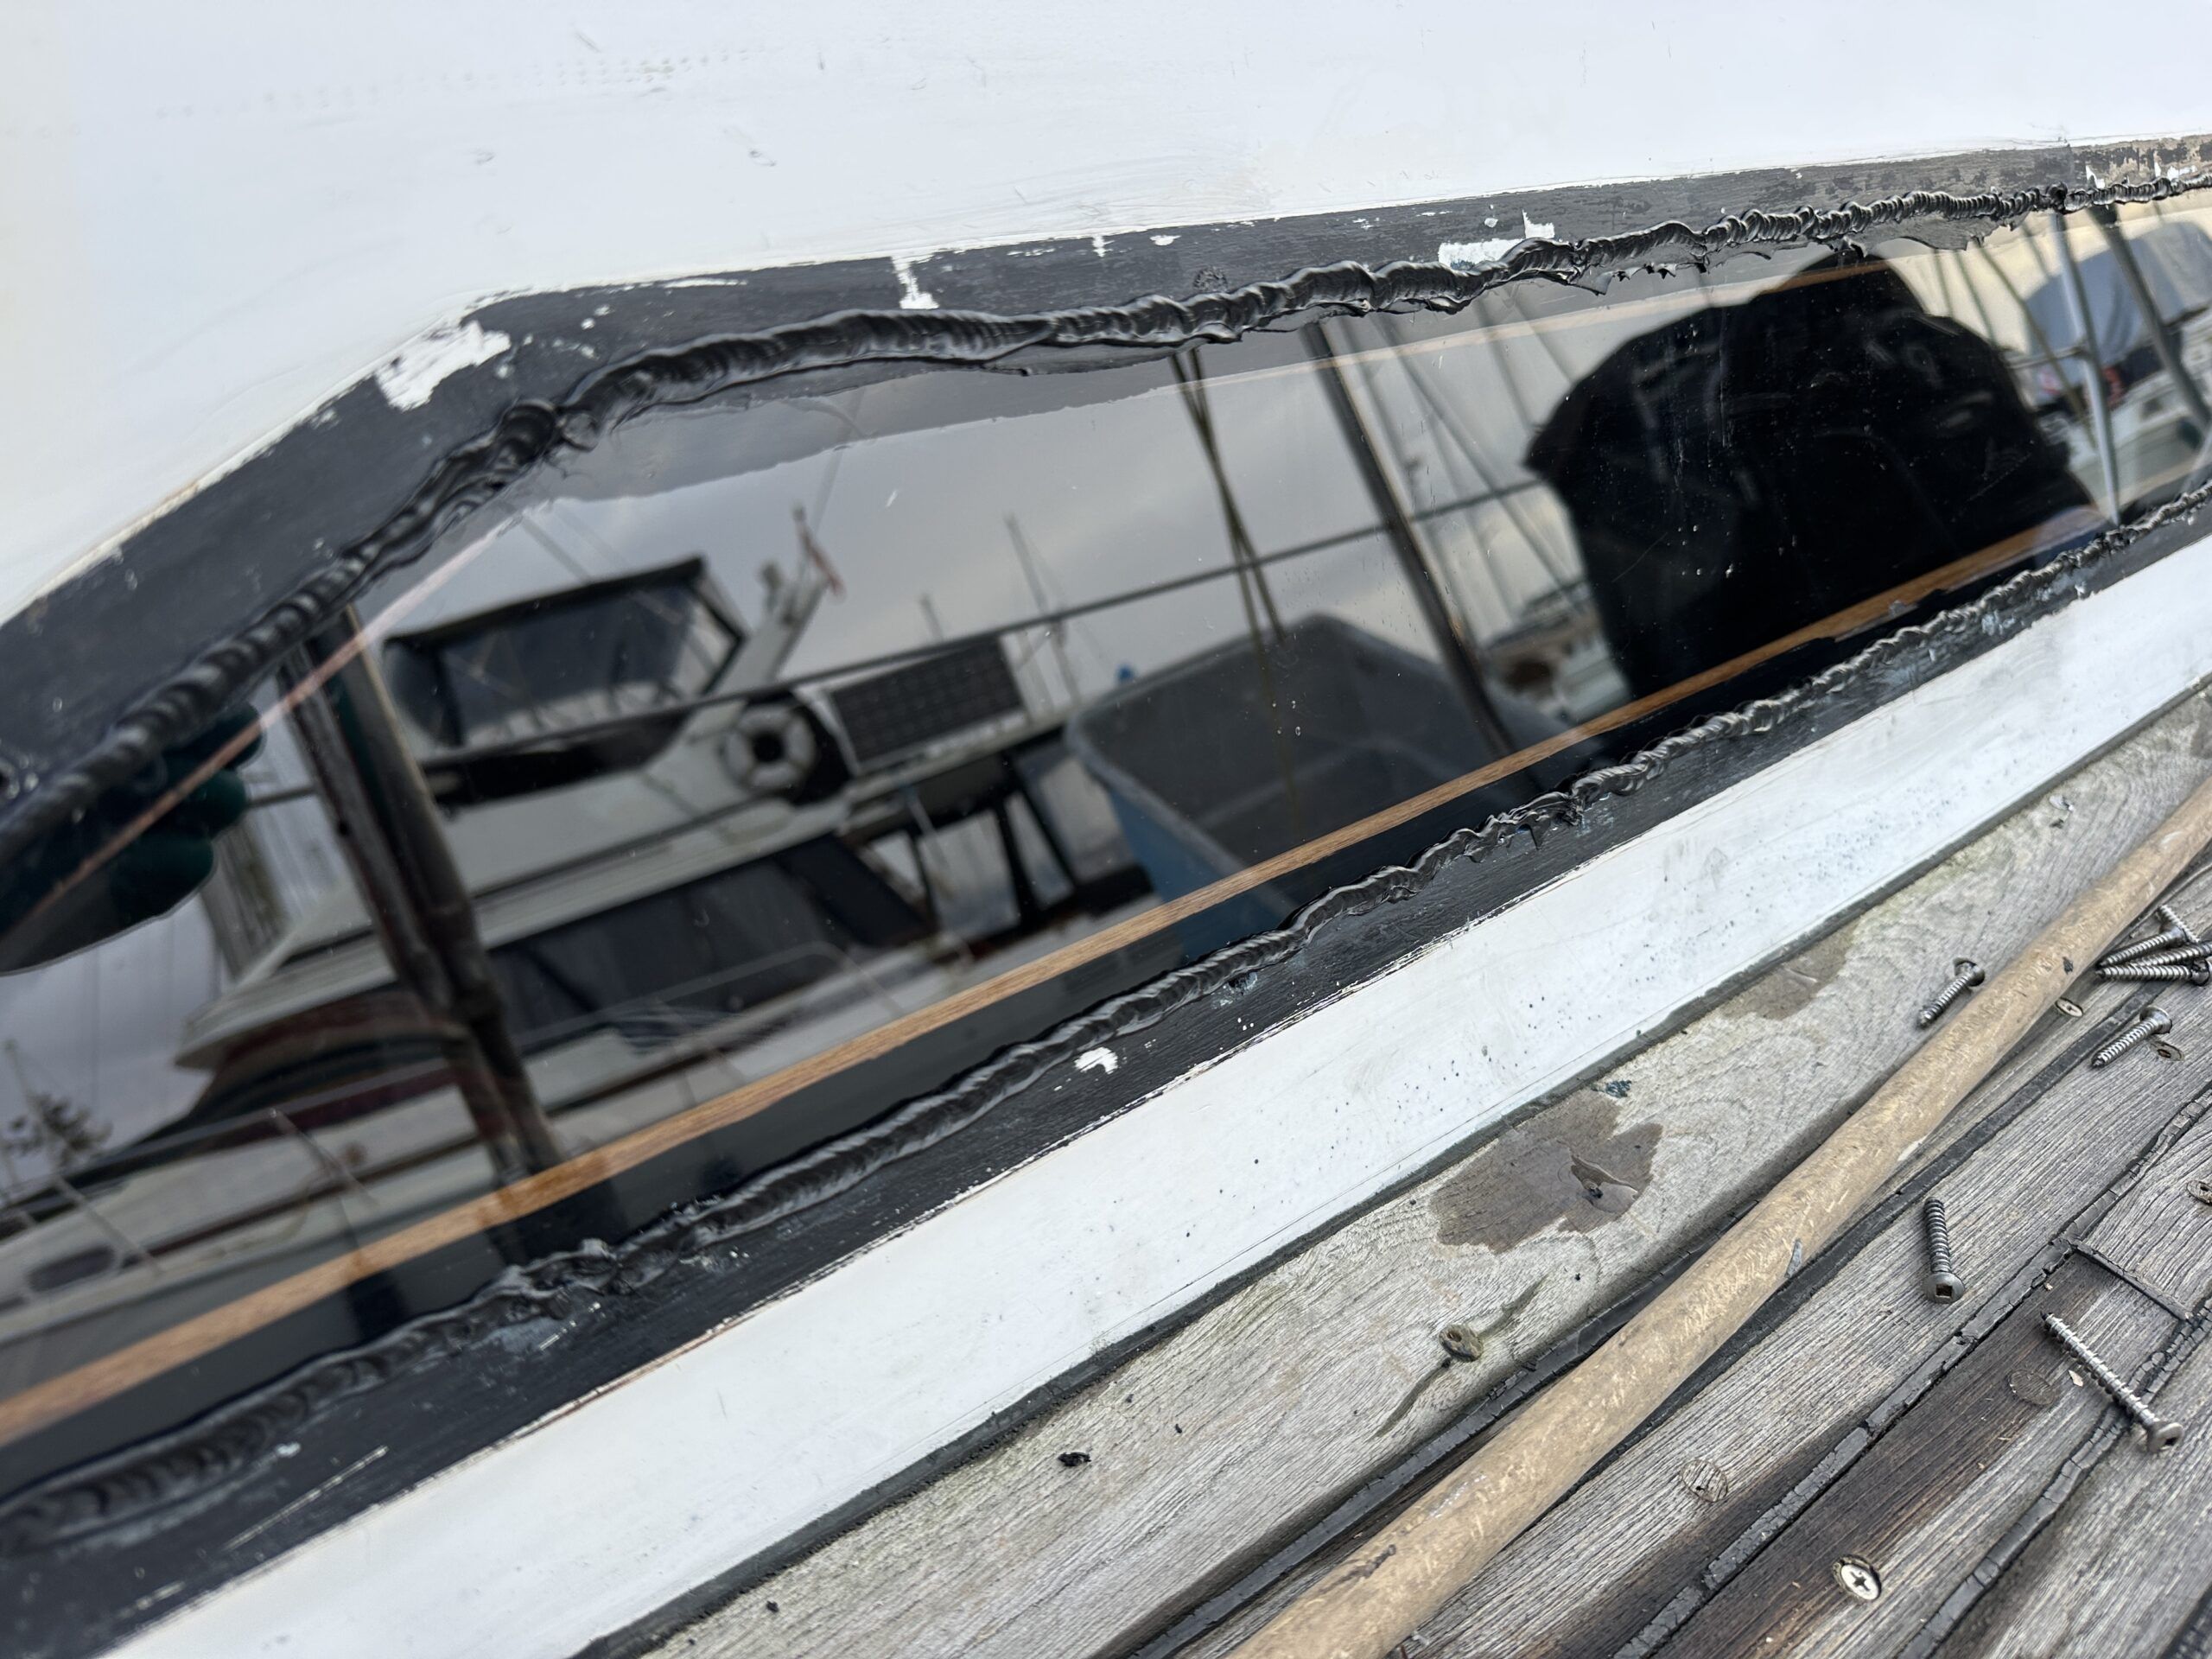
4. Cut the Sealant and Remove Old Plexiglass
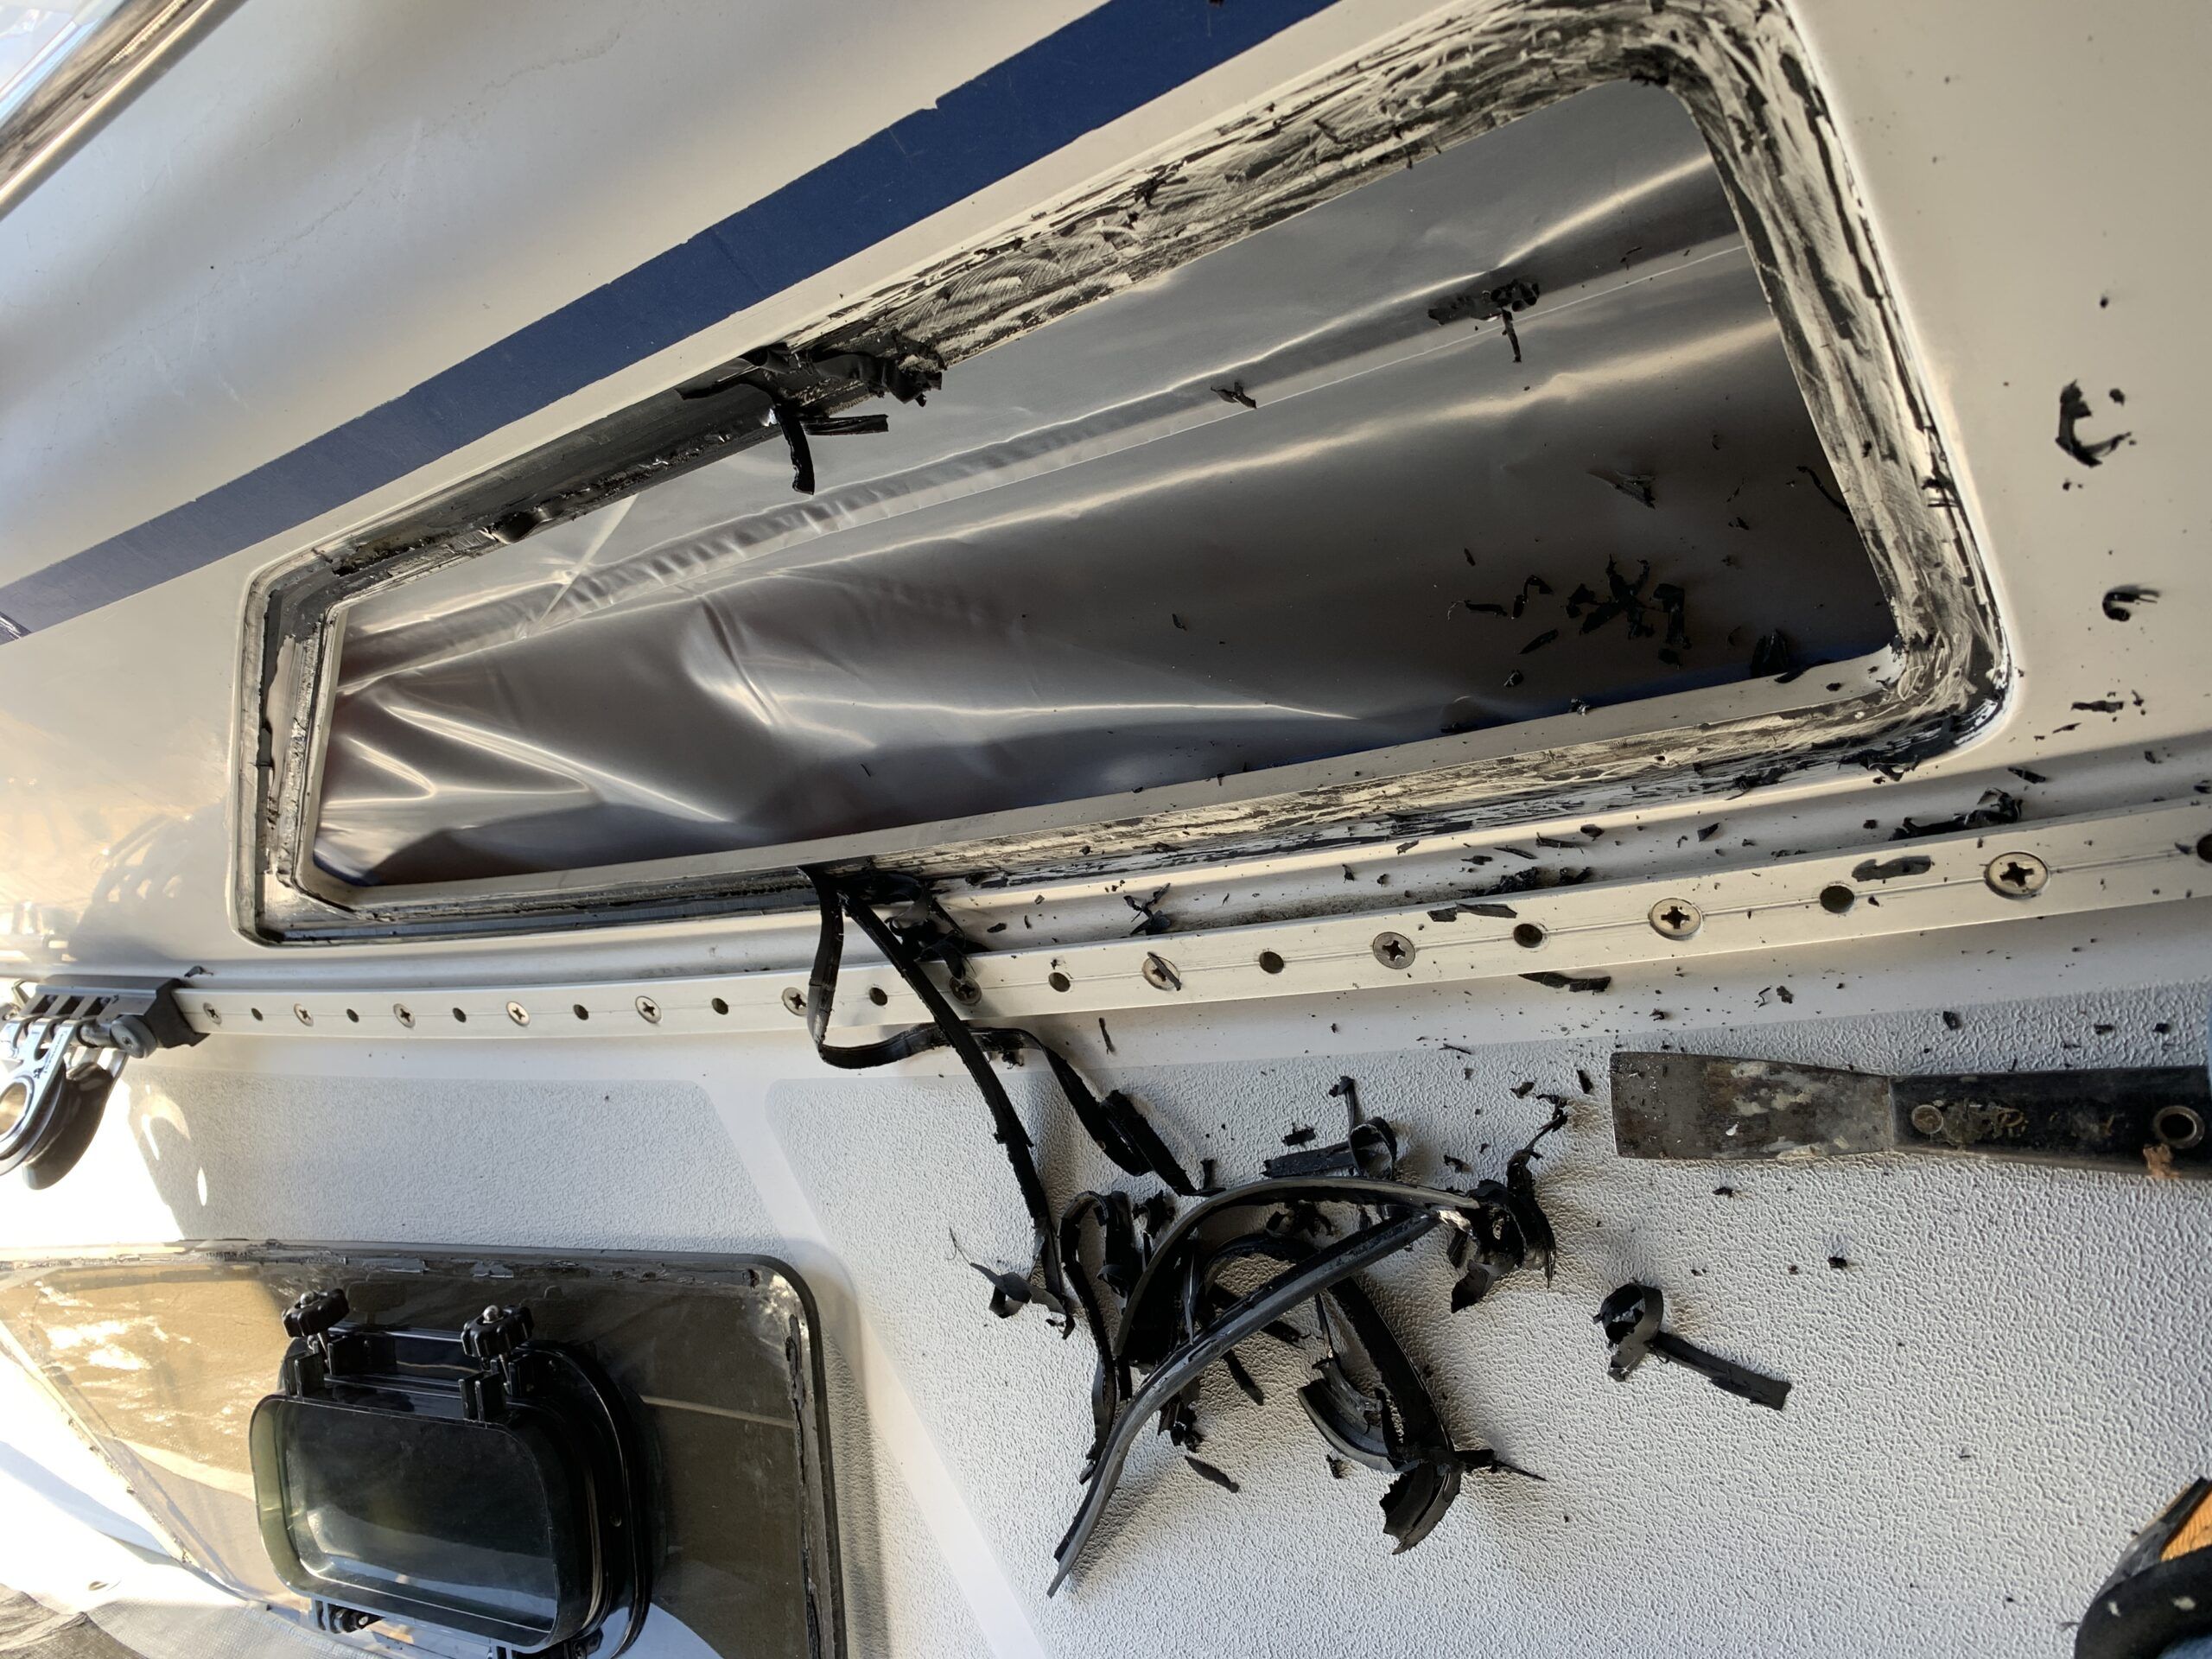
Patience is called for when removing the old plexiglass. The old sealant may be reluctantly let go. Just like the framed windows, work from the inside as much as possible, cutting the sealant with box cutter type knives and forcing pry bars and wedges between the plexiglass and gelcoat. If the plexiglass shatters or cracks, remove the individual pieces.
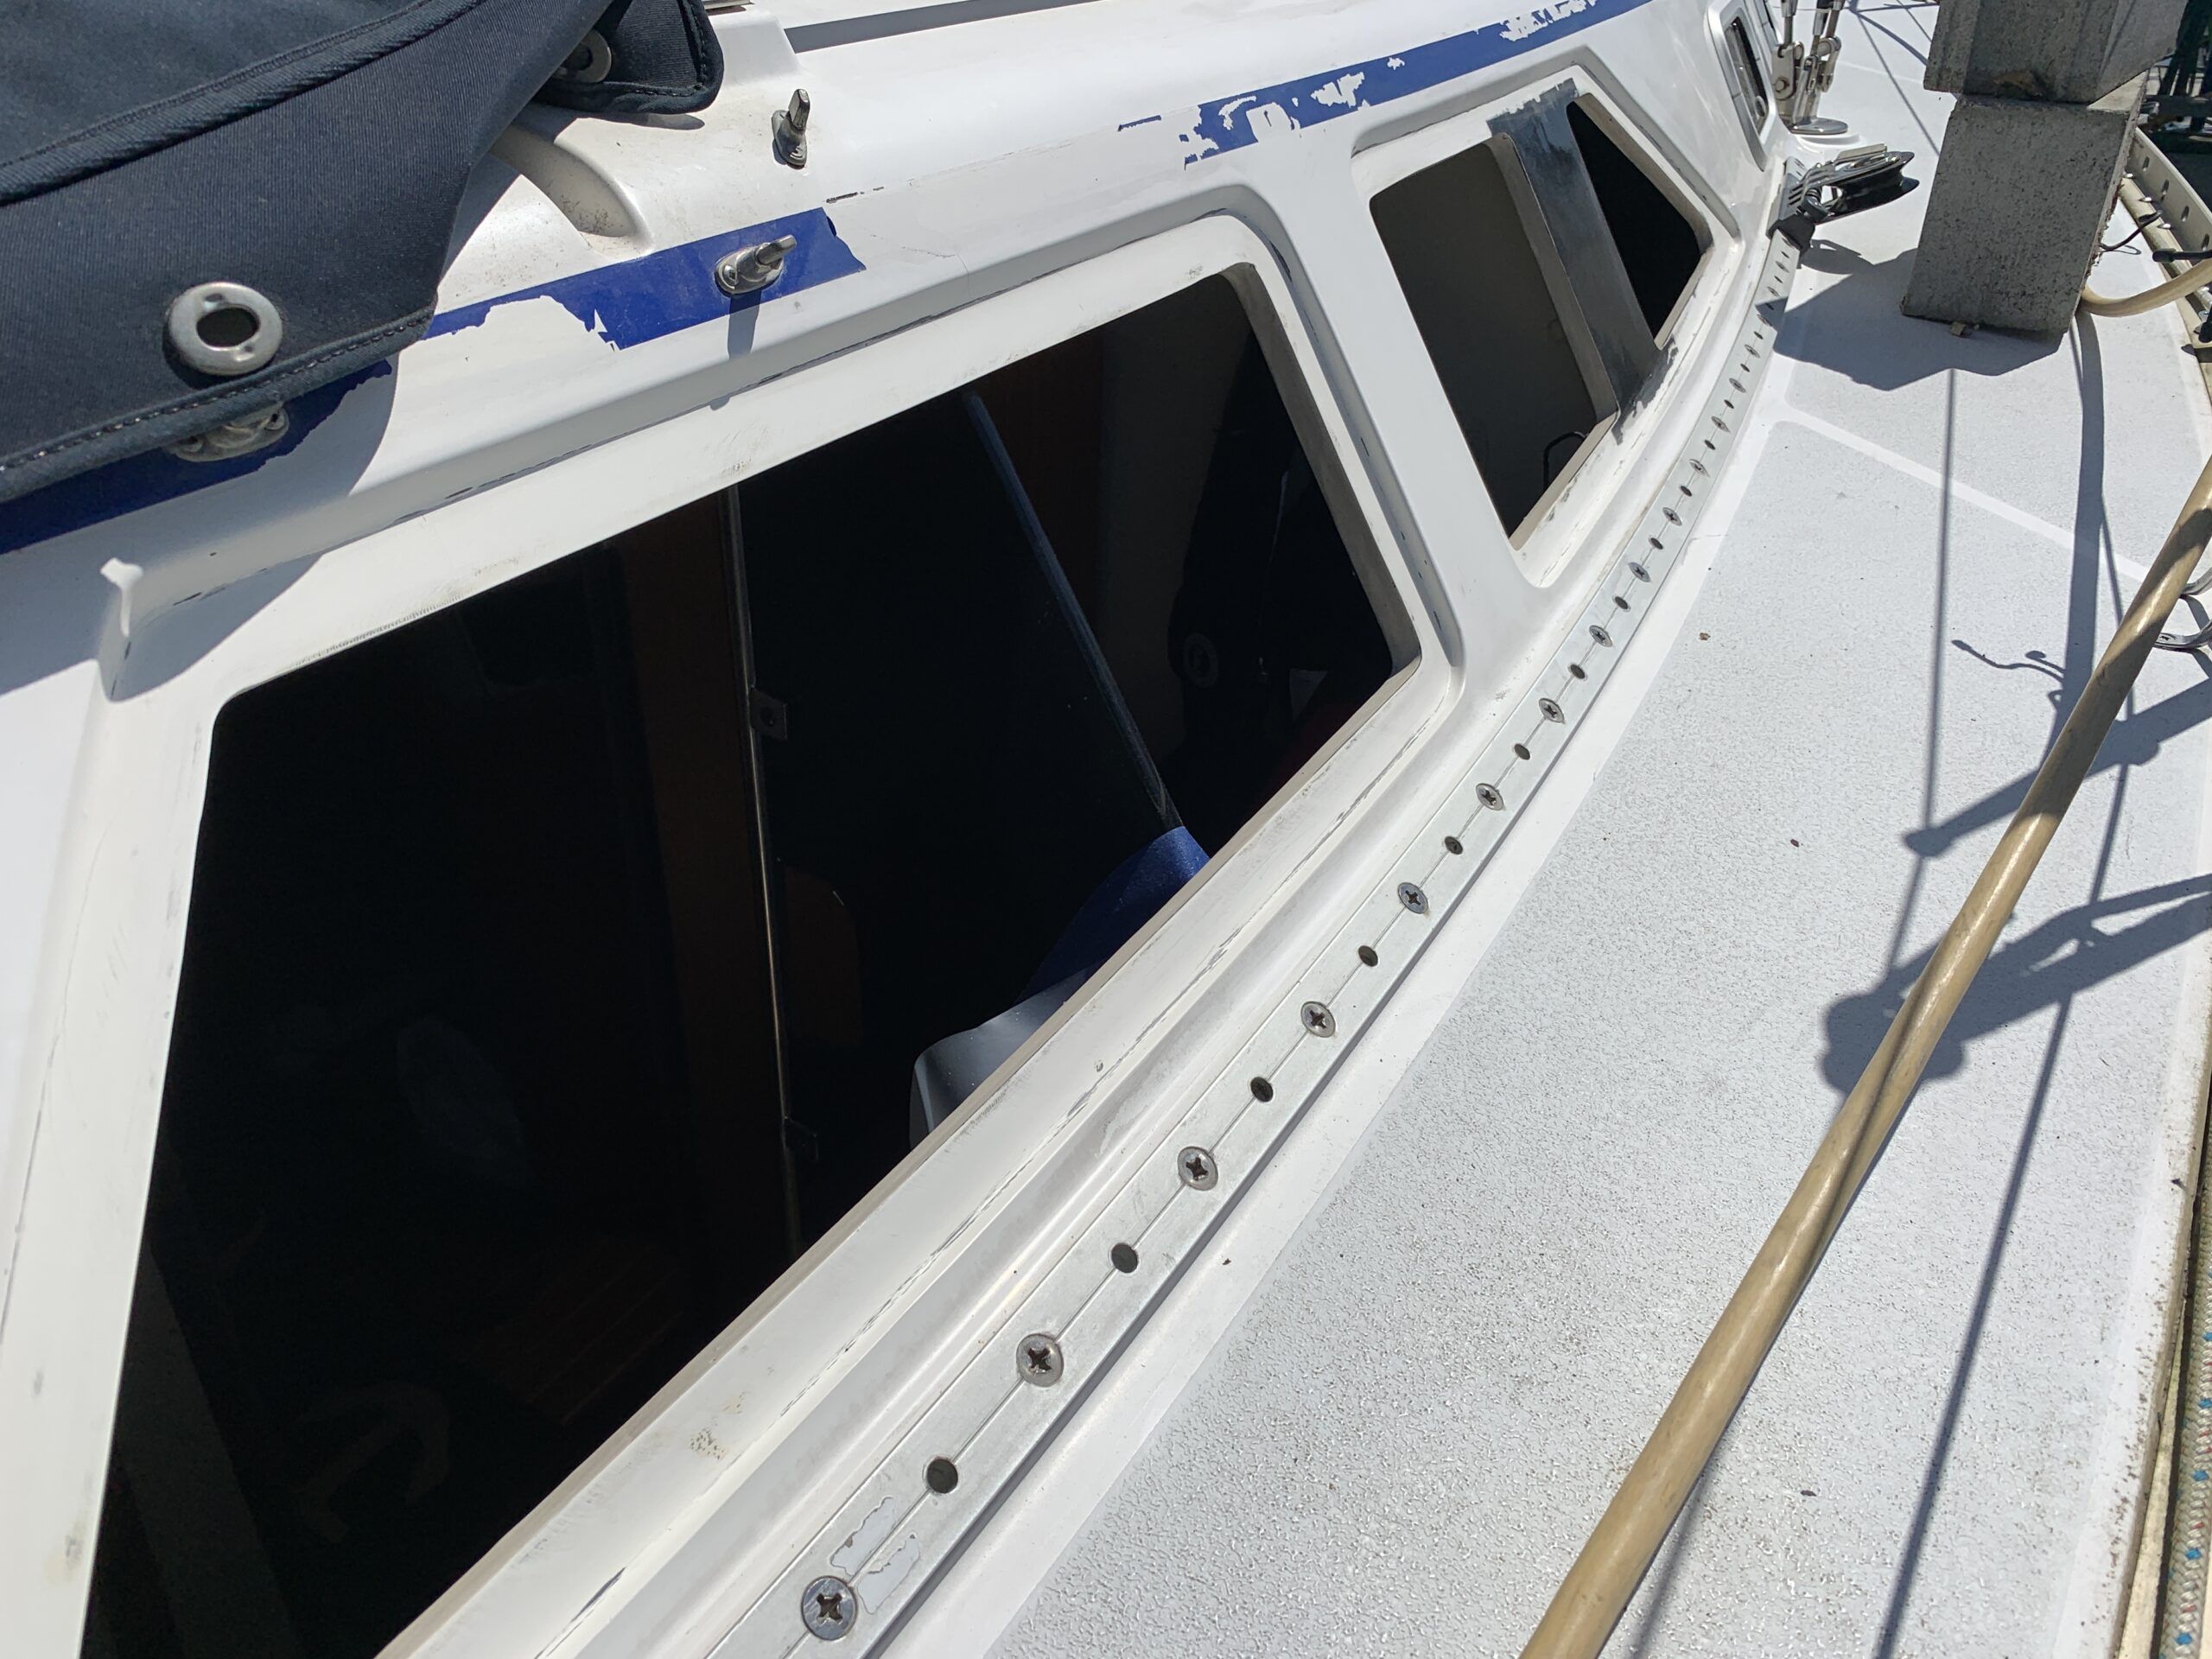
5. Clean Cabin Trunk
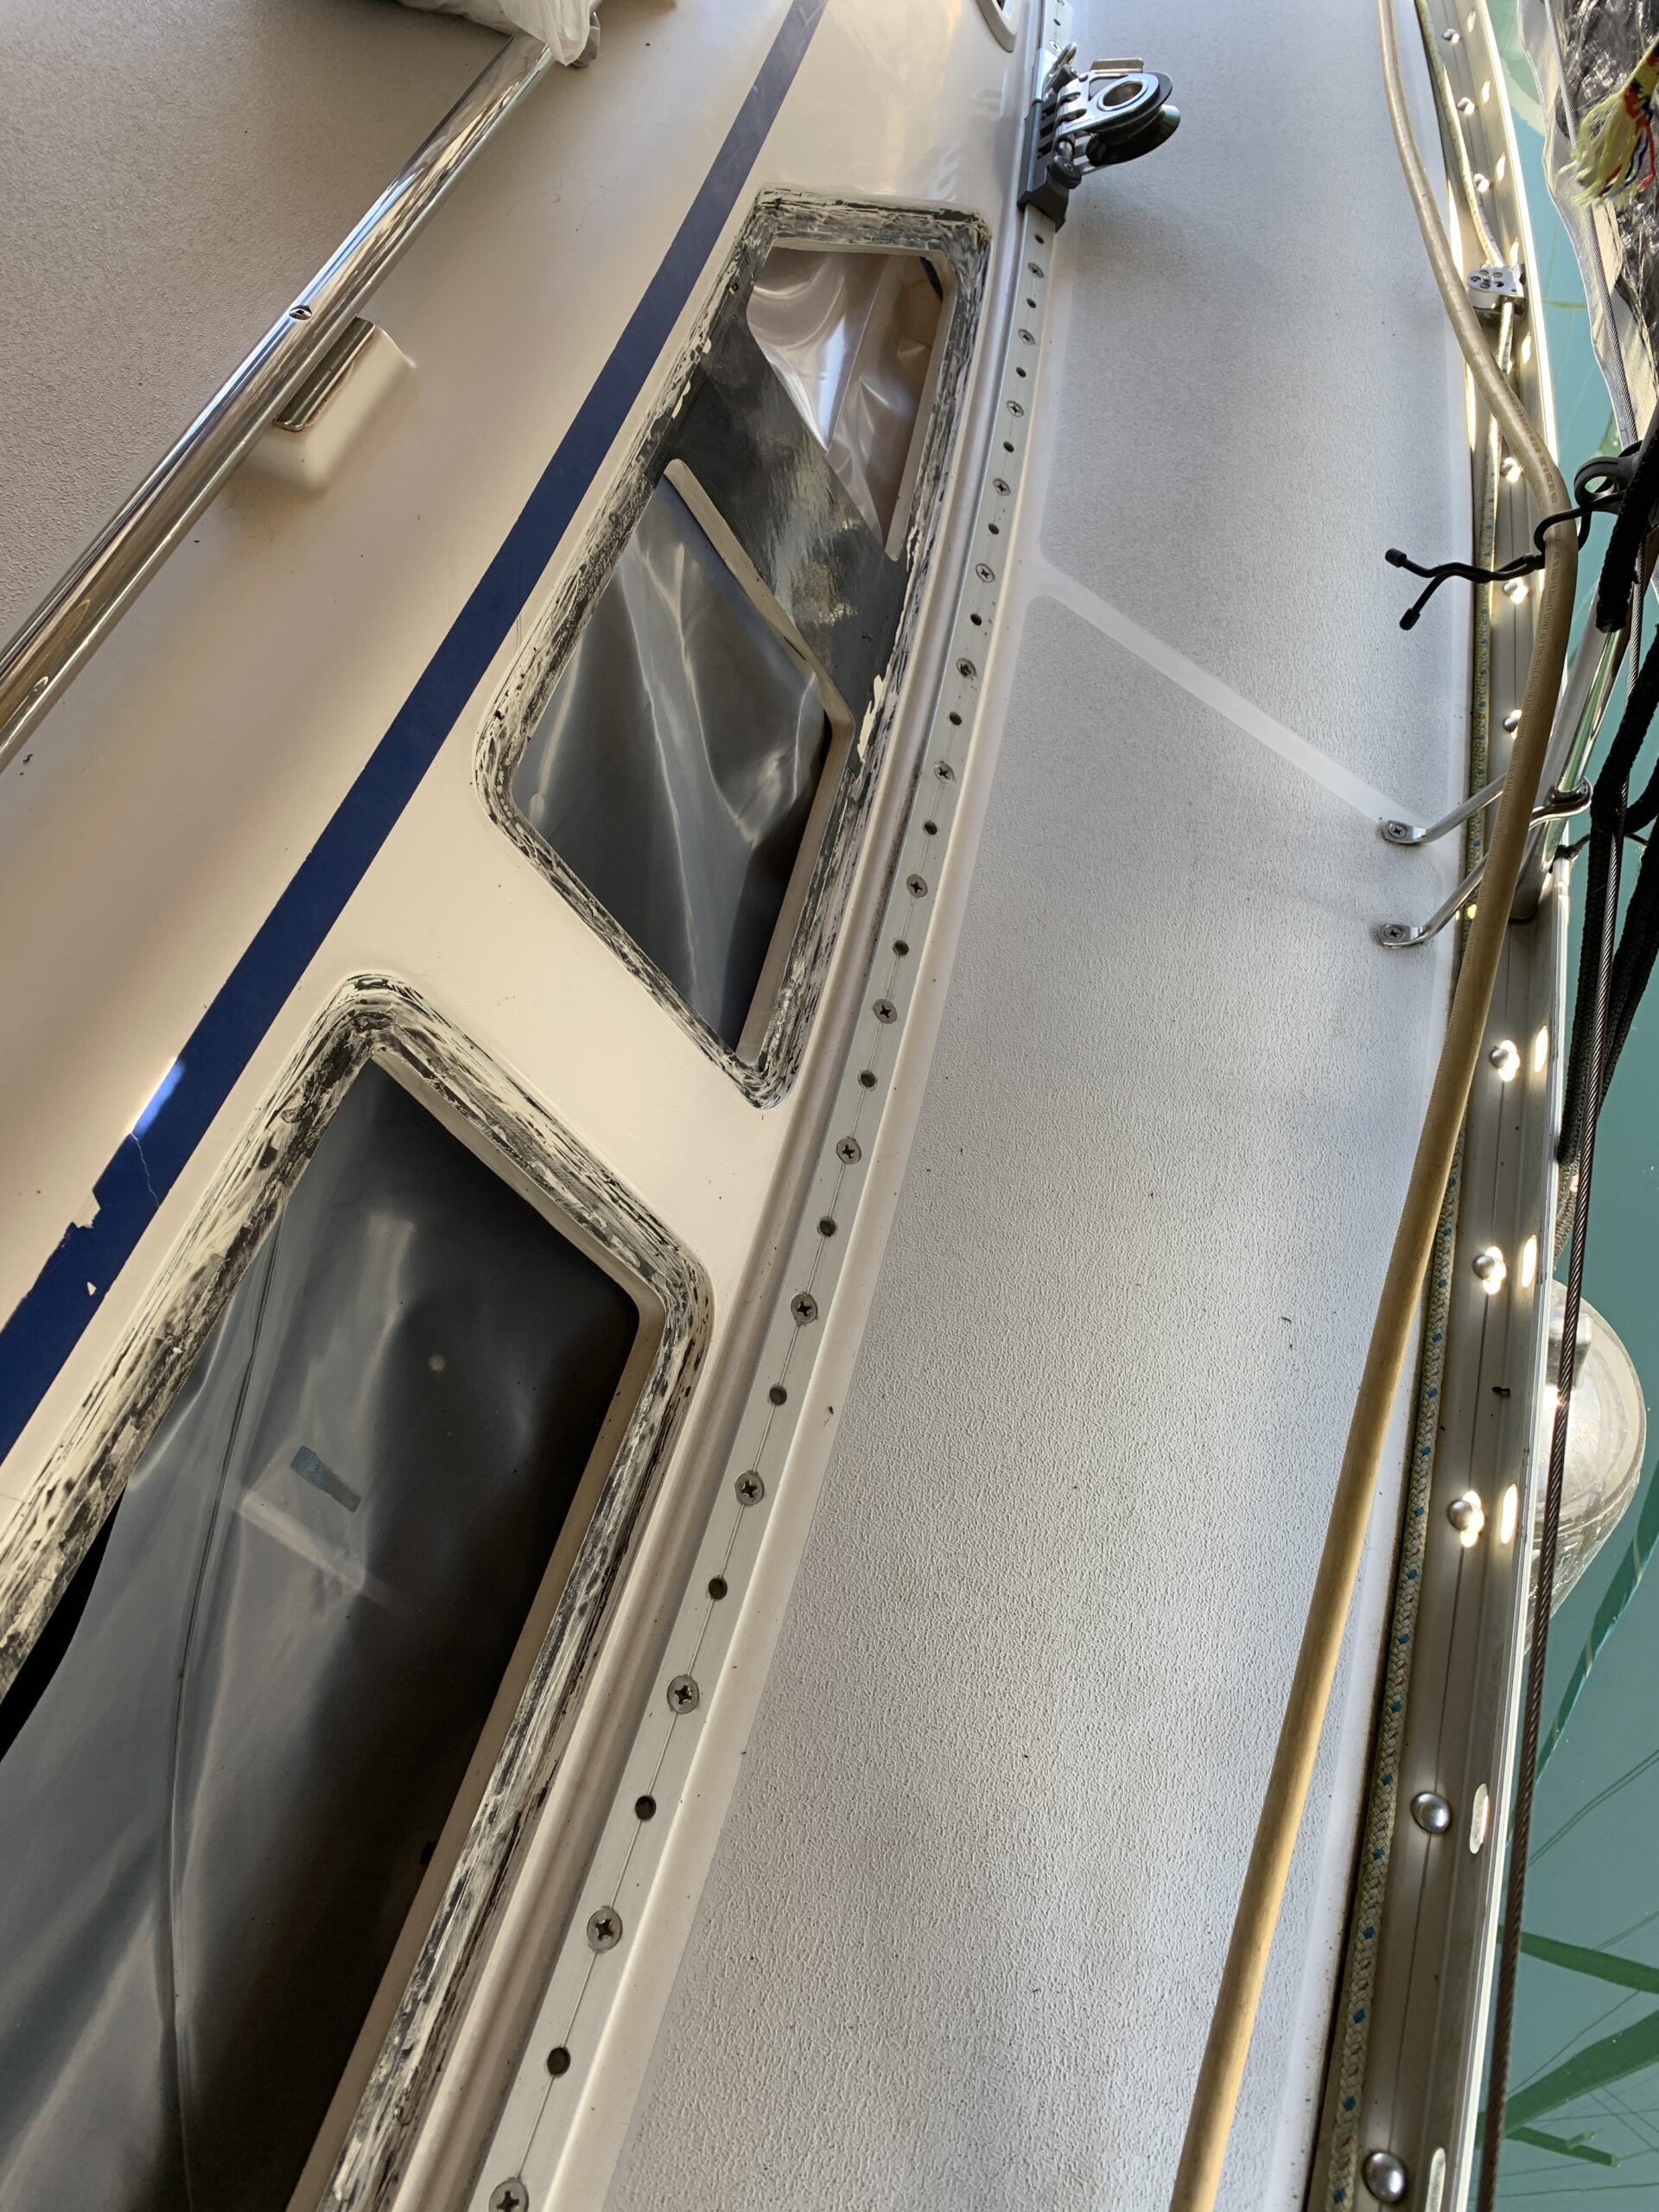
Once the plexiglass has been removed the slight recess on the cabin trunk will need to be cleaned of all sealant—right down to the gelcoat to ensure a proper seal for the new plexiglass. Just like preparing for the framed windows, a putty knife, sandpaper and solvent will be required.
Installing the Plexiglass for Frameless Windows
1. Trace Where Frame Meets Cabin Edge
The replacement plexiglass will have paper or plastic covering on both sides. Don’t remove the paper just yet, it will protect the surface from scratches during installation. Place the plexiglass in the opening and, from inside the cabin, trace where the frame meets the edge of the cabin trunk. It helps if someone is holding the plexiglass in place on deck. Weights leaning against the plexiglass also works.
2. Remove Paper/Plastic Covering From Outside Edge
Remove the plexiglass and, using a sharp box-cutter type knife, carefully cut the manufacturer’s paper/plastic covering an eight or sixteenth of an inch outboard of the traced line. This will keep the potential scratch from the knife from showing up once the window is in place. Remove the paper/plastic from this outside edge. This is where the sealant will be applied.
3. Choose Sealant
Options for sealant are somewhat limited. Butyl tape provides an easy solution but does not address the space between the edge of the window and gelcoat on the outside. Keeping in mind that the plexiglass is clear or slightly tinted, you will be able to see the butyl tape from outside. If it’s not applied perfectly and does not cover the entire lip that will be holding the window, it will look odd.
Also, a sealant of some type will still need to be applied to the gap between the edge of the plexiglass and the cabin trunk. I’ve had success using the Sikaflex system designed for attaching plexiglass to a substructure (metal, gelcoat, wood). Sika has a fairly detailed PDF guideline on how to bond plexiglass to any substructure.
The recommended primer, Sika Primer 209D, is expensive and has a relatively short shelf life—this adds cost to the project. But keep in mind that there is no point in undertaking all this work just to have the new windows leak after a good thrashing to windward where the boat is going to flex and break that seal. Plexiglass is notoriously difficult material to adhere to.
4. Apply Primer
Using a small brush, paint the black Sika Primer 209D onto the now exposed lip and edge of the plexiglass. Don’t be sparing, but don’t apply so much that it runs off. This is the material you will be looking at through the clear or tinted Plexiglass once it’s installed. An even finish, two or three thin coats if necessary, will look better than one thick coat. This material dries very quickly.
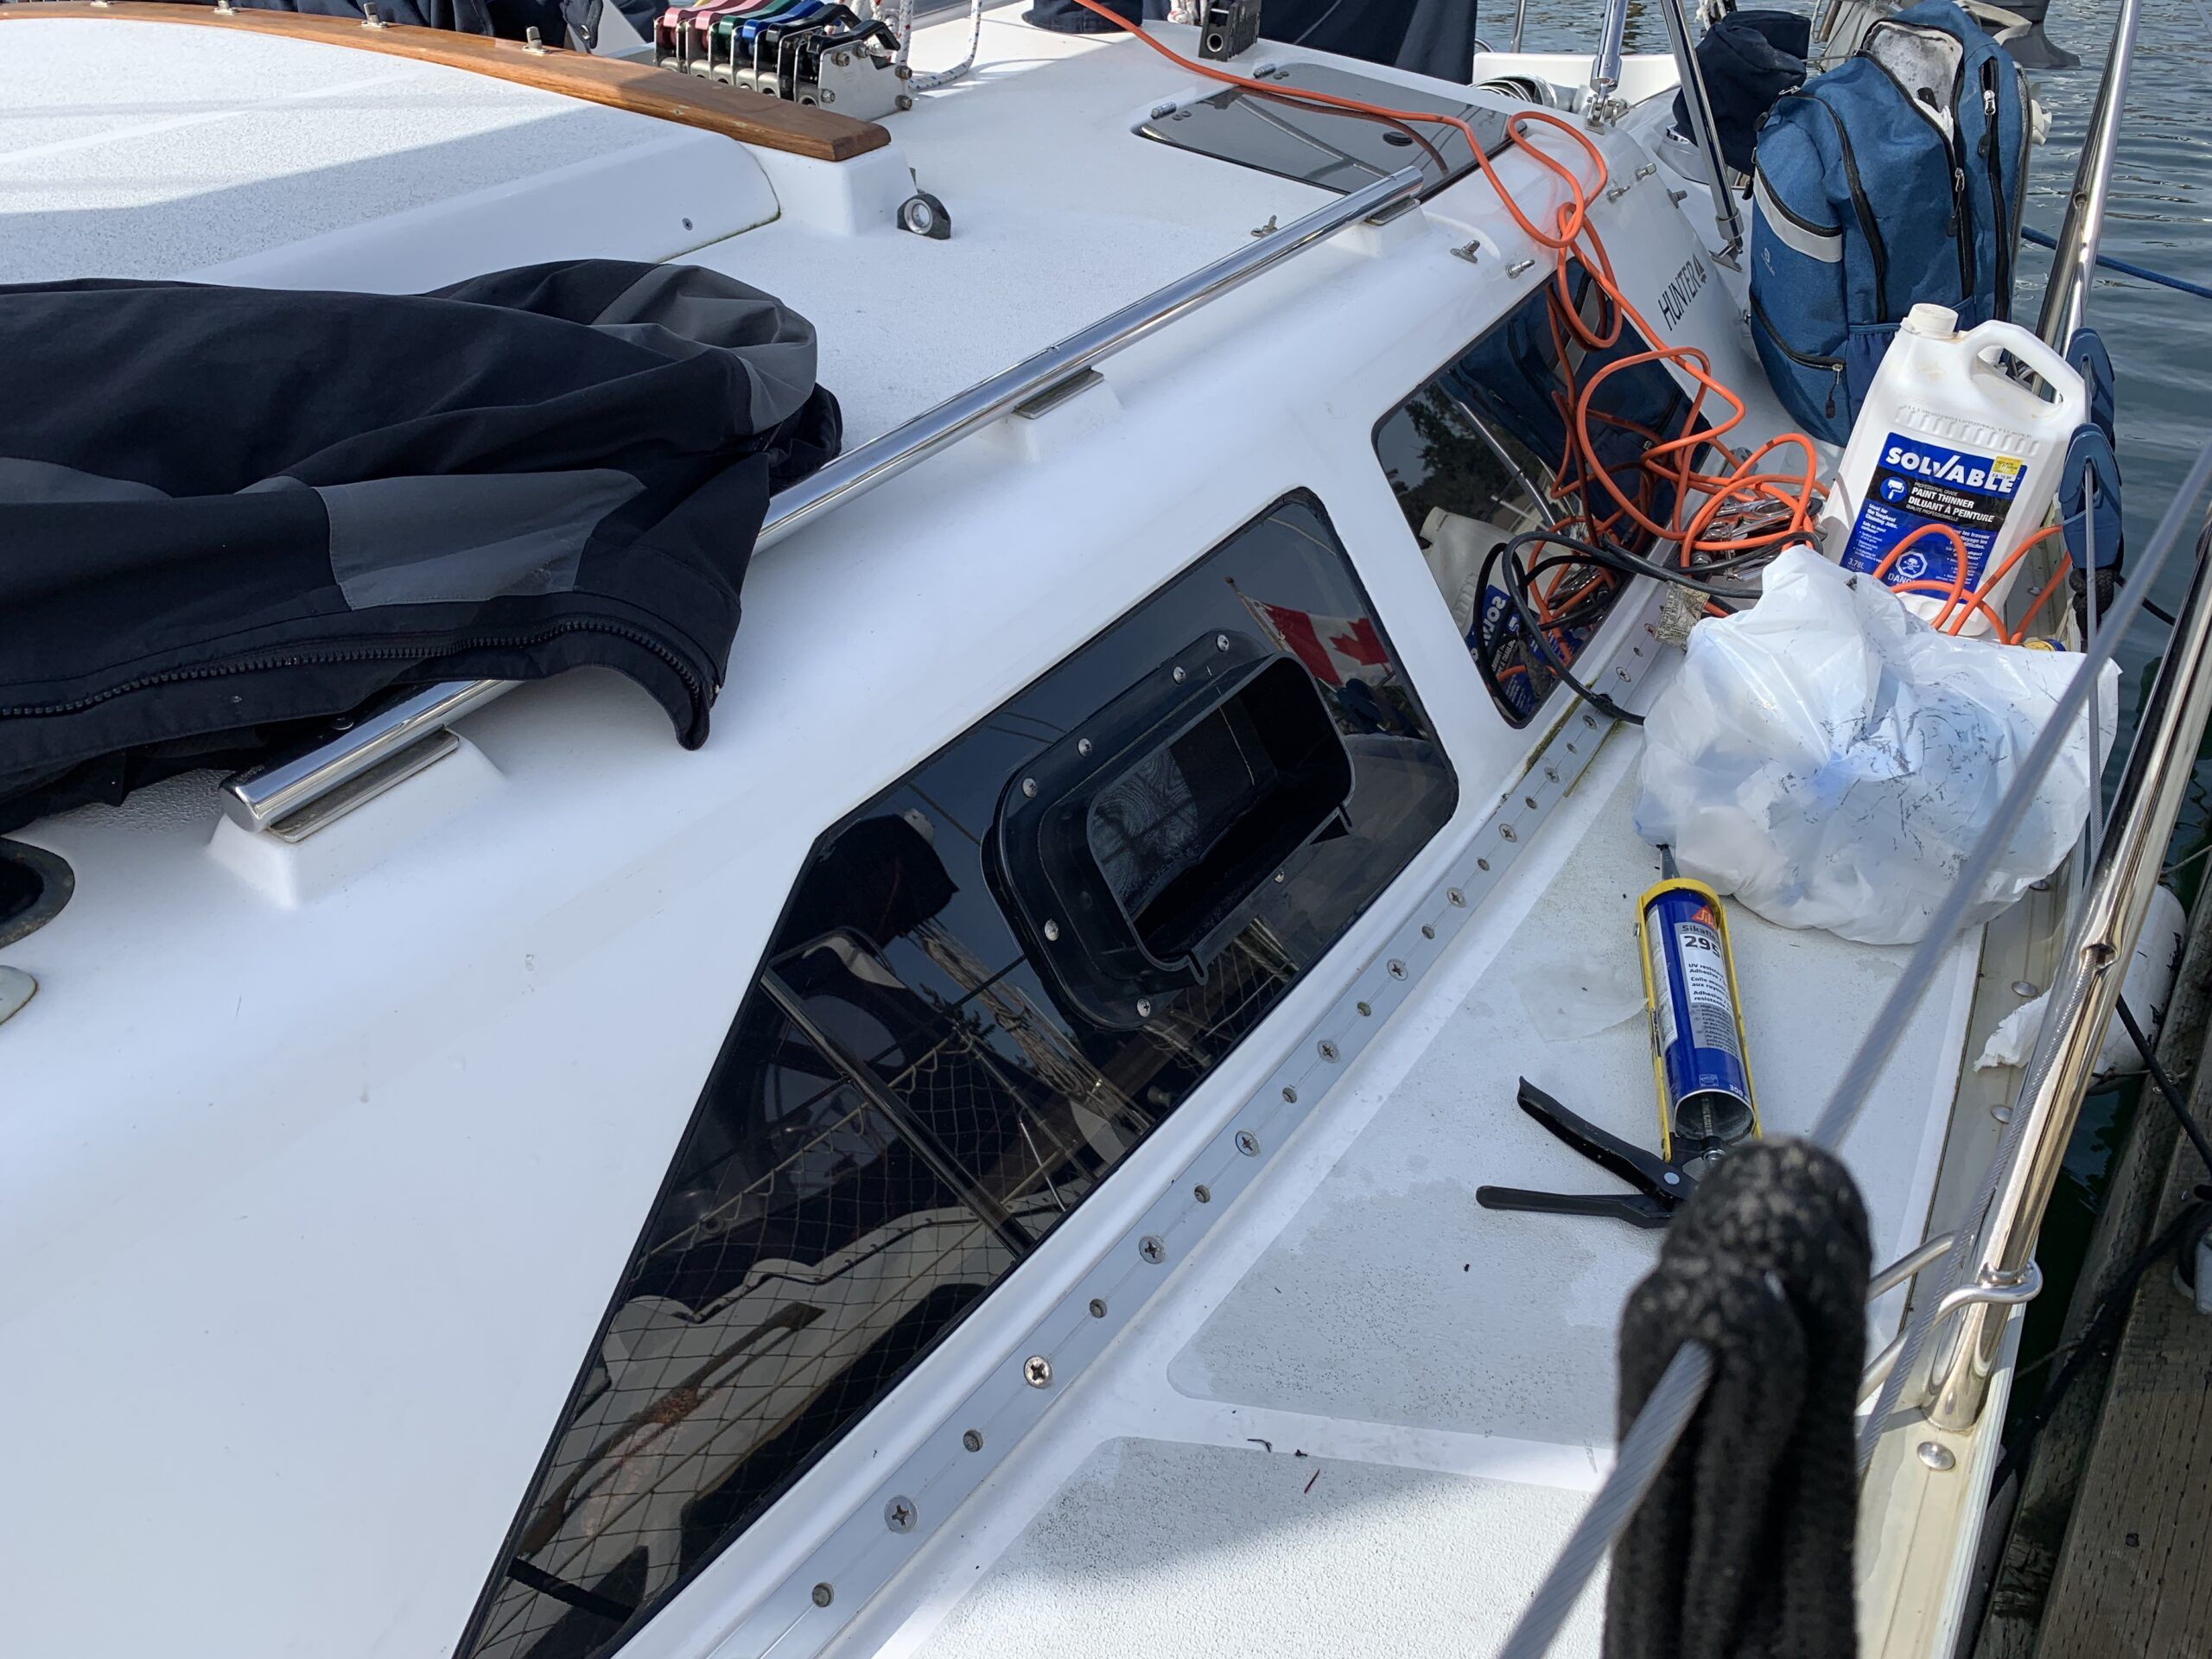
5. Protect Self and Boat from Sealant Mess
Next comes the really messy part. Applying the black Sikaflex 295UV (the UV is for Ultra Violet, designed to withstand the sun). It will get everywhere before you’re finished with this installation. Protect the deck with a drop-cloth or taped down plastic sheet. If you’re concerned about your clothing, I would highly recommend a disposable “bunny suit.” Have plenty of disposable gloves available, you will be changing them regularly. A garbage bag is also handy for the contaminated material.
6. Apply Sealant
Apply an even bead of sealant to the painted plexiglass, enough so that when it’s pressed against the window opening the bead will form a flat seal. Do the same for the window opening. Push the window into the opening with even pressure. Some of the sealant may squeeze out into the gap between the window and the cabin trunk. If it stays below the surface of the window and gelcoat it can remain. If it squeezes out above it will have to be removed. The final step will be filling this gap with sealant and it will look better if it’s one continuous bead. Solvent and paper towels will clean up the extruded sealant before you continue with the final step.
7. Brace Plexiglass In Place
Brace the plexiglass into place with weights. To keep the plexiglass from sliding down in the opening a small spacer may be required. I’ve used coins in the past, easy to remove once the Sikaflex has set up. Now it’s time to be patient. Wait for the Sikaflex to set, usually overnight, just to ensure that if there is a bending pressure on the plexiglass as you follow the curve of the cabin top, the Sikaflex won’t let go. Inspect the inside of the window to ensure that no sealant has escaped into the cabin when the window was pushed into place. Cleaning that sealant with solvent and small squares of paper towels will probably be required.
8. Apply Sealant to Gap
To finish the job, it’s time to apply Sikaflex 295UV to the gap between the plexiglass and the gelcoat on the outside. Remember the coat of wax that you applied before starting this project? This is where it comes into play. The protective paper or plastic is still on the plexiglass, protecting the outside surface.
Apply masking tape to the gelcoat where it dips into the lip now occupied by the new window. Inject the Sikaflex 295UV into the gap between the plexiglass and raised portion of the cabin trunk. Using a small spatula, wooden tongue depressor or best yet, a gloved finger, spread the Sikaflex evenly between the plexiglass and gelcoat. Final appearance is your choice. There should be very little Sikaflex on the edges of masking tape or plexiglass.
9. Remove Tape and Protective Paper/Plastic
Once satisfied, carefully remove the masking tape, keeping it from touching anything before it goes into a garbage can or bag. Do the same with the protective paper or plastic on the window. Do not allow the Sikaflex to dry before taking this step. There may be a small lip where the tape and protective paper or plastic has been removed. This can be left as is or smoothed out using small pieces of paper towel dampened with solvent. This bead will set up within hours and finish the job.
Clean-Up
Whether framed or unframed, the clean-up needs to be done immediately before the sealant sets up. I’ve always used small squares of paper towels dampened with solvent. One swipe at the offending piece and dispose of the small square. A second swipe will only spread the sealant around. Have a garbage bag or container at the ready.
If you didn’t wax the gelcoat around the window opening before you started, there may be stains embedded in the gelcoat that solvent just won’t remove. Particularly black sealant on white gelcoat. A polishing compound will probably remove this stain, removing a layer of the offending gelcoat. Not an ideal solution but better than leaving the stain.
Conclusion
Now that you have successfully replaced your windows, and the view out is spectacularly clear, and fellow sailors who have been watching and offering advice from the safety of the dock have moved on, you’ve become an expert at window replacements! You’ll be asked to assist fellow sailors—lucky you!


In fact, acrylic is very slightly stronger and stiffer than polycarbonate. Polycarbonate is about 20 times more impact resistant, and acrylic resists UV damamge about 2-5 time longer, depending on coatings. I don’t think the choice was typically to save money, but rather just a matter of philosophy; which matters more, impact or haze resistance? If thick enough acrylic is strong enough, and virtually all opening hatches are acrylic. But I did crack a lens once by dropping an anchor on it (yup–that will about do it–didn’t take much).
If the prior window was installed using VHB tape (likely) a heat gun, a not-too-sharp scraper, and leather gloves will be your companion for hours. It’s the only practical way. Expect to apply heat just short of the softening point of the gelcoat. If you taped the perimeter the tape will likely melt if you are careless, so keep an eye on the that.
See “PS Tests Adhesive Removers,” December 2016 for the best solutions to remove silicone. Remove Marine Formula is many times more effective on silicone than any solvent. DeBond is for polyurethanes. A solvent wipe or water wash at the end is good, but let the removers do the heavy lifting. Read the instructions; they make a difference. Don’t just spray and wipe and expect them to work properly.
I recommend using VHB tape to secure the window. Most builders do it this way. Then fill the gap with sealant (use spacers around the edges). Butyl tape provides no retension and is not typically used for windows, only hardware that are secured with through bolts. Butyl tape has also been documented to cause crazing of acrylic windows. Hit or miss, depending on the formula. Avoid it for windows.
Dow 795 is the preferred sealant, at least in the US. No primer required, glazing specific, and also much easier to use neatly than polyurethanes. Very long life. PS testing has revealed the sort comings of polyurethanes for glazing, and the absolute necessity for using the specified primer (otherwise the UV attacks the bond through the glazing and the window can leak withing a year or so–the primer is opaque and prevents this).
See also “F-24 Portlight Replacement,” September 2023 for a different expereince. I’ve never replace framed fixed windows, only opening hatch lenses and frameless windows.
Thanks Drew! Your information is most helpful. I’ve read your articles for years and appreciate your extensive knowledge. I did not know about the DOW 795 and have never seen it in a marine hardware store. Another lesson learned along the way! I’m currently refurbishing the Bomar hatches on a Pacific Seacraft 37 and will give that a try. Thank you!
Excellent piece Drew – but would be very helpful to get advice on best way to fix crazed/scratched plexiglass to prolong life of existing ports (on a 2006 Sabre 386) – which are badly scratched, probably from having used paper towels to clean in the past. Getting mixed messages from different sources on fixes.
Hello Basil. Thanks for the comment. I’ve had very limited success with the standard headlight cleaning kits available at most automotive shops. But it only clears fine scratches and haze, doesn’t do anything for your typical scratches. The crazing is internal and, as far as I am aware, is not repairable. On my Islander the windows were replaced in 2004 and, due to crazing, need replacing once again. Sabre 386s are great boats! I sailed Maui to Victoria on one in 2016, great trip. I look after the boat for a non-resident owner but have not seen any crazing on the portlights yet. Lets see if Drew has any helpful hints.
Crazing is internal and unrepairable. The best cure is prevention by covering windows.
Buffing can work for surface damamge. Start with a coarse compound and work your way down. On my last boat the big ports crazed and the only solution was replacement. Same with my F-24. But small opening Beckson ports on my PDQ responded well to polishing once a year.
If there are sealing problems (leaks) buffing will almost certainly lead to replacement.
On a slightly different topic, do NOT buff solar panels. PS has posted on this. The action, whether machine or manual, results in micro cracking of the cells, to small to see but enough to cause a dramatic drop in output either immediate or within 6 months. The haze of the cover sheet scatters light but does not actual reduce light transmission that much (PS did some testing of that too). Just keep them tolerably clean, and a light waxing helps both hazing and by repelling dirt.