

Many of the fiberglass boats manufactured in the 70s and 80s, sail or power, were built on production assembly lines where speed and expense were a primary focus. Finishing was somewhat lacking when it came to hidden interior detail. Other than the bulkheads, a favorite solution seems to have been carpet or fabric glued over the raw fiberglass of the hull interior. This was a quick cover for a host of poorly finished interior details, details lost in the need for efficiency. There were usually fabric zippers to allow access to fasteners, the zipper most often seized solid by this time.
As the years drifted by the stained and faded fabric, or carpet, sagged away from the disintegrating open cell foam backing, or simply lost its visual appeal. There was also the often present “boat smell” associated to mold hidden behind the fabric or carpet. Time for an upgrade!
The question was: replace it with what? Once the fabric, usually vinyl, or carpet was pulled away from the fiberglass the lack of finish detail was again apparent. Painting was an option but a marginal improvement, the bare fiberglass prone to sweating profusely in our damp Pacific Northwest environment. Something that looked nautical and provided a degree of insulation would be much more acceptable. The proposal put forward was to have wooden strips running fore and aft with half inch closed cell foam behind it, fastened to the fiberglass as a insulating layer.

1. Make a Plan: Wood Strips and Closed Cell Foam
The wood strips chosen for this project were 1¼ wide x ¼ thick oak. Any wood that complements the interior finish would do. Mahogany, teak and ash have all been used, depending on the wishes of the boat owner. The dimensions chosen allow for maximum flexibility to cover a host of interior angles and bumps. Gluing the strips directly to the hull would prove difficult and eliminate any degree of insulation except for the thickness of the wood itself.
A better choice was a barrier of closed cell foam, closed cell to keep water from being absorbed into the material. Cedar ribs would to be epoxied against the hull, evenly spaced, then the oak strips fastened to the ribs. This would allow room for the insulating foam between the ribs and behind the covering wood strips.
The next variable to address; should the strips be butted together, creating a solid wall, or leave narrow gaps between strips to allow for ventilation. Narrow gaps were chosen which also allowed for flexibility in the installation. There are very few parallel surfaces in most boats and I’m not a master woodworker. Leaving gaps would draw less attention to my mistakes.
Although I have incorporated this solution into our own Islander Bahama 30, this particular project was at the request of a sailing friend on an O’Day 37. The decisions had been made, and the winter project began.
2. Remove Original Material and Residue
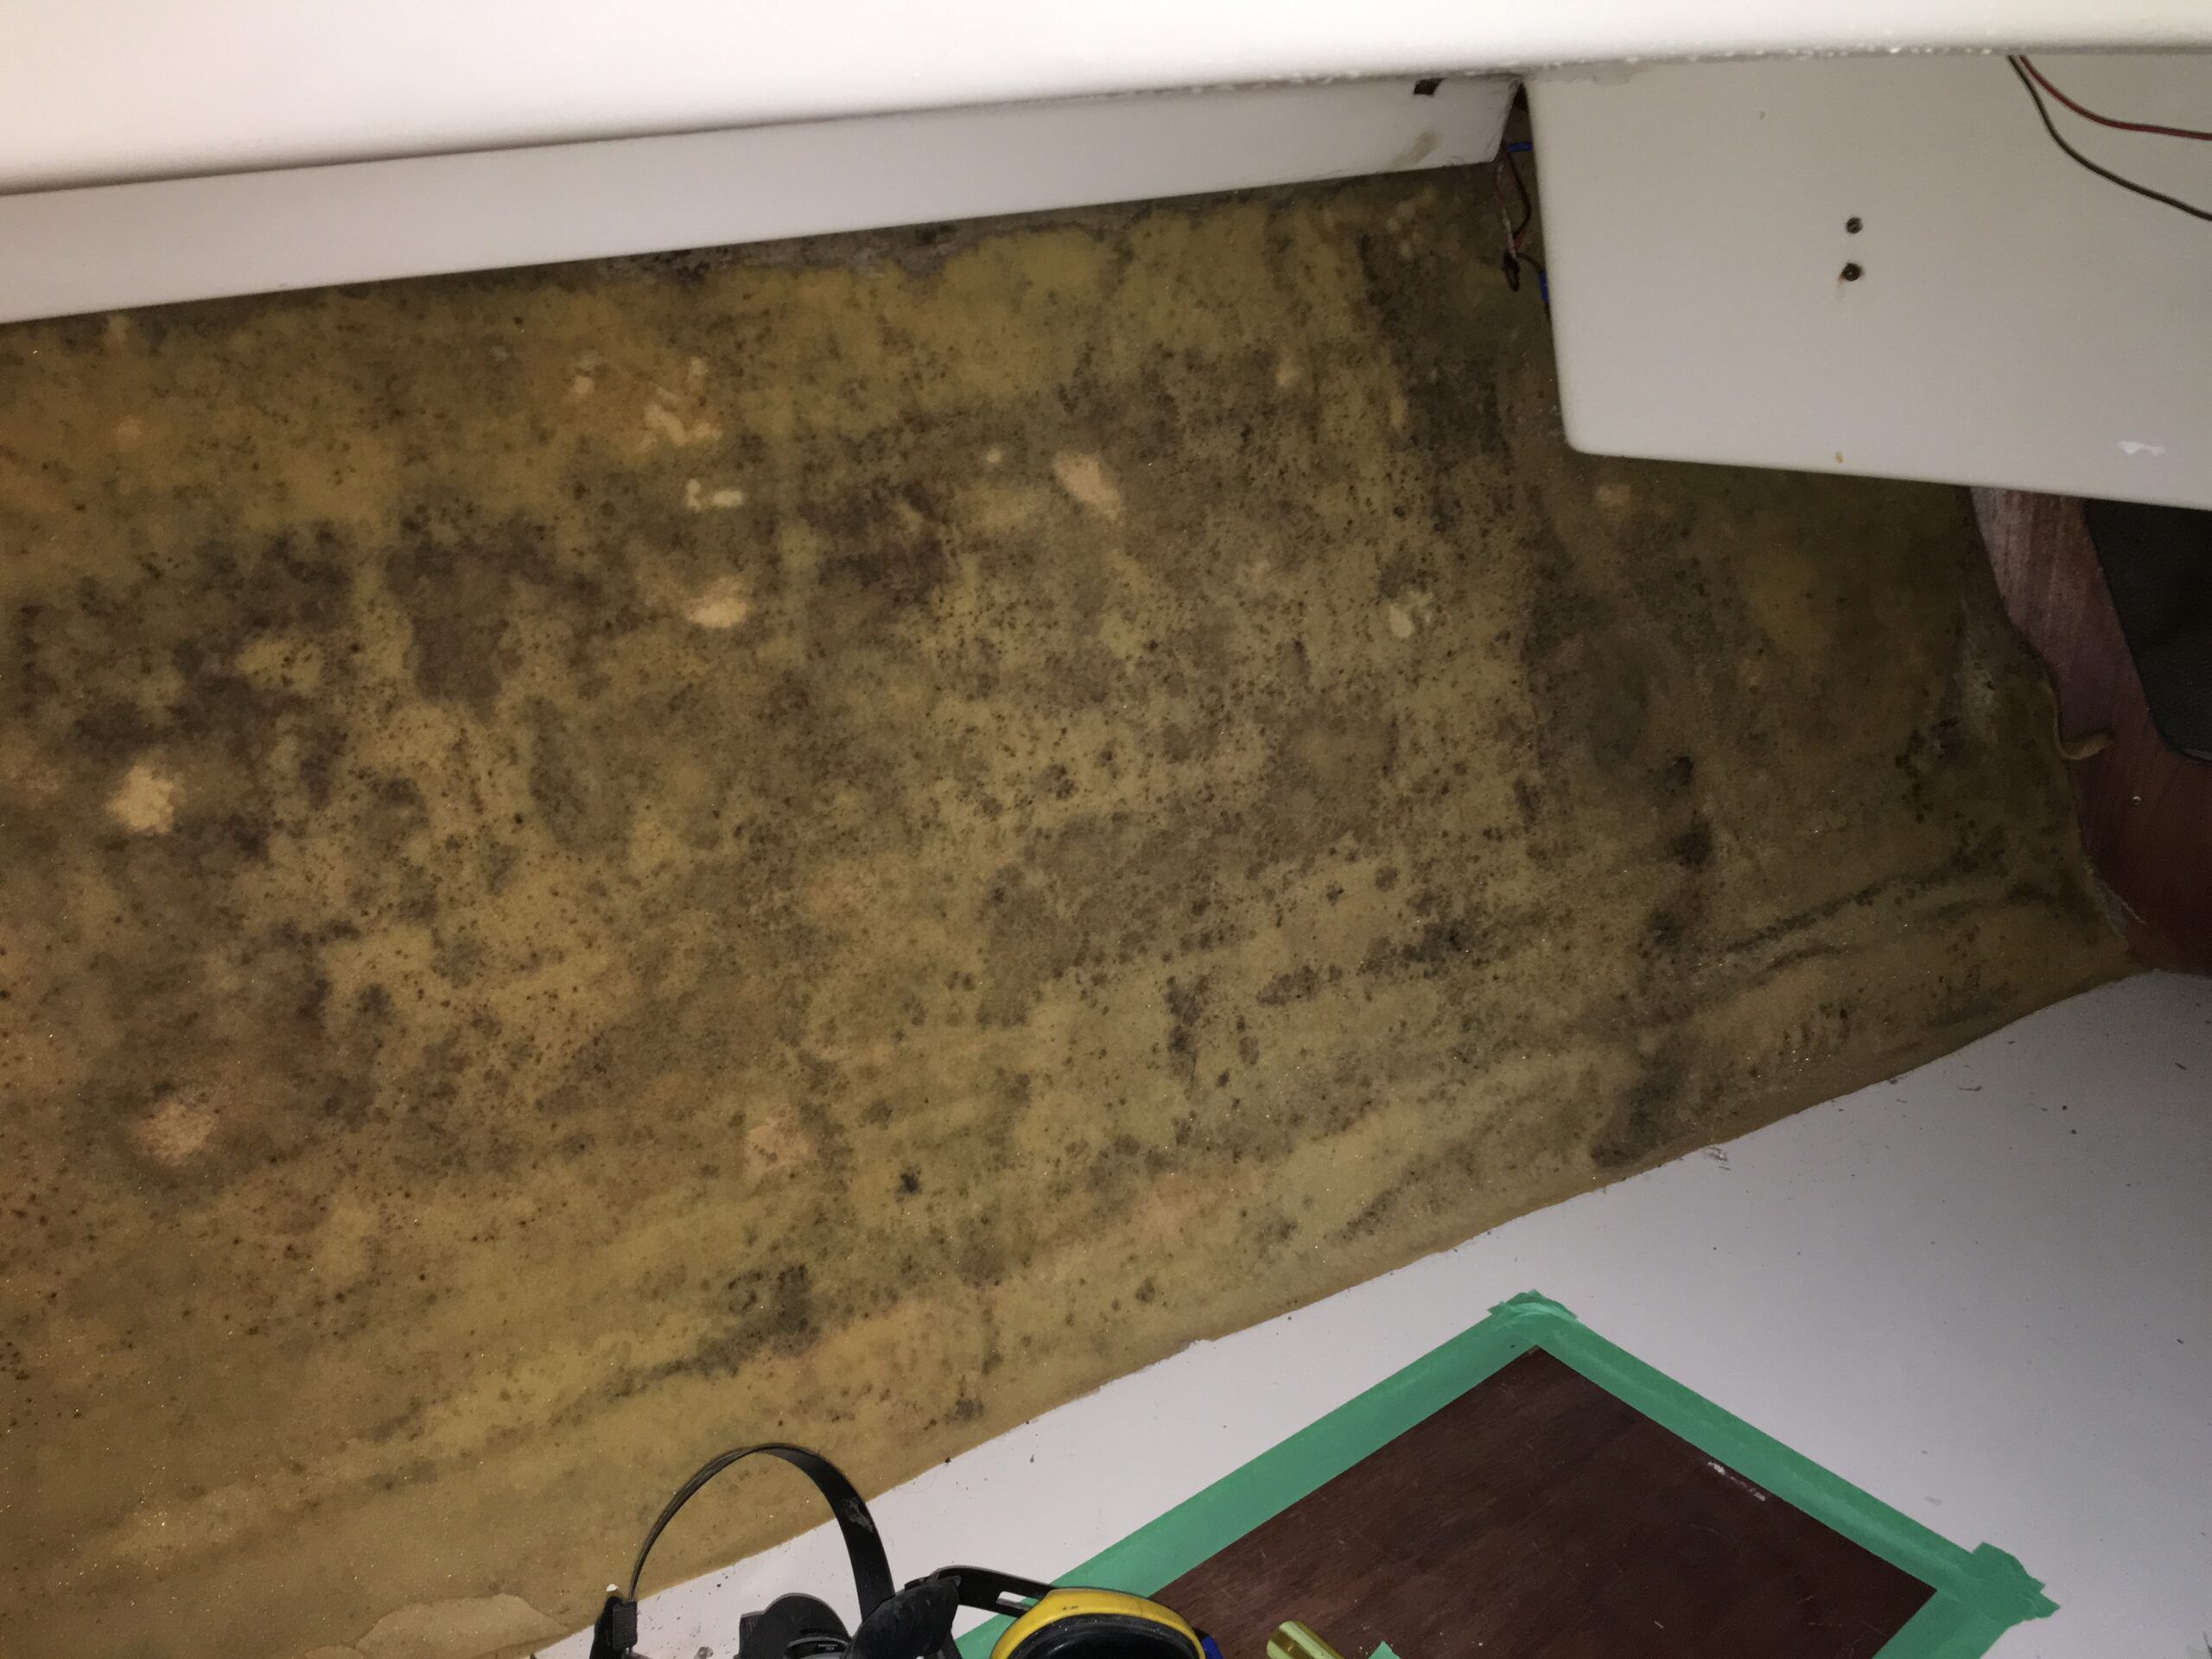
Once the original material was pulled off the fiberglass hull I was left with the old mold-encrusted open cell foam installed by at the factory, still stuck to the hull. Scraping this thin, black, mold encrusted material proved to be frustrating and laborious in a cramped space. A sanding disk on an angle grinder worked far more effectively. Be prepared for a dust storm!
I isolated the area with plastic sheeting and wore a proper respirator and safety goggles. The fine bits of foam and fibreglass dust created an intense cloud in a very confined space.
3. Measure, Cut and Epoxy the Ribs
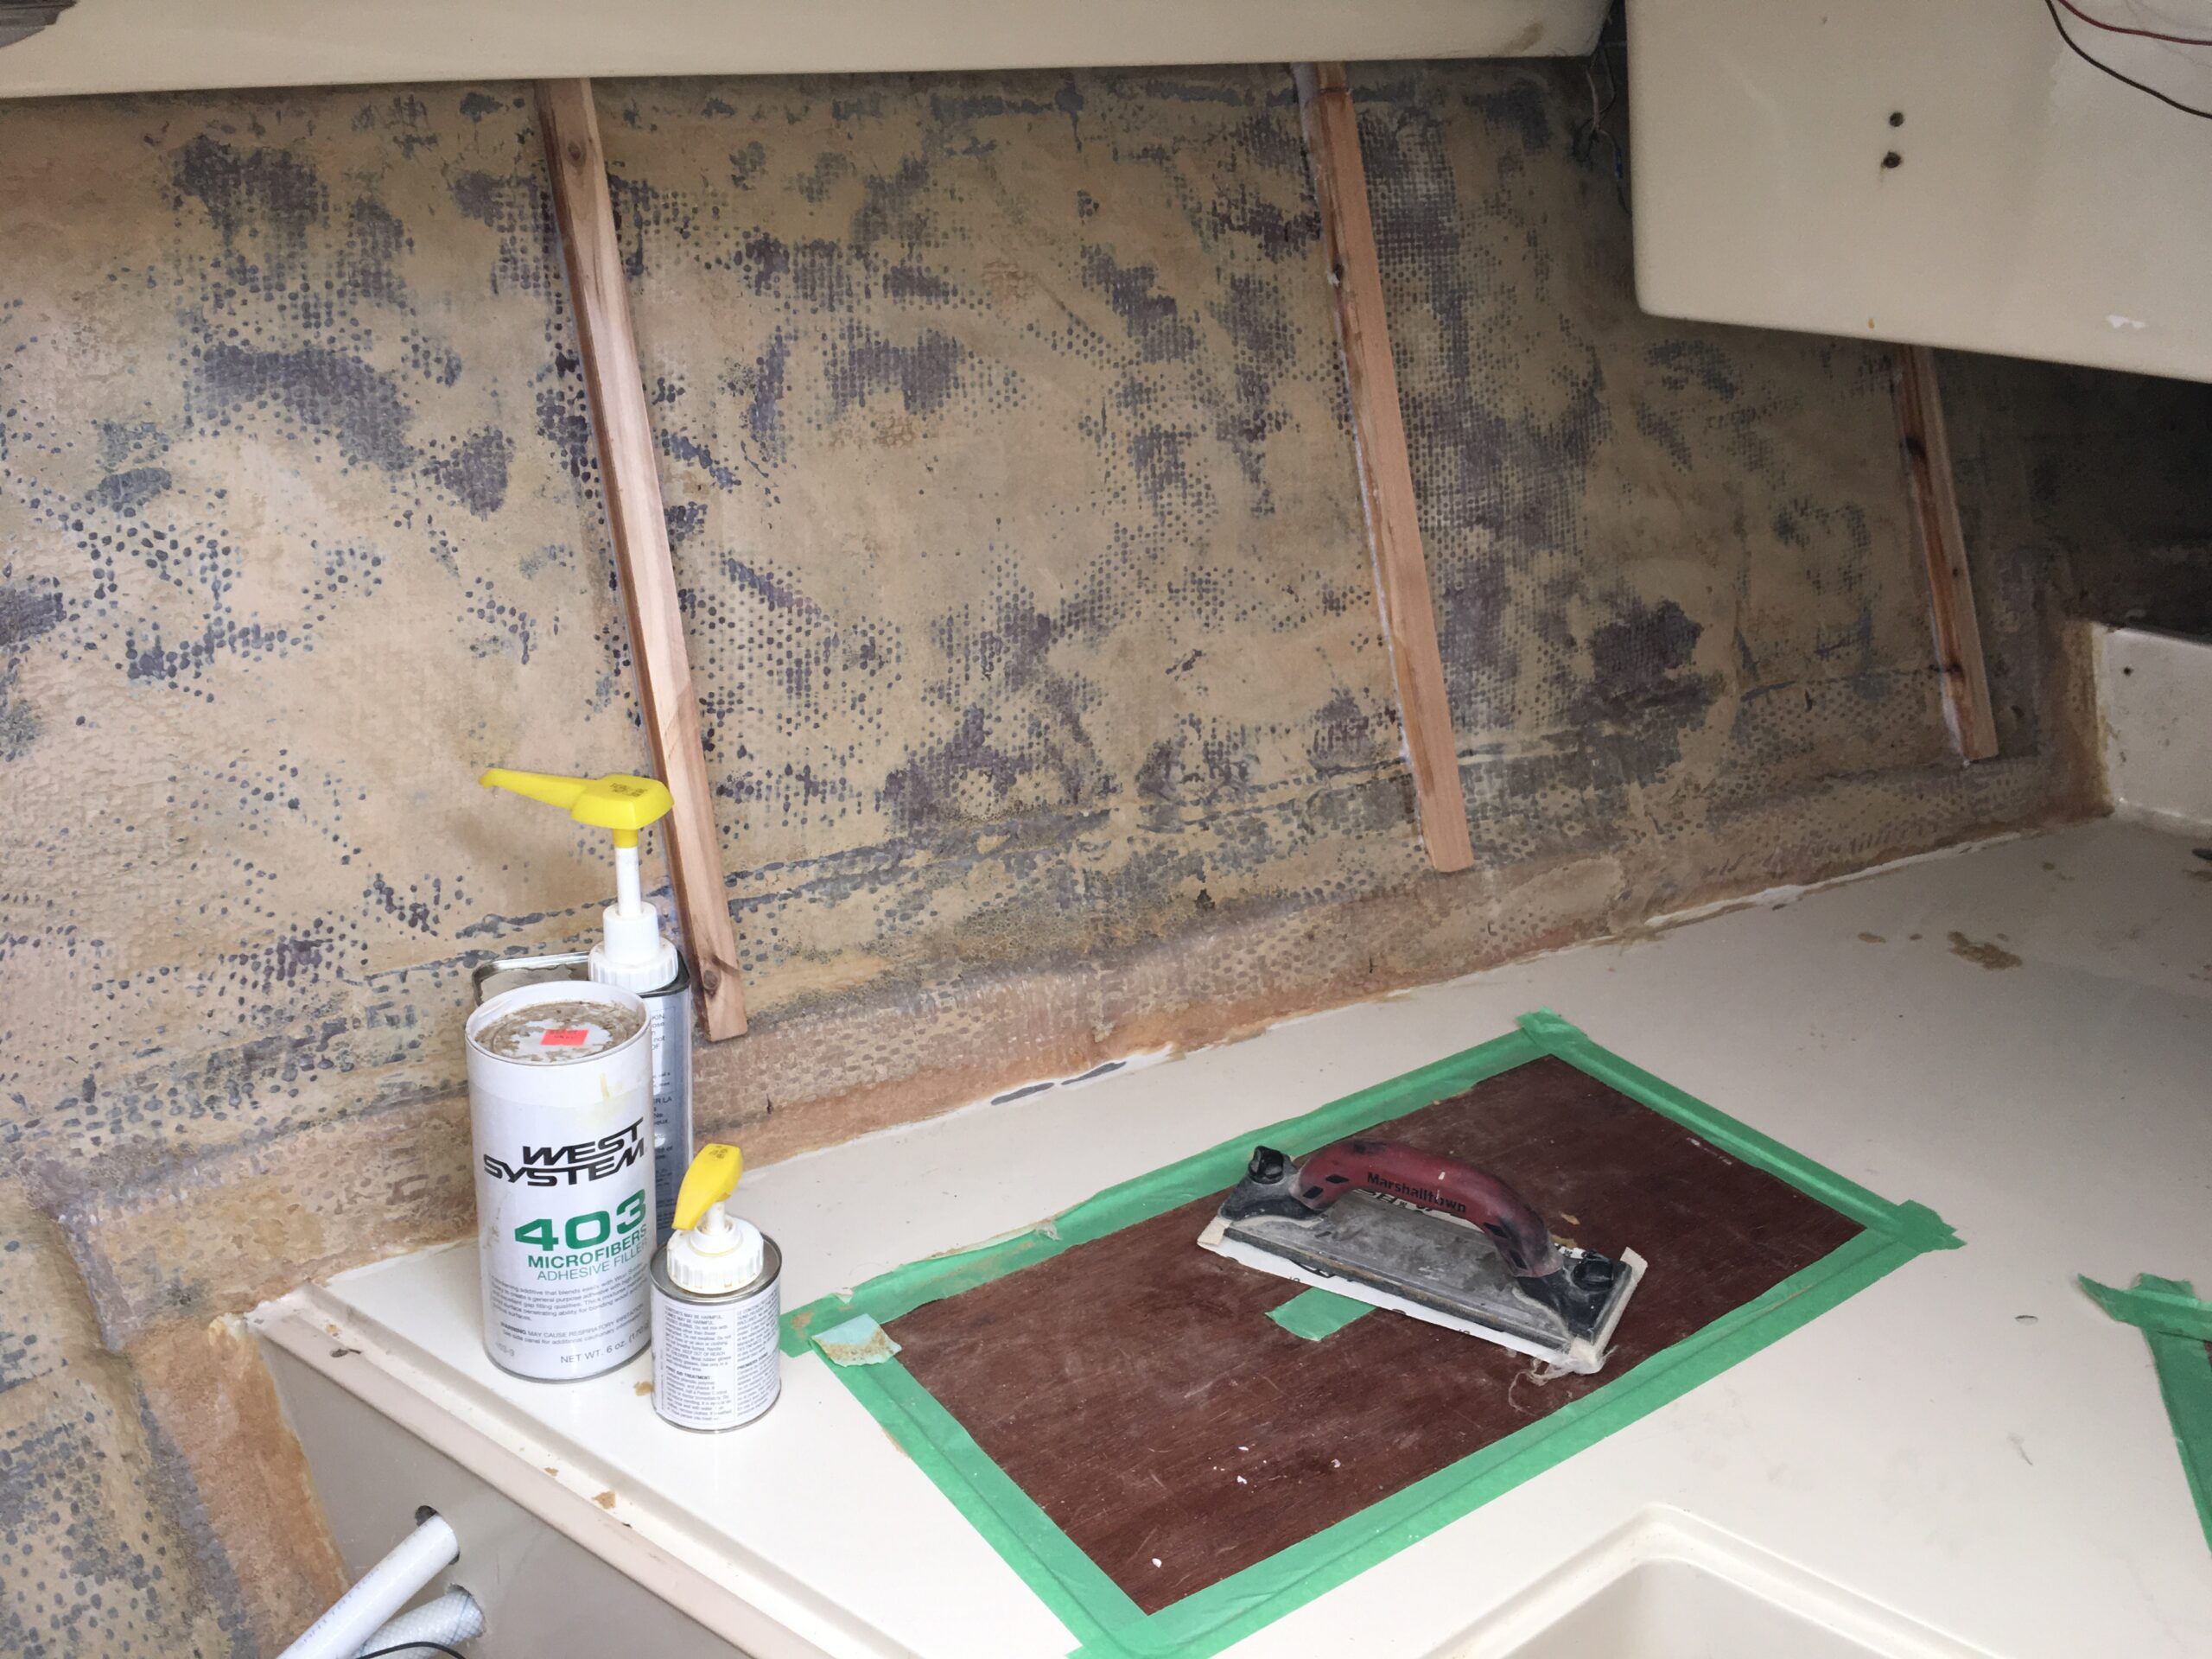
With clean fiberglass the next step was measuring, cutting and epoxying the ribs onto the bare surface. Using one-inch square cedar, cut and tapered where necessary to conform to the curve and bumps in the hull, the ribs were evenly spaced vertically on the fiberglass. The number of ribs and the spacing are dependent upon the curvature of the hull. Tighter curves require more ribs to force the oak strips into the right contours. Where cabinetry interfered, shorter ribs were cut to fit the space.
The bare fiberglass was washed with acetone where the ribs were to be glued to the hull. Using West System epoxy with 403 Microfiber Adhesive Filler as a thickening agent, the thick paste was troweled onto the back side of the ribs as well as the selected locations on the hull. This was to ensure a solid bond to the fiberglass.
Where the hull wasn’t too curved, the ribs were simply braced into place and the sticky epoxy held them until cured. If the ribs need to be bent excessively to conform to the hull, cutting thin multiple groves across the back side of the rib allowed the wood to bend easily without cracking. Bracing was accomplished with thin, flexible strips of wood from one side of the hull to the other.
4. Paint Ribs with Primer
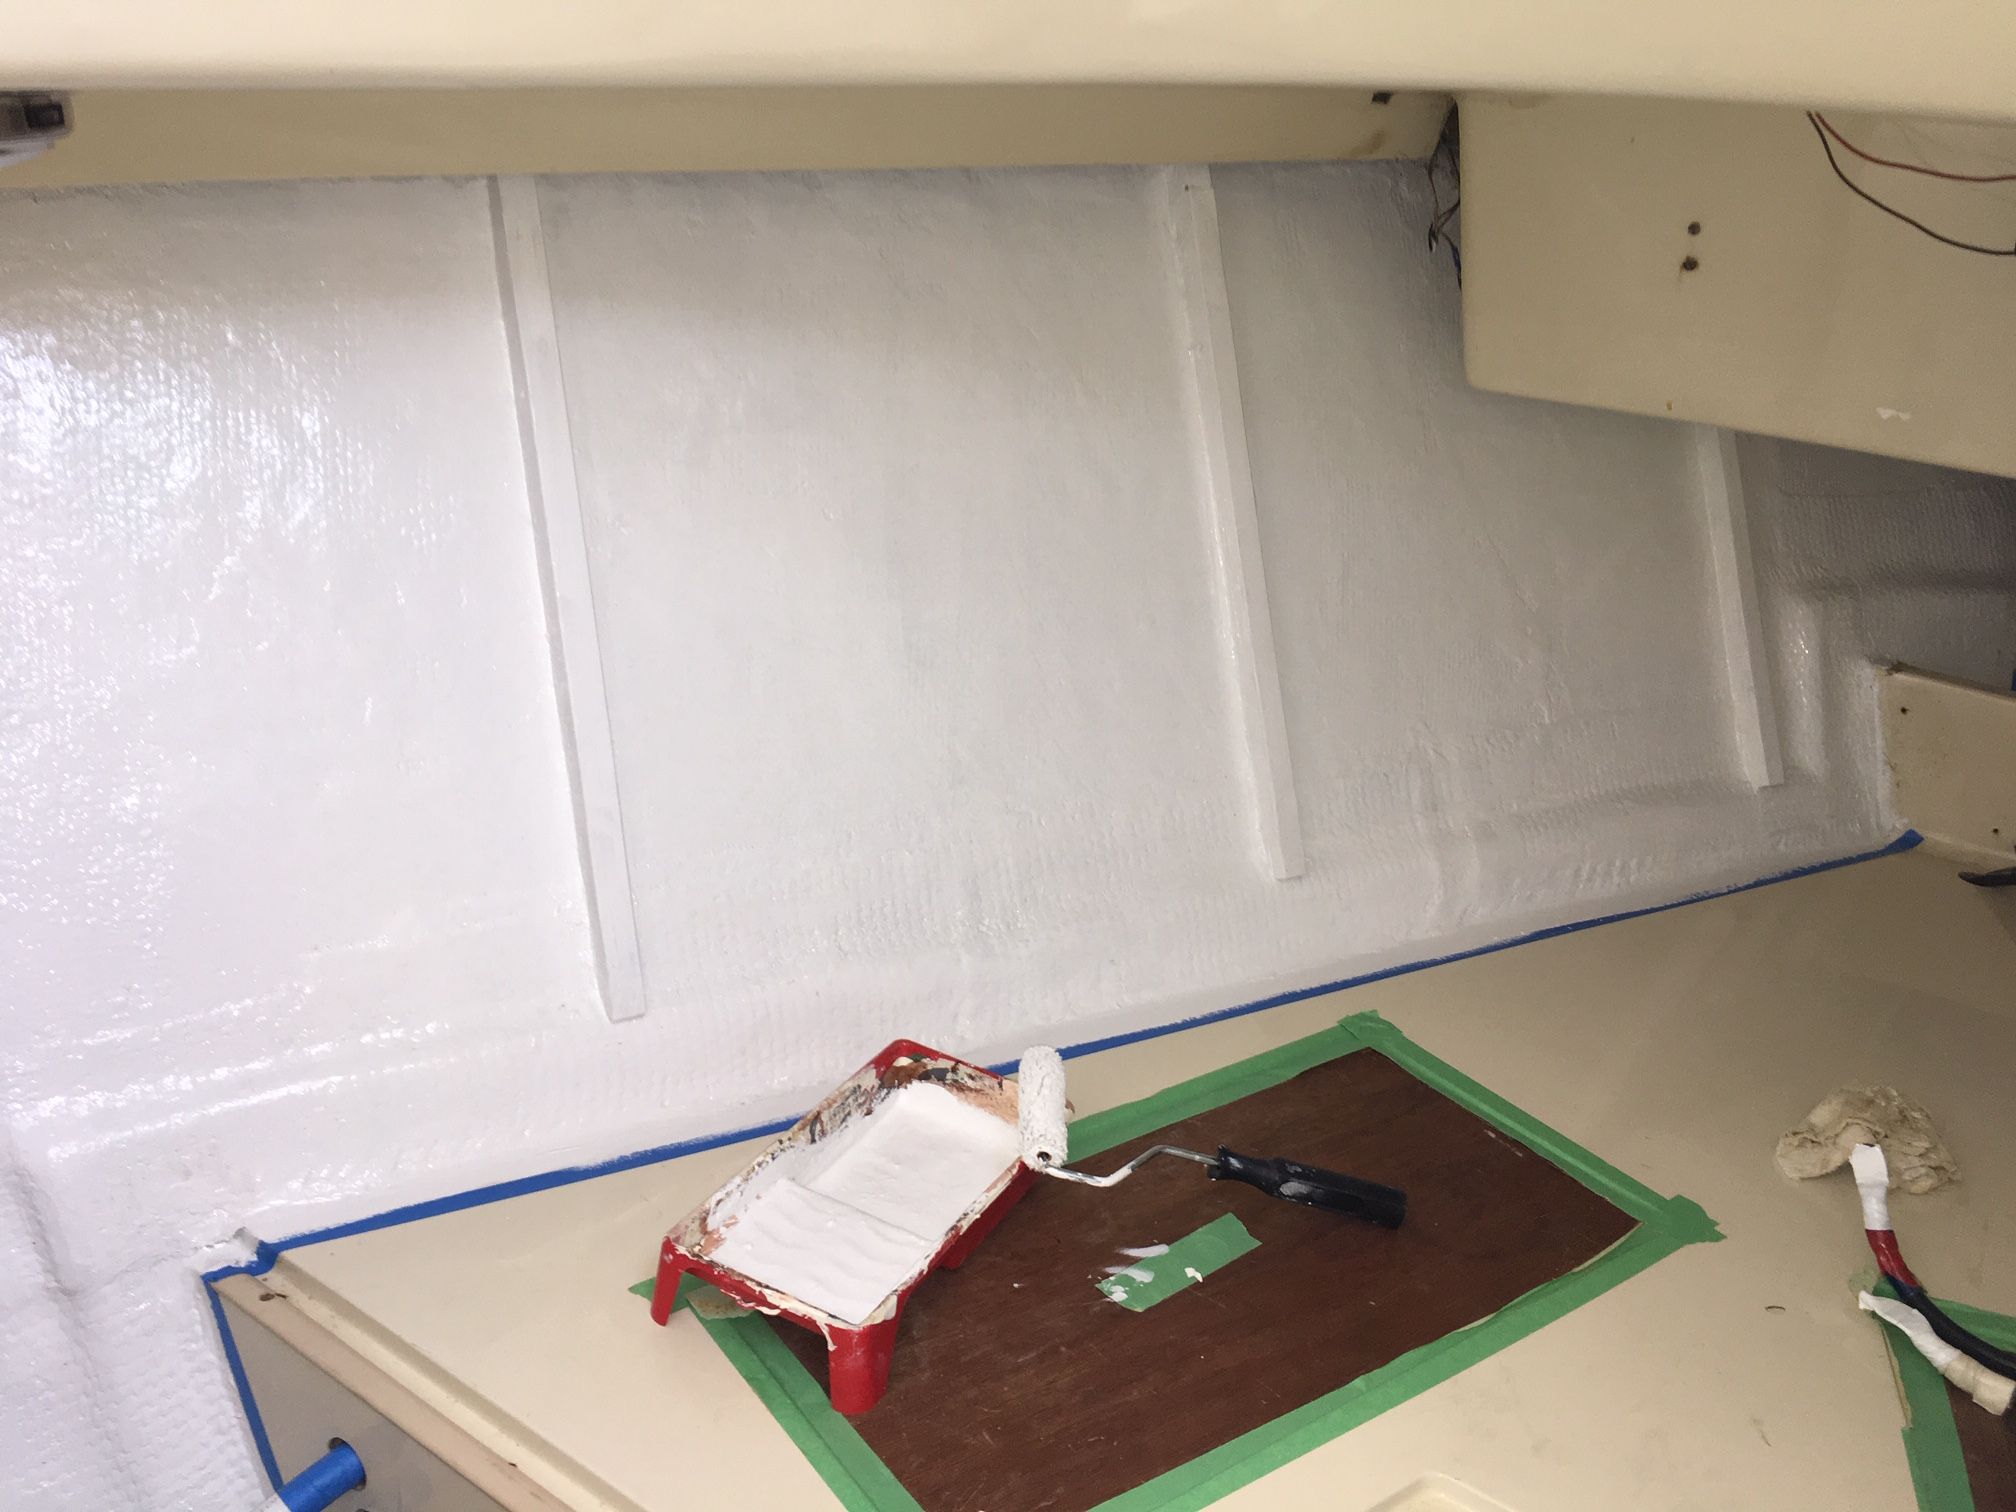
Once all the ribs were in and cured, the fiberglass and ribs were painted with white primer, just to provide a clean background. The white closed-cell foam was somewhat translucent and, without paint, an uneven hull finish would show through the gaps in the oak strips.
The area at the top and bottom of the area to be covered with oak strips, along with the face and edges of the ribs (visible after the oak strips were installed), were finished with enamel matching the original hull color.
5. Glue Insulating Foam onto Fiberglass
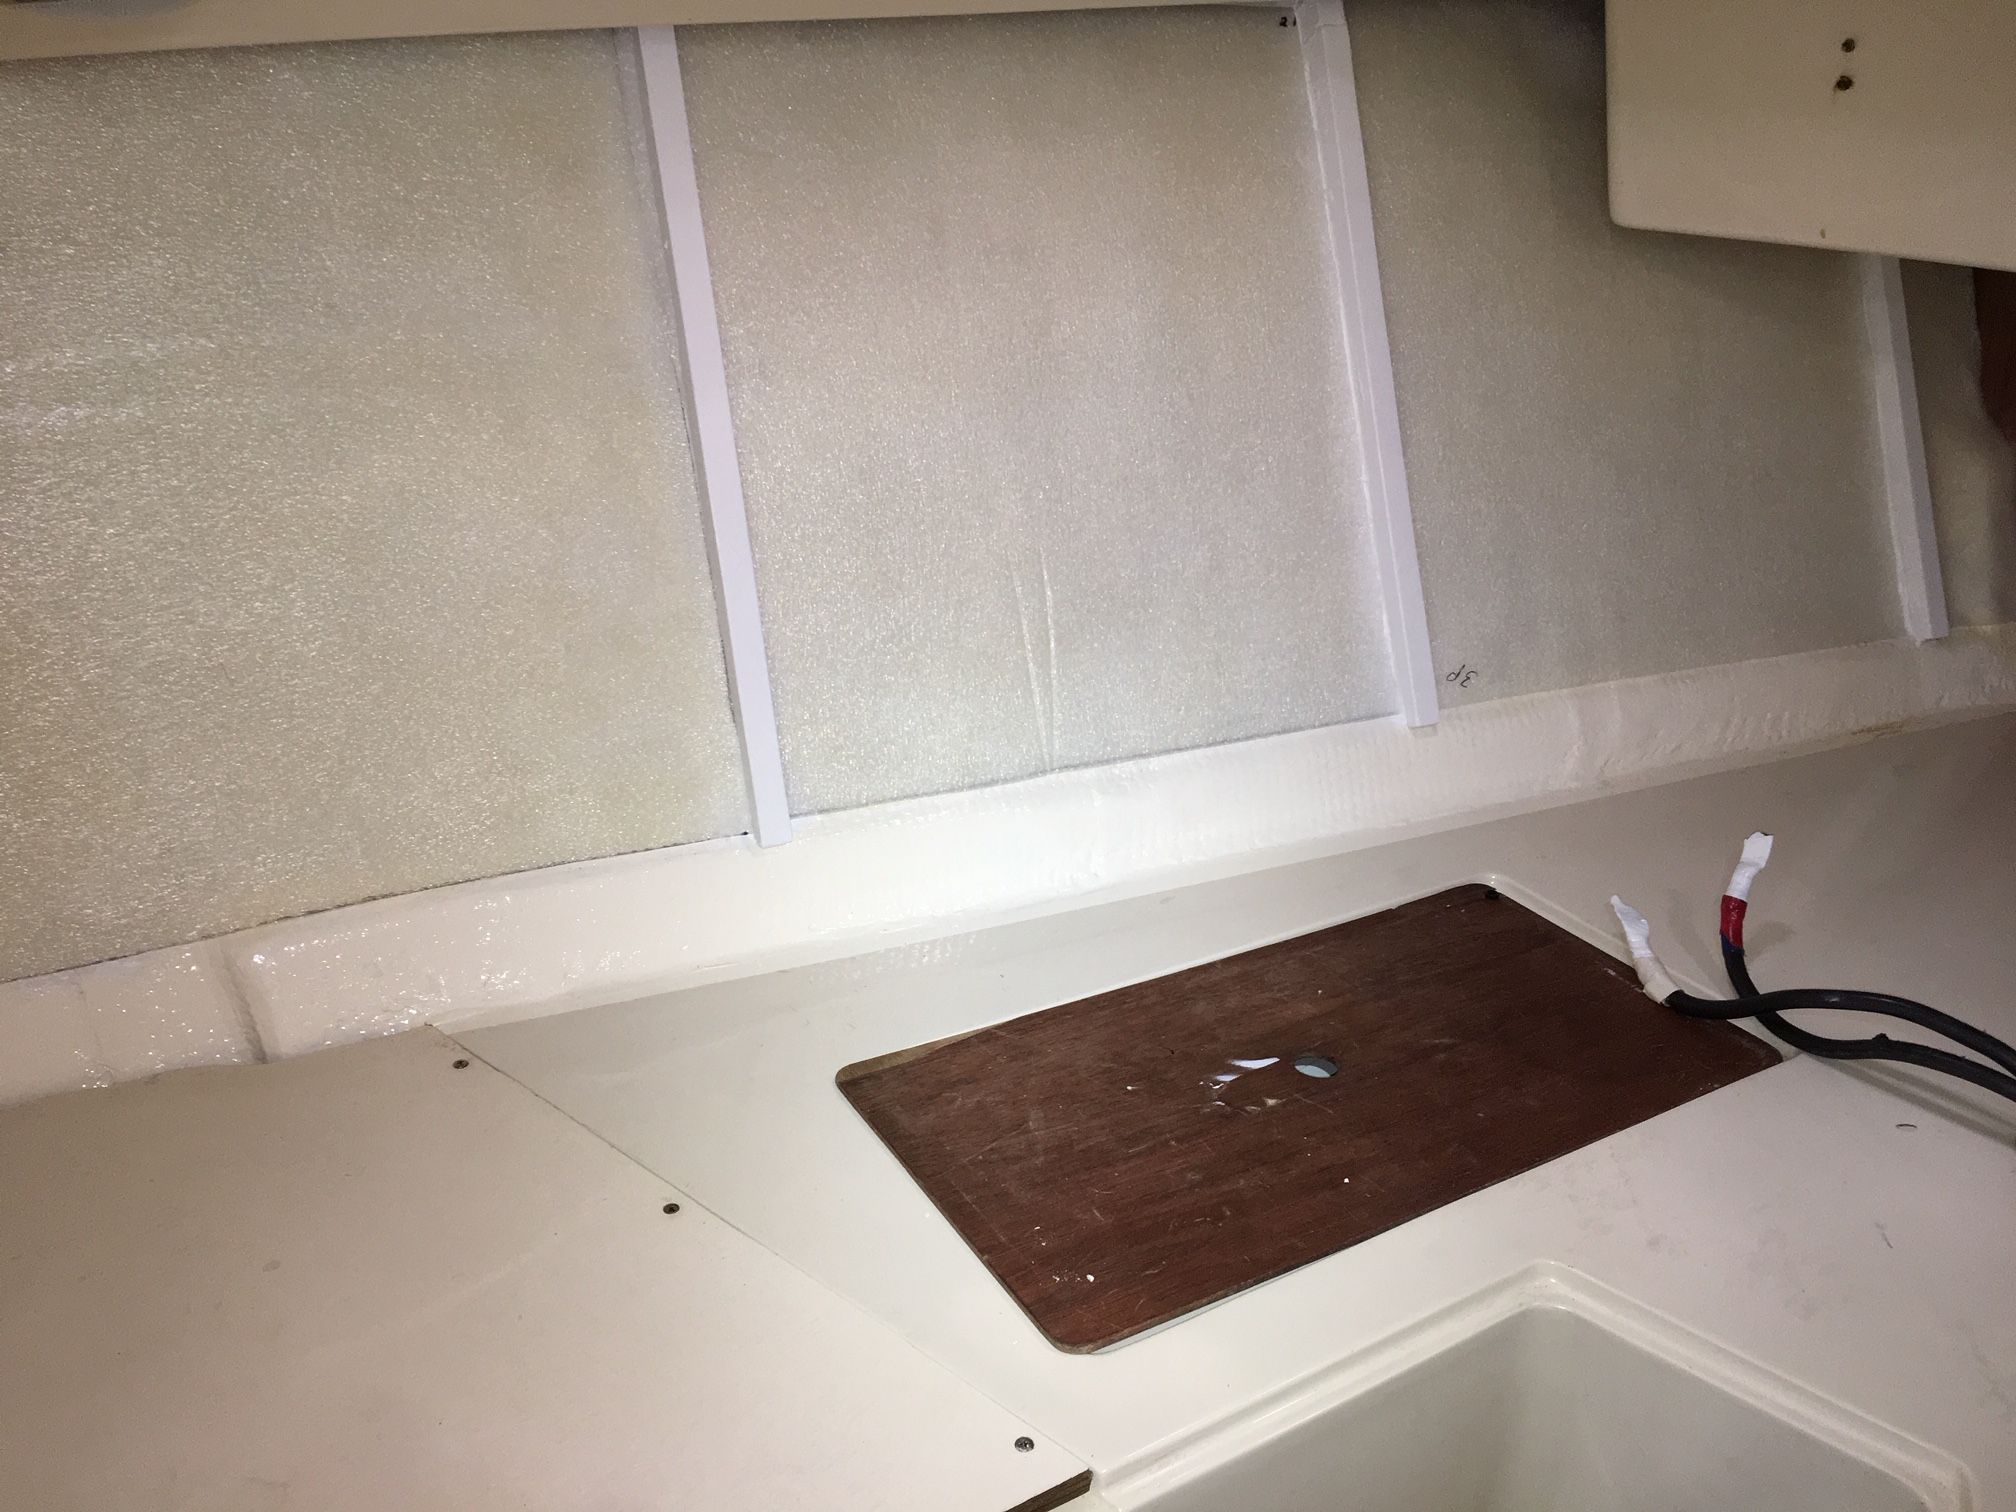
For insulation, ½-in. white polyethylene closed cell foam was purchased from a local craft store. It is easy to cut with scissors or a knife to fit the desired space between the ribs. The foam was glued onto the fiberglass using common contact cement.
If the boat was to attain live-aboard status, more effective forms of insulation would need to be explored. The ½-in. of polyethylene was enough to prevent sweating for a seasonal cruiser.
6. Cut and Install Wooden Strips

Then came the task of creating and installing the wooden strips. The oak was cut to the desired dimensions, long enough so that no joints would be required. All the strips were sealed on all sides with S1 epoxy sealer. With the potential of a hull/deck leak occurring some time in the future there was a risk of water dripping down on the strips. The epoxy would prevent discoloration.
The side and edges facing the interior were finished with three additional coats of satin varnish. Sealing and varnishing the strips was much easier to do in the garage at home than in the confined spaces aboard.
The installation itself was straight forward. Keeping in mind future access to the area behind this type of installation, such as the hull/deck joint, no glue was applied when attaching the horizontal oak strips to the ribs. Appropriately sized wood screws (# 6 stainless-steel) with finishing (cup) washers were used.
Start from the Bottom Up
Starting with the bottom horizontal strip it was screwed into place parallel to whatever horizontal surface was already in place. This benchmark strip didn’t have to be right at the base. Typically, seat cushions or a mattress would cover the bottom four to six inches anyway. Then, installing one strip at a time, the oak strips were attached upwards towards the deck head.
The difficult part was ensuring that the fastening screws, always visible in the finished product, were lined up visually straight on the rib. The ends of the strips could be left as installed, in a neat, finished line against the fore and aft bulkheads, or an option was to install a piece of vertical trim once all the strips were in place.
Finishing near the deckhead also posed a challenge. The deck usually rises towards the bow. Tapering the strips to conform to this rise worked well. Leaving a narrow gap where the strips meet the deckhead was conducive to ventilation and access to hull/deck fasteners.
Conclusion
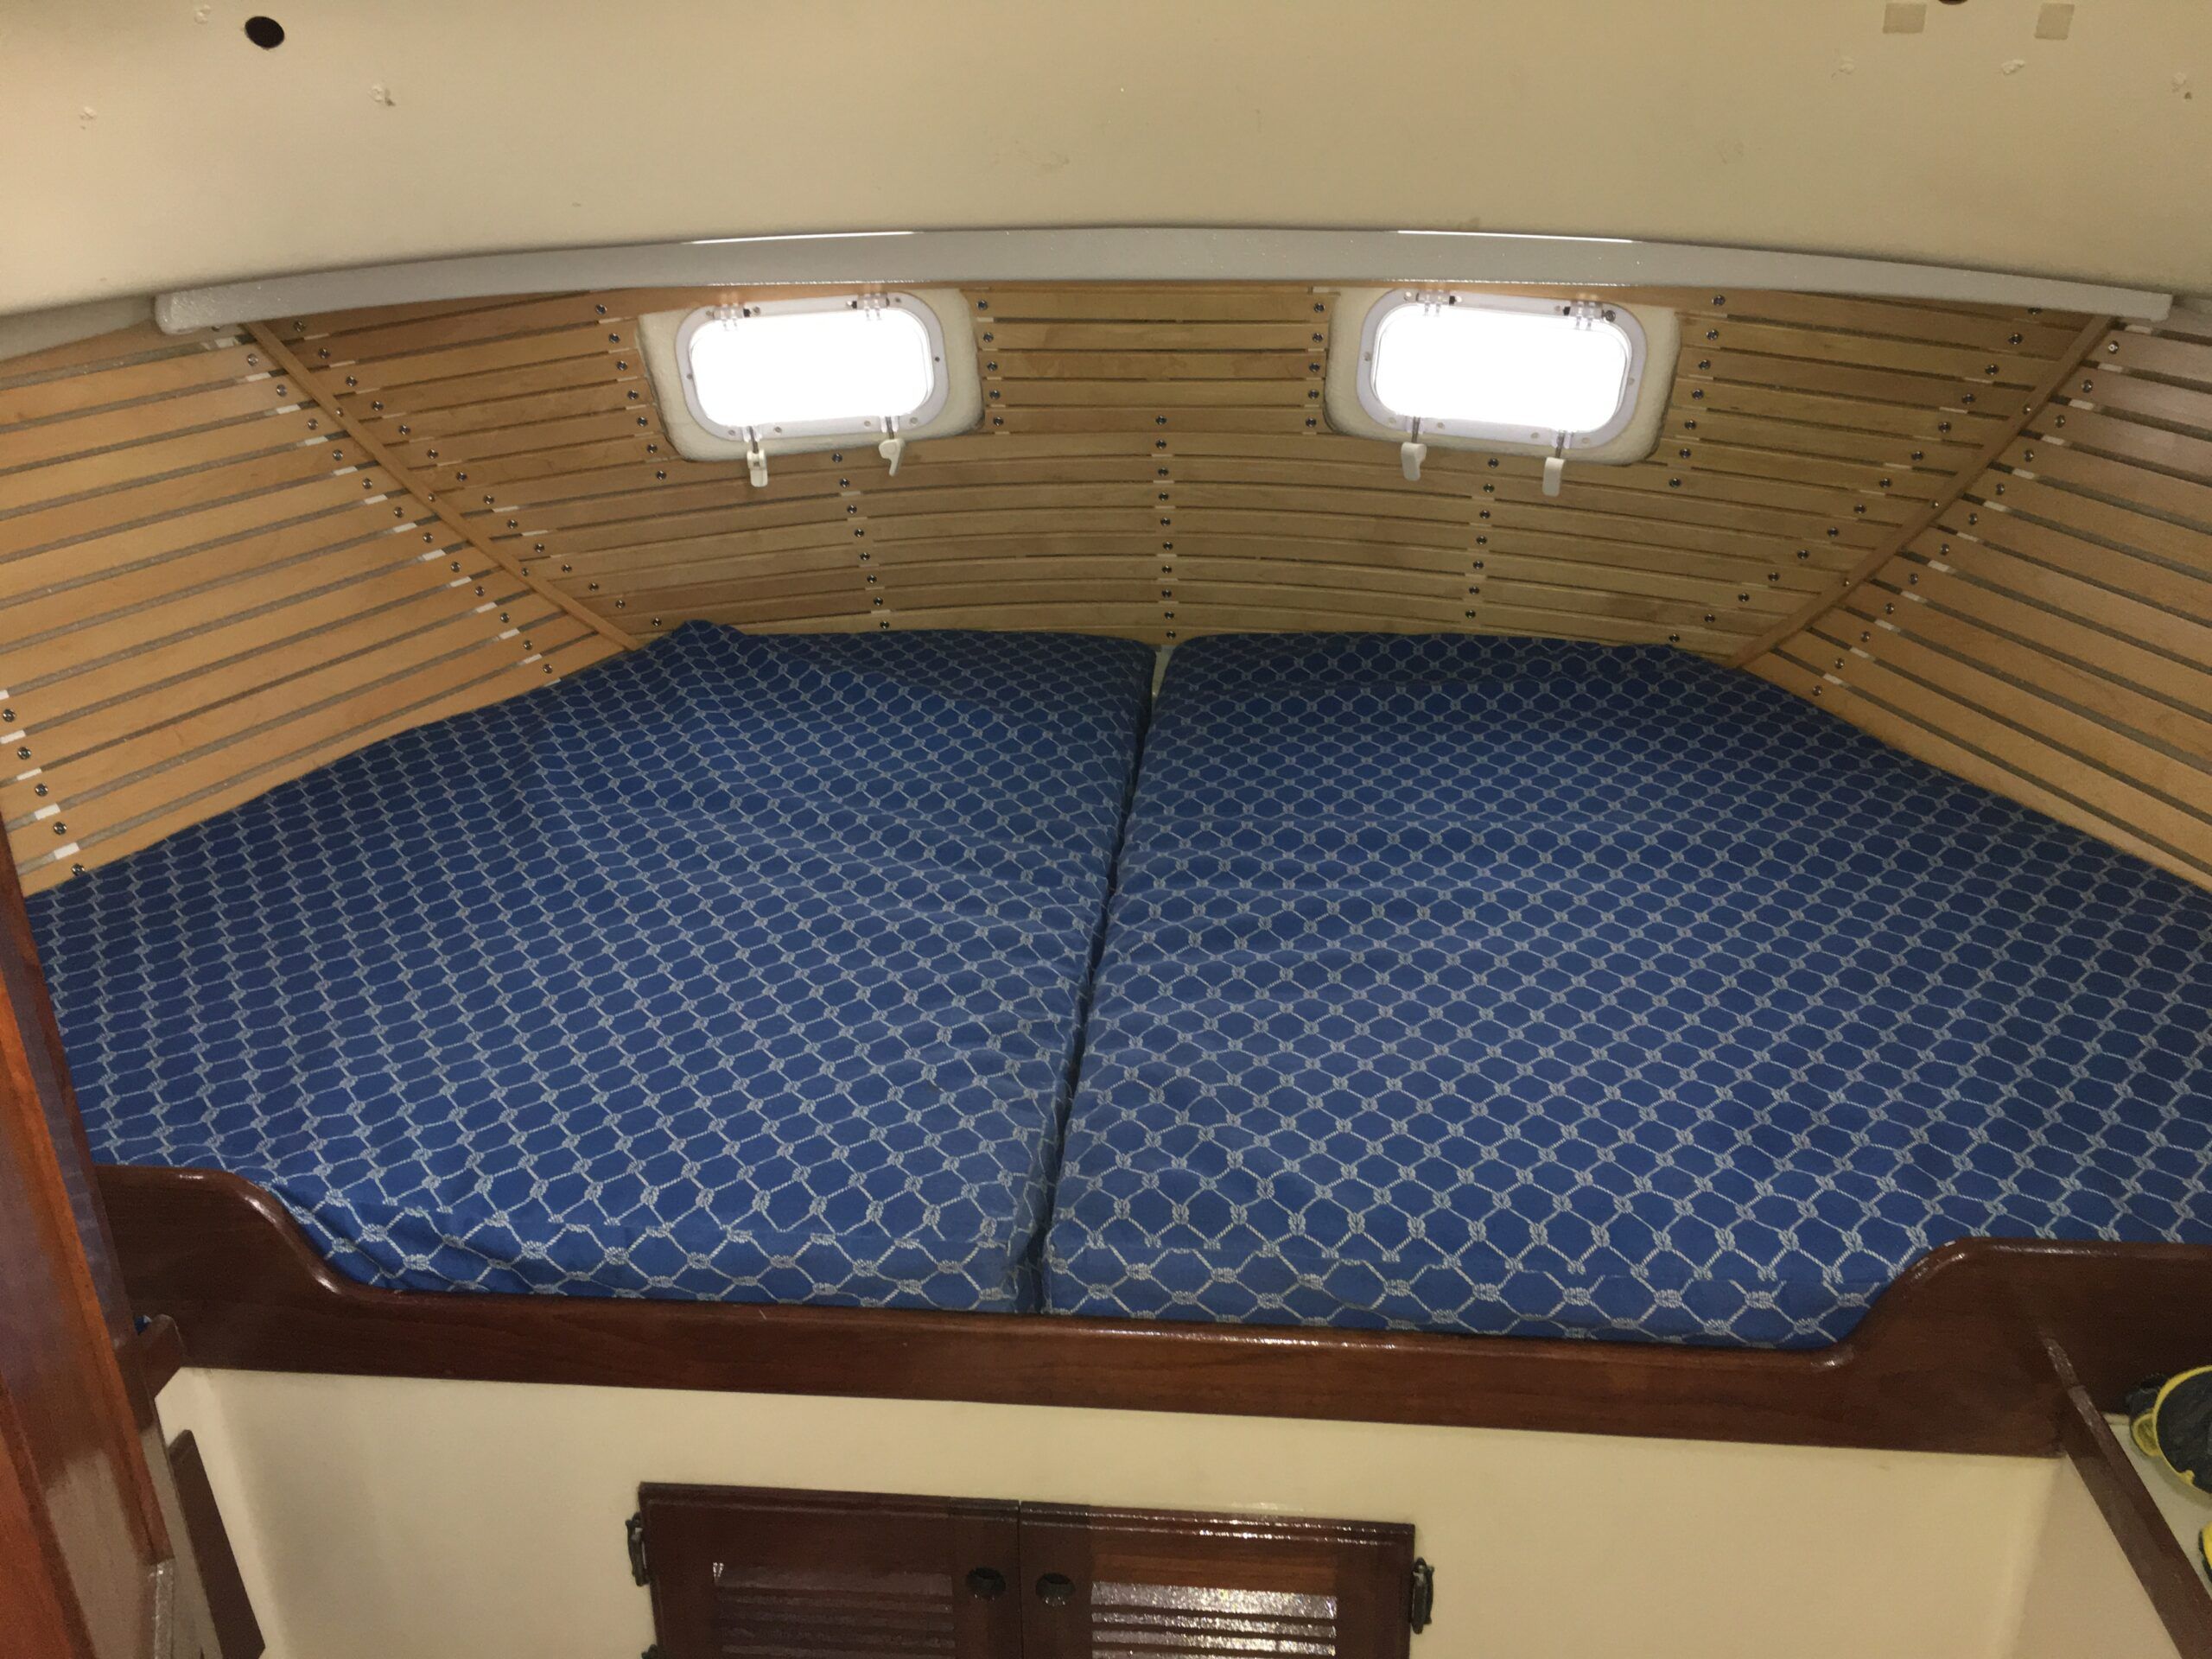
The finished product looked warm, cozy and nautical.
This task project has been completed on a few boats now, using simple carpentry tool; a table saw and router to form the wood, a cordless drill/driver, hand mitre saw, tape measure, and a sliding T-bevel to measure angles. Selected woods have been mahogany, oak, maple and ash.
I am not a finishing carpenter by any description and simply learned by doing. Any boat owner handy with tools and a bit of imagination can do it! The cabin certainly looks inviting and there is no longer a lingering musty odor.


