
")
During the 1970s and early 80s frenzy of fiberglass production boat building, many cabin soles were pretty basic—a textured fiberglass pan or bare plywood. The assumption was that the owner would cover it with carpet. Yes, back in the day, carpet was in vogue for boats constructed for the masses. Custom or high-end sailboats were finished with proper teak and holly timbers. That was considered too expensive for boats designed for the majority of buyers. As the years went by, teak and holly laminates arrived and become the new norm at all levels—a cost-effective touch of luxury for cabin interiors.
Aboard our 1978 Islander Bahama 30, the cabin sole was plywood and, where the plywood met the hull, fiberglass curved upwards in the corners. At time of purchase, we simply replaced the previous owners’ worn-out carpet with a new one, an inexpensive refresh. It was a temporary fix. I had other plans. A winter project was in the making.
Matching the Wood
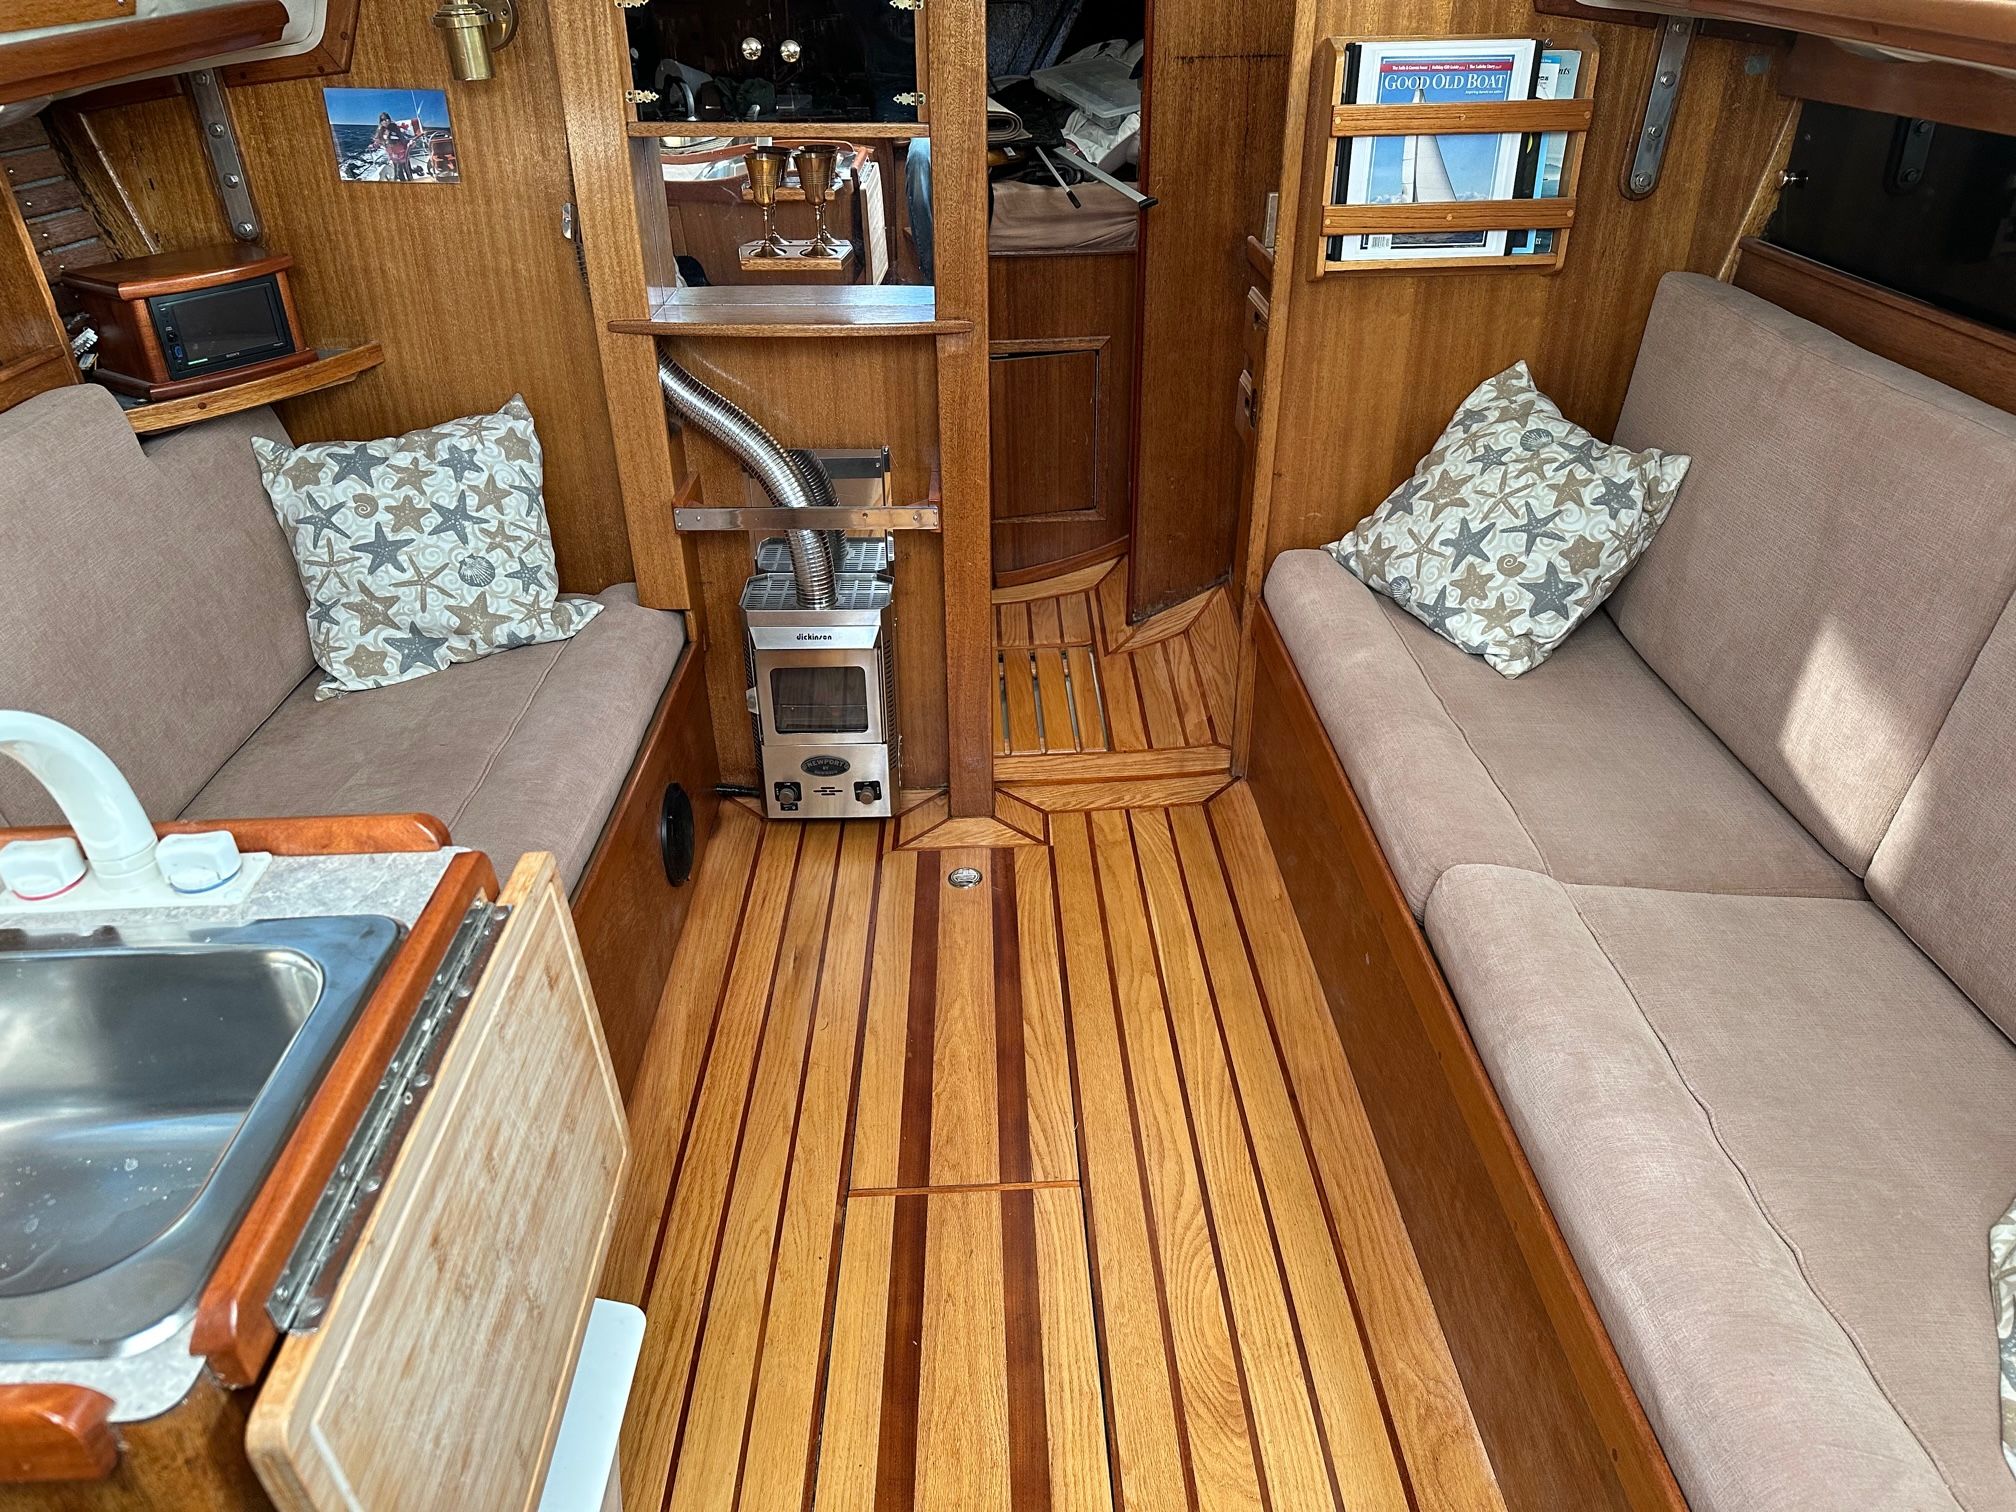
The interior woodwork on early Bahama 30s was light mahogany varnished to a soft glow, a much brighter interior than the dark teak of later models, and a trend of that era. It was considered more cost effect to oil teak once than to varnish other woods multiple times. The standard teak and holly laminate cabin sole came later too, matching the teak interior. But with our mahogany cabinetry, installing a teak and holly laminate would look odd, not quite right. I wanted something that would accent the woodwork. I decided to go with oak planks with mahogany strips, patterned like the standard teak and holly laminate. As there was nothing available on the market, I would have to create my own.
1. Buy the Planks
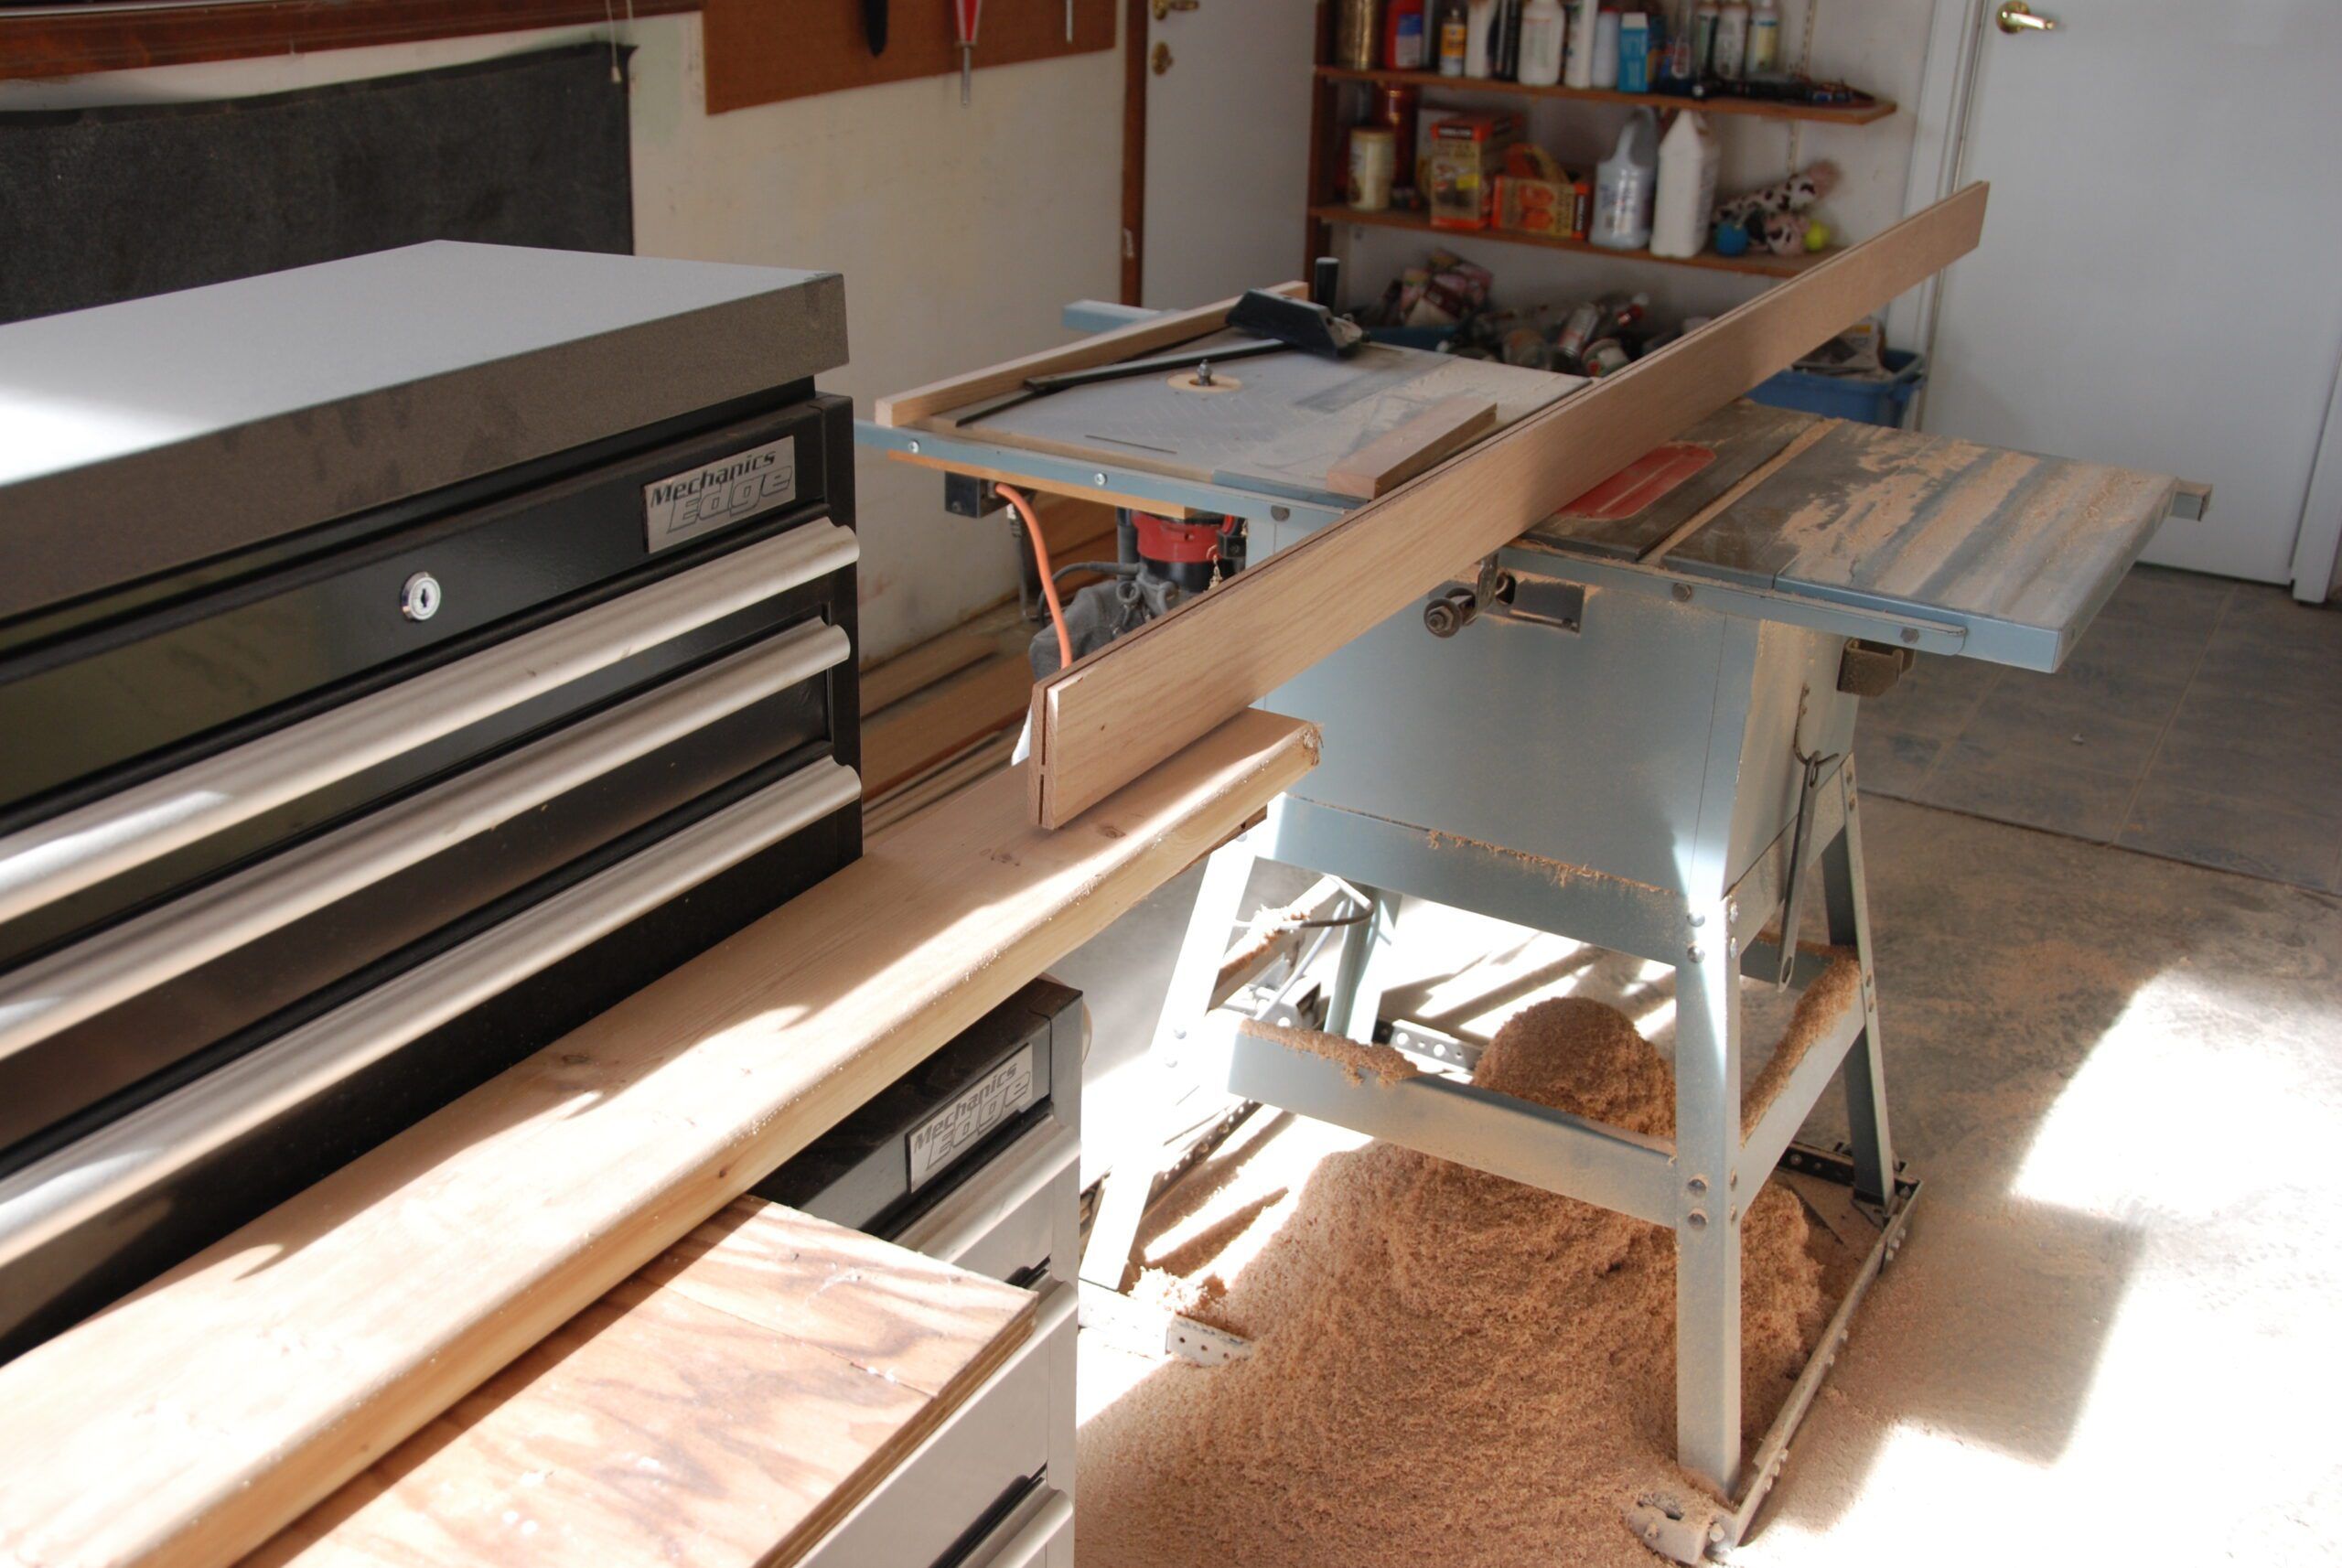
The first step was purchasing the 1 x 5-in. oak and mahogany planks. The actual dimensions of the planks were ¾-in. thick, too thick for what I wanted to work with. Curving the oak into the corners was going to be difficult and the ¾-in. thick planks would make that almost impossible. Therefore, each plank was cut down the middle of the thickness, creating two thin planks out of one thick one.
The option, of course, would have been to have the planks commercially milled down to the correct thickness. But that would have been expensive and wasted a lot of wood.
2. Fill the Gap Where Plywood Meets the Hull
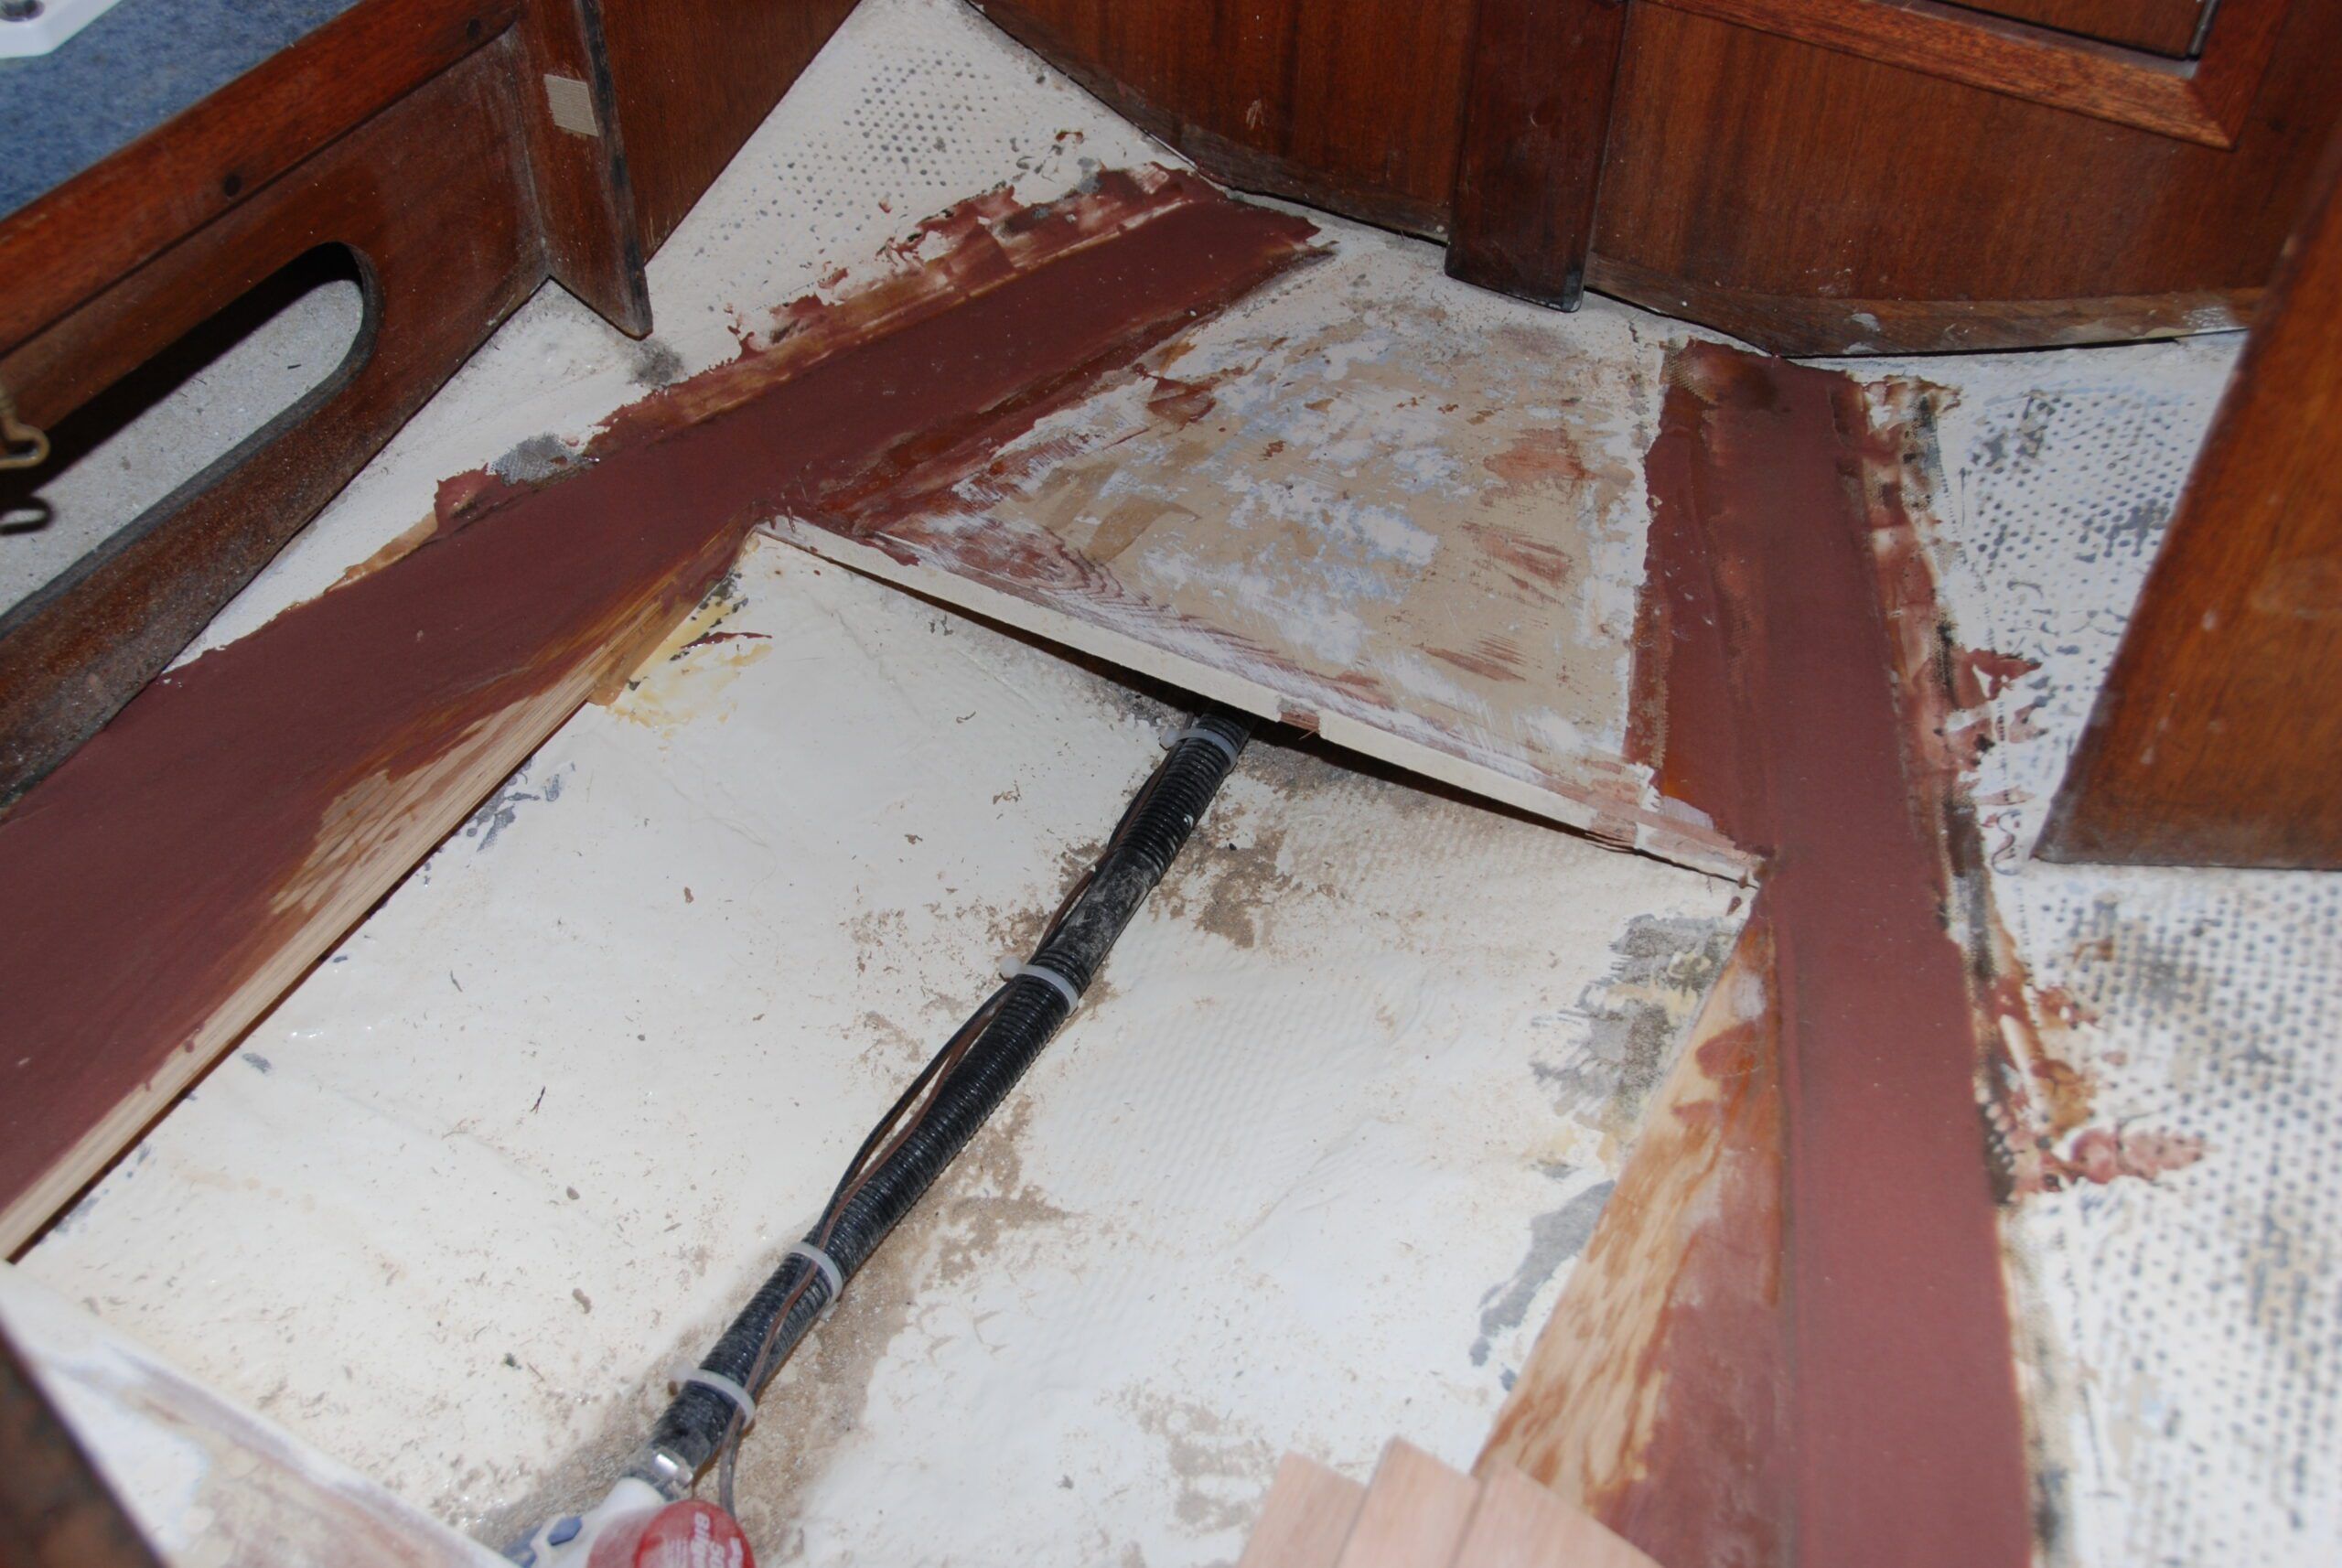
Next was filling the gap where the plywood met the curved hull. Plenty of sanding to smooth out the lumps and bumps on the plywood and, using West System epoxies with a filler, a smooth transition from the level plywood to the curved hull was created.
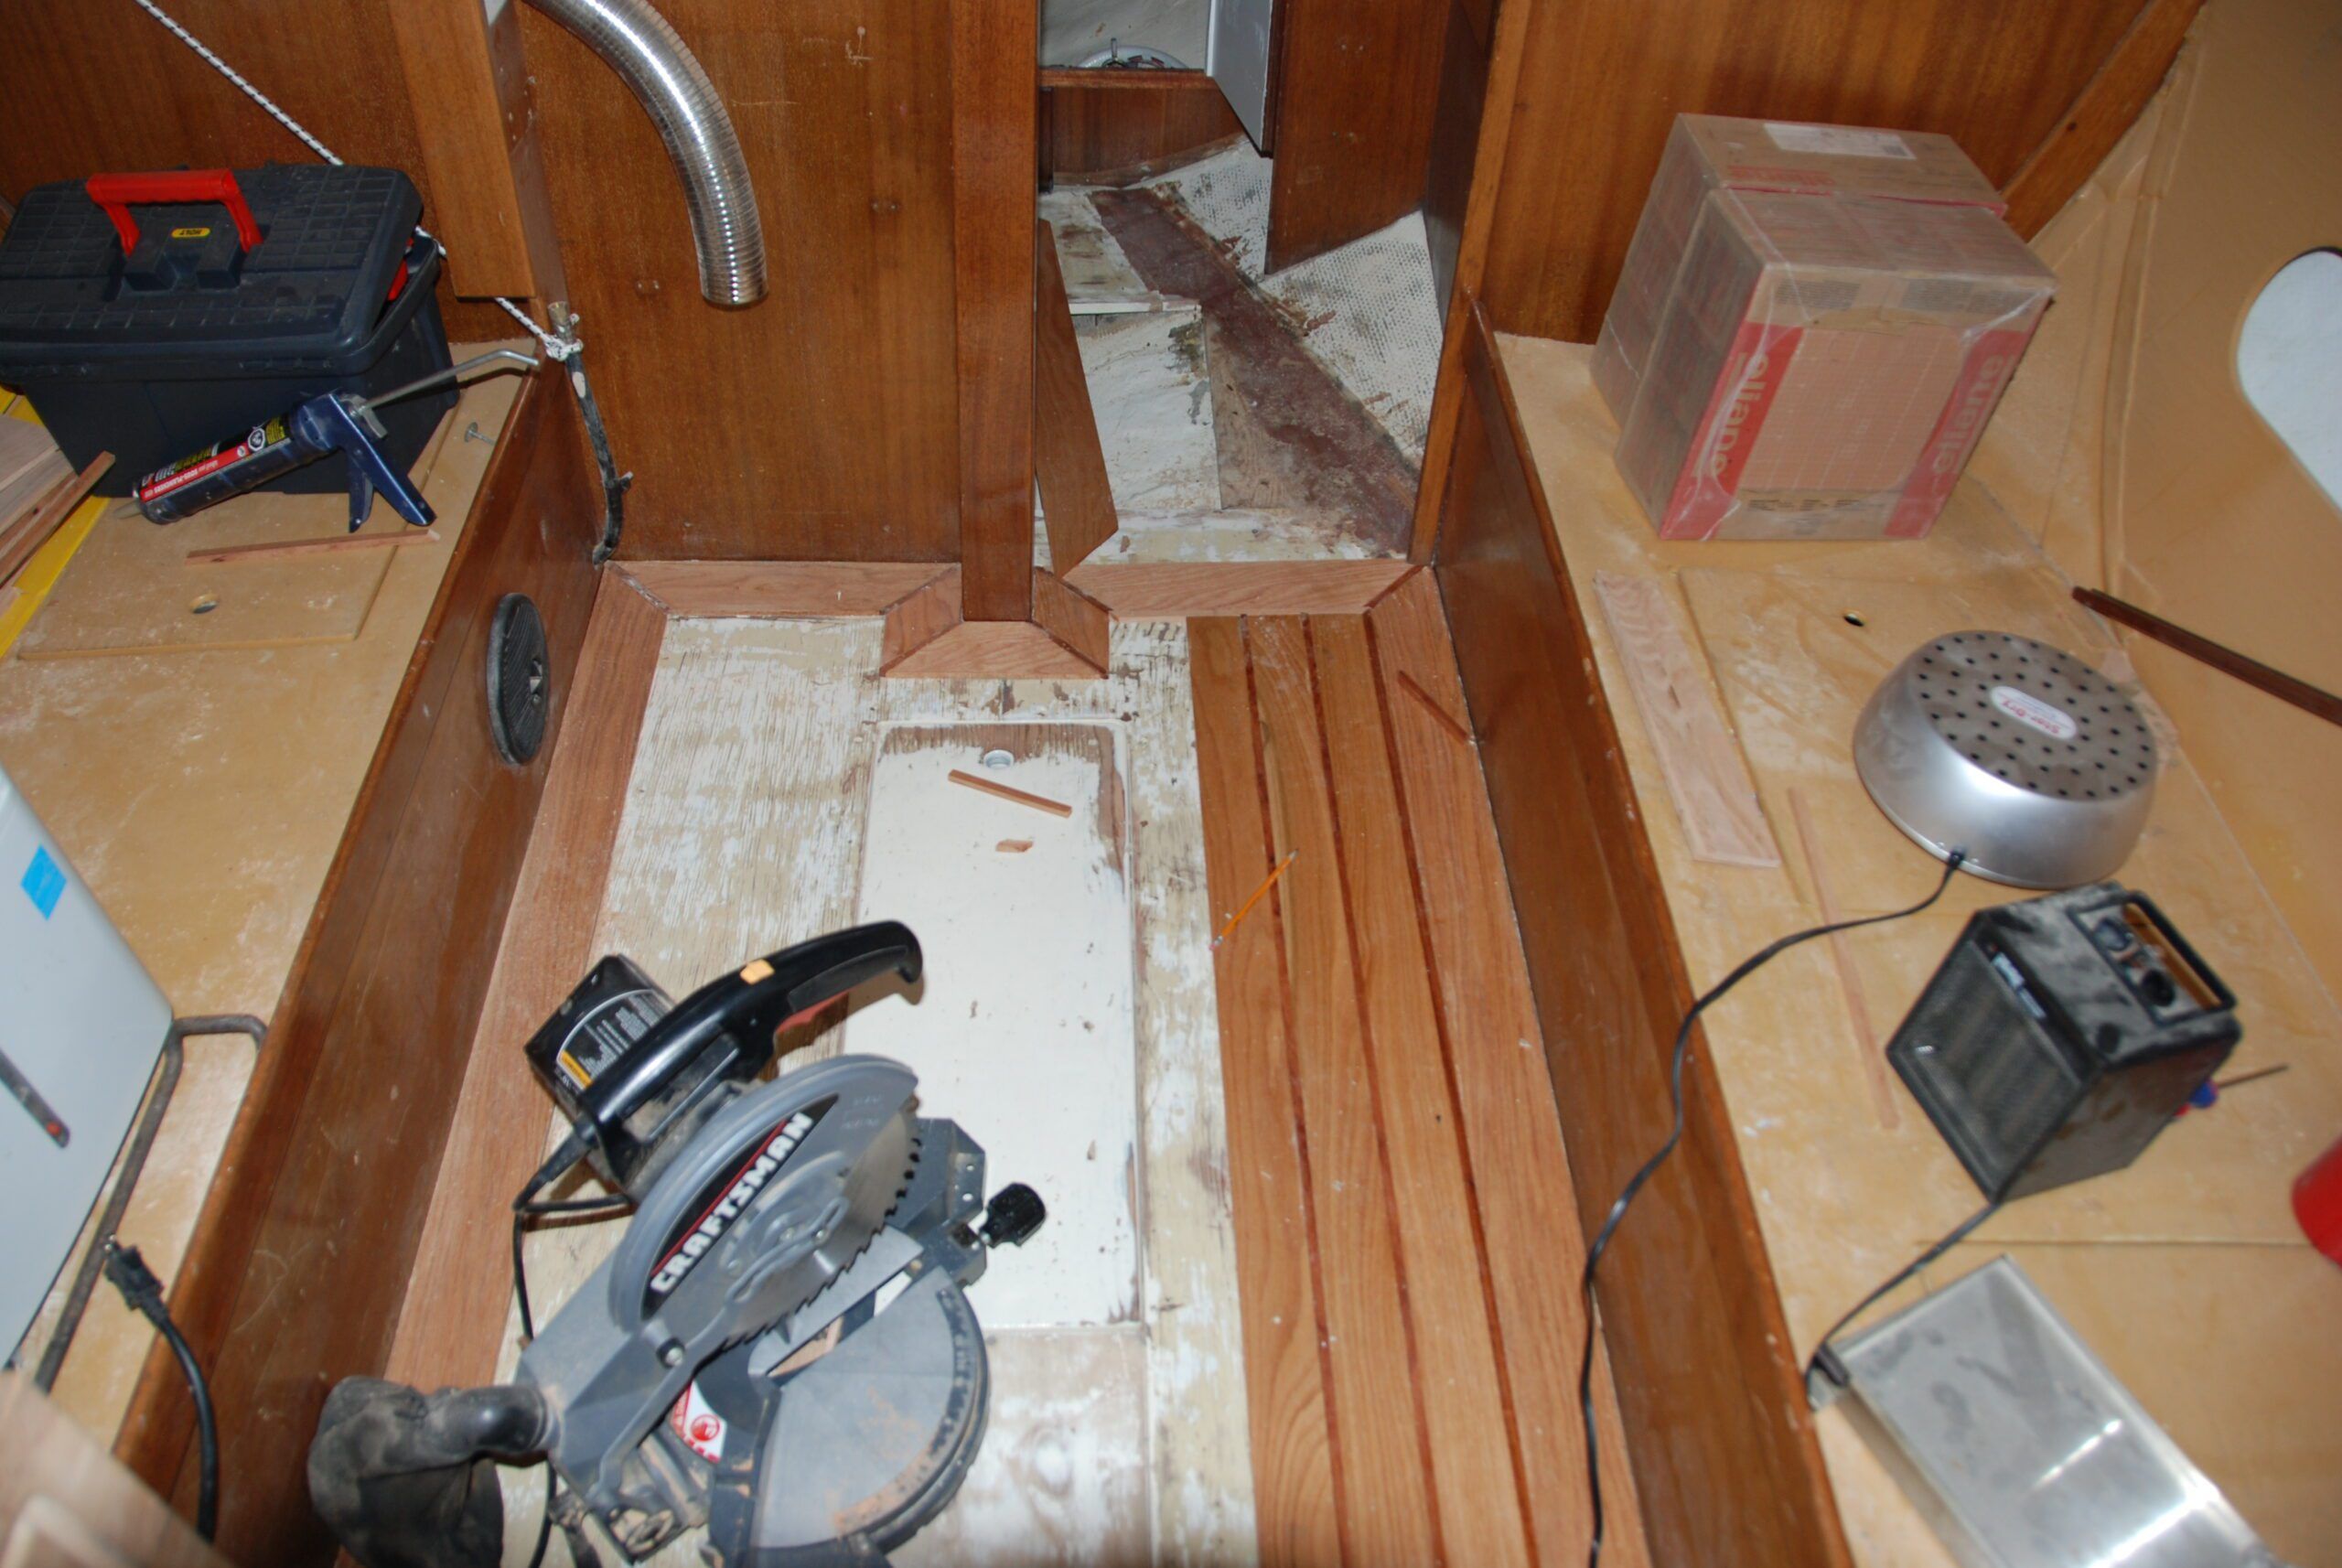
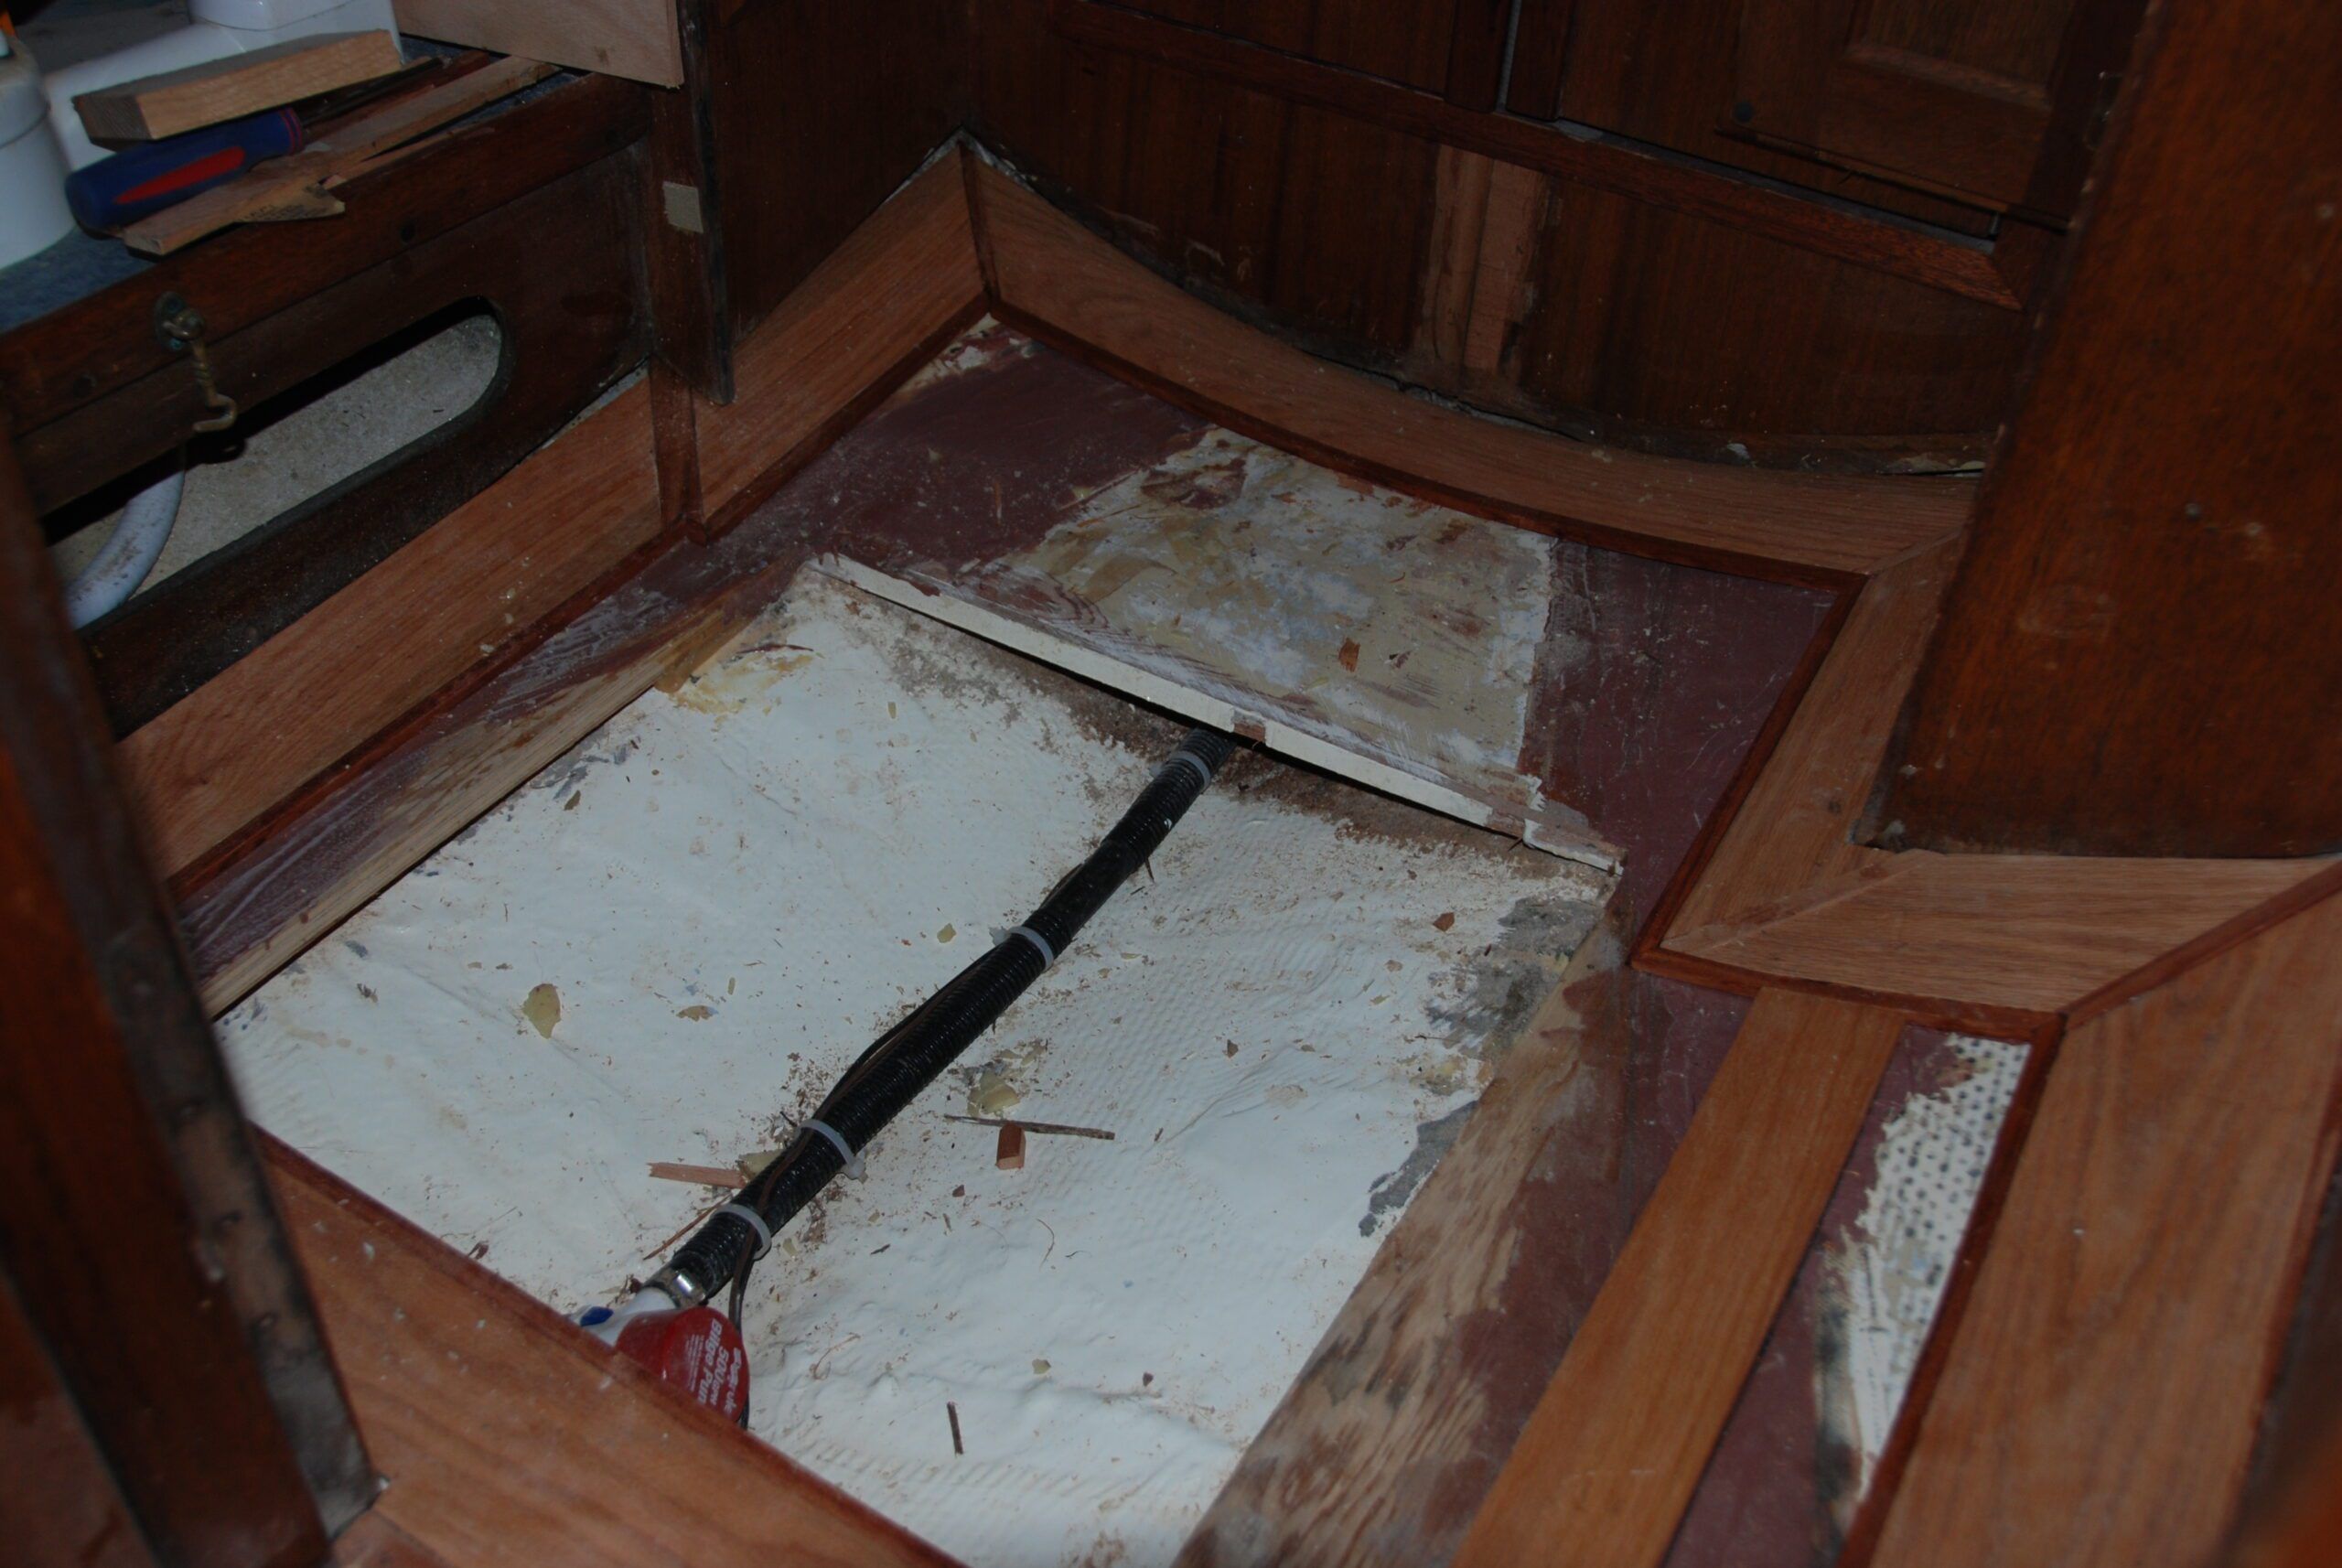
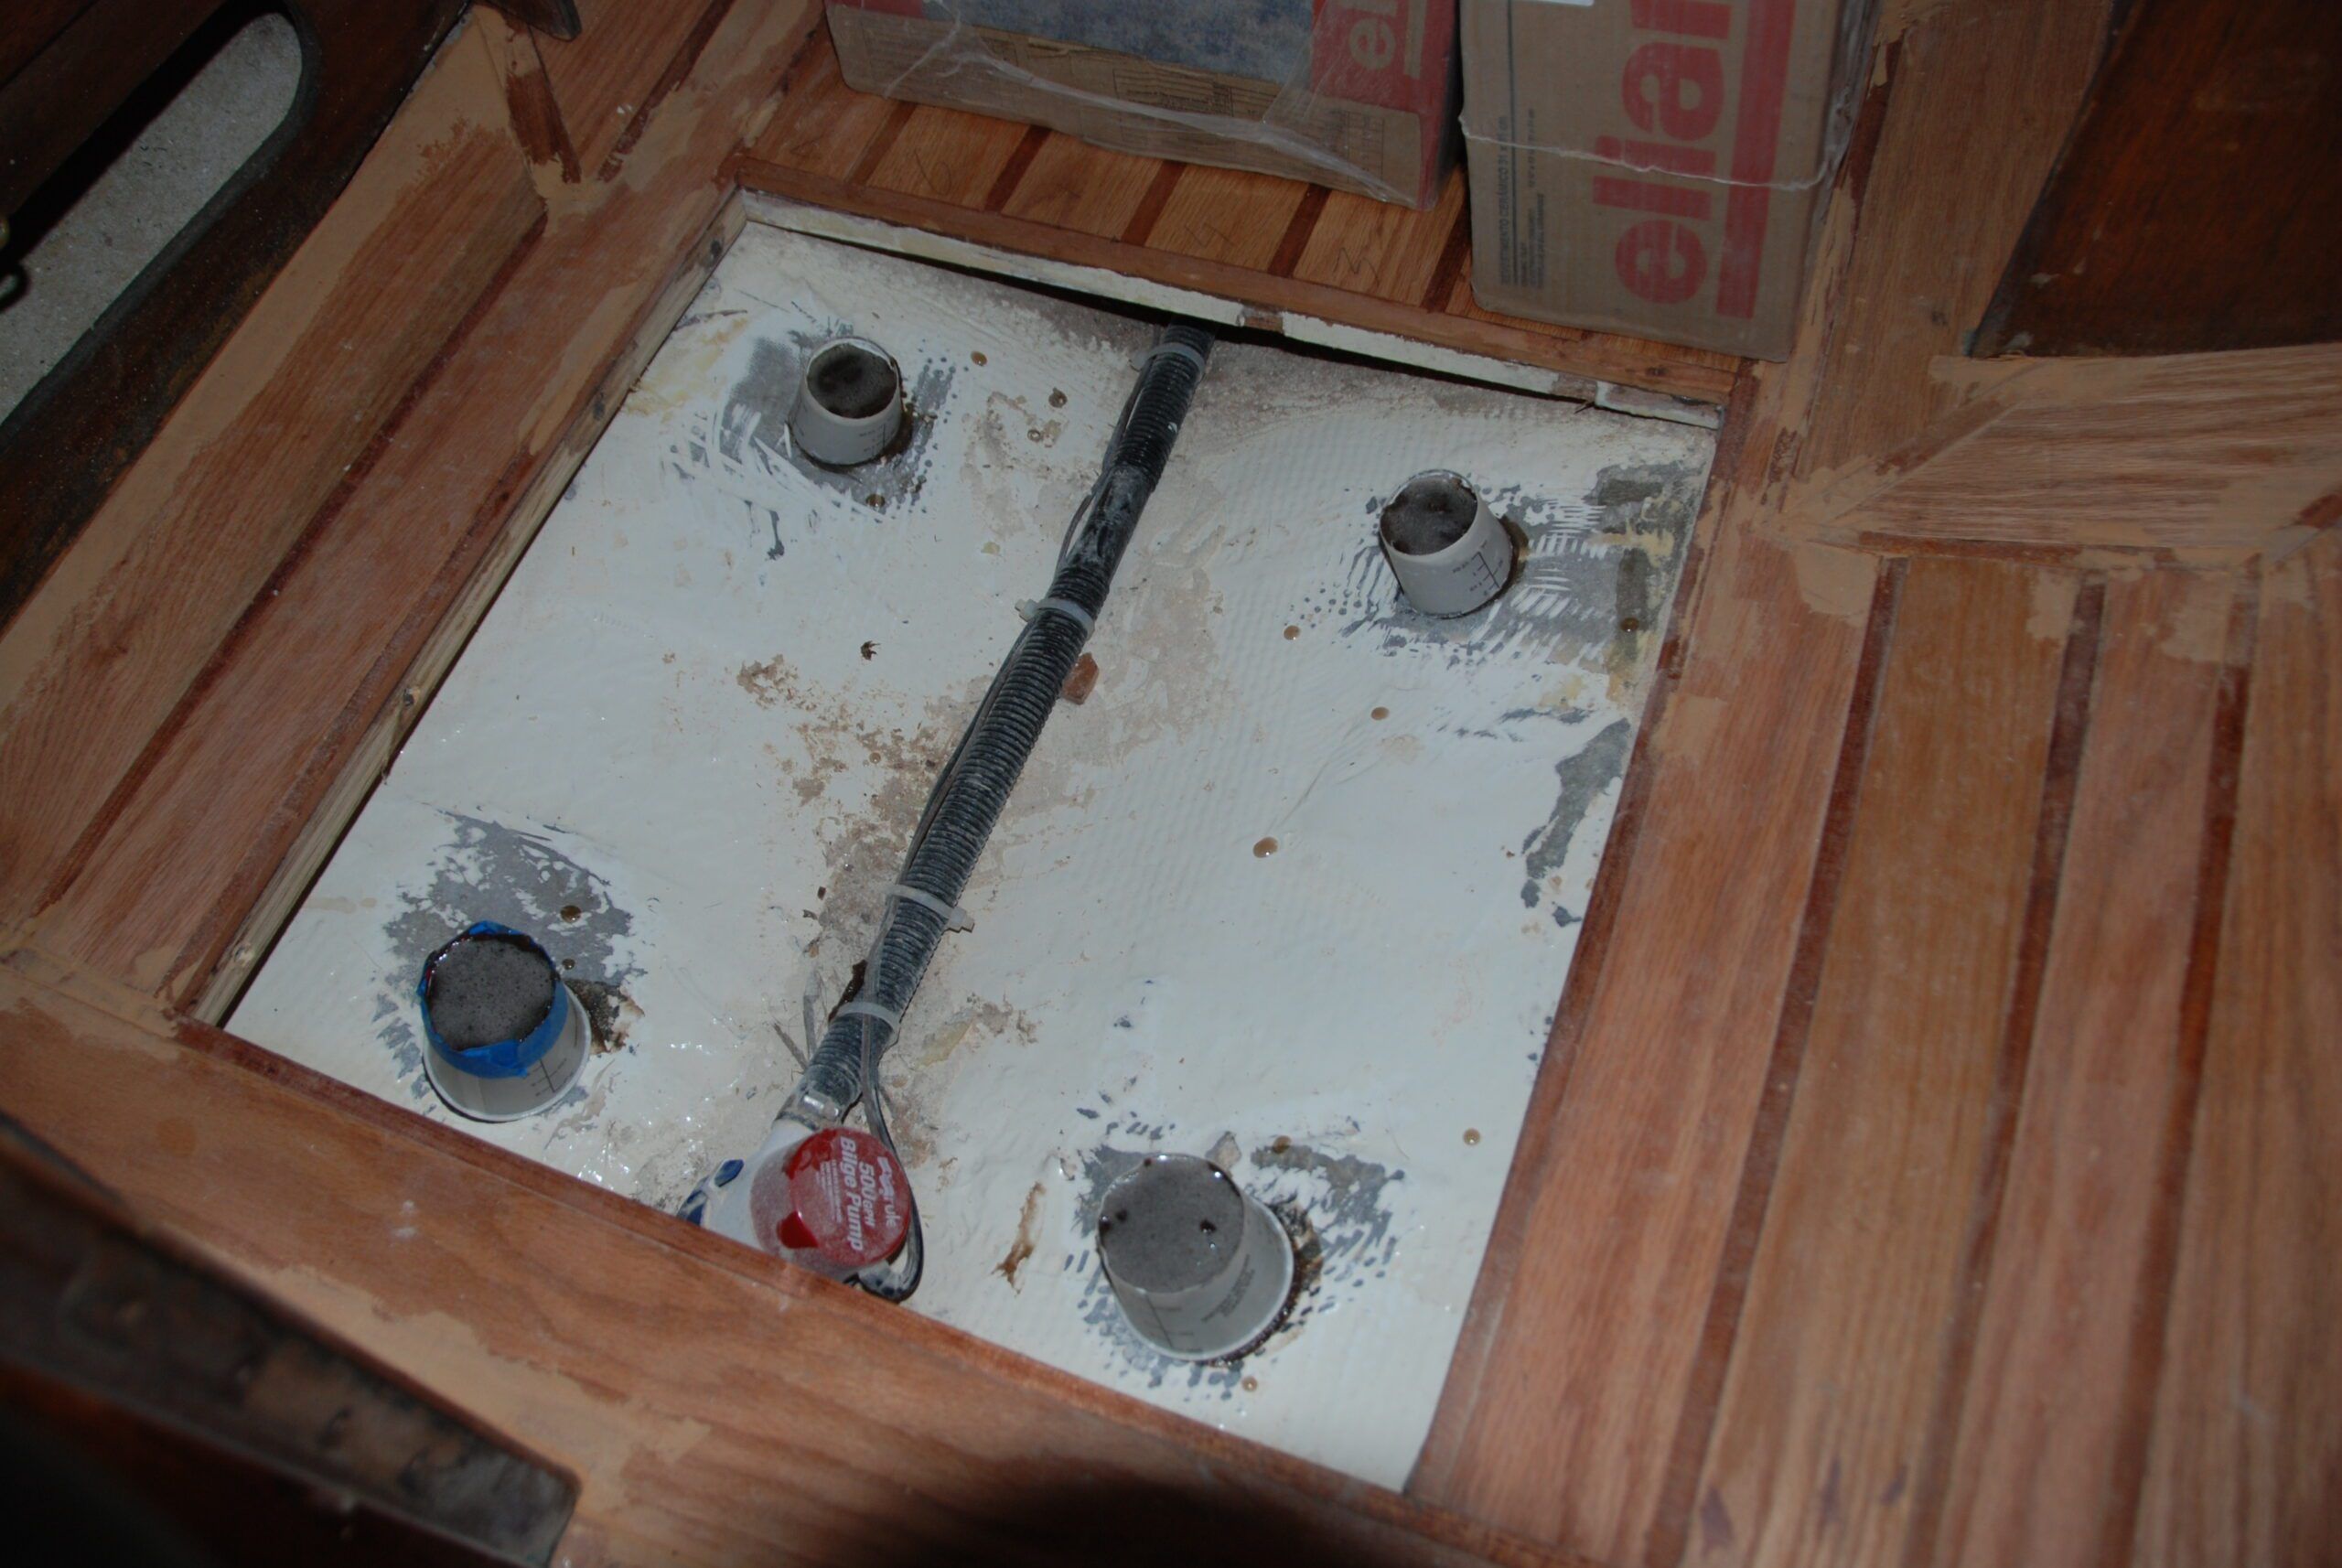
3. Enlarge Access to the Bilge
Now was also the opportune time to enlarge access to the bilge. The two, narrow factory-installed hatches were widened. New hatch boards would have to be cut, but this provided much better access to the bilge.
4. Make Sump Pan for Shower
The head compartment forward of the main bulkhead occupied the full width of the hull. A second bulkhead separated it from the V-berth. Later models had a shower pan embedded in the sole, but the 1978 models had no such provisions. With a shower highly desired by the admiral (wife), I would have to create a sump pan.
The plywood sole was cut out to an appropriate size for a shower pan. The fiberglass hull underneath was part of the bilge and it was separated from the main bilge for a shower sump. A simple shower curtain on a track would be installed at the head liner, allowing for a 24- by 24-in. shower stall.
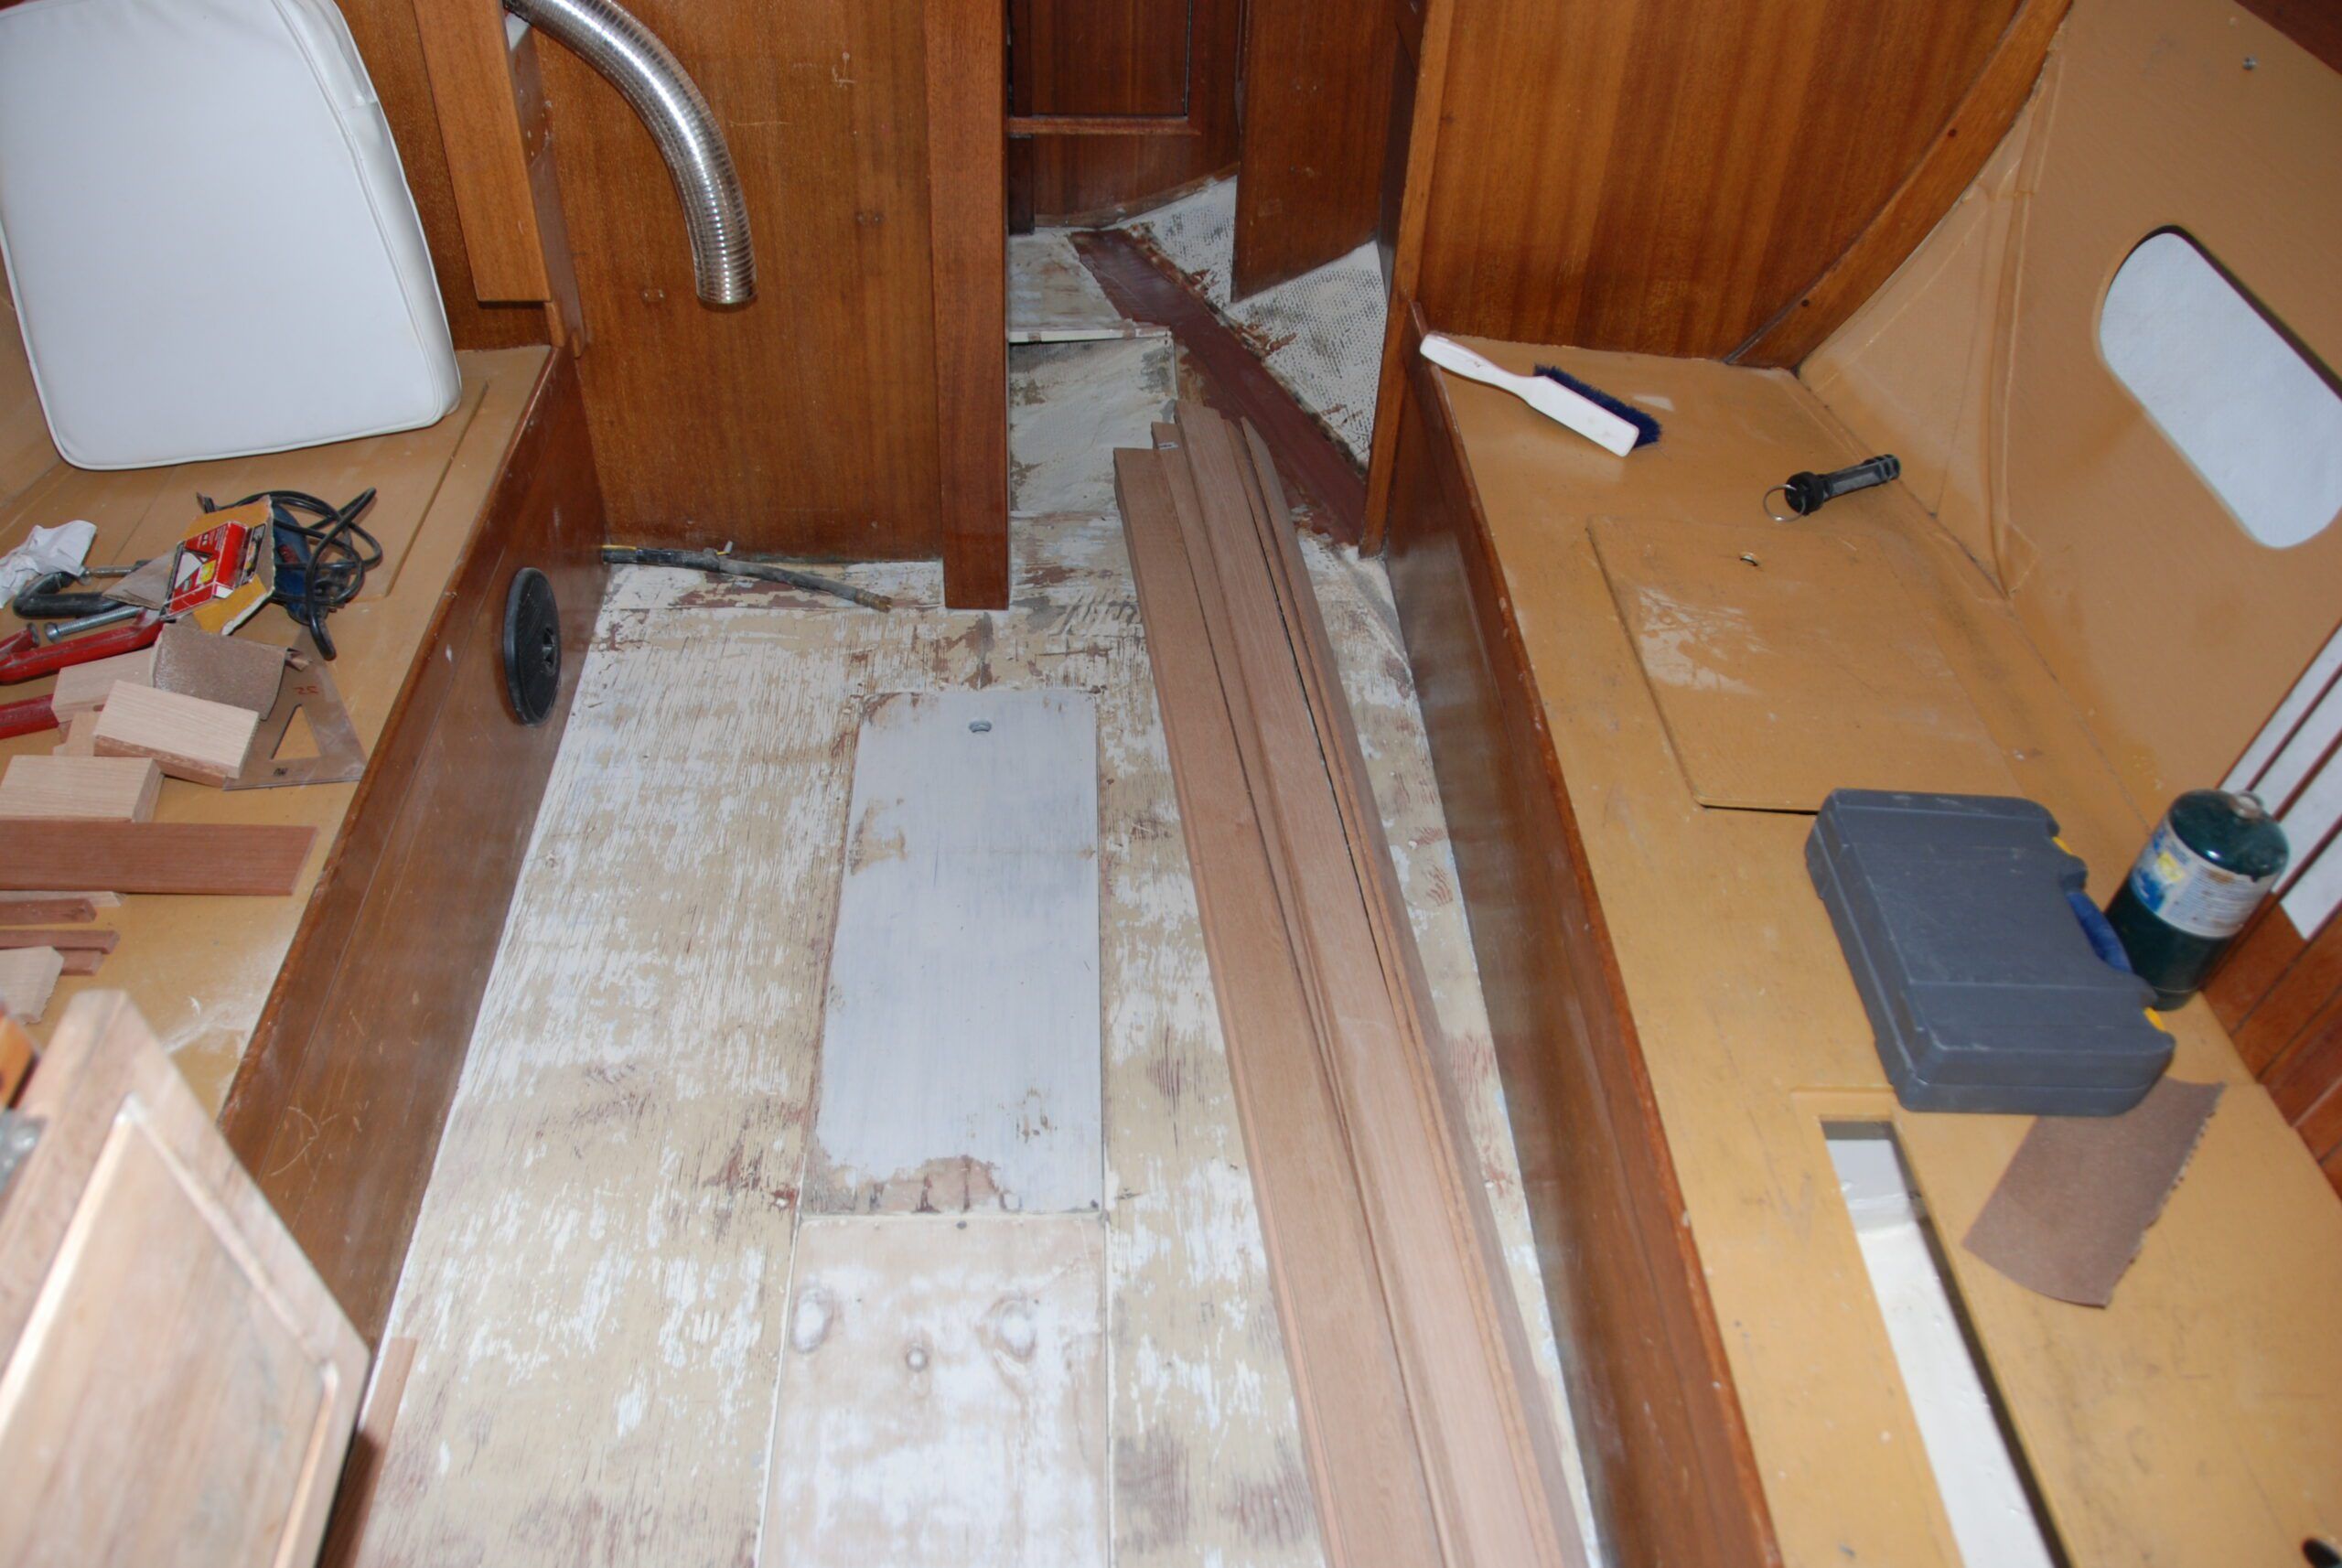
5. Measure and Cut the Planks
Back to the main cabin, measuring the width of the sole determined the width of each plank. Odd size planking along the settees would look, well, odd. At the foot of the companionway and at the forward bulkhead planks were cut to 45-degree angles, a little fancy work. Each longitudinal plank was then cut to the correct length and laid down in a trial fit. This was to ensure appropriate width sizing for the cabin and to ensuring the bilge hatch was the correct width. The actual opening was trimmed where necessary to fit the plank pattern.
6. Seal the Planks on All Edges
Once satisfied with the planking pattern, each plank was sealed on all four sides and at the ends with S1 sealer, an epoxy-based sealer specifically designed for water proofing wood. Unlike teak, oak is prone to staining when exposed to water.
7. Epoxy in Planks
Starting with the trim pieces at the companionway/galley and the bulkhead, each oak plank and mahogany trim piece was then epoxied into place using West System epoxy with a thickening agent. Weights were used to keep pressure on the planks, holding them in place one at a time, waiting for the epoxy to cure before installing the next plank.
A laborious task, but I had all winter. As can be seen in the photos, I made an effort around the mast post and galley to make the cabin ends decorative.
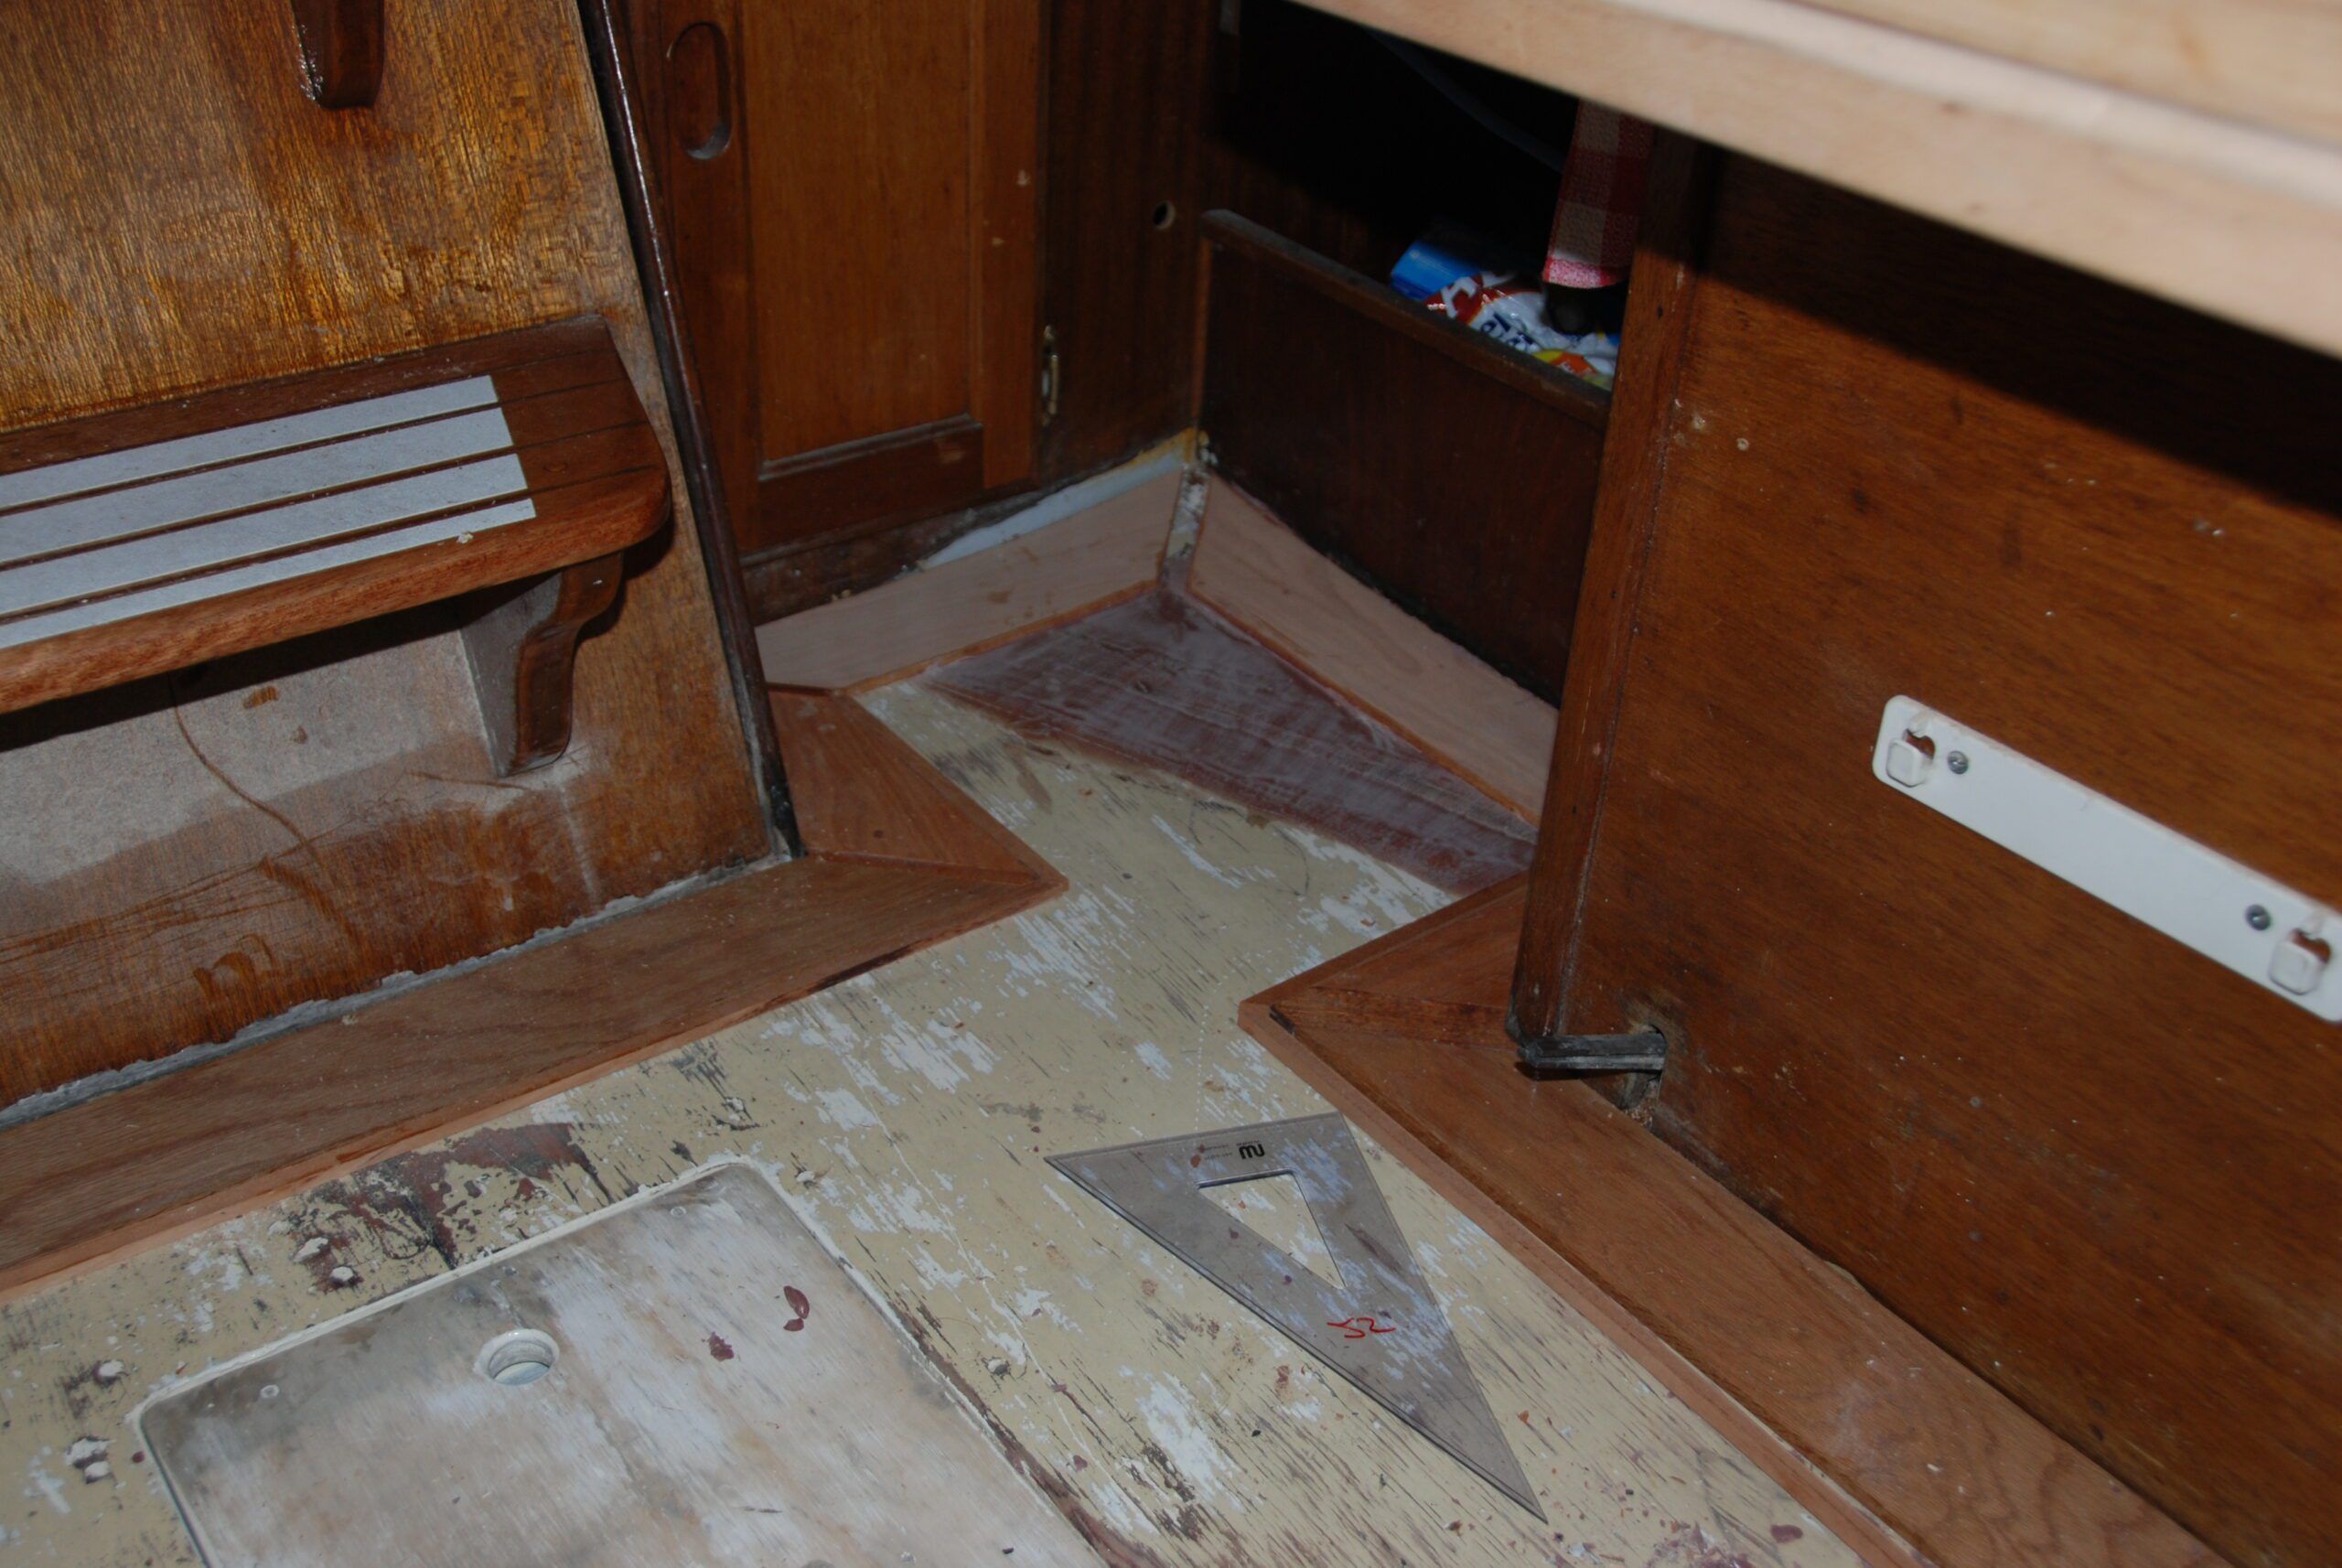
8. Making Adjustments for Varied Widths and Curves
Cabin
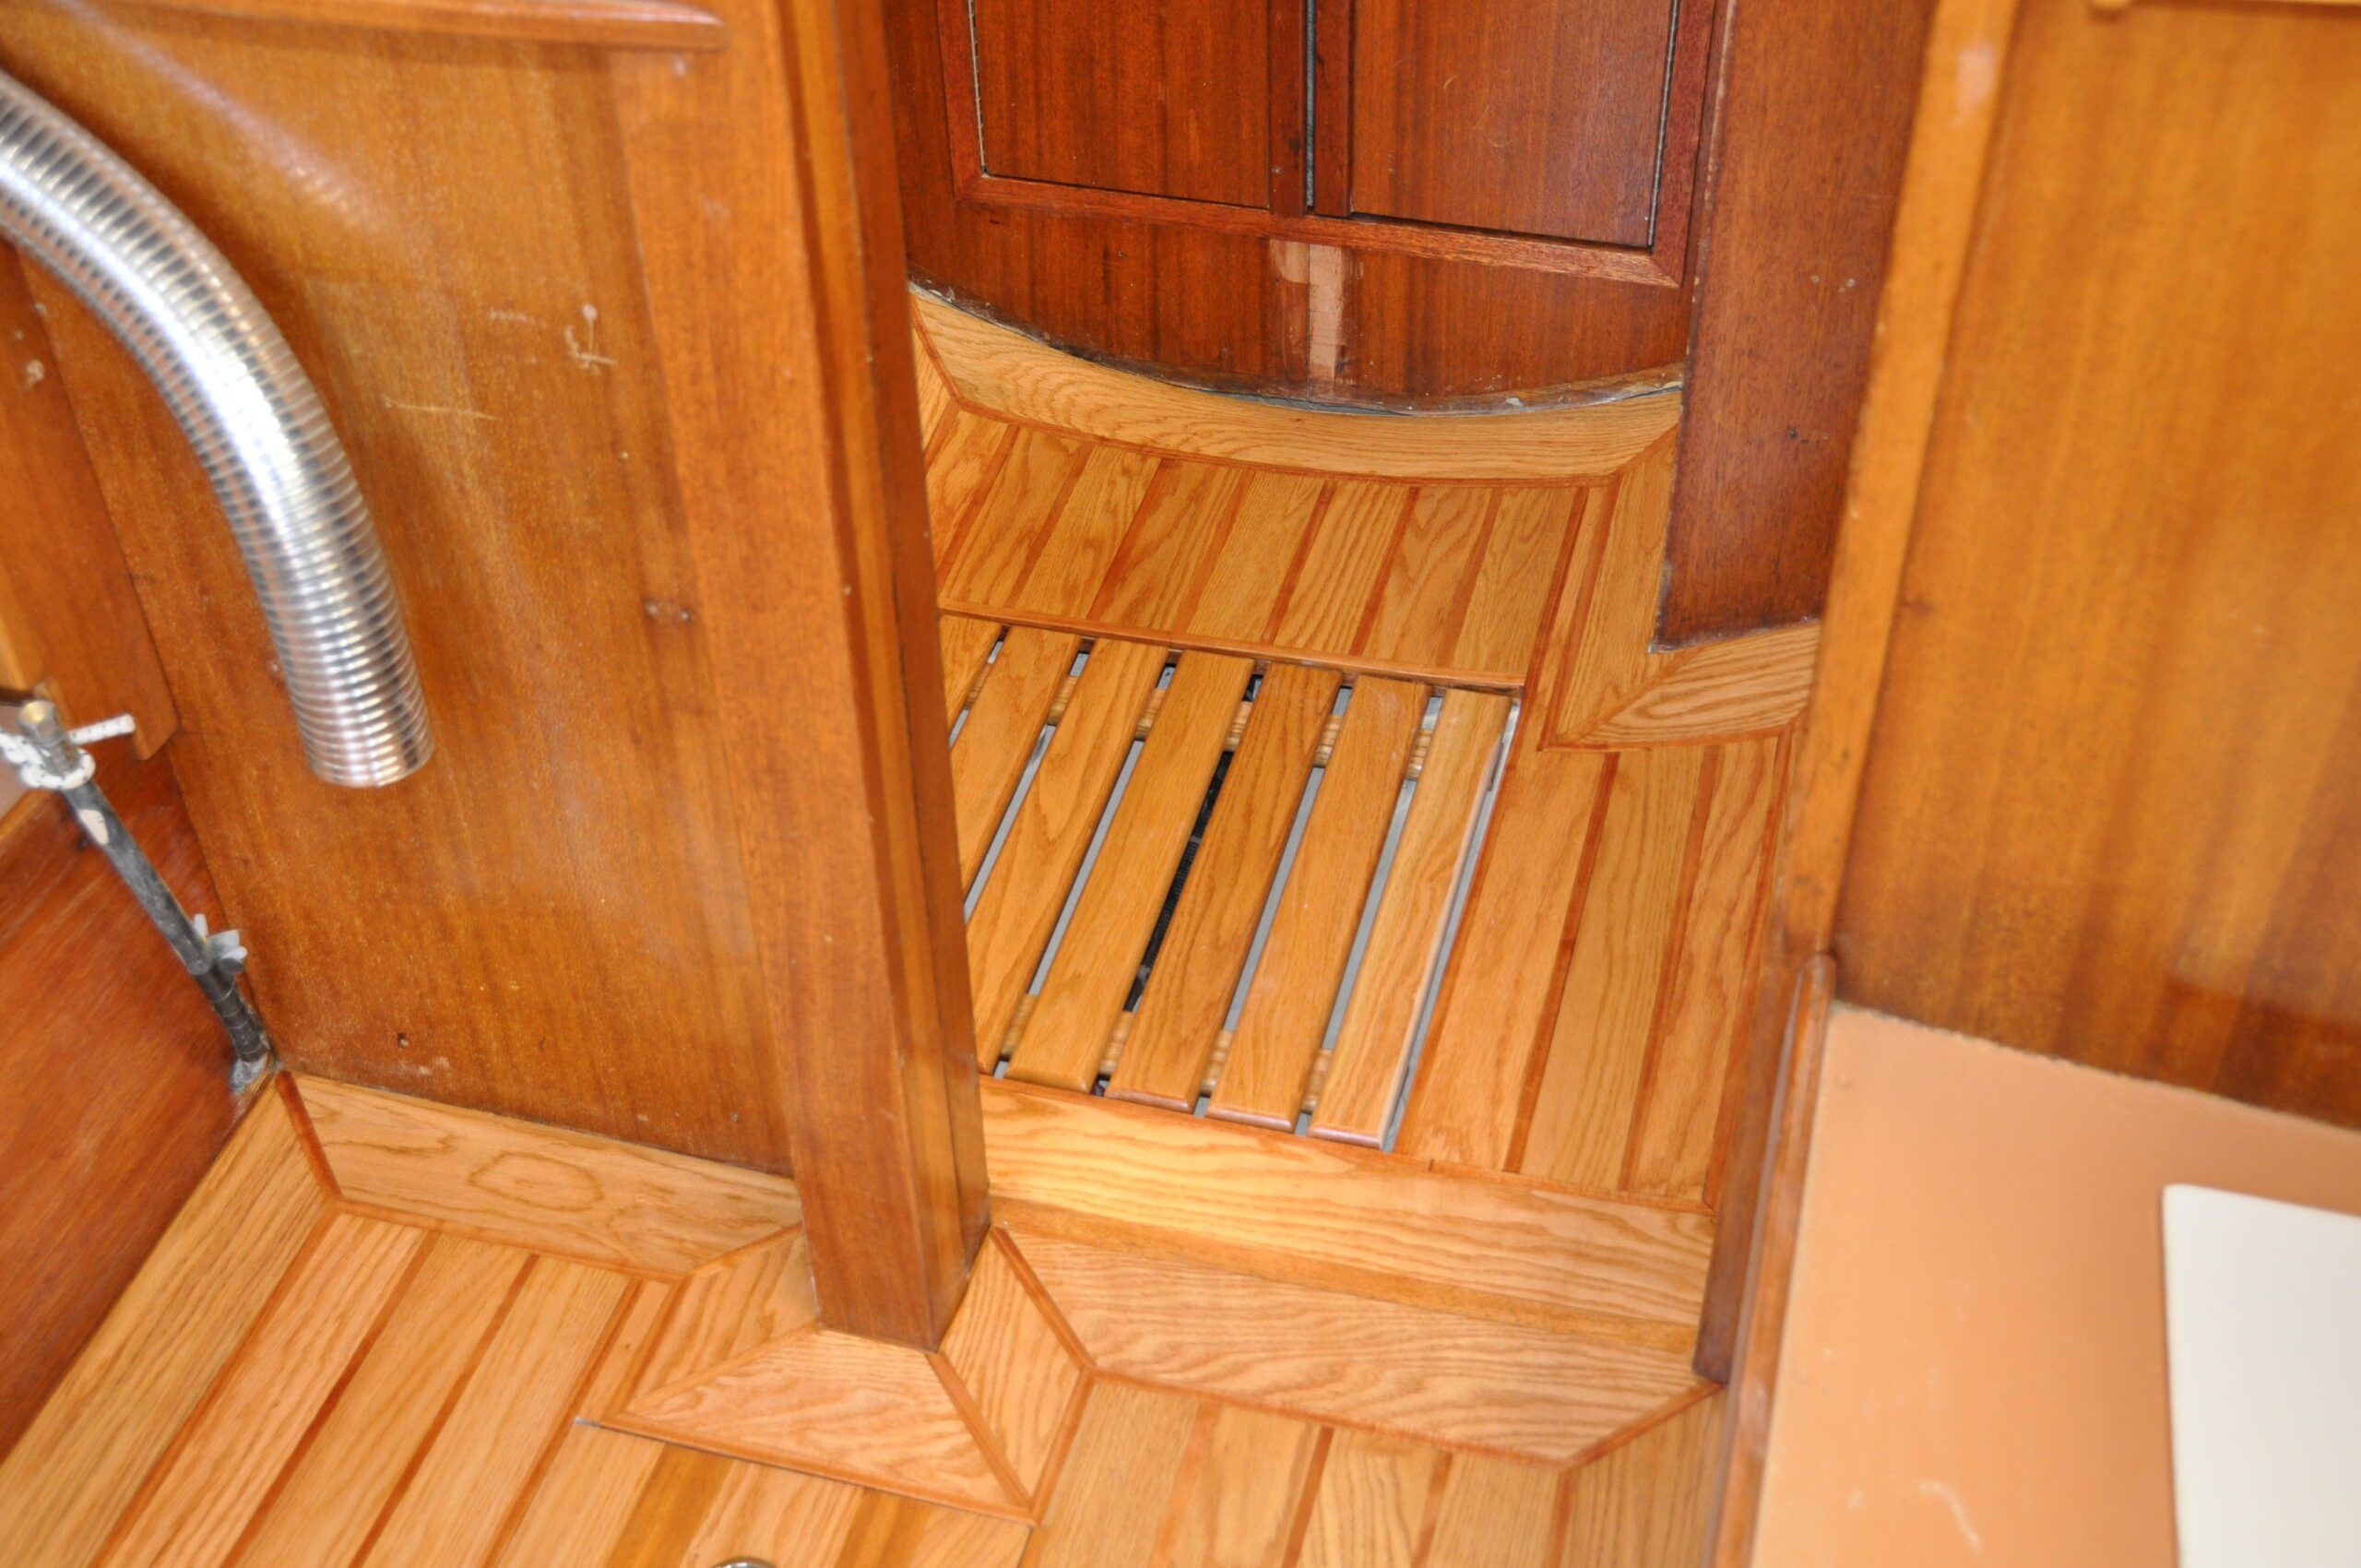
The bilge hatches featured an extra wide oak plank with mahogany trim in the middle, compensating for any measuring errors. Although the settees appeared parallel, the cabin actually tapers towards the bow by about an inch. The wide center plank compensates for this and the tapper is not visible to the eye. The underside of the new bilge hatches had box frames added to increase rigidity.
Head
The head compartment was a bit more challenging. The hull curved up dramatically in the corners. The planks would have to bend to follow the curves. Oak is quite a stiff and brittle wood, not prone to bending easily. A steam box was constructed out of PVC pipe and, using a kettle on the galley stove, the short oak planks were heated with steam.
Once properly heated the oak became quite flexible. Using an adjustable boat hook each plank was pressed into place by bracing against the ceiling. One plank at a time and waiting for it to cool and dry, the pieces would retain the curve and were epoxying into place.
Shower Grate
For the shower opening a grate was constructed to match the oak planks of the sole, matching the grain, with open slots where the mahogany trim would be. To hold the grate in place supports were created using disposable wax paper cups cut to the correct height, taped into place and then filled with thickened epoxy.
The grid sits on these supports with a positioning pin on the support matching a hole in the underside of the grid. Very simple. The grid can be lifted out for cleaning. A small switch-activated sump pump empties the shower water overboard through the vanity sink drain under the cabinetry.
9. Level the Plank Joints and Reseal
Then came the seemingly endless sanding to level the plank joints. Working from 60 to 120 grit sandpaper the new woodwork was leveled into a smooth surface. Plenty of dust in the cabin! Of course, this sanding also removed the previously applied coat of S1 sealer from the top of the planks. The sealer was re-applied to the surface and allowed to cure. Top coating followed with Interlux satin spar varnish in multiple coats.
Conclusion
The resulting sole was very complementary to the cabin and, installed in 2010, has lasted over the years with little deterioration. A simple sanding and re-application of varnish every few years and the sole looks new once again. A project well worth the time and effort applied.
This project could also be applied to fiberglass sole pans as found in many production boats of that era. All it takes is a bit of imagination and time. The carpets can be relegated to the dust bin!


Resawing 1 x 5″ wood on a table saw (or equivalent)? That is an absolute and total “no”. Insanely dangerous. Unguarded blade, unstable orientation, no featherboard?, push stick?, high kickback risk, etc.
The only power tool for this is a bandsaw – followed by planing or sanding.
I’ve made my mistakes – but I wouldn’t be talking to friends or strangers about one like this.
Thanks (I think) for the comment John. Unfortunately, I don’t have a wood working shop and fully realize that I don’t have the latest and best of equipment in the garage/shop that I do have. I have to make do with the tools at hand. I counted my fingers, still have 10. One comment in the article is that a planer would have been an option. Probably a far safer option. But I made it work with very careful application, very small cuts multiple times. And it worked. Again, thanks for reading and commenting.