
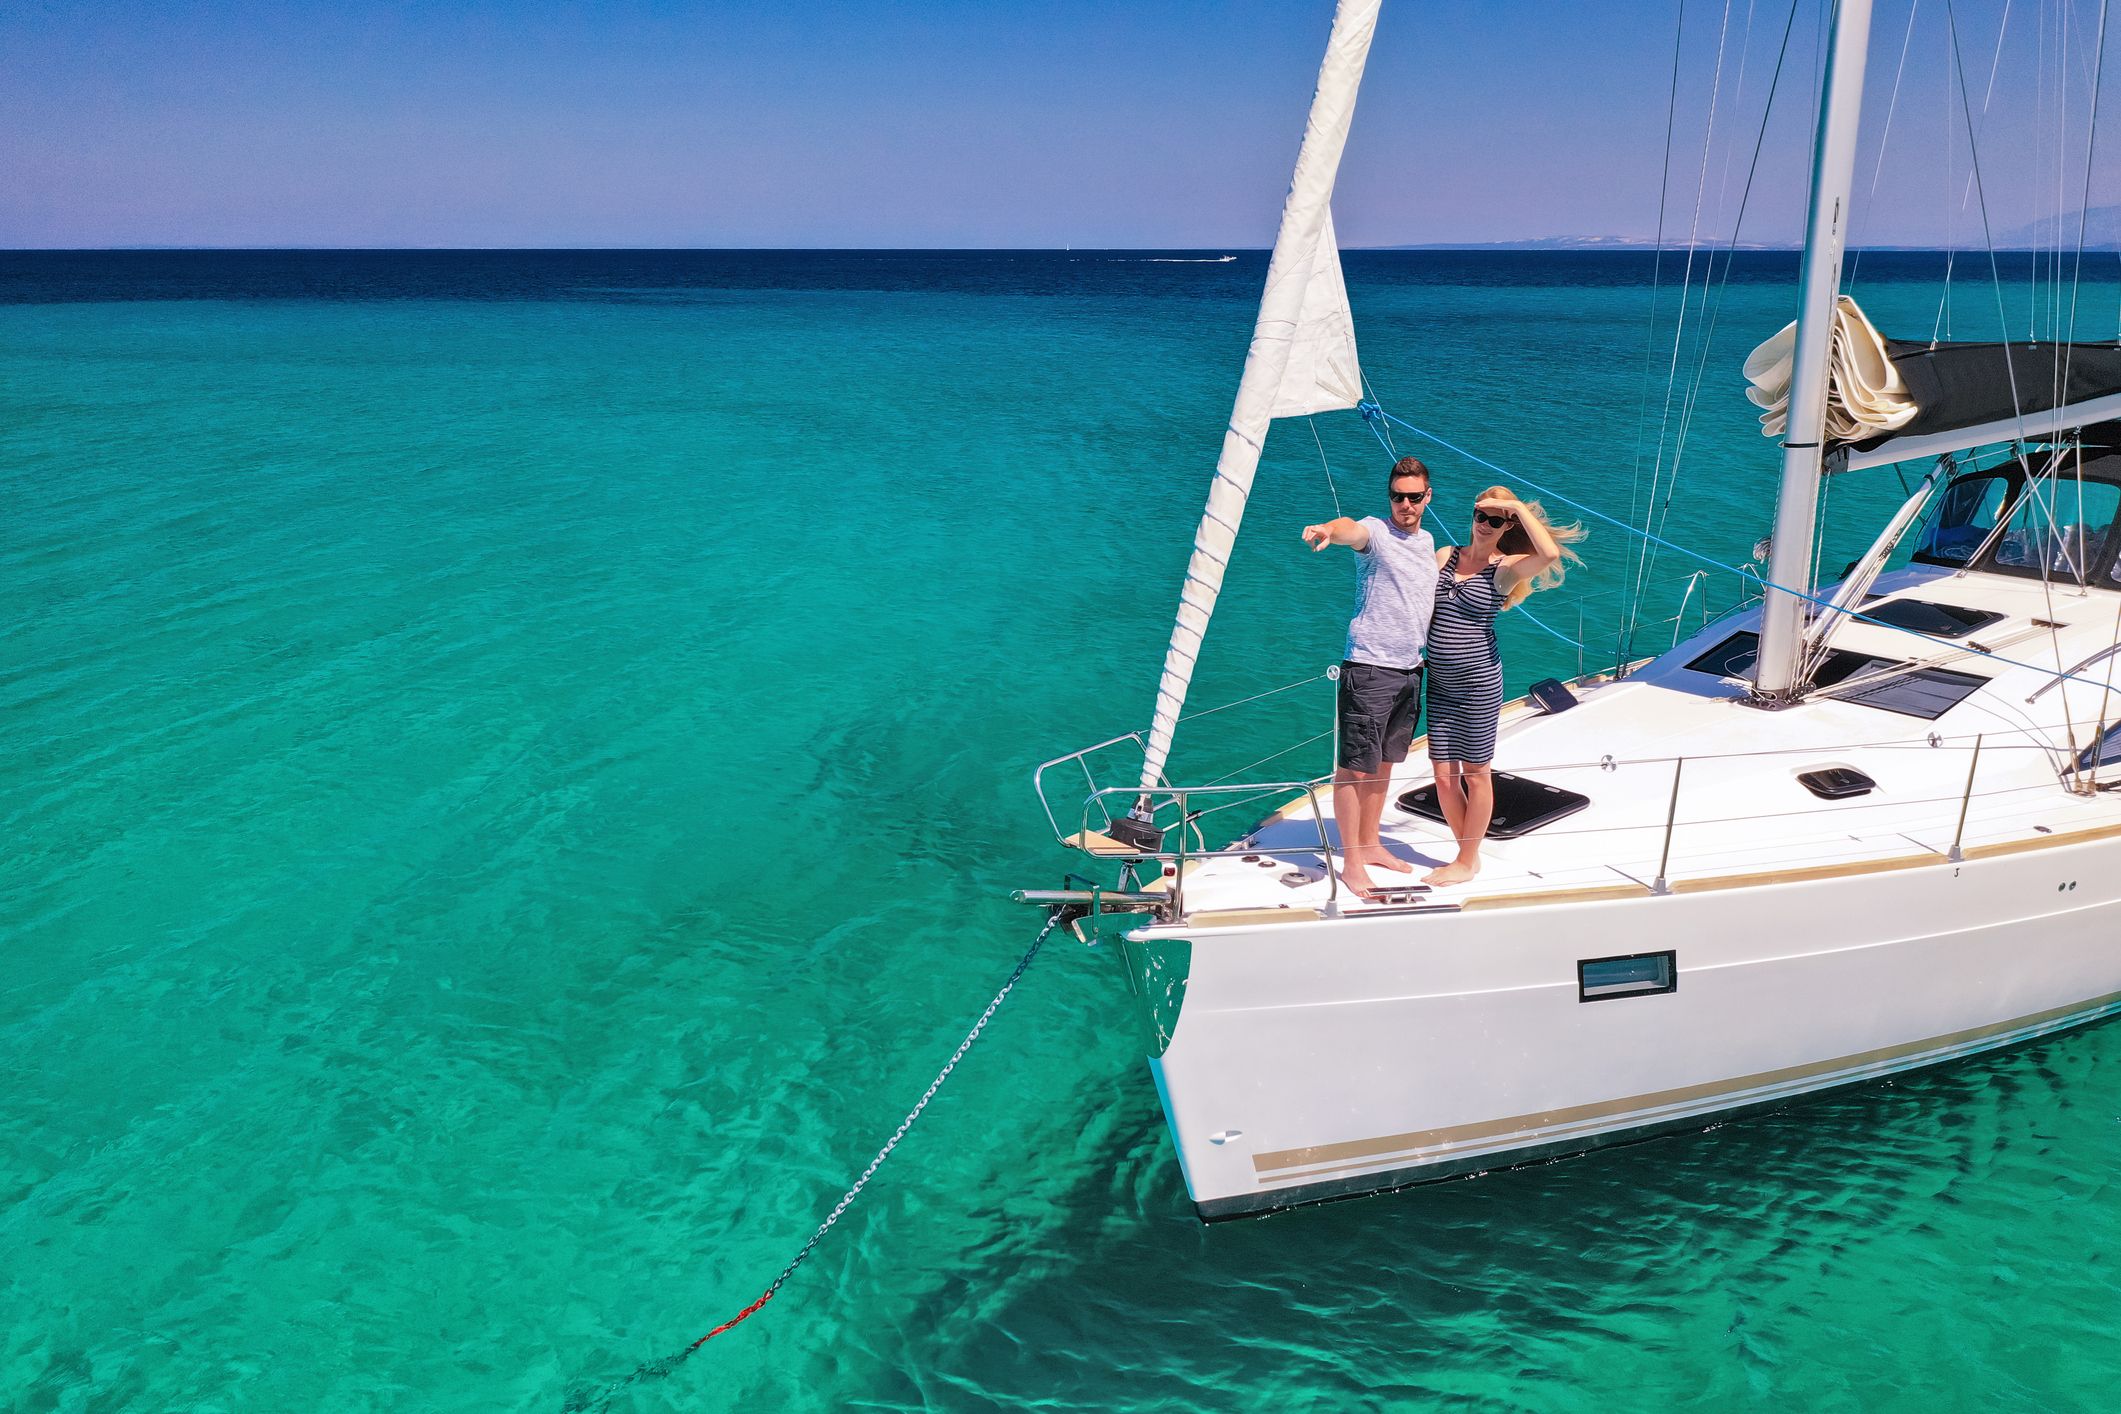
During the last few months, while quietly anchored in some of my favorite local anchorages, I’ve witnessed a number of anchoring failures. I observed that these failures were due to two causes. The first cause was technique, which was based on an obvious lack of knowledge and experience. The second cause was poor or inadequate anchoring gear (anchor, chain, rode, etc.).
When you ask sailors, most will admit that anchoring is one of their most most nerve-racking procedures. Many admit they sleep poorly, if at all, with one eye open all night, aware of the boat’s every movement, wondering if they might be dragging and heading towards other boats or shallows.
While we can’t control how others set their anchor, we can observe their technique. For example, we can watch their anchor rode angle to get an idea of how much rode they’ve deployed and what their swing perimeter would be.
We also need to consider sea and wind conditions in the anchorage. If their anchor rode or chain is straight down and sea conditions are calm with zero wind, for example, it is impossible to really know how much rode was deployed. Under these conditions, it may not matter. But if the conditions are windy and seas are rolly, the rode angle will speak volumes as to how much rode they’ve deployed and may help you determine where to drop your own anchor and how much rode to let out.
I say it may help you determine how much rode to deploy because you can’t trust that other sailors know what they are doing. Trust your own instincts and the information you have first.
The Right Gear
Anchor
Enough about other sailors—we can only control our own actions and make sure we do a good job. To do that, let’s start with understanding how it all works. For tips on selecting an anchor, see “Selecting the Right Anchor Size,” and “Anchoring in Squishy Bottoms.” What kind of anchor you choose will be based on your particular boat and your sailing area. A great place to start is asking local sailors and boating stores what they use and recommend.
Setting the anchor model aside, let’s go over what a good anchor setup involves and what function each component actually performs.
First, let’s define what kind of sailboat you have. Is she a basic sailboat you will be using locally with a simple anchor well for manual deployment and retrieval, or is she a larger boat with a windlass? This is important, as each has its own particularities.
Anchor Well
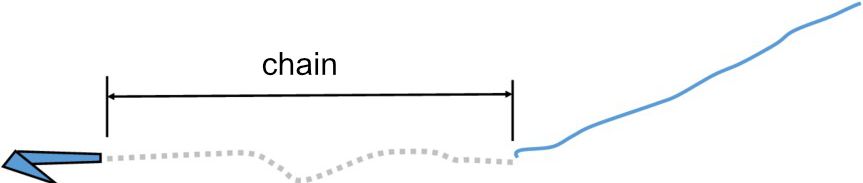
I’ll begin with the basic sailboat with an anchor well to store the chain and rode, and maybe the anchor as well, if it is not set on an anchor roller or bow pulpit.
The first component, which is connected to the anchor, will be chain. How much chain is up to you, but there is a proven rule of thumb. The chain should be at least one-and-a-half times the length of your boat. For example, a 28-footer should have a minimum of 42 feet of chain.
Then comes the anchor rope. I always recommend at least 150 feet of rope. It is important that the rope be proper anchor rope as it must be sinkable. One end of the rope must be attached to the chain via a proper loop with a galvanized metal insert and a galvanized shackle. The other end of the rope, known as the bitter end, must be secured to the boat. If that end is not secured properly, you might find out why it is called the “bitter end” at the most inappropriate time.
Windlass
If your boat is a little larger and has a windlass—an electrical marine-rated winch that can deploy and retrieve the anchor—your entire rode is most likely going to be chain only. However, some windlasses can accommodate both chain and rope. In this case, the rope and chain must be woven together, not attached by a shackle, in order to facilitate the chain-to-rope transition through the windlass gear.
If you’re sailing off into the world, a 100-percent chain rode is best. If you are staying in local or known areas, a combo chain/rope will lighten the weight at the bow considerably. When using a 100-percent-chain rode with a windlass, you must use a snubber line as a final step to anchoring. A snubber line has a hook at one end to secure it to a chain link; the other end is secured to a cleat on the bow. See “Anchor Snubber Shock Load Test.”
Once installed, you then release a little more chain to take the pressure off the windlass capstan. Twice, I’ve seen failures when no snubber line was used. As the breeze and swells increased, the windlass capstan lock could not hold, releasing chain in an uncontrollable free fall. This is a very scary moment for any captain, but also for all nearby boats as well.
Types of Chain
Where you sail will also determine what grade of chain and rope you should use. For example, although galvanized chain is the standard, some saltwater sailors are switching their chain from galvanized to stainless steel, which provides greater corrosion resistance, leaves few or no rust stains on deck and is, in most cases, heavier, which makes anchoring easier since less chain is required. Some also like the nice shiny look. See “Anchor Rode Buyer’s Guide: How to Select the Right Chain or Chain-Line Combination.”
Keep in mind, regardless of the anchor you will use, the chain is the most critical part of the anchor gear. Once the anchor has been dropped and has dug into the seabed, it is the weight and length of the chain that will keep the anchor at the proper angle of attack and secured in the seabed. Also, as the boat may rise and fall with waves and wakes, the chain’s weight will keep pulling down. The scope of the chain and rope deployed will be key.
The differences between salt water versus fresh water should also be considered. Salt water increases the buoyancy of all things and speeds up corrosion, shortening the lifespan of both chain and rope. This is why some saltwater sailors opt for stainless steel chain and stronger rope rather than all-chain rode.
Most freshwater sailors use basic galvanized chain, mostly for the lower cost, but will admit to the frustration of rust stains on deck and corrosion flakes inside the anchor well. This is true in my case, which is why I use a collapsable bucket to flush my chain and anchor well with fresh lake water after every anchoring.
Swivel
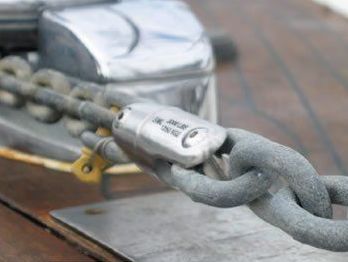
In addition to an anchor, chain and rope, you may also consider an anchor swivel. I do not recommend these as there have been many incidents of swivel failures and lost anchors—see “Anchor Swivels: Caution Required.” To me, the few benefits simply do not outweigh the risks. However, if you are considering a swivel, make sure you do proper research—see “Broken Anchor Swivels and the Tales They Tell” and “How Well Do Anchor Swivels Reduce Chain Twist.”
The biggest mistake and a common cause for swivel failure is improper installation. Despite many misleading images online, an anchor swivel must not be attached directly to the anchor. There must be at least four to eight chain links between the anchor and the swivel. If you have an anchor locker, make sure there are enough chain links between the anchor and swivel so the swivel reaches inside the well once the anchor is parked on the roller—make sure the anchor well hatch can close properly.
Best Practices and Common Mistakes
Let’s go over best practices for setting the anchor. As I conducted research for this article, I found that, to my surprise, many sailors are not completely sure how anchoring really works and, as a result, admit they seldom or never anchor.
Use Enough Rode
A few weeks ago, while anchored, I heard some very colorful words coming from a nearby boat. The four people aboard were, after three attempts at setting their anchor, once again hauling up the anchor only to drop it again right where they were. They were upset the boat was not staying put. Three things were clear. One, they were not dropping enough rode; two, they expected the boat to stay in the same spot as the anchor; and three, their rode was entirely made up of rope—no chain.
From my boat, I offered them some help and a lesson on anchoring. The young sailors had no idea the deployed rode needed to be 5 to 7 times the depth of the water, even more without chain. They were dropping only the depth, thinking the anchor alone was supposed to hold the boat.
Orient the Boat Properly
In another recent situation, a sailor dropped his anchor while the boat was still in forward motion. The boat continued forward over the anchor and chain, causing unfortunate hard scratching on the hull. In addition, the boat was not facing the wind when they dropped the anchor, so once backed down, the boat was in danger of swinging into nearby boats.
These are just two examples of many similar situations that come up often. This is truly unfortunate, as understanding proper anchoring techniques can make the whole boating experience better and much less stressful for everyone.
How to Anchor Correctly
Here are the steps I use that have proven successful almost every time. Almost, because until you drop the anchor, you will not know if it will grab and hold or if you will need to reset. Resetting an anchor is common even for the most experienced sailors and should not be considered a failure. The failure would be to ignore it and expect the situation to fix itself, which is another poor judgment I’ve seen in the past.
Assess the Anchorage
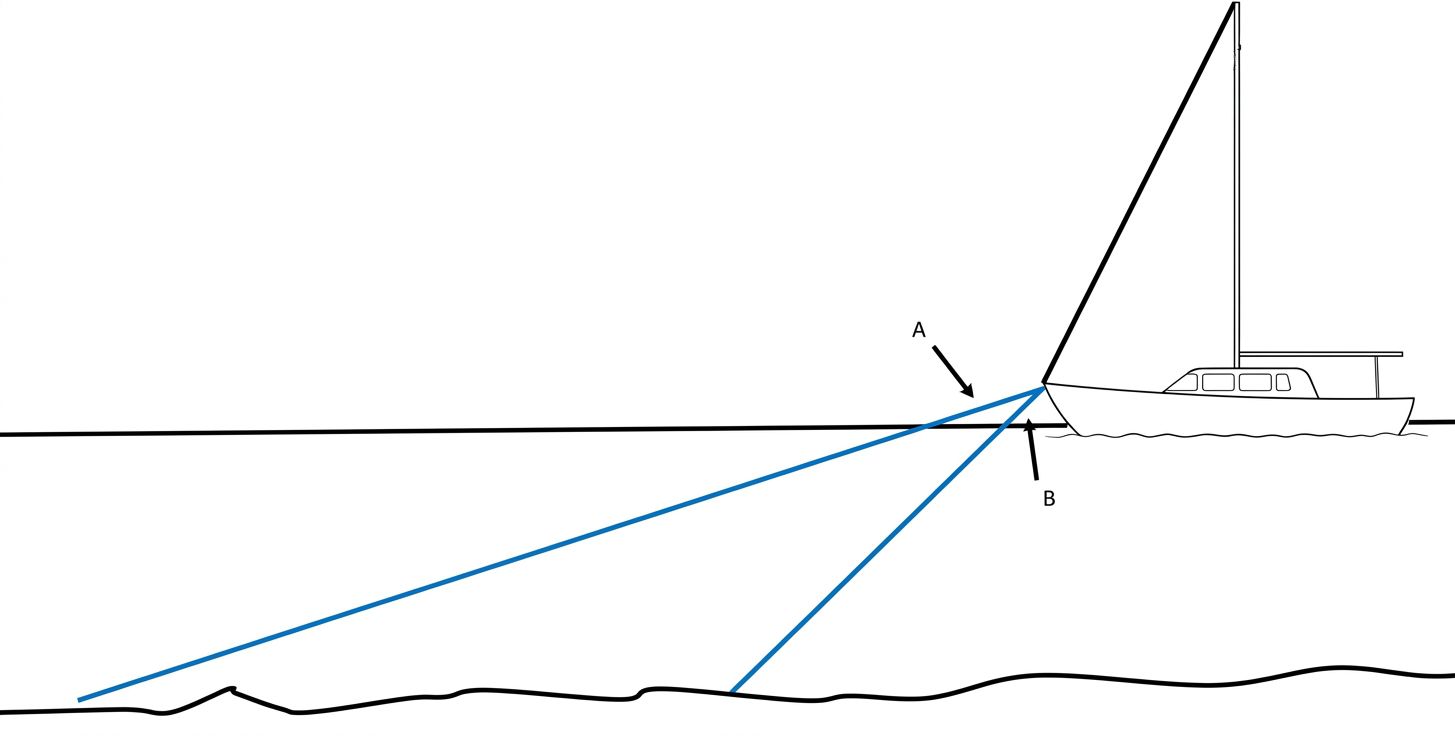
As you approach the anchorage, observe the other boats. Which way are they facing? Whichever way they are facing, this is the direction you should now be approaching the anchorage. If the boats are all facing outside the anchorage area, you may need to advance deep into the anchorage first and then turn around to move into the anchorage field.
Notice the wind speed and the angle of each boat’s rode. In the image above, A indicates a longer rode than B; therefore, A will most likely have a wider swing radius than B. Be aware that wind speed, or lack thereof, will also change the angle of the rode. For example, if there is no wind, rode B may simply be lying on the seabed. But in a breeze, the boat will be pushed further out, changing the angle and swing radius.
Choose a Spot and Note Depth
Keeping all these observations in mind, you can now move ahead towards what you judge will be a good spot. Note the depth and calculate the scope you will need to deploy. A good rule is a 7-to-1 scope ratio, meaning your depth multiplied by 7. So, in 10 feet of water depth, your scope should be 10 x 7 = 70 feet. If there is room to swing and few boats around, you can give it a little more. Please note that if you have a chain-and-rope setup, be sure to drop all the chain regardless of depth. Remember, the chain is what makes the anchor hold better.
Consider Bottom Quality
Before dropping the anchor, if I suspect the seabed is rocky and/or I want to drop more scope that usual, I will attach a float or fender to the anchor head with a line 5 or 6 feet longer than the water depth. This will let everyone know where my anchor is and, should my anchor get stuck in the rocks, I will be able to use that line to pull the anchor up and out of the rocks. See “Floating Your Rode.”
Allow Boat to Move Backwards
Once you’ve dropped the proper scope, give the boat time to move backwards on its own, keeping an eye on things around you, especially if any other boats are trying to tell you something. They may know something important about the area.
Reverse the Boat
Once you are confident that the boat has backed down enough, shift the transmission into reverse until you can feel that the anchor has dug in. Once it has, bring the engine RPMs up and hold for about 30 seconds to a minute. If the boat stays put, you are set. Turn off the engine and relax.
Optional: Set Anchor Alarm
You may want to set an anchor alarm on your navigation app. I use Savvy Navvy as mine and can easily set my scope. If my boat moves outside the scope area, I will get an alarm on my phone, even when ashore.
Leaving the Anchorage
In the second part of this series, I will go over departing from your anchorage. There are a few methods I use regularly, including sailing out, that complete the anchoring experience in a calm, safe way for you and your fellow sailors.