
Bowsprits are a common feature on traditional boats as a way to extend the sail plan beyond the boat’s length over deck and create a cutter rig. A cutter rig has some big advantages. It increases sail area without affecting stability or adding weight aloft. It also allows more flexibility by splitting the headsail into two independent sails. In more modern designs, bowsprits are increasingly seen as a way of flying downwind sails further forward and clear of the furling jib or genoa.
There are some big differences between these two uses of a bowsprit. The modern boat will have either a short bowsprit molded into the hull or a temporary bowsprit made from either metal or carbon that is only extended when needed.
The traditional bowsprit may be set up to ship inboard when in harbor but is normally left rigged at sea. It is a substantial spar stayed similarly to a mast and is usually much longer than the modern version. It is this traditional version that I am focusing on in this article.
Why Might You Need To Replace a Bowsprit?
Almost all traditional bowsprits were made from wood and they live on the foredeck. Time and weather take their toll so they suffer rot and damage. A bowsprit rarely lasts the life of the boat so it is something that has to be replaced on a regular cycle—quite a long cycle. A properly made bowsprit given reasonable care should last 15 to 20 years. Once it comes time to replace it you may get a shock about the price. A short simple one may cost $2-3,000 but can be as much as $10,000 if you get a yard to both make and install it. That is assuming you can find anyone that will take the job on.
This has led people to look at using stainless steel or aluminum as an option. It works, should avoid rot and may outlast a wooden one. If you are having someone make the bowsprit for you, or you live in an area where suitable wood has to be imported long distances, costs are likely to be similar, so the decision probably comes down to looks.
In comparison, making your own can save a lot and is a relatively simple job. The one I detail here cost me less than $60 for the wood. If you are replacing an existing one most of the hardware should be reusable. In my case the boat was designed for a bowsprit but for some reason it was never fitted. Even so, the total cost for the project including all the hardware was under $300—the antique bronze cranse iron was the most expensive item.
This article focuses on actually making the bowsprit. I have added some notes on rigging but will be doing some detailed articles and videos on rigging the bowsprit and setting up all the other deck hardware on my boat later this spring. See future articles in Practical Sailor or on my channel.
DIY Bowsprit Process
Choose Timber
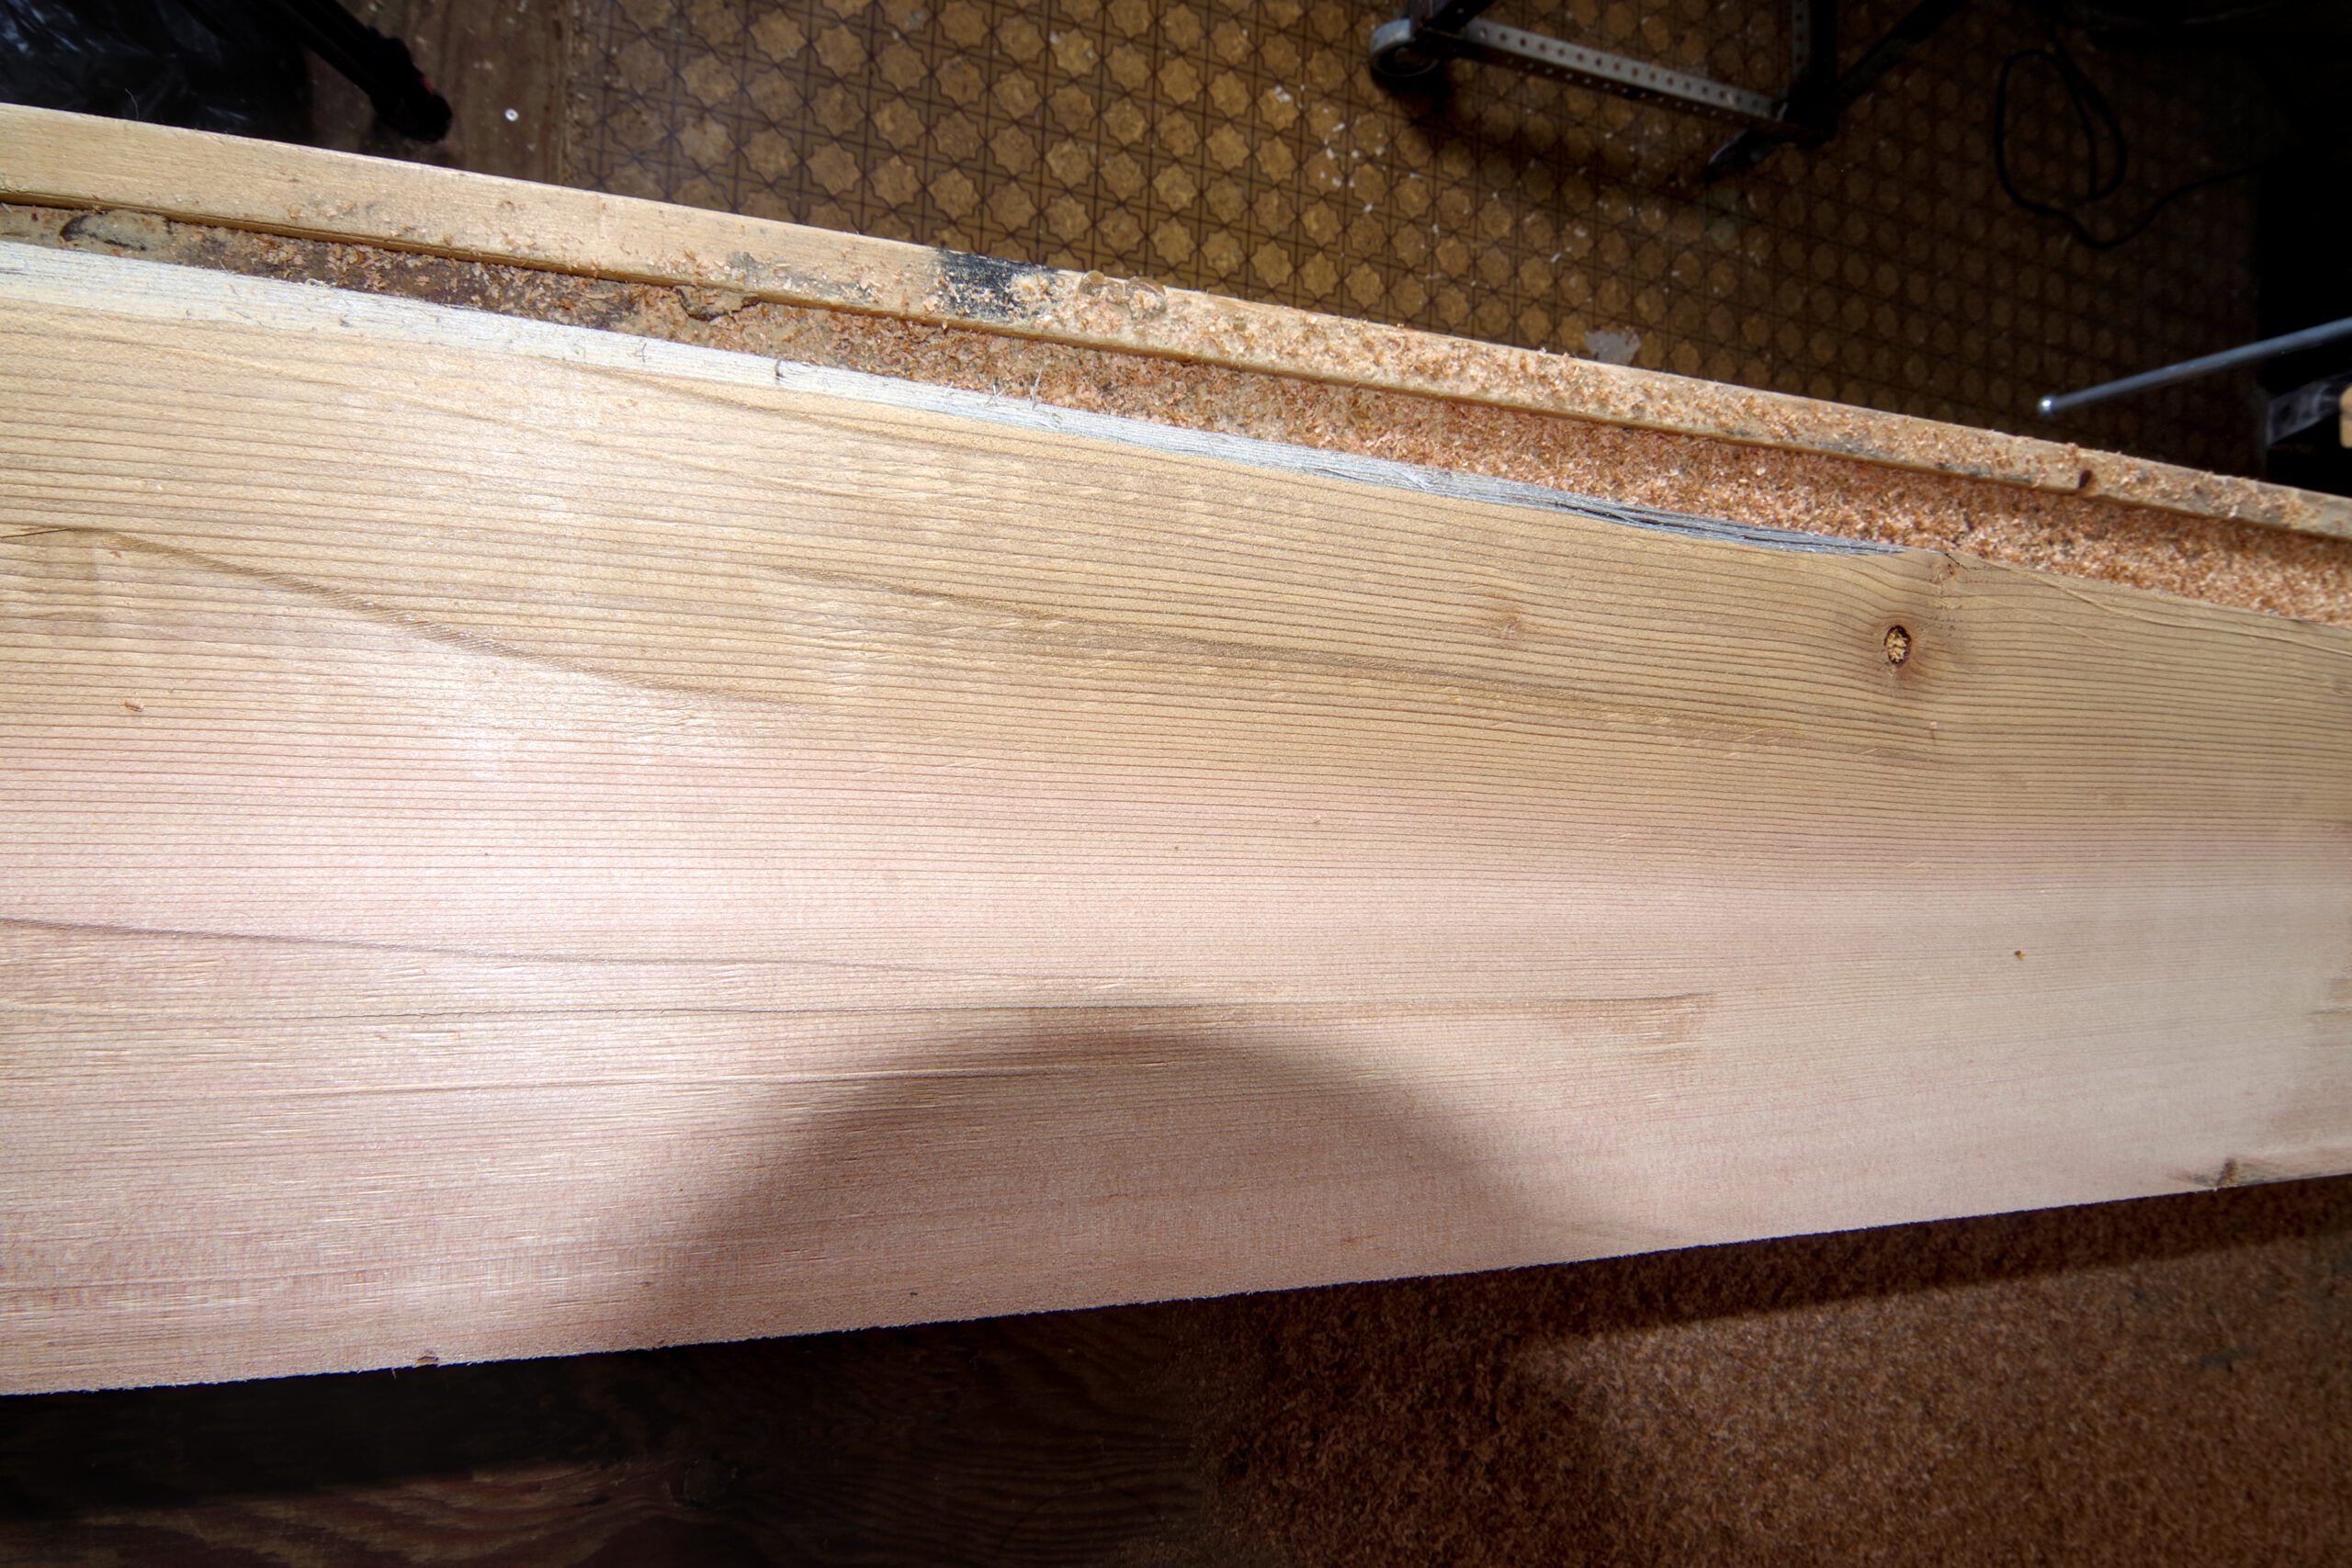
The first thing we need to do is to get hold of a suitable piece of timber. This is actually the most critical step in the project. If we look at the picture below it shows what we are looking for.
Look at how closely spaced the grain is. When you look at any piece of wood you see the grain as stripes of dark and light wood. Each of those stripes is a year’s growth, the dark part is the winter growth and the light part is the summer. When a tree grows quickly it puts on a lot of the light summer growth, which is not as strong and more prone to rot compared to the dark winter growth. Next, we need straight grain both along the length and across the end.
Lamination Option
If you cannot get hold of a single piece of wood that is big enough, all is not lost. Look for good quality boards that you can laminate together to make the size you want. This is not difficult. Make sure the boards are flat and glue them together with thickened epoxy. When gluing up make sure you have a flat surface to work on and stack enough weight on it for the glue to just start squeezing out. Arrange it so that the joins will run vertically in the finished bowsprit. A laminated bowsprit will be just as strong as one made from a single piece, just more work.
Sourcing Wood
I am lucky to live in the Pacific Northwest where wood grows, so this post cost me $60 from the local sawmill and is old growth cedar. If there are no mills in your area you will need to find a specialist timber importer, and it will cost substantially more mainly due to shipping costs. You won’t find anything suitable at the local DIY store.
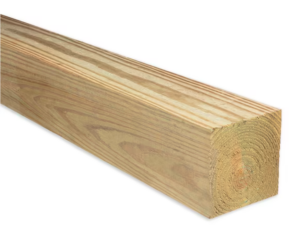
This is typically what you would see at the DIY store, it would be half the strength and much more susceptible to rot. It is also likely to be unstable. Timber of this grade simply does not belong on a boat.
The final thing on selecting wood is knots. As you can see in the top of the picture there are some small tight knots in this piece. Anything under about 1/2 inch in diameter is okay and will not affect the strength but large knots when the center is loose should be rejected.
Take your time selecting the piece of timber. If the timber is poor the bowsprit will be weak and will not stay straight.
Planing
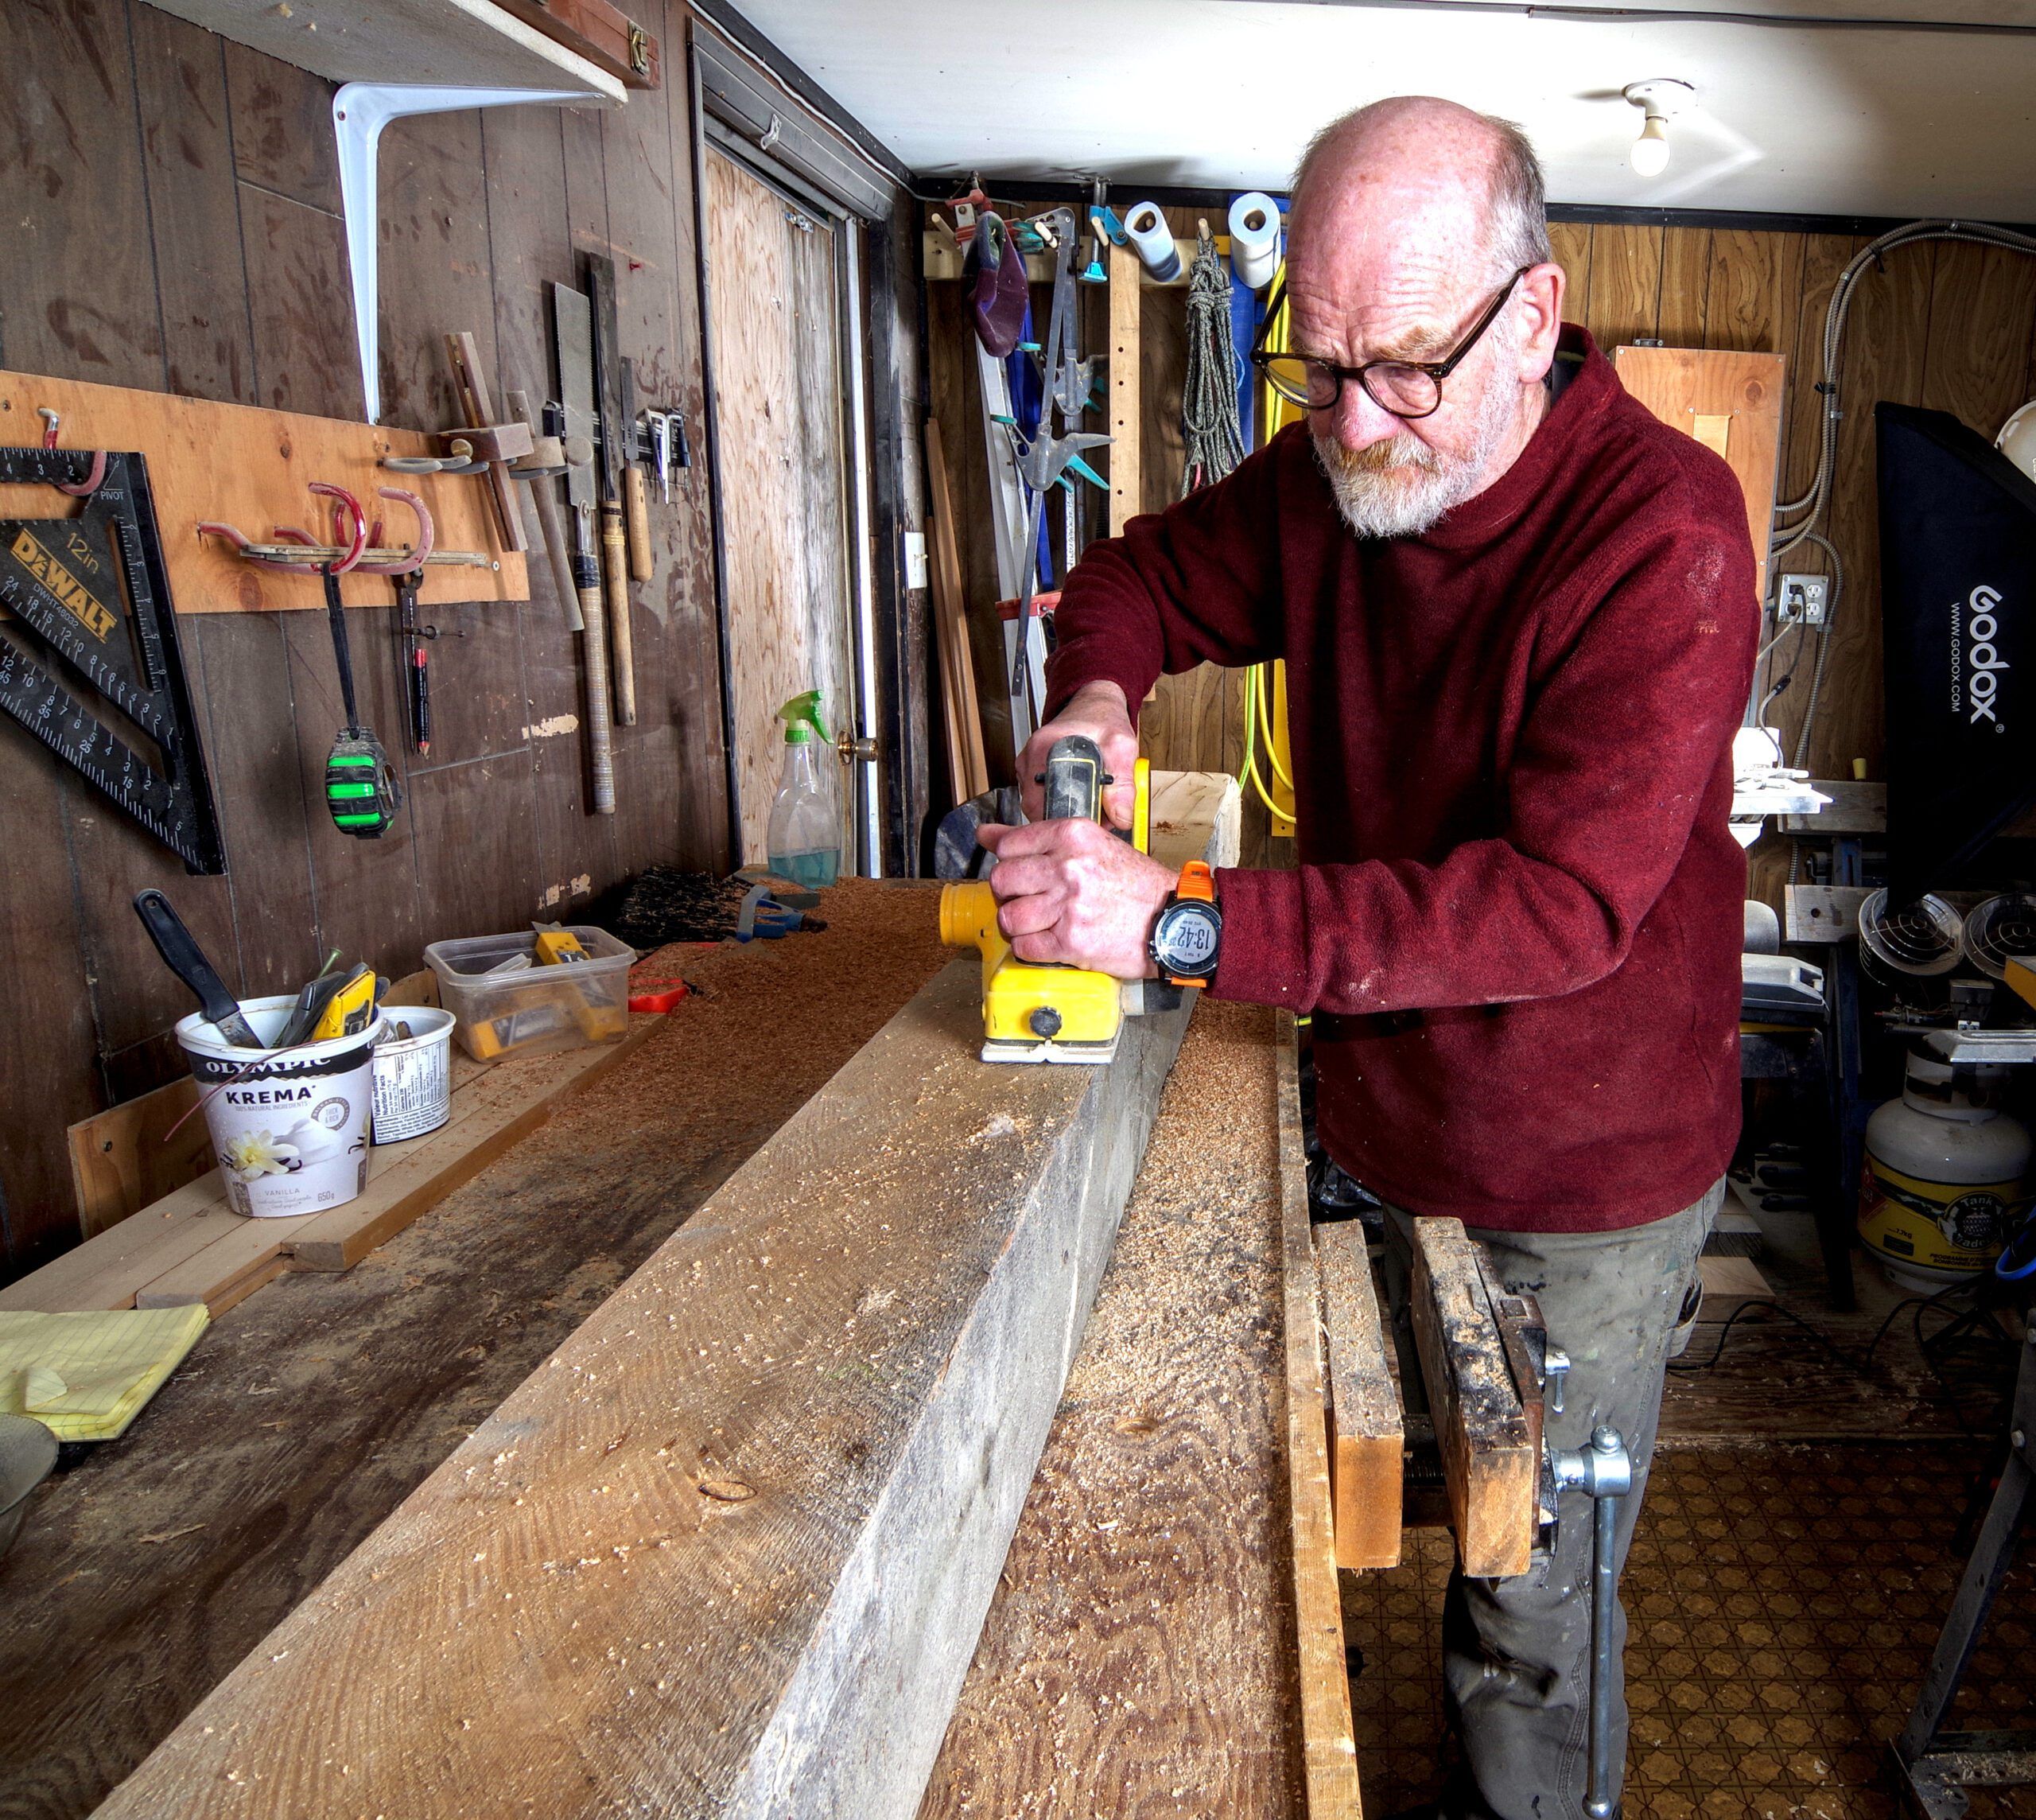
Turning your piece of wood into a bowsprit starts by cleaning it up. The easiest way is with an electric plane. We just need to cut it roughly to size and clean enough to check there are no problems with the wood. When timber is rough sawn it can sometimes hide defects. Don’t worry about planing marks at this stage, we are just roughing out.
The one I am making is for a 32-ft. cutter similar to a Westsail 32. It has a 5-ft. extension beyond the bow and 4-ft. 6-in. inboard plus 6 in. for the cranse iron making 10 ft. overall. I started with a 6 x 6 post, finished size is 5 1/2 sq. in. at the heel tapering to 4 1/4 round at the cranse iron shoulder.
Sizing
Before continuing to show how I make the bowsprit I want to talk about sizing it. This does get a bit complicated, but I think it is important.
When considering what size you need, the best bet is to look at the one you are replacing or to find a similar boat and see what they fit. An important check however is to see if there have been any problems. How long did the previous bowsprit last, did it crack or bend? If there was a problem, go up one size. Adding 1 inch to the size will increase its strength by 50 percent. There is no easy way to determine exactly what size a bowsprit needs to be because there is no way to determine exactly how strong a piece of wood is. To a large extent, if it looks right, it is right.
For a traditionally mounted bowsprit, if it fails it will do so by buckling because the load is in compression. Effectively, the butt-end acts like a pivot and the stays stop the outboard end moving in the same way that a deck stepped mast is rigged.
To get a rough idea of how strong it needs to be in this case you can take the load the forestay is designed to handle and multiply it by 1.5 to allow for the stay angles. Use the safe working load, not the break load. In my case I have 7-mm wire so the SWL is 820 lb. based on a 10:1 safety factor which is typical for a heavy offshore boat. It will certainly be less than 1600 lb.
Strength
When we look at the strength of timber, a 10-ft. length 4 inches square has a safe working load in compression of around 4 tons and the 5 1/5 section I have is around 10 tons. In other words, unless your bowsprit is so skinny people would laugh at it, it is not going to collapse due to the rig loads.
There is however another important factor which is how much it can bend. In theory a bowsprit should not bend because the shrouds, bobstay and forestay will hold it in place. A failed stay will result in a broken bowsprit in the same way that a failed mast stay will bring the rig down.
In a traditional setup that is exactly what happens, most of the loads from the sails are transferred to the points where the stays attach to the hull. The highest load is on the bobstay. In a traditional setup the bobstay anchor is really the only point we need to worry about; and it needs to hold around twice the maximum forestay load. In my case that works out to a minimum of 1.6 ton, but I want to play safe and take that up to 2 ton.
Bolting
That is not the end of the story, so far we have been looking at a traditionally rigged bowsprit. Most boats no longer have a Samson post or any way of fitting one because the foca’sl is now a sleeping cabin, not a sail locker. A Samson post would run through the middle of the bunk!
If you don’t already have a Samson post or bit installed, the simplest solution is to bolt the bowsprit to the deck. Assuming sufficient attention is paid to reinforcing the deck, that is actually a big improvement in many ways. The only drawback is that it cannot be retracted in harbor.
With the bowsprit bolted down, we have now effectively reduced the length that can flex or buckle to only the part that extends past the bow. That just doubled its strength. In addition, it cannot pivot on the heel the way the traditional setup could but is solidly held in place.
There is some complex math involved in answering this question which I cannot go into here. To give a short answer, a bowsprit made from a 6 × 6 timber is stiff enough to hold a 1 ton load at a length up to about 2 1/2 feet, but definitely not over 3 feet. That is why all those short stubby bowsprits designed to support downwind sails on modern performance boats don’t have stays. For a true cutter you will not have enough separation between the headsails with a 2 1/2 foot bowsprit unless your staysail is well inboard of the bow. So no, we cannot leave out the stays. Possibly. Without any stays the bowsprit wants to deflect around 1 inch with a one-ton load and probably fail at around 2 ton. One inch of deflection may not sound much but think how much forestay sag you would get if you slackened the jib stay by an inch. However, if we reduce that load to 1/2 ton we would only see a movement of about 1/3 inch in the bowsprit end, which is quite acceptable and likely what the sailmaker expected. So we can say that if we are happy to allow the end of the bowsprit to move up to 1/3 of an inch, it will absorb most of the loads under normal sailing conditions. Once the load exceeds 1/2 ton the stays will be increasingly loaded to prevent excessive movement that could lead to failure. The bowsprit end is now restrained by its stays rather than fixed by them. That is very simple, instead of tensioned stainless-steel wire or rods that try to eliminate all movement, we go back to traditional rigging with rope and deadeyes. I am not suggesting hemp!! Use HMPE. The stays should be at least the same size as the rigging, in my case a minimum of 7 mm, but I am going to go with 10 mm. The lashings want to be about 4 mm with several turns. Pull everything as tight as you can and I think you will achieve the desired effect of constraining the bowsprit under heavy load but reducing the load on the stays considerably. Note, this only applies if the bowsprit is rigidly fixed to the deck. In a traditionally-mounted sprit the load always transfers through the stays even if there is some movement at the outboard end. There is an important caveat to this plan. The bobstay needs to have a sleeve over it to protect it from chafe. If the anchor chain rubs against an HMPE stay it will cut through it in no time.Does Bolting the Bowsprit to the Deck Reduce the Load on the Stays?
How Do We Arrange the Stays To Allow This Movement?
Shaping the Bowsprit
Once we have the blank planed down and checked it is time to start shaping it. The shaping is done both to make it look right and to reduce the weight, especially the weight at the outboard end.
There is another choice to make here. If the bowsprit is going to have a platform mounted on it, you probably want to leave the top flat and full width right to the outboard end. Adding a platform and extending the pulpit to surround it will add considerably the weight you are putting beyond the bow. The bowsprit is probably around 50 lb., however if you add a platform, pulpit and two anchors you are likely looking at a couple of hundred pounds in total. That is enough to change the boat’s handling characteristics and is not a modification that should be done without consulting the designer. If there is not going to be a platform, you want a round section at the outboard end. The one I am making will be round, no platform.
We can start shaping with a circular saw, but first we need to mark where to cut it.
Start by Marking Out the End
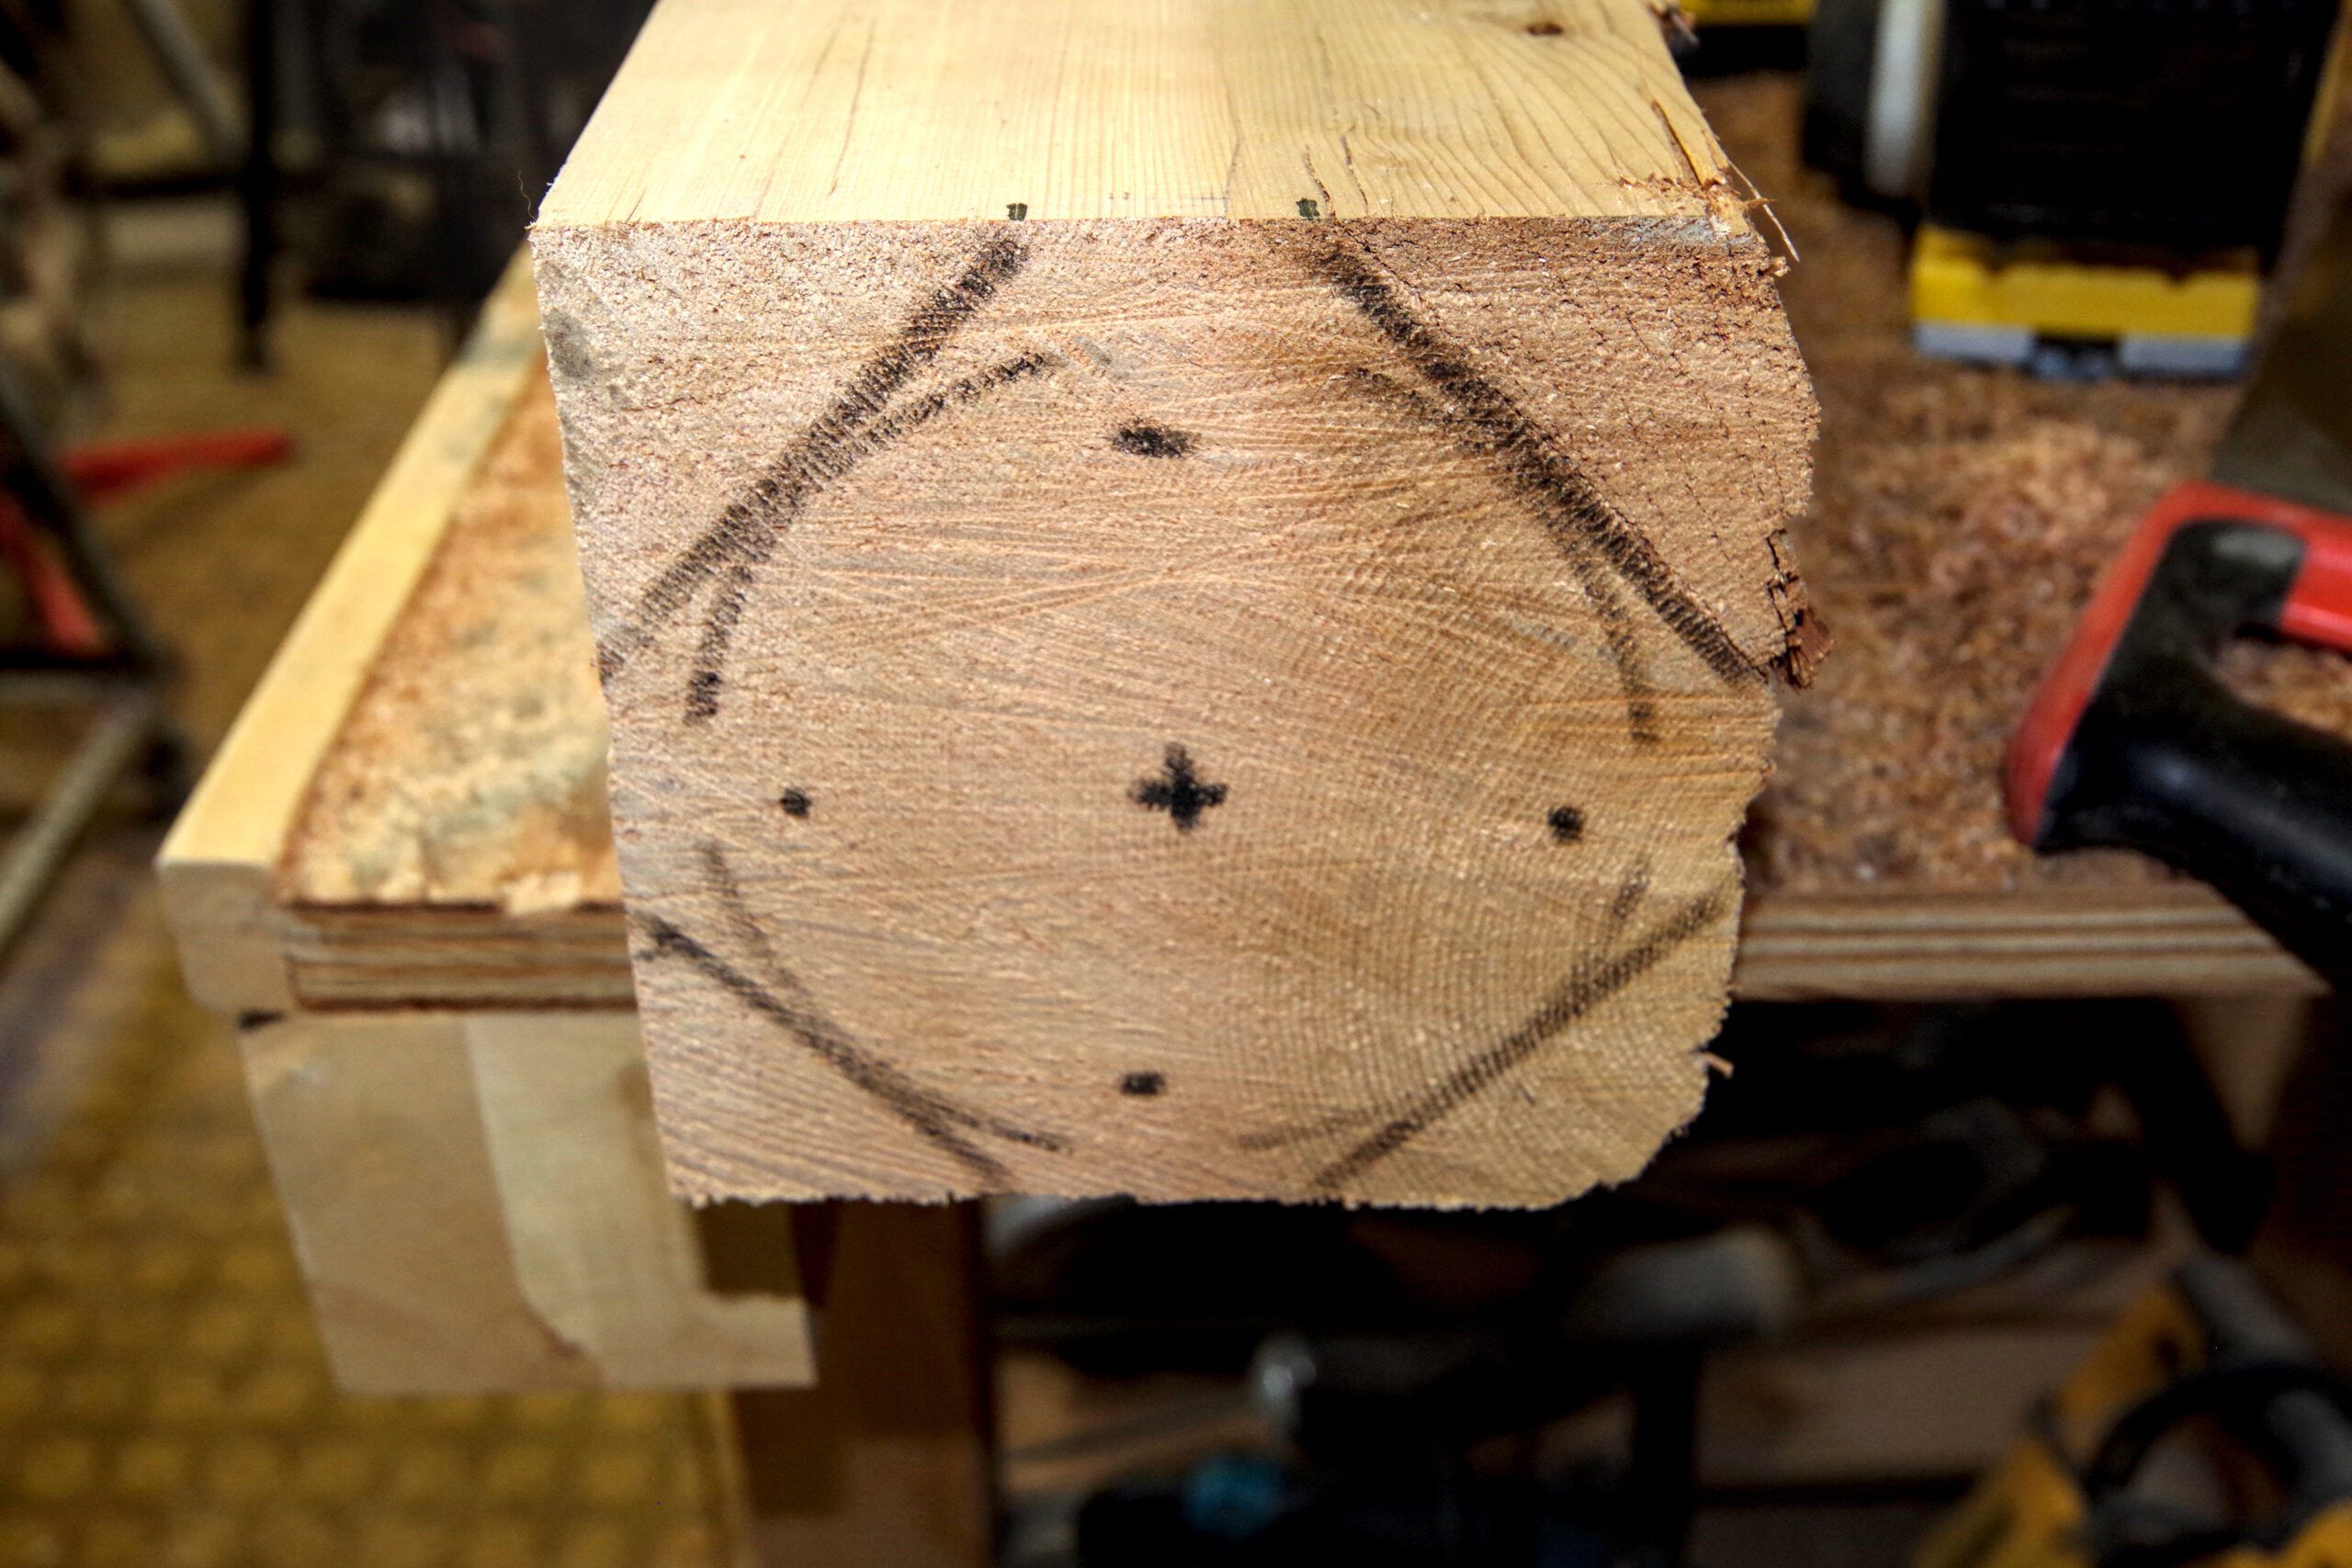
Draw a circle around the outside of the cranse iron. Now add lines at 45 degrees that just clip the edges. Next move onto the side and mark two lines across it. One where the back of the cranse iron will sit and one where the bow will be. Make the one where the cranse iron will sit about 1 1/2 inches deeper than the iron to allow for rounding the end. Now join the ends of the diagonal lines to the end of the bow line as shown below.
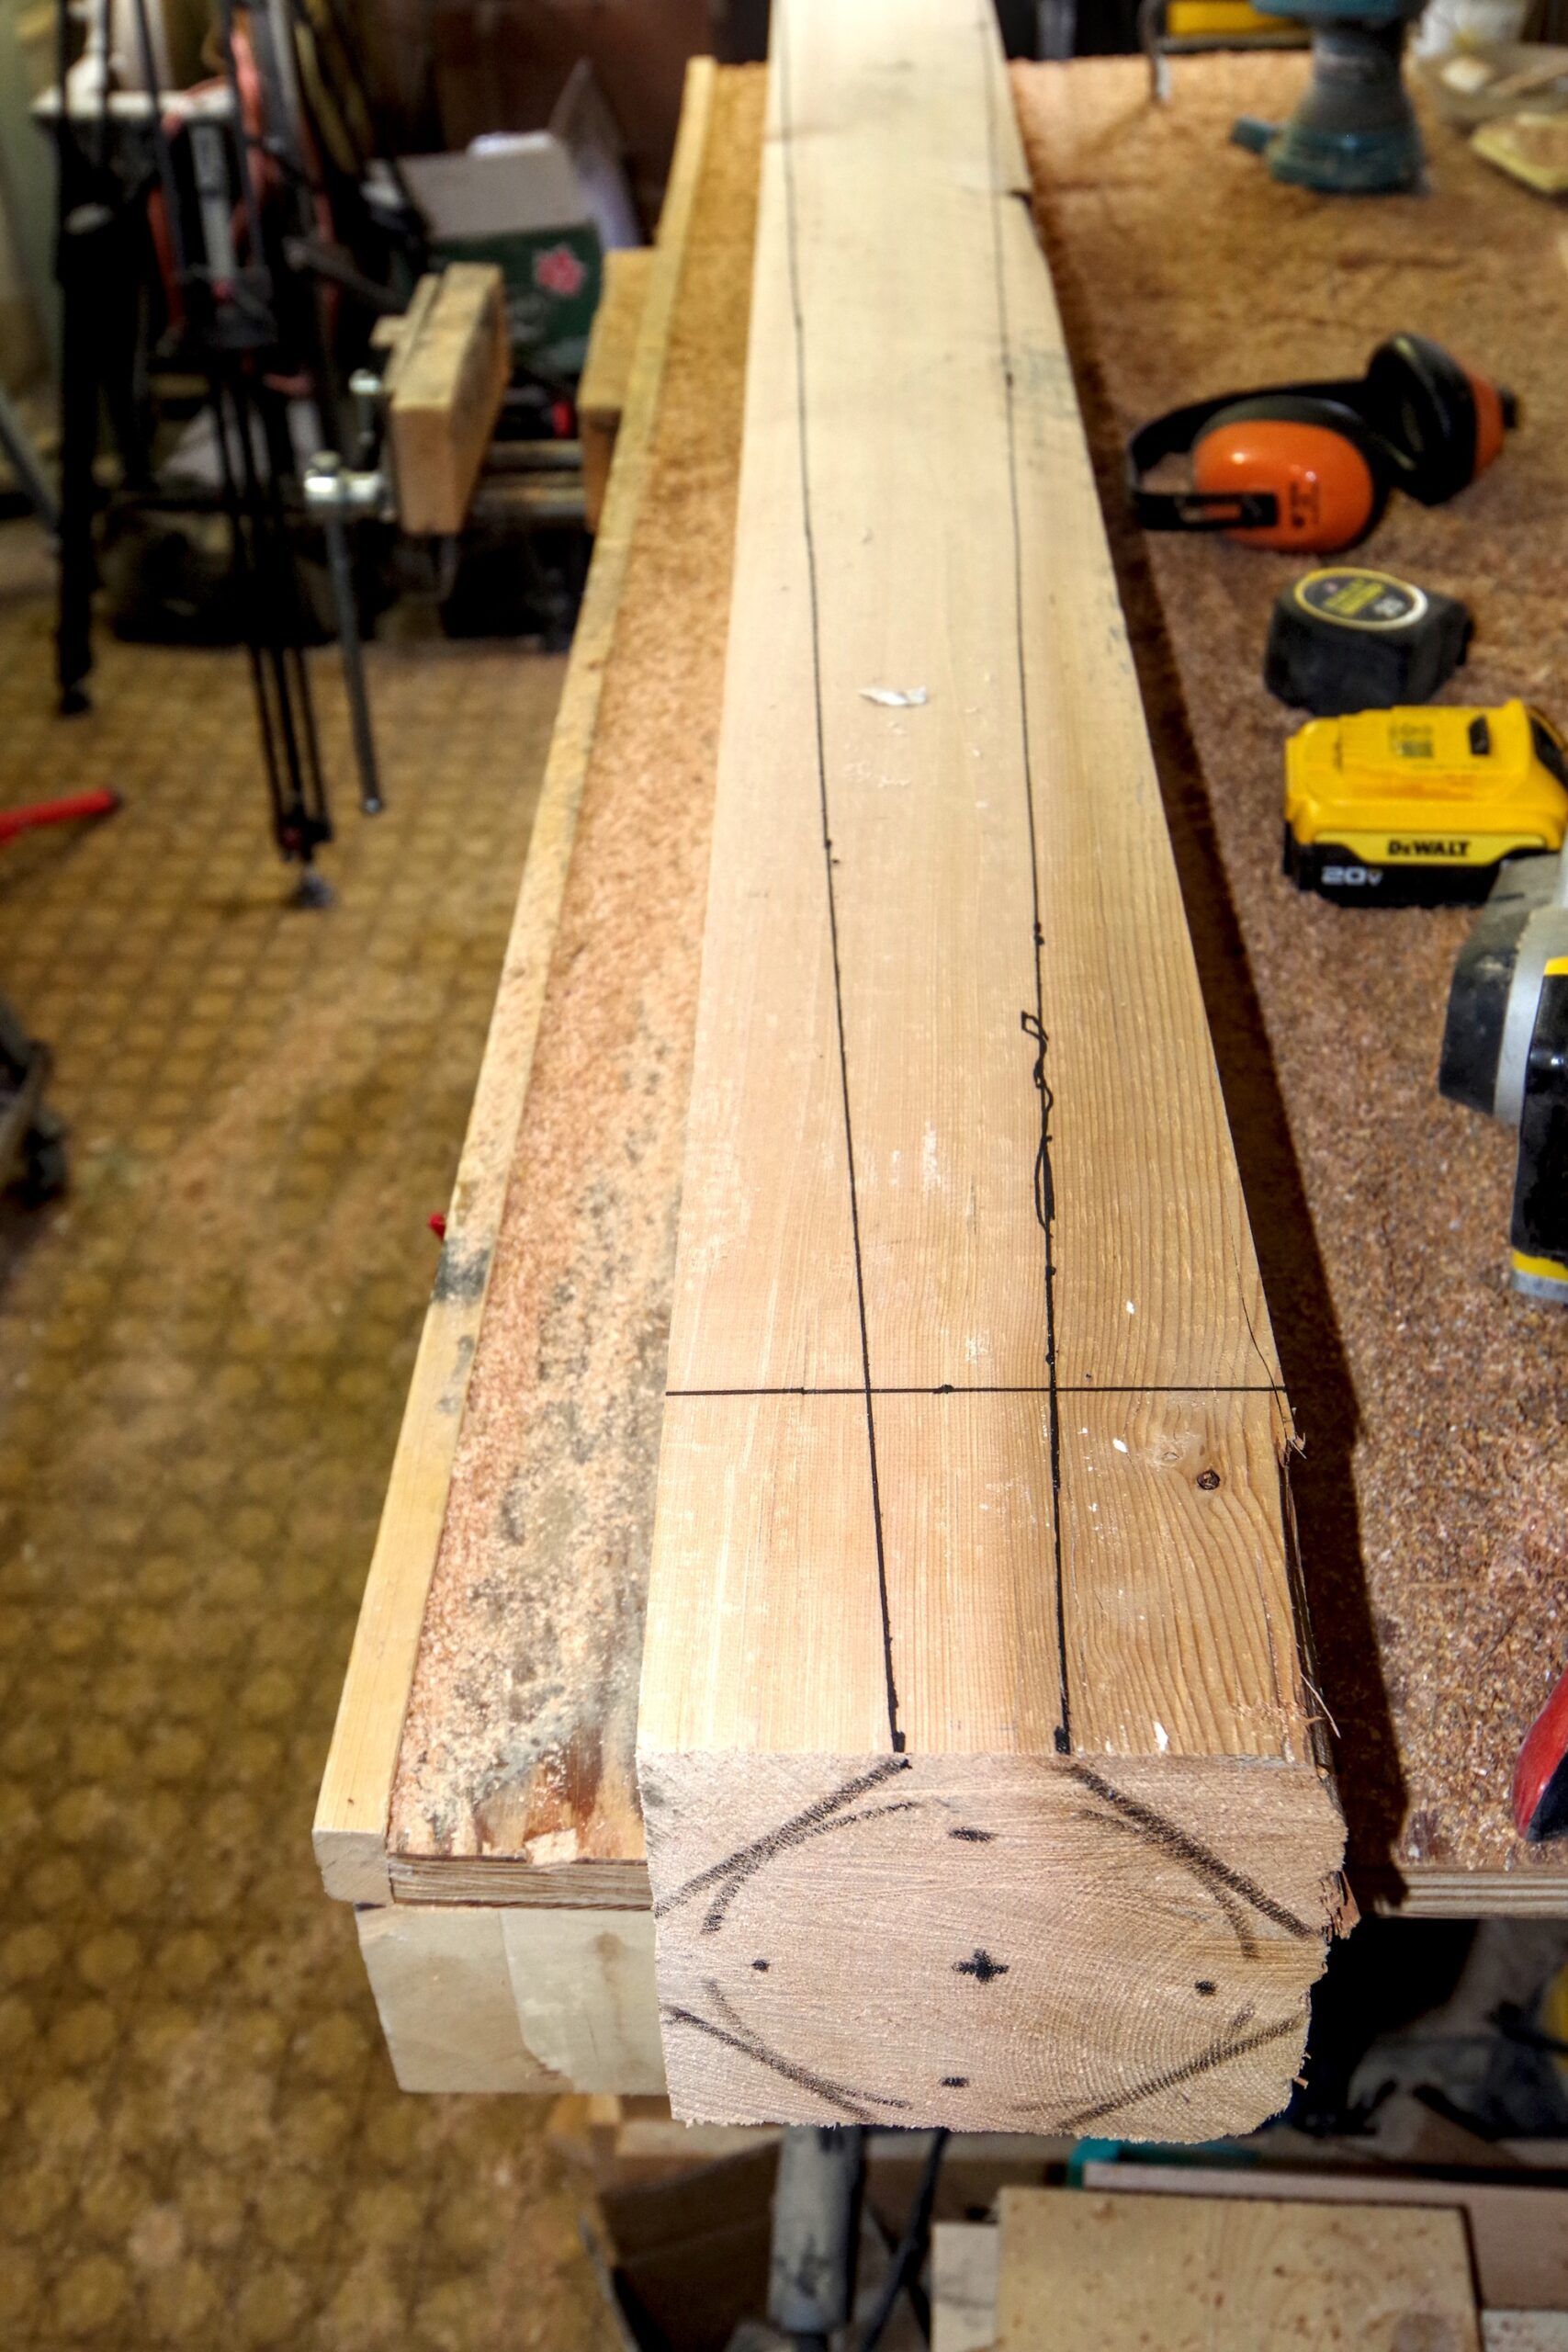
Cut With Skilsaw
The first step in shaping is to use a Skilsaw with the blade set at a 45-degree angle to cut along the lines on the side. These cuts taper the bowsprit from the square section at the bow to a hexagon at the tip, and you finish up with this.
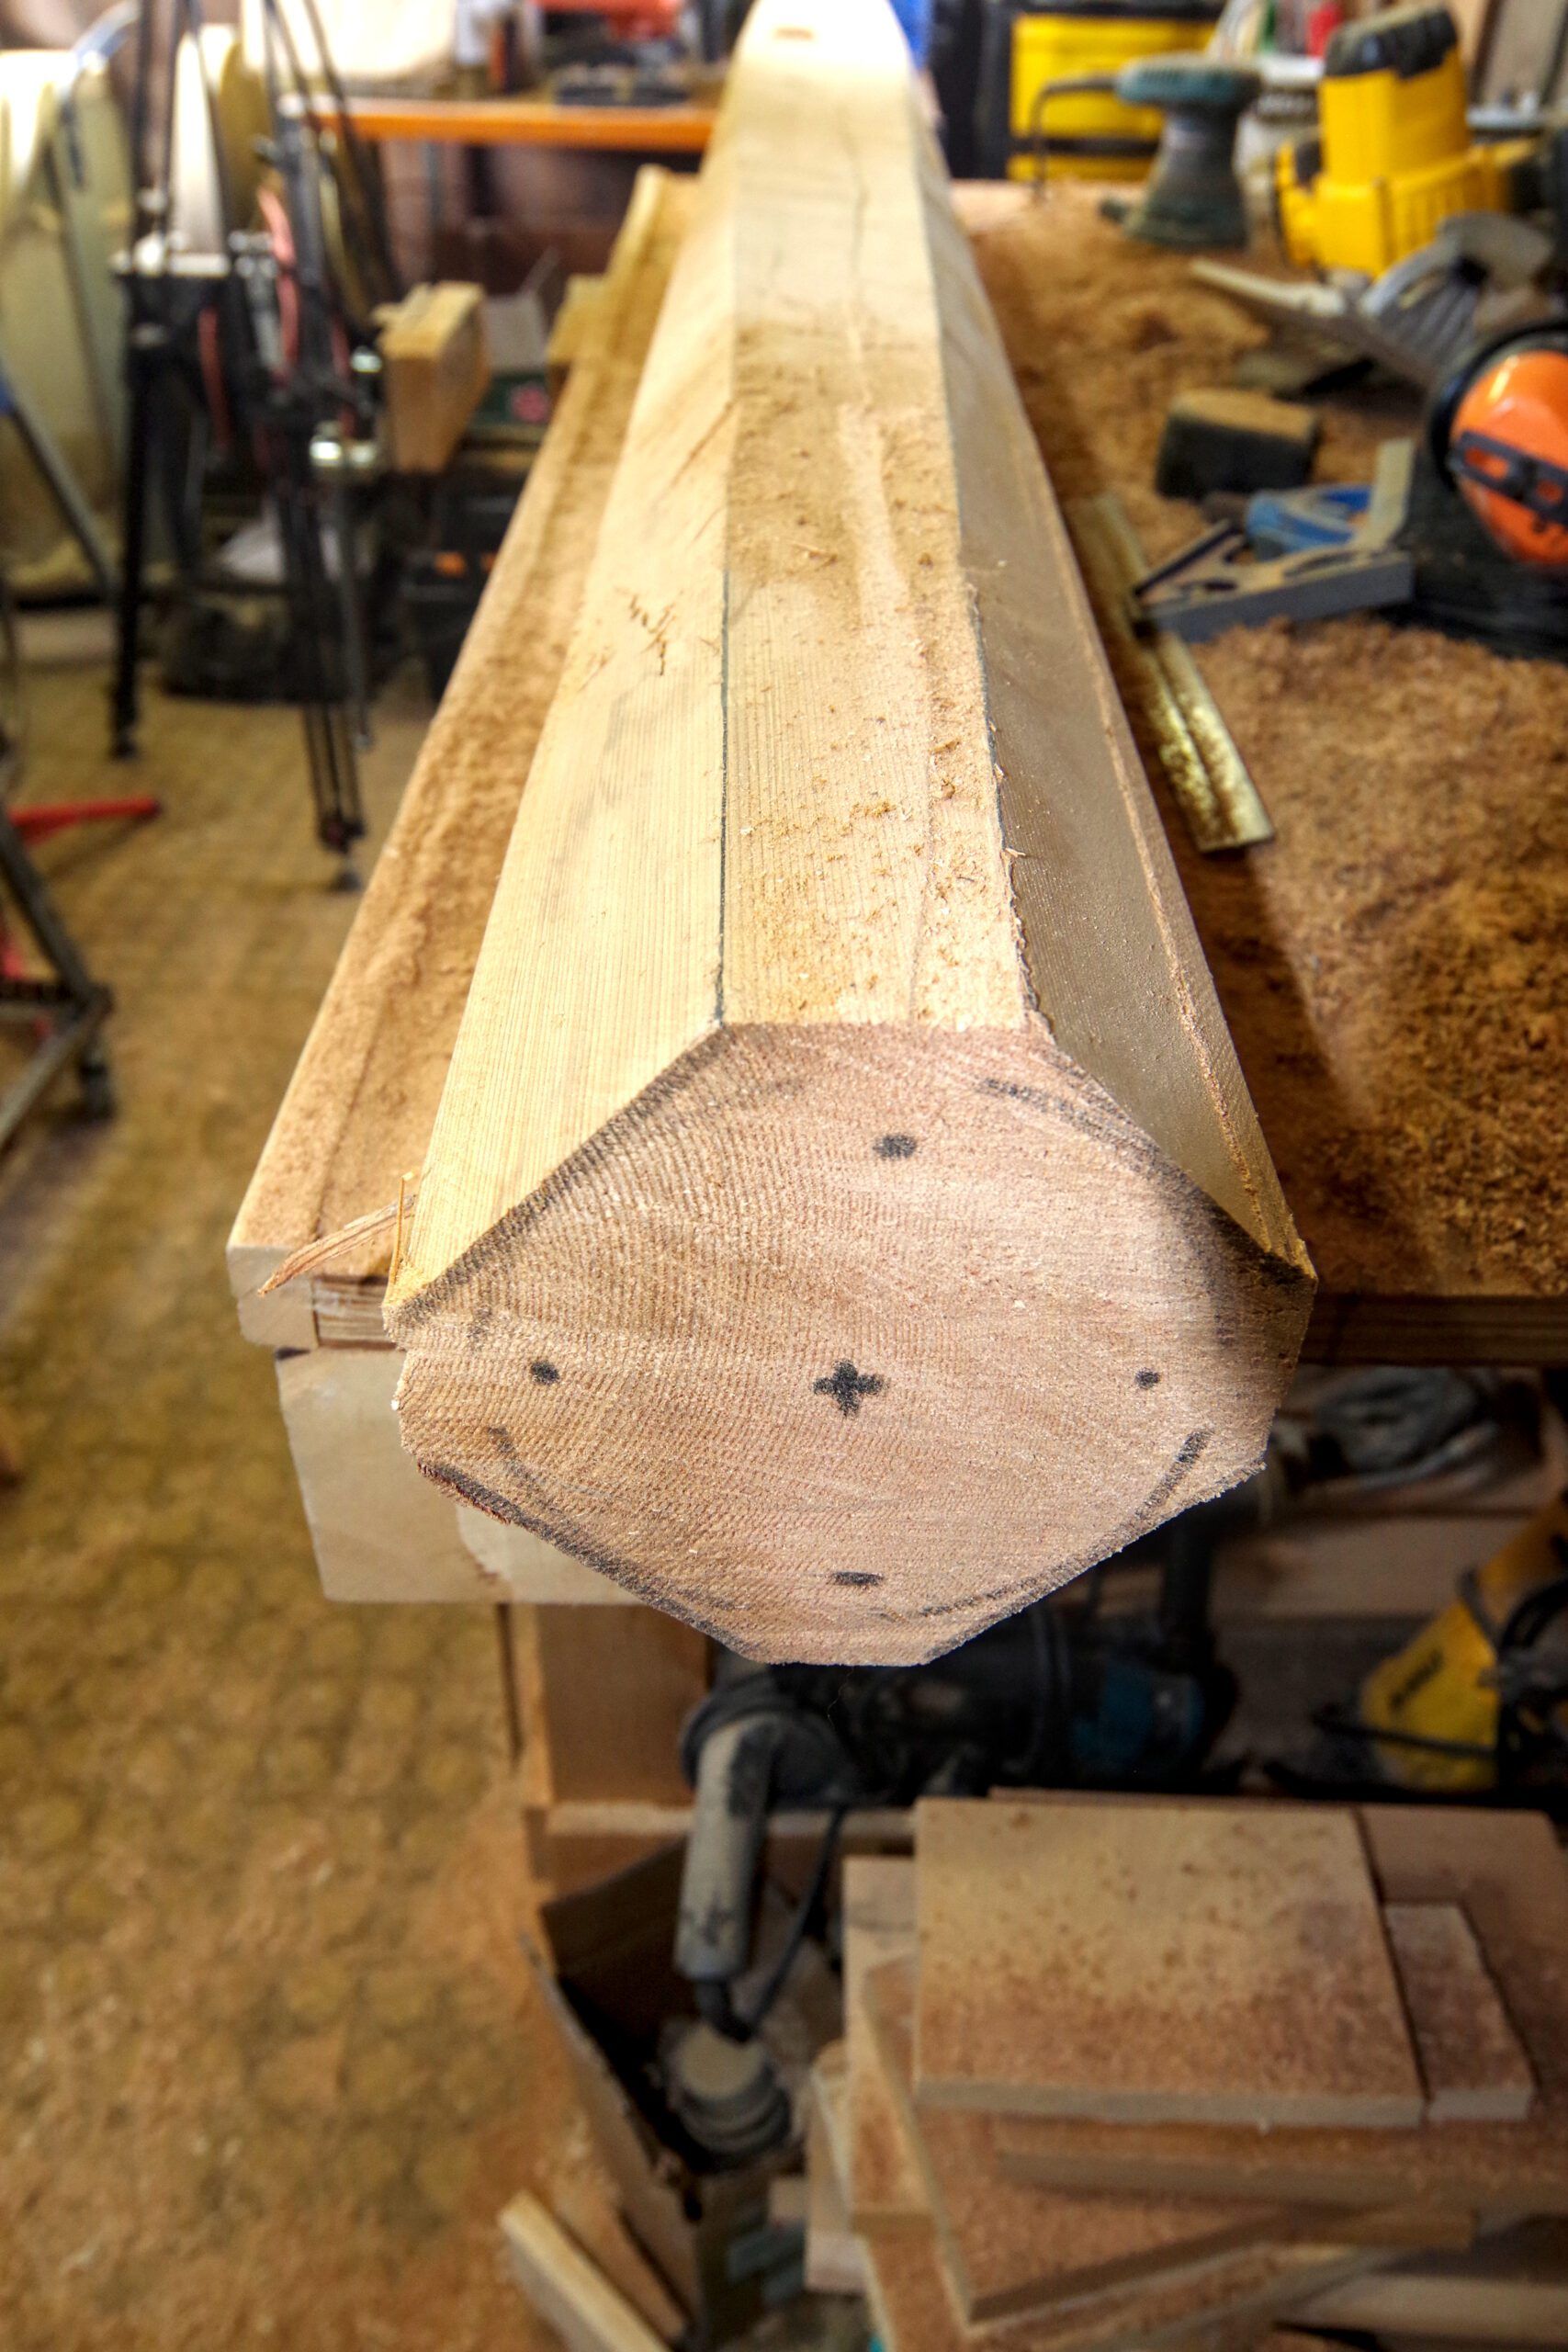
Plane
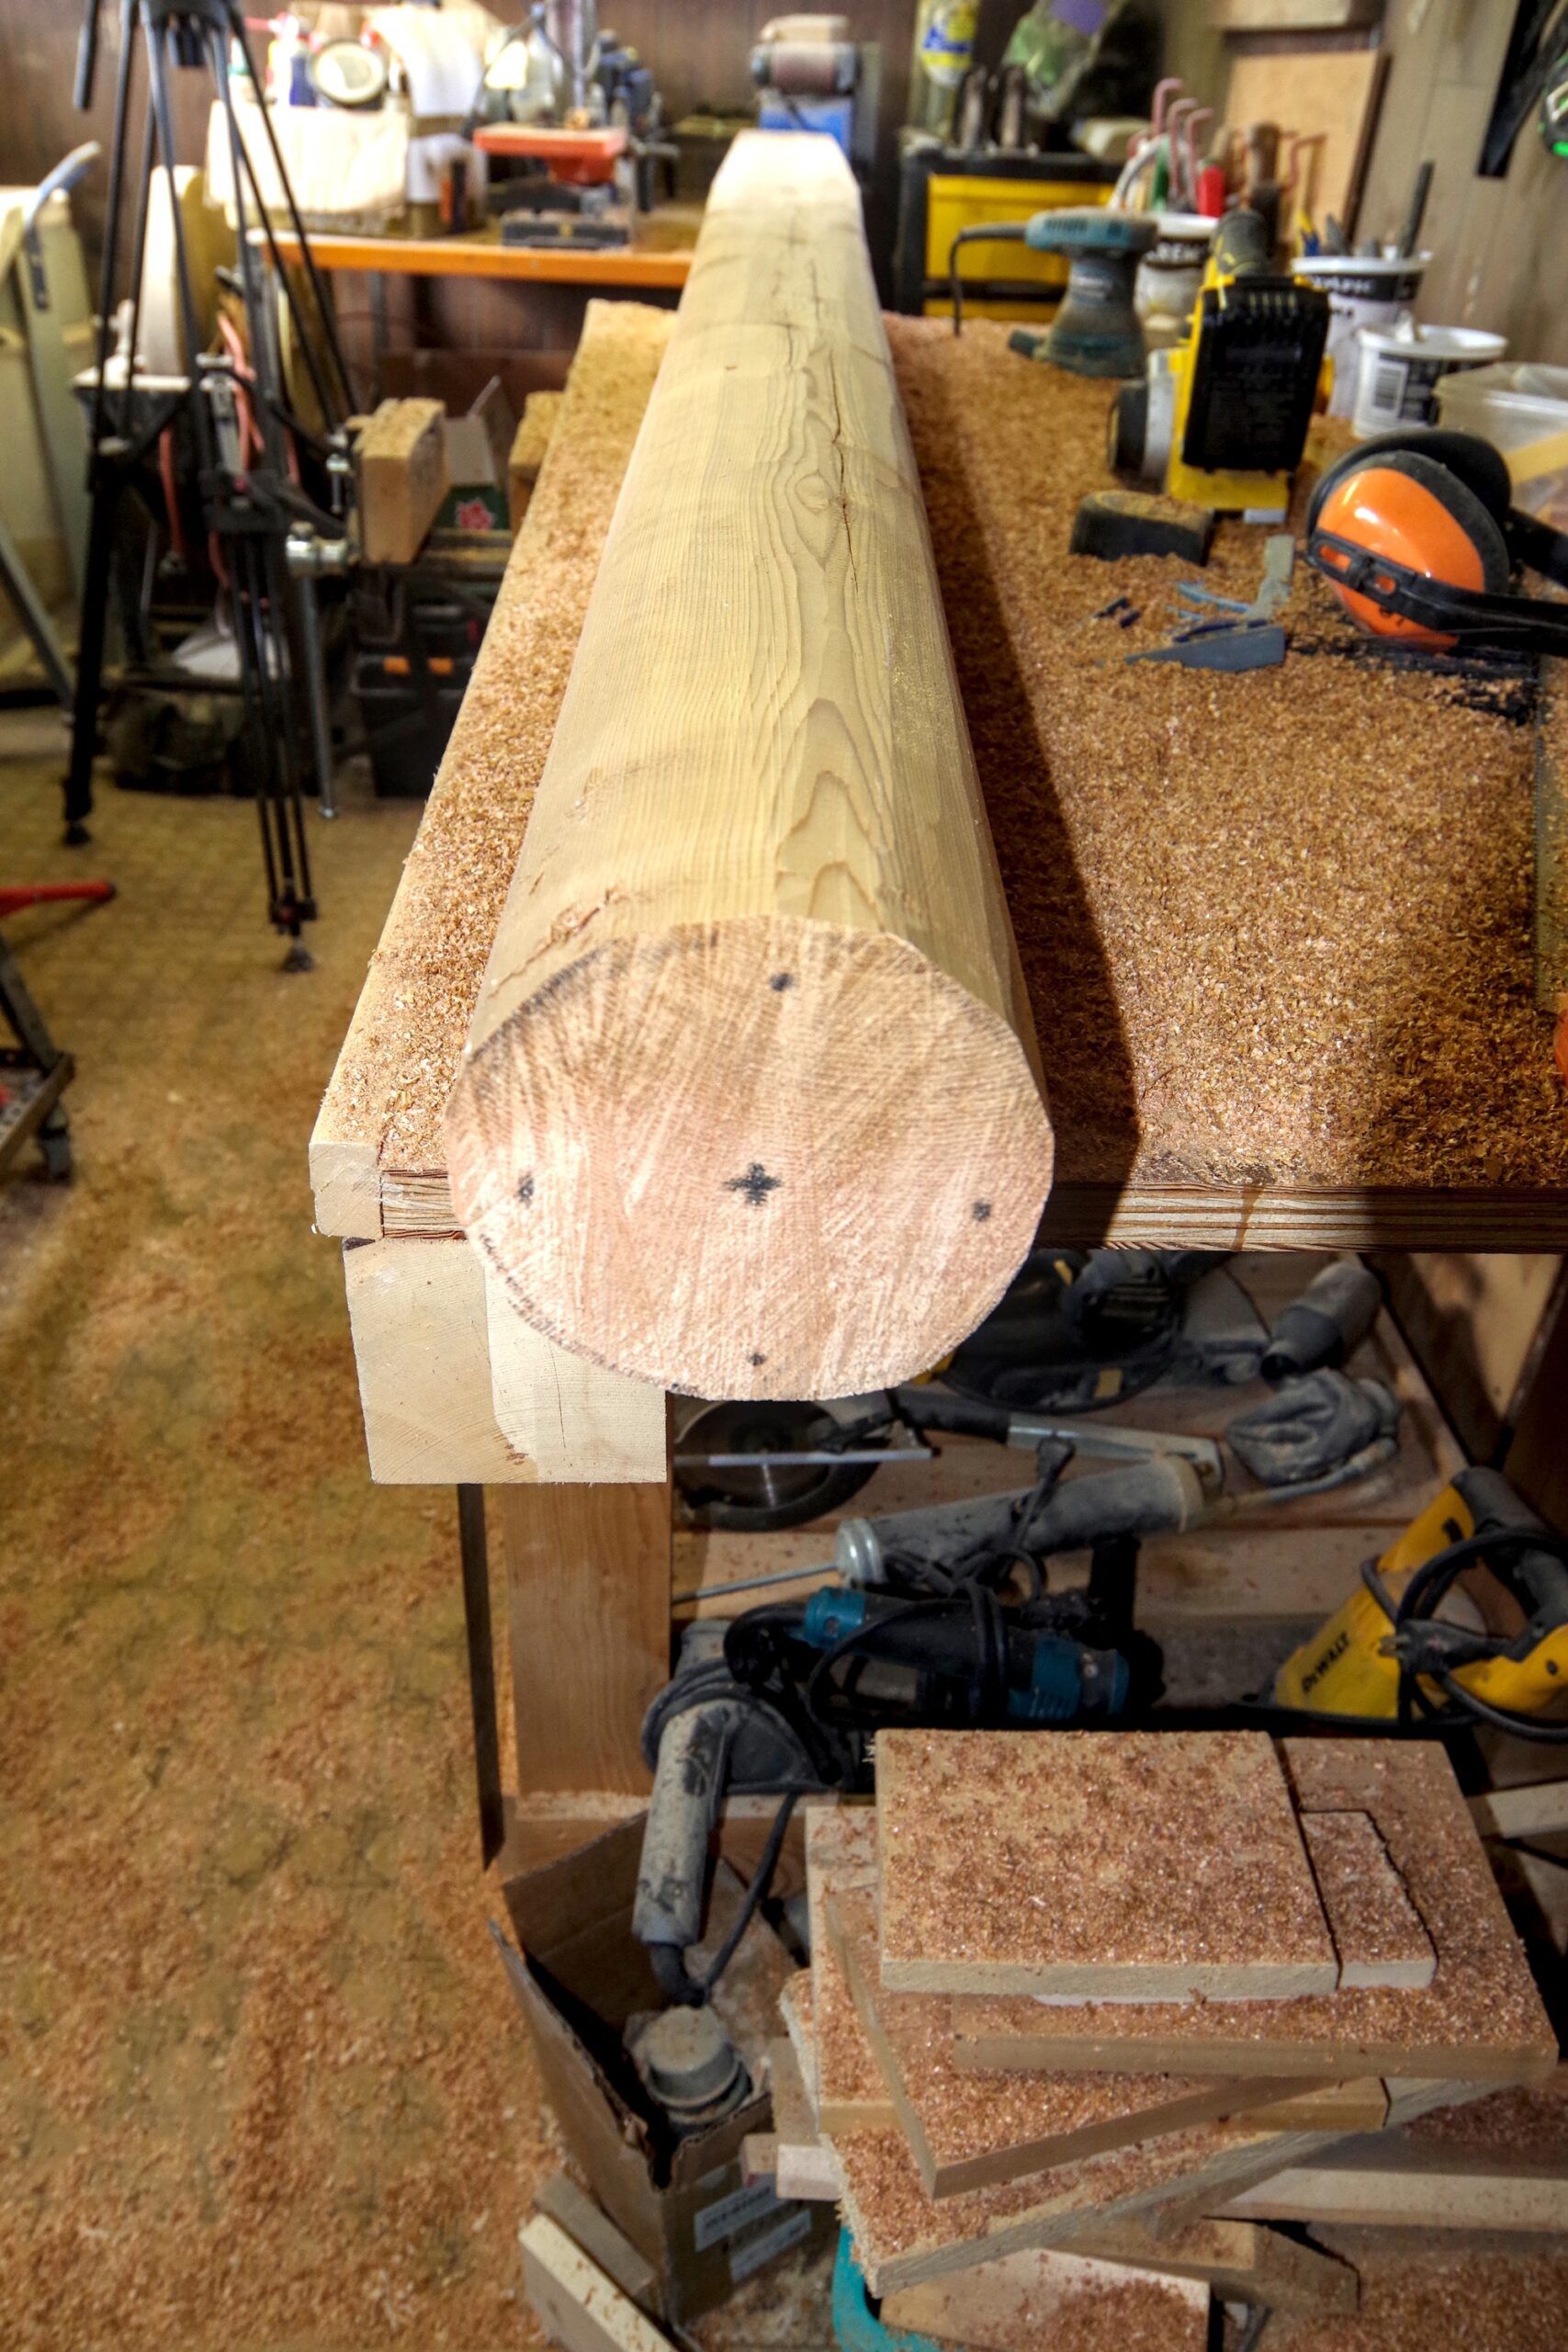
Now we can go back to using the power plane and round the shape to get a smooth transition between the round tip and the square butt with a nice even taper. This is all done by eye, it is not critical and when it looks right, it is right.
Sand
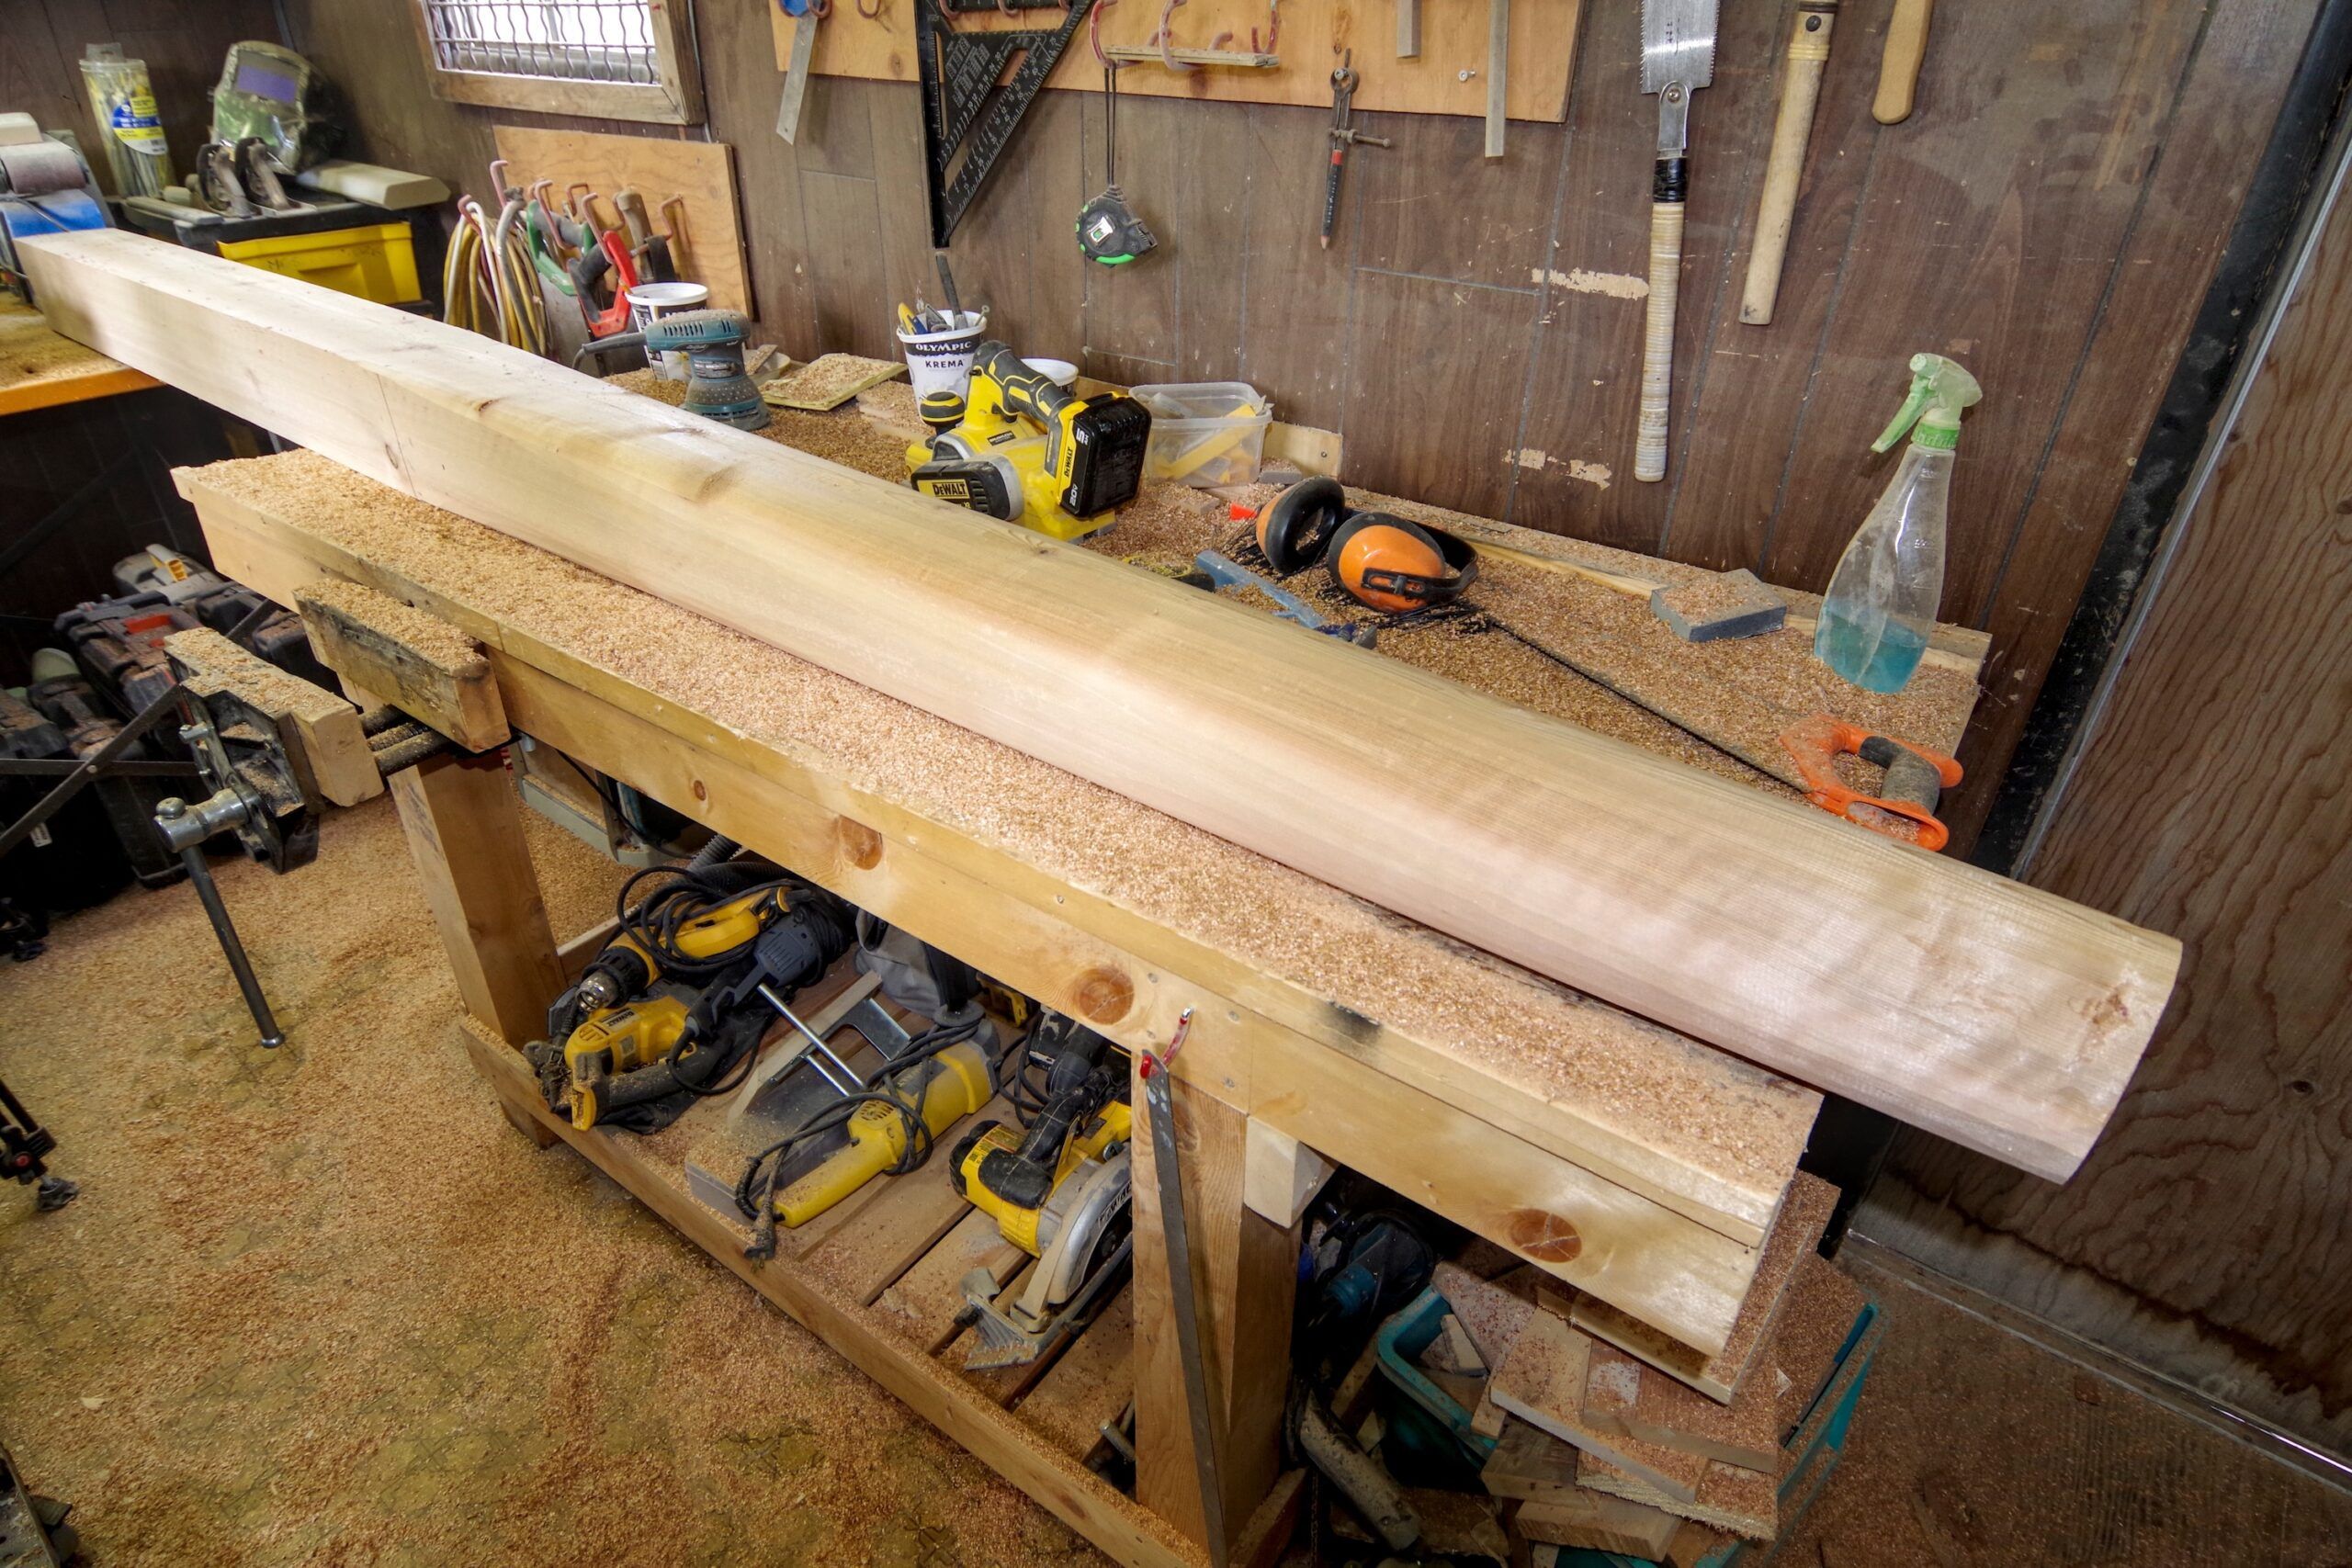
Finish with a coarse sander to get rid of the planing marks and get to a final size and shape. Don’t take the tip down too small. You need to finish up with the end diameter about 1/2 inch bigger than the outside of the cranse iron.
Fit Cranse Iron
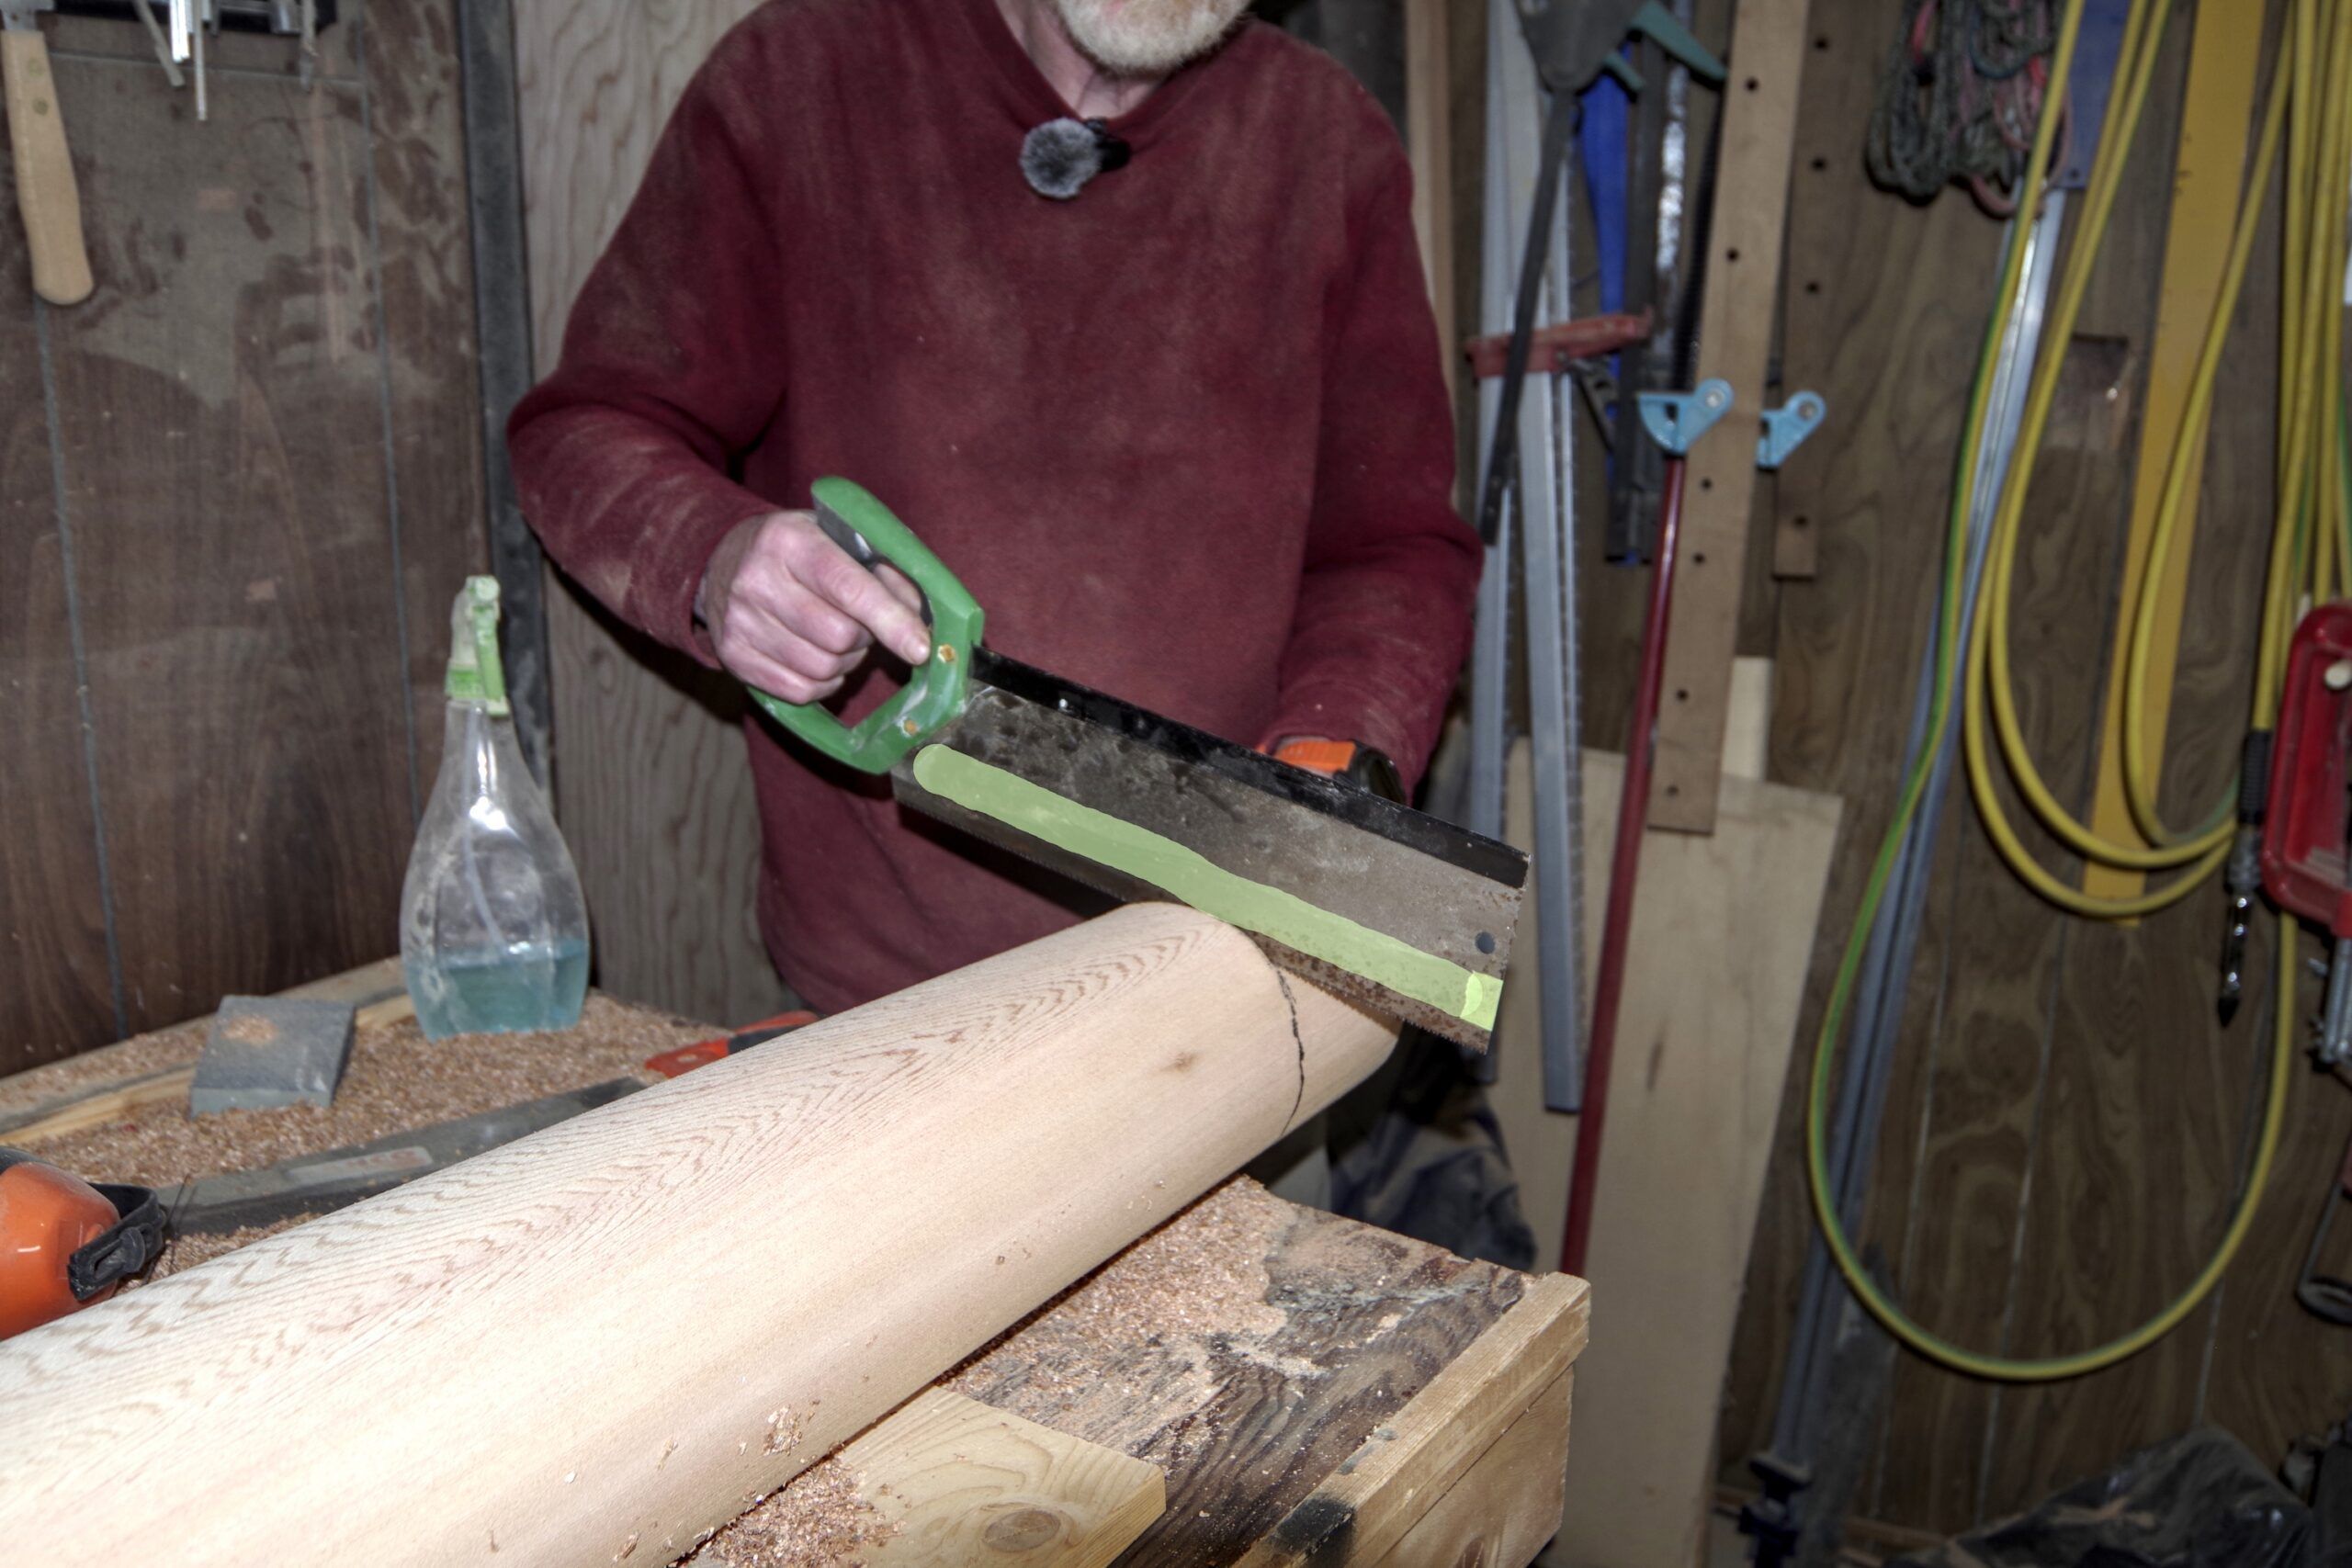
Next we need to fit the cranse iron. Step one is to cut the shoulder. Mark a circle right round about 1 1/2 inches further back than the depth of the cranse iron. Now cut along that line with a stiff-backed saw. To get the depth right use a piece of tape along the blade set so that the depth will be a bit bigger than the inside diameter of the cranse iron. Don’t overcut it at this stage, the shoulder can be finished to the correct size onee the cranse iron can be slid up close to the shoulder we are creating.
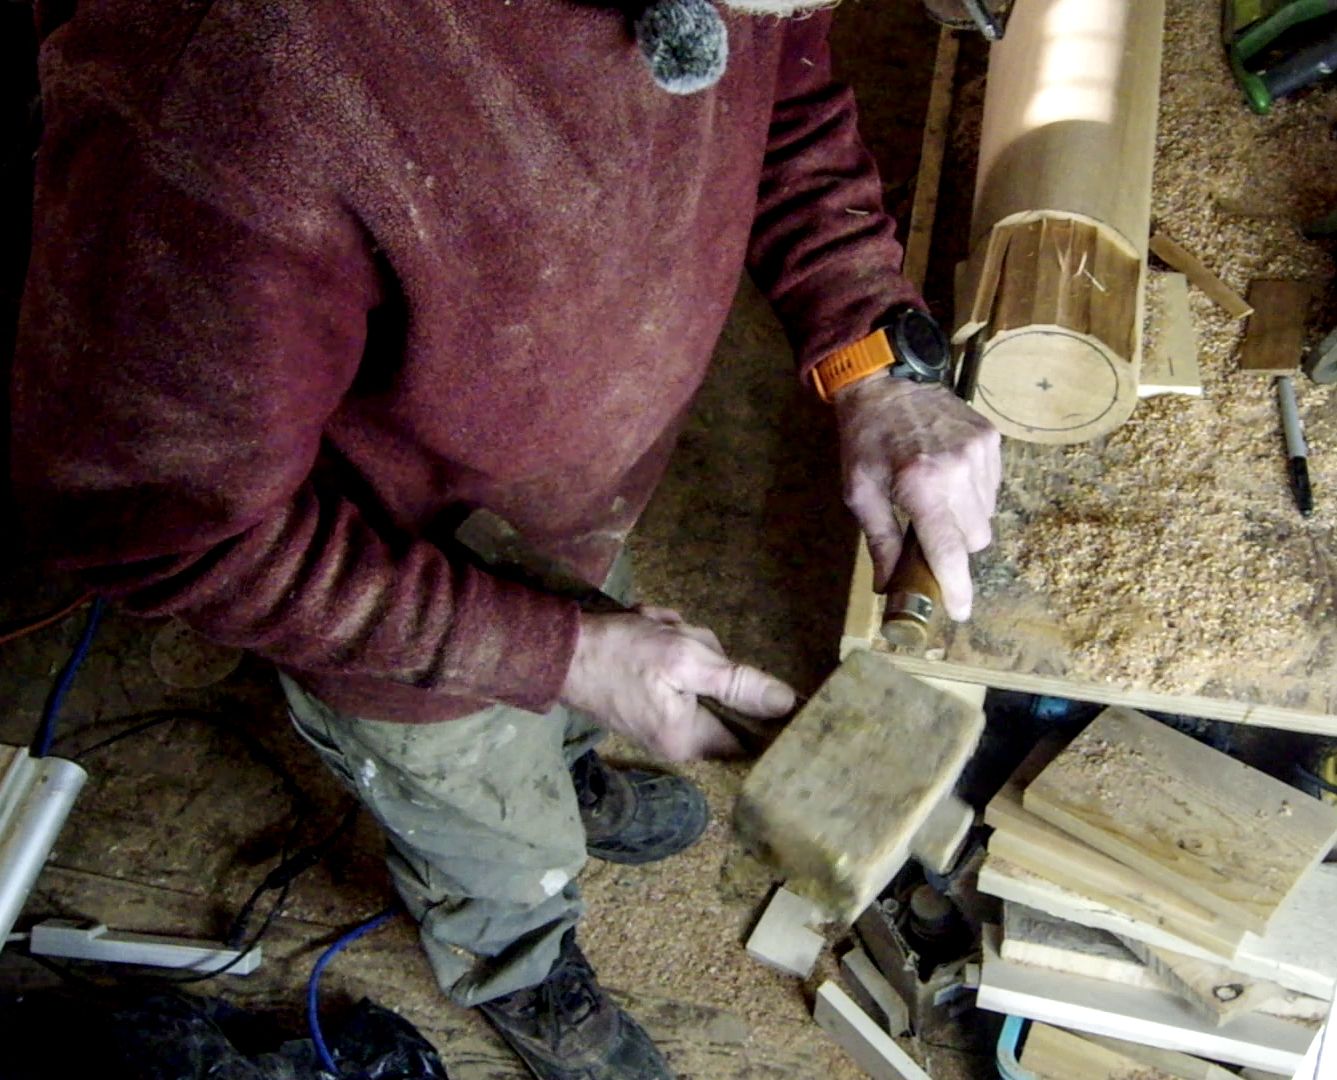
Once you have cut all round to form the shoulder you need to start splitting the wood away with a chisel and mallet. You can start by splitting quite big chunks off but as you get closer take smaller shavings and finally put the mallet down and pare the last bit by hand.
Sand
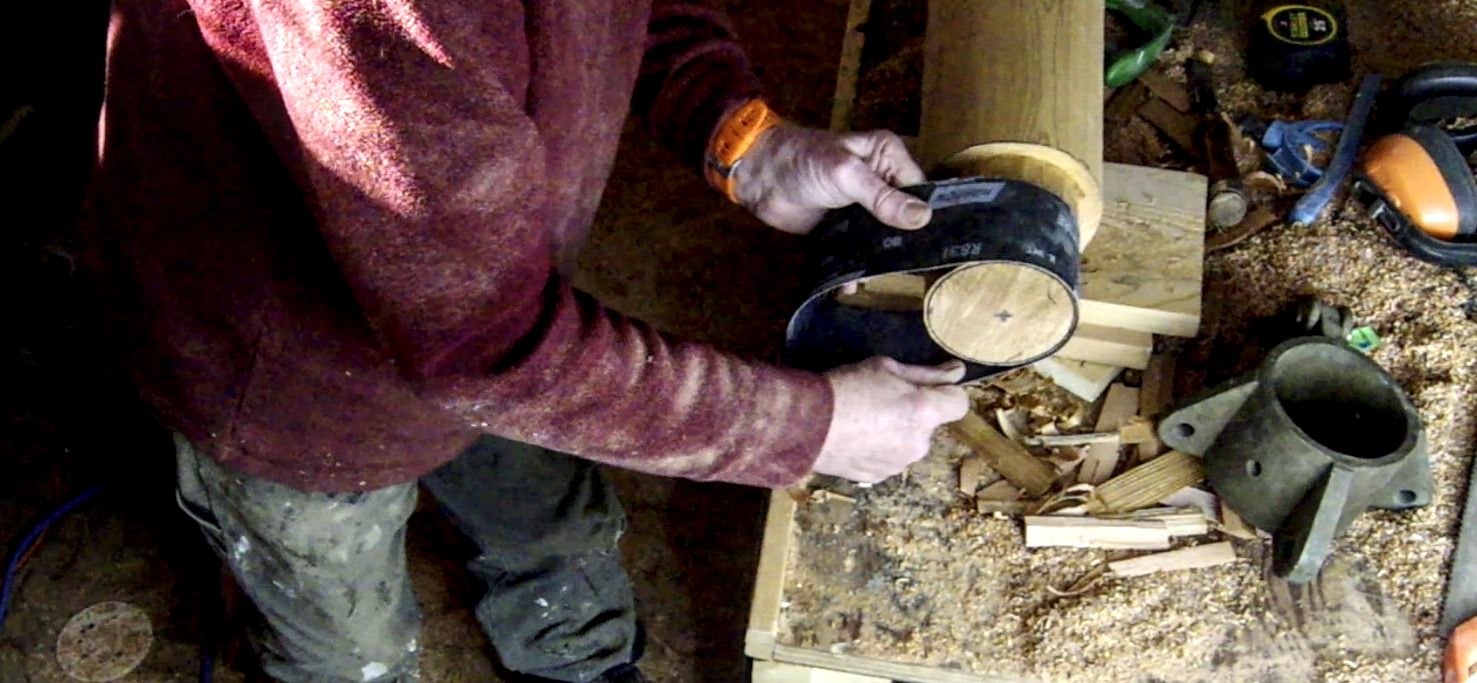
Finally finish by sanding. The easiest way I have found to do this is to take an 80g sanding belt and turn it inside out. Alternatively, if you have a roll of coarse sandpaper, simply cut a length off. What you want is a way to wrap the sandpaper around the work and sand using a back and forward motion. This will create a smooth round finish.
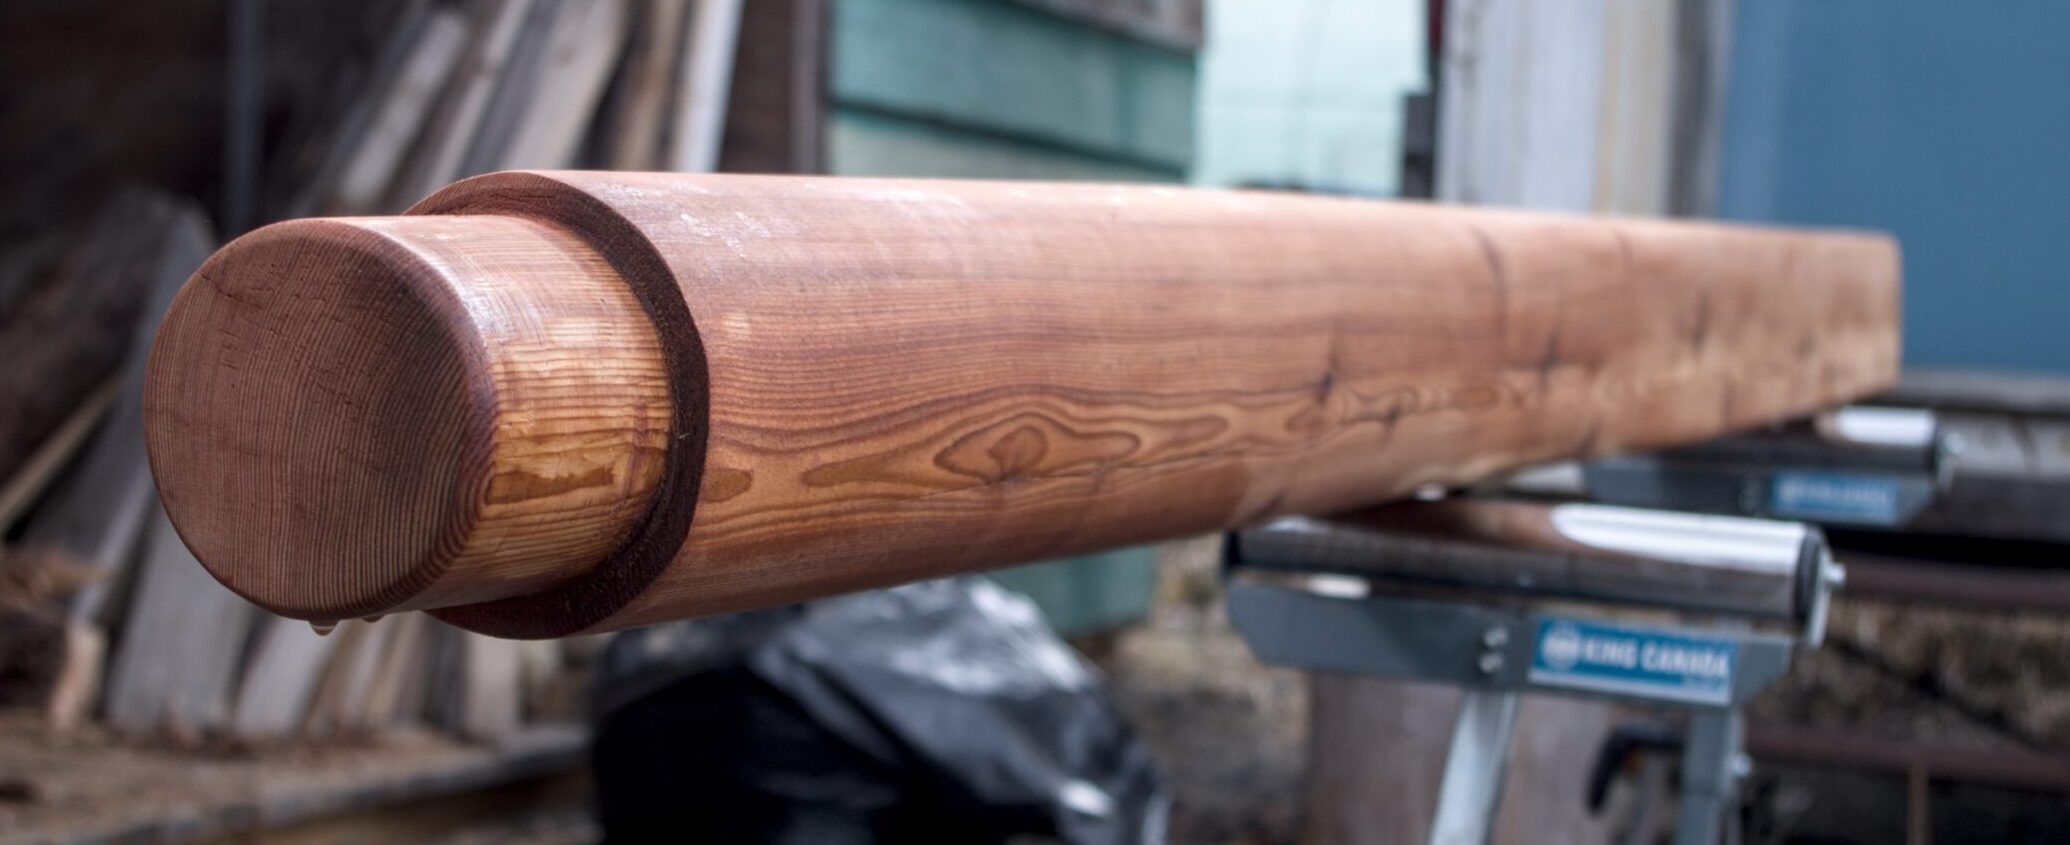
Keep working on this until the cranse iron will easily slide on. You don’t want it a tight fit as you need room to bed it on with marine sealant once the bowsprit is complete and varnished. You will probably find that the cranse iron is not perfectly round. If you are reusing one, it will likely have distorted a bit in use. Even a new one will usually not be perfect, cast fittings never are unless the inside diameter was machine finished which is unlikely. This is the fitting finished with all the edges neatly rounded.
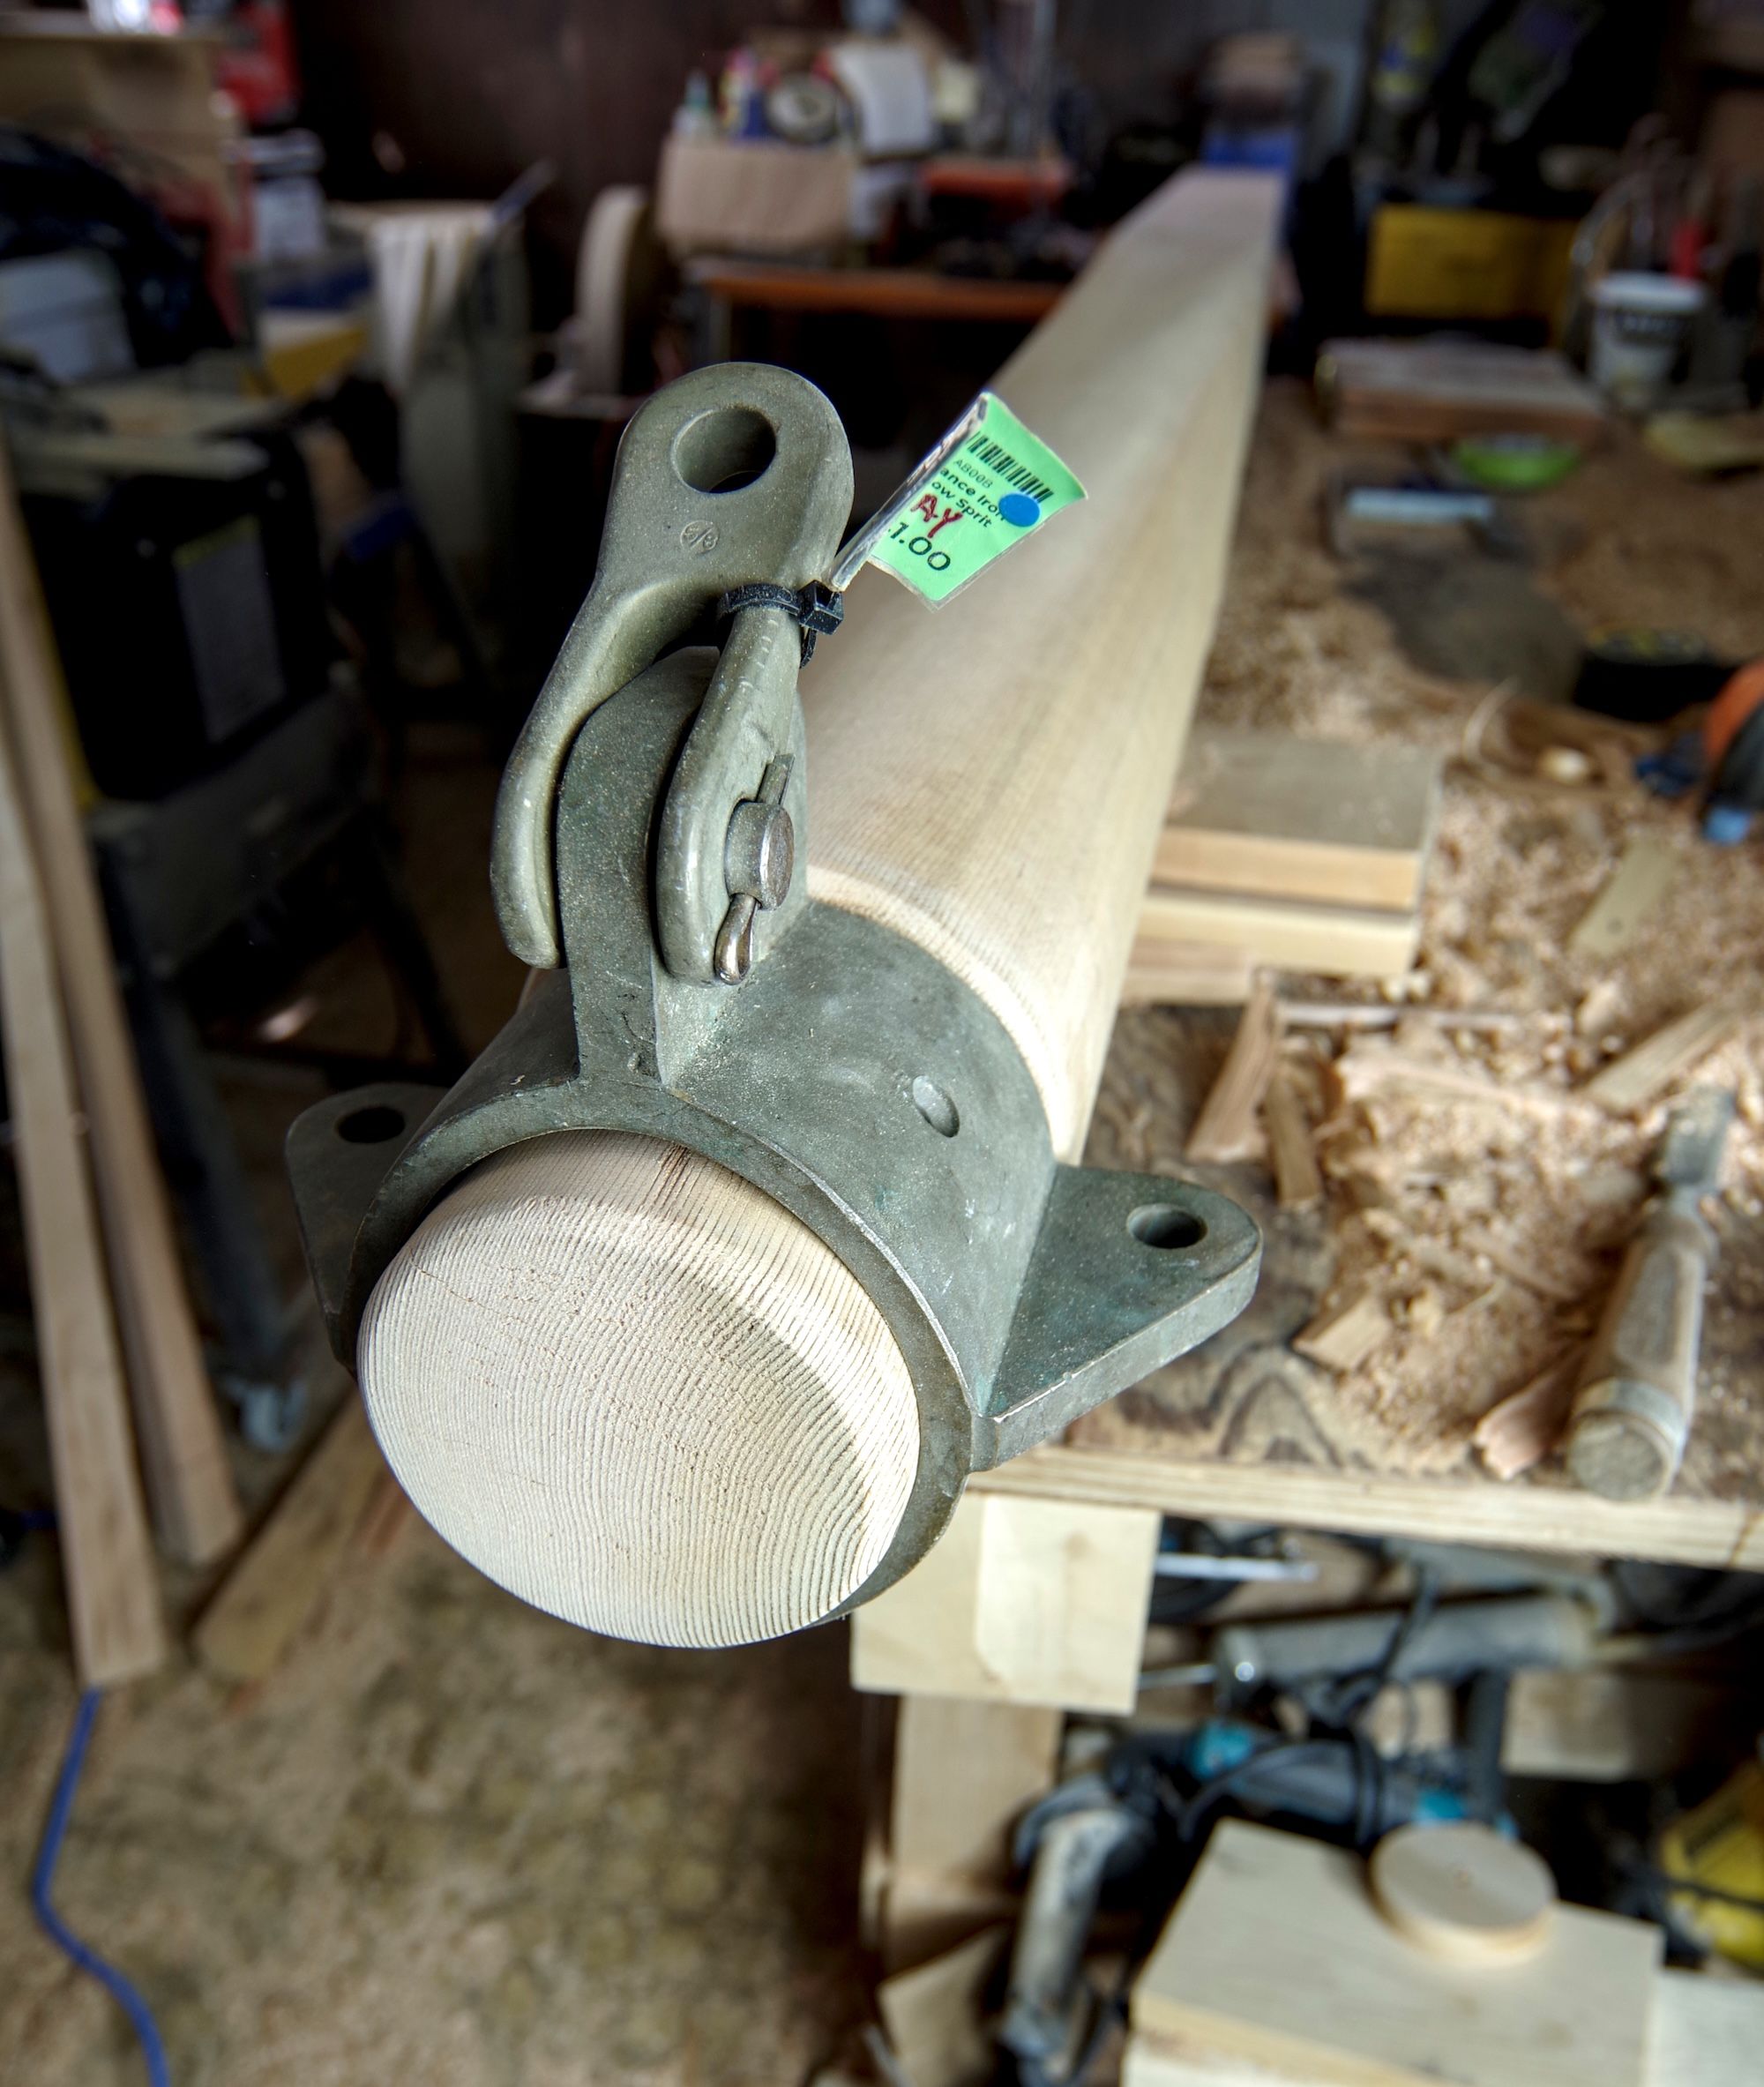
Note two things in the picture above. The end of the bowsprit extends about an inch through the cranse iron. This is deliberate. The end is the most vulnerable part to damage and decay, so you want to leave some wood exposed as a sacrificial end. Also, the shoulder step is about ¼-in. larger than the cranse iron. There will be a lot of weight-bearing on the shoulder, and some extra depth adds significantly to its strength.
Continue to clean the rest of the bowsprit down with finer grade sandpaper until you are happy with the shape and finish.
Fitting
All we need now is a means of fitting it to the boat. That is going to be different for each boat. If you are replacing an old bowsprit that is great news, you just have to copy the fitting details from the old one. In general, a traditionally mounted and removable bowsprit that butts directly against the Samson post has a notch cut in the post and a peg at the end of the bowsprit to hold it in place. Bitts are also often notched into the side of the bowsprit and then have a bolt through both the bitts and the bowsprit. Remember that in these cases the bowsprit is only fixed at the butt-end. Any fitting that it passes through at the bow should be a loose fit and allow the bowsprit to freely move around as the shrouds and stays are tensioned.
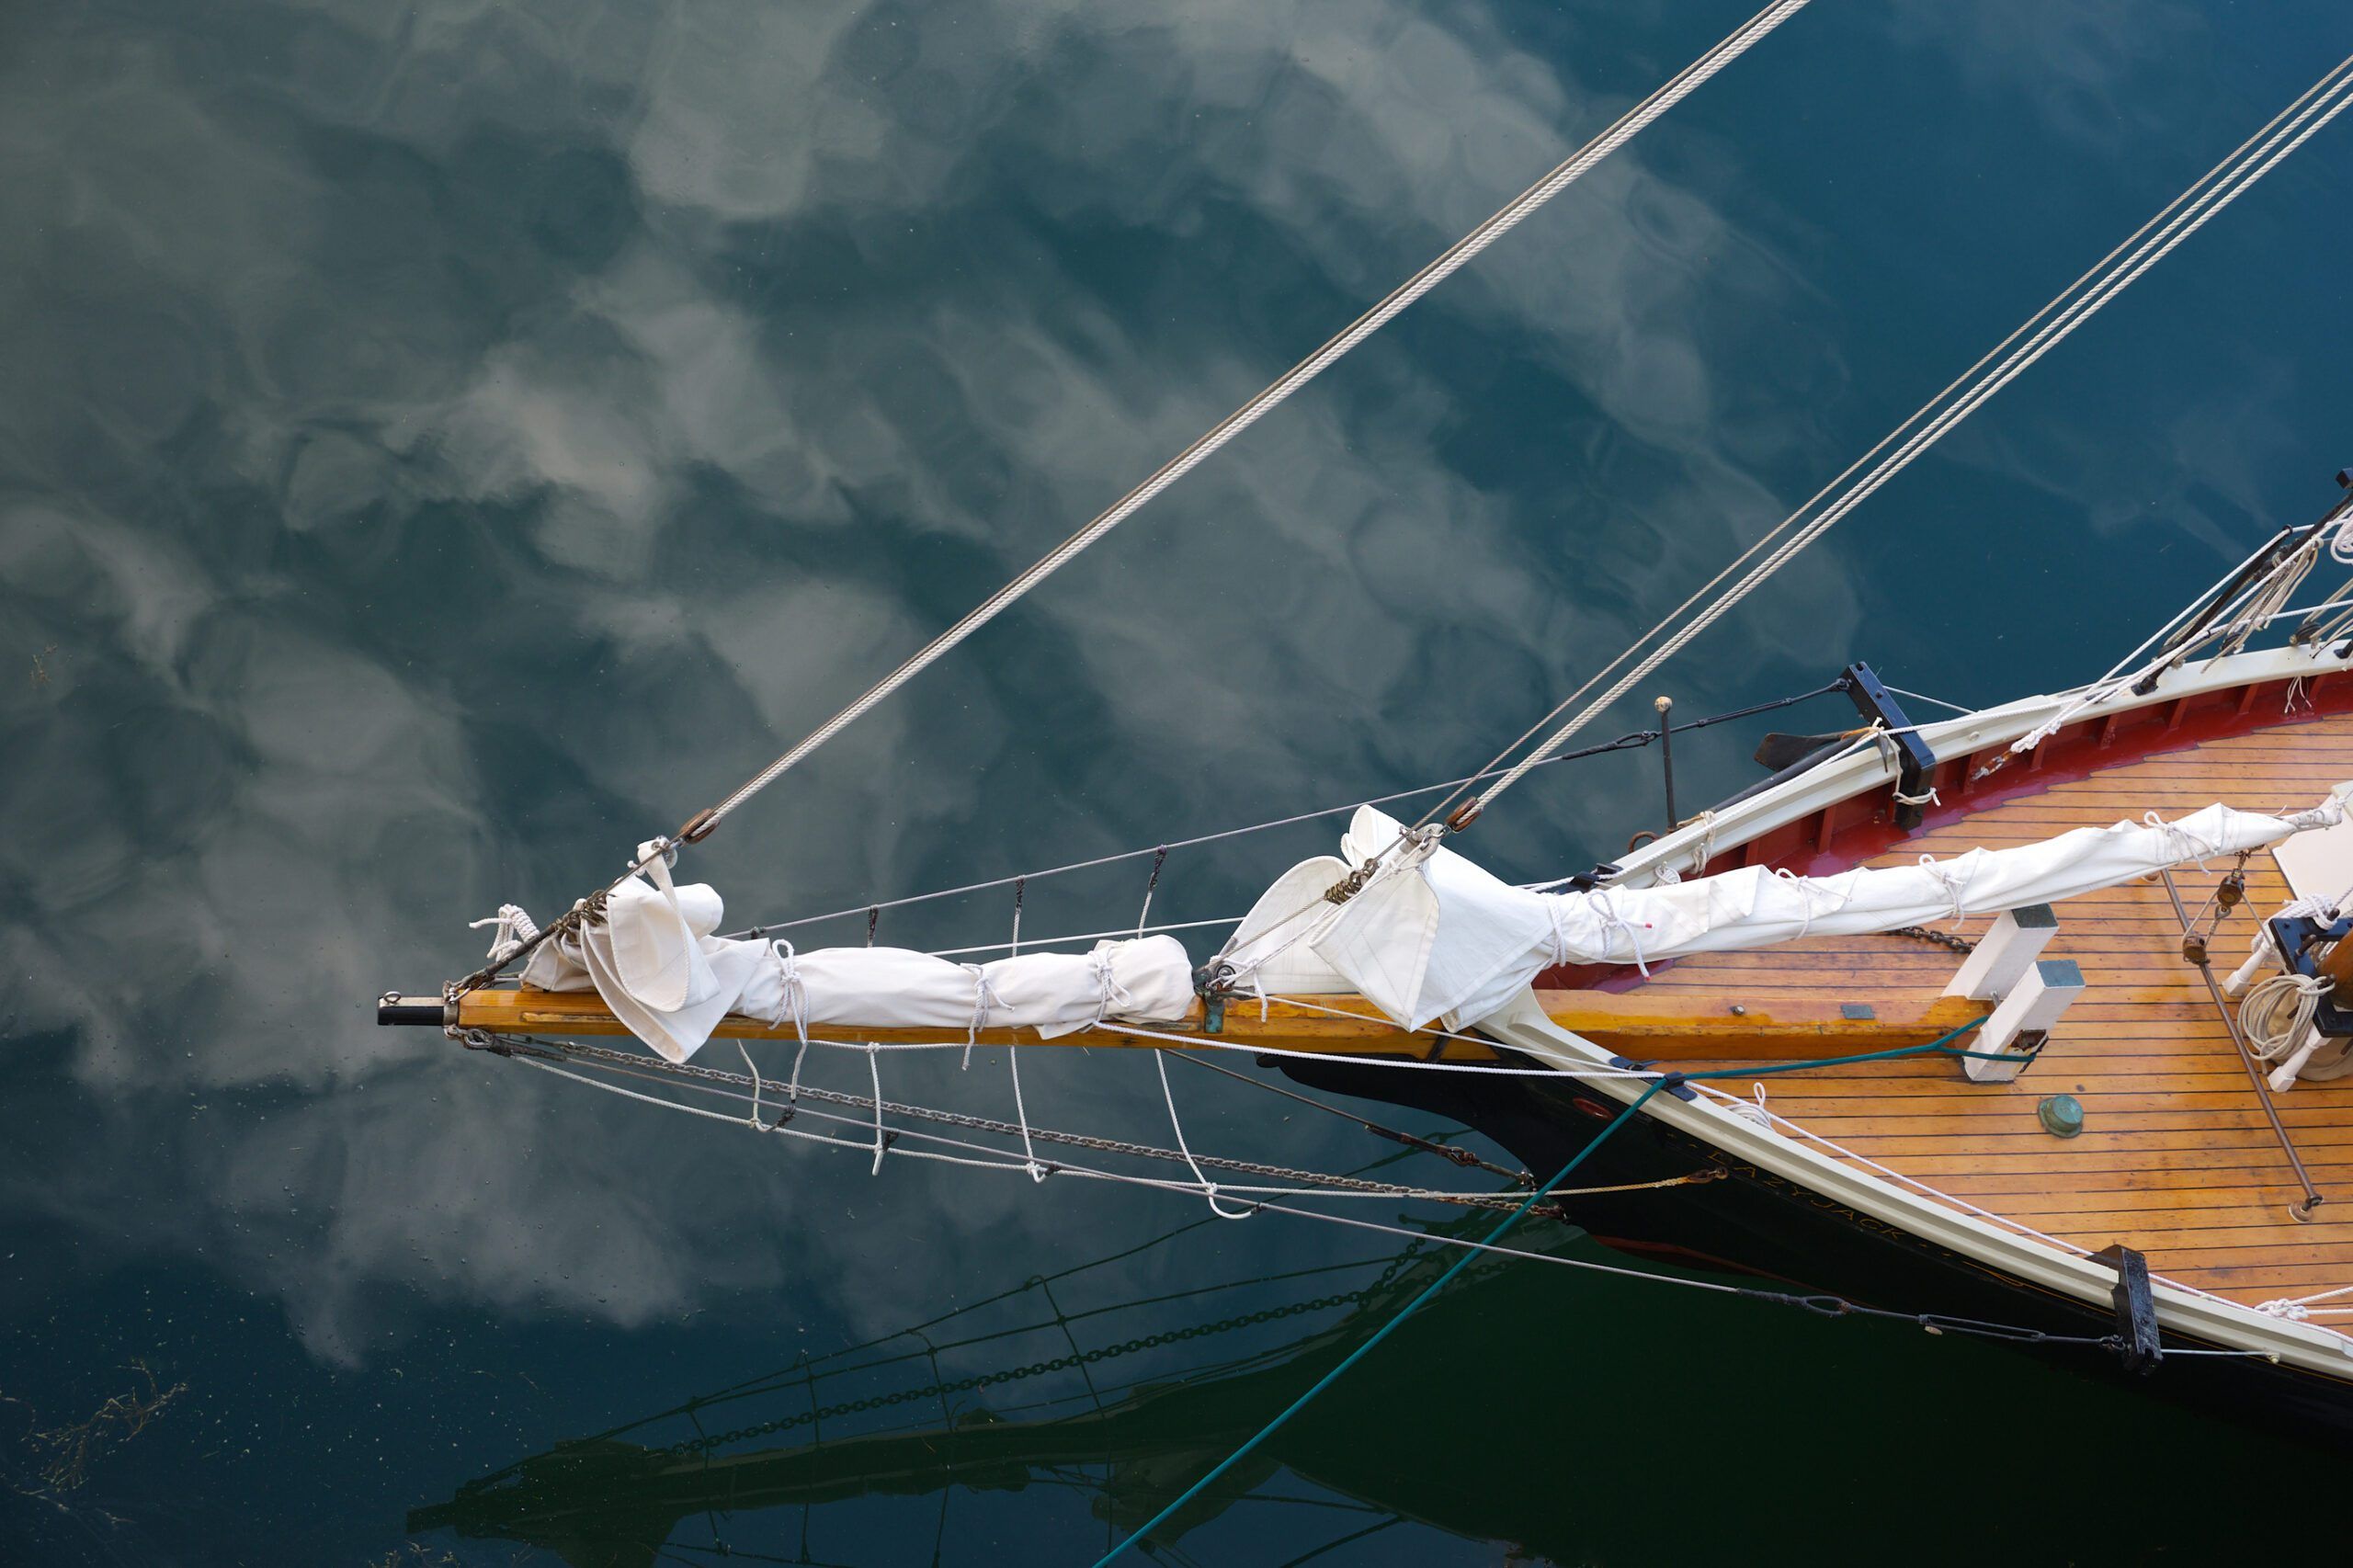
This shows a very traditional arrangement with the bowsprit notched into the bitts. A bolt passes through both the bits and the bowsprit. The inner stay is attached to a fitting that goes around the bowsprit and is bolted to the stem, but this is not holding the bowsprit in place. To work, remember the bitts must go through the deck and extend down to the keel or be firmly boated to a structural bulkhead. While it works well this arrangement has always been prone to leaks and on many boats the bitts would block access to the anchor locker or obstruct the forward cabin.
Bolting to Deck
In my case I am bolting the bowsprit to the deck instead. The boat was designed for a bowsprit, but it was never fitted, so I am starting from scratch. The deck was already ¾-in. thick plywood with a decent king plank underneath. To be sure of the strength I added another layer of ¾-in. plywood on top that went from the stem to the cabin top front and epoxy bonded it to the deck. It is not just the deck strength that is of concern, it is also how much wood the bolts are passing through. If the deck is not solid enough what can happen is that the load on the bolts will slowly make them creep back and oval the holes.
Bolt Arrangement
In order to bolt the bowsprit down I need to drill some holes for the bolts. With a 5 ½-in. bowsprit, that is quite a big hole. I also want the load evenly distributed. Rather than three large bolts, I am arranging smaller ones in pairs. A further complication is that I want an inner forestay two feet back from the stem-head. This will be fastened with a large U bolt, but they don’t make one long enough to go through the bowsprit and the deck. So, the U bolt goes through the bowsprit only then there are four bolts surrounding it. This gives me a total of nine bolts.
The shear strength of a 10 mm S/S bolt is somewhat over 2 tons so that should be fine and spreading the load over nine bolts should stop any deformation of the holes. The depth of the bowsprit plus the deck is about 10 inches so that does present a problem, standard 10 mm bolts only go up to 7 1/2 inches. To get long enough bolts I would have to go to at least ½-in. which is unnecessary and expensive. The solution is to use threaded bar and cut it to length.
Drill Holes in Bowsprit
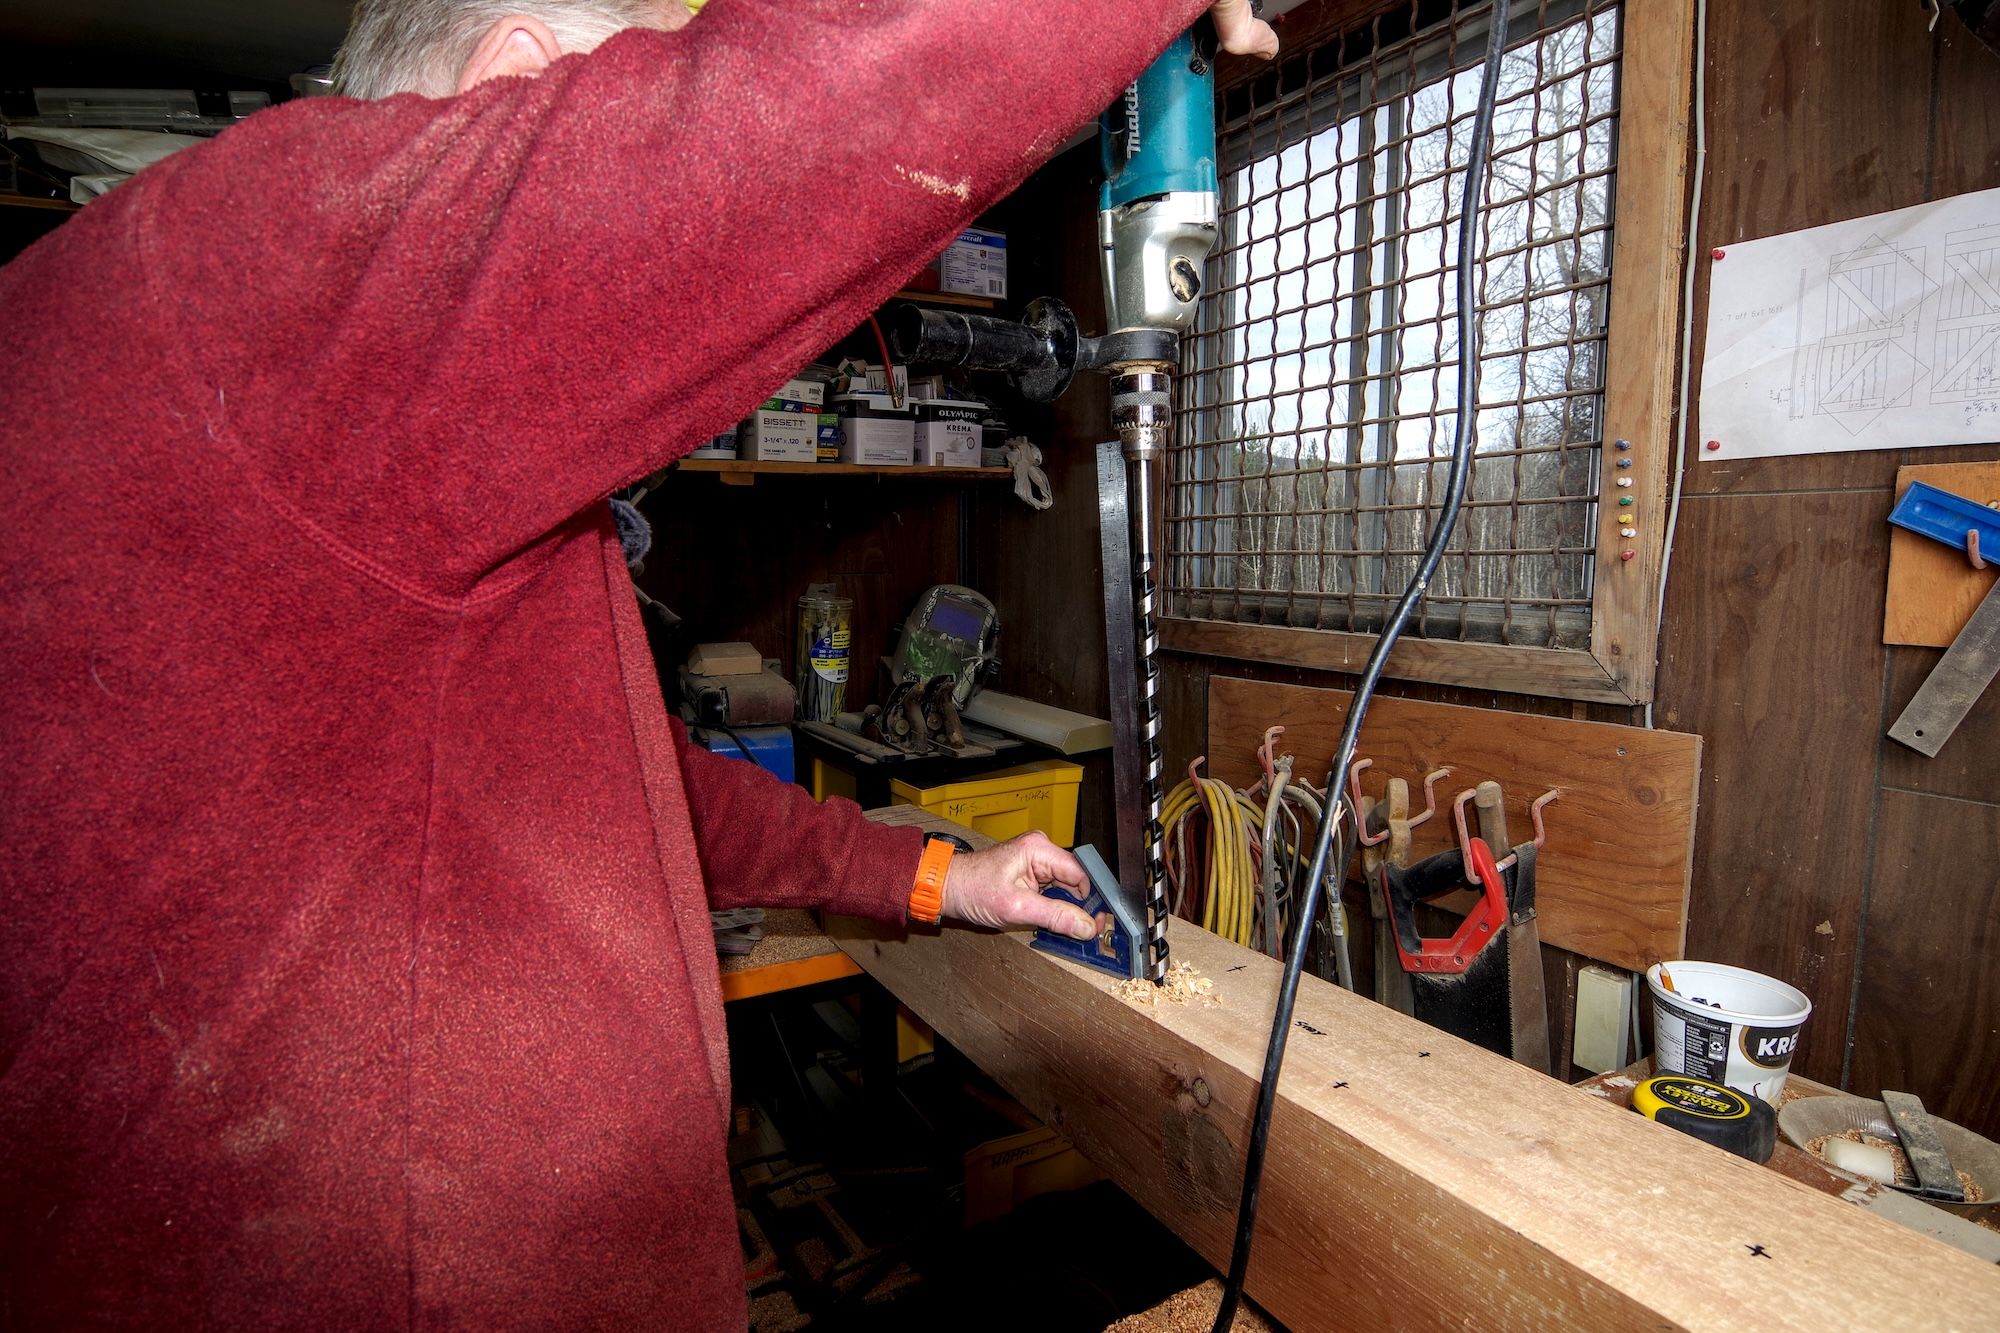
So now we know what the bolts are we need to drill the holes. Whenever you put a hole in a bowsprit you are creating a potential for water to get in. Bowsprits almost always fail because water gets in through the fastenings or from underneath and they rot out from the inside. You see nothing wrong until the whole thing starts to give. Usually, the first sign is movement in something attached to it like the windlass. To help prevent this I am going to drill the holes oversize and line them with PVC tube glued in with a flexible waterproof mastic. Pex water pipe is ideal, it has a 16 mm outside diameter and a 12 mm bore.
Drilling the holes is the next challenge. They do not make standard twist drills long enough and even if they did a drill that long is almost guaranteed to run out of true. The right tool for the job is an auger bit running at slow speed. These run straight and have very large flutes to clear the cuttings. Lining the drill up using a square set on the top of the bowsprit is accurate enough, so that is what I did and it worked fine.
Once the holes are drilled insert the PVC tube and glue them in. Cut them a bit long and then trim them once the glue has set.
Sand and Treat
All that is left to do now is a final sand down and several coats of whatever you normally use to treat wood on deck. You could use epoxy or a high-quality spar varnish. Both have a long life, but both are equally difficult to repair if damaged and a big job when they finally come to the end of their life.
For a bowsprit, my preference is to treat it like the deck boards and oil it. The main reason is that the ground tackle and chain are almost guaranteed to cause some damage to any coating, so I want one that is easy and simple to top up. When I clean and re-oil the deck I will do the bowsprit as well.
My other consideration, particularly with epoxy coatings, is that it is as good at keeping water in as it is at keeping it out. If there is any damage or water gets in through a loose fitting, a super waterproof coating like epoxy will not let it dry out again, so the wood can remain soaked and rot can start. With an oil finish any slight moisture ingress has a chance to dry through the coating. In any case cedar is extremely durable and will last 20 years without any coating at all.
This is the finished job with two coats of oil applied.
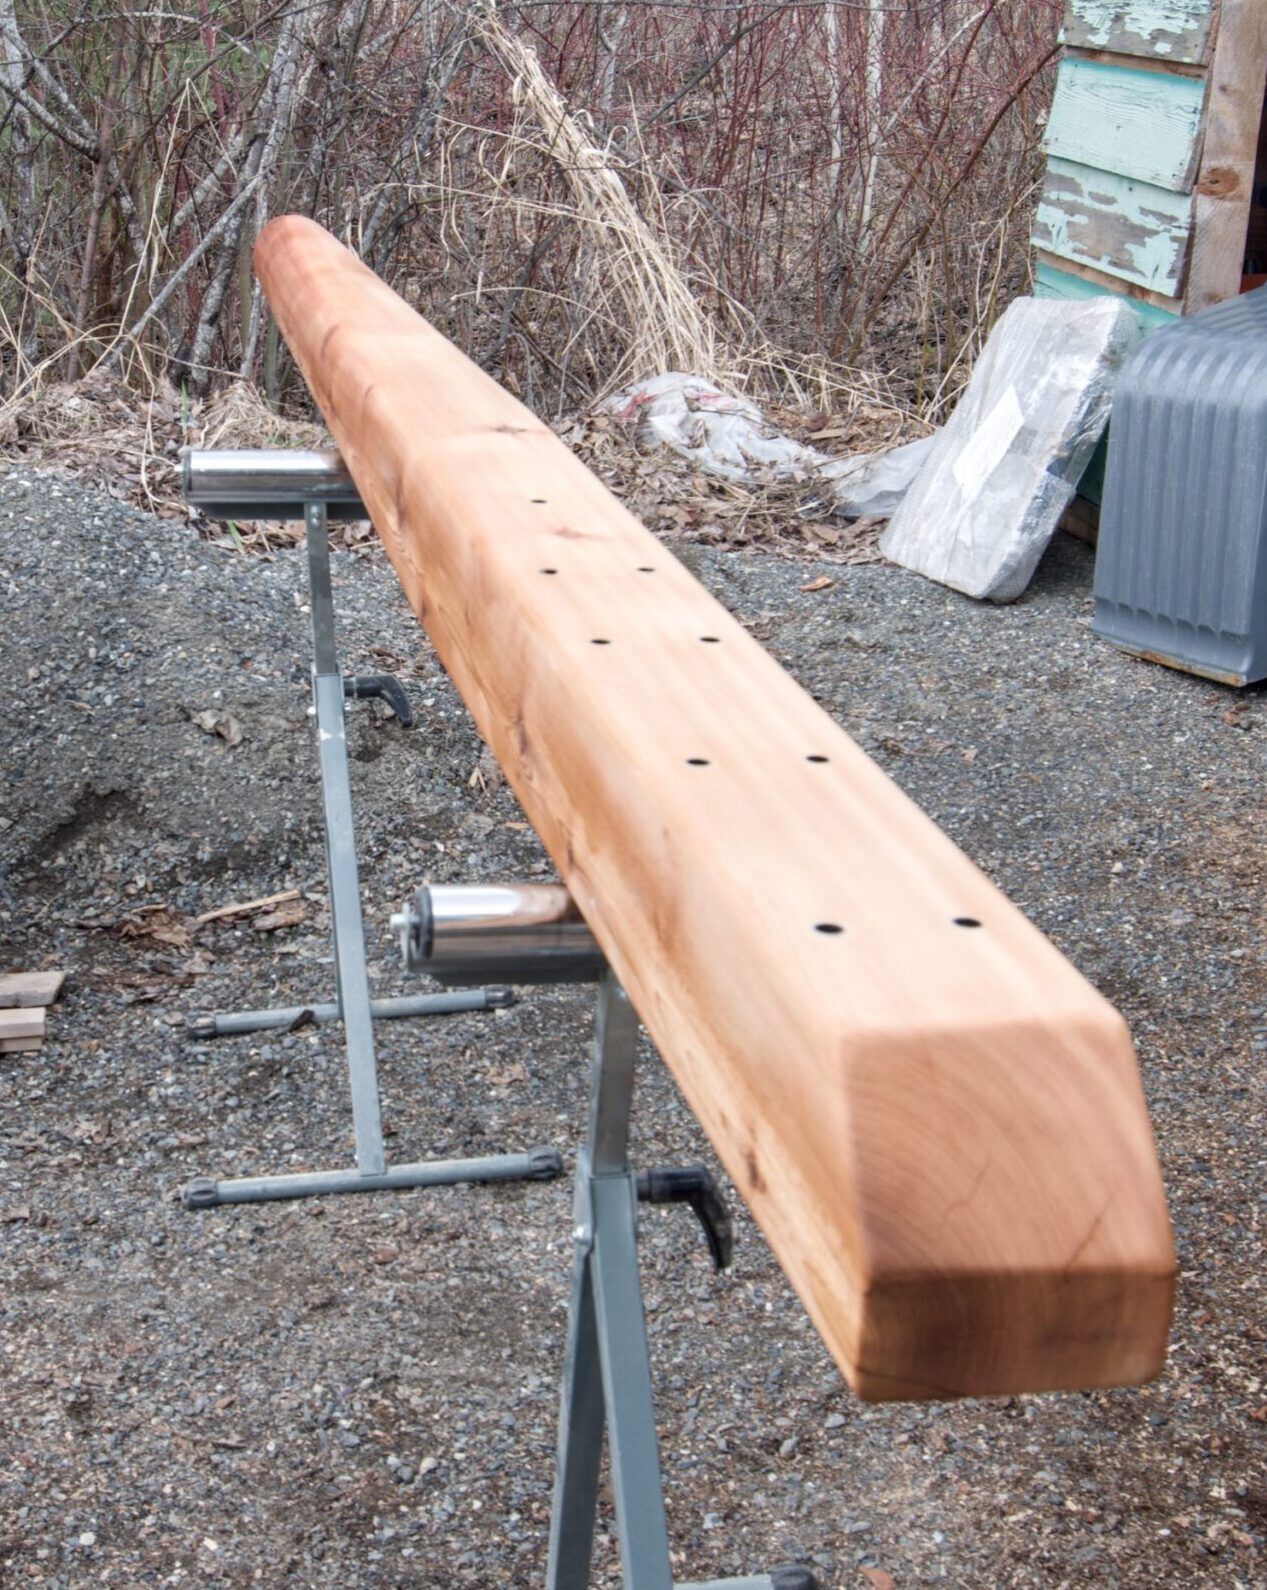
Having tried many different products, I am doing the exterior wood on Brigid with plain tung oil. I will be doing a follow-up on fitting the bowsprit and other winter projects either here or on my YouTube channel.
Notes
The deflection (D) of a cantilever beam with a point load at the end is calculated using the formula:
D = PL3 / 3EI
Where:
- P is the load,
- L is the length,
- E is the material stiffness, (around 1,600,000psi for pine)
- I is the beam’s resistance to bending. (around 76lbs/cu inch for pine)