


One of the aspects of safety on a voyaging sailboat that I am most concerned about is that objects stay stowed where they’re supposed to live, with absolutely no chance of them getting away. Loose objects rolling around in a locker or a lazarette are one thing, but stuff escaping from a locker or lazarette and rolling around on the sole are another. I think the importance of a situation like being knocked down is often underestimated these days, and the danger of loose objects in the boat is often not even considered.
Yacht manufacturers are building boats with cabinet hardware that doesn’t meet what I consider to be safe marine standards. If a cabinet or locker can’t remain closed under any circumstance, it’s insufficient and is likely dangerous. I see many, even new yachts, with hardware like this.
I also notice that most boat owners I talk with are largely unaware of just how dangerous loose items strewn about a pitching yacht can be, and consequently do little if anything to alleviate that possibility. Generally, they don’t know if their cabinets won’t stay closed or are even hazardous to use. One of my mantras for my manual on fitting out yachts for crossing oceans is, “You don’t know what you don’t know,” no matter how long you’ve been sailing or how much YouTube you’ve watched.
Uh Oh, SpaghettiOs
My good friend was in the Queen’s Birthday Storm. He and his girlfriend were sailing an extremely well prepared Westsail 32. Greg was a genius when it came to fitting out ocean passage-making yachts, and that’s probably why he lived to tell this story.
Queen’s Birthday Storm
The Queen’s Birthday Storm was a deadly low pressure system originating in the tropics near Fiji. It drifted south and collided with a high pressure system of cold Antarctic air that had stalled over New Zealand. In the Pacific, between N.Z. and Tonga, it intensified rapidly becoming a “bomb” that generated huge confused seas, up to 50 feet, and winds ranging from 65 to 100 kn.
During the days from June 1 to June 4, 1994, the storm caught a flotilla of cruisers headed to Tonga north of New Zealand. This resulted in the abandonment of seven yachts and the consequential rescue of a dozen or more sailors, as well as the loss of a family of three and their yacht, never to be found. The stories are quite horrific and there’s a good documentary on the storm.
Risky Rations
My friends were not only in the throes of the storm, they were thought to have been in the most intense quadrant and even passed through the eye according to Greg. They were rolled, dismasted, and had been knocked down once at this point. My friend was hand steering as the seas were too big at 50 feet to run under his Aries. He was hypothermic and hungry.
His girlfriend was opening a can of SpaghettiOs for him and let go of the can to get the opener. At that moment they were knocked down again. The can flew across the galley, or rather the boat flew into the can, and the can literally smashed open on the coach roof side. Think of the force behind the velocity of that can to smash open on the coach roof, and how seriously that could injure a person. A serious injury, especially at a time like that, could spell disaster.
The worst disasters start with the smallest thing and then spiral out of control.
How to Keep Items Safely Stowed
Every picture I’ve ever seen of yachts that have been in serious storms, that had been either knocked down or rolled, had huge, dangerous messes below decks, mine included. And every sailor I’ve ever talked with that’s been in a serious storm has mentioned the dangerous mess below decks. Often we hear of injuries caused by these messy conditions.
But all of this is easily avoidable with a few quick and easy cabinet hardware solutions that most of us handy sailors are already tooled up for and possess the skills to do.
Let’s have a look first at the poor hardware that I see on so many boats, and then we’ll look at these few, simple, quick and easy solutions for the replacement of this gear.
Learn to keep these cabinet doors, lockers, and hatches well closed so they keep things where they’re supposed to be, and alleviate the dangers of having a mess inside your boat.
Examples of Inappropriate Hardware, Latches or Closures
Tension Catch
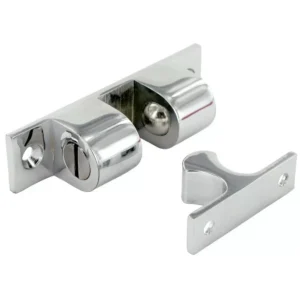
I call this a knob and ball bearing catch. Can be pushed open by things inside the space.
Finger Holes
Can break your finger. My biggest pet peeve.
Finger Holes With a Locking Mechanism Inside
Can break your finger and are ergonomically uncomfortable. No wait, this is my biggest pet peeve.
Elbow Catch
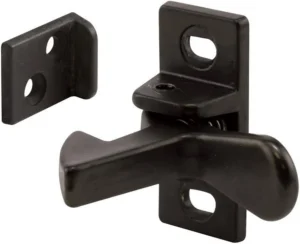
Can be opened from inside. They also are used inside of a door requiring the reach-through finger hole in the door.
Hold Down Clamps
I call these thumb latches. Can catch on your clothes, be flipped open, and you can hit your knee, elbow, or head on them.
Ring Latches
Can get stuck down, making them difficult to open. They can also stay up and catch your toes or flip up and catch your toes. Some have small tongues that don’t latch well and can break your finger.
Ring Lifts
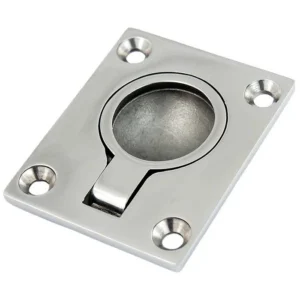
Can get stuck down, making them difficult to open. They can also stay up and catch your toes or flip up and catch your toes and can break your finger.
Hooks
Can flip open, have a sharp point, can catch your clothes, and can cut you.
Bolts
Can catch your clothes, flip open, and can get corroded and jam.
All of these pieces of hardware, or styles of fasteners and openers, can be replaced with one of only three types of latches, and are all easily installed.
Safe Hardware To Use
Turning Latch
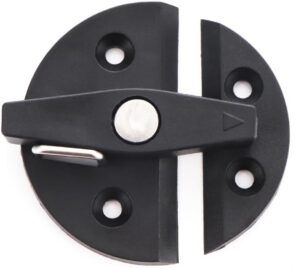
For inset doors, I like a very simple turning latch. They are two-part pieces of hardware. One piece is simply a catchplate; the other is the mechanism with one moving part. The catchplate goes on the operable door, and the locking mechanism goes on the fixed part surrounding the door.
When the door is closed, the mechanism is simply turned to stand over the catchplate, on which there is a tiny “nub” that keeps the turning mechanism in place, and the door is secured.
They are simple, strong, practical, and safe because they keep the door closed. They are also low profile, so they can’t catch on your clothes or knock your elbow, knee, or head.
You can usually find them sold in pairs or packages of four for between $7.00 and $14.00 USD.
Turning Knob
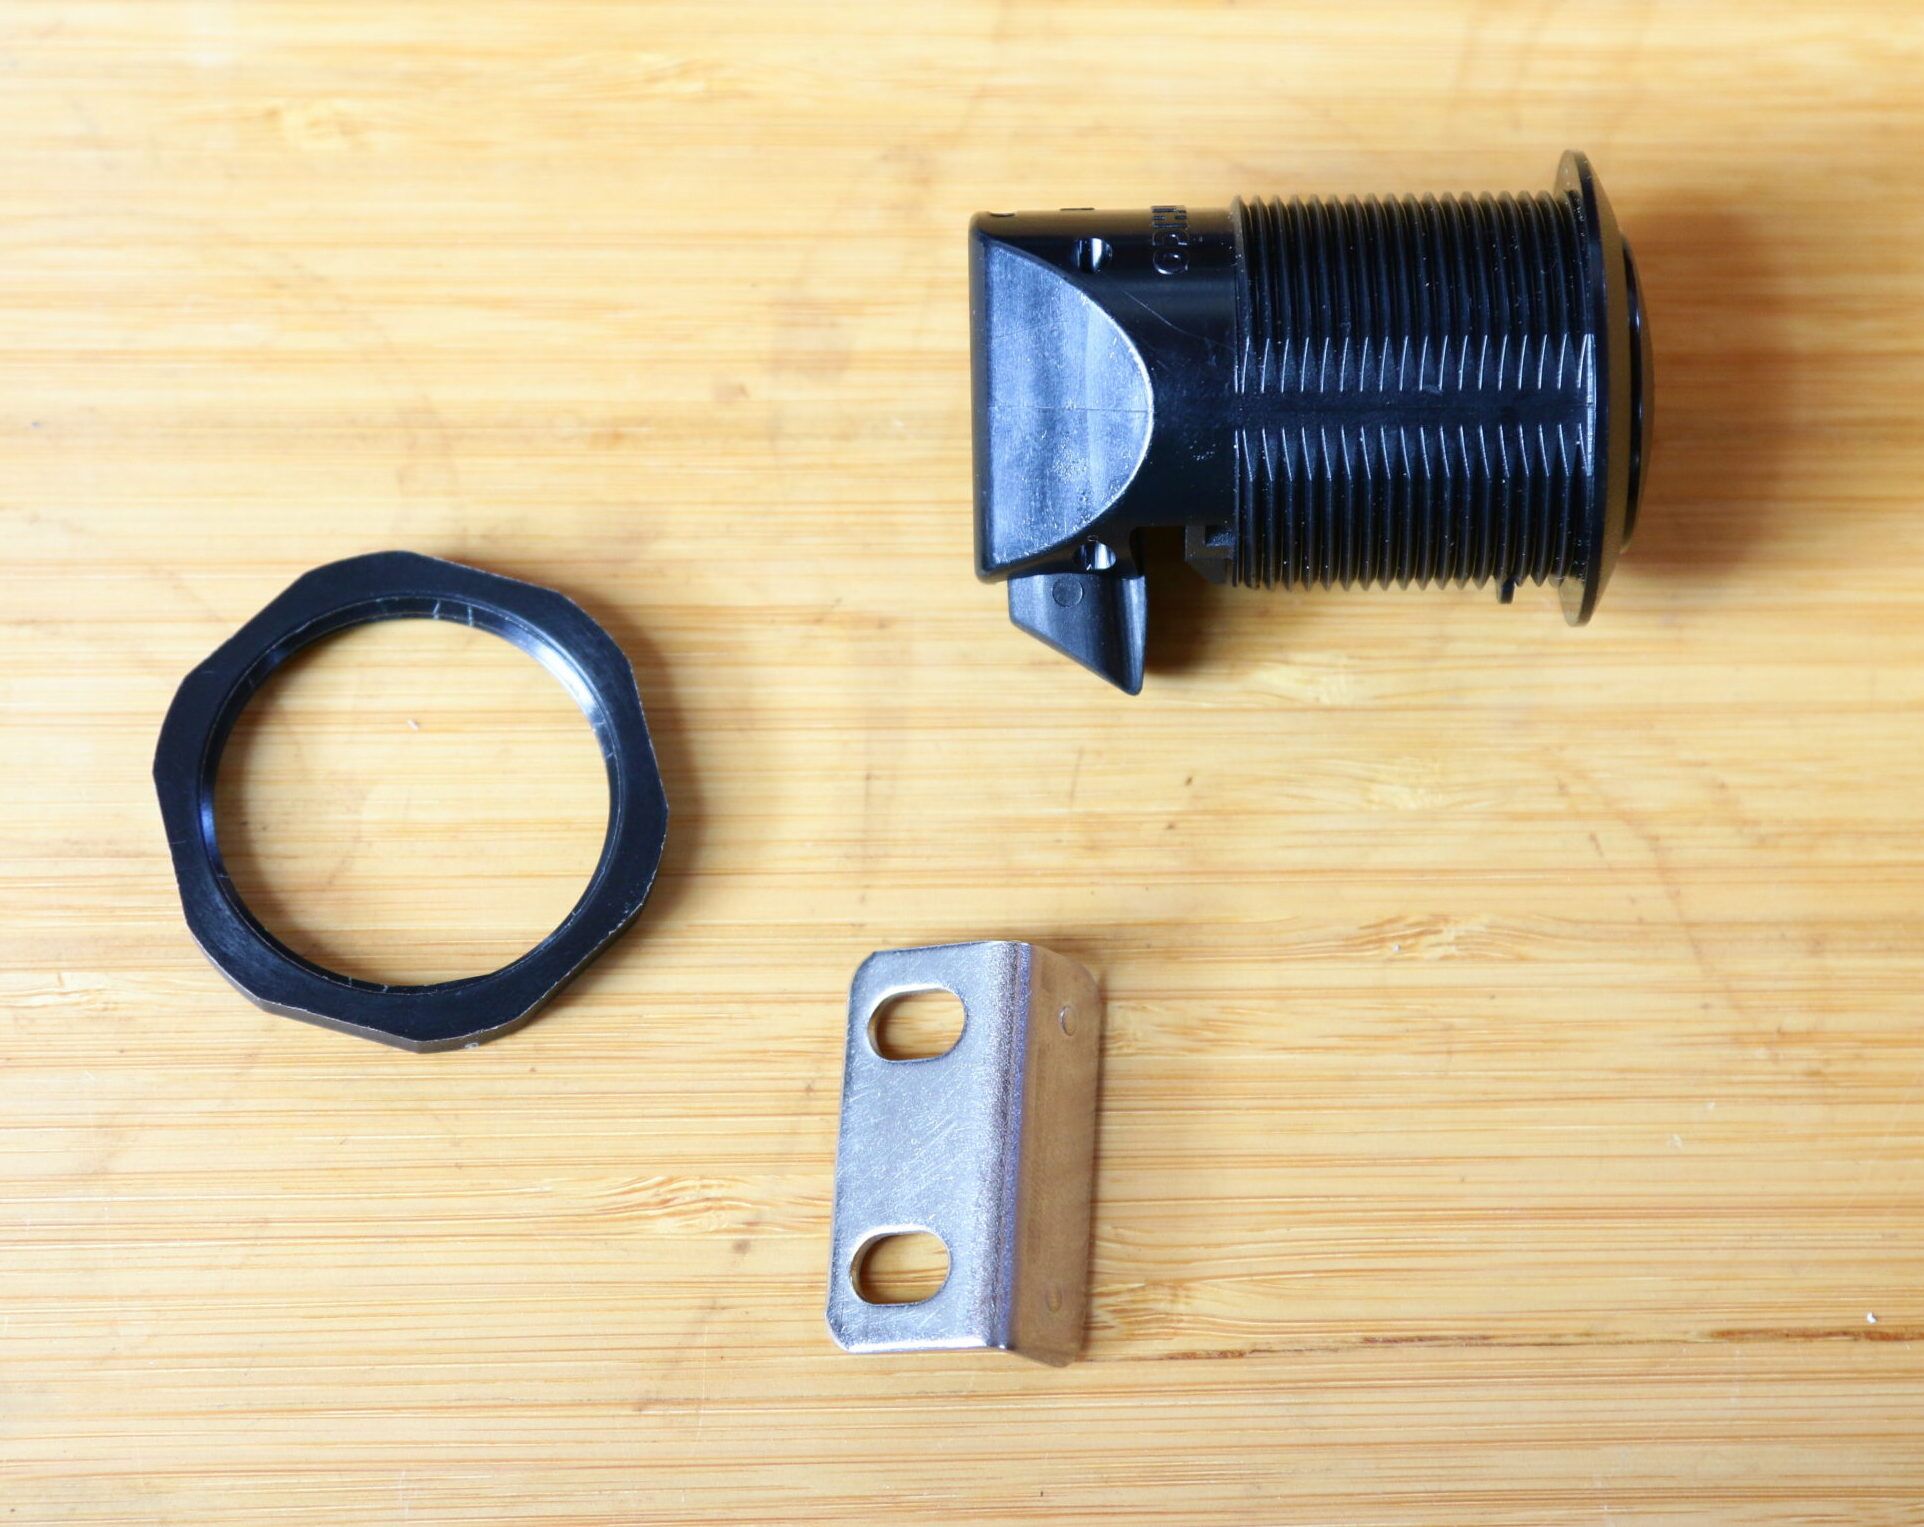
For overlay doors, I like a clever, flush mounted, push in, pop out turning knob. It has a tongue on the one end of the device that’s through the door, which catches on the provided metal catch mounted on the cabinet’s frame. The knob turns in both directions, is very ergonomically comfortable, easy to grab and turn, and when not in use, it pushes and clicks in to be almost completely flush with the door. Again, this eliminates the possibility of hitting your elbow, knee, or head on it, and it can’t catch your clothes.
They come in several materials, although I like the black plastic material best, partly for aesthetic reasons and partly because they won’t corrode. They are still quite strong.
You can find these singularly or sometimes in packs of several. They’re around $18.00 USD for one, and less per piece of course when buying bundles.
Quick Release Pins
Quick release pins are basically clevis pins with a ball bearing tensioned in their end that can be released with a push in button on the operator end. The operator end also has a flange to wrap your fingers around, and some have a small hole in the flange for a lanyard.
These are perfect for bypass doors, where you can drill a hole through both doors at the overlap, insert the pin, and both doors are kept closed. When open, the pin can hang right there on its lanyard, ready to be reinserted in the doors.
They come in several different pin diameters and lengths to fit nearly any application you might need them for, and are usually around $6.00 USD for one, but can be found in packs of multiples as well.
Lift and Turn and Compression Latches
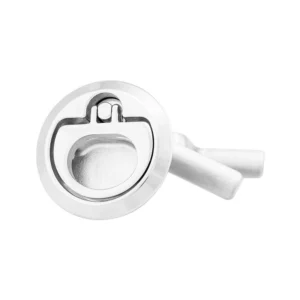
For hatches like those in the sole of the saloon or lazarettes above decks, I prefer lift and turn latches or compression latches, depending on whether they’ll be used above or below decks.
The compression latches are watertight, the lift and turns are not, and both can be bought in locking and non-locking versions. I prefer a non-locking latch for lazarettes, cockpit soles, or saloon soles. I prefer all hatches be easily and quickly accessible. Having a lock in between you and a piece of important gear could waste precious time if in an emergency. Of course for lockers, hatches or lazarettes in which one wants to store precious cargo, the locking ones make more sense. The latches fit into holes drilled at 2 in., 2 ½ in., and 3 in., and they fit with an almost flush finish.
Cons
They do have a pull up ring, which I’m not a fan of, but the rings are not tiny, and you only have your finger through them for a second to pull it from its indent; your fingers actually wrap around the ring to operate the mechanism.
Pros
They snap down and stay down well, and they will not spring up on their own. They are adjustable, have a long-threaded stem on which the catch goes, enabling them to fit a wide range of hatch thicknesses and can be adjusted to pull down quite tight.
These are made of stainless steel, and depending on which brand you buy, they are of high quality, so they won’t corrode. Corrosion causes rings to get stuck closed and become difficult to open when you need them most, or they risk getting stuck in the up position with the ring sticking up. I bought Gemlux, and I am very pleased with them. They range in price depending on what size and type, from around $75.00 USD to around $180.00 USD for the 3-in. ones.
Above-Deck Capabilities
Watertight compression latches are perfectly suited for above deck use in lazarettes and cockpit soles, where you don’t want any water ingress. These latches will cover most, if not all, of your yacht’s needs for securing hatches above and below decks.
Cost
Replacing this hardware on an average 30-ft. cruising yacht could vary in cost significantly depending on a few factors. The first, of course, is how many cabinets, lockers, lazarettes, and hatches you have that need hardware replacement. The second is whether it’s a DIY project or you’re hiring a marine woodworker to do the job for you.
DIY
As a DIY project, one could probably do a complete hardware replacement, including above decks lazarettes and hatches for between $600 to $800 USD. That’s assuming you already have well-closing cockpit and saloon sole hatches. If you don’t, make sure those are on your work list to retro-fit. Many people disregard their soles thinking they are heavy enough to stay put, or that they won’t be in a situation that could dislodge them from their position. But don’t overlook these hatches, they could become deadly if unsecured when in a violent seaway.
Professional
To have a marine woodworker complete the work for you would easily be double to triple the DIY cost, depending on where it is you live, and the difficulty or the extent of the retrofit on which the person needs to work. In the U.S., costs would be higher of course, than if one was say in Indonesia, where labor is considerably cheaper, yet the craftsmanship is excellent.
In my Crealock 37, the hardware has cost me about $1,200 USD and that’s for all my cabinets, lockers, and settee storage compartments inside, four lazarettes above decks, and my cockpit and saloon soles. I’m using nine Gemlux compression latches so my replacement hardware cost is high considering they’re the most expensive of the latches I’m using.
Depending on how you work, and your skills and abilities, these installations could be completed without everything on this list. However, as we all know, boat work always turns into an exponentially more complicated job than when first set out upon. When I’m starting a more extensive project I clear a good work space on which to spread out my tools. I prepare a bench of some sort to work on, pull out all my tools and prepare them for the tasks ahead. It might sound geeky, but it’s efficient. For one, you don’t waste time looking for tools. For another, having different dedicated tool and work areas means you’re not constantly clearing the tools from the area you’re working. The organization goes up, and the frustration level goes down. Organization and cleanliness considerably expedite the project, especially in a tight space.
Conclusion
I’ve always felt it’s important for things to be in their appropriate place, be it in the kitchen, in my woodshop, or in my car. I need to know where things are that are part of the task I’m performing, in order to operate efficiently, accurately, and safely. But this is never a more important practice than on my boat, because besides being more efficient, it’s much safer, and safety to me is the main goal to strive for when preparing a sailboat for voyaging.
Knowing where things are is the first task—keeping those objects where you put them is the second objective. When the gear you need isn’t where it’s supposed to be when you need it most, one element of safety is gone. But when it’s loose in the yacht, it’s an added level of danger that takes away from a safe sailing experience.
Check your cabinet hardware. Make sure it’s going to operate as you need it to. If it’s not going to suffice when the weather turns, change it out for the appropriate solution to ensure a safe ocean passage under any circumstances.







Nice.
I would add flexible/rubber draw latches to the list. The C7 series from Southco are common on boats and have many uses. Lazarettes and secondary security latches on front-opening fridges are two. Very secure. Larger versions secure the hoods and battery box lids on road tractors.
They are nice, I think the best part is they’re low profile. For me, I feel like they can be opened too easily by clothes catching on them, or just getting knocked from underneath. I have never used them so I’m only speaking from my looking into them when I was checking Southco’s fasteners. I think I wouldn’t use them in hight traffic area. Have you noticed them ever being opened accidentally? Thanks!