

Cleats are those ever-present little devices we all have on deck and, until a line must be tied, most boaters pay little or no attention to them.
However, if you’ve been boating for a while, you’ve certainly tied your fair share of lines to cleats, whether these were on your boat or on other people’s boats. In doing so, I’m also sure you’ve seen cleats that were well located—they provided convenient attachment points for a multitude of uses, from sheets, to mooring to towing the tender, etc. But at times, we’ve seen cleats that were impracticality located or simply missing where one should be.
Mid-Cockpit Cleats
One frequent example is cleats that are located about mid-cockpit, usually close to a winch. These are often located there to cleat a foresail sheet coming off a (non-self tailing) winch while sailing, and then used to tie the boat abeam to the dock.
While this is not a bad thought, it is certainly not a great one. If you always tie your boat along side a dock or on a finger pier, that may work. However, if and when you need to berth or tie your boat “stern to” the dock, wharf or wall—often called Mediterranean mooring—having your back cleats at mid cockpit, away from the stern, will make your boat vulnerable to excessive side-to-side swaying outside your designated berth space. It could also possibly cause your boat to hit and damage the neighboring boats, especially in stormy and/or windy conditions. Of course, fenders are helpful, but can only protect so much.
Towing Points
Also, not to be neglected, are occasions when you may need to tow a tender or another boat in need of assistance. I’ve often seen boats pull other boats with the line(s) tied to the stern pulpit because no stern cleats were present. Pulpits, albeit strong, are not really designed or secured (back plated) adequately to have and maintain a constant load. They are especially not made for towing, when the constant shock from the pulling and slacking of the boat being towed creates changing tension, which can very easily and quickly damage the pulpit’s attachment point to the deck or simply bend out of shape.
One piece of equipment now found on more modern sailboats is the addition of self-tailing winches as standard equipment. This means that cleats no longer need to be located near the aft winches. This in turn means that cleats can now be installed on the true stern, where they will perform a much-improved role in properly securing the boat. This more practical location also allows for tying and towing the dinghy without any line interference in the cockpit.
Install Backing Plates
Whether you decide to move your cleats or add new ones on the proper stern, it is important to select a location that will provide you access to insert a strong backing plate. Do not even think of simply drilling a few screws to install a cleat. I can guarantee it will not hold or last long.
Instead, get as large a stainless-steel backing plate as you can find and fit, use 3M 4200 (or similar) to position and glue the backing plate while securing the cleat to the backing plate with properly sized 316 stainless-steel screws and nuts. If a backing plate is not possible, be sure to install stainless-steel washers, as large and thick as you can fit. Make sure to add 3M 4200 inside the drilled holes to protect the core from any water penetration.
To reduce clean up time, provide a professional looking finish, and protect the surrounding deck, use a pencil to mark the outline of the cleat base and mask off outside of this area. When ready to install and secure, add a little 3M 4200 under the cleat base beforehand. This will result in a very strong, secure and watertight installation. Do not forget to add some red Loctite on the end of the mounting screws for the nuts to stay tight.
Install Fairleads
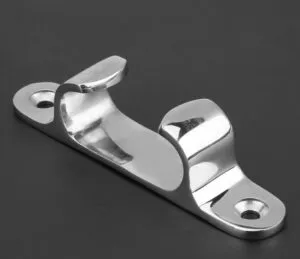
If adding new cleats is not an option, adding fairleads is a viable, easy and inexpensive alternative. The fairleads can be installed as far back on the stern as possible, which allows the mooring line to pass through the fairlead and lead to the existing mid-cockpit cleat. A good quality fairlead will protect the line from chafing as well as keep the line from rubbing on the gelcoat. Just make sure you test the installation location first, making sure the line can reach the fairlead from the dock and forward to the winch without any obstacles.
To install the fairleads, follow the same aforementioned installation process used for installing a cleat.
Spring Lines
Now that we’ve looked at stern lines, let’s consider spring lines. I see many boats that have no proper location to tie a line at mid ship. Hence why we see many boaters using the lifeline stanchions or cabin top handrails. These are not necessarily bad locations if staying onboard or tying up for a short time, and the wind and waters are calm with no risk of incoming wakes from other boats passing by.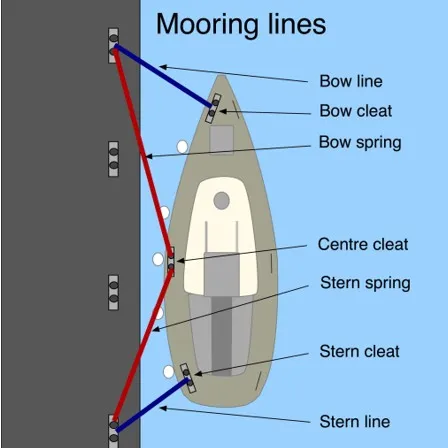
Spring lines, when properly set, will prevent or at least minimize the boat from hitting the dock or wall and limit the fore and aft movement in bad weather, high winds and storms. Spring lines should always be used when docking in tight or busy areas. Counting on the stanchions to assume these lateral loads under severe or extreme conditions would not be wise.
Aluminum Gunwales
Some boats have aluminum gunwales with holes all along the length of the boat. These can be used to add spring lines as well. However, prolonged exposure can quickly damage, even cut, the line. If using this as an attachment point, it would be best to start by adding a proper sized shackle to the gunwale then feed the spring line through the shackle. The rounded edge of the shackle will help reduce wear on the line.
Focus on Proper Tying
Another habit I often notice is how people actually tie their boat—some are pretty funny, if not bizarre. Laughter aside, many cleat their lines with a certain lack of concern, or perhaps awareness, of how quickly their lines can be released in case of any emergency. I’ve seen people put on so many twists and turns on cleats; it will only make releasing the lines that much harder and time consuming. Add some extra lines that are tied with knots to handrails, gunwales, etc. and you can have a pretty serious problem on your hands if leaving the dock quickly is required, which can be made even worse if shorthanded.
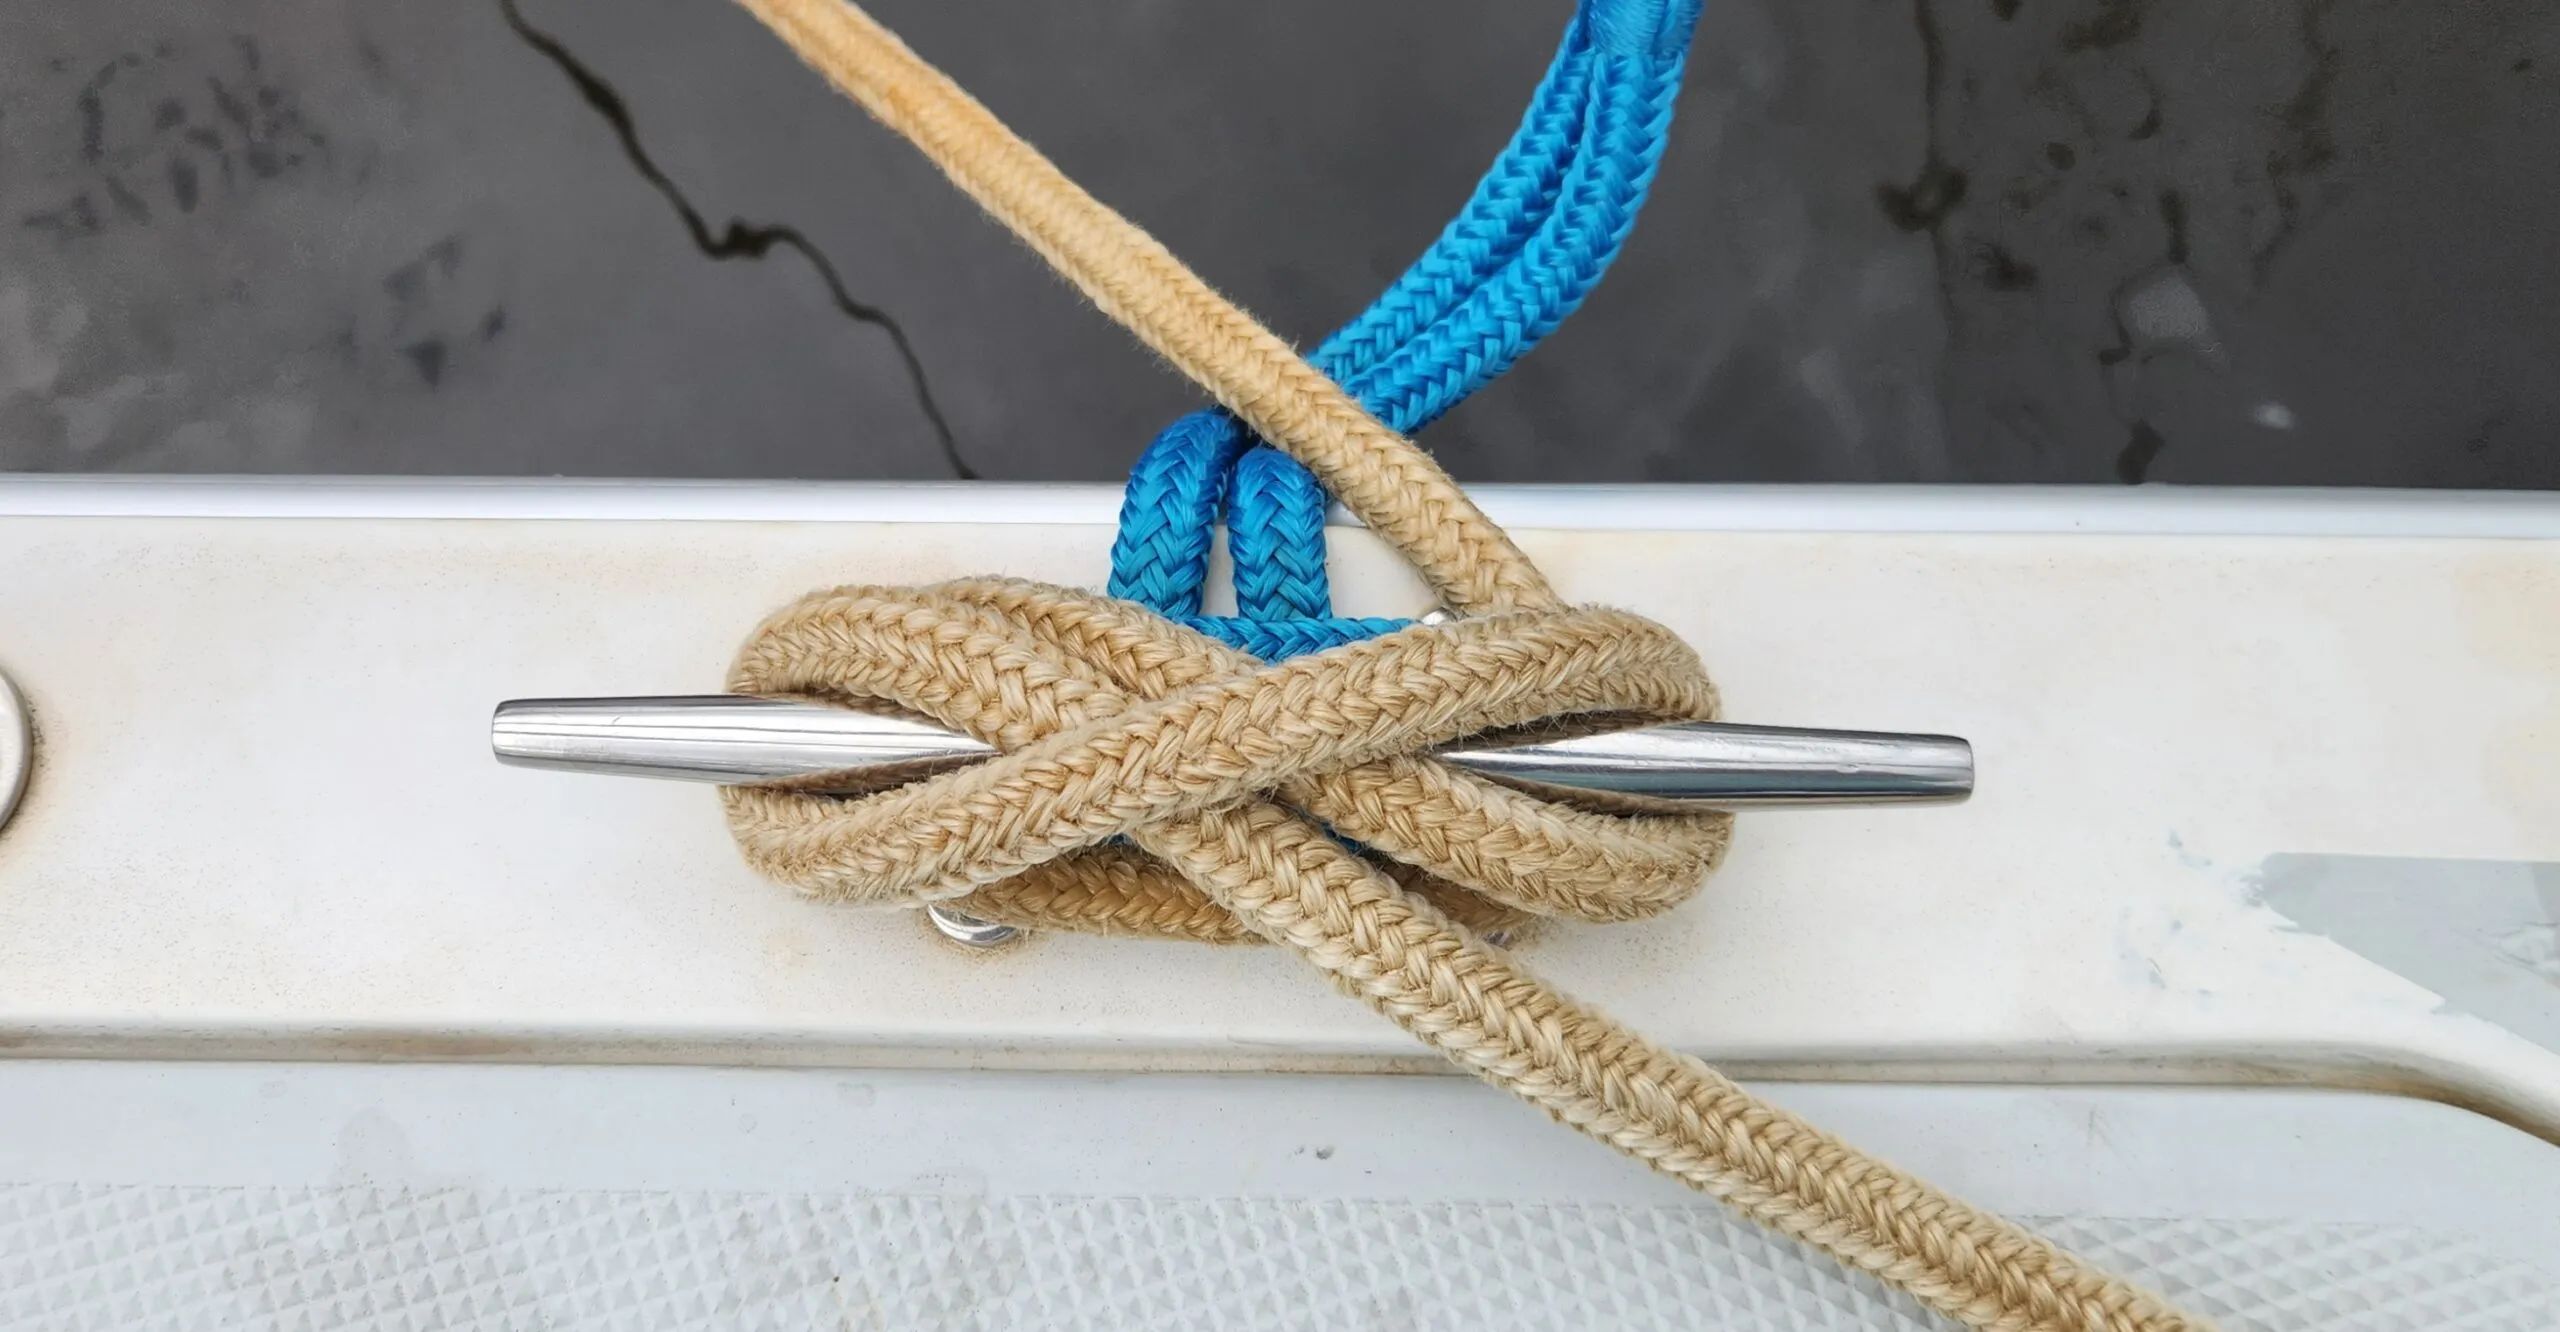
For more about how to properly cleat or tie a line, see “How to Cleat Your Lines Properly.” Everyone on board that is part of the crew should learn how to do this well. I know I always double check any lines that were handled by others, and have often had to reset them.






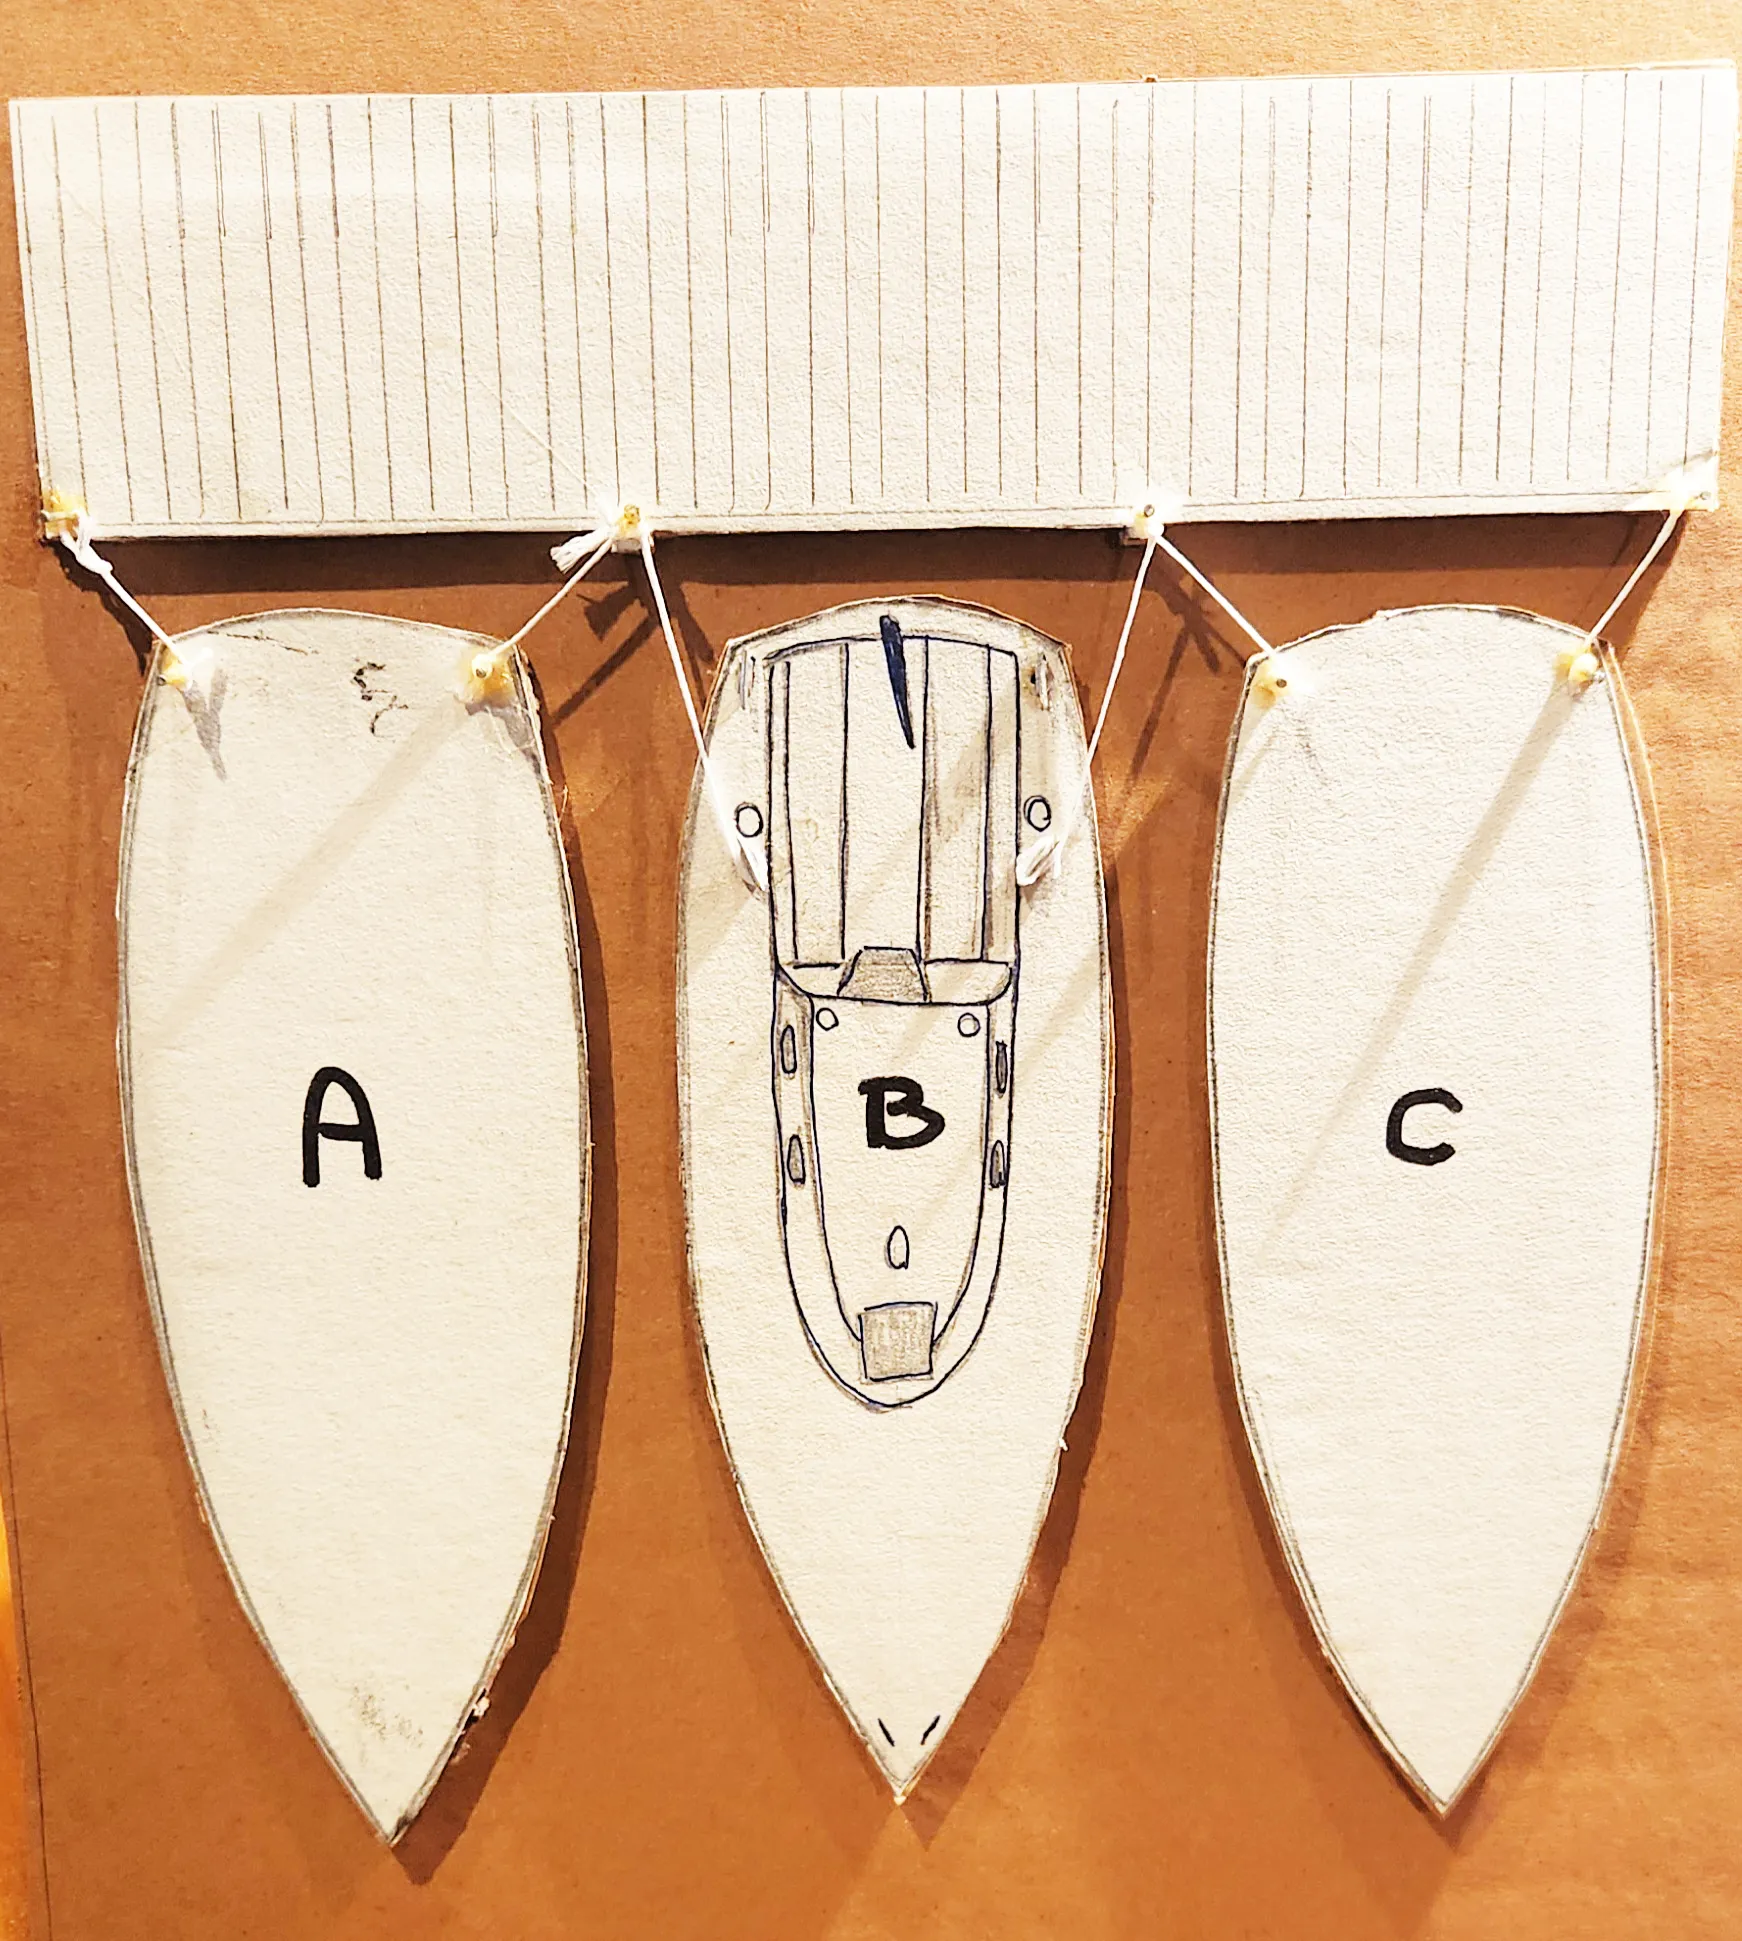
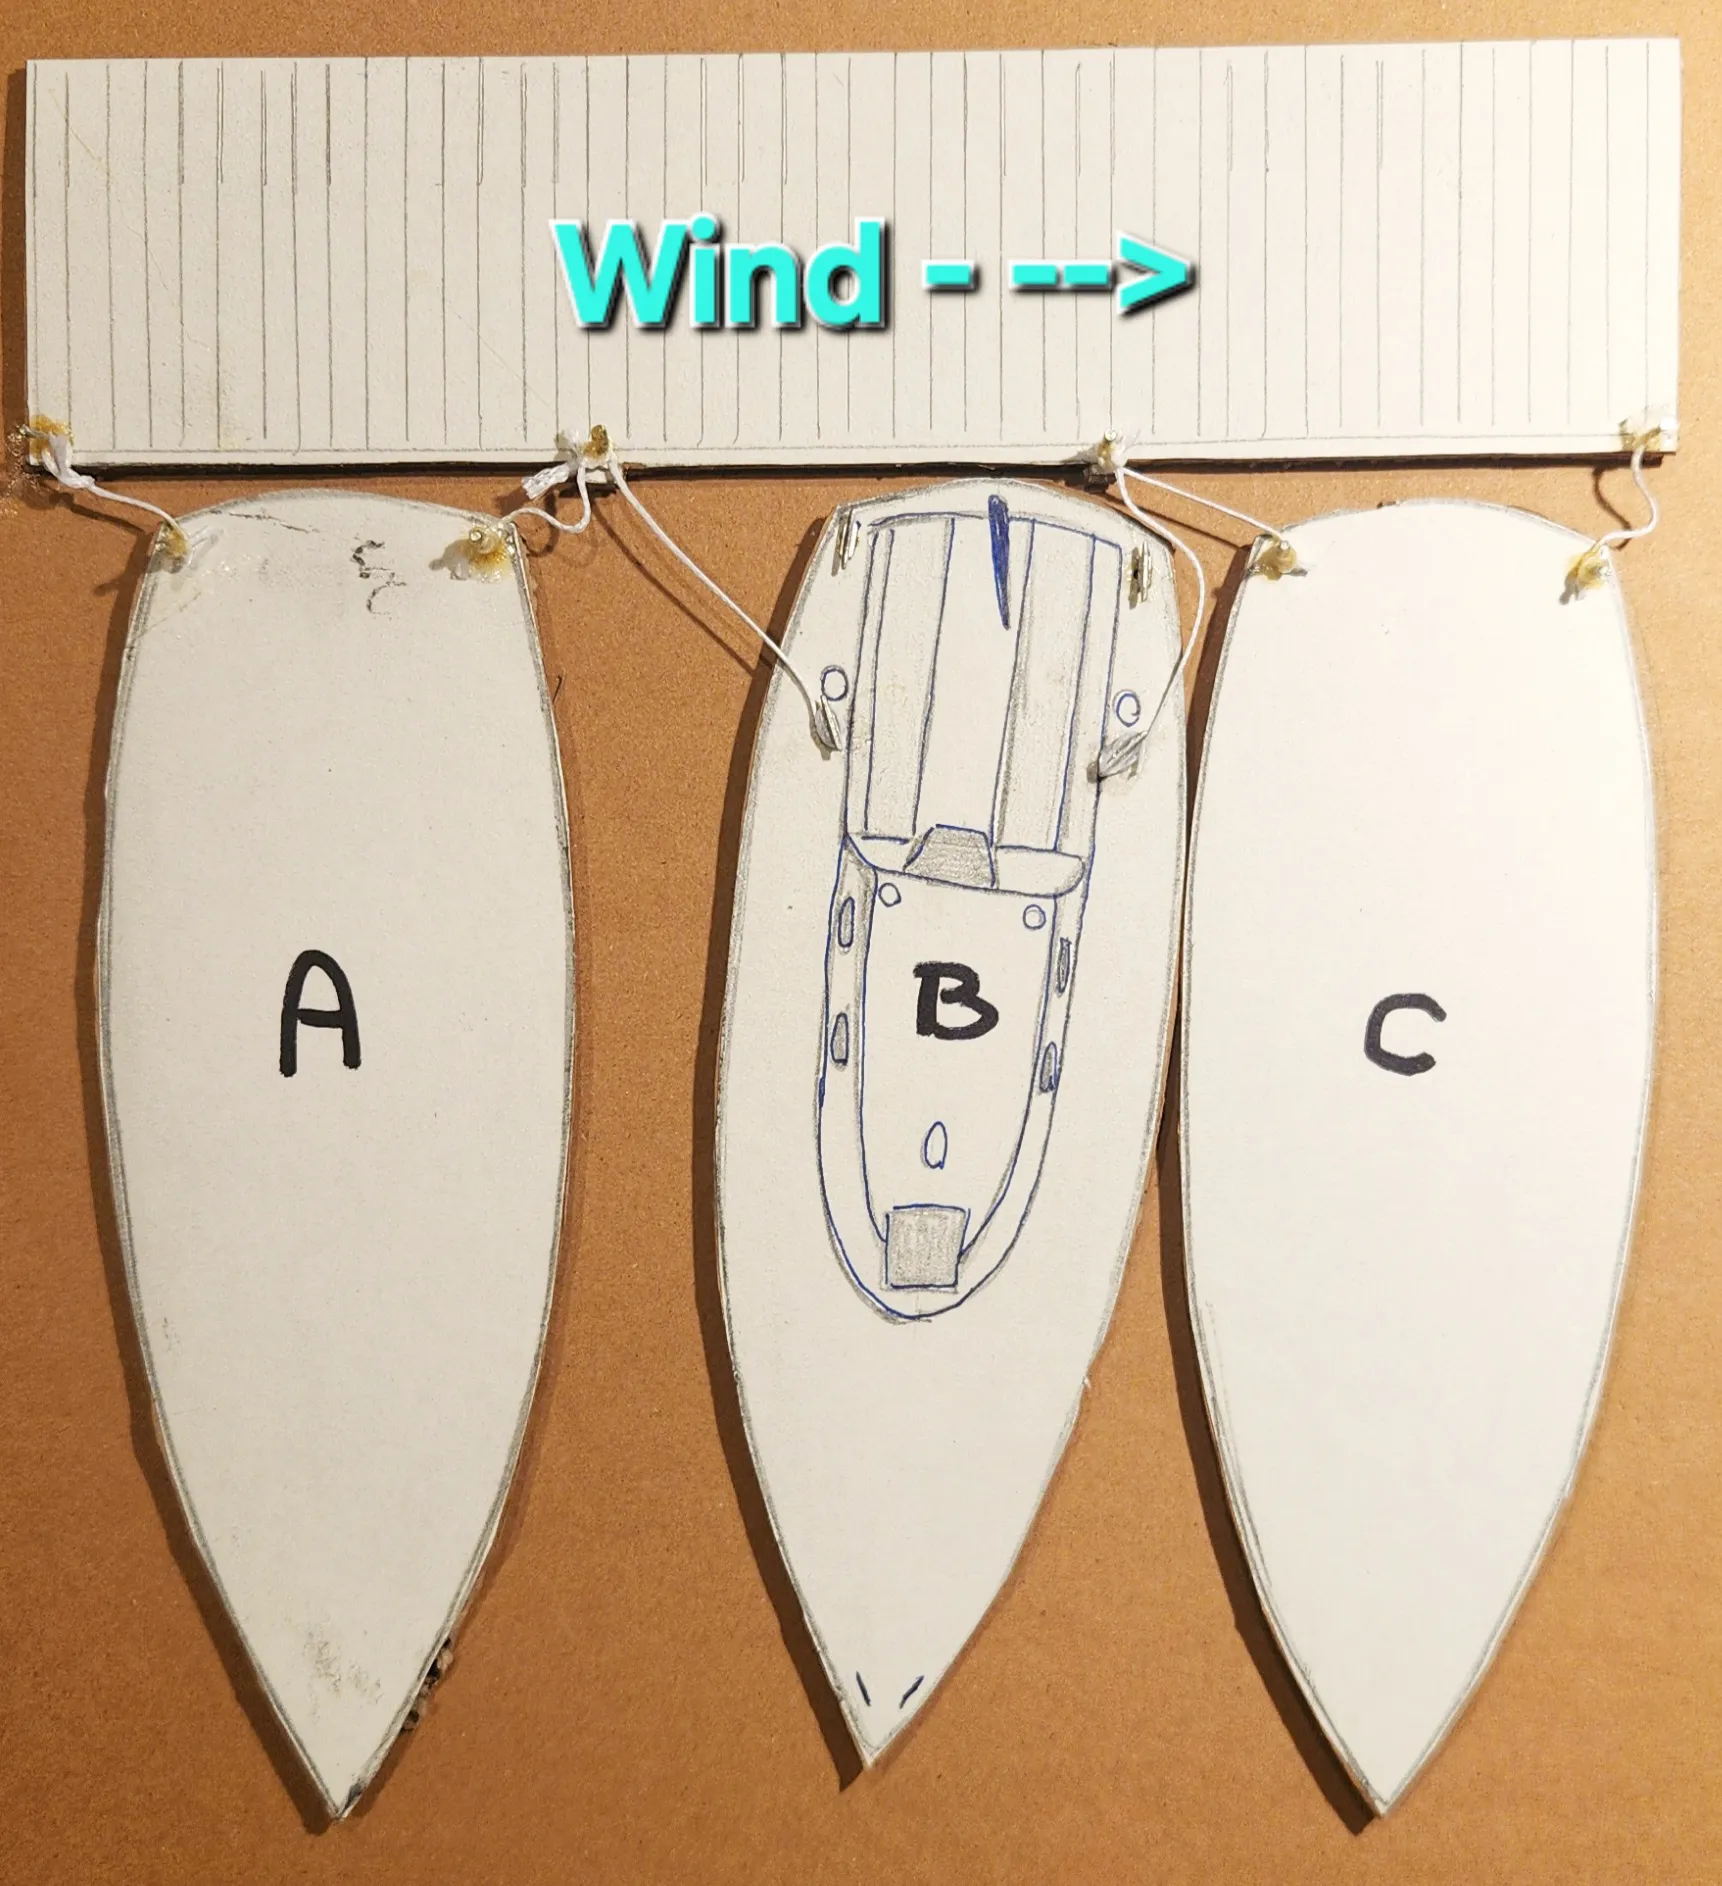
It might be worth mentioning that these are primarily methods for floating docks and areas with very limited tides. A boat tied up like A or C, along most of the Atlantic seaboard, would hit the dock twice each day.
If there is a significant tidal range, the stern lines need to be cris-crossed, and the bow and stern lines should be led to the outboard side. This increases the length of the lines, allowing for more vertical movement without causing lateral movement.
Additionally, fenders alone don’t really work when moored to pilings against a tidal bulkhead. Fender boards can slide up and down without being pushed out of position.
Sharp angles through fairleads can really chew up ropes if there is any surge. You need chafe gear, and even better, to align the fairleads with the direction of pull so there is only a small deflection. I stopped using the fairleads on my current boat, they are so poorly located. The lead straight from the cleat is very often better. This is true on many boats. Add a smooth stainless chafe rail to the deck as needed.
Hi Drew and thanks taking time to add your valid comments. However, as you know, no two docking situations are the same. However, I do think the main objective of the article has been met, which is to consider where your cleats are located and ask yourself if moving or adding some to a better location.
Absolutely! I’ve seen some very strange, dysfunctional locations. The lack of spring cleats is also too common.
Great article! It’s worth mentioning that standard nomenclature for spring lines names them:
1. What part of the boat they are coming from
2. Which direction they are leading
Therefore the line labeled “bow spring” in this diagram is a “midship forward spring” line.
A bow spring would exit the bow and could go forward (“bow forward spring”) or lead aft (“bow aft spring”)
The line incorrectly labeled “stern spring” in the diagram is leading from midship and going aft. It is therefore a “midship aft spring”. A stern spring line will lead from the stern of the boat and often go forward as a “stern forward” spring line.
Thanks for reading and taking time to add a comment and precisions Jennifer.
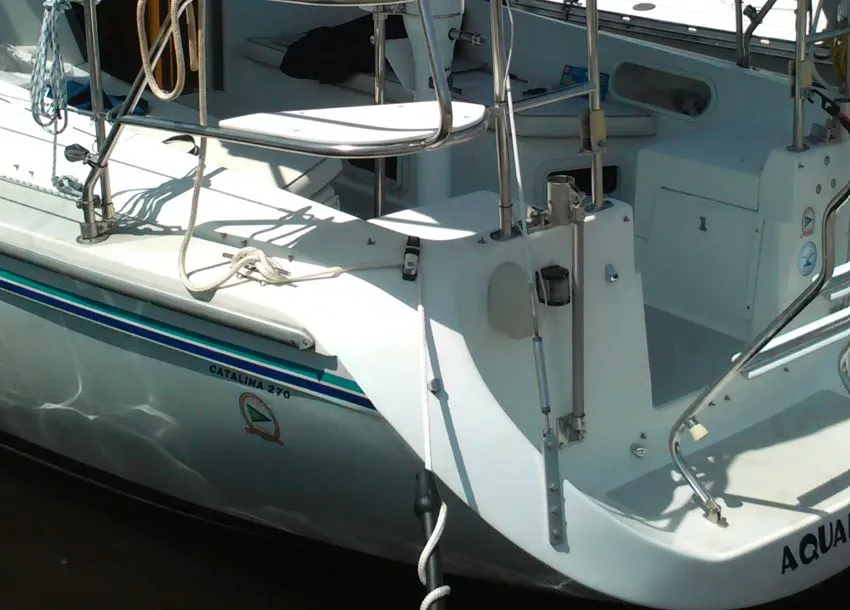
What is the purpose of the fairleads on the stern of the example boat? They don’t seem to be adding any value in the application shown. It appears that leading straight off the cleat would be just as effective. Am I missing something?
As far as the naming of spring lines, I like the convention that John Harries teaches: “forward running spring” and “aft running spring”. You only have to look at the line and see what direction it is going and not where it’s attached or what its job is.
Yes, what were they thinking with that stern cleat? As tied, it just adds a serious chafe point. I have a pair like that I don’t use.
If the lines were cris-crossed, as they would be at a tidal dock, the sternlines would rub on the split backstay. Another example of poor cleat and chock location.
Look how much fun the cleat is to reach, for something you use every day.
Too little thought or consideration is paid to mooring, even though boats spend nearly all their lives at the dock. As Mark points out, cleat and fairlead location should right up there with a strong keel and a good mast step, and way above upholstery selection and cup holders. I’ve been lucky to own boats with good locations.
I’m not sure red loctite is appropriate. If for any reason you need to remove the cleat you either then need to destroy the fastener and risk damage to the deck, or use a torch, which for most boats is a non-starter (unless it is a steel boat). Blue loctite and a nylock nut, or with properly sized and installed lock washers, would be my choice, it is very very unlikely to loosen but could, if necessary, be removed with significant effort.
Thanks for that input Maththew. Blue lock tite would be a very good choice as well for the reasons you mentioned.
To avoid ‘starcracks’ in gelcoat around cleats, fairleads, & or any other stressed fittings, take a reinforcing pad to a ‘stiff point’, like a gunwale, style line, & or similar ‘strong point’. Take the reinforcing pad, (made of anything non-corrosive, rot resistant, & or stiff). If U already have ‘star cracks, spiders, etc’., (& who doesn’t), I found, (in 60 years exp.), U have them, permanently. The ‘good books’ say how to fill, fair, paint etc. but I found the best I could do (permanently), is take the tops off the cracks, to make them less obvious. Painting is only temporary, sanding doesn’t ‘flatten them’. A panel beater’s (dent remover’s), ‘filler’, (bog, mud, bondo) ‘file’, takes the tops off the gelcoat cracks, & makes them less obvious. That was the best I could hope for. ‘B J’. Australis, (hence the different terms).
Thanks for those details BJ.
This winter, I learned (it started moving) that my bow cleat was installed in a cored deck, that the core was not sealed, and that there was no backing plate (only distorted fender washers). Not a fun place to recore, since I did most of the work from inside, but it wasn’t my first rodeo. At least the old bolts were easy to get out, since they were wobbly! Now it’s solid glass and a big backing plate.
I can only imagine the contorsionnist positions you had to suffer through! Lol..