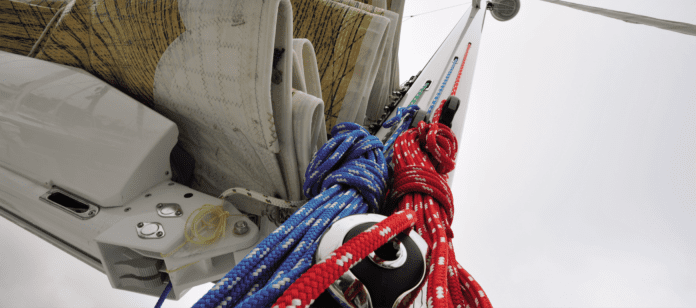
In time, even the best cared for halyards need replacing. Sailors using high-modulus single braids or exposed core halyards often replace such costly and vulnerable ropes while in winter storage with either a retired halyard, or an inexpensive messenger or mousing line. In the spring this replacement line is used to pull the good halyard back into place or install a new halyard.
The new halyard can be attached to the messenger line by sewing the ends together, which can also pull apart unless expertly done. They can be taped together, which is asking to lose the halyard inside the mast. Every spring someone in my marina loses a halyard; you can hear the sobbing rows away. Or you can connect them in a seamanlike manner with reeving splices. And that’s what this article is about.
Because the line thickness cannot be increased without the risk of jamming, you want to use only halyard cover to make the line-to-line connection.
Whether making a conventional eye splice or a sewn splice, the connection described here can be as much as 40 percent as strong as the line itself, so for the purposes of pulling a new halyard into place, it is virtually impossible to break.
To save a little time and create a more flexible splice that will feed over sheaves and through even the tightest gaps without worries, we illustrate here how to make a reeving eye—a compact eye splice with a slightly shorter bury-length (the distance that the rope end will be “buried” back into the rope) and with additional stitching to seize the splice in place.
With a working load of 400 pounds, this shorter splice is more than strong enough for pulling a new halyard into place. The spliced eye is a smoother, prettier, and easy to do in new line. Splicing old line is more difficult, so we often sew those, and using a sewn end-splice instead of one that is tuck-spliced is still completely reliable. All stitching described is done with doubled waxed #4 whipping twine, and assumes that we are using a ½-inch diameter halyard.
REMOVING THE CORE
First secure the cover to the core with an overhand knot several feet from the bitter end. If the bitter end is melted or whipped, cut that off. Milk the cover up toward the knot, and remove the core—remove 20 inches for a bury splice and 8 inches for a sewn splice. Trim the core square for a sewn splice. For a spliced eye, cut the core diagonally so that you create a long tapered end that won’t create any bulges when you bury it in the cover during splicing.
SPLICED EYE
Insert a wire fid (Marlow rigger’s needle, Ronstan D-Splicer, Toss Wand, etc.), or simply a 30-inch length of rigging wire bent in half, into the cover where the core taper begins. Exit the cover 12 inches from the end—a little less than half way toward the end.
Taper the cover by cutting on an angle or removing about 1/3 of the strands from the last 1.5 inches. This makes it easier to pull the tail inside the cover if using a wire fid. Secure the end of the cover in the wire fid and pull it back inside the cover to the exit at the core overlap. Bunching up the cover will make it easier to pull the cover inside, and twist as needed.
Now here comes the magic. Remove the fid from cover, form a compact eye, and then stretch the cover back out, milking the tail of the cover partially back inside. Determine the correct tail length to overlap the core taper, bunch up the cover, trim, and milk the tail inside. Ideally, there is no increase or decrease in diameter where the tapers overlap.
Place 10 lock stitches (not too tight) in two rows at the eye end to prevent the splice from shifting when not tensioned. A hollow fid can also be used for this splice, pulling the tail in the reverse direction.
SEWN EYE
Making a reeving eye with stitching alone is a little simpler. Pull the cover until it extends 8 inches beyond the core and fuse the end with heat, flattening it in the process. Fold it over double, until it ends at the core bump. Stitch an eye (about 25-35 snug stitches in two rows), continuing the stitching over the end of the cover to hold it flush and about 2 inches over the section with the core.
To use a reeving eye to feed a new halyard, make a reeving eye in both lines —the line being used to feed the new halyard and the new halyard—and lash them together with about 4 loops of doubled whipping twine, tied off with a square knot.
Some might call this approach overkill, but you will use them frequently, especially if you remove your halyards during the off-season. You can often order halyards with ends pre-spliced for reeving at little or no extra cost.










A few pictures, or even better, videos to illustrate the technique would be extremely valuable.
Agreed. I feel I could learn more on YouTube.