


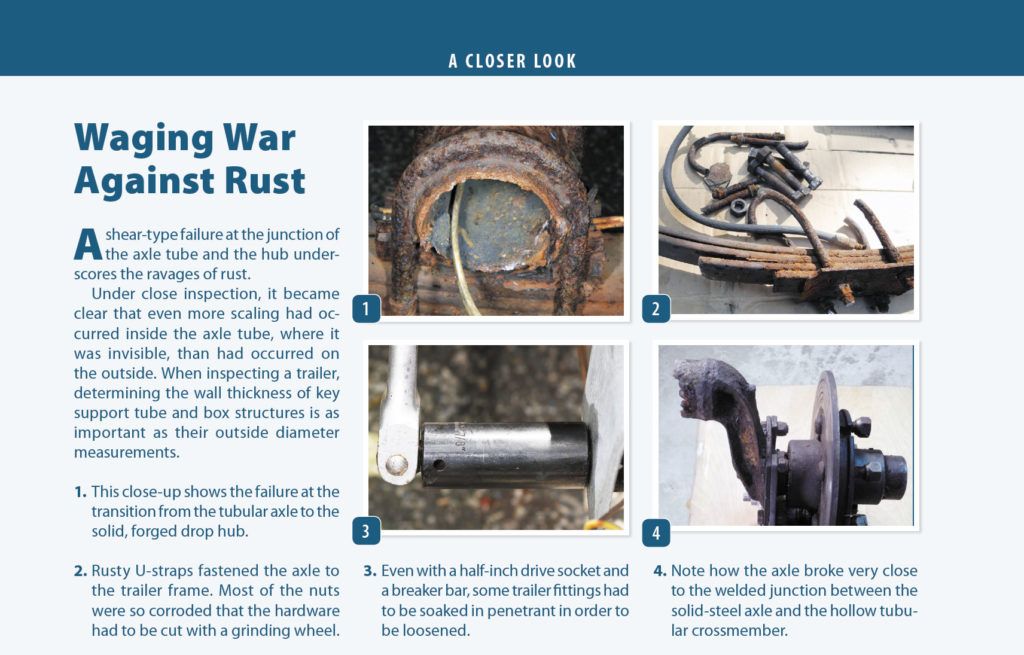
Over the years, weve stressed the importance of keeping a close eye on stainless-steel sailboat hardware and why pitting, crevice-corrosion, and galvanic action are the enemies. But we may have downplayed the need to be aware of how plain old ferrous-metal oxidation comes into the picture. Mild steel and high-carbon steel are even more prone to corrosion, and despite the fact that the oxidation is far easier to spot on these metals, this ticking timebomb somehow gets ignored.
Last summer, Practical Sailor Technical Editor Ralph Naranjo got a firsthand lesson in what happens when you ignore these obvious signs. It was a perfect summer day when he backed his Cape Dory Typhoons trailer into position at the local ramp and heard an odd sound. The wheel hub spindle had sheared off the axle tube, leaving the trailers left wheel with an unmovable list and leaving Naranjo blocking the community launch on a Friday afternoon. Had this happened on the highway, or even when traveling on a local road at 30 miles per hour, the consequences could have been dire.
Naranjo reached for his tools, and his wife, Lenore, reached for her cellphone. It quickly became clear that there was no simple repair that he could implement quickly. Fortunately, Lenore found a local service station with well-equipped tow truck, and they solved the two initial problems for $150. The towers arrived with a four-wheel, dolly-like carriage that was quickly clamped into place under the existing axle, replacing both the missing wheel and the functional one on the opposite side. The Typhoon was launched, and the broken trailer was delivered to the Naranjos driveway.
The next step was to determine whether the trailer was worth repairing, and if so, whether it was a do-it-yourself job or needed to be handled by the local trailer repair shop.
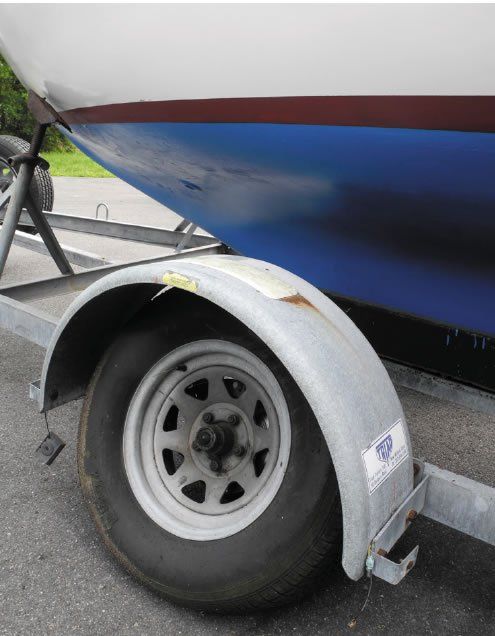
The single-axle Triad trailer was about 20 years old, but the hot-dipped galvanized frame was in good shape and showing no sign of rust. The axle tube and leaf springs, however, were quite rusty, and the hubs and spindles certainly had felt the years of immersion in salt water, not to mention the mileage.
Naranjo quickly realized that rather than trying to refurbish these components, replacement was the most sensible option. By replacing the entire axle, hub, and spring assembly, the old but quite sound frame would become a like new trailer. He ordered a complete axle assembly that included leaf springs, axle (cross tube and spindle arms), hubs, and all new links, plus bolts and Nylock nuts from Triad. Because the original surge-brake system is no longer part of the trailer setup, the new axle assembly is far less complicated to install.
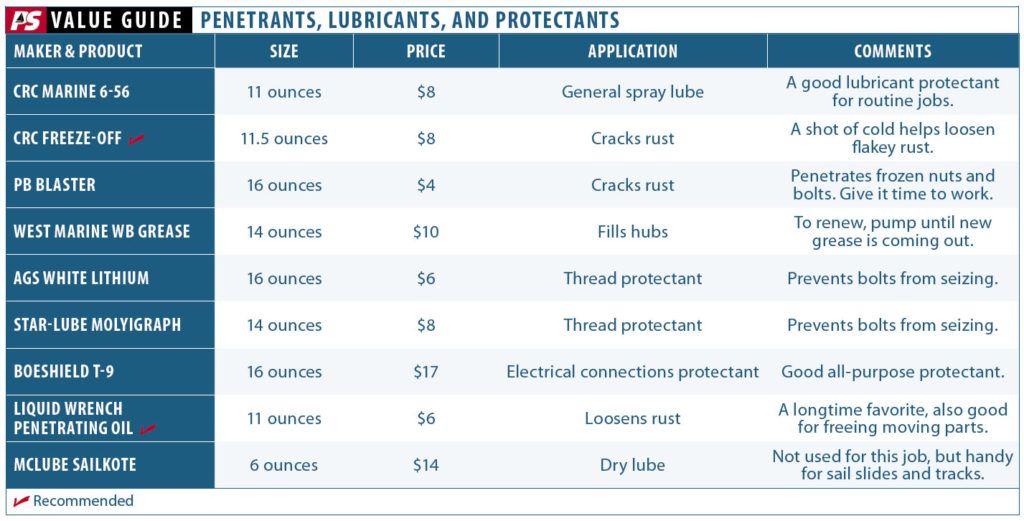
Corrosion complicated the disassembly of the old axle-mounting hardware. Heavy-duty, U-shaped clamps held many parts to the frame, and a good set of half-inch, drive-deep (six-point) sockets and a breaker bar proved their worth, as did a full array of light oils, penetrants, freezing sprays, a propane torch, and a die grinder. Protective glasses and leather work gloves also proved to be of value.
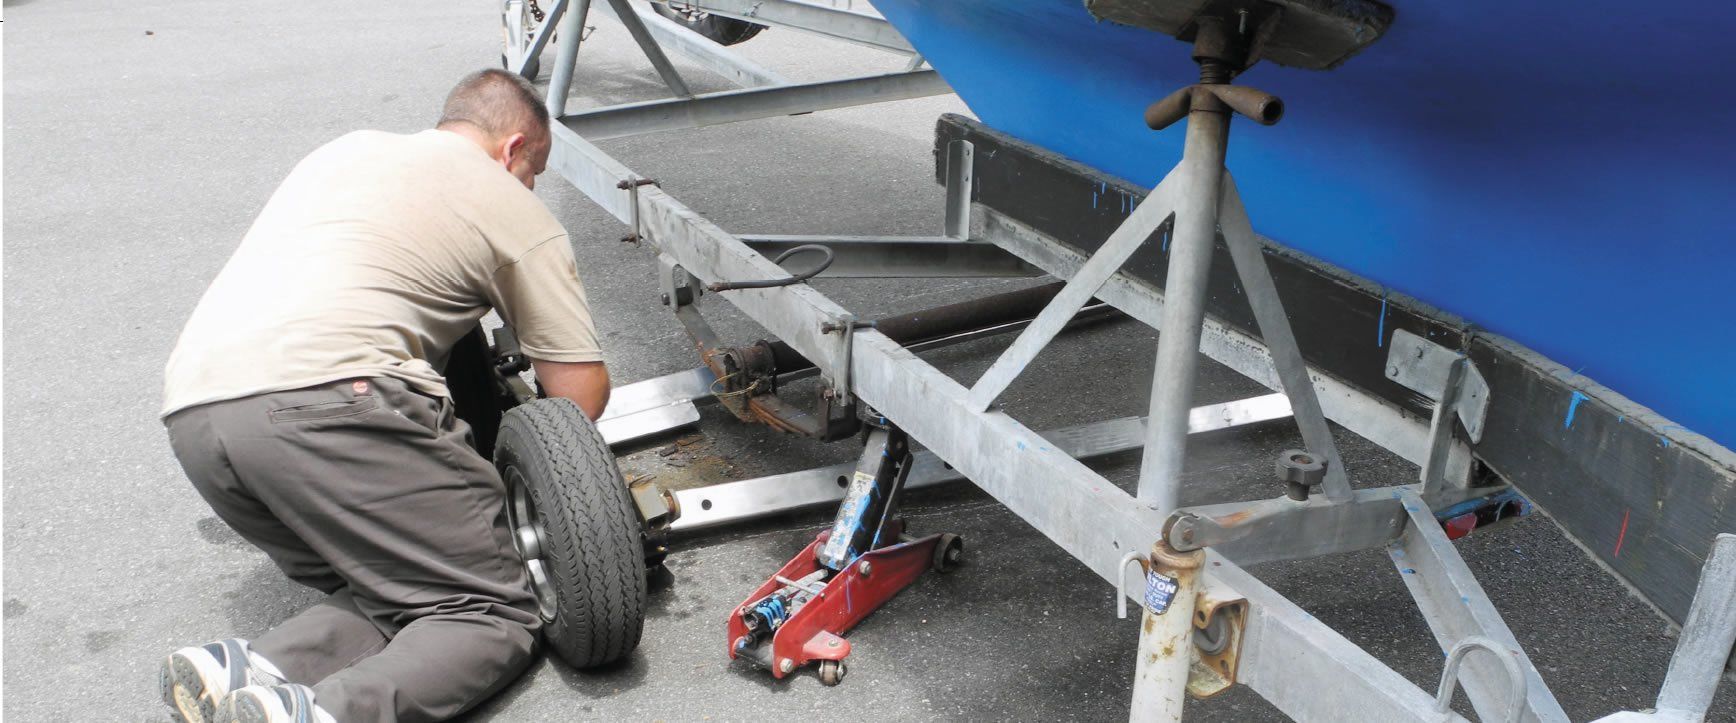
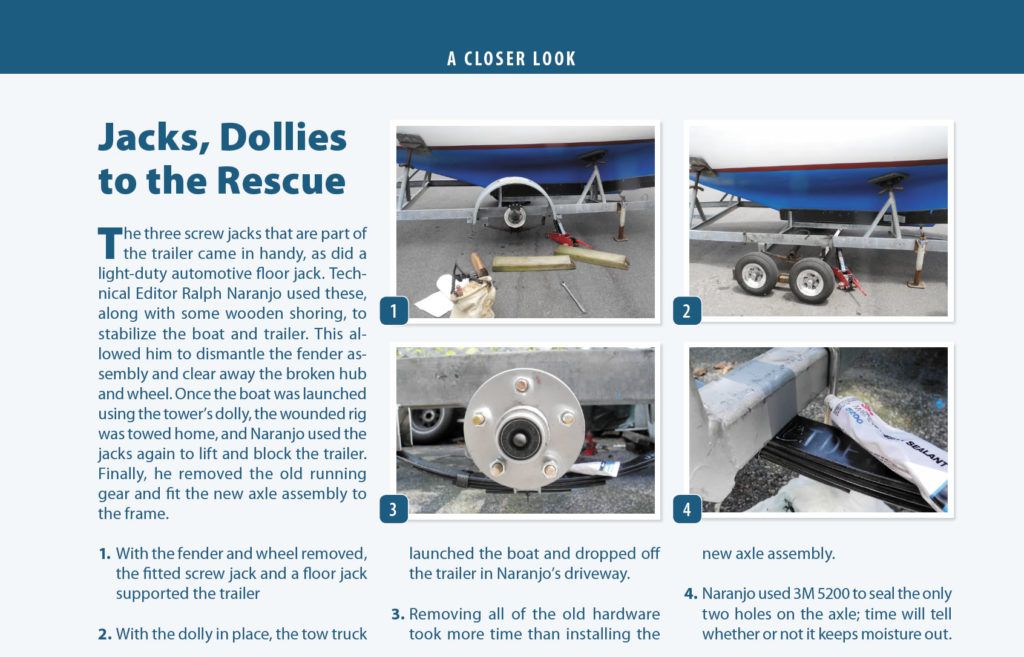
With the boat off the trailer, Naranjo used the three screw jacks (already attached to the trailer) to lift and support the frame as he tackled the axle removal process. He began by loosening the clamps that held the fenders in place. Both box/open-end combination wrenches and deep sockets on a ratchet drive came in handy for this job. The task was made easier by dousing the clamps several times with Liquid Wrench the day before attempting to loosen the nuts.
To free the U-shaped clamps that held the axle to the leaf springs, he swapped wrenches for a die grinder and cut off the clamps. The trick was to cut from an angle that did not allow the axle assembly to roll and pinch the grinder.
The leading end of the leaf spring was bolted to tangs welded to the trailer frame, and removing this corroded bolt was the most challenging part of the ordeal. Even with penetrants, cold, and heat, the reluctant bolt took an hour to remove. Once all the old suspension gear was out of the way, Naranjo looked closely at the welded fittings that held the leaf springs-the welds were intact and free of corrosion. A new axle and springs would rejuvenate the trailer.
Naranjo laid out the new gear that hed ordered from Triad. The new axle tube was square rather than cylindrical, and bolts, tangs, and other mounting hardware fit perfectly. He used an anti-seize compound on all threads and carefully bedded the axle-to-leaf-spring alignment hole with 3M 5200 adhesive sealant in an attempt to keep water from entering the otherwise completely sealed axle. Bolting in the new components was much easier than disassembling the old corroded suspension system, and it took only a couple of hours.
Conclusion
Naranjos trailer trauma stemmed from one omission. For years, he carried out routine maintenance, but he neglected to consider the wall thickness of the axle tube. The tube was thinner than he thought, and it corroded from inside and out. Although the forged, drop spindles were solid steel, they were welded to a tubular crossmember that should not have been allowed to rust. The outcome was embarrassing, but it could have been a lot worse, had it happened at highway speed.
His decision to replace the entire axle assembly, springs and all, tallied up to $312 in parts-a small fraction of a new trailer. And with a couple of days of sweat equity and the right tools, everything was back up to spec. By turning to the trailer manufacturer for components, Naranjo got the right parts and also benefited from Triads expertise. The designer/builder has the most experience with your trailer, and upgrades and improvements theyve made to the unit can usually be retrofitted to an older model. More importantly, every part fit and each nut, bolt, and spring link plate was included in the parts shipment.
Words of Wisdom
Hoping to expedite his DIY trailer renovation, Naranjo looked to Triads manufacturer and got some sage advice that is useful to all trailer owners. Heres the wise counsel that company president Mike Orro offered:
Today, most boat trailers have a grease zerk fitting built into their axles that allows a user to simply attach a standard-sized grease gun and pump grease into the system. As the user continues to pump, the grease is channeled through the center of the axle, eventually exiting at the rear end of the spindle, just in front of the grease seal. As new grease continues to be pumped, the old grease will come out of the bearing cap, and it should be captured and properly disposed of. A change of color and viscosity designates when the new grease has filled the hub. If an axle is not set up with a grease zerk system, the bearings need to be repacked by hand. This requires removing the hub/drum and grease seal.
All too often, bearing greasing is neglected or never completely changed. Bearing grease deteriorates over time, losing its viscosity and eventually its ability to keep the bearings cool. Continued deterioration of the grease will ultimately lead to bearing failure. If youre lucky, youll have a bearing failure that is relatively easy to repair-but youll need the right bearings. Automobile bearings are generally not interchangeable with trailer wheel bearings.
If youre water launching, there is a good chance that water enters the bearing cavity. This inundation, coupled with poor quality or older grease, can wreak havoc with both the wheel bearings and the axle. Once the bearings begin to rust, they generate friction, which essentially heats up the bearing. If the current state of the grease is unable to cool the bearings, they get so hot that they can actually weld themselves to the axle spindle-a catastrophic failure. Chances are that the axle spindle (surface where the bearings ride) will be destroyed and the axle will no longer be usable.
A bearing failure puts a dent in a family vacation, while an axle failure ruins the entire holiday. Most trailer repair shops do not stock trailer axle beams, so an immediate repair is unlikely. If the axle on your trailer is not built to popular size dimensions, it can take up to two weeks to have an axle made. So check bearings and replace the bearing grease as a part of yearly maintenance. A good rule of thumb for standard bearing grease systems is to change the grease every 12 months or 12,000 miles.
The second most common problem that Orr said he sees is a lack of brake maintenance. Most of the problems start right at the actuator and with the brake fluid. Follow the brake manufacturers maintenance recommendations and specs regarding brake fluid. Another issue with brakes is corrosion. Boat trailers operate in a harsh environment, especially ones used in salt water. Brakes should be checked prior to the beginning of each season or at the very least annually, especially drum brakes. Disc brakes are preferred because all of the components of the brake system are exposed, so potential problems can be easily seen. This is not the case with drum brakes. All of the brake components on a drum brake are hidden inside the brake drum, so its extremely difficult to see whats going on.
At a very minimum, Orr recommends, the brake fluid level should be checked and the brake system should be checked for proper operation on an annual basis. Each brake actuator should have a way to simulate the brake activation without needing to drive the trailer. Get the make and model of the brake actuator, and go to that manufacturers website and review the owners manual. In the manual, there should be instructions on how to check the brake system. If the brakes are not engaging and the brake fluid reservoir is full, its time to pull the brake drum and do an inspection. Drum brakes also need to be periodically adjusted.
Though theyre not structural, trailer lights play a crucial role and should always be checked for proper operation. Components are fairly inexpensive and can usually be found at big box stores or at a variety of automotive stores. Most of the time, a towing vehicles lights cannot be seen when a boat is loaded on the trailer, and trailer-mounted lights are a legal necessity. One way to prevent light failure is to mount them on extensions (PVC tubing is common) that keep them above the water when the boat is launched.
Finally, be sure to check the hardware holding components to the trailer frame. For the most part, some surface rust is expected. But when hardware and nuts and bolts begin to flake rust, as opposed to showing a small amount of scaling, you have a serious corrosion problem, and its just a matter of time before that component fails. Flaking rust means its absolutely time to change that particular component.
 .
.


