

Mechanical terminals allow sailors replace a broken shroud or even re-rig their own boat without hiring a professional rigger with a swage machine. Although the process of fitting a mechanical terminal is within reach of a competent do-it-yourself, there are a few pitfalls to avoid. Fortunately, we had the help of the late Brion Toss, one the most respected riggers in the business, to review the steps involved in forming a mechanical fitting for us in 2016. If you are contemplating re-rigging this fall or winter, this excerpt from the original report should put you on the right track.
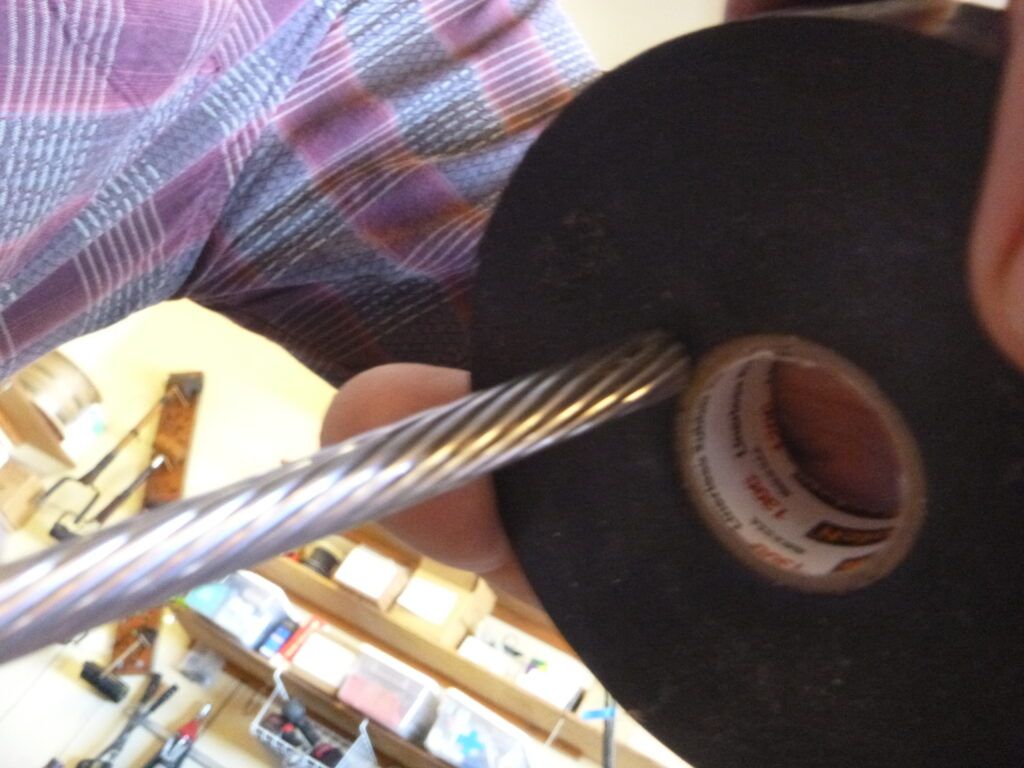
All of the mechanical terminals we tested in 2016 are based on the same assembly concept: The rigger opens the cover yarns, and then slides a wedge over the core yarns, near the end of the wire. The rigger closes the cover yarns over the wedge, and then, screws together the two outer parts of the terminal over the wedge, compressing the material, and thus generating friction. Simple, but like any assembly, it can be done wrong. Here are a few things to watch out for when assembling a mechanical terminal.
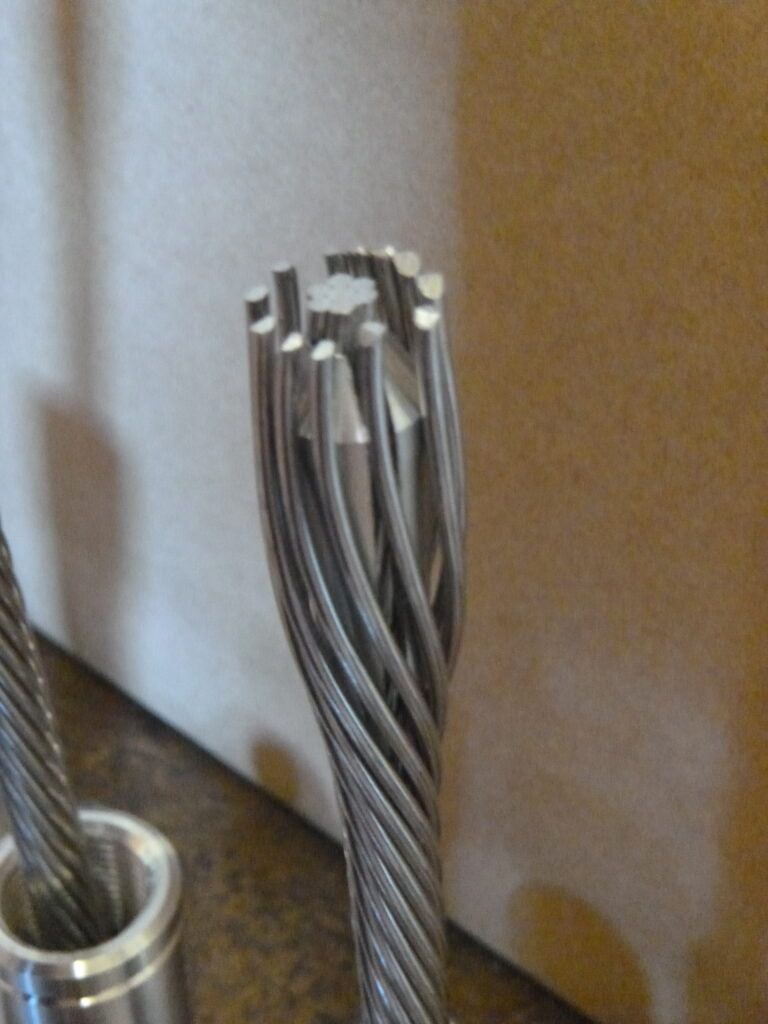
Core Show
Different terminal brands have different requirements for how much core shows past the wedge. Too much or too little core show can compromise terminal efficiency. It can also make assembly more difficult. Read the instructions for your brand.
Uneven Ends
If you cut the wire with shears, you are likely to bend at least some of the ends and will have ends of different lengths. This will make it harder to arrange or bend them evenly. Uneven ends are also more likely to snag, resulting in twisted yarns and/or sideways bend. Either problem can compromise efficiency. Uneven ends can also snag and be pushed backward into the socket, resulting in one or more loose yarns on the standing part. Instead of cutting with shears, you can put tape on either side of the cut site, then use a hacksaw to cut the wires; its a cleaner way to go.
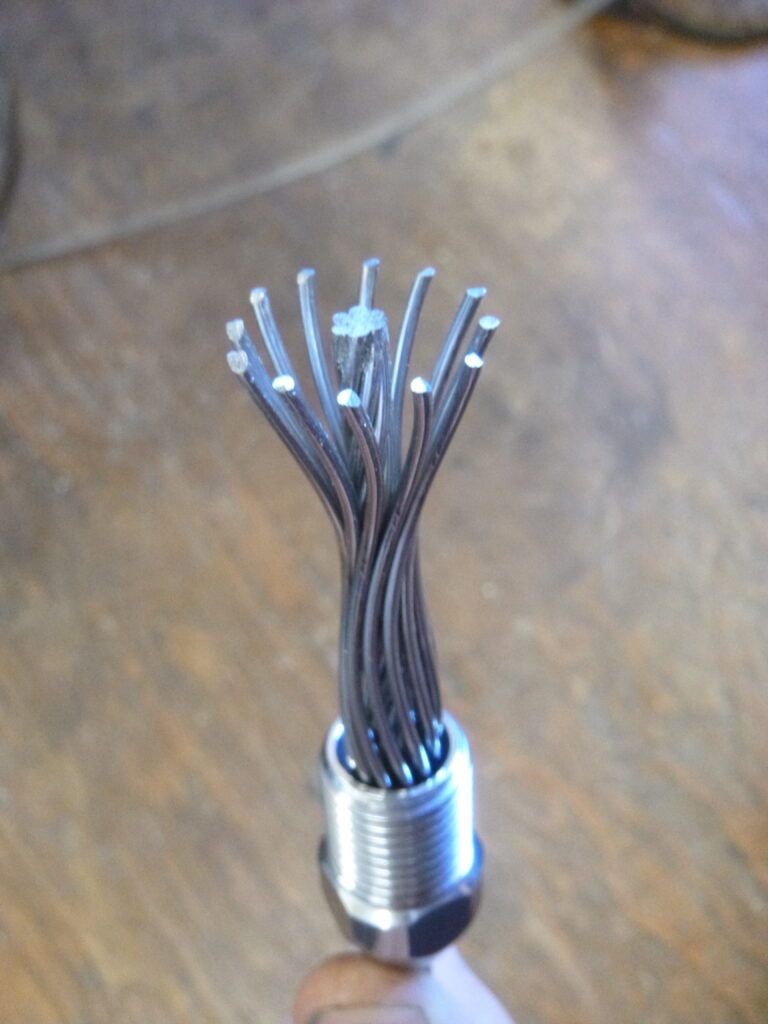
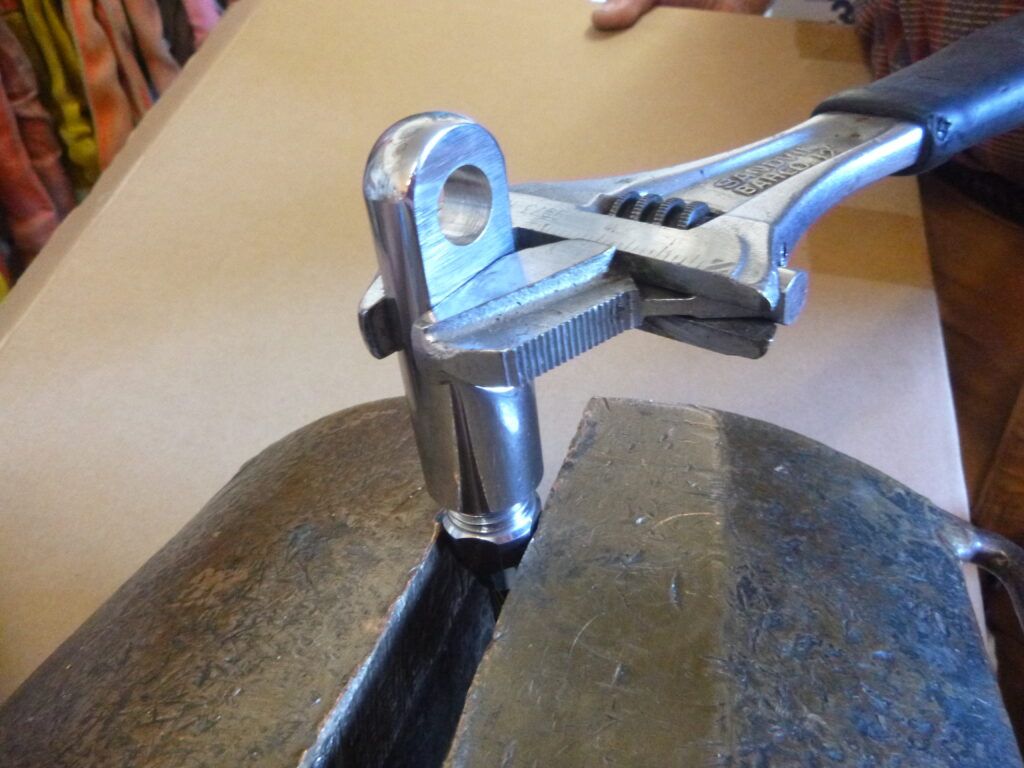
Twisted Cover Yarns
The cover yarns need to be opened up, so that you can get the wedge onto the core. There should be no twists; the yarns should open up like a flower. Otherwise, you will create distortions in the standing part that weaken the wire.
Incorrect wedge positioning
The wedge has one or more slots in its side, allowing the wedge to compress onto the core yarns, generating friction there. With Sta-Lok and Norseman, it is possible to get a cover yarn stuck in the wedge slots. If this happens, the wedge wont be able to compress onto the wires core, and the core wont be able to take its share of the load. If a rigger slides the wedge too far onto the core, the projecting wire ends of both the core and the cover will mash into the inside of the terminal, deforming the wire. If the wedge is not on far enough, it can slip off the end of the core and fail to compress the core. In addition, the cover yarns will not have the proper amount of bearing against the wedge. Each brand requires a different amount of core to be showing.
The Wrong Wedge
The wedge is a key component for all of these terminals. Every manufacturer makes wedges for different wire constructions, as well as different diameters, and each brands wedges have their own shapes and wall thicknesses. Dont substitute wedges from a different brand. Even if you have the right brand of wedge, it is possible to fit the wrong wedge to a wire, and if you do, the cores contribution will be affected. Even worse, the wrong wedge can also reduce the covers efficiency, allowing it to pull out of the terminal. Sta-Lok now inscribes the wedge information on the wedge, and Hayn color-codes its wedges, but the user needs to confirm that each wedge is the right one for the project.
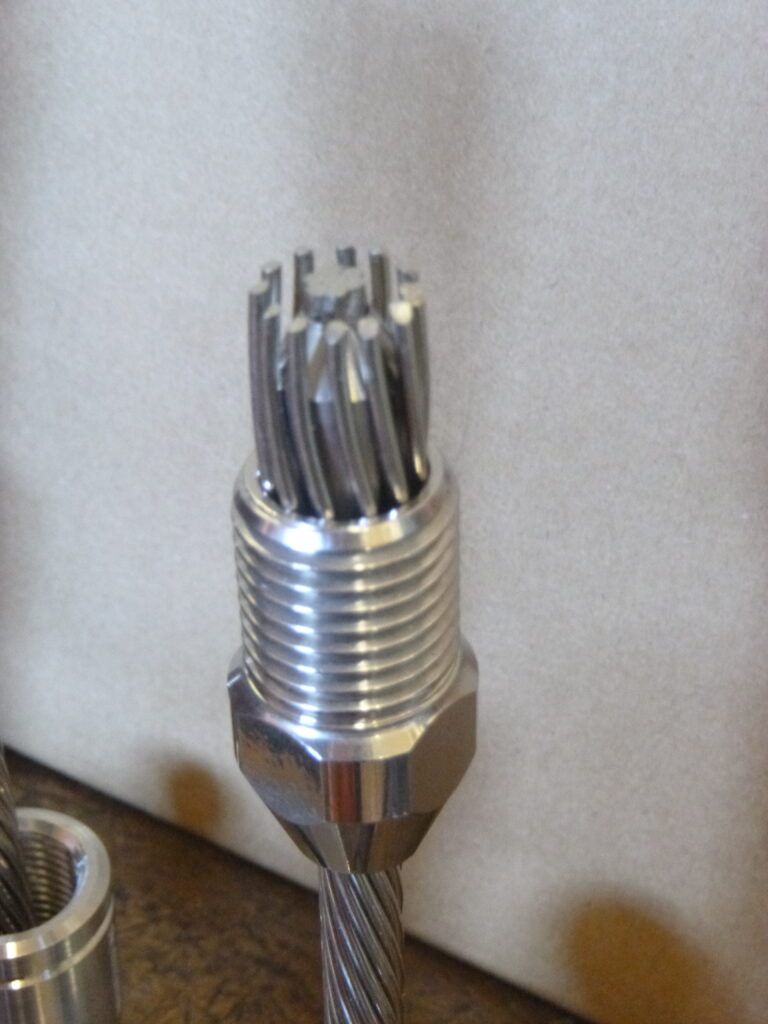
Mis-formation
The cover yarns for the Sta-Lok fitting must be bent over the top corner of the wedge, for full security. The cover yarns for the Norseman get bent twice, once over the top corner of the wedge and then again to return almost to their original course. The Hayn cover yarns don’t get bent at all, but it is possible to deform them by mistake. Poor assembly technique can result in the cover yarns being folded to the side, twisted, pushed back, or all of the above.
Unbalanced wire
Sometimes when you cut a piece of wire rope, the core withdraws a bit inside. This is a very bad sign, as it means that the wire was not properly balanced at the factory. In use, this will tend to put a disproportionate amount of load onto the core, lowering the breaking strength, and thus the safety factor. In addition, it will make it difficult to get the correct amount of core show and still keep the cover yarns short enough that you can get the terminal together. If your wire rope withdraws its core, return it. We also recommend checking the end of the wire when it is still on the spool.
Galled threads
Because assembling this type of terminal involves screwing together two pieces of stainless steel under some appreciable load, there is a danger of galling. Basically, the two surfaces deposit molecules onto each other, literally welding the pieces together. It is amazingly easy to gall a terminal so thoroughly that the only way to get it apart is with a metal-cutting saw. Lubrication of the threads would certainly prevent galling, but that would run counter to the very important need to secure the terminal with Loctite or a similar adhesive, to keep it from coming apart. Fortunately, Loctite acts first as a lubricant and acts last as a glue.
Ignoring Rumble
Most terminals of this type are characterized by exquisite machining, but every once in a while, you get one with rough threads that grind and rumble when you assemble the pieces (squeaking is normal). The threads might look smooth to the uneducated eye, but the rumbling is made by little bits of metal-which can defeat any lubricant you put on there, and then you are back at galling. In extreme cases, crumbled threads can lead to terminal failure. If the threads feel rough, return the terminal and ask for a smooth one. One of the reasons we prefer Hi-Mod terminals is that their threads are rolled, rather than cut. This makes them notably smoother. (Beware of inducing galling here also. Cutting wire next to the terminal can cause dust particles to deposit on the threads.)
Over-tensioning
When screwing these terminals together, it is important to run things firmly home. But once the yarns are properly seated, and you feel solid resistance, there is no point in adding more than a quarter-turn.
Sealant
Sta-Lok and Norseman recommend sealant inside their terminals to prevent internal corrosion. Hayn maintains that this is not necessary with its terminals. Brion Toss uses 3Ms 4000 inside all mechanical terminals in his rigging shop-enough that some is forced out the end of the terminal at final assembly. We tested with and without sealant, with no change in end results.
 5. Each socket is dry-fitted before applying sealant.


Did you rest my password?
Damn expensive those fittings
To me there is an ambiguity in that Loctite seems to be recommended, or at least mentioned as a lubricant for avoiding galling, but then later it is definitely stated that each socket is dry fitted before applying sealant. What is the correct way to handle these “damn expensive” fittings as far a Loctite, dry fitting, and avoiding galling?
Someone once said about pornography “I can’t tell you what it is, but I know it when I see it”. I’m going to say that the two pieces of the Hayn terminal should fit together “nicely”. What’s nice? I can’t tell you, but you know it when you feel it. If I was forced to describe it, I would say that when tightening by hand, just the two pieces, no wedge, no wire, they almost feel like there’s oil on the threads, even when there’s not. They should feel like parts of a fine watch. But if there’s the slightest (slightest slightest) feeling of “sand” when tightening by hand, it’s “not nice” and should be returned.
Now, why did I explicitly state Hayn? Because I was told by Brion Toss years ago that they were the best, full stop. It was his opinion that all three were very good, but Hayn were far and away the easiest to assemble correctly, with incorrect assembly being potentially disastrous. Study the assembly instructions of the big three, you’ll see what he meant.
As to the use of Locktite, make no mistake, I love it. We are of course referring to the medium strength thread locker here, aka, Locktite “blue”. Every threaded fastener on
my boat is coated with something; grease on electrical connections, Locktite on small parts where a lockwasher is a poor choice or the tightening torque is small, or Tefgel.
But Locktite is a threadlocker; while it has some anti-gauling properties (and is orders of magnitude better than nothing), that’s not exactly what it was designed for.
However, that’s exactly what Tefgel was designed for, to the point where it really has no thread locking properties. But it’s spectacularly good at preventing “cold welds”, both the quick ones we call gauling as well as the long term weld that occurs when salt water hits a metal, even a metal like 316 stainless.
Again, on my boat, if it’s tightened with a wrench as opposed to a screwdriver, it gets Tefgel.
Note that I’m not concerned about the lack of a threadlocker, either chemical or mechanical. Threaded parts hold together very nicely all on their own when the threads are properly formed and then suitably torqued. That’s especially true in this case when the threads with be placed in tension once the rigging is installed.
(Where this falls down is when vibration is excessive and consistent, and/or heat is involved. Under these circumstances, which are not relevant to our rigging discussion, it all gets trickier.)
My recommendation, therefore (this coming from an unknown stranger over that most reliable medium, the internet) is that unless a manufacturer tells you otherwise, I’d use Tefgel (or one of the clones) on this type of fitting before I’d use Locktite. But I would never ever ever use nothing.
Hope this helps.