


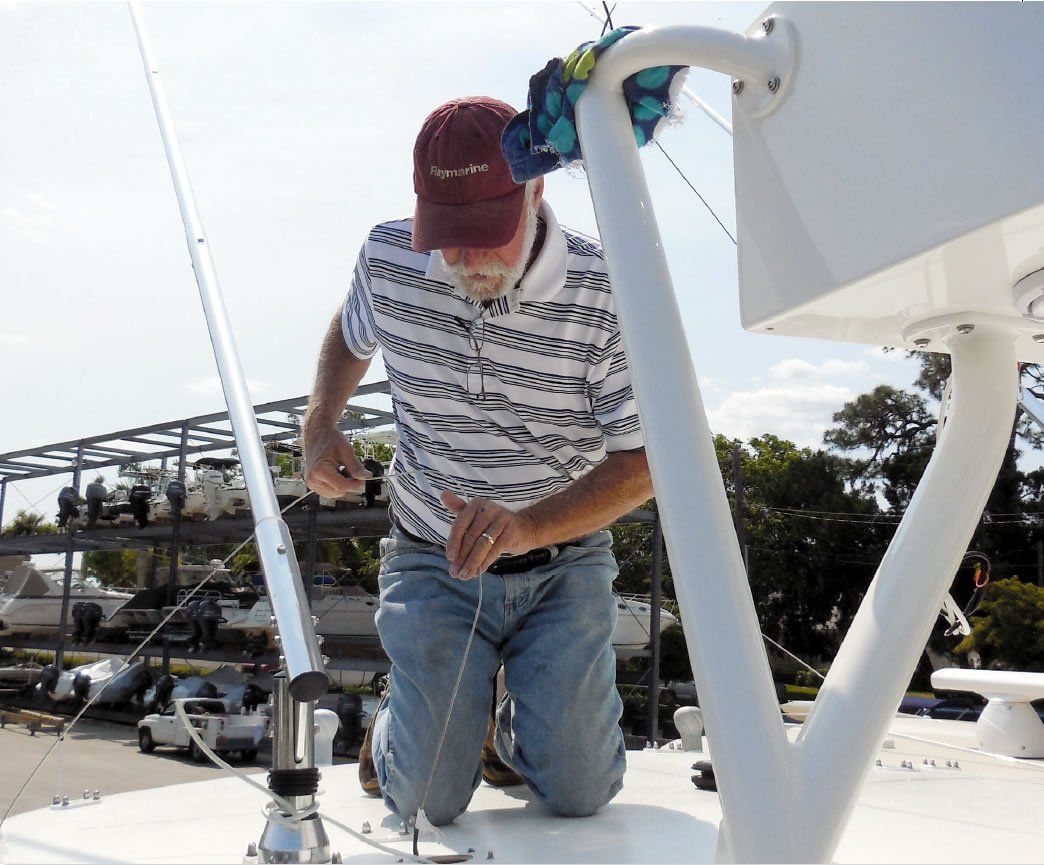
Running the wires for new electronics requires your best cursing vocabulary, lots of sweat, twisting body contortions, luck, and the occasional bandage. For tips on how to make this job easier, we turned to PS contributor Bill Bishop. A professional marine-electronics installer, Bishop has many ingenious ways to thread a wire from point A to point B.
The Fish Method
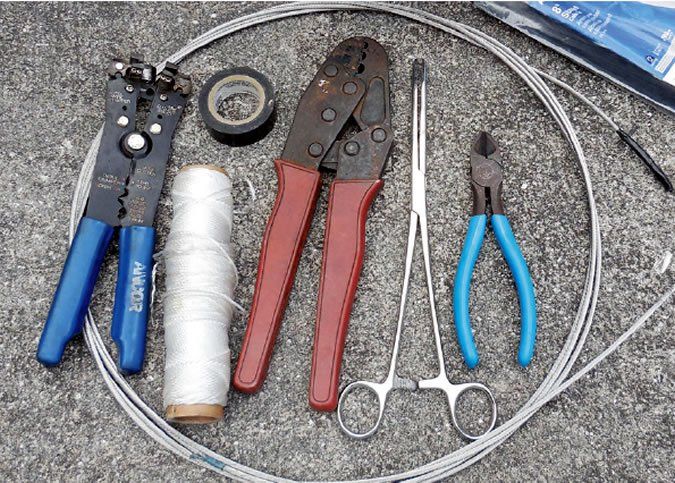
The most important tool in the wire-pulling arsenal is what electricians call fish tape or simply a fish. An electricians fish tape sometimes works for short runs, but stiffer, 1/8-inch 1 x 19 stainless-steel lifeline wire is much better for most boat projects. A 15-foot length is usually enough.
The next thing you need is good-quality electrical tape to cover the ends of your wire fish; Bishop prefers the 3M brand electrical tape. Start about 1.5 inches away from the end of the fish and tightly spiral-wrap the electrical tape toward the end until youre about a half-inch past the wire end. Fold the excess tape down over the wire end and spiral the tape in the other direction. Now, bend each end of your newly wrapped wire about 10 degrees. Your fish is now ready for action.
You don’t usually use the fish tape to pull a wire through. You use it to install the pull string. Bishops favorite string for wire pulling is 10-pound masons line, available at any hardware store. To help thread your fish or new cables through tight squeezes, youll need a lubricant. Bishop uses liquid dishwashing soap or lithium grease. To complete his wire-pulling toolkit, Bishop has a long-jawed hemostat (available at pharmacies or through medical supply stores), wire cutters, and a smartphone camera.
Pulling cables
Consider enlisting a helper for the next few steps. Uncoil the cables or wires you need to pull, arrange them on the deck by connector size-largest to smallest. You are going to use the pull-string to pull each cable, one at a time, in order from largest connector to smallest.
Now, the fun part. Pushing gently, send your fish backward through the wire run to the starting point, and attach the fish to the pull string. To attach the string to the fish, use three half-hitches (see photos), then tape it securely in place. Then, pull the fish and string back through the conduit to the other end. Now, you can cut off the string, leaving about a foot still attached to the fish because you will need it again. Before you forget, tie the string you just pulled through to something so that it wont accidentally get pulled back into the conduit.
The process is repeated with the first wire cable you are going to run. This time, however, you will be using the string to pull, not the fish wire. When attaching the string to the electrical cable, use the same technique (three half-hitches). Attach the string to the cable itself, never to a connector. Youll want to leave plenty of extra string-about six inches-after tying the hitches. To this, you will tie a second string to leave behind for pulling your next cable. When you tape up the string and connector, try to create a smooth, narrow package. Adding some lubricant (liquid dish soap) to the lead section of the cable and connector will help slip it through the conduit.
Getting Stuck
Cables will get stuck. If you pushed the fish through a web of other cables, the connector on your new cable wont make it through. When threading the wires through small spaces, terminals, plugs, and some other connectors may get stuck. If a fat connector keeps jamming as you try to thread it, youll be forced to cut off the connector, send the wire through the hole or conduit, and then re-attach the connector. Inline fuses pose a similar problem, but you can cut off and reattach those without too much difficulty. Some manufacturers warn against cutting a depth-sounder transducer cable, but we havent found it to be a problem as long as you don’t significantly shorten (or lengthen) the cable. If youre forced to cut off a terminal or connector, make sure you leave a long pigtail (about a foot is good) for re-attaching the connector. The wires are color-coded, so you can match and splice the wires together.
You can also cut off RJ45-style network connectors, as well as NMEA 2000 connectors. Most NMEA connector manufacturers can supply you with simple replacements. For RJ45 connectors, youll need a special crimping tool. If you do cut off an RJ45 connector, be sure to save it for cross-referencing the color configuration for the new connector. Its much easier to just keep the RJ45 connector intact, so try repeated pulls before cutting one off.
Sometimes there is a bend in a conduit that you can’t see. Dont yank. Pull the cable back out and check for chafe. You may have to replace the line. If all looks good, you can add some dishwashing liquid to the lead end. Keep backing out and trying again. If the fish made it through the hole, your new cable should make it too.
Radar cables are thick and seem immune to a bit of extra tugging, but very small gauge wires are often part of the same bundle, and they may break if the tugging becomes too energetic.
If the cable jams repeatedly, you can try using your cellphone camera to discover what the obstacle is. Since the flash is right next to the camera lens you can take pictures through surprisingly small holes. The results my surprise you.
Cable Splicing 101
When re-splicing a plug or connector back onto the cable end, the easiest approach is to remove about an 1 inches off each cables sheath. Strip each individual wire enough to use a butt connector. Then, line up the cables so the stripped wires are alongside each other and use two tie-wraps to lash them together. Twist the corresponding wires together and crimp on a connector. Although it isn’t pretty, the tie wraps stop any strain on the connectors. This is much more secure than a simple butt connector. A few wraps of electrical tape will protect most connections. In exposed areas, you can go so far as to solder the connections and cover them with heat-shrink tubing.
Securing your Wiring
Be sure to use chafe protection where cables pass through holes or take sharp bends around corners. This would include stainless-steel tubing on binnacles and other areas with sharp edges. Split-loom hose or sections of plastic hose with slits work well in these spots.
A good rule of thumb is that the radius of any bend should be at least 10 times the diameter of the wire. Wiring should be secured well enough to stop it from sagging or moving around while underway, but not too tightly harnessed. When using tie wraps, don’t cinch them too tight. This will damage the wiring over time. Also, don’t force wiring into sharp bends while routing it. This puts added strain on the wire strands to the point of breaking a circuit.
Other Tips
Remember about the little bend at each end of the fish? Sometimes while pushing the fish through a conduit, you will encounter a tight-curved bend. The end of the fish can get stuck there, especially if the interior walls are corrugated. When this happens, its time to create a mini Roto-rooter. By coiling the end in your hands into a loop about 8 inches in diameter and rotating it while you push, the end of the fish will work though some fairly tight corners.
Dont make connections and wire splices in areas where you can’t access them. This will save you headaches when troubleshooting.
When using electrical tape, leave a small tab of folded-over tape at the end. This makes it easier to remove the tape afterward.
Long-jawed hemostats will let you grab a pull-string that is visible through very small holes.
When there are multiple turns, it can be impossible to get a fish through. A good alternative is using a shop vac at one end and hand feeding the pull string with a small piece of fluff tied on the end toward the vacuum. If the fit is good, it will suck the string down into the vacuum cleaner. As a last resort, if there is existing wiring in the conduit, you can cut it and use it to install a new pull string. Ideally, it is no longer being used. If it is, you can always resplice it.
Happy wiring!
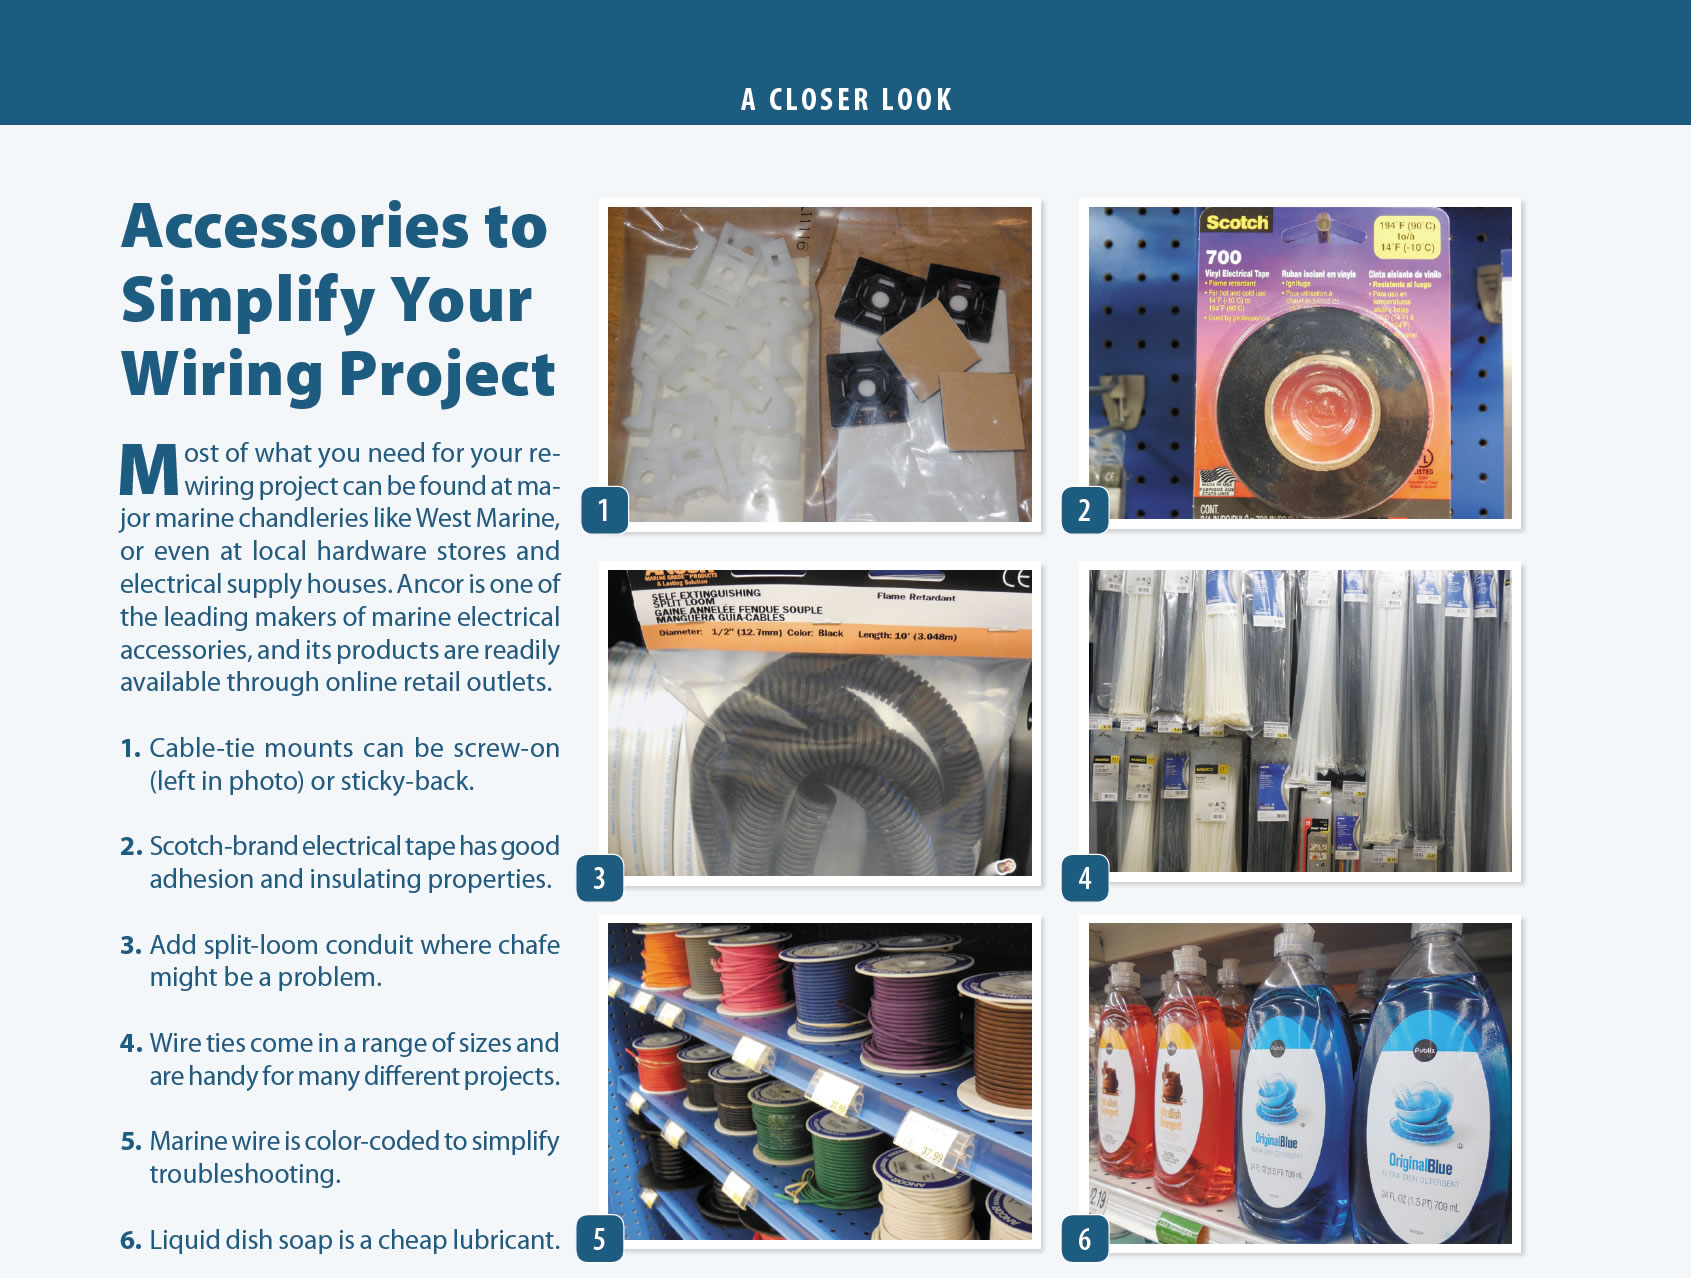
Most of what you need for your re-wiring project can be found at major marine chandleries like West Marine, or even at local hardware stores and electrical supply houses. Ancor is one of the leading makers of marine electrical accessories, and its products are readily available through online retail outlets.
- Cable-tie mounts can be screw-on (left in photo) or sticky-back.
- Scotch-brand electrical tape has good adhesion and insulating properties.
- Add split-loom conduit where chafe might be a problem.
- Wire ties come in a range of sizes and are handy for many different projects.
- Marine wire is color-coded to simplify troubleshooting.
- Liquid dish soap is a cheap lubricant.
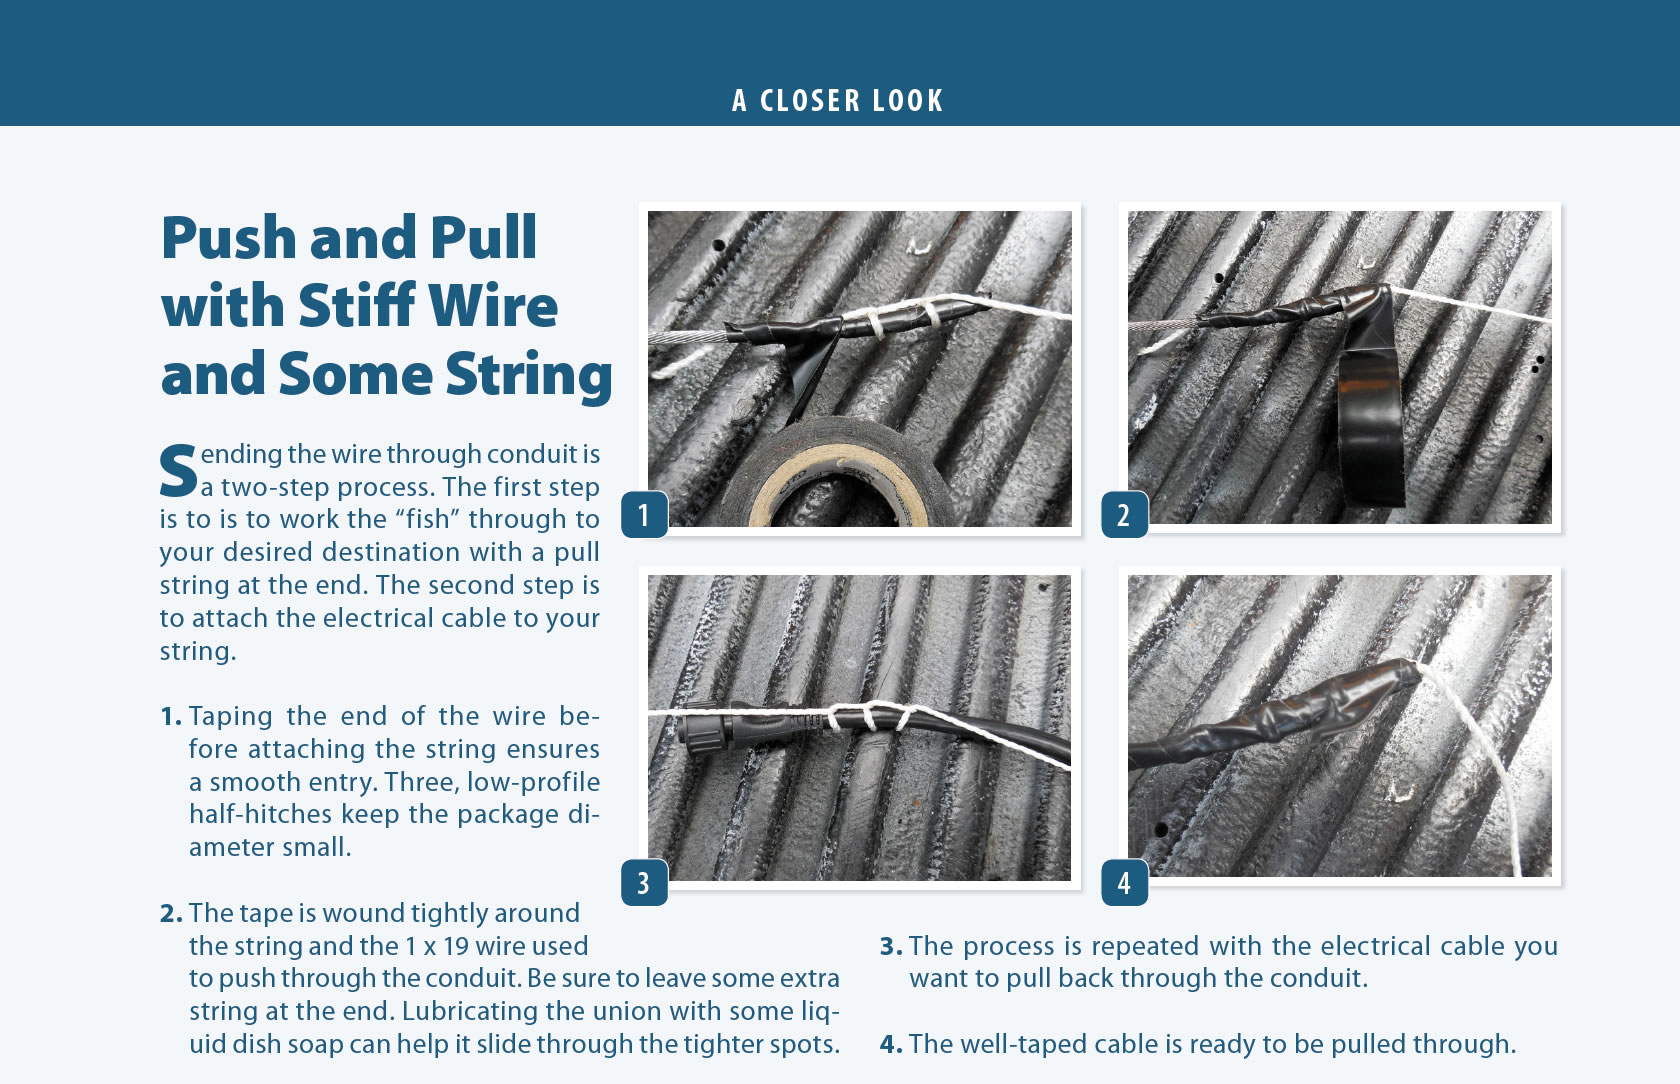
Sending the wire through conduit is a two-step process. The first step is to is to work the “fish” through to your desired destination with a pull string at the end. The second step is to attach the electrical cable to your string.
- Taping the end of the wire before attaching the string ensures a smooth entry. Three, low-profile half-hitches keep the package diameter small.
- The tape is wound tightly around the string and the 1 x 19 wire used to push through the conduit. Be sure to leave some extra string at the end. Lubricating the union with some liquid dish soap can help it slide through the tighter spots.
- The process is repeated with the electrical cable you want to pull back through the conduit.
- The well-taped cable is ready to be pulled through.


