


No sailor can resist the temptation to look over another sailors work, and nothing draws the eye faster than your neighbors docklines. We like to know our boat and our neighbors boats will be where we left them when we return, not rubbing together or worse. Sometimes, however, a stroll down the dock makes us nervous.
This gallery of rogue docklines represents only a taste of what PS tester Drew Frye found within a short walk of his slip. How many of these will come loose during the next storm?
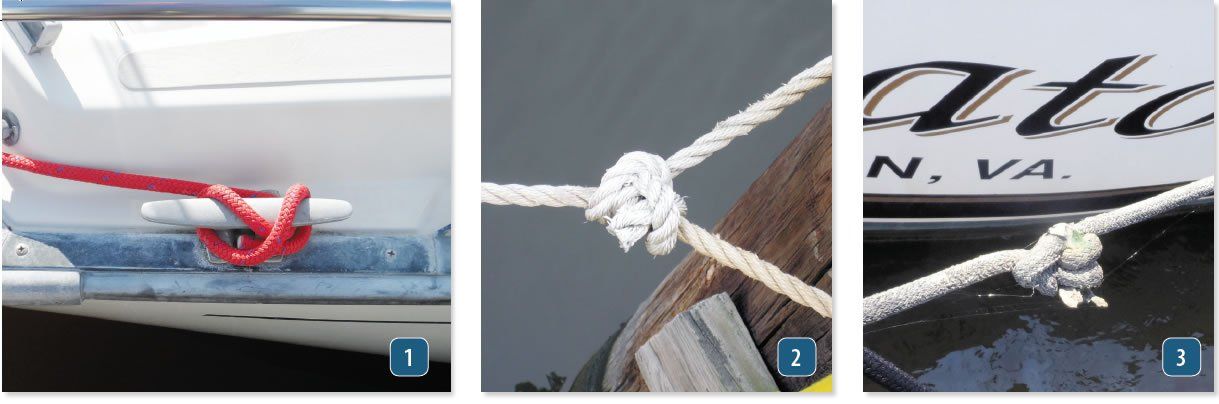
1. & 2. There is no tail to the cleats or knots. Beginning rock climbers are instructed to always tie a backup knot with the tail of the rope, typically a double overhand knot around the standing part. While this backup can prevent the tail from slipping through as the knot tightens, the real purpose is to reinforce the habit of leaving a nice long tail on the knot-just as Smoky the Bear recommends breaking matches between your fingers to ensures that they are cool before tossing them.
3. Knots reduce line strength by 30 to 50 percent. This half-inch, double-braid nylon dockline clearly compromised by age and UV exposure, probably has less than 20 percent of its strength remaining.
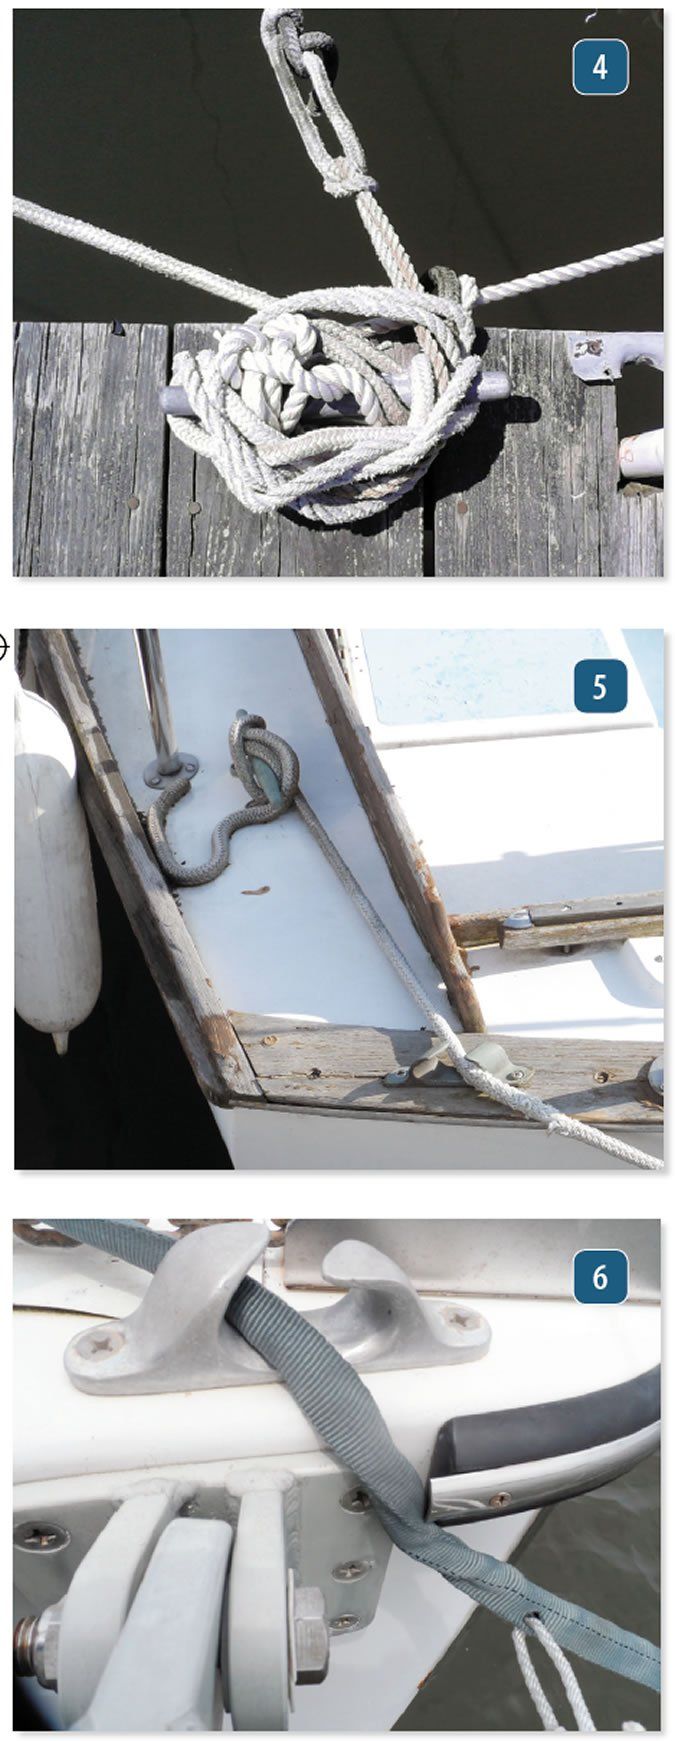
4. Beware of the multi-boat dock cleat. While we are often forced to work with what weve got, theres no way of telling what youve got in a situation like this. Rather than join the crowd, find something else to tie to. The dock plank-the only structure that the cleat is secured to-is held by only four nails of uncertain age.
5. Watch out for chocks with sharp angles. Chocks are not intended to meet the rope at a cutting angle. Often, swapping the port and starboard chocks will result in kinder angles. Crossing at a severe angle might look more secure, but its murder on the line.
6. Fix unnecessary chafe points. Invest in chafe gear. One boat in our marina had a knife-sharp rubrail wearing against the bow line. This problem was solved by fitting a hard rubber block to fill the gap. Chafe guards are good, but eliminating the sharp spot is better.
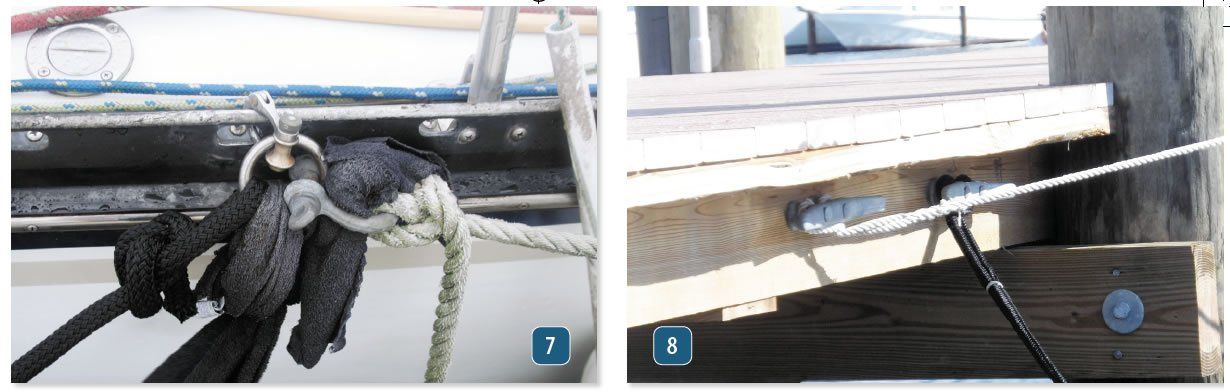
7. Consider adding mid-ship cleats for spring lines. Again, we use what weve got, but counting on a snap shackle for this use requires blind optimism. A conventional shackle, or even a soft shackle would work better here. Rags for chafe gear are better than nothing, but leather would serve better. A well-reinforced toerail will survive this use, but is not designed to take lateral loads.
8. Steer clear of poorly placed cleats. An upscale marina recently upgraded its dock cleats, though many of the slip holders would disagree. Dock clutter is reduced and chafe is reduced at normal tides, but we see many problems. The new cleats are hard to reach and potentially dangerous with a large boat. Only one line size fits the cleat properly, even though there are many slip sizes. Cleats arent designed for upward pull; weve seen horns snapped off cleats by upward pull on a storm tide. Cleats are not designed for strait-pull loads, and poorly made hitches will fail more easily on these cleats. Most sailors have resigned themselves to using them as rings, making all adjustments at the boat end. This is certainly not a design that is friendly to the transient boater, who supplies his own lines for tying up. When we visited this marina for service, we tied to the pilings without even noticing the cleats at first, then assumed they were for some unknown purpose when we did notice them, and were dumbfounded when we learned about the marina upgrade.
9. & 10. These boat owners used stopper-knot mooring for cleats. We found both of these dubious cleat arrangements in the same marina, where apparently rope costs so much that local boaters can’t afford the extra 24 inches of rope required to properly hitch to a cleat. One boat came loose a few days after this photo was taken. The other, we generously cut (and replaced with a longer rope) during a high tide, since it could not be released and the line was starting to pull the boat over, overloading the boat cleat.
11. Before a tropical storm, we watched this boat owner dutifully double up his lines to this rotten piling, which predictably failed.
The right way
There are many ways to secure your boat to a dock, depending on the circumstances, but they all have a few things in common:
Chafe Guards: Many things work-from commercial guards (see PS July 2011 and October 2012 online) to hose to webbing to special coatings (see PS March 2015 online). Weve seen short lengths of chain used on concrete docks. What matters is that the chafe protection is inspected and is in the right place.
Chock angle: The line should not turn more that 30 degrees at the exit. Better yet, cleats should be located and deck edges designed such that chocks are not needed.
Splices: Protect splices with chafe gear where needed. The throat is particularly vulnerable on the side where the cover enters the line, since the cover is often 100-percent load bearing in that location. (The core may be buried, but generally not far enough to carry load.)
Length: Lines should be long enough for any possible tide, using crossing patterns as needed. The line must not snag on anything while rising and falling.
Dont tie to winches: A lot of boaters ignore this advice. Some books even advise to do it. However, do you really want to load the pawls every few seconds, all day and all night, all year? Add a midship cleat, if that is what you need.
Spring lines: Spring lines (see PS June 2016 online) greatly reduce motion and make it possible to position the boat accurately while using long, crossed bow and stern lines. They also reduce forces and provide redundancy against failure.
Fenders and fender boards: A whole article could be written about the advantages of fender boards. Using a fender board ensures the fenders can’t get trapped above or below the dock, or be pushed out of place.
If you are planning to leave your boat for a long period, or are preparing for storm season, consider spending a few nights on the boat in the slip, observing how it moves through the tide cycle and with different wind directions.


