

There may come a time when repowering your cherished sailboat needs to be addressed. I suspected that not all 13 horses of the venerable Volvo MD7A two-cylinder diesel in our 1978 Islander Bahama 30 were performing anymore. Those that were tended to overheat. Cleaning internal passages had been undertaken a number of times, but the internal corrosion caused by saltwater cooling had taken its toll. A total rebuild was an option I considered but rejected. Sailing buddies had taken that route and continued to have problems with their older engines.
A dependable engine is critical when cruising the Pacific Northwest, where reliance on the iron genny is essential in the strong currents and light-airs common in midsummer. The original Volvo was also a two-cylinder diesel mounted on original engine mounts in a compartment open to stern lockers under the cockpit sole. A very common set-up in the heyday of production sailboats in the 70s and 80s, engine noise and vibration were not considered a priority in design and construction. Raising voices while the diesel ran was the norm.
With a general knowledge of how sailboats were put together, but not being a mechanic nor fiberglass expert, I hopped to do the majority of the installation myself. The potential cost of a professional diesel installation was frightful. My primary focus was going to be reliability along with reducing the noise and vibration coming from the engine compartment. On larger sailboats the engine can be buried deep in the bowels of the boat, in some cases barely noticeable while running. But on smaller boats, the diesel is a very close companion, usually right under the cockpit sole! I explored the available options.
ENGINE SELECTION
Although the commonly available two cylinder 16 hp diesels would be sufficient to bring a 30-ft., 8,500 lb. sailboat to hull speed, I was looking for a three-cylinder engine. Three cylinders are inherently smoother running than two, and vibration is noise. I settled on the Beta 20 from the Canadian distributor in Sidney, British Columbia. The Beta 30 is a modern three-cylinder Kubota 722 block designed primarily for industrial use (tractors, generators, etc.).
DRIVE TRAIN
Vibration causes noise. Any rattle caused by vibration amplifies that noise. Engine vibration transmitted to the hull is a major cause of rattles and, subsequently, noise aboard a boat. In a typical engine/shaft/propeller set up the engine must be firmly secured to keep the shaft aligned with the log and strut. Firm engine mounts, particularly when hardened over time, generally transmit a lot of vibration to the hull.
To retain the shaft/strut configuration of the Islander, I looked at the Aquadrive thrust bearing system. This system installs a thrust bearing separate from the transmission, allowing a universal style coupling to the shaft. This allows increased engine movement on softer mounts while not disturbing shaft alignment. Unfortunately, there simply was not enough space in the engine compartment between what would be the new transmission and the shaft log/strut layout.
Another option was a sail-drive unit. The drive unit, similar to an outboard leg, is mounted on a custom bed glassed to the inside of the hull, the leg fitted through the bottom of the hull on a large rubber seal. With no shaft alignment to worry about, the engine can be fitted with soft mounts. The rubber seal and soft mounts allow for flexibility of the engine, isolating the vibration from the hull.
Having considered the options, I settled on a Beta 20, the Kubota 722 block marinized by the British, combined with an Italian-manufactured SeaProp60 saildrive with an Eliche Radice two-blade folding prop. Definitely an international system!
ISOLATING THE ENGINE COMPARTMENT
With softer engine mounts, vibration to the hull would be significantly reduced, minimizing onboard rattles and the resulting noise. But a diesel is still a noisy machine. I needed to consider isolating the engine compartment from the cockpit lockers and installing sound insulating material. More on this later.
INSTALL PROCESS
1. ENSURE NEW ENGINE WILL FIT
The first step in this somewhat intimidating project was to ensure that the Beta unit would fit the relatively small engine compartment under the cockpit sole of the Islander. Critical was the width of the molded fiberglass engine bed supplied by Beta, and overall engine height. Keeping in mind that the Volvo was still in place, a scale model cardboard mock-up of both the compartment and the Beta combination was constructed out of cardboard. The Beta would fit, but just barely. I ordered the engine/saildrive combination from the Canadian distributor for Beta Marine.
2. REMOVE OLD ENGINE, WIDEN ENGINE COMPARTMENT, REROUTE WIRING
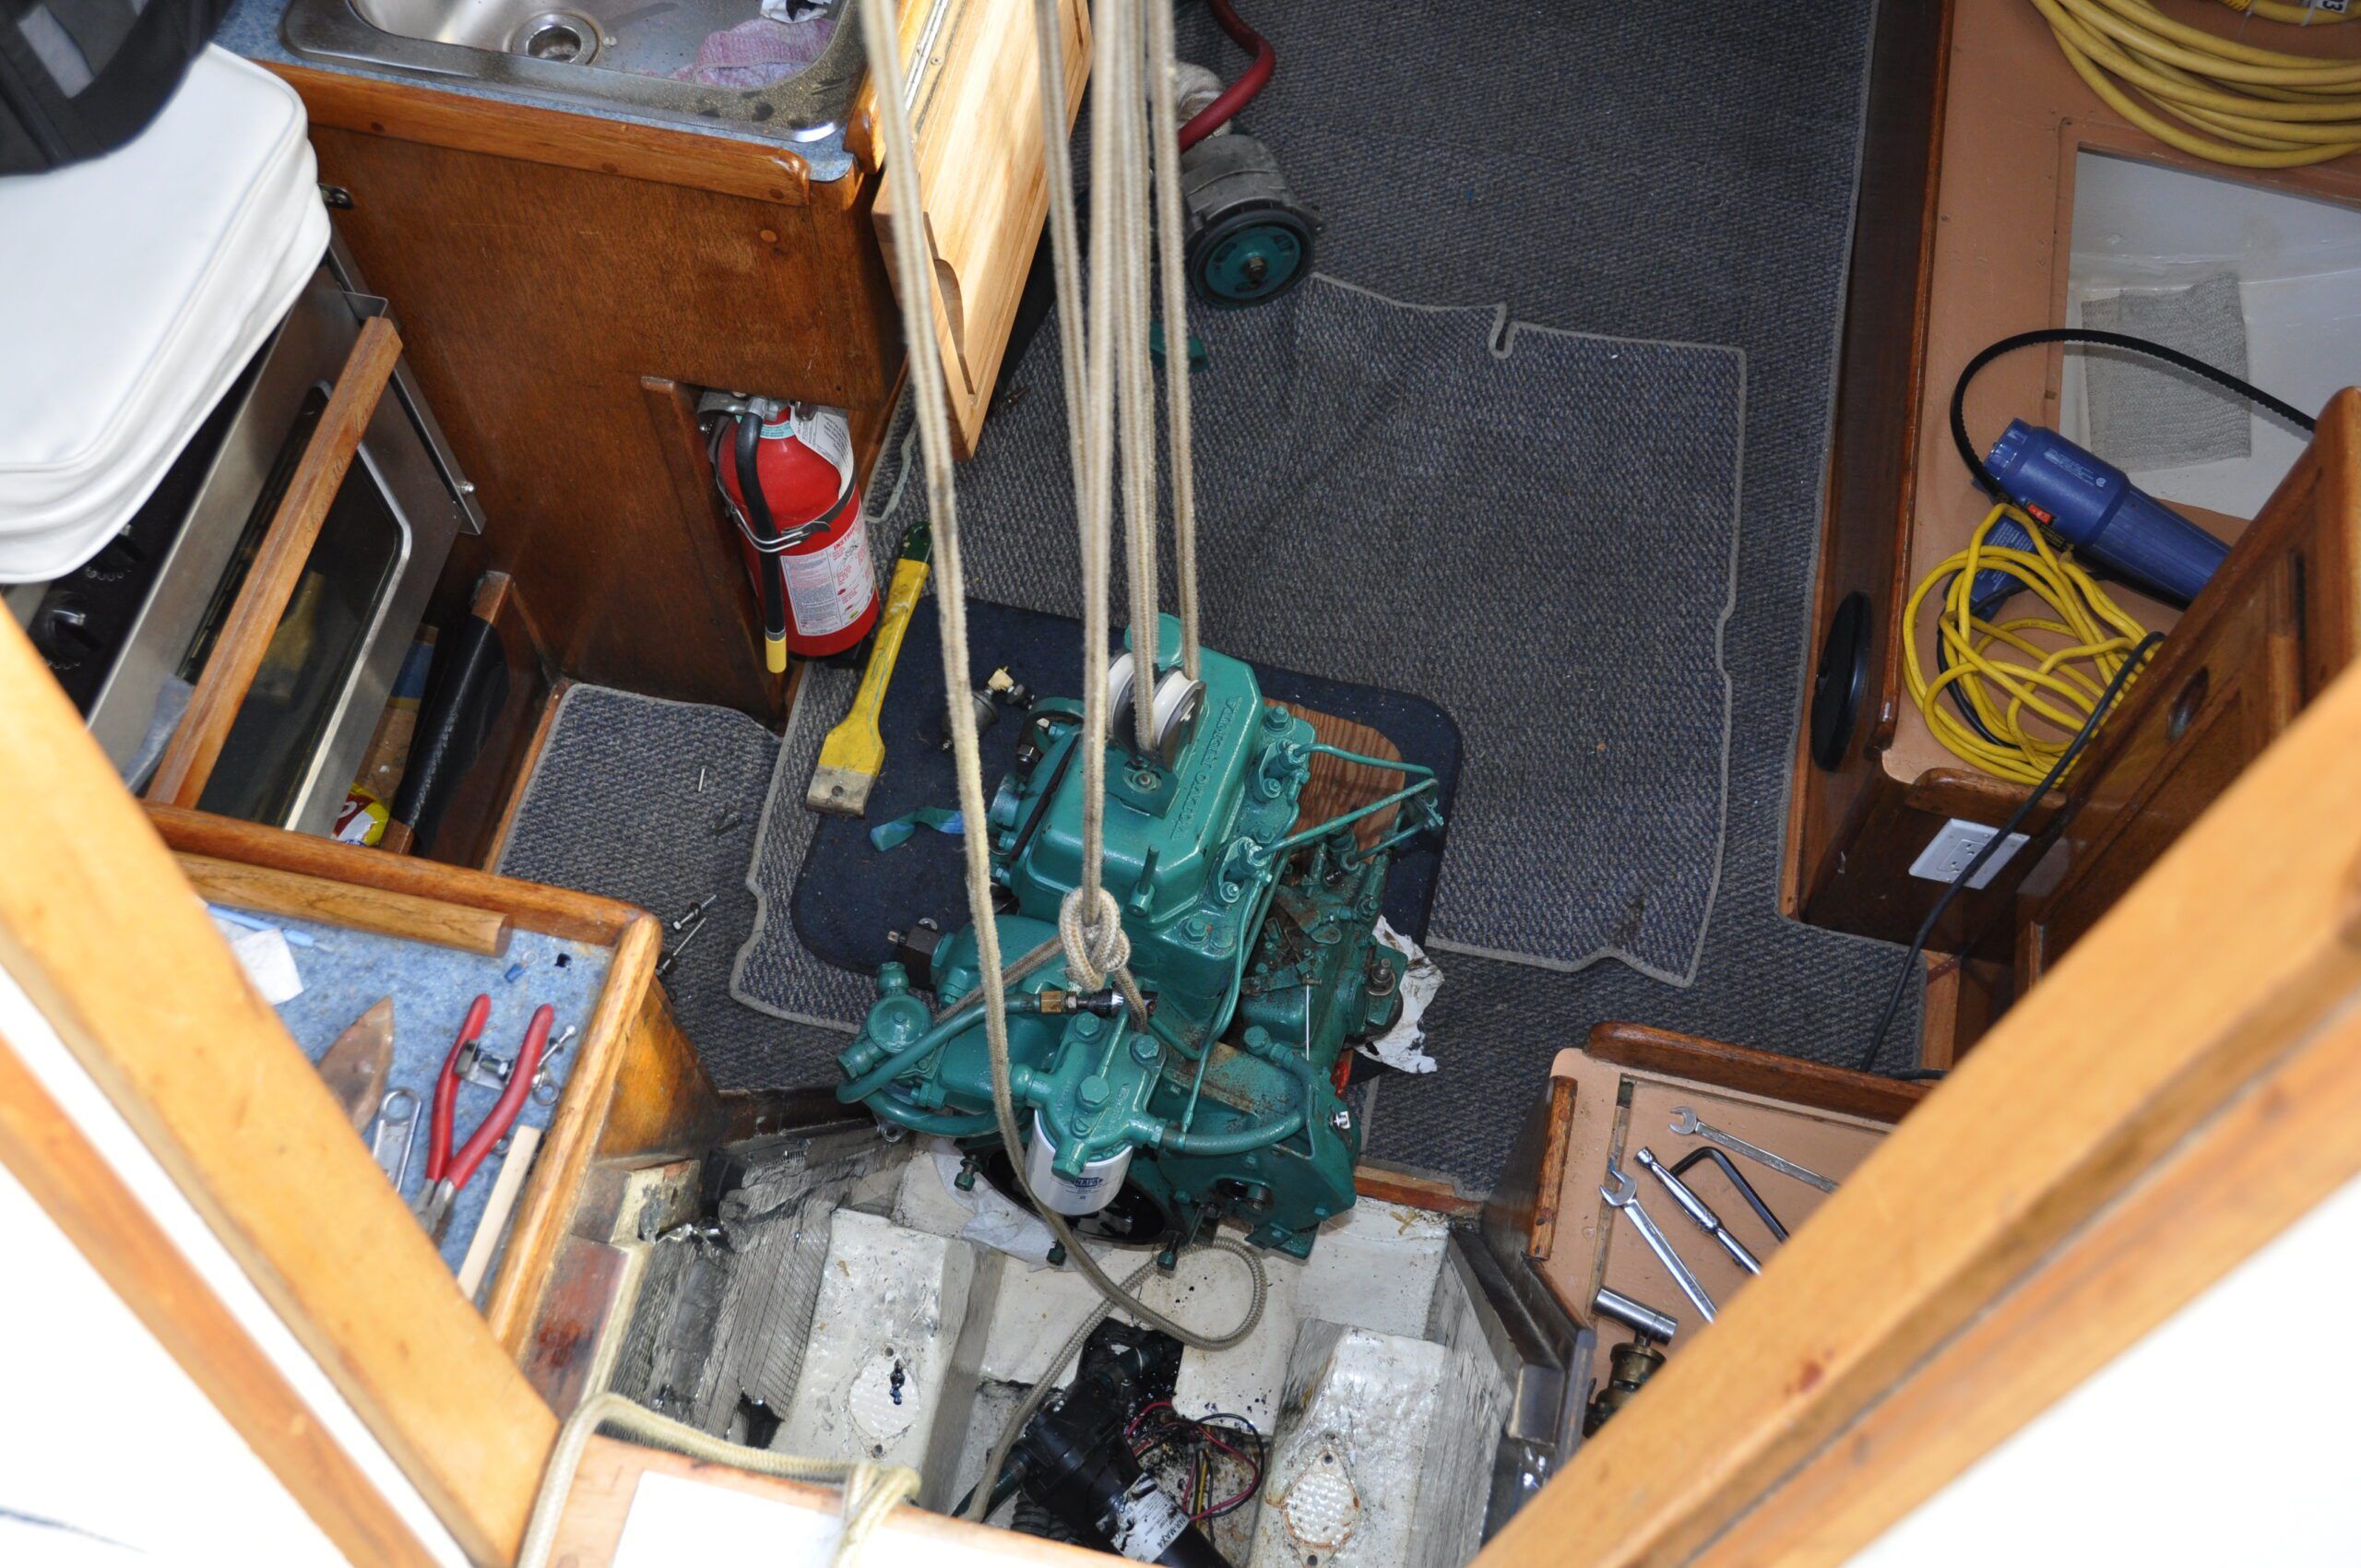
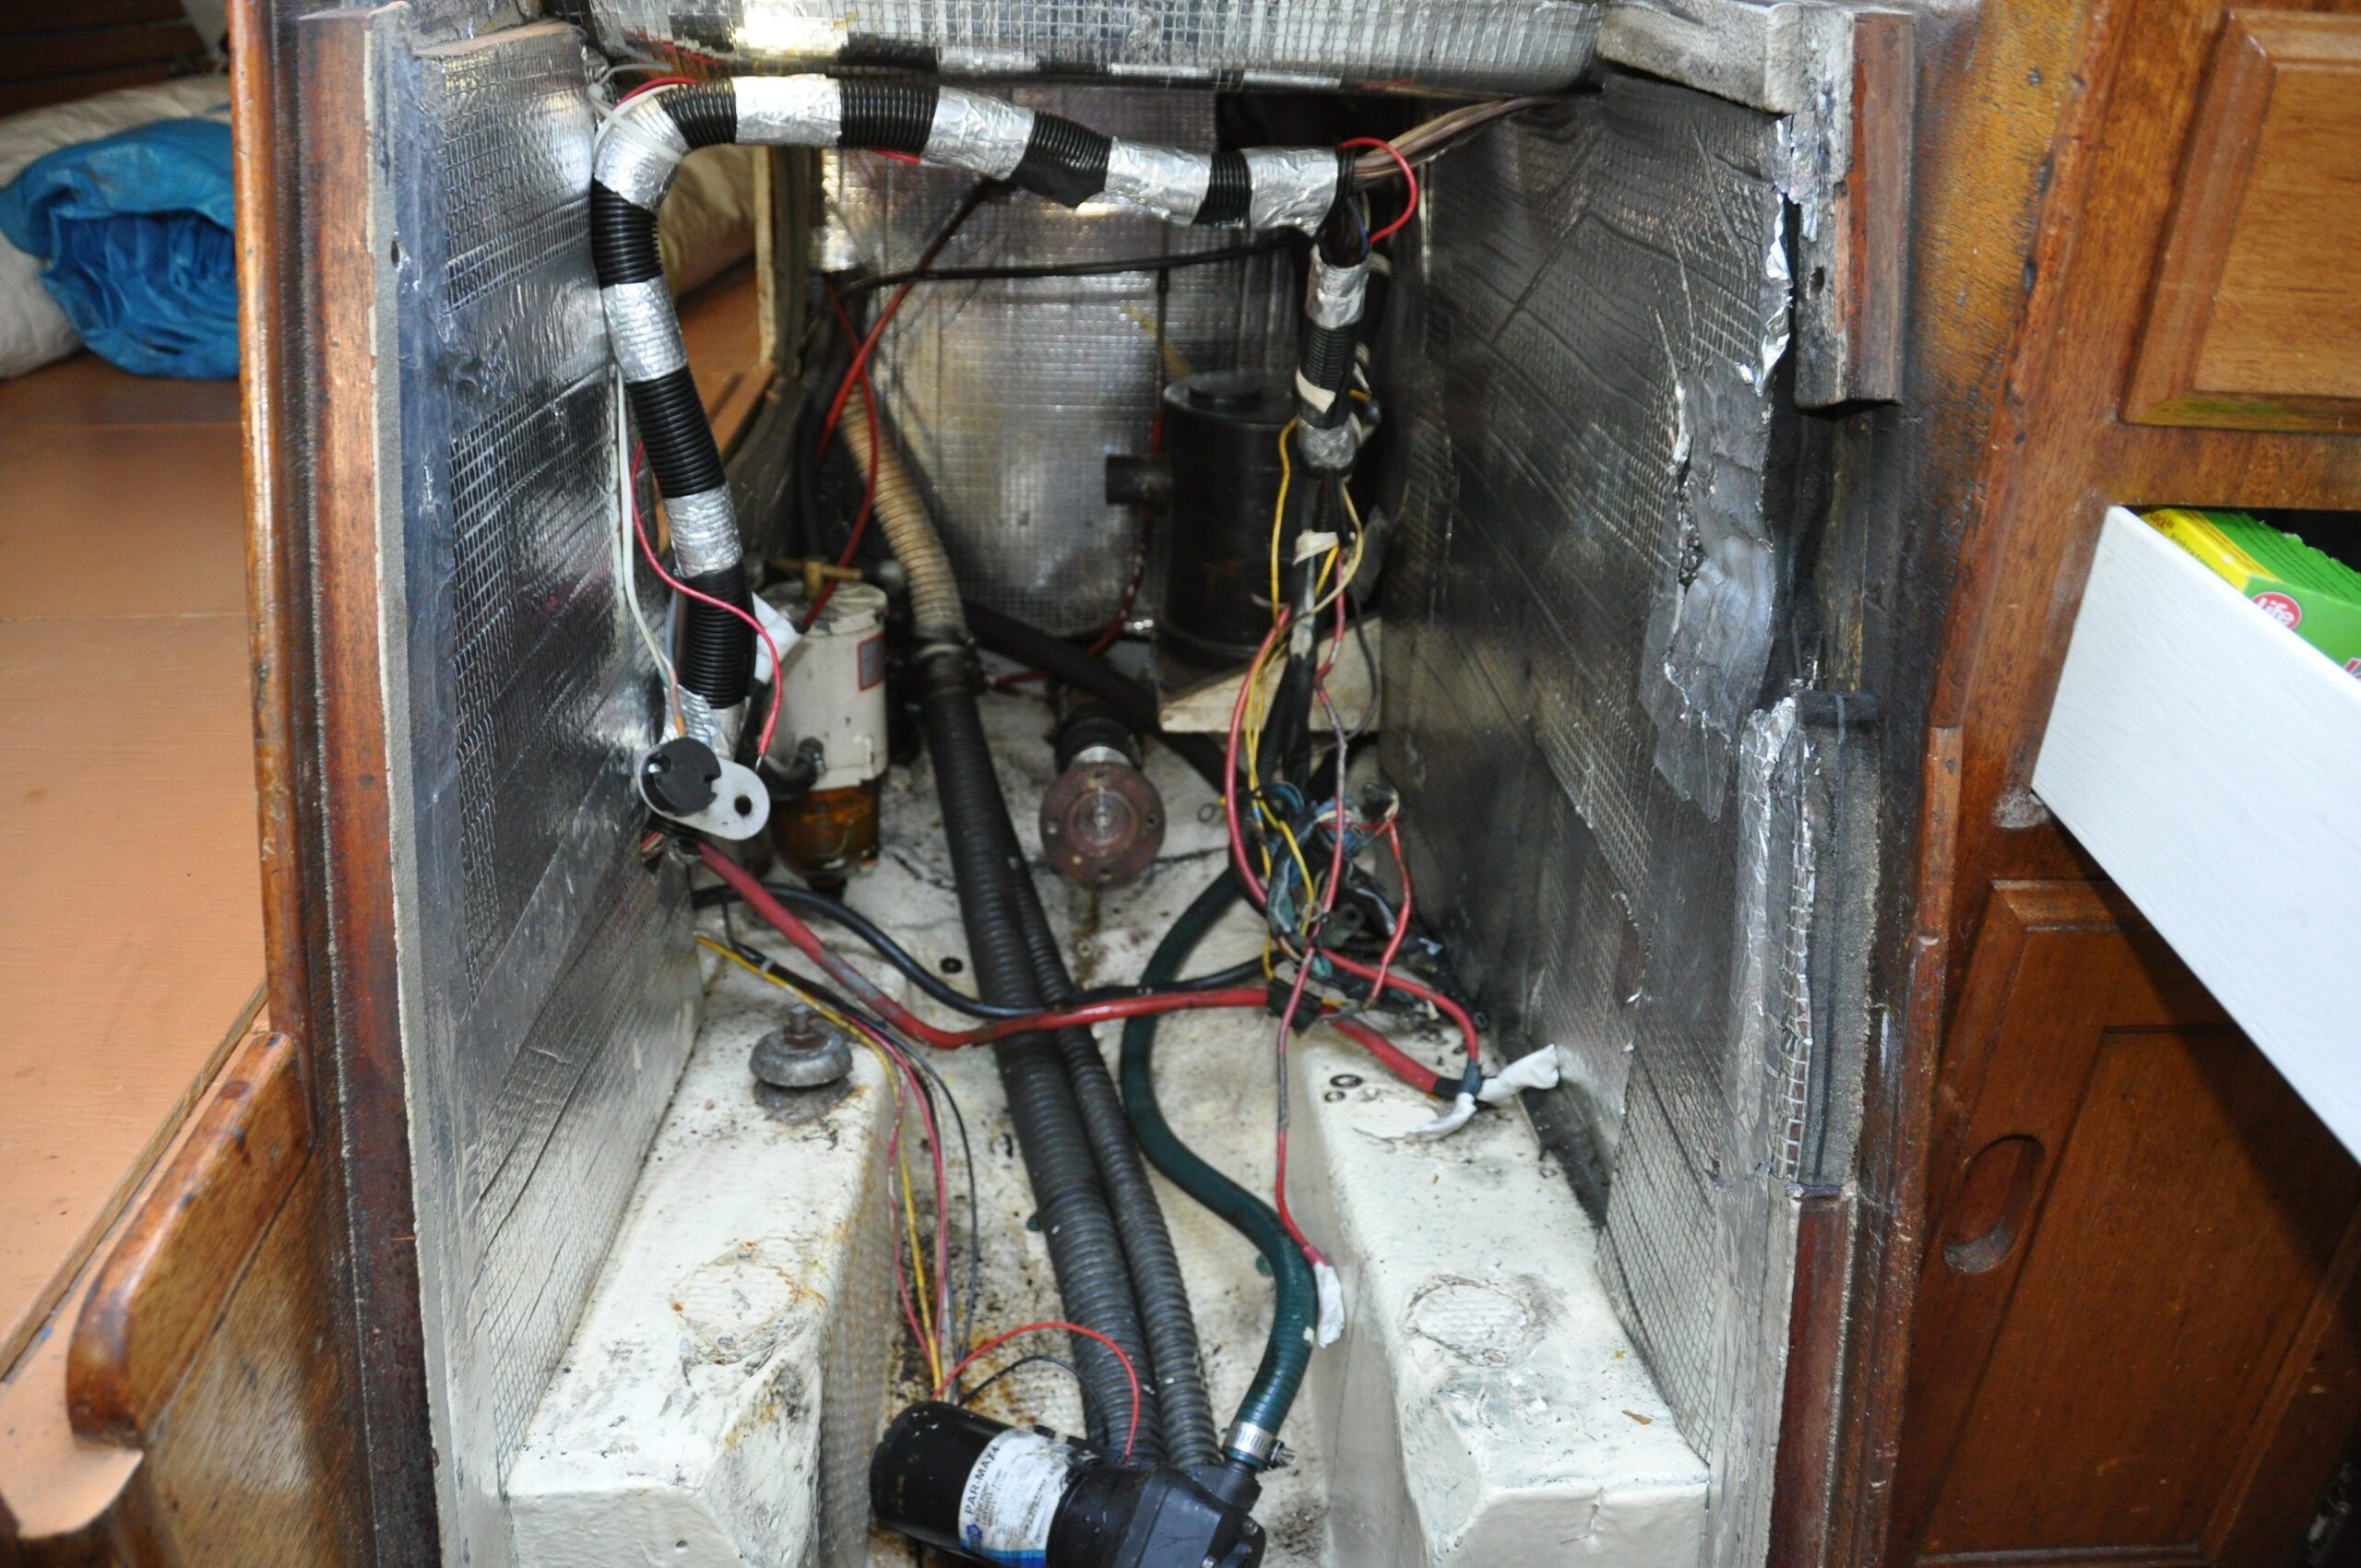
As winter approached, the Islander was hauled out at the local boatyard that allowed owners to work on their boats. The old Volvo was removed using the boom to lower it to the ground and onto a metal recycler. Using pry bars and an angle grinder, the oil-soaked mahogany engine bearers, shaft and strut were removed. The engine compartment was cleaned up and all associated wiring assessed. The factory wiring for the port side of the Islander crossed through the engine compartment, a pretty standard practice back in the 70s. I wanted to eliminate the potential fire risk. All the wiring was re-routed against the transom inside the stern lockers. The Beta would arrive with its own wiring harness from the included control panel, a simple plug-in. Very clean.
3. ASSEMBLE ENGINE/LEG UNIT ONTO NEW BED
After the the engine package arrived, work began on the installation process. The manufacturer required the installer (me) to assemble the engine/leg unit onto the provided bed for alignment. Mounting holes on the bed needed be drilled and tapped to ensure the entire package was properly aligned. This was carried out at home where there was much more room to work. The completed unit was then disassembled and the engine bed prepared for installation in the boat.
4. REGLASS NEW ENGINE COMPARTMENT AND CUT NEW HOLE IN HULL
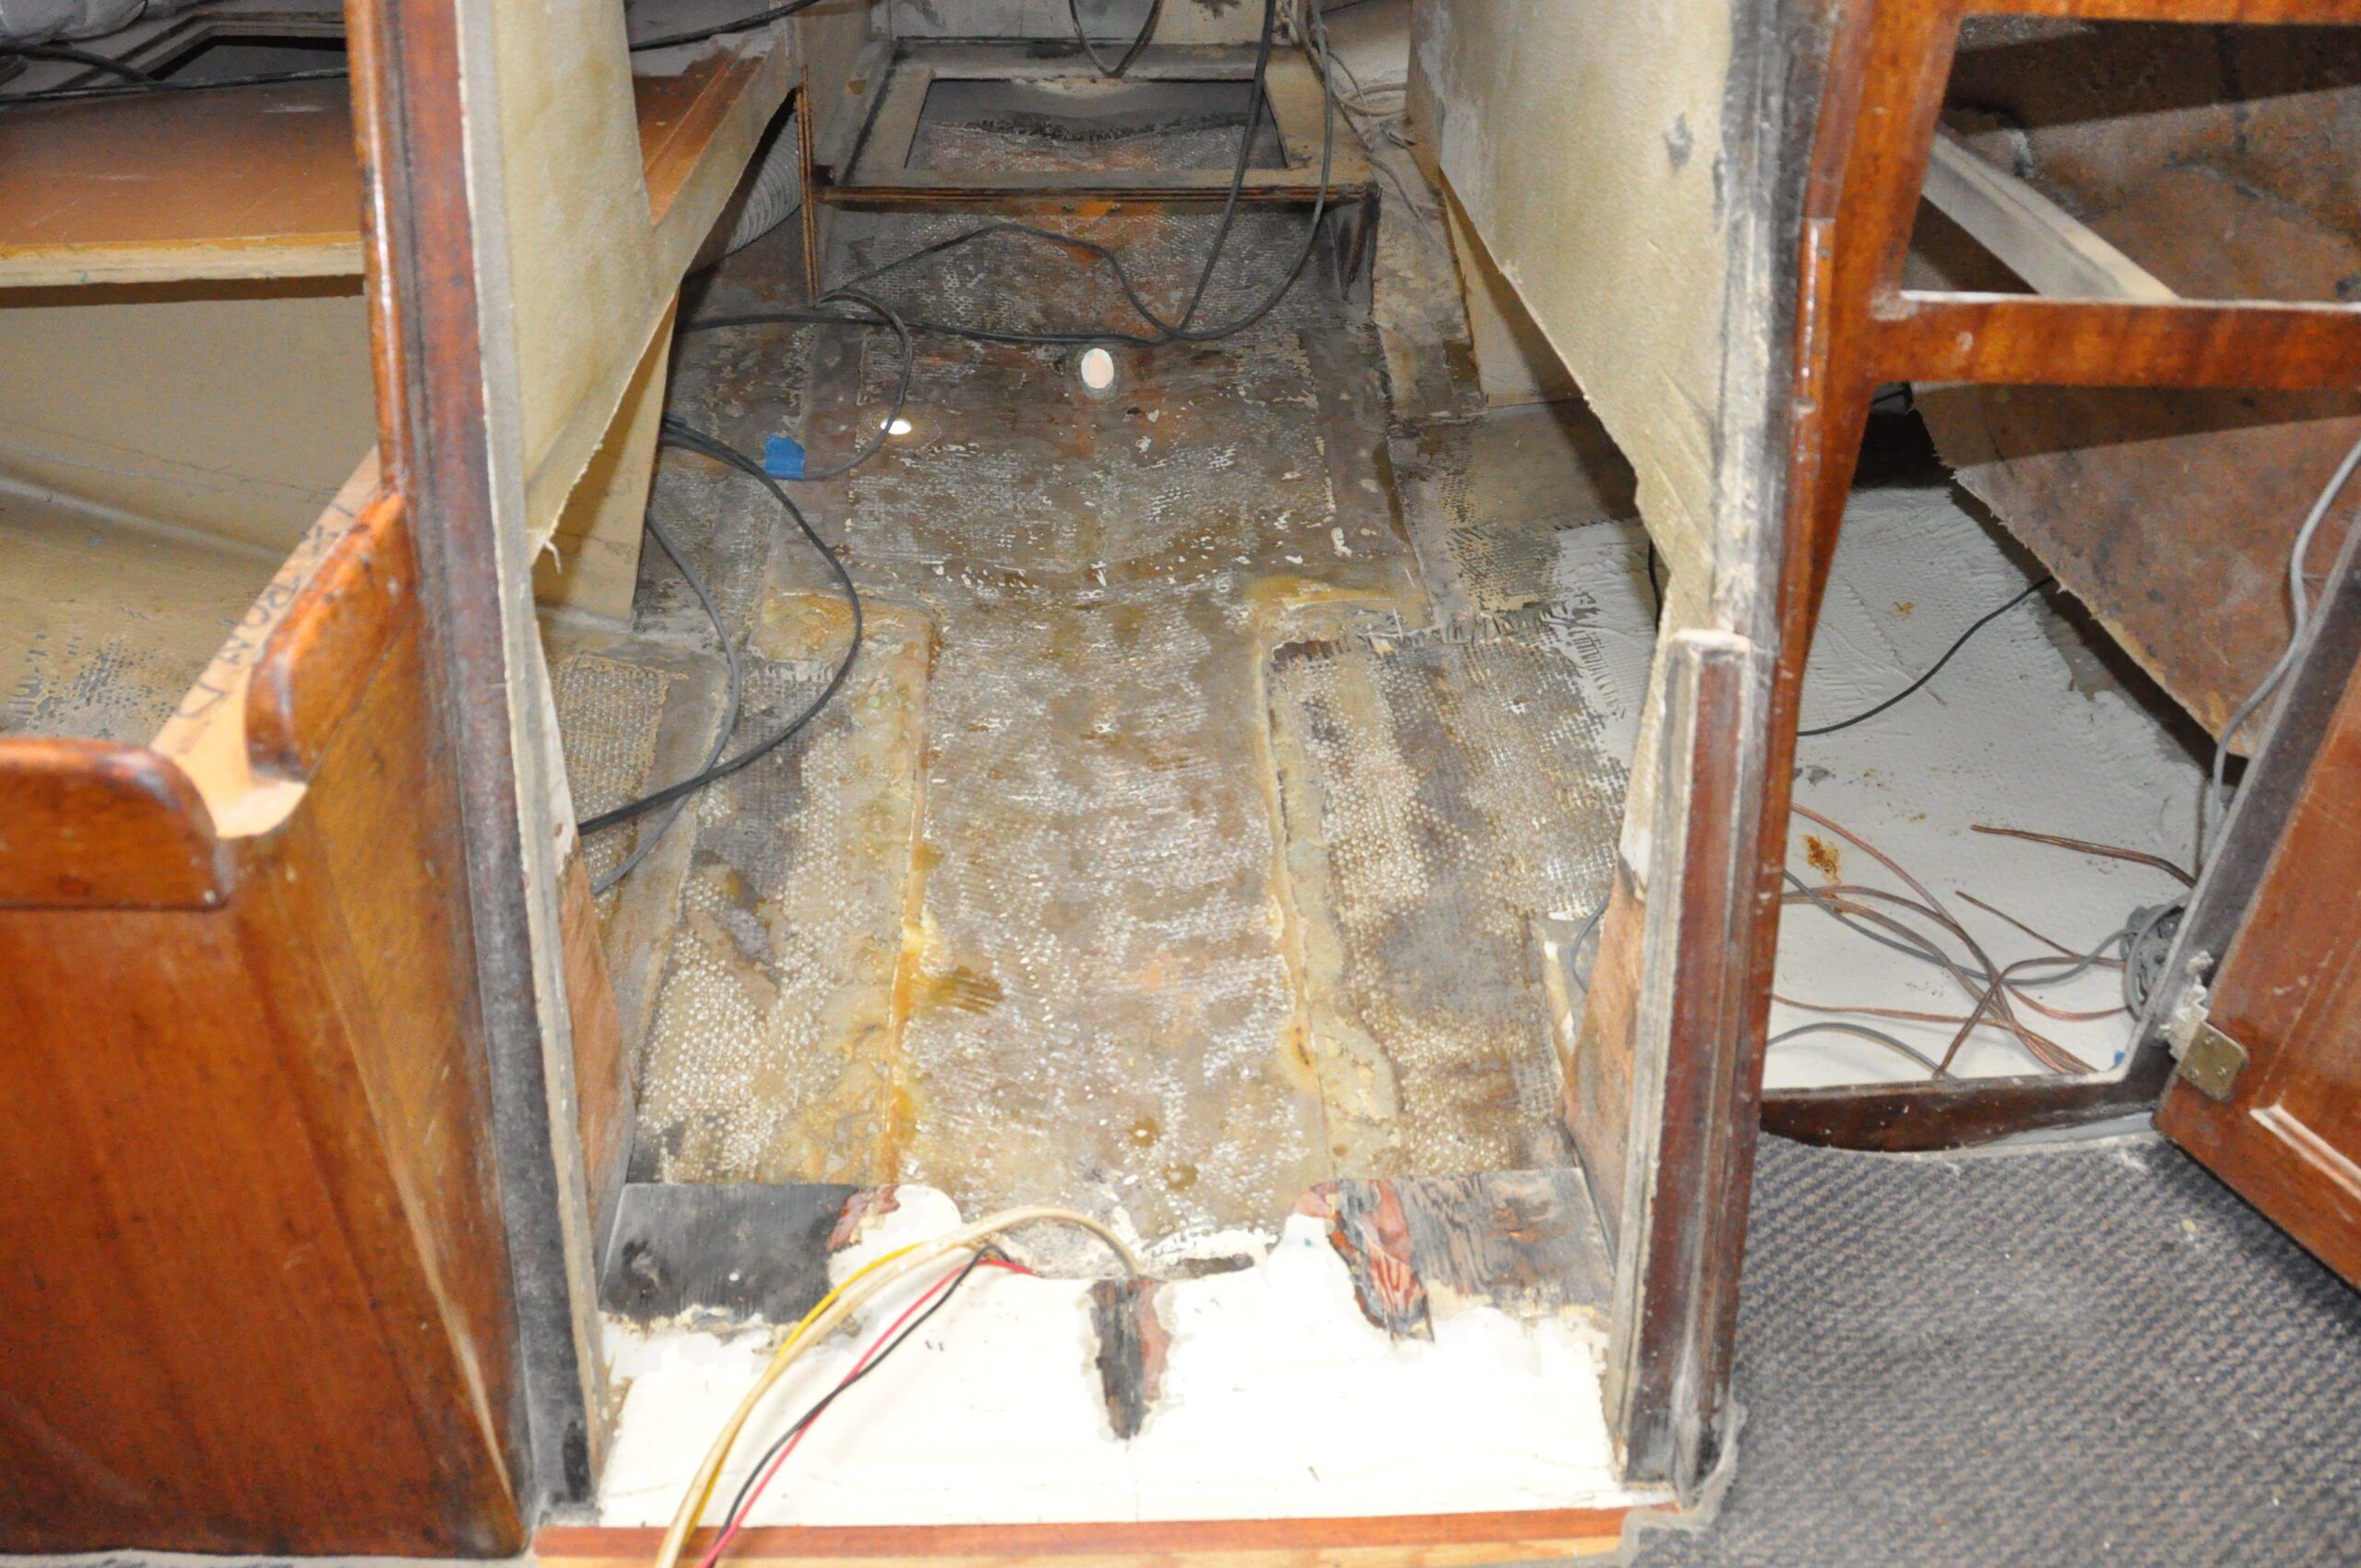
The engine bed was wider than the engine compartment aboard the Islander. I had to remove cabinetry to allow the bed to be glassed in. I also had to seal the original strut bolts, shaft log and Volvo raw water intake holes. I applied plenty of fiberglass to the inside of the hull and fairing on the outside. I then trimmed the bed to the contours of the hull using a jig saw and belt sander, taking small steps to ensure that not too much material was removed at one time!
The bed was lined up inside the compartment, the position marked, and then (argh!) the hole was cut through the hull (an owner should never have to cut a hole this enormous through the hull). For future peace of mind, I had a local marine repair shop complete the actual glassing in of the engine bed. I didn’t want an oversight on my part in the glassing process to cause the bed to separate from the hull.
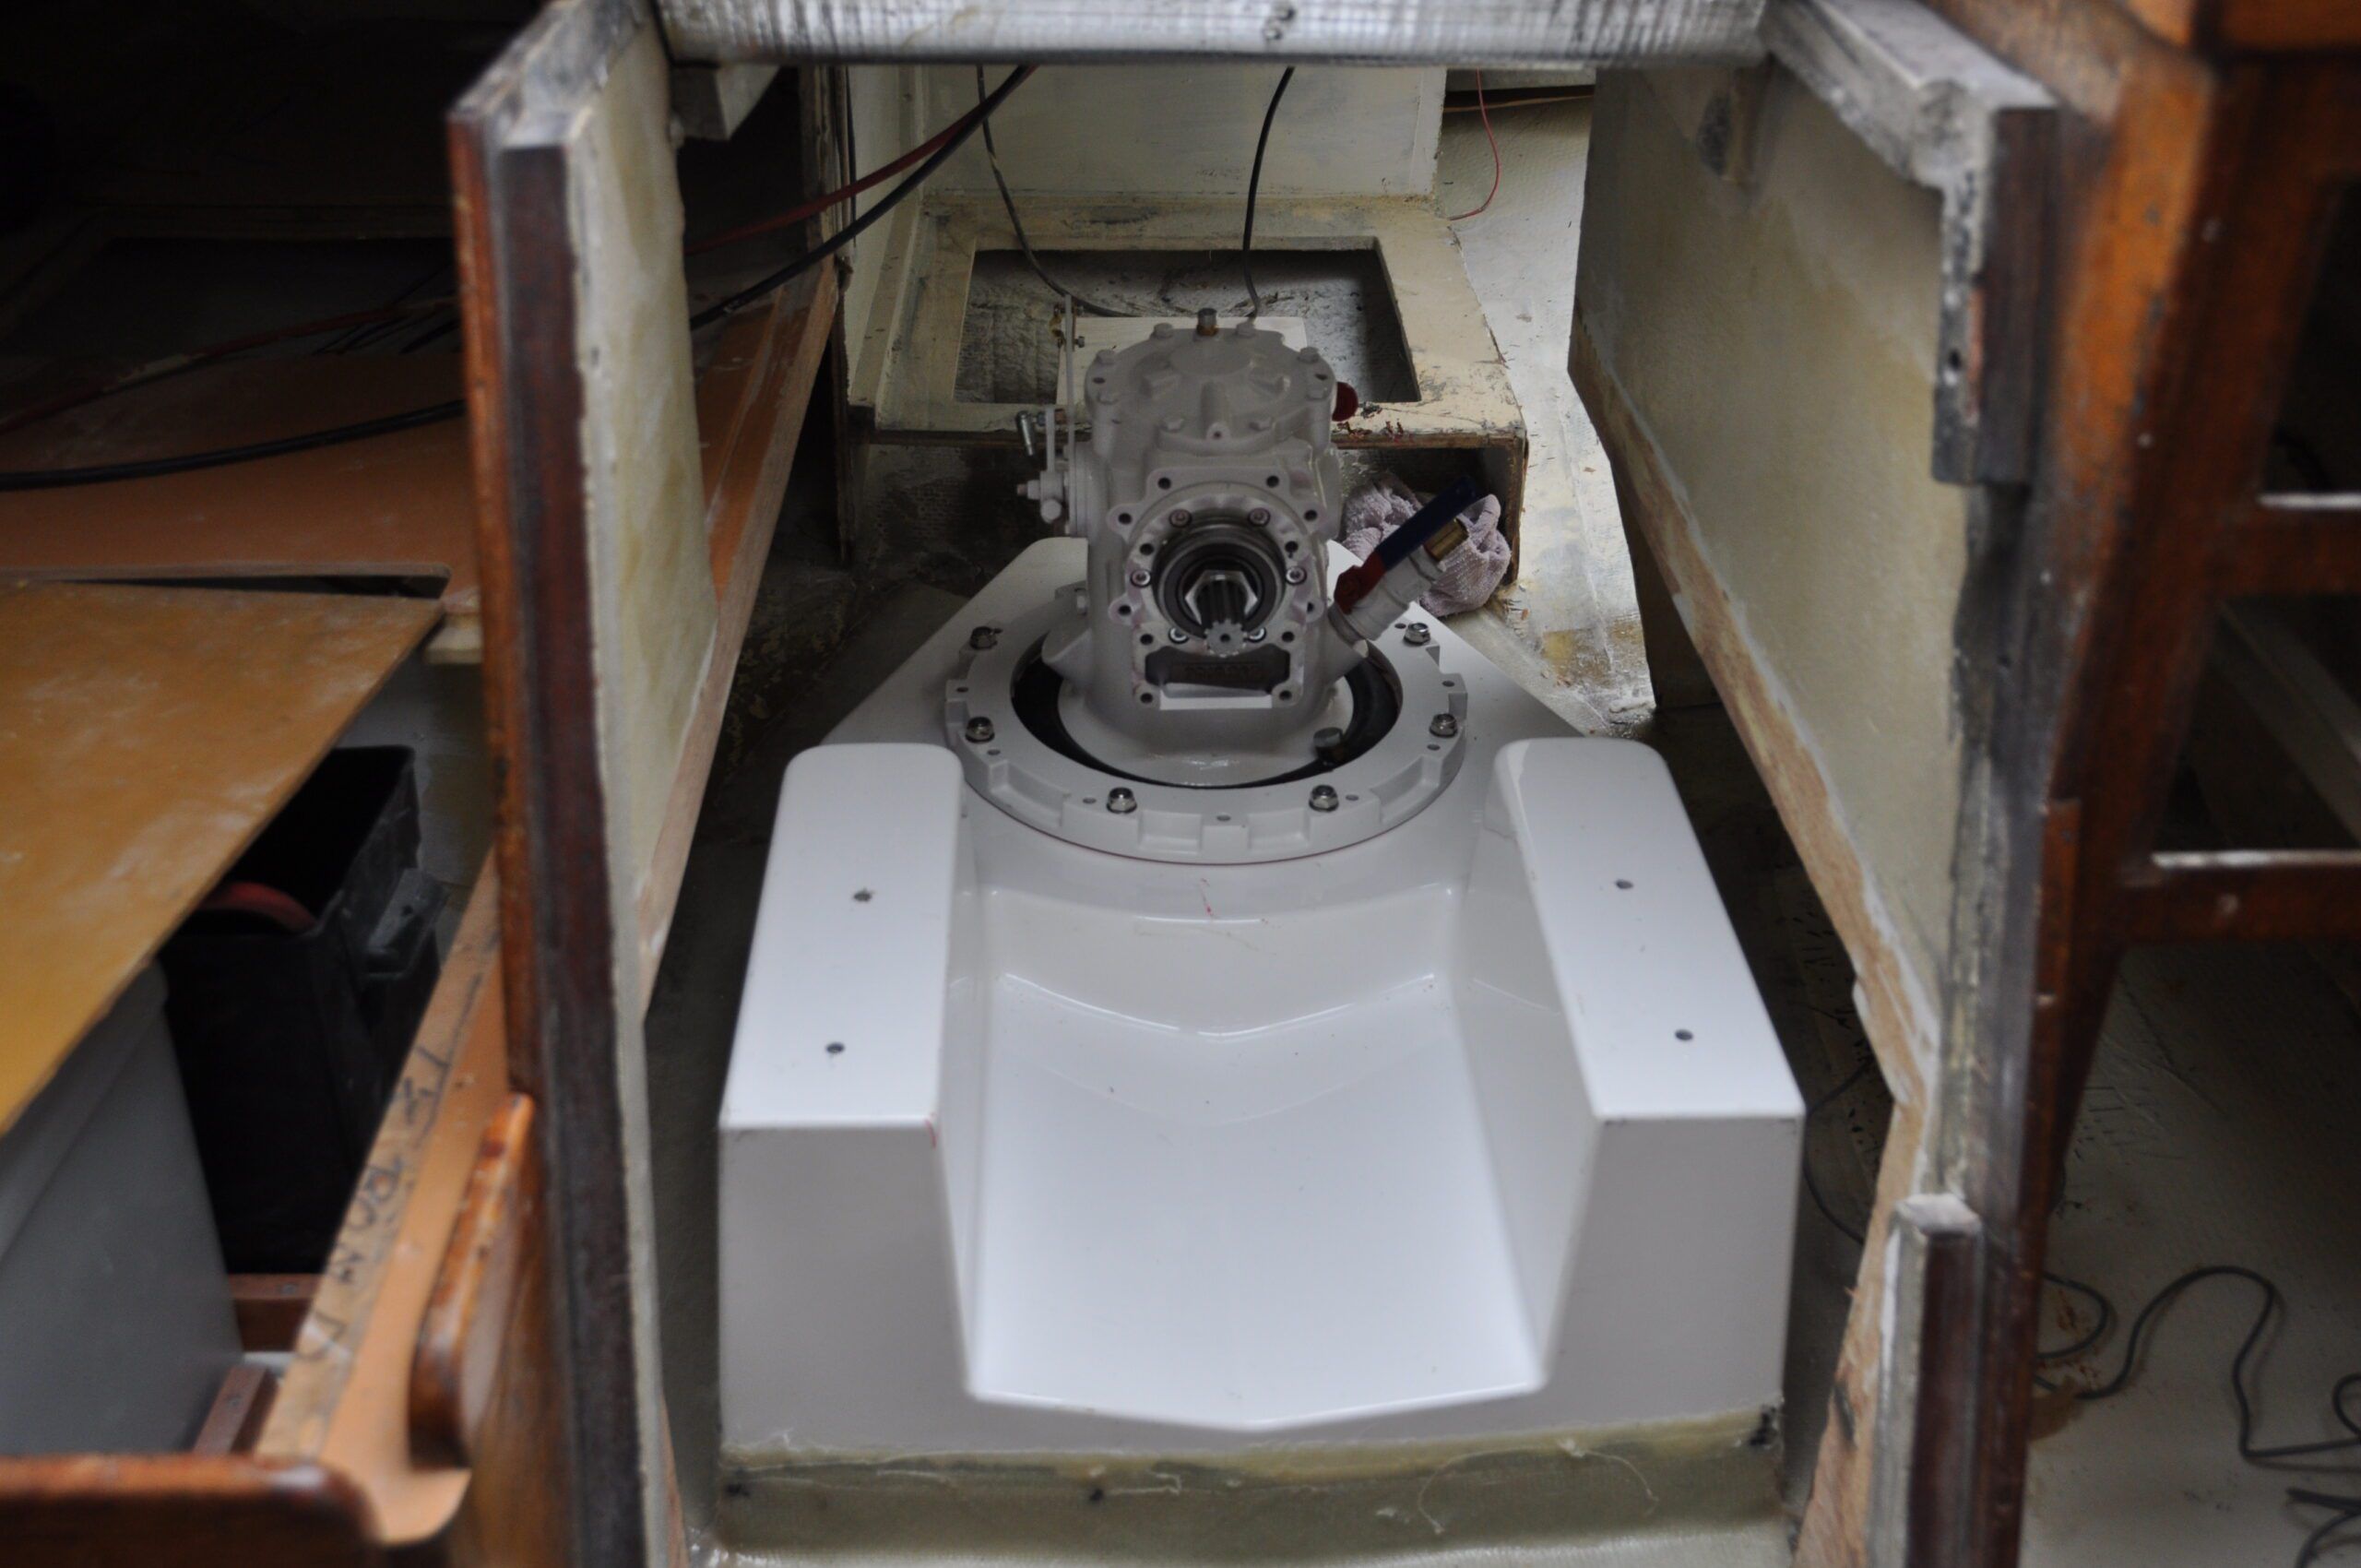
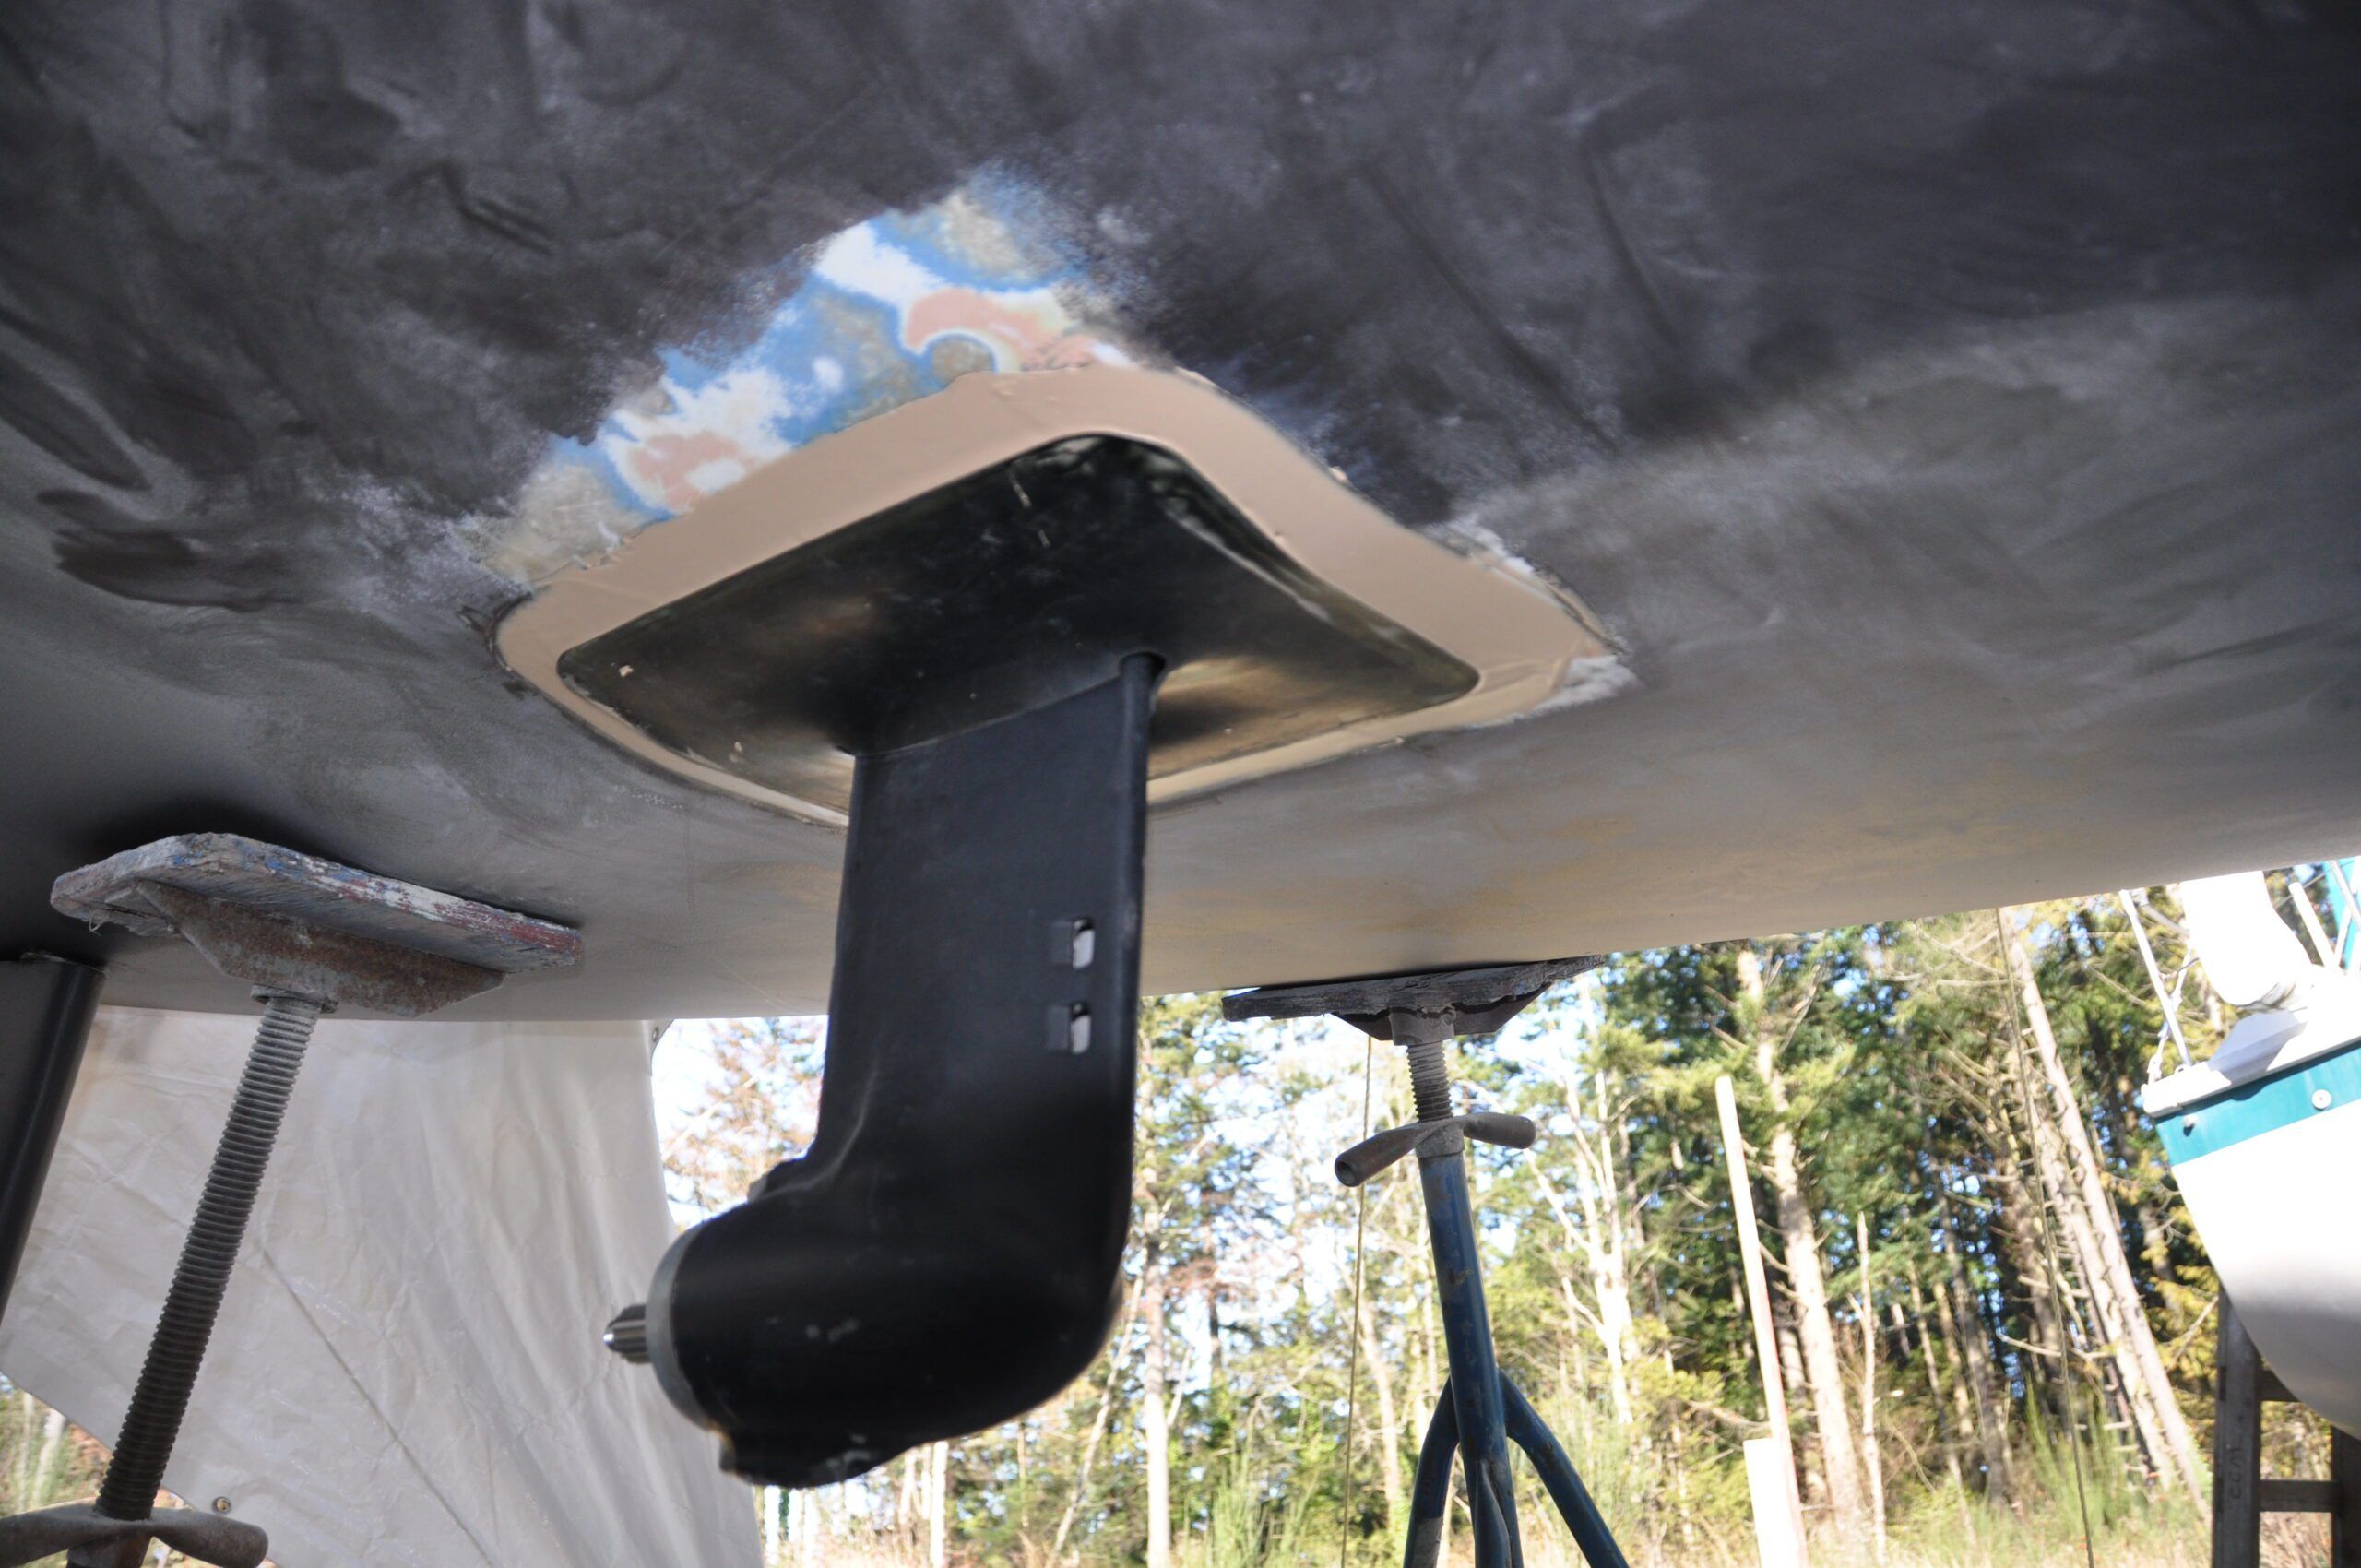
5. INSTALL SEAPROP60 LEG
The next step was to install the SeaProp60 leg onto the bed. This unit was light enough to be physically carried to the boat and up the ladder. Space was tight and partial disassembly to lower the overall height of the unit was required to be able to tilt the leg onto the bed. Once the leg was bolted down with the rubber seal properly in place the hull was once again watertight. In the interest of saving boatyard costs, I launched and towed the boat back to my home port marina. There was still plenty of work to do, but it could all be done at the dock.
6. SOUNDPROOFING THE COMPARTMENT
With the engine bed and saildrive unit in place, the engine compartment cabinetry had to be constructed and glassed into place before the Beta was installed. Marine grade plywood panels were cut and assembled, then glassed into place. Once completed, the entire compartment was painted with a sound absorbing material called Silent Running, an interesting and effective material. Foam sound insulation sheets were then glued over top of the paint. Then I installed engine control cabling to the pedestal, wiring to the new instrument panel and fuel lines.
7. ENGINE INSTALLATION
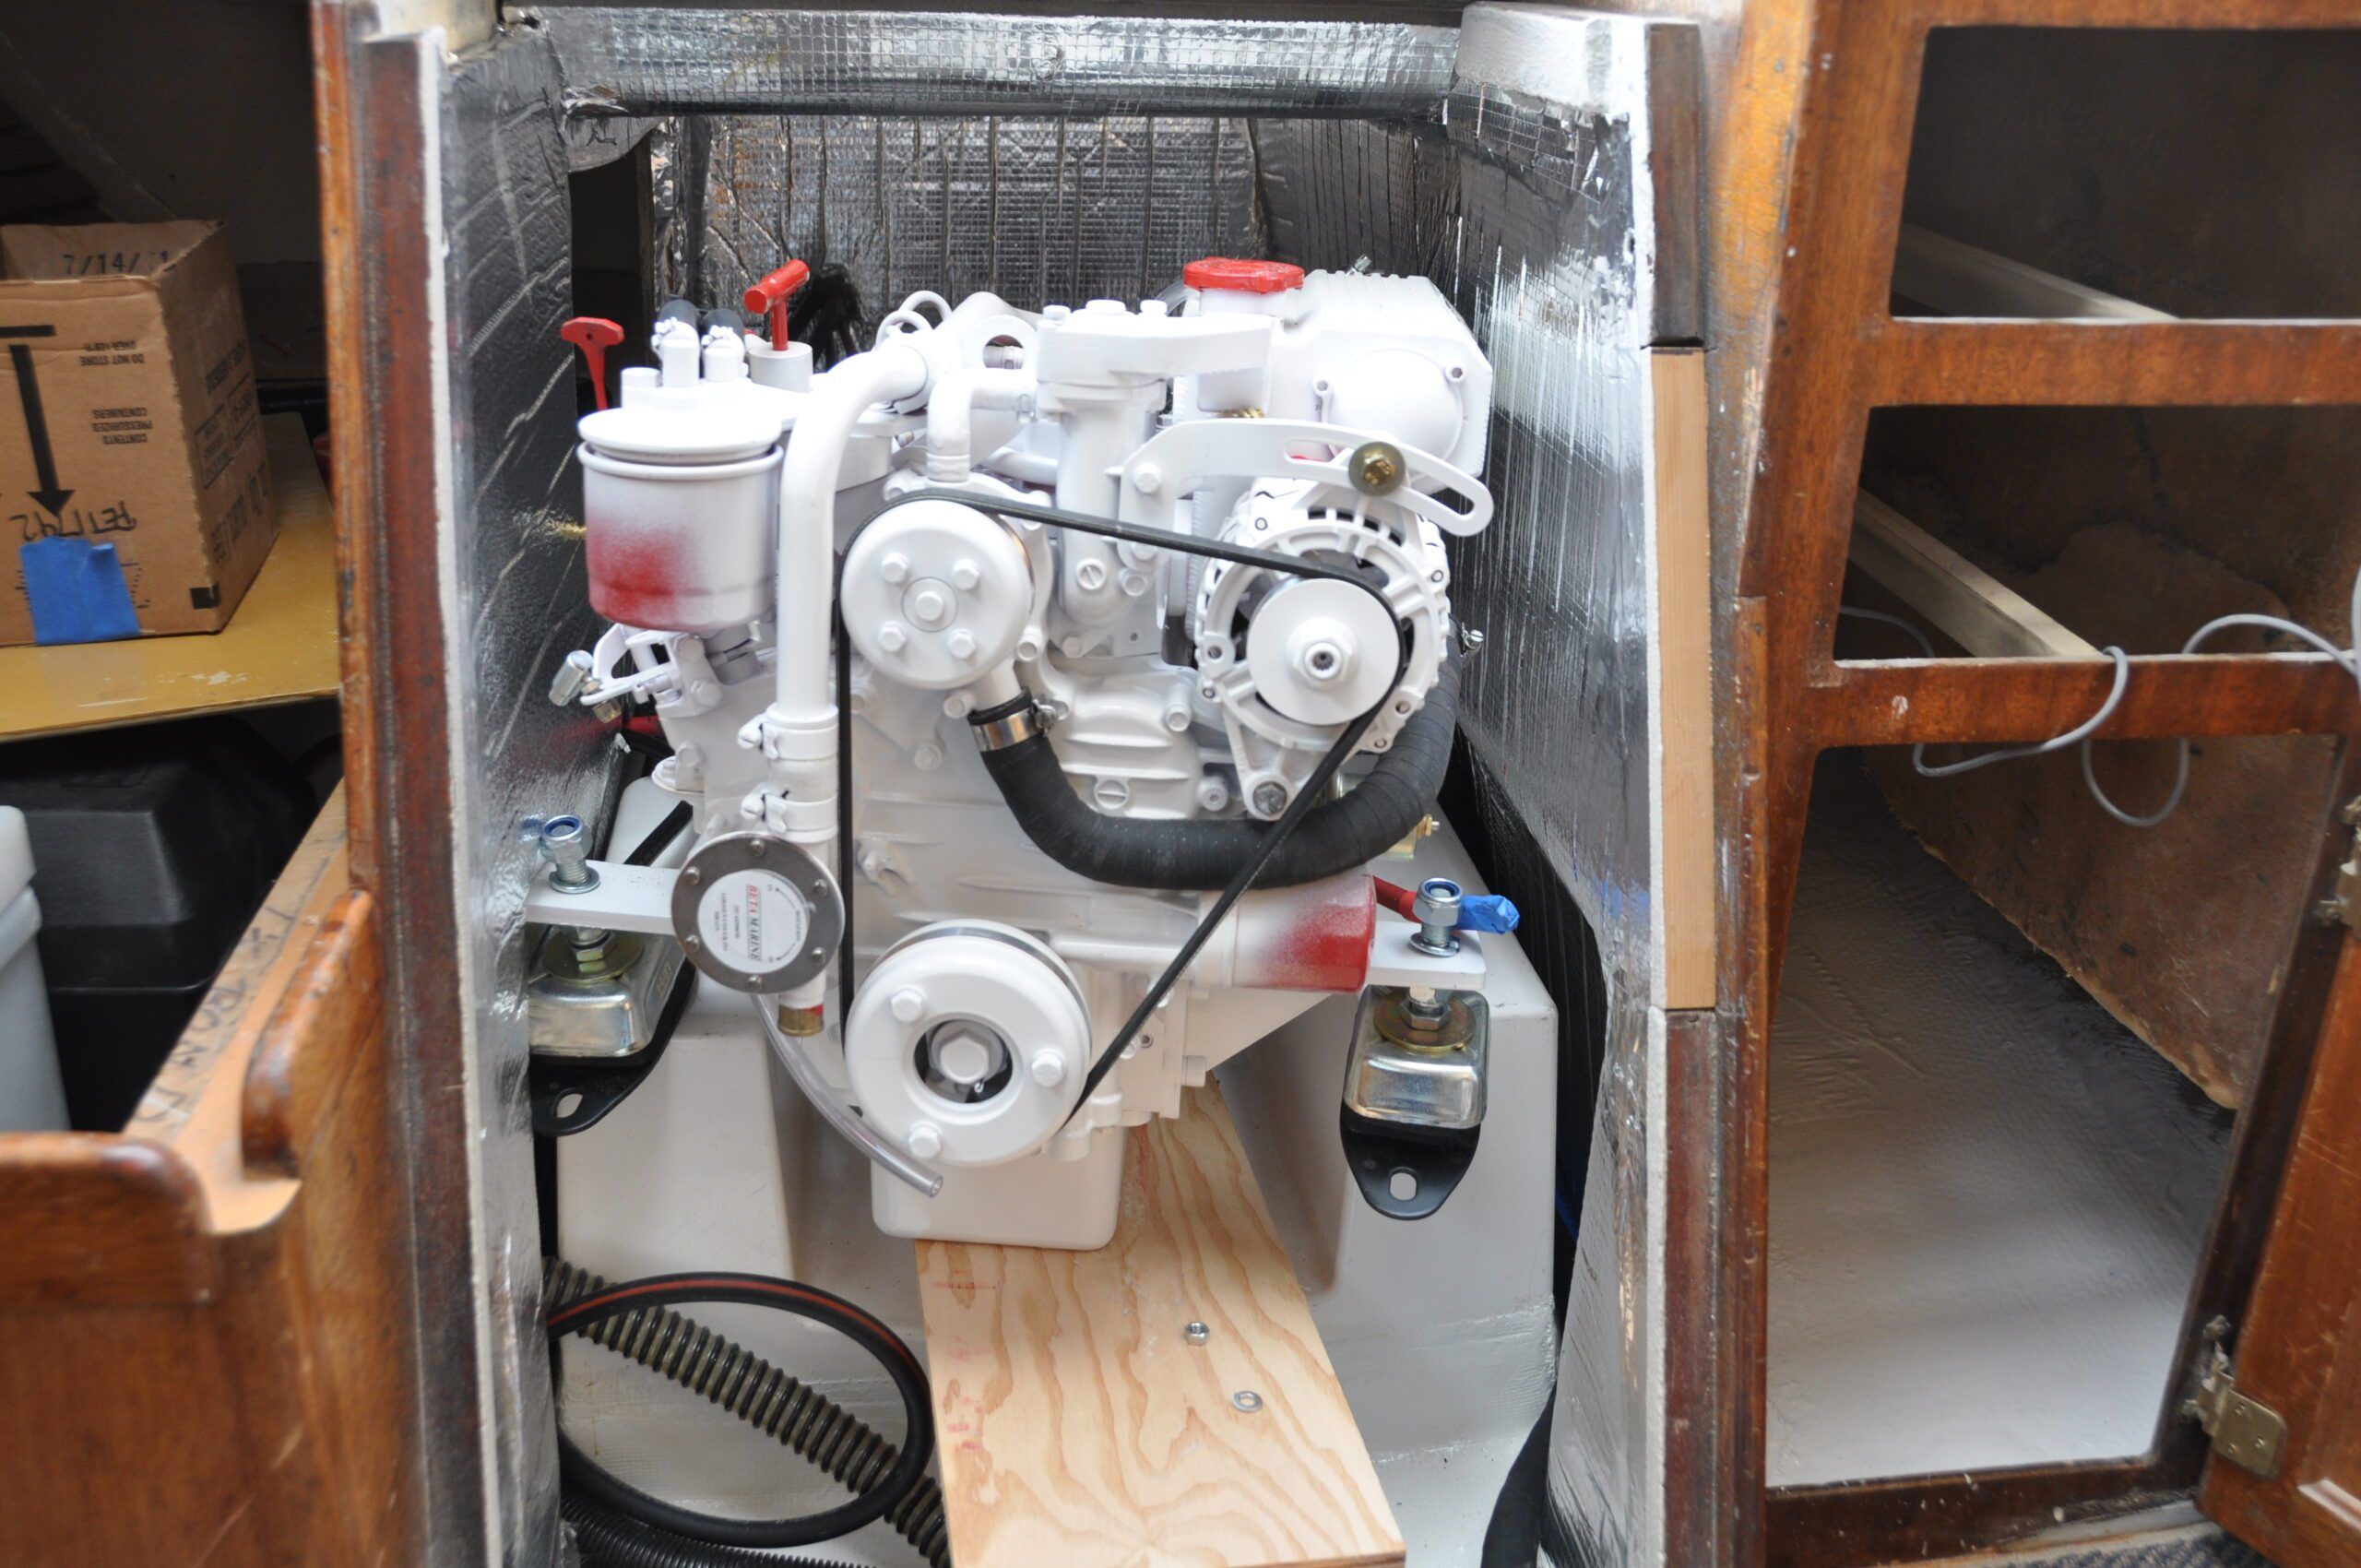
From there it was a fairly simple matter of bringing the Beta aboard into the main cabin sole. Using wood blocking to adjust for height, sliding the engine onto the bed was accomplished without heavy machinery. It was bolted to the saildrive unit and secured to the soft engine mounts on the bed. The wiring harness was a simple plug-in to the Beta instrument panel mounted in the cockpit. Engine controls from the pedestal and fuel lines from the tank were connected. The Beta started immediately and the sound of a smoothly running diesel music to my ears!
GALVANIC CORROSION PREVENTION
With abundant social media horror stories about rampant saildrive corrosion, galvanic corrosion was of concern. To protect the aluminum saildrive unit from that potential I:
- Added additional coats of epoxy paint over the manufacturer’s barrier epoxy before applying a non-copper based antifouling paint. That biocide-based paint was also applied to a two-foot radius around the leg, as recommended by the manufacturer. The remainder of the hull received the usual copper based bottom paint;
- Installed a ProMarinerR ProSafe RS Galvanic Isolator on the shore power wires at the socket. This device stops electrical leakage into or out of the boat’s electrical system through the shore-power cord, yet allows for a fully functioning grounding, critical for electrical safety aboard; and
- Complemented the manufacturer’s zinc on the saildrive with a 10-gauge wire from the engine to an additional sacrificial zinc that hangs over the side whenever I’m at a marina and plugged into shore power.
After 11 years of continual submersion there is no sign of corrosion on the leg.
CONCLUSION
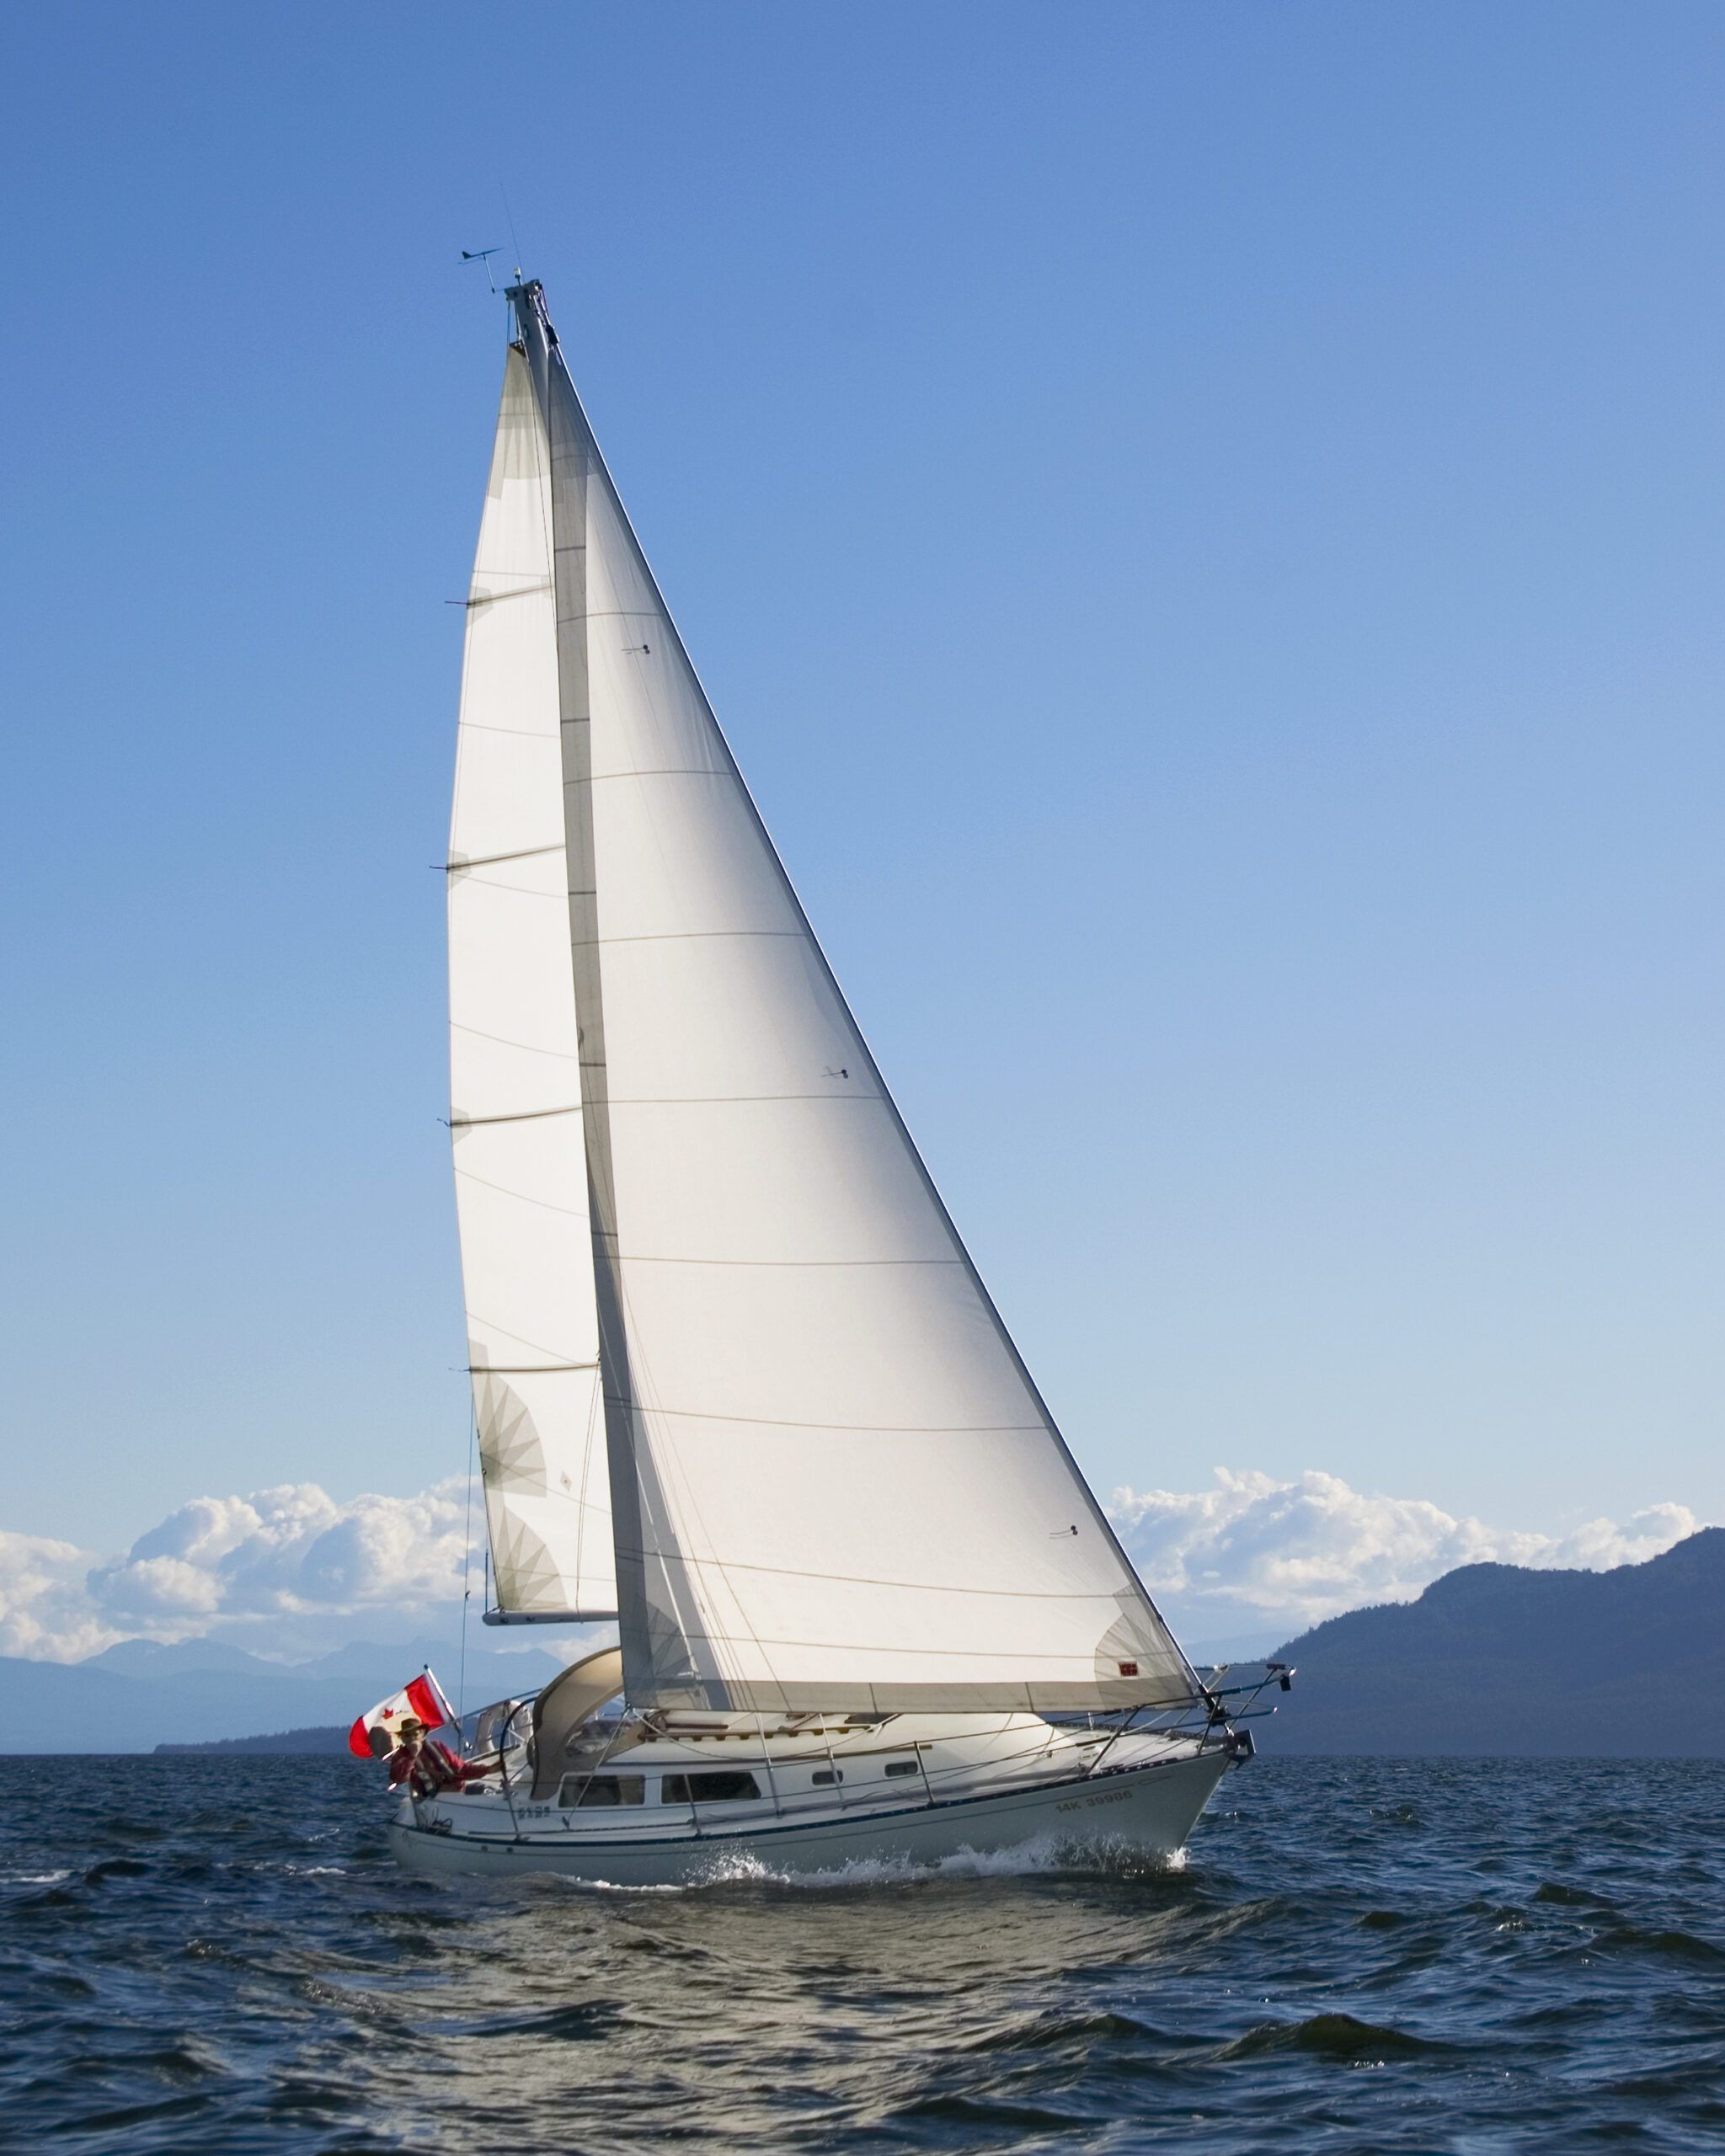
We now have 1,300 hours over 11 years of cruising on this engine/saildrive combination. Performance under power has been excellent. Servicing the Beta is a joy with all the service points easily accessible at the front of the engine. The SeaProp saildrive has been reliable and, other than monitoring and replacing lubricant, has not needed any servicing. I’m still impressed by how quiet and vibration free this installation has been. Knowledgeable guests with a sailing background are always amazed. The noise level has been greatly reduced both in the cabin and cockpit. We can hold a conversation in a normal tone of voice, even at full cruising speed. Wind noise is now more of a factor!


