

My previous boat had two 30 Amp 110V circuits. When I bought my new boat it came with 50A 125/250V service. I didnt give it much thought at the time, but now I realize that the 2x 30A approach is much preferred. I have never seen any discussion of this in the boating press.

With two 30A circuits, one circuit powers the air conditioning and heating, the other everything else. Here in the Northeast, almost every marina slip you encounter while cruising has at least one 30A outlet available. If we could only reach one outlet it was simple to manage; when we were aboard we would plug in the air conditioning circuit and run the lights off of the batteries. When we were out and about during the day we would switch the plugs and top off the batteries. We carried two 50-foot cordsets so in the event we were more than 50 ft. from an outlet, we could string both together. In a pinch, an inexpensive splitter allowed us to plug both into a 50A outlet.
Cruising with 50A service turns out to be much more of problem. First of all, a fifty foot 50A cordset is heavy, and coiling the thing is a bit like wrestling a python. Many marinas only have a few transient slips with 50A outlets, and these come in two flavors; 50A 125V and 50A 125/250V. When you reserve a slip with 50A service, you may not get what you expect. We still need to carry two 50-foot cordsets to be sure of reaching an outlet. (Another issue to explore: why do manufacturers always put the inlet on the stern? Bow in with a 45-foot boat, a fifty foot cable doesn’t have much chance to reach the powerhead. If they put the inlet amidships, it wouldnt matter how you came in. Also, inside the boat it would usually be a shorter run to the breaker panel.
Of course it is possible to run a 50A service from two 30A outlets, but for this you need an expensive combiner and the two outlets have to be wired in opposite phase. In my experience marinas rarely wire their powerheads that way (whatever the standards may require). In fact it seems to be common to wire a whole floating dock in the same phase. More often than not I will have to work my way along the float trying different outlets and even so, it is not unusual to be unable find a pair that will work together.
The upshot is that I now have to cruise with two 50A cables, two 30A cables and a combiner. This is over 100 pounds and $2,000 worth of equipment, and sometimes we still don’t have shore power.
James McGinnis
Annapolis, MD
The Iconic Seagull Outboard
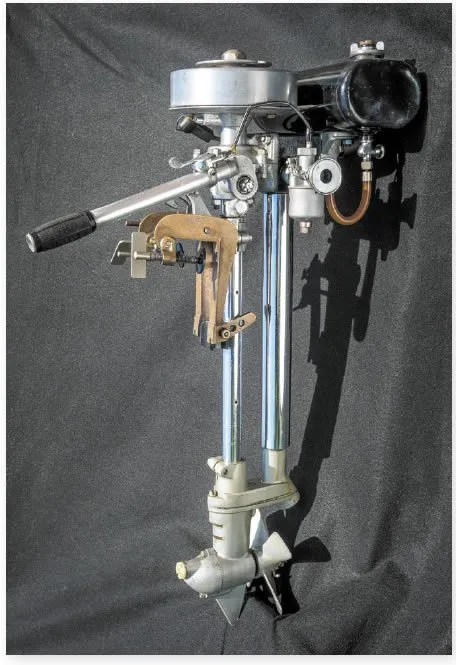
It seems that the iconic British Seagull is once again in the lime(ys) light. In reading Mailport in the May 2017 issue of Practical Sailor, I appreciated Dr. Pachecos justifiable touting of his 1968 Silver Seagull and sharing experiences about the motor. However, I would like to make some comments and corrections relating to the Editors response. All models of the Seagull line are water-cooled and definitely not air-cooled. The parent company was initially formed in 1931 under the name Marston Seagull, [not British Marstow Seagull] and was reorganized in 1938 to become British Seagull, [not Sea Gull] until ceasing production around 1996.
Throughout production, the company maintained the original salt-water design of its motors, which are perhaps the most user-friendly, easily maintainable small outboard motors in the range of 2 to 6 hp. It is interesting to note that the logo The Best Outboard Motor For The World is embossed atop the flywheels on many Seagulls. In addition to Dr. Pachecos (Seagull) website, I suggest interested followers also refer to Mr. John Williams website (www.saving-old-seagulls.co.uk) to study a very comprehensive archive of history and information about these intrepid survivors. John is also a specialist in providing parts and service as well as buying and selling Seagulls.
Amazingly, Seagulls are still sought after by collectors and are also found to be in worldwide use by a number of devotees. Occasionally, some appear for sale in yard sales, flea markets or Craigslist, and are frequently offered on eBay along with new and used replacement parts to support restoration and maintenance of all models. I would also like to mention the Antique Outboard Motor Club is another source to search.
Among the more obscure and unexpected places to find old outboards, including Seagulls, are marine stores handling used and consignment items. As a rewarding example of such, when I visited the Mystic Marine Consignment Store in Mystic, Connecticut, I discovered a 1963 two-horsepower Seagull Featherweight and eventually bought it for only $40. The price was low due to the fact that it was stuck and covered with lots of grime and oil, which, in effect, had served to protect it during years of dormant storage and also made it appear to be a mortally sick old bird, much less one ever likely to fly again.
By luck, working with cautious persistence, I was able to free it up, disassemble, service, thoroughly clean, and inspect every aspect of the motor, thereby restoring it to nearly like-new mechanical condition and cosmetic appearance. Not bad compared to the present-day cost in the range of $1,200 for a new motor of similar size! Believe it or not, it started on the first pull and ran and idled perfectly without faltering. Out on the water, the old bird kicks my vintage 8 1/2-foot Grumman dinghy smartly along, as does a more powerful 40 Plus Seagull on my new 10-foot Trinka.
To my mind, so much for the naysayers, and to be sure, they are out there, claiming that Seagulls never easily start, run, and perform well. For goodness sake, the Brits and Aussies even race them! So even if you are just slightly mechanically inclined, consider searching for an old Seagull to adopt and take under wing to make your little yachting tender fly along oer the sea. With responsible care, it will obediently serve you well for years, cost little to buy and maintain, and you can work on it yourself. Hence, out of respect for Seagulls and to avoid frustration, I strongly recommend obtaining sets of Whitworth sockets and wrenches for your toolbox.
Capt. Steve Sheets
SV Squid
Portsmouth, R.I.
Thank you for correcting our reference to air-cooling; we knew better.
Highs and Lows of Cooking Fuel
One thing you missed in you recent tips on cooking fuel. Sailing in Europe, for many of us continuing to use propane is not easy, because of difficulty finding bottles that will fit in our gas lockers. The larger butane Camping GAZ cylinders that are readily available and exchangeable work fine on our Force 10 1999 stove, using the propane jets. The 904 (4pound) and 907 (6 pound) bottles last a long time. We often only use one 907 a month, and can carry three 907s and one 904 in our locker, enough for a summer of cruising.
Converting from propane was easy, as we already had a sealed locker.The Gaz cylinders are connected by a screw in regulator/shutoff valve. So, all we did was take out the propane regulator and connect a gas hose to the solenoid shut off and the screw-in regulator.
Gus Wilson
Wings
Sabre 38 MkII
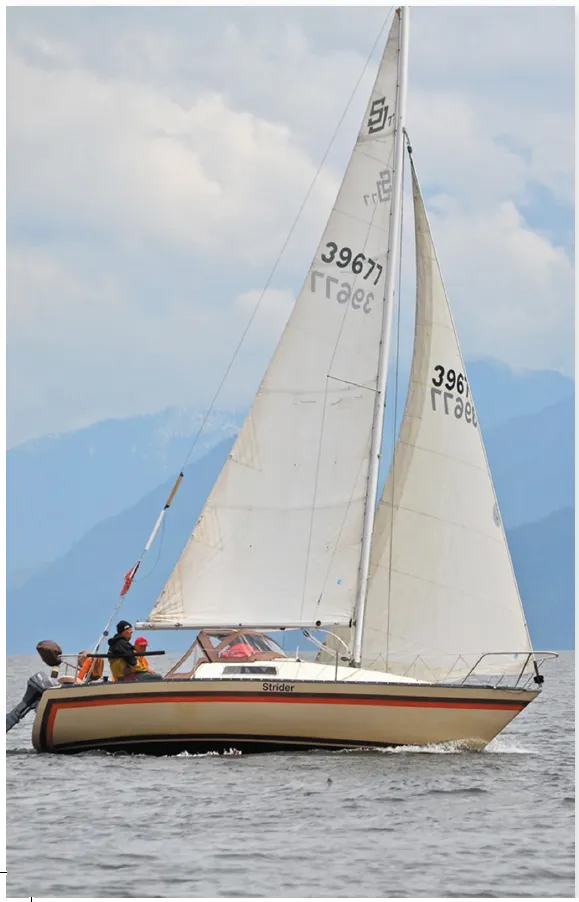
San Juan 27
Can you review the San Juan 7.7. Having owned and sailed thousands of miles on Hull No. 16 since delivered in February 1980 Im pleased to advise this is a hard to beat performance pocket cruiser. I sail mine out of Point Roberts, WA in the fabulous water of the Pacific Northwest. There were approximately 225 boats built and theres a very active 86-member association on Facebook.
Hugh Stewart
San Juan 27
Port Roberts, Washington
We can. SJ 7.7 owners can contact us at [email protected] to help.
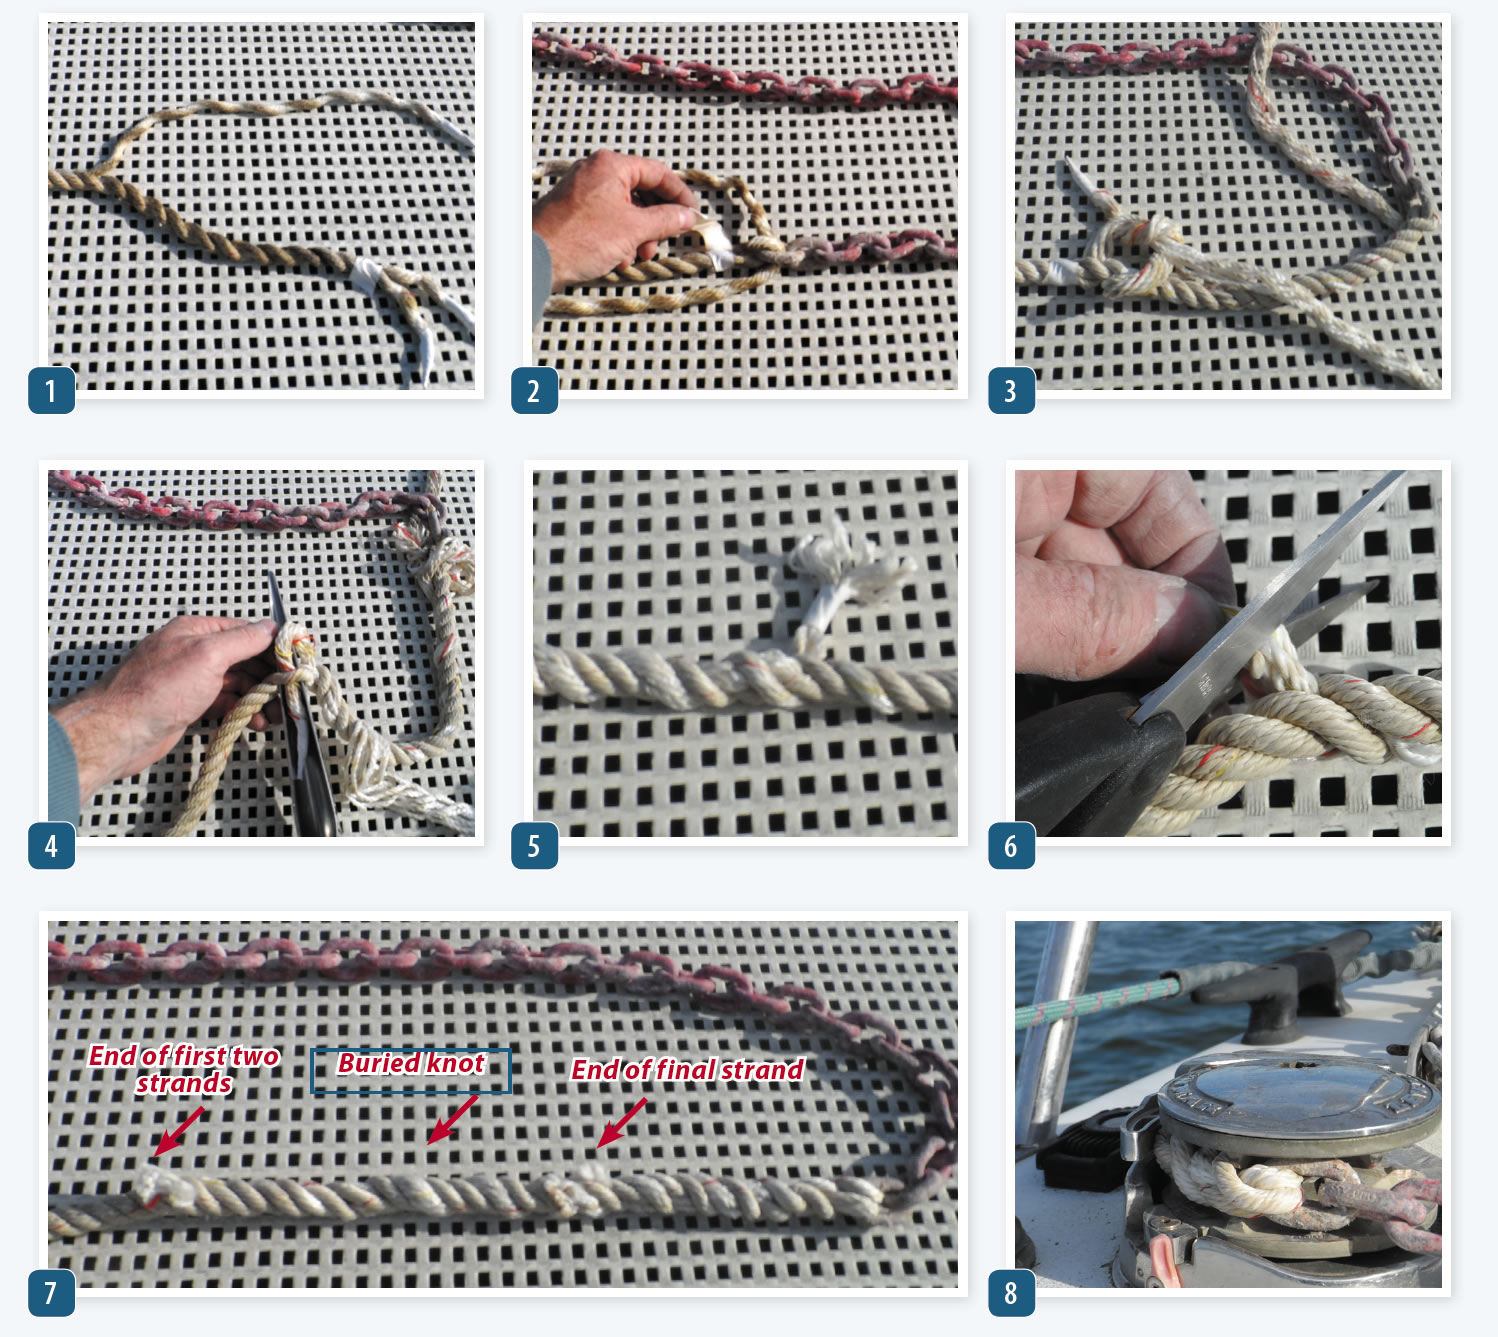
In “Chain Splice Test” (Practical Sailor, March 2017), we investigated several methods for connecting three-strand rope to high strength chain. Of these, a two-strand long splice, coined the “traditional irony splice” by renowned rigger Brian Toss, proved to hold at full-strength and was by far the smoothest through a windlass. Several readers found the description of how to tie the knot confused them, so we’ll try again. Two other resources to consult are the second edition of Toss’ book, “The Rigger’s Apprentice,” and Ashley’s Book of Knots, where it the two-strand splice appears as knot #2858.
Open the strands at the end and tape the ends. Tape around the line 24 inches from the end. Gently unlay one strand 24 inches to the tape. Do not disturb the remaining strands. (Photo 1)
Tape the two strands at 16 inches from the end. Gently unlay the two strands without disturbing the twist. Remove the tape at the 16-inch mark and save. Pass one of the two loose strands through the last link of the chain, and relay it into the groove left vacan’t by the other strand that was unlaid. (Photo 2)
One of the strands will lie more naturally into the groove, and it must be the same groove that was vacated (trace it back to the unlaid strand). If you get it right, the strand should naturally follow the old groove as you twist. Disturb the rope as little as possible by laying the rope on a flat surface.
Replace the tape that was removed to prevent the loose strand at the last chain link from unlaying. Maintain the twist of the re-laid strand by counter-rotating firmly. It should look and feel exactly like the other two strands and carry similar tension. This is critical, since it allows the strand to carry tension, and because back-tucking depends on even tension in all three strands.
Continue laying the strand in the groove until it meets the strand that was unlaid up to the 24-inch tape. There should be about eight inches left of the strand remaining. Lock the two strands together using an overhand knot (leftover-right the reverse will look obviously wrong). Pulled very snug, the knot will sink into the weave. (Photo 3)
Tuck both the tails against the lay 4-6 times, each continuing in the same direction, like any three-strand splice. It is no longer critical to maintain the lay of the strands at this point, and the splice will be more flexible and pass the windlass more smoothly if the strands are allowed to spread. (Photo 4).
Returning to the chain end, pass the remaining strand through the last link in the opposite direction. It must bear directly on the link, not across the other strand. Tuck the strand back against the lay five to six times, as you would when splicing any three-strand splice. The tension must be equal to the first strand.
Roll the finished splice under foot to make it smooth. Trim all ends to about one-rope diameter. They will wear off smooth over time and will not interfere. Don’t trim them too short or they will untuck. (Photos 5 and 6).
Soak the splice with Yale Maxijacket for increased wear resistance. Apply the coating in a single very heavy soaking, not multiple thin coats. Allow at least 72 hours drying time before immersion. The finished splice is about two feet long and fits perfectly in the windlass (Photos 7 and 8).


