

The reader will notice that the title is not “How to Build a Wooden Wheel”. I don’t pretend to be a carpenter or shipwright, and have limited skills and tools. And I am certainly not saying that this is “the right way” to build a wood wheel. But, having always coveted a wooden rim on a sailboat wheel, this is how I managed to do it at minimal costs.
The stainless steering wheel on our 1978 Islander Bahama 30 was always cold on the eyes and the hands. Although I wished for something else, I wasn’t a fan of commercially available leather covers that exceeded my boat budget and stayed wet after a rain. Over the years, I wrapped ¼-in. Dacron line around the rim for visual appeal and warmer hands. But a teak rim was always the dream. Research found that Edson offered a teak rimmed wheel, but at a cost far beyond my expectations. The question became, “Can I build my own?”
I couldn’t find any information on how this was supposed to be constructed. I wanted to retain the strength of the stainless wheel, without which the wooden wheels I had seen featured quite bulky spokes. With limited knowledge and wood working skill I approached it with a degree of trepidation. Sailing buddies thought it wasn’t possible. My fallback position (if the project failed) was a return to the basic stainless rim, or wrap it in line again.
I started with the Edson 36-in. stainless steel wheel that’s been on Natasha for a number of years. Measurements were taken with the intention of providing between ⅛-in. and ¼-in. of solid teak over the 1-in. stainless rim. And instead of a purely teak rim, I wanted oak inserts on the in/outside edges, joining the fore and aft teak halves. I thought this would enhance the look as well as cutting down the amount of ridiculously expensive teak required. I also included an oak quadrant at the bottom of the wheel as a quick visual reference to wheel position when sailing. Before any cutting of expensive teak or oak, I would also take practice steps on inexpensive pine.
MEASURING
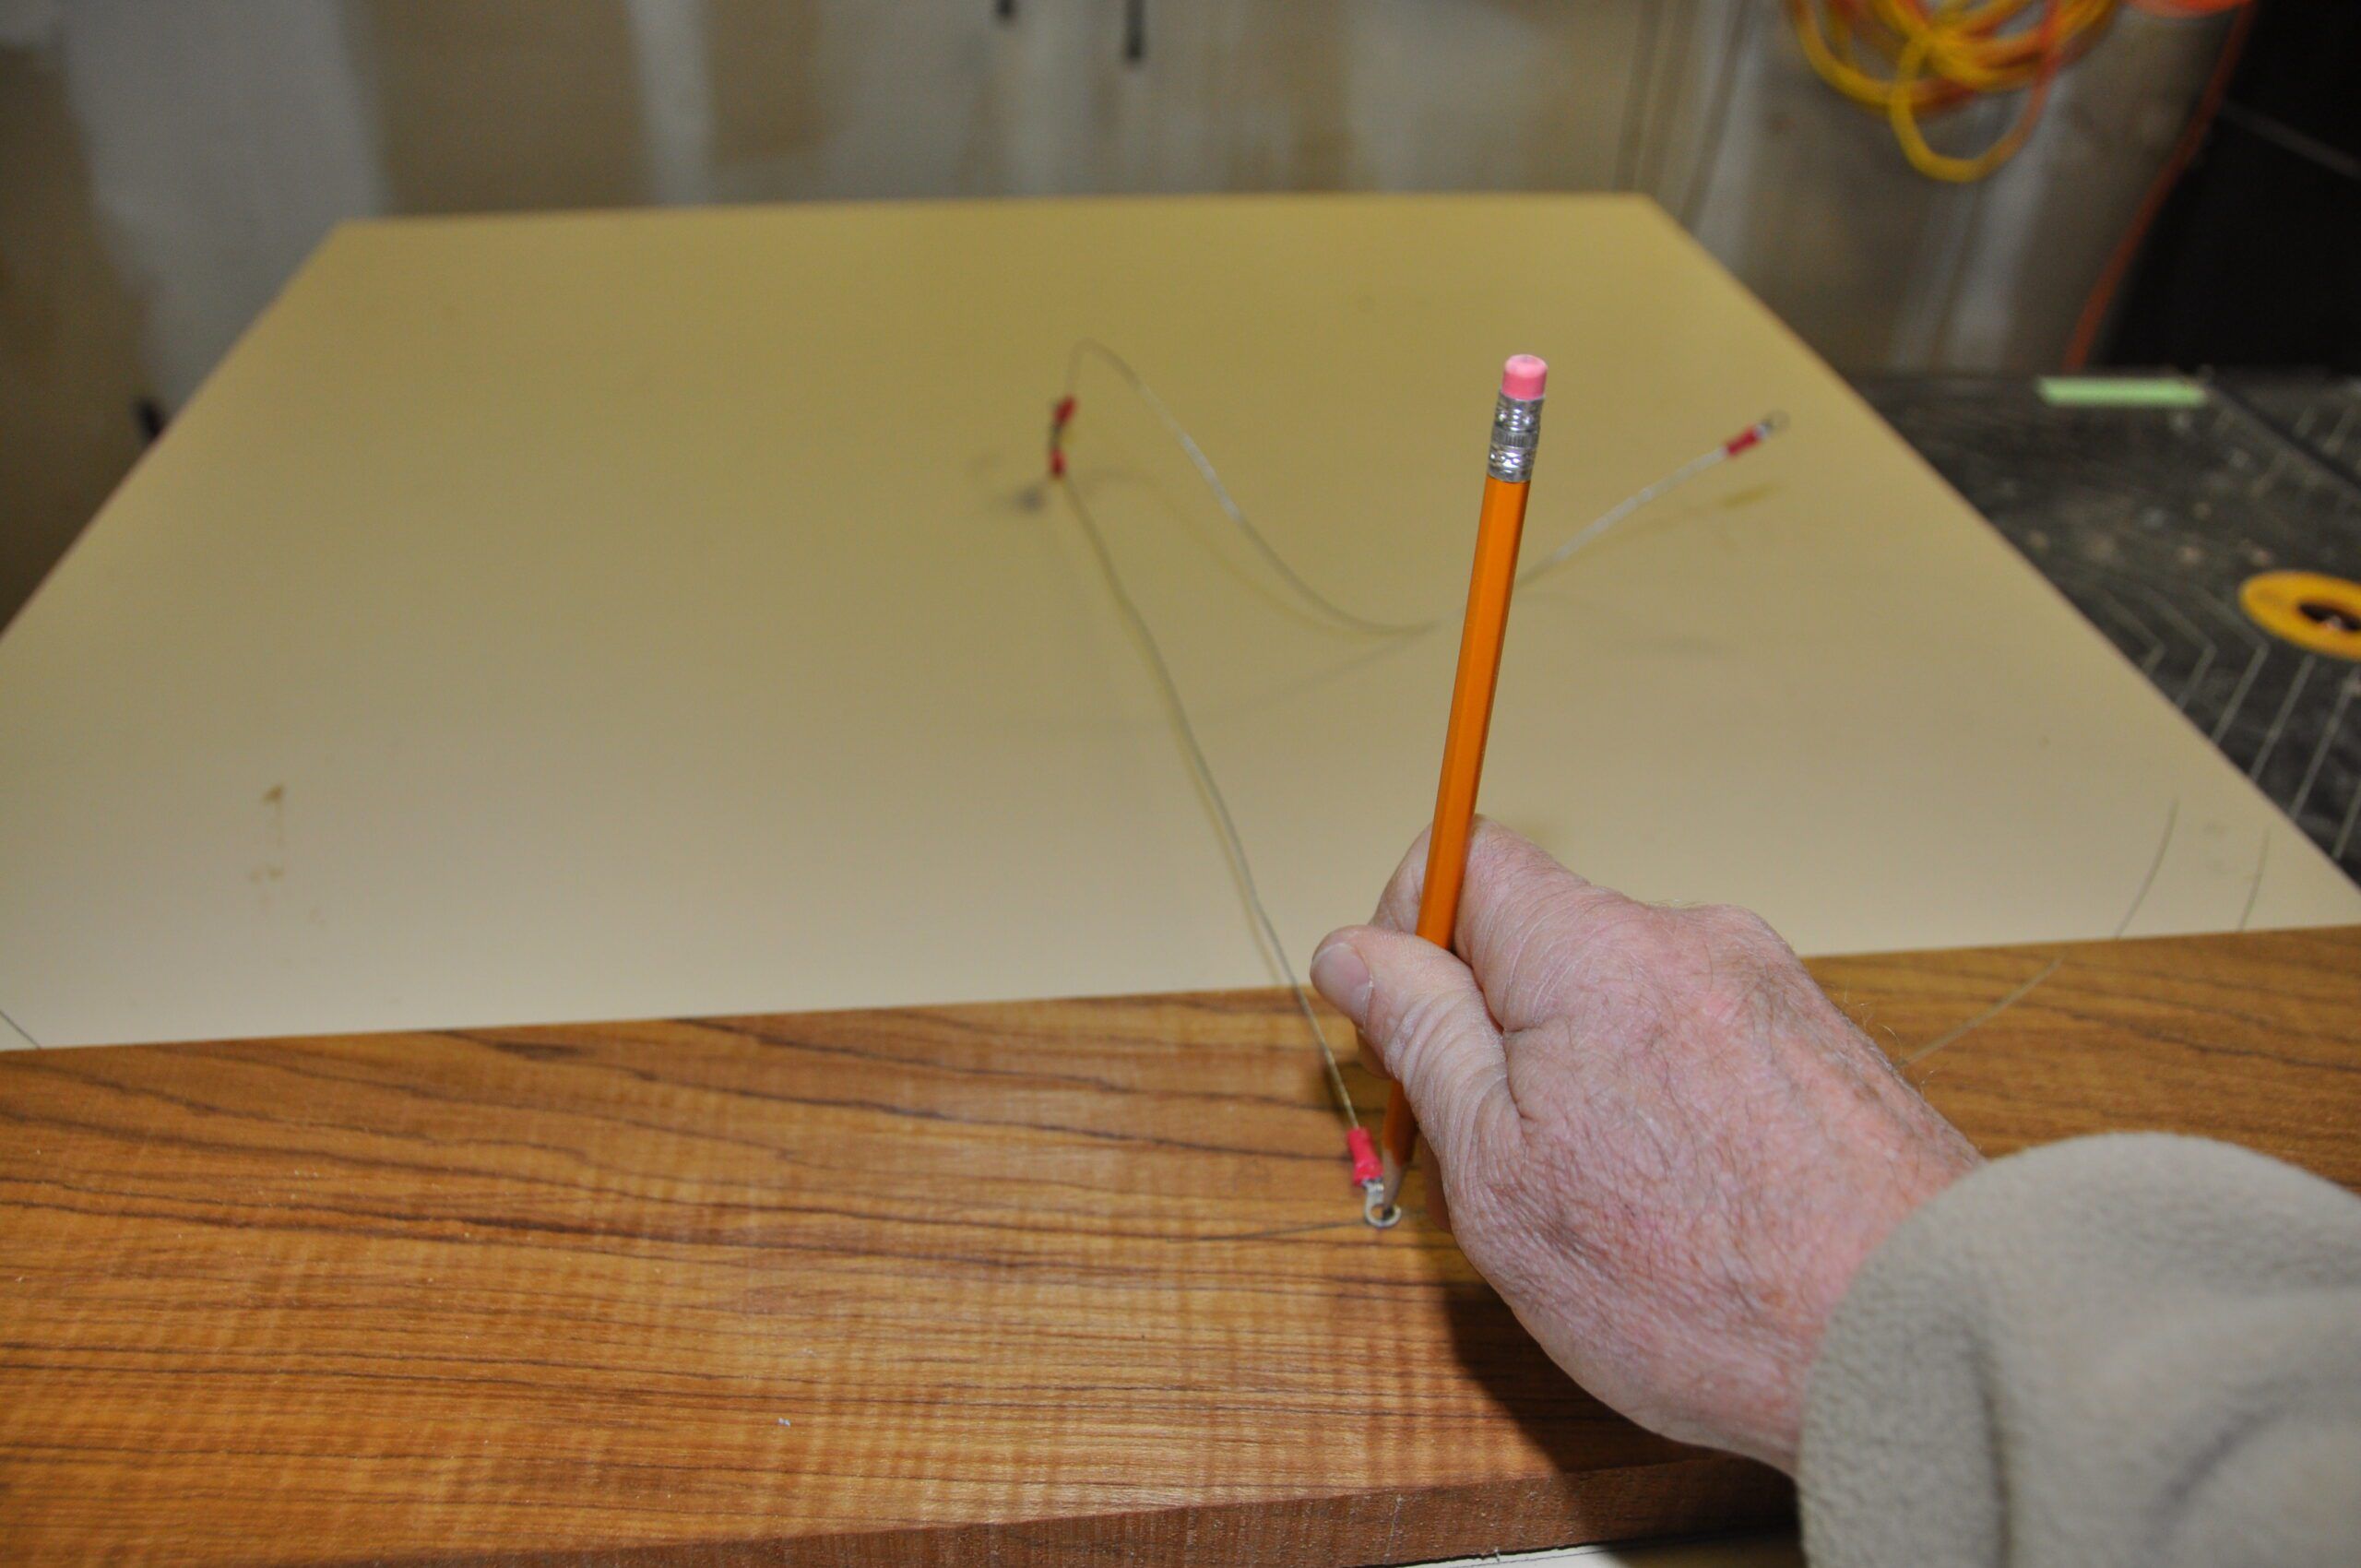
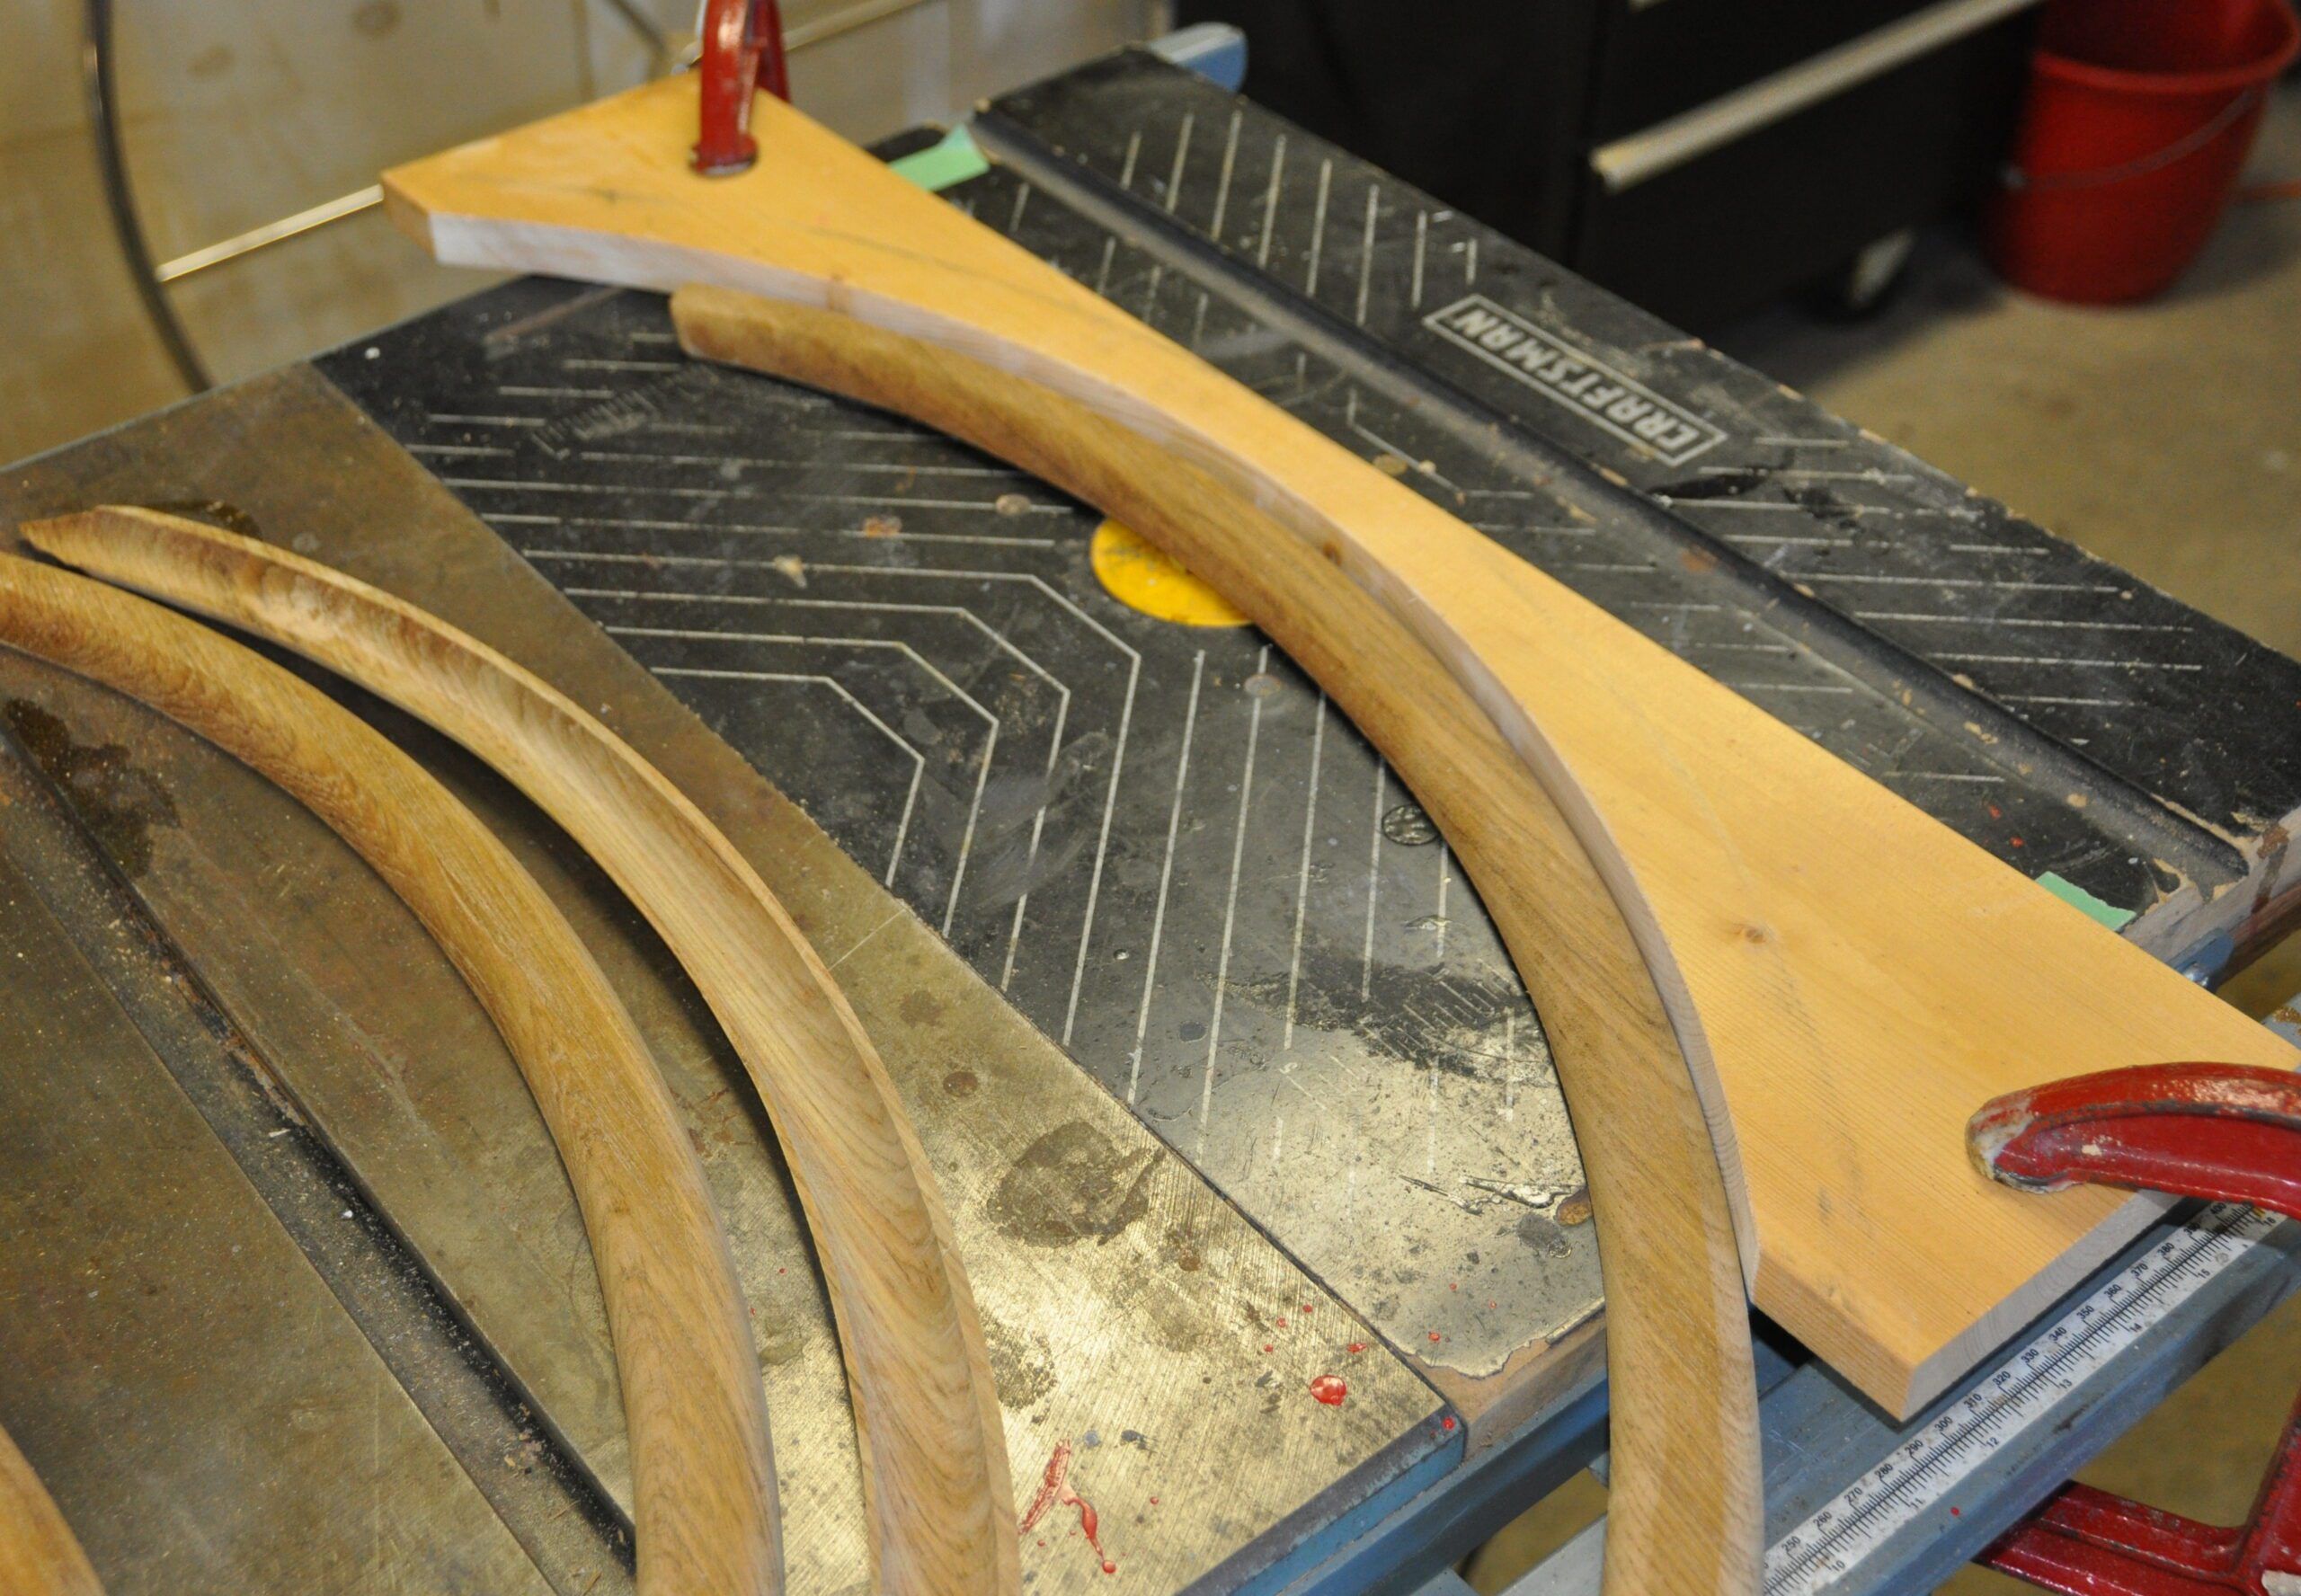
The first step was to set up a measuring table. I used an old countertop and placed a nail in a position that would allow me to measure the wheel radius. A piece of wire (no stretch) with eyelets at both ends was carefully measured to the inside and outside radiuses of the stainless wheel. This allowed me to mark cutting lines on a 1-in. by 8-in. teak plank, the lines including the ⅛-in. to ¼-in. thickness I wanted for the teak over the metal of the wheel. To minimize waste on the plank, I drew the pieces to allow for overlapping pieces facing the opposite directions on the plank. Each piece was cut just outside the drawn lines using a hand-held jigsaw. A floor mounted band saw would have been ideal, but you work with what you’ve got.
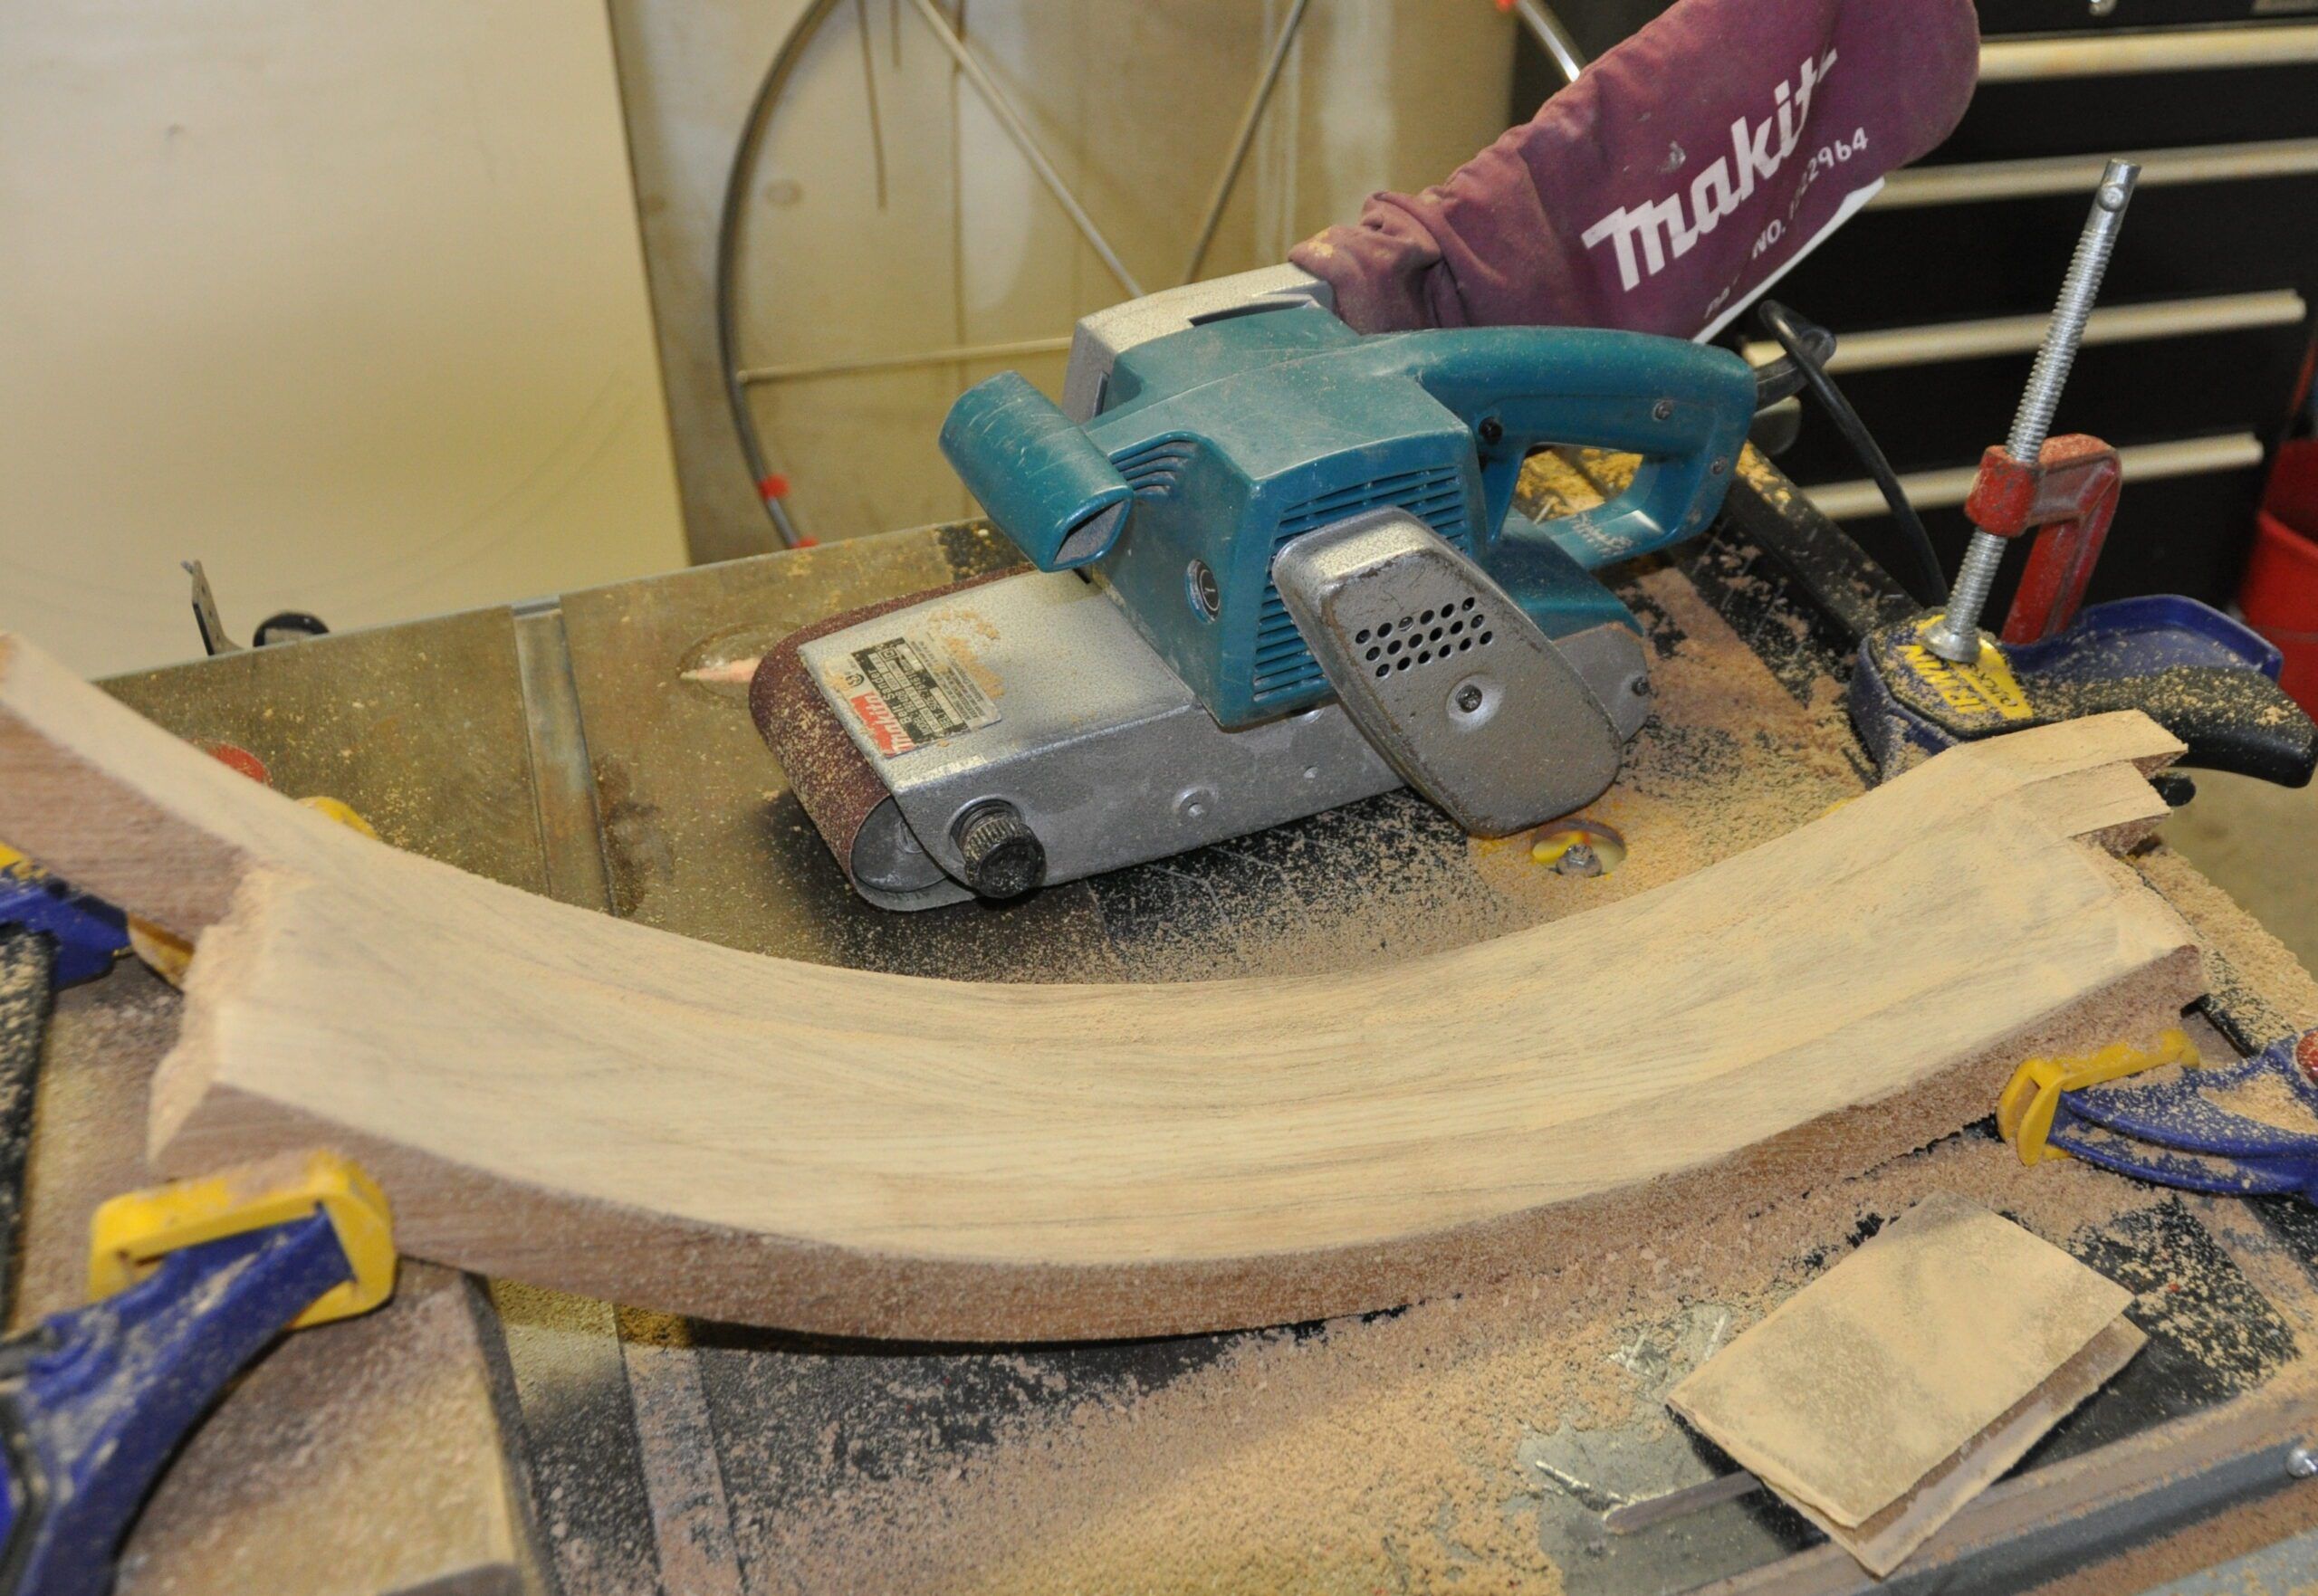
I ended up with five curved pieces of teak, one inch thick. To ensure that each piece would be identical I clamped them all together side by side, then sanded down to the drawn lines. I started with a belt sander for rough sanding and finished with a hand made sanding block cut to the same inside and outside radiuses.
ROUNDING THE EDGES

The next step was to round the edges of the curved teak pieces. The wheel rim was round, and I wanted the teak to also be round. Using a ¼-round router bit with guide bearing for accuracy, and being a coward with power tools, I took small cuts with the table mounted router until the desired edges were achieved. I now had five pieces of curved and nearly rounded teak.
SEPARATING THE FORE AND AFT PIECES
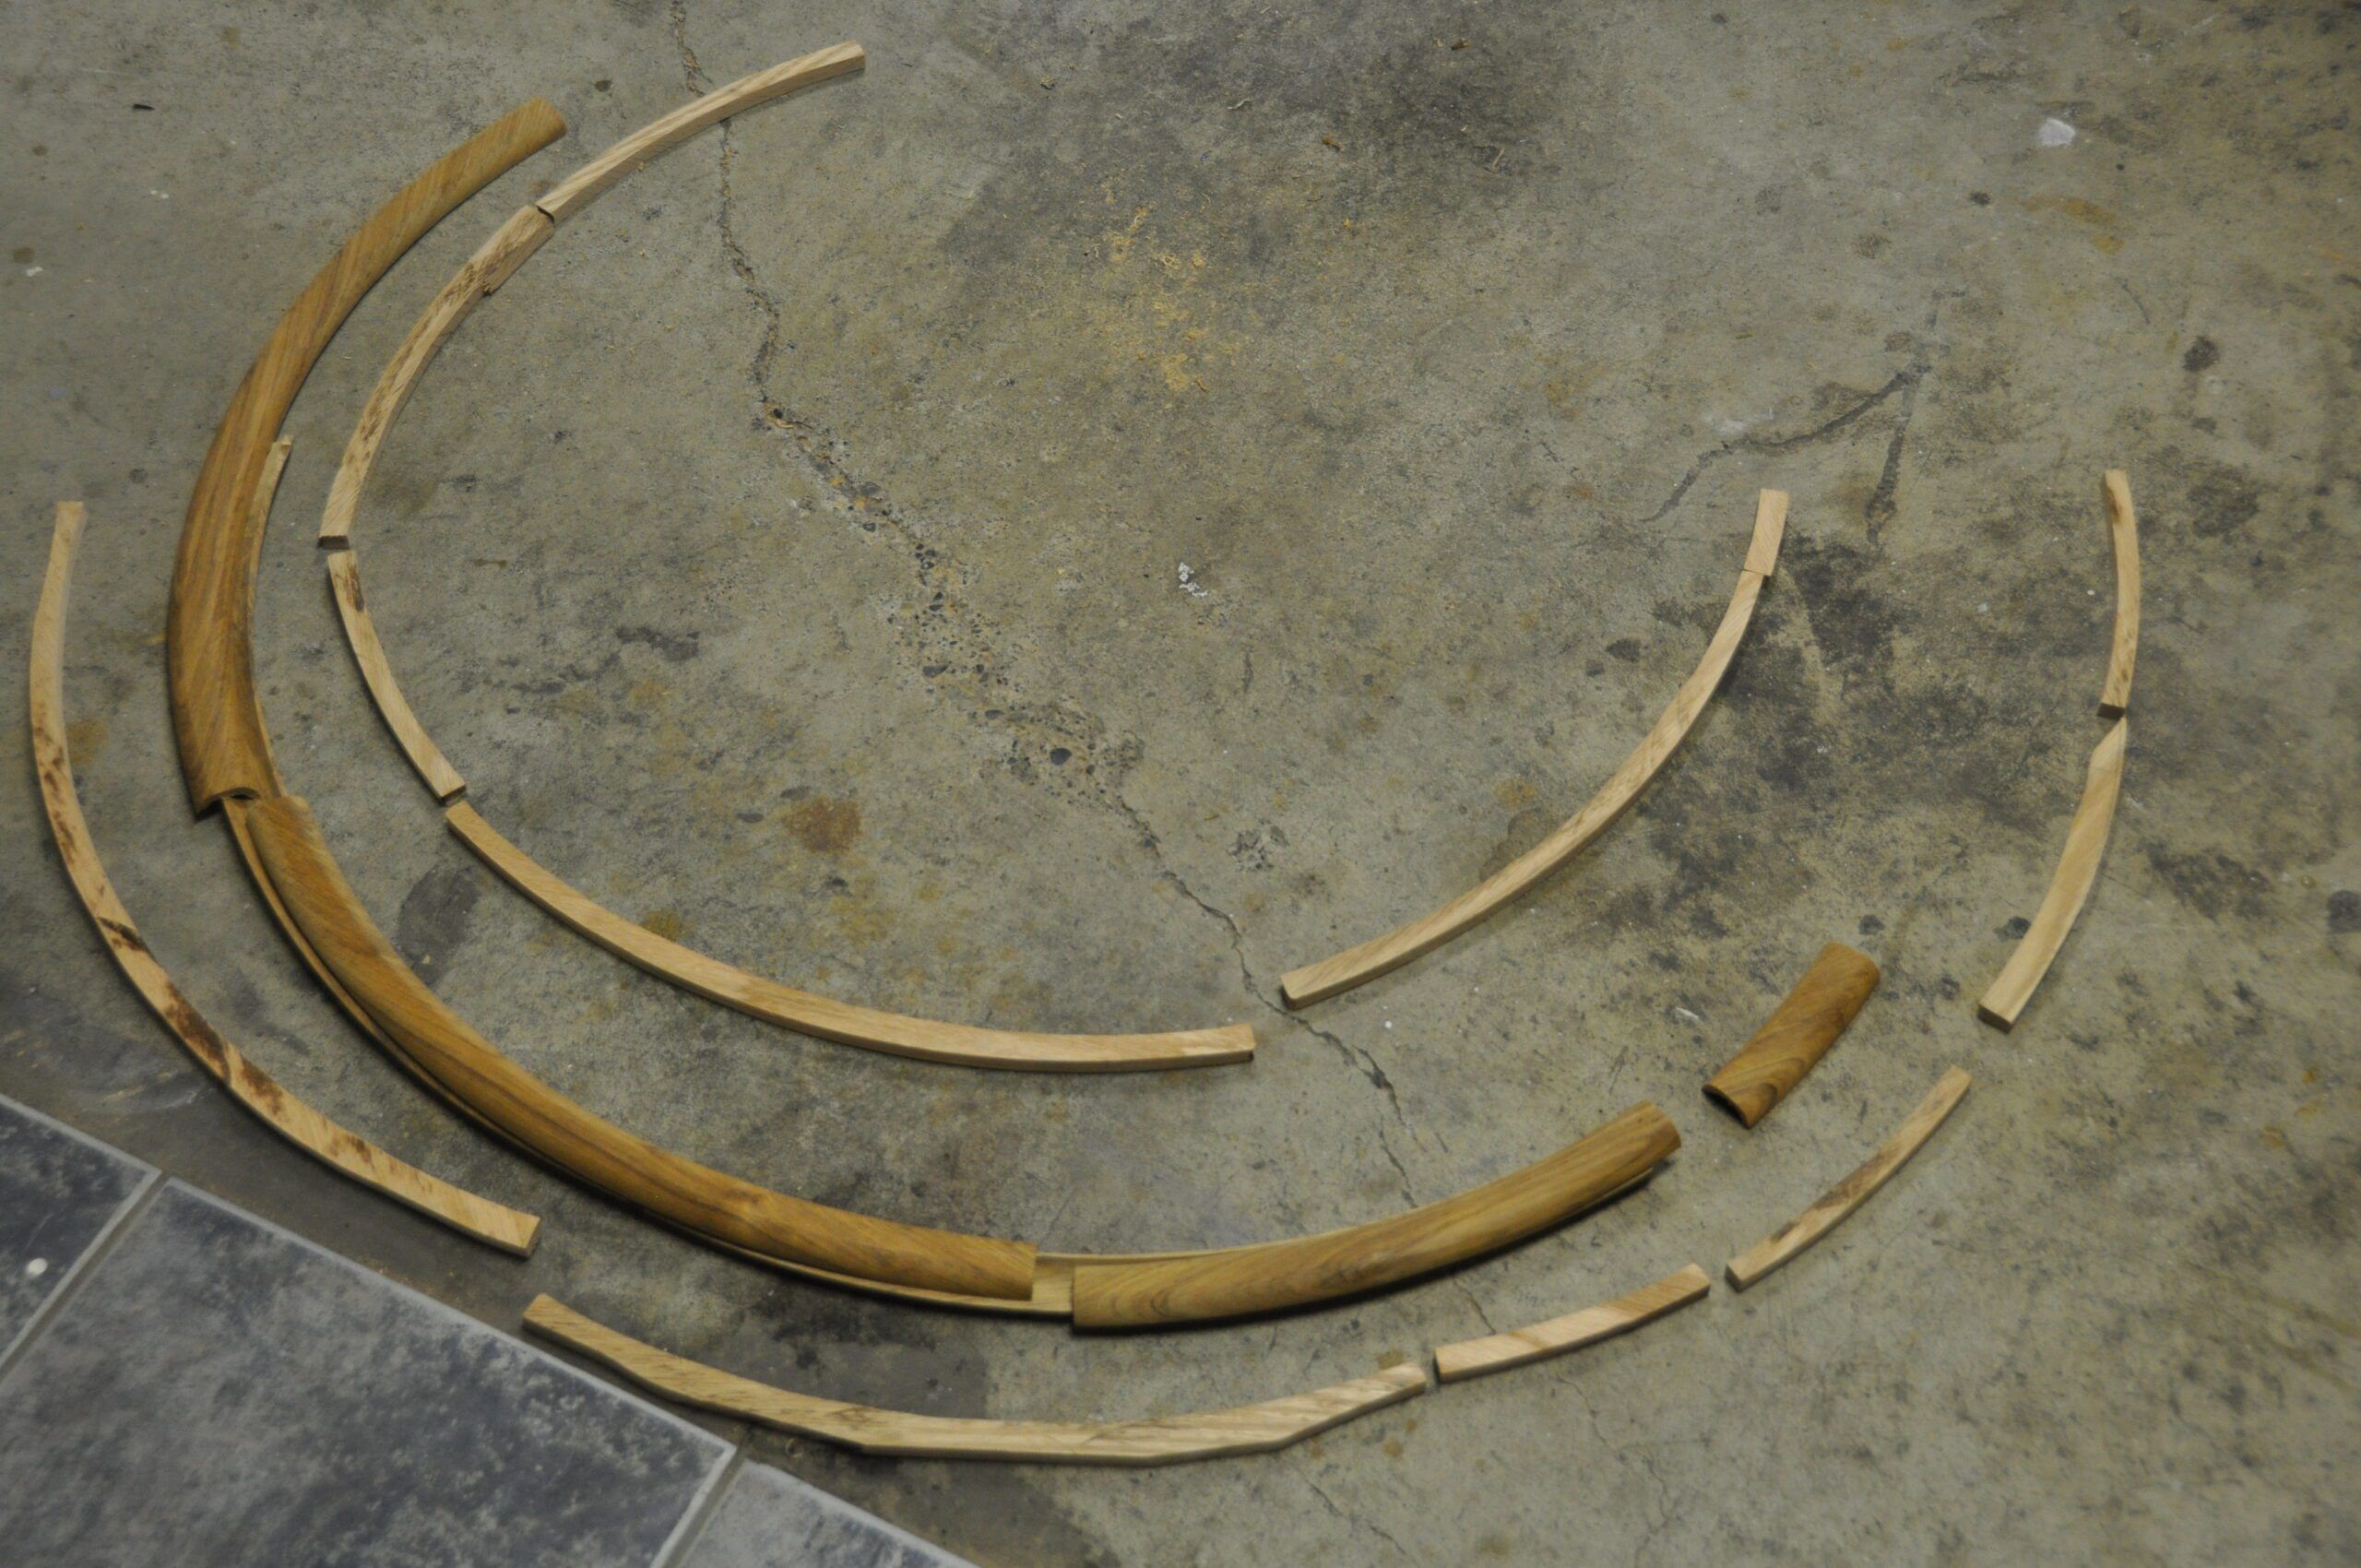
To create the front and aft halves of each curved piece, the piece was simply cut in half lengthwise on a table saw. Each piece had been 1-in. thick and now each half was just under ½-in. thick. Great care was taken with the table saw! I now had 10 curved matching pieces, rounded on the outside, flat on the inside.
HOLLOWING THE PIECES
Hollowing out the cut halves to accommodate the stainless-steel rim was the riskiest and most challenging part of the project. This would have to be accomplished using a 1-in. bullnose router bit, the wheel rim being of 1-in. diameter. The standard straight router fence would not work; there was just too much room for error as the curved halves were moved past the bit. I fabricated a curved router fence to the same radius as the outside dimension of the curved pieces, aligning it carefully on the router table. Using plenty of practice pieces and multiple shallow cuts with the router, I was able to create the hollow on each teak piece, the remaining teak being about ⅛th– to ³⁄₁₆ths-in. thickness. I now had the front and back shells for the rim.
OAK INSERTS
The teak pieces were 1 ¼-in. wide, but just less than ½-in. thick. There would have to be wood spacers between the forward and aft pieces of teak. Using the same procedure as the teak pieces, I drew the narrow-curved sections onto a ¾-in. oak plank, cut the curves, then clamped them together and sanded them into shape. The inserts were cut to a width (separating the teak pieces fore and aft) that would allow sufficient room inside the teak shells for epoxy once all the pieces were assembled on the rim. I also fabricated the oak piece for the bottom of the wheel, the visual reference for wheel position.
ASSEMBLY
All pieces were assembled surrounding the wheel, marking the position of each piece. The oak quadrant at the bottom was not included in the first gluing. The stainless rim was roughed up with 80 grit emery cloth and washed thoroughly with acetone. Using West System epoxy with adhesive filler, a thick, sticky, non-drip paste was created. Slow hardener was selected to ensure there would be sufficient time for assembly before the epoxy stiffened. The paste was troweled into the hollow of each teak half and the critical sides of the oak inserts. Each piece was placed onto the rim using overlapping joints at the fore and aft of each piece.
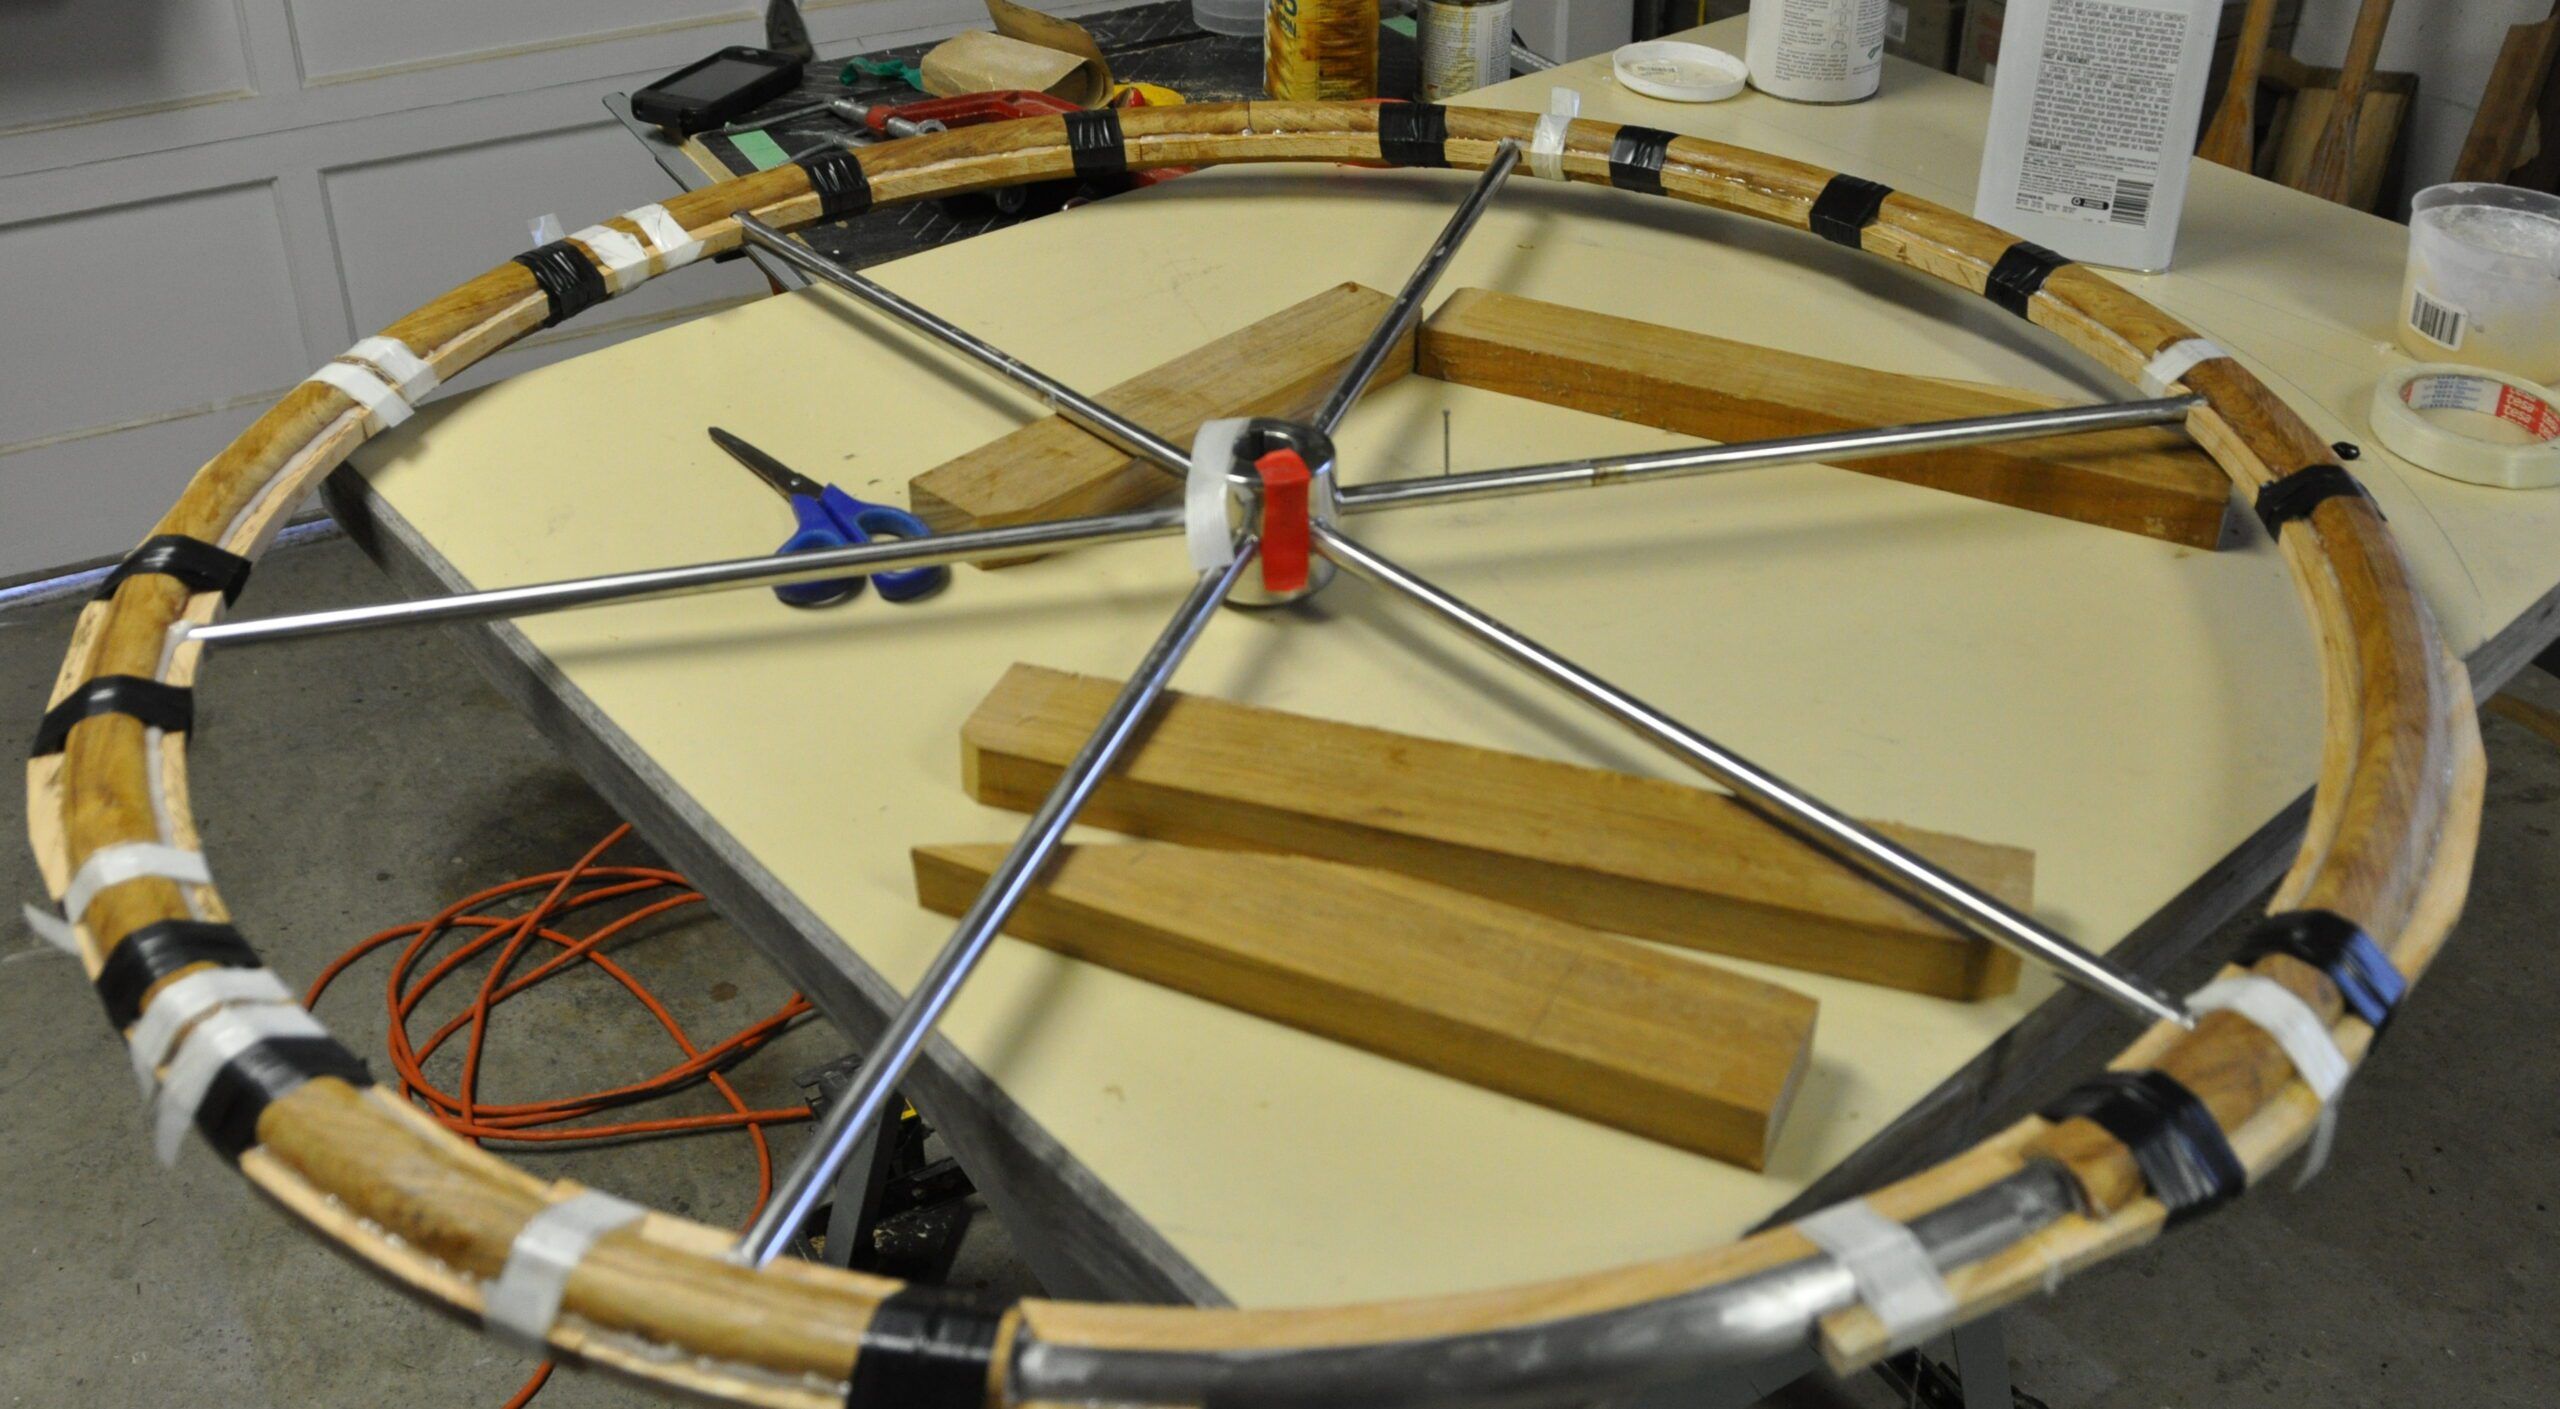
Elastic electrical tape was applied to hold the glued pieces in place. Care was taken to ensure that each wood piece lined up with the next one on their epoxy bed. No clamping was necessary, the elasticity of the tape was sufficient pressure to bring the pieces together. Clamping would have simply squeezed out more epoxy and warped the teak. Once the epoxy had cured and the tape removed, the length on the oak quadrant at the bottom could be determined, cut and epoxied into place.
SANDING
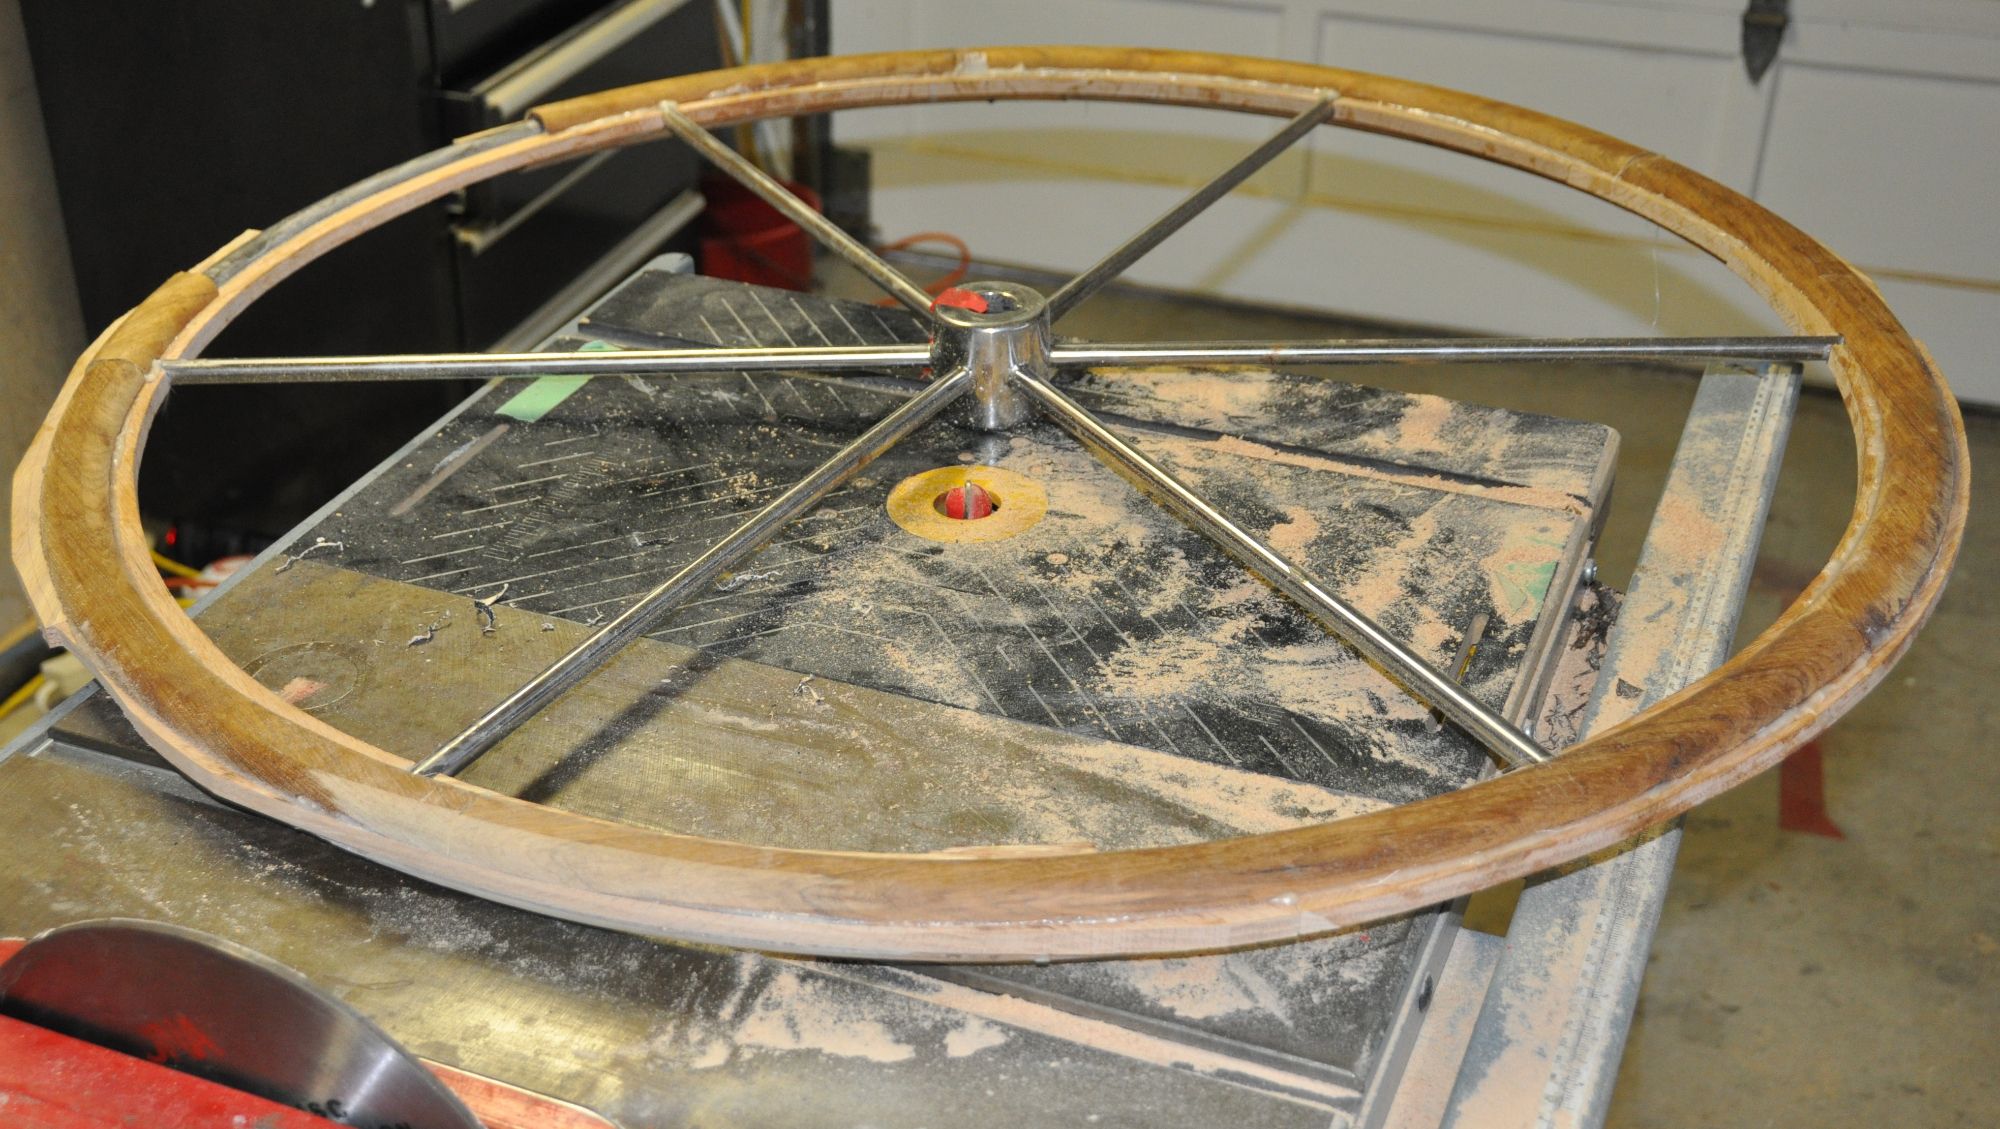
Then began the most time-consuming part of the project, sanding! Starting with a small sanding disk on an angle grinder, the oak inserts on the in and outside of the rim were rough sanded down level with the teak. Then, using the custom sanding blocks, and progressing from 80 to 220 grit sandpaper, the whole rim was sanded into a smooth, round profile. A Dremel tool with sanding disk was used to assist around the spokes. The accuracy of the initial profiling of the teak stands out dramatically when the final sanding occurs.
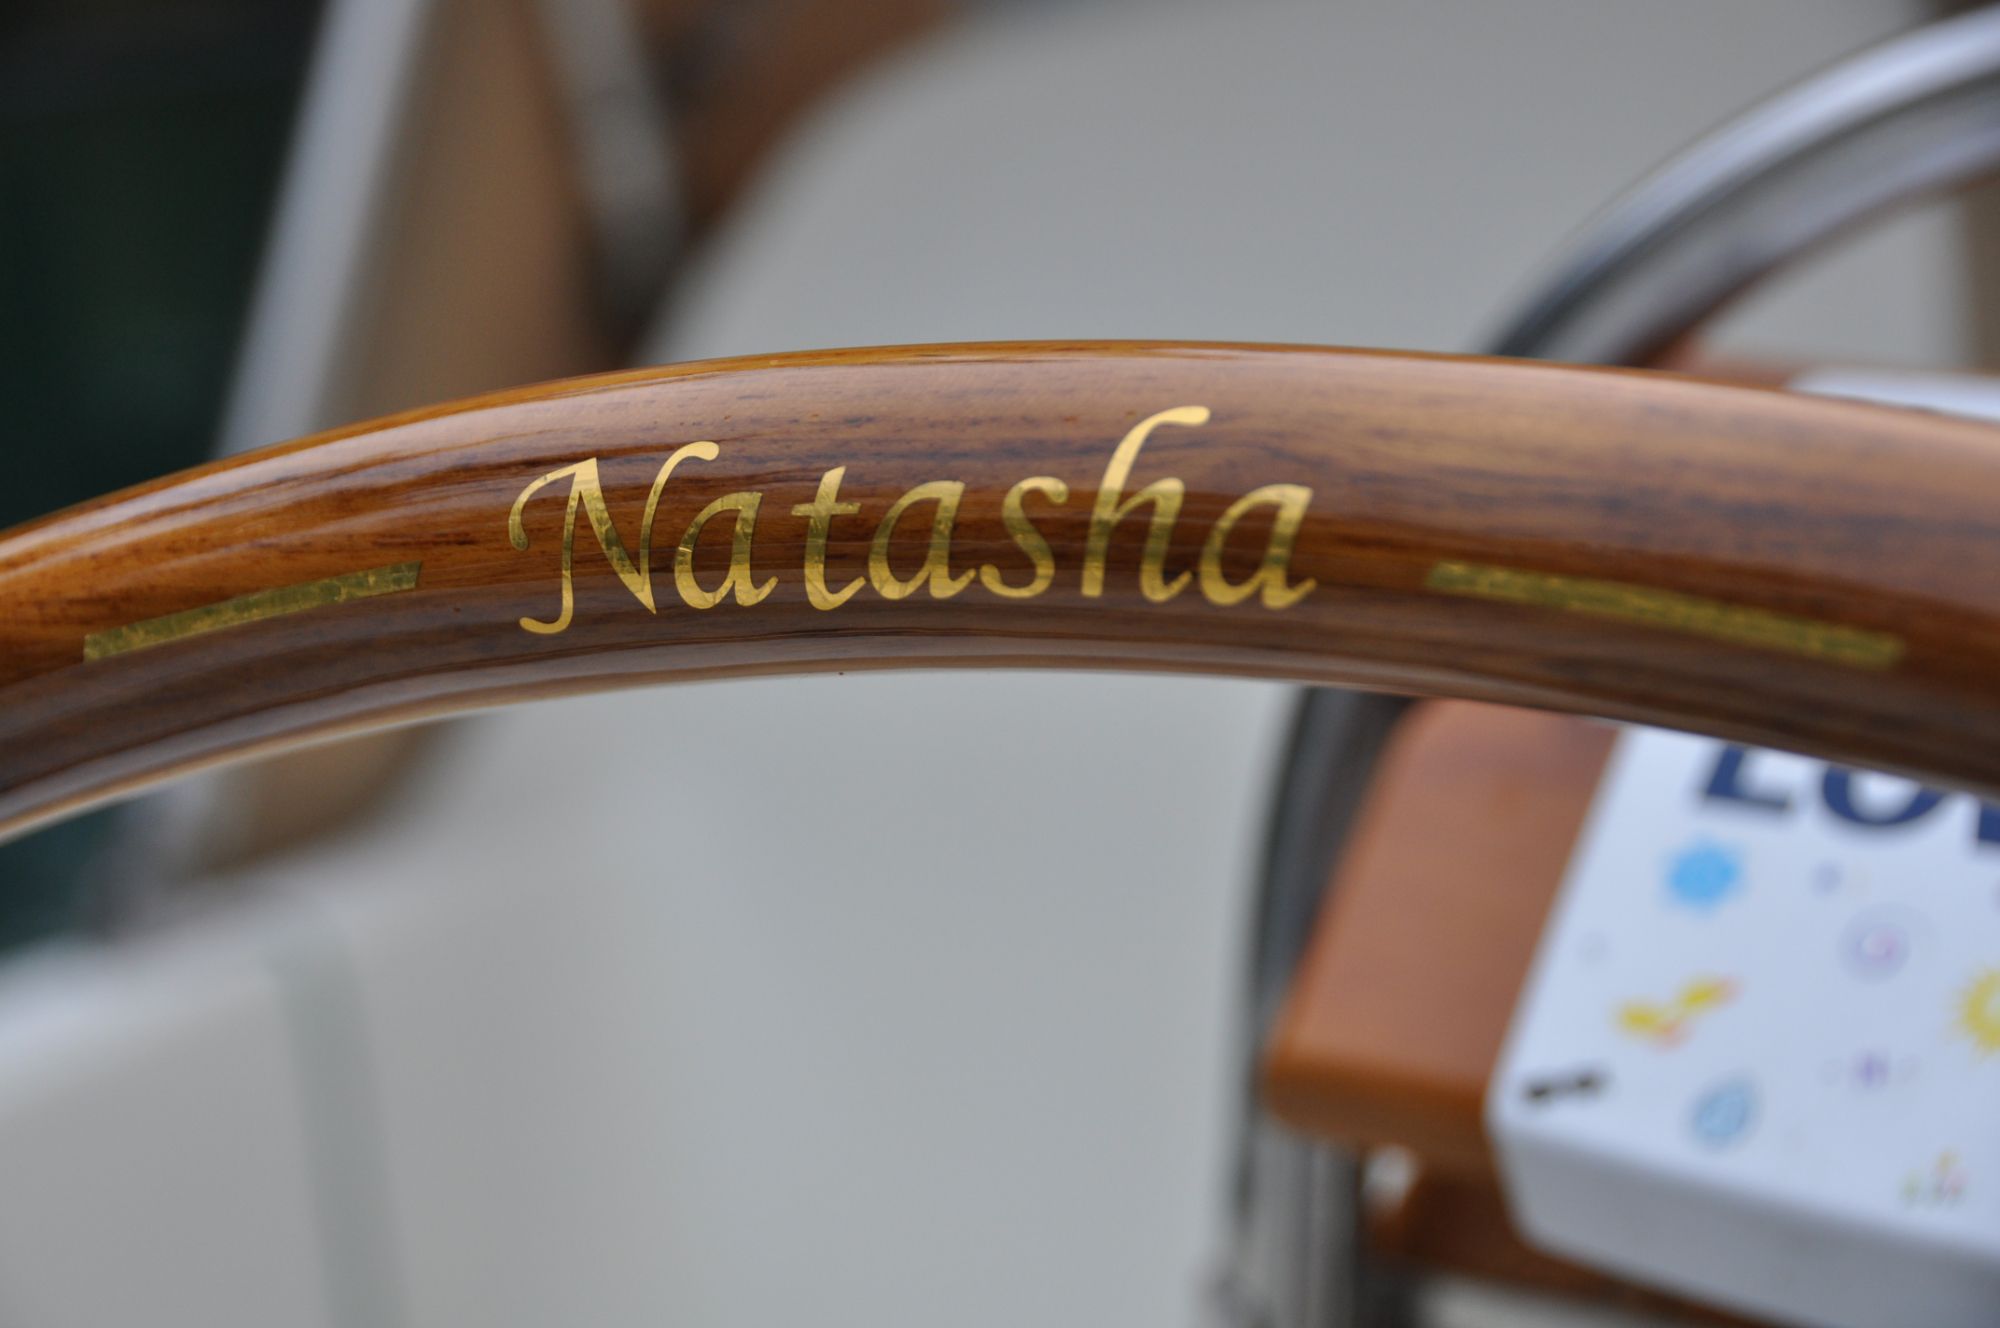
FINISHING
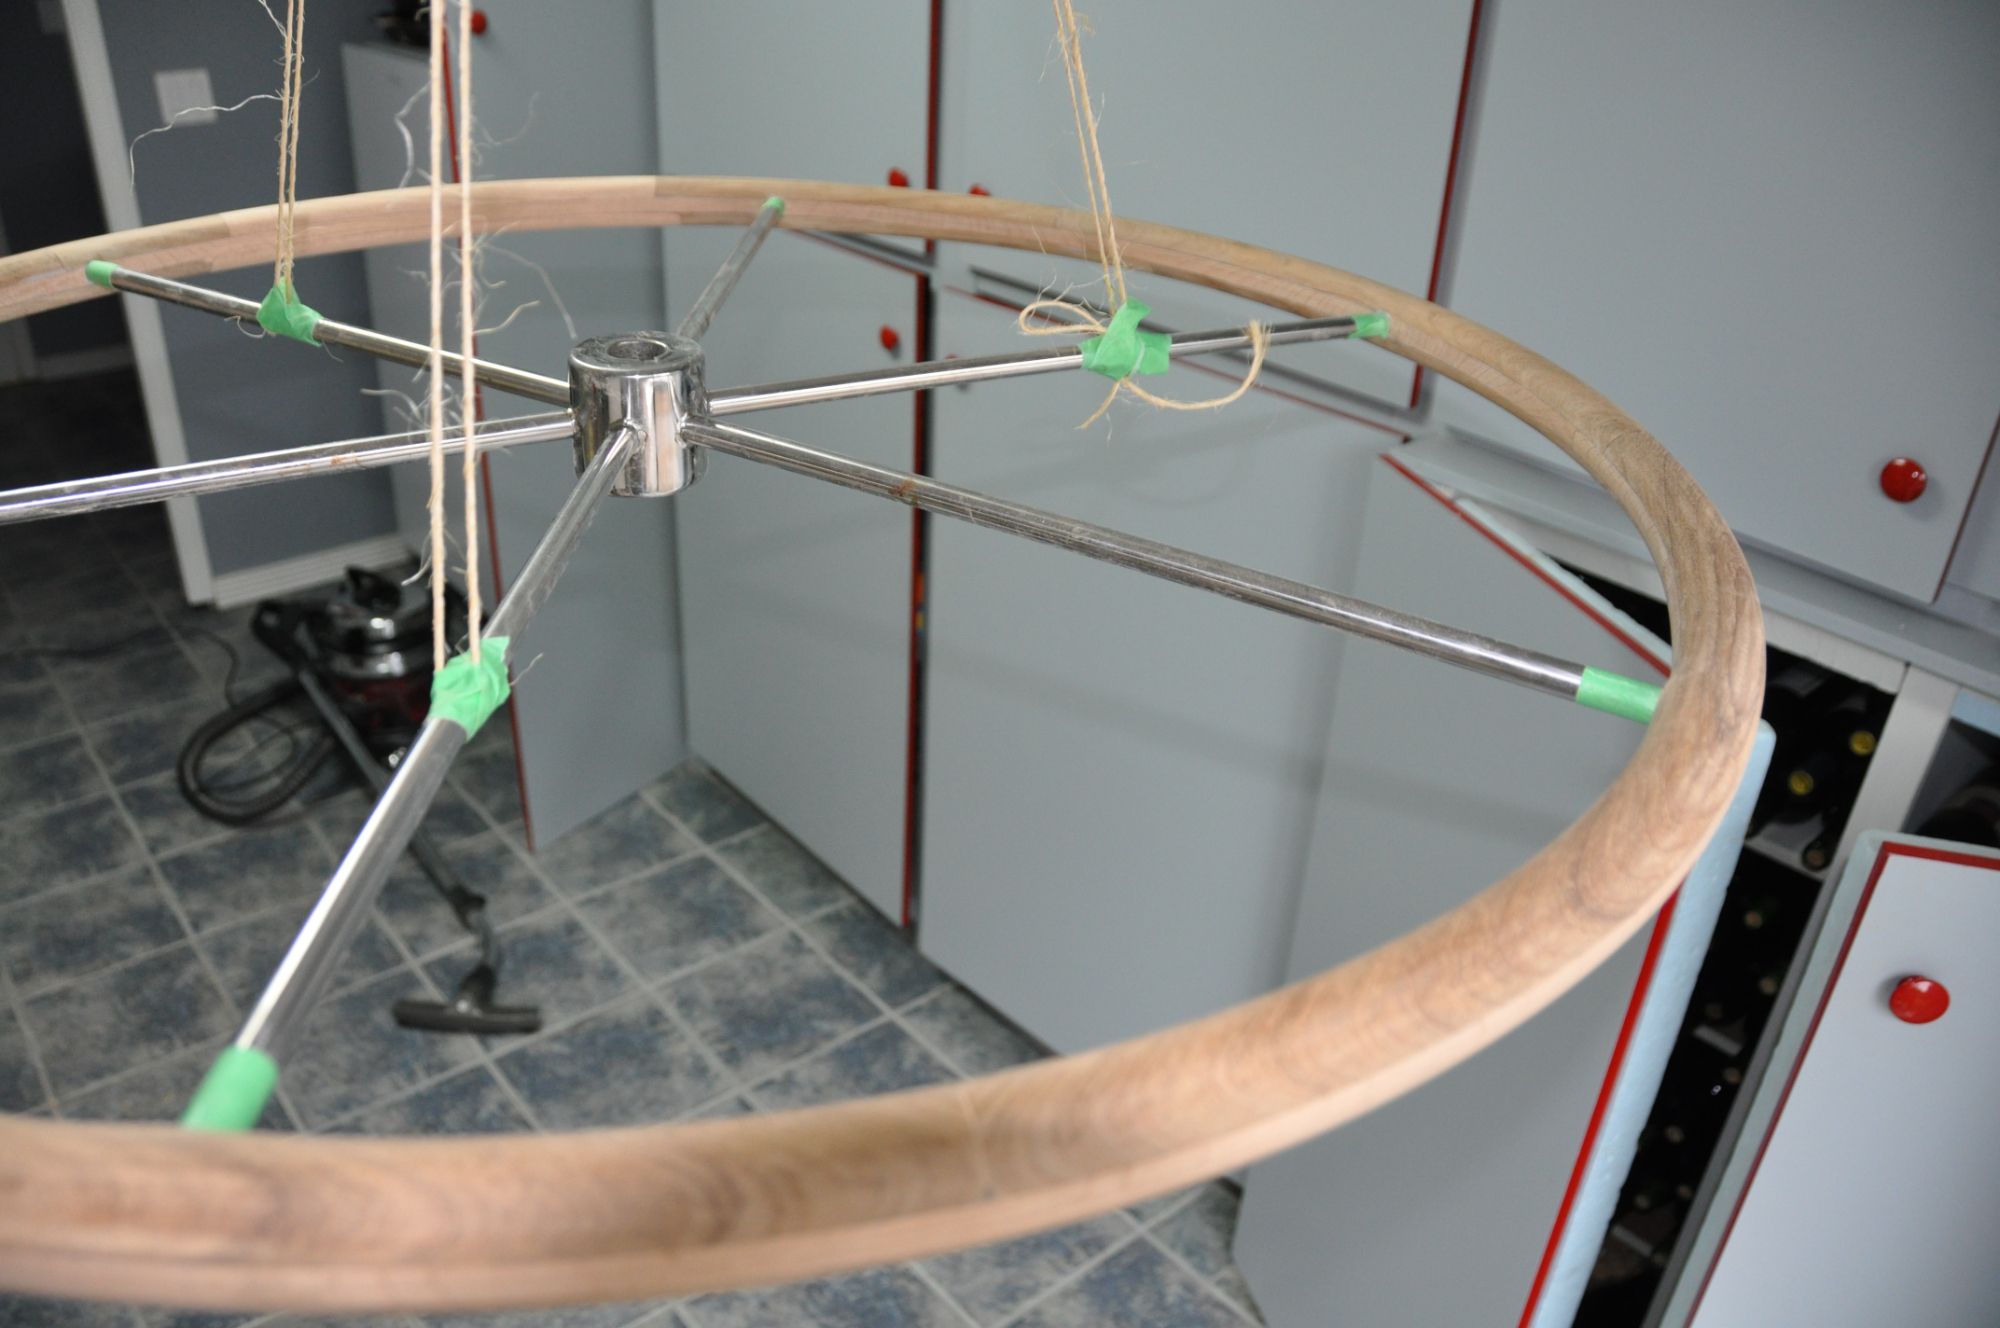
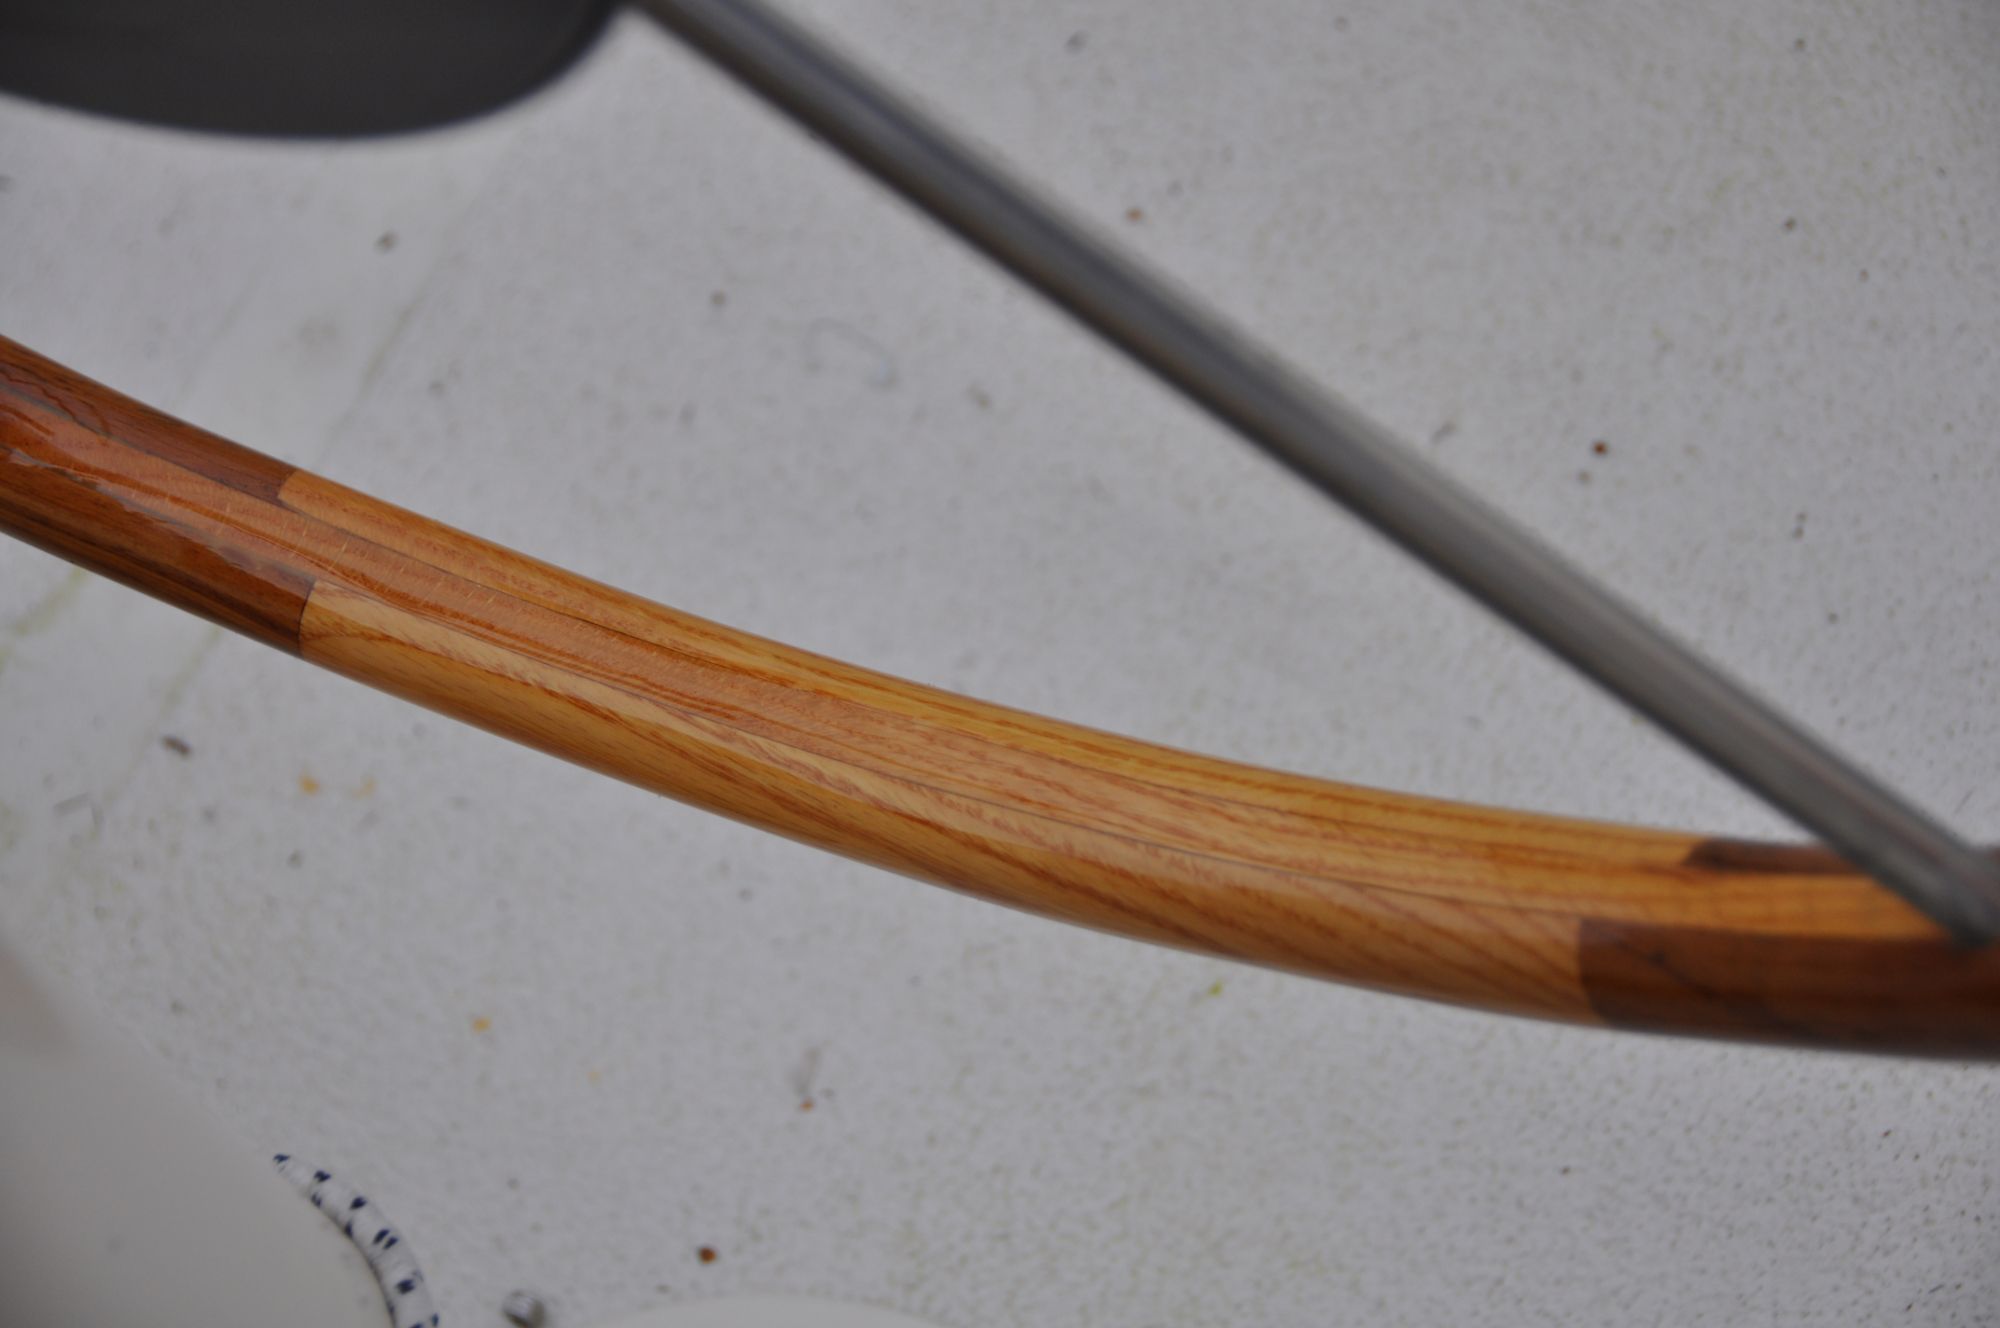
Once satisfied with the shape of the wood rim, the varnishing began. Epifanes high gloss was applied in seven initial layers, creating a very smooth, high luster finish. Any good marine varnish would suffice. The boat name, Natasha, was created in imitation gold leaf and secured on both sides at the top of the wheel. Six more coats of varnish finished the project!
SUCCESS!
The entire project was completed over a three-week period with actual working time being about 40 hours. Waiting for varnish to cure took just as long as the assembly. Material costs were minimal, the oak, epoxy and varnish were already on hand from previous projects. Just the teak needed to be purchased.
The wheel has been in service since 2013 with no separation or delamination. It feels wonderful on the hands and is pleasing to the eye. The wheel is stored below in the v-berth when the boat is not in use. We remove the wheel from the pedestal when at anchor or at a dock and lash it to the stays on the side deck, just to make more room in the small cockpit. It does attract attention there!


Excellent work! This is the stuff that makes Practical Sailor great.
The one correction I would make is the authors comment on having “…limited skills…”. This is not an easy project. The results look spectacular.
Thanks for the comment. Believe me when I say I’m not a wood worker! The greatest fear was losing a finger in the table saw or router! The project was just a logical progression, one step at a time, how am I going to accomplish the next step. And fortune shone down on me! I’ve constructed two since for sailing buddies, one is somewhere in the south Pacific on a Hans Christian 48, the other hanging over a fireplace since the owner sold the boat, kept the wheel. But it’s a very high-risk project and very labor intensive.
Beautiful! Love the craftsmanship. Thanks for sharing.
Beautiful work. Good on ya! And thanks for sharing, as well…
Wow Bert, as a fine woodworker myself that is quite a feat. That’s an awesome job my friend, my goodness! Actually right now I’m trying to find my own “Wheel” to put on a cruiser, for myself to get out on a long long sail, before I make one for myself though, (before I get to old… LOL).
Thanks for the comment Ed. Life is all about priorities. I was fortunate enough that my wife and daughter allowed me, and accompanied me, through our sailing adventures. You can’t buy back time or memories. Get out while you can. And then capture the moments with our modern technology for those coming days when the body gives up and sailing is no longer an option. Sailboat – powerboat – motor home – rest home. I’ve resisted the transitions so far!