

Fairing in through hull fittings will go a long way toward reducing bottom drag in light air, but it won’t really do the job unless the paint surface of the bottom is smooth.
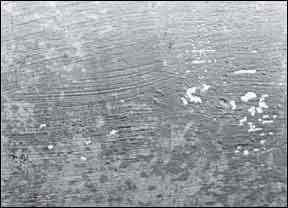
A surprisingly high percentage of boats not used primarily for racing have bottom paint jobs that range from poor to atrocious. If your bottom has peeling patches that haven’t been in, brush marks from failure to smooth out thick bottom paints, or stipple marks from application with a roller, your boat will be slower in light air than it could be.
Bottom paints, unlike topside paints, are not formulated for smooth application, in most cases. They have a high solids content and quick-flashing solvents, a combination guaranteed to make smooth application difficult. Even the racing boat with the smoothest bottom didn’t start out that way. The smoothness is the result of a fair amount of time consuming, but not particularly difficult labor. If it pays off for the racing sailor, it can pay off for any sailor.
288
Unfortunately, the bottom of the typical non-racing boat generally gets a lick and a promise. Bottom painting is usually the very last thing done before the boat is launched, and by that time all you want to do is get the thing in the water and go sailing. The bottom is a classic case of out of sight, out of mind.
If your bottom painting and boat launching sequence consists of slap it on and slip it in, you’re doing yourself and your boat no favor. Just one extra day of work can go a long way toward improving light air performance of almost any boat.
On the other hand, if your bottom paint is a peeling mess, one day of work won’t get you very far — but then your boat won’t get you very far very fast in winds under eight knots either.
While small areas of peeling paint can be faired in with polyester putty such as Bondo, it may be almost as much work to fair and patch as it is to start from scratch and do it right.
Chances are that if your bottom paint has begun to peel, it will only continue to get worse, in spite of patching of the finish. If you don’t take it all off this year, you’ll probably have to do it next year.
Removing Bottom Paint
Getting the old bottom paint off is one of the least pleasant tasks associated with boating. Most bottom paints sand poorly. Using a heat gun puts a lot of unpleasant and toxic vapors in the air. Drill-attached mechanical paint removing tools we have used are hopelessly slow.
That leaves chemical paint removers, and chemical paint removers are messy, expensive, and no fun at all. Generally, however, they are the best solution.
When choosing a paint remover, you must select one that is mild enough that it will not harm the hull material beneath the paint. If you have a fiberglass hull, use only a remover specifically formulated for use on fiberglass, such as International Fiberglass Pintoff 299. The use of more powerful removers may seriously damage your gelcoat, if in doubt, don’t use it!
When using paint removers, you must mask off areas of the hull that are not to be treated. Splashing of the remover is inevitable, so take the extra time to mask off topsides and boottop with newspaper and masking tape. Use paint remover sparingly near masking tape, as it may dissolve.
Use cheap, throwaway bristle brushes to apply paint remover. Foam brushes will dissolve. Do not under any circumstances use steel wool to remove paint sludge. The small particles of steel wool which inevitably break off will turn to tiny rust marks guaranteed to plague you forever.
Wear protective clothing when using paint remover. Old long sleeve shirts, old pants, and old shoes are called for, as are rubber gloves. Protective glasses are also a good idea.

288
Use a thick coat of paint remover, and be patient. Most people waste about half of each coat of remover by scraping it off before the action is completed. The stuff is expensive, so impatience is costly.
The ambient temperature will greatly affect the speed with which the remover acts, so you must rely on the appearance of the surface to judge when the remover has done its things.
When the paint is bubbling off the surface, test a small area with a wide (3″) putty knife. If the paint peels off down to the fiberglass, it’s ready. If not, wait a few more minutes (but not so long that the mess becomes dry).
Realistically, several applications are likely to be required, particularly if there is buildup of several years of paint.
After the old paint is removed, it may be necessary to wash the hull, either with a solvent or with water, depending on the paint remover used. It is important that all traces of paint remover be eliminated before going on to the next step. A large portion of the success of a good bottom job both in light air performance and in longevity of the surface -lies in the preparation done before application of bottom paint. Bottom preparation means more than a good sanding to provide adhesion for the new paint. It means the creation of a smooth surface that is impervious to water.
While the process of gelcoat blistering is not completely understood, there is little doubt that overzealous sanding of bottom gelcoat can create a porous surface that increases the likelihood of blistering. At the same time, failure to adequately sand the bottom gelcoat means poor paint adhesion, flaking, and ultimately, a repeat of the paint stripping process.
The best way to prepare a gelcoat surface for the application of bottom paint is thorough machine sanding, followed by one or more coats of epoxy primer. The epoxy primer will provide a surface far more impervious to water than the original gelcoat surface of the hull.
Sanding can be done with a compact orbital sander, or with a foam pad in a slow speed rotary sander. Unless you’re skilled with a rotary sander, stick with the orbital type. A rotary sander in inexperienced hands is second only to a belt sander in its ability to turn a valuable boat to a piece of junk in minimum time. We once observed an overzealous owner with a rotary disc sander halve the value of a 34-footer in two days of grinding.
As a rule, 100 grit aluminum oxide paper in a sander such as the Makita 04510 will do an adequate job of surface preparation prior to the application of epoxy primer. Remove all sanding residue with an air hose, a vacuum cleaner, or a solvent wipedown before priming. If you use solvent, it must be compatible with the epoxy primer used. The thinner for the primer is usually the best choice.
Priming and Fairing Before priming, any obvious gouges in the surface of the hull should be faired out with an epoxy-based fairing putty. The dings must be thoroughly clean and dry before applying compound. A portable hair dryer can be used to remove all traces of moisture from gouges. You can use a premade fairing compound, such as Interlux 4496A/4497B, or you can make up your own from epoxy resin and microballoons or microspheres.
It is important that the fairing compound not be harder than the surrounding surface, or it will be almost impossible to smooth without creating hollows. For this reason, super hard epoxy compounds designed for mending broken metal are not recommended for fairing. An epoxy and microballoon mixture just dense enough to hang on a vertical surface without sagging off is ideal.
Priming with a two-part epoxy primer is the key to a long lasting bottom finish. Every major paint manufacturer makes this type of primer. A good example is Interlux 404/414 Barrier-Kote Epoxy primer, but there are plenty of others on the market.
Epoxy primers can be applied by brush, roller, or spraying. For the average boatowner, one of the best ways is to apply with a smooth roller while someone follows behind with a wide foam brush, smoothing out the roller nap marks. However you apply it, make the coat as smooth as possible, since sanding out surface irregularities in epoxy paint isn’t easy.
Putting a good bottom on your boat is probably one of the most time-consuming jobs you will face as a boatowner.
No matter how careful you are in applying the primer, sanding will be necessary. You can sand with the same electric sander used to prepare the surface before priming, but wet sanding with silicone carbide paper is faster and more effective. You cannot, of course, wet sand with an electric sander.
When wet sanding, you must use some type of sanding block. The ideal sanding block for the rounded surface of a hull is dense rubber, with just a little flexibility. Rubber blocks sold for auto body repairs are ideal for this. You must not sand without a block, as even the slight differential in pressure between the different fingers on your hand will make it difficult to get a really smooth surface.
288
220 grit paper, used wet, is just about right for sanding primer. If you find yourself cutting through to the base gelcoat in a lot of places, however, switch to finer paper.
The secret of wet sanding is to use plenty of water, as the paper clogs quickly. You use much less paper wet sanding than dry sanding if you rinse the paper constantly. It also helps to hose off the hull frequently. It is possible to wet sand without a hose, using a large bucket of water for rinsing your sanding block, but a hose is far more effective.
If your hull is a good, smooth fiberglass molding, wet sanding with a small block will be effective. If, however, there are numerous bumps and hollows, a longer sanding block will have to be used to keep from accentuating local irregularities in the surface. You can make your own “long boards” for fairing using l/4” plywood or Masonite, padded out with a thin layer of Neoprene or other dense, closed cell foam. Simple wood grips can be screwed to the top of the board, with the paper wrapped around and stapled to the top. A board long enough to accommodate two sheets of paper laid end to end is the maximum size one person can handle comfortably, and will do an adequate job on most surfaces.
As an alternative, you can use blocks of Foamglas, which can be cut to any size, and which works very well when used wet. Used dry, it makes a terrible mess, and is one of the most uncomfortable materials you will ever handle, as the small glass particles can really irritate the skin. A further disadvantage of Foamglas is that it is too abrasive for most surfaces, and will almost instantly cut through coats of primer. It is most effective in preliminary fairing in new construction or on a heavily puttied hull.
Foamglas is a product of Pittsburgh Corning, and is an insulating material used in the construction industry. Check the Yellow Pages under “Insulation Materials” for a local distributor. Foamglas is available in small, prepackaged pieces under various names (touted as a “miracle sanding product”) but the cost is ridiculous when purchased this way.
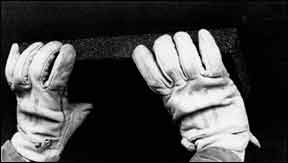
You must use heavy gloves, preferably leather, with taped up fingers, when using Foamglas. It will cut through fabric work gloves in a matter of minutes when sanding, so you can imagine what it can do to hands: it’s probably a good way to permantely remove your fingerprints.
As a rule, wet sand whenever possible. Not only will the paper work faster, but you will create no sanding dust to get in your hair, eyes, and skin.
After thoroughly sanding the first coat of epoxy primer, you will probably discover small surface irregularities that you missed the first time around with the fairing compound. Epoxy fairing compounds stick well to epoxy primer, so you can still touch them up before applying the next coat of primer.
If you’ve cut down through the primer to the gelcoat in only a few places, touch these up with a patch coat of epoxy primer before applying another full coat. If you’ve cut through in a lot of places, either your hull surface is uneven or you used too coarse a grit of sandpaper. If you need to spot prime more than about 10% of the bottom, just put on another full coat. It will go faster than a spot prime coat.
In all cases, a second full coat of epoxy primer is recommended. You really want a good, thick epoxy barrier between your bottom gelcoat and the water. In addition, a thick prime base will let you get away with years of wet sanding your bottom paint without fear of cutting through to the glass.
After applying a second coat of primer, wet sand the bottom again. Spot prime and re-sand any places where you break through to the gelcoat after the second coat of primer.
Now spend some time going over every square inch of the bottom. The most effective way to do this is at night, using a handheld spotlight with the beam directed almost parallel to the hull surface. Dings and brush marks will stand out like a sore thumb, showing you areas that need a little more work. Since the quality of the bottom depends very much on the attention you give it at this stage, take your time. They may laugh at you now, but we know who gets the last laugh.
The epoxy surface should now have a dull sheen. Any high gloss patches haven’t been adequately sanded. Admittedly, you walk a fine line between having a smooth, fast surface and one that is too slick to hold bottom paint.
Painting Proper application of bottom paint varies with the type of paint used. As a rule, the preparation you have done is far more thorough than that recommended by the paint manufacturer, and you may undo your hard hours of labor if you blithely slap on a coat of paint.
If you’ve gone to the trouble to carefully prepare your hull, you’ll want to use at least a medium hard paint to get a final surface as good as the subsurface you’ve created. The bottom paint should be hard enough to allow wet sanding.
288
Because fouling characteristics vary so dramatically from place to place, the most practical bottom paint is the one that works best for boats in your area. That statement isn’t a copout, it’s a simple fact.
Although most paints have good general instructions on the can, it can be helpful to call the manufacturer for more details. Every paint manufacturer has a chemist or technician who can make recommendations for the application of bottom paint over a smooth, fresh, epoxy bottom. The paint chemist can also tell you what type of applicator will be most effective and give the smoothest job.
Like the epoxy primer, the bottom paint must be applied as smoothly as possible. As a rule, two coats of paint will yield a paint film thick enough for wet sanding, although the required film thickness for effective antifouling properties will vary from paint to paint.
Spray application of bottom paints is not a job for amateurs. Solvents such as xylene and toluene, used to thin some paints for spraying, and the organotin antifouling components of some bottom paints, are quite toxic. An amateur -or professional using inadequate protective clothing or lacking a respirator designed for toxic vapors is simply asking for trouble.
Application with brush or roller is far less dangerous (but not safe). Protective clothing, including long sleeves and gloves, should be worn at all times, and the use of a respirator -not a paper particle mask will offer further protection.
The same precaution goes for wet sanding the bottom paint to achieve the final smooth surface. Don’t get the bottom paint residue on your skin. Wear rubber gloves, long sleeves, and a respirator. The 3M #8709 Easy Spray Paint Respirator, which costs under $10, is an inexpensive, fairly comfortable respirator for use when toxic materials such as bottom paints are handled only occasionally.
Wet sanding bottom paint is little different from wet sanding epoxy primer, except that you may be able to use finer grits of paper. All you want to do is smooth down irregularities resulting from paint application, removing as little paint as possible. Once again, the rubber sanding block is the ideal tool.
By the time you get to the point of wet sanding the bottom paint, you’re probably pretty tired from the seeming ly endless tedium of bottom sanding. If thorough sanding of the entire bottom is more than you can bear, concentrate on the front half of the hull. Few boats maintain laminar water flow much past the keel.
Conclusion
Putting a good bottom on your boat is probably one of the most time-consuming jobs you will face as a boatowner. It is not something to go through if you plan on selling the boat next year.
However, a smooth bottom will pay big dividends whether you race, daysail or cruise. The advantage in racing is obvious. The smoothness of the bottom doesn’t affect your rating under any racing rule, but it has a dramatic effect on light air performance.
Good light air performance should be the concern of the cruiser, too. A boat that is sluggish in light air from a rough bottom will have to carry more fuel, since you’ll probably run the engine more in light air.
A smooth bottom will help you save hours on short passages, days on longer ones. A boat averaging 6.25 knots will complete a 625 mile trip in 100 hours. A boat that is a quarter knot slower -a conservative estimate of the difference in speed a smooth bottom can make in light air -will take more than four hours longer to make the same trip.
Over time, the effort you put into creating a smooth, well-sealed bottom will probably pay off in lower maintenance. Most peeling bottom paint is the result of poor surface preparation. If you go through the effort of putting a good bottom on, then thoroughly wet sand before applying more paint, you’ll have less paint buildup. Less paint buildup means less tendency for the paint to separate from the hull.
It may be psychologically difficult to put the time into the part of the boat that no one ever sees. It’s not like the instant gratification you get when someone admires your varnished mahogany or well-oiled teak. Nevertheless, you can take pride in knowing that a smooth bottom on a boat is one of the important jobs in making your boat better, and that you can do it yourself.


