

While the consequence of letting your varnish and hull paint to fade is usually no worse than a blow to your ego, you don’t want to let your non-skid deck paint lose its grip. More than a few cruises have been cut short because someone lost their footing on a slippery deck.
Refinishing your boat decks nonskid coating is a big project, but so are the payoffs. Not only does it make your deck look like new, it is a whole lot safer. Here some general tips to help you get more mileage out of a nonskid restoration. For additional research, I’ve posted links to our previous tests of non-skid deck products.
Proper Application
The secret to durable non-skid starts with proper application.
Surface prep: We all know proper surface prep can make or break coatings applications, but it also directly affects the coatings service life. Always follow makers recommendations.
To prime or not to prime? That depends on the deck substrate being painted and the type of paint being used. If the surface is bare wood or bare metal, plan to apply a coat of primer (and a sealer for wood). A one-part primer is often sufficient, but a two-part epoxy primer will offer more durability and hardness. If you are allergic to epoxy, there are some excellent polyurethane primers designed for cars that also have good track records in the marine environment (PS is currently researching this further and would be interested in hearing from readers who have gone this route). Bare fiberglass requires a dewaxer, scuff sanding, and a coat of primer when applying most paints; however, some paints like Durabak and KiwiGrip recommend primers only for bare metal and wood.
Application: The surface must be clean and totally dry. After sanding, wipe it down with xylene, dewaxer, or acetone. Some paint makers warn against using solvents, so be sure whatever you wipe down with is compatible with the paint. The easiest paints to apply are those one-part paints that have the additive already mixed in. As long as the paint is thoroughly mixed, you can achieve a relatively even finish (see the cardboard trick described below for two-part paints).
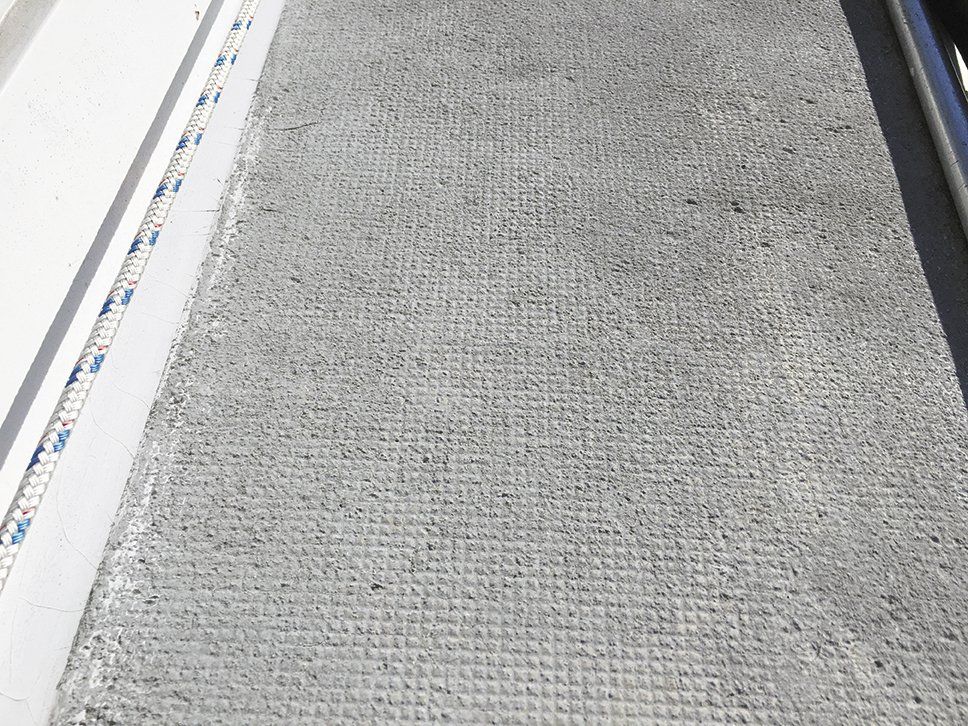
When it comes to using a paint with a separate nonskid additive, we recommend combining the mix-in and broadcast methods to get the most uniform grit pattern. Mix the nonskid additive with the paint, roll it on with the recommended nap roller (usually 1/4″ – 3/8″ solvent resistant), and sift more aggregate on the paint while its tacky; once the paint dries, you can brush off the excess and apply a second coat in the same manner. You can make an aggregate shaker by poking a dozen or so holes in the lid of the can with an ice pick, then up-ending it to sprinkle the additive across the deck. Pre-mixed nonskid paint users can also broadcast nonskid additive atop coats of the pre-mixed paint for a more aggressive grip.
Two-part LPU paints like Awlgrip will generally last longer and stay cleaner than textured paints or one-part coatings, but these temperature and humidity-sensitive products can be more difficult to apply for a first-timer. If you are rolling, the makers generally recommend that the additive be sprinkled or sprayed on while the paint is still tacky to achieve an even covering. The excess additive is brushed and vacuumed away and then the surface is recoated with paint (no additive). Following the maker’s guidelines for spray application will generally achieve a more even result.
Although the maker of Awlgrip advises that Griptex, the designated texture additive, should not be mixed into paint when rolling paint, we have done this using a technique shared with us by a Florida boatbuilder who has used this on his own boats for years. If you want to go this route, you should do a few test runs.
The main problem with using a roller to apply LPU paint with the non-skid additive mixed is that the texture tends to clump. This problem is exacerbated by the narrow working window for applying with two-part paints. To avoid clumping and wasting paint, you can use a small sausage roller with a medium to fine fiber nap (3/8″-1/8″). Be sure the roller is solvent resistant. Foam roller covers are not recommended. Carefully measure the desired texture before adding it to the pre-mixed paint, and thoroughly stir the additive into the pre-mixed paint. Before painting, roll the roller across a sheet of cardboard to ensure the paint is evenly distributed across the roller.
To reduce paint waste, we used lint-free 1/8″ solvent-resistant mohair sausage roller covers used for working with marine paints and resins. You can use up to 3/8″ inch roller covers using this technique—but test first. These mohair rollers are lint-free, but to ensure there was no lint, we rolled them over the sticky side of our masking tape to remove an loose fibers.
Work in small section and change rollers frequently. We used a 50/50 mixture of fine and medium grit additive in our Awlgrip. We did not do this with coarse grit, which we assume, would produce more obvious clumping if the paint is not throughly mixed.
A final coat, without grit, sealed the surface. Be sure to keep the coats thin-multiple thin coats are preferred over one heavy coat-and plan to apply the paint when there is minimal humidity. On all but a few tiny sections, the result was an even non-skid that was indistinguishable from a spray-on coating. When we recoat, we will likely do the broadcast method recommended by the manufacturers to see how it compares.
If are looking at ways to prevent slipping on step pads, stairs, or work stations (at the base of the mast, for example) and are not yet ready to embark on a paint project, check out our report on report on non-skid tape.
Taping: Use only high quality masking tape designed for outdoor use. Do not exceed the manufacturer’s recommended service period, otherwise you’re in for a big job removing tape one fleck at a time. Ralph Naranjo evaluated all the leading tapes from the leading manufacturer 3M in his report 3M Masking Tape Matchup. He also included techniques on following tight curves, which are common on non-skid sections.
Curing: Follow the makers recommendation for dry time, and be sure to allow the paint to fully cure before subjecting it to foot traffic. This allows the paint to achieve maximum hardness, making it more abrasion resistant and longer lasting.
Mat Installation: If you’re installing a self-adhesive mat, application is a no-brainer. Just be sure its where you want it before you stick it to the deck; contact adhesives don’t allow the small wiggle adjustments that epoxies do in application.
Testers also learned a few application lessons the hard way when installing nonskid mats with two-part epoxy. The epoxy usually has about an hour of pot life before it becomes permanently stuck to whatever its touching, so clean up any errant epoxy with a solvent as soon as possible.
Its also best to decide on the mats exact location before mixing the epoxy; you can use paper templates to help in this process. Be sure to leave a lip around the mat edge that is free of glue; the epoxy will squeeze into the bare area when the mat is put in place.
Regular Maintenance
Boat bath: Nonskid paints and mats should be cleaned regularly to remove abrasive salt spray and dirt. Wash with standard, mild boat soaps (PS, January 2013) or household cleaners and a soft- to medium-bristled brush. Steer clear of bleach and other chlorinated or acid-based cleaners as they can affect the paints color pigments and UV inhibitors. Be sure to rinse the decks well with fresh water, when possible.
Mold and Mildew: To prevent mold and mildew, you can lightly scrub the surface with an ammonia/detergent solution. To spot clean areas that are heavily soiled or show mildew, you’ll likely need to step up to more aggressive cleaner. Pettit recommends its Bio-Blue 92; the blend of cleaning agents and silica grit also can be used to de-wax or etch during surface prep. Durabak recommends fighting mildew and stains with a disinfectant like Lysol, and KiwiGrip advises using bleach or a mild acid solution to remove mold and mildew stains.
Wax Not: While waxing can breathe new life into topside paint, the paint makers we talked to do not recommend waxing painted nonskid. Most nonskid paints and bead/powder additives have UV protection built in, and the paint formulas include UV absorbers, making waxing unnecessary.
Touch-ups: Address any peeling or worn nonskid paint as soon as possible. Most of the nonskid paints we tested are easily repairable: A bit of scuff sanding, cleaning, and touch-up painting will keep the coating from meeting an early demise.
Longevity expectations
Nonskids life expectancy can vary based on type (paint vs. mats, and paint type), boat location (UV-saturated South Florida vs. overcast Seattle), and how it is cared for. In our non-skid surface tests, the soft-foam mats we tested did not weather as well as more rugged mats like Treadmaster-nor did some one-part paints, but they can be freshened up with a little sanding and a recoat. For example, Pettit reports that EZ-Decks should perform well in Florida for about three years before needing a recoat.
A properly applied two-part LPU should deliver at least five years before needing recoating—you could get as long as ten. Less viscous polyurethanes like Durabak and KiwiGrip claim to last a decade, but in our experience with Durabak, five years is the maximum in the marine environment.
Practical Sailor Non-skid Tests
Over the years, Practical Sailor has conducted dozens of test comparing painted-on non-skid exterior coatings. We’ve also compared the heavy-duty textured mats, including faux teak and cork, that are applied with adhesive. Three long-term tests of these coatings and mat products are still ongoing.
Here is a summary of what we found so far:
For long-term use, a two-part polyurethane (LPU) paint with a textured additive will provide the most durable exterior non-skid surface. Among the two-part LPU paint kits that scored the highest in our past tests were Awlgrip Griptex additive (with Interlux Perfection) and polypropylene beads (with Epifanes LPU). Triflex Treadmaster was our top contender among the adhesive mats, although it had become extremely hard, almost brittle, after 10 years.
Among the textured paint products, Durabak has since been eclipsed by Kiwigrip and Interlux Interdeck for durability.(See Do-it-Yourself Nonskid Options, PS November 2013, and Non-skid Ten Years After.) We are currently looking at two relatively new products on the market, Pettit Tuffcoat, a rubberized textured coating with a two-part epoxy primer. And TotalTread, from Totalboat, a ready-mixed, slip-resistant polyurethane non-skid deck paint with texturing agents. Tuffcoat is effectively a marine version of a product that is popular for coating the beds of pickup trucks, and TotalTread is representative of the moderately priced, easy-to-apply, non-skid coatings.
We are also working on a 10-year update on faux teak vinyl mats. So far, the results are very similar, and our long-term testing has not yielded any big losers or winners. The budget-priced Plasdeck and Permateek had slightly grippier surfaces in our initial test. The thicker Dek-King and Flexiteek products were slightly cooler. Testers were also impressed by the cork infused Marinedecks grip and durability.(See Synthetics Go Toe to Toe, PS December 2015).
Remember that non-skid surface is only one element to onboard safety. Even the grippiest deck is of little use if you have to creep around shrouds, hurdle over cockpit coamings, or move around deck with nothing to grab. As you ponder your non-skid options, consider taking inventory of your boat’s ergonomic features, as described in Tech Editor Drew Frye’s report, (“Tall-step Syndrome,” PS February 2016).
If you are in the market for a new or used boat, be sure to look at Ralph Naranjo’s report on cockpit ergonomics (“A Practical Look at Cockpit Design,”PS April 2012).
Finally, if you are looking into breathing new life into an old boat with a cosmetic makeover, our recently published 4-Volume e-book “Painting Your Boat From Bottom to Top,” compiles and updates more than a decade of research and hard-won experience on marine coatings.


