

No one likes drilling holes in their boat, and to drill holes for a simple snap seems like overkill. I love snaps for window covers, and even securing seat cushions, but it’s hard to justify the risk of leaks and a rotten core just to attach a fabric accessory. YKK, a company best known for its heavy-duty zippers, has a solution.
SNADs consist of a snap stud or snap socket mounted on disk that is backed with 3M Very High Bond (VHB) tape. There are two sizes. The larger 40 mm SNAD has an adhesive disc with about two square inches of sticky surface area. These are recommended for marine use because the bond is more reliable. They are specifically recommended for surfaces with bonding challenges—glass, low energy plastics like polyethylene and PVC, and inflatable boats. The smaller 25 mm SNAD discs feature less than one-square-inch of adhesive backing and are fine for gelcoat and low-load uses, like window covers. Flexible silicone-backed SNADs with metal studs are designed for curved or flexing surfaces, and stiff plastic SNADs offer more adhesive area to bond with rigid, flat surfaces.
Durability
Regular users consider the plastic SNADs to be more durable because they are less prone to corrosion or spring fatigue. The plastic version, especially the 40 mm size, sticks a little better to rigid materials because it is less flexible and has more adhesive surface area.
SNADs are not recommended for applications with sustained pressure, like a dodger that has shrunk. The adhesive can withstand a good tug while you are pulling the cover off, but with sustained loads greater than 15 pounds, the VHB backing tape creeps (slips) and fails.
SNADs are best used for applications with light or intermittent loads. Anything canvas is a good candidate for a SNAD. We’ve used them on a companionway cover as well as window covers.
They won’t work well with tight canvas or canvas that has shrunk, because the loads will be too great. They work for cockpit covers, and smaller sheet bags (holding no more than 5 pounds). We’ve found they work well with seat cushions.
Attachment to Gelcoat
If the gelcoat is in good shape, just wipe the surface down with denatured alcohol. If wax or ceramic coating is present, clean more vigorously with xylene or acetone.
Allow the surface to dry. If the gelcoat is oxidized, scrub with a Scotch-Brite pad or equivalent to remove the chalky gelcoat. Apply 3M Primer 94 with a Q-tip. Rough surfaces should get two coats, allowing 5 to 10 minutes between each coat.
The primer is available in either an 8-ounce container or a 0.6-milliliter ampule, which is good for about 30 SNADs. The primer should be applied immediate prior to installation, not the night before. The primer is clear, so a template is useful to avoid over-application. If the surface is glass, you’ll need to use 3M VHB Silane Glass Primer.
To install the SNAD, remove the backing and hold it firmly in place for 60 seconds. Don’t use the SNAD for 72 hours. Correct installation is critical to full performance.
Attachment to Fabric
40 mm silicone (flexible) base SNADs work reasonably well on non-porous fabrics like inflatables, where they are useful for installing chaps and covers. Make certain to remove all protectant (wax) coating thoroughly, using multiple passes with solvent. Sand the fabric lightly and apply 3M 94 Tape Primer as directed.
Flexible-base SNADs can be used on vinyl-covered seat covers and other smooth, non-porous fabrics. Weak fabrics will need reinforcement to prevent tearing at the snap. If sewing a reinforcement patch is impractical, you can use a polyurethane sealant such as Sikaflex 291 or Loctite PL S-40 to glue a reinforcing patch onto the underside.
Note: For Sunbrella, sailcloth, and all porous fabrics, we recommend reinforcing the area and installing a conventional press-in snap.
Socket versus Studs
Sailrite recommends that the stud part be attached to the boat and the metal socket on the canvas. Another SNAD supplier, Robship prefers the reverse—the socket on the boat and the metal stud on the fabric. The disadvantage of placing the socket on the boat is that if it is horizontally mounted it can fill with dirt. The advantage of placing the SNAD socket on the boat is that it’s easier to use an unsnapping tool like the Topsnapper, if needed, to reduce strain on both parts while unsnapping.
Using SNADs
Metal snaps should be lubricated several times each season, but don’t lubricate plastic SNADs. The plastic might be incompatible with some oils, and the oil might cause the adhesive to break down. When separating SNAD parts hold the base down with your thumb as you lift.
Bottom line: Though not as simple or reliable as conventional snaps, stick-on SNADs eliminate the need to drill a hole. If you want to change the original installation, it’s easy to move the SNAD. For some canvas projects they are the easiest option—if not the best.
SNADs improve holding where it counts

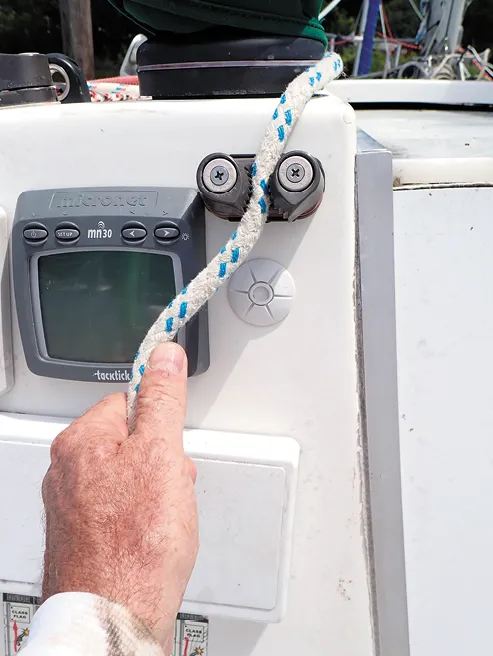
1. Robship put the stud on the fabric and the socket on the fiberglass bulkhead. It is easier to pry apart this way.
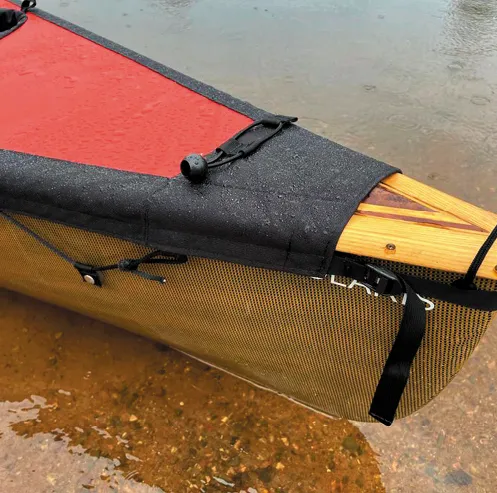
2. SNADs secure a spray cover to a kayak. SNADs will also bond well to properly prepped Hypalon and PVC making them a good choice for spray covers or chaps.
3. SNADs were a no brainer for our companionway curtain (see photo facing page). The larger size used here offers more bonding area.
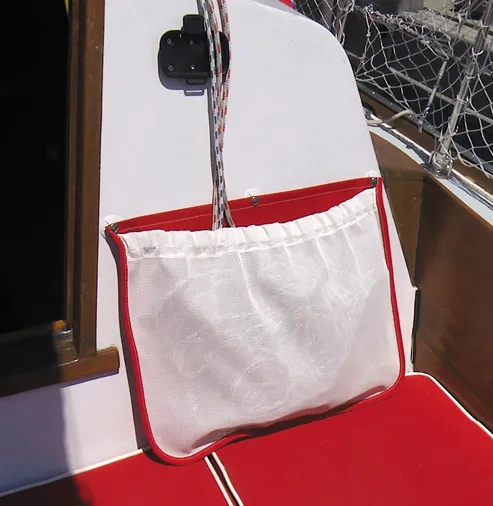
4. SNADs make it easy to add sheet bags to the cockpit. Sailrite (www.sailrite.com) sells kits with enough material for the handy do-it-yourselfer to make four bags.

This article was first published on 24 October 2023 and has been updated.


Love your magazine and all the testing you do. I read the tests and results in each issue.
I’ve used 3M VHB tape (the adhesive on SNADs) to attach winch handle pockets. I put VHB around the perimeter of the handle holder and stuck it to the fiberglass. No problems after a couple of years. Quicker than drilling holes. I’m sure there are other applications for VHB double sided tape.
Thanks much for the info on surface prep and primers. Also the tips on dinghy attachment. Well done!
My current winch handle holder is mounted with VHB tape. Very solid. The main thing with these products is to have very clean surfaces and to stay withing the application temperature limits (mostly not too cold).
Almost hidden in this article is a mention of Ironwood Pacific’s Top-Snapper tool which should be given more attention. SNADs that are frequently unsnapped have a tendency to eventually pull off even well prepared surfaces, though the VHB tape is easy to replace. The Top-Snapper eliminates the stress on the tape when unsnapping by pushing the snap and SNAD apart instead of pulling as you do with just your fingers. I have 14 SNADs that hold my pilot house window covers in place and which are snapped/unsnapped almost daily. I have yet to replace any more VHB tape since I started using the Top-Snapper. My many additional SNADs that are not regularly separated have been rock solid for years and are a very useful product.