


The windows on our Corsair F-24 trimaran were obviously damaged by UV radiation. All we could see through them were shapes of objects that were very close to the windows. That’s what 20 years of exposure does to polycarbonate.
The real motivation to replace them came the day the window seal let go. I was sailing along in a building breeze and heard an odd flapping noise on one side, something like a halyard clanging against the mast, but at deck level. When I went to investigate, I found the front third of the 51-inch portlight was flapping back and forth like a reed, ready to rip off and fly away.
A careful application of duct tape—lots because the deck was wet—secured it for several hours until I reached harbor. There, I dried off the window, reapplied more tape, and planned for a replacement. It was early spring, so it would be months until the weather became warm enough to make a strong installation.
Plastic windows are light, strong and inexpensive. On boats we have two basic choices in glazing material. Acrylic is more UV resistant and lasts many times longer than polycarbonate. Polycarbonate, used in bullet-proof windows, is tougher per square inch, but acrylic is plenty strong—you just need to use thicker glazing in some applications. The chief difference between the two is UV resistance, where acrylic excels.
Eventually, exposure to UV rays damages any plastic, even acrylic, resulting in hazing and crazing within the plastic that no amount of polishing can remove. You can delay this with covers, but after 15-25 years, any clear plastic will likely need to be replaced.
The most common window failure is at the seal. They leak. Leaks can develop over years as sealants begin to fail. The force of thermal expansion accelerates the process. As materials expand and contract with temperature changes, the bond-line between the glazing and the frame is stressed and eventually opens.
In our experience, portlights longer than 30 inches, like those on our F-24 test boat, suffer disproportionately from premature leakage. On our boat, the port side window had begun leaking years before the starboard one let go. Noticing that the previous owner had tried to repair a leak at the forward section of the port window with hardware store silicone, I pumped DOW 795 adhesive sealant into the joint, and this kept the water out.
Then the starboard window peeled loose in dramatic fashion, also starting from the forward edge. It was obvious that my too-long windows were expanding and contracting at a rate that was destroying the seal. As a result, I chose to shorten the windows on our F-24 from 51 inches to about half that length.
This had the added benefit of allowing us to cut replacements from a 2’ x 4’ sheet of acrylic instead of a far more expensive 4’ x 8’ sheet. Conveniently, there was an existing column at the midpoint where the two new, smaller windows would join. We got quotes on having the replacements professionally cut to fit, but every quote exceeded $650, so I cut the panes myself. The 2’ x 4’ sheet was only $93; cutting took only a bit over an hour.
WINDOW MATERIALS
Polycarbonate and acrylic are both used for portlights, but not only does acrylic have much better UV resistance, it will remain clear twice as long. Both have similar strength and will not break due to water pressure or foot traffic if made of the proper thickness. However, Lexan has far greater toughness when struck with a hard object (an anchor, for example). This is because it has more elasticity, flexing more before it breaks.
Polycarbonate will block UV but acrylic does not, so we recommend tinting windows to prevent UV damage to the interior (see “Hatch Tinting Test,” PS March 2022). UV rays will also attack the sealant. If you need a clear window, polycarbonate might be a good choice, but you have to choose your sealant carefully, since the solvents can cause polycarbonate to craze (see “The Right Caulk for Your Boat,” PS December 2021).
CUTTING WINDOWS TO SHAPE
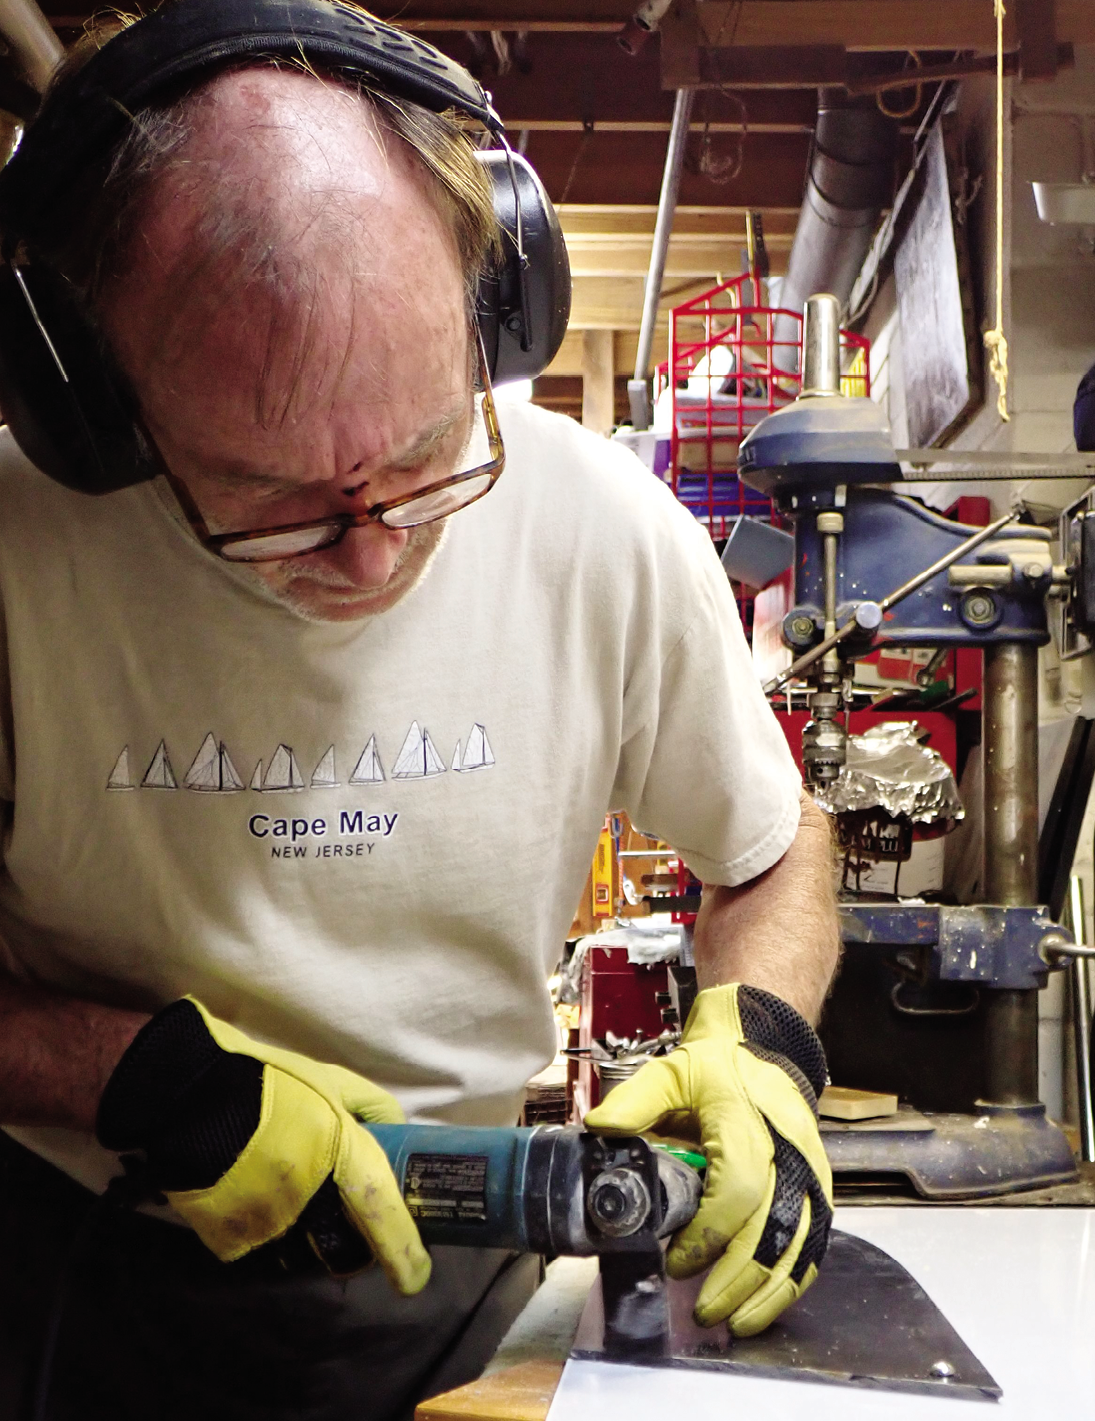
Glazing manufacturers have data sheets describing approved methods for cutting. Polycarbonate is easy to work with, but acrylic is slightly prone to cracking, so we suggest practicing on a piece of scrap first. We have cut rectangular windows using score-and snap plastic cutters. We then carefully round the corners with a sanding disc on an angle grinder. We’ve also cut plastic using a table saw and band saw—using a fine blade and feeding it slowly through the blade.
Perhaps the most user-friendly DIY method for cutting curved windows is using the fine cutting blade on an oscillating multitool. The Fein Multimaster tool was one of the first of this type, but there are many copycats today (see “What’s in the Practical Sailor Toolbag,” PS January 2012). Use the old window as a template. Make the cuts using multiple passes and light pressure to avoid melting the plastic. Leave the protective film on during the cutting process. This should remain in place as long as possible to avoid scratching and contamination.
A hole saw is best for larger round holes. Drill small round holes with a twist drill. For drilling acrylic, a sharp tip angle (60-90 degrees) is suggested to prevent grabbing and chipping. Common bits have tip angles of about 120 degrees, which you can carefully sharpen, but better to look for sharp-tip bits meant for cutting soft plastics. Clamping the work helps, as does moderate steady pressure and sometimes a dullish bit. Tight outside curves can be rounded with a sanding disc on an angle grinder, followed by smoothing with fine paper on an orbital sander.
Do not to cut the windows too big. The window must rest flat on VHB tape without touching the surrounding frame. A slight edge bevel (about ½ to 2⁄3 the thickness of the glazing) on the underside of the glazing provides more room for sealant and eliminates a stress riser for the sealant.
SCREWS
There is disagreement on using screws to fasten plastic glazing. Some claim these can lead to cracks in the corners, usually the result of thermal expansion. However, you can prevent cracking by drilling oversized holes. Do not countersink the holes, and when fastening the window, the screws should be snug, but not too tight.
Fasteners offer backup retention in the event of sealant failure. Placed in the corners, they are also convenient for attaching window covers, which protect the new windows from UV, scratches, and bird bombs. We used screws to fasten the windows on our previous test boat, a PDQ catamaran. The seals lasted for more than 20 years, so I was confident we could use them again on the F-24.
If you plan to use screws, pre-drill the glazing before it is bonded into place. You can drill the fastener holes in the frame to line up with these holes later.
INSTALLATION MATERIALS
Our choices of sealing materials are very specific and accepted throughout the industry. As much as I enjoy the search for more economical products, sealing window glazing is not a place to cut corners. The industry standard is to use 3M VHB (very high bonding) tape for sticking the window in place before sealing (see “Through-Bolt Alternatives”). The 5952 family of VHB is best for joining gelcoat to acrylic or polycarbonate. A tape thickness of 1-2 mm is best for providing room for the sealant and allowing thermal expansion.
In addition to the bonding tape, you’ll need a sealant. DOW 795 (DOW 791 in the United Kingdom) is the go-to silicone for structural window glazing. Other silicones do not bond as well, and the window can literally fall out.
Polyurethanes, including 3M 4200 and Sika 295, might seem like a good options, but PS testing and industry experience have found that UV light coming through the glazing eventually attacks the sealant at the bond surface. Many European boats use Sika 295, but they first paint the bond area of the glazing with Sika’s special opaque primer to prevent UV failure.
WEATHER
VHB tape requires an application temperature of 70°F-90°F. It will not bond properly in cool weather, and in very hot weather it will creep. Using space heaters to raise the ambient temperature seldom works. The DOW 795 sealant skims over too quickly in high temperatures and direct sun.
WINDOW REMOVAL
Before removing the old window, tape a tarp to the inside of the cabin. Lots of dirt and pieces of old sealant are going to fall in during the removal and cleaning process. My starboard window was loose and came off with the lightest encouragement from a putty knife. The port window required a much more aggressive approach, but eventually a pair of sharpened drywall knives did the trick. If the sealant is particularly stubborn, try a remover. We found Debond Marine Formula works well for removing all traces of silicone and Re-Mov is excellent for loosening polyurethane (see PS Tests Silicone and Adhesive Removers, PS January 2017). Slit along the bond line with a razor knife as deeply as possible, apply, and let soak for 10 minutes. Repeat.
HEAT GUN
After 20 years, the original VHB tape will have hardened into a concrete-like material. Neither a scraper or wire brush will be much help. But a heat gun will. The trick is to heat the adhesive enough to soften the tape residue, but not the gel coat. A slightly sharpened 1-inch wide putty knife is the best tool. Round the corners to prevent gouging and to make it easier to work the corners. A nice fat, comfortable wooden handle is best, and wear leather gloves for the heat. It took me four hours with the gun set on high and right in close, not counting breaks. This is the toughest part of the job.
CLEANING UP THE SURFACE
Remove any remaining silicone or polyurethane residue using the appropriate remover (see above) and a small wire brush. You can try solvents, but the removers are many times more effective and will result in less damage to the frame. Clean up the residue with a soapy washcloth, followed by several wipe downs with fresh water. You will also wipe down the surface with denatured alcohol just before applying the primer or VHB tape.
VHB TAPE PRIMER
If the surface is very smooth and non-porous, proceed directly with VHB tape. Old, porous gelcoat should be primed with 3M Tape Primer 94. It dries in less than 15 minutes and provides a slick, impermeable surface that will maximize VHB bonding. Extend the primer under the entire area that the sealant will cover. Do this shortly before applying the tape. Also, if you mask the perimeter of the frame at this time with 3M blue painter’s tape, you won’t have to tape again for the sealant step.
VHB TAPE
Unless you have used 3M’s primer, wipe the frame one last time with alcohol. Apply a ¾-inch strip of VHB tape around the inside rim of the frame. Trim as needed with a razor blade. Roll the tape firmly into place with its cover strip still in place. A fiberglass laminating roller or wallpaper seam roller works well. It takes several days for VHB tape to reach full strength, but after 20 minutes it will achieve a good bond.
TEST FIT
Once the VHB tape touches the glazing it will grab the glazing. The window can’t be repositioned, and there are no second chances. Dry fit the glazing with the tape’s protective cover still in place. Place spacers around the perimeter of the frame to ensure perfect fit. These will help guide the window into a centered location. Short pieces of ¾ x 1/8-inch aluminum angle work well. We’ve also used popsicle sticks. You can tape your spacers in place if needed. The window may require trimming so that it sits flat on the VHB tape. An angle grinder with a 150-grit wheel works well for small adjustments.
Remove the red release strip from the VHB tape. Remove the inner protective film from the glazing and wipe the bonding edge with alcohol. For larger windows, you’ll want two people for fitting. Place one corner first, and then ease the window into place. Once in position, press firmly all around the perimeter several times, as you did for the tape. You don’t need a roller; palm pressure is sufficient.
SCREWS
Screws are optional. If you are installing screws for cover snaps or for retention, this is the time to drill the holes into the frame area. You could drill these holes later, but then the chips from the drill will land in the wet sealant. Drill either for #8 machine screws or #8 self-tapping screws.
SEALANT
Remove the spacers and mask the perimeter of the frame and glazing with 3M blue painter’s tape. (You should have already done this during the taping process.) Leave the outer protective film on the glazing and you will not need to mask it. Use a high-ratio caulking gun like the 26:1 JES M26S for better control (see “Caulking Gun Shootout,” PS August 2021). Pump the DOW 795 (DOW 791 in the UK) into the gap, filling the space from the VHB tape out to the surface. A 3/16-inch hole in the pump spout is about right. Wipe off any excess sealant and allow it to set for about 5-10 minutes. Do not continue wiping after the first pass; the sealant skins over rather quickly in warm weather, and any smoothing attempts now will just make it look worse. Avoid working in direct sun if possible, or at least avoid the middle of the day for this critical step.
Peel off the masking tape and protective film very carefully, before the sealant has skinned over. Do not allow the sealant to dry before peeling the tape.
Install the screws. No more than finger tight to avoid stressing the plastic. A cone of sealant under the head prevents leaks.
With care, your new windows should provide another twenty years of trouble-free service.
CONTACTS
3M, www.3M.com
FEIN, www.fein.com
PLEXIGLAS, www.plexiglas.de
SABIC (LEXAN), www.sabic.com
SIKA, www.sika.com
SUNBRELLA, www.sunbrella.com
YKK, www.ykkfastening.com
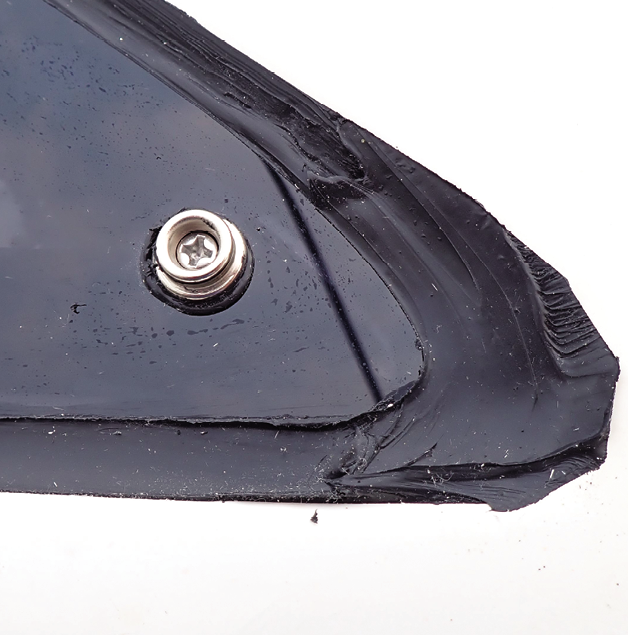
1. Our installation left plenty of room for thermal expansion at the corners. Getting a smooth finish on the DOW 795 is tricky. It helps to practice first.
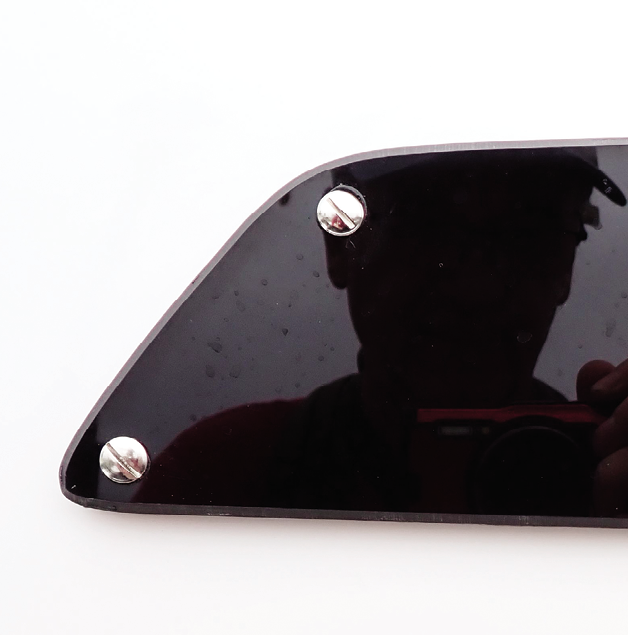
2. We drilled oversized holes in the glazing so that the screws would not cause stress cracks.
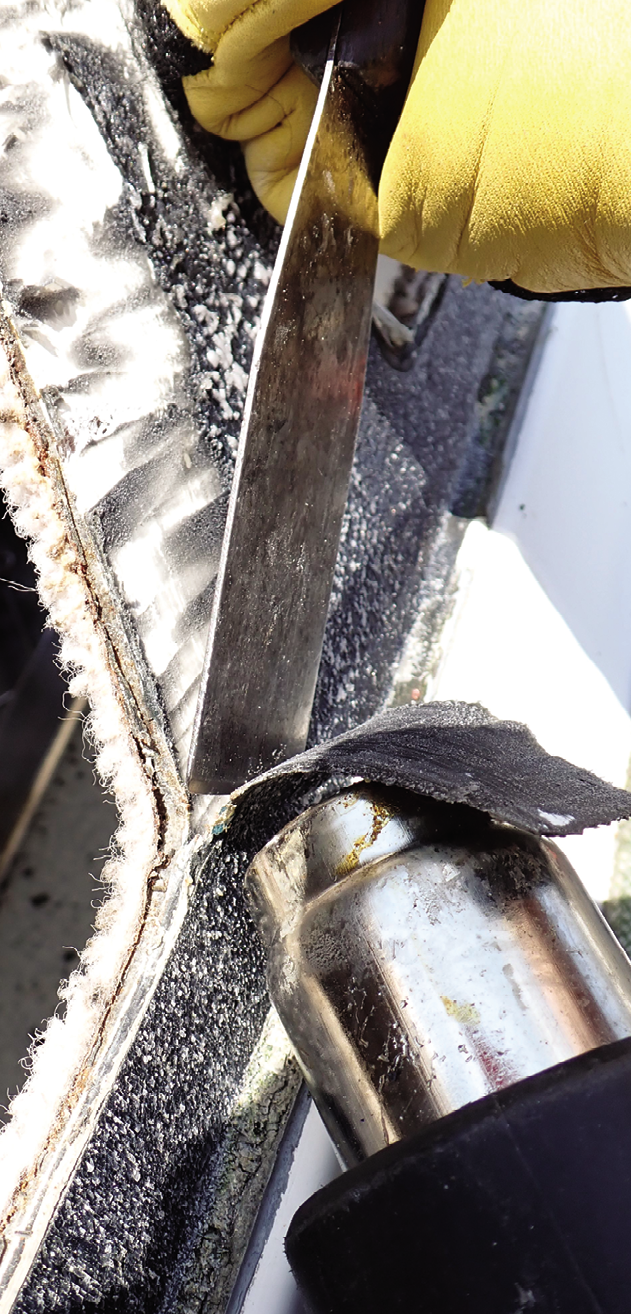
1. Keep the heat gun moving so as not to overheat the gelcoat.
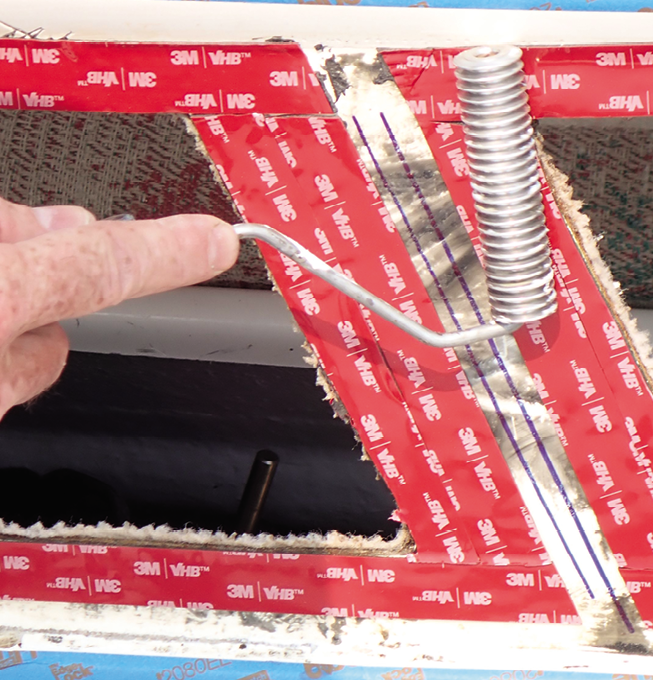
2. We used a grooved laminating roller to firmly press down the tape and ensure a good bond.
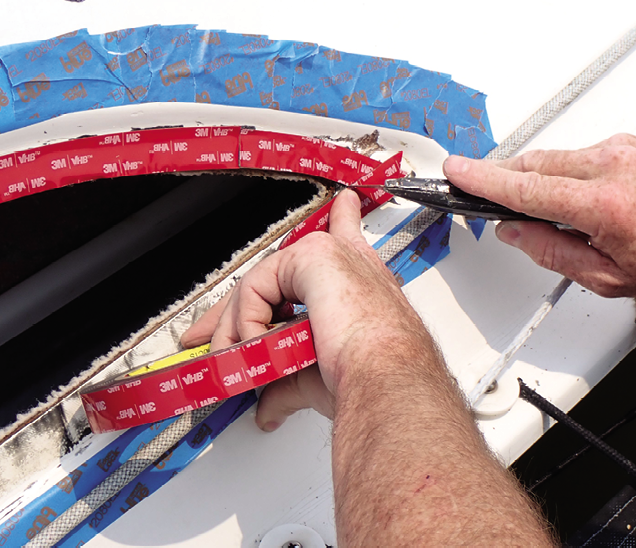
3. A sharp box cutter was used to trim the tape to fit.
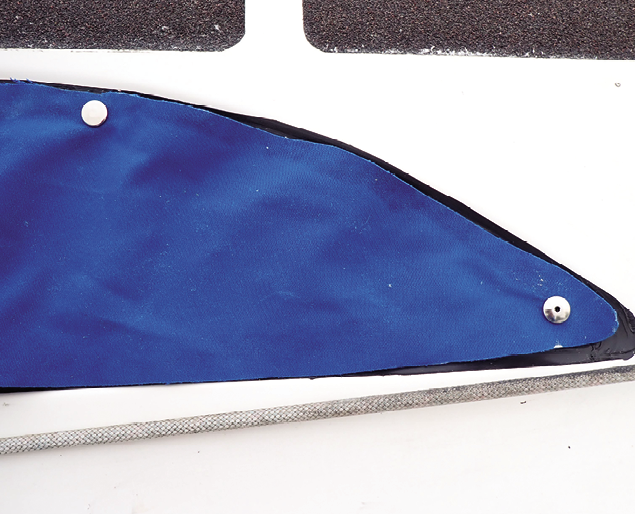
1. Keeping the cover loose reduces strain on the snaps.

2. We put snaps at every corner and spaced them evenly along the sides, top and bottom. Not every screw was a snap.
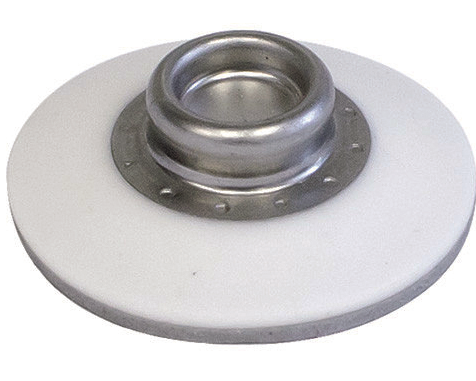
3. Adhesive snaps like the YKK SNADs make it easy to retrofit windows with a snap-on cover.


