Everybody has spills, and just a tiny splatter of epoxy can make a mess of an otherwise flawless job. Never fear, there are some proven cleanup tricks.
For uncured epoxy, tape off the surrounding area to prevent spread. Wipe and scrape up what you can, and wipe up obvious spills with acetone. Next, wipe down the entire work area with vinegar, and anywhere the epoxy may have splattered. Be sure to keep the vinegar away from the actual work since it will prevent a good cure.
Even 24 hours later, the epoxy has not fully cured. A few reactive tails persist, and acetone, or better yet, vinegar, can attack these weak spots, softening the epoxy. Wet a rag, leave it on the spot for 20 minutes or longer, and scrub vigorously with a stiff bristle brush. Failing that, try a plastic razor, old credit card, or scrub gently with a fine stainless wire brush.
If the epoxy has cured, you are in a bit more trouble. If the surface is porous , there is little hope, but sometimes a long soak in vinegar helps. If it is a painted or varnished surface, spot refinishing is the best path. With gelcoat, on the other hand, there are some tricks.
HEAT
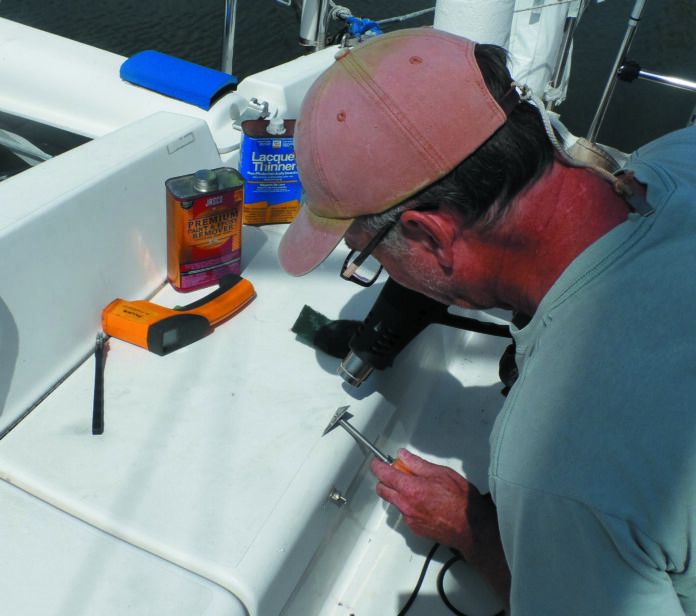
Epoxy softens at about 200F, but gelcoat doesn’t soften until 260-300F. A hair drier might work, but a heat gun is ideal. This difference in softening temperatures is not great, so we strongly suggest monitoring the process with an infrared thermometer. The inexpensive IR fever thermometers that became ubiquitous with the outbreak of COVID also have a surface mode, perfect for measuring the gelcoat temperature. Core materials are also vulnerable to heat damage; Divinycell H80 softens at 190F and Corecell softens at 240F. It will take time for the heat to reach the core, but this reinforces the need for temperature monitoring. The balsa core of our test boat is limited by the vinylester skin bond, which weakens around 250F.
We started with the heat gun on high to warm things up more quickly, but reduced it to low within 15 seconds and kept it on low while working to avoid overheating. Start with the gun close to the work, and gradually move it out to 4 inches or so as the surface warms.
Practice on plywood first. Heat the scraper or wire brush by keeping it in the airstream while the surface is warming. A hot scraper or brush cuts better.
SCRAPERS
Use only use draw-type scrapers, which are less likely to gouge. We liked the metal shave hook style best. They come in a variety of shapes. The rounded blades can be customized on the grinder to fit any curve. It should be sharp, but not so sharp that it will shave into gelcoat. Use very light pressure. After removing most if the epoxy, tape off the spill and sand with 400 grit.
SOLVENTS
Random pattern non-skid presents a problem for scrapers, which inevitably catch on the raised surface. We’ve tried several approaches using solvents to get around this, all to no avail. You can remove the thick part of spill with a scraper, but the rest will remain visible until you decide to paint or touch up the stained area.


