

This is the last of a three-part series describing the planning and installation of an inboard diesel engine in my previously engine-free Cape Dory 36. In Part I (see PS April 2023), I described project goals, propulsion options, and the project’s unique challenges. In Part II (see PS June 2023), I described the positioning, design, and construction of the shaft log and engine beds, major changes for the electrical system, and finally, the installation of the engine itself. Part 2 concluded with an engine start-up and systems test with the boat on the hard. In Part III, I’ll discuss steps required to get a perfect match between the engine and propeller. I conclude the series with an assessment of the overall project.
LAUNCHING THE BOAT
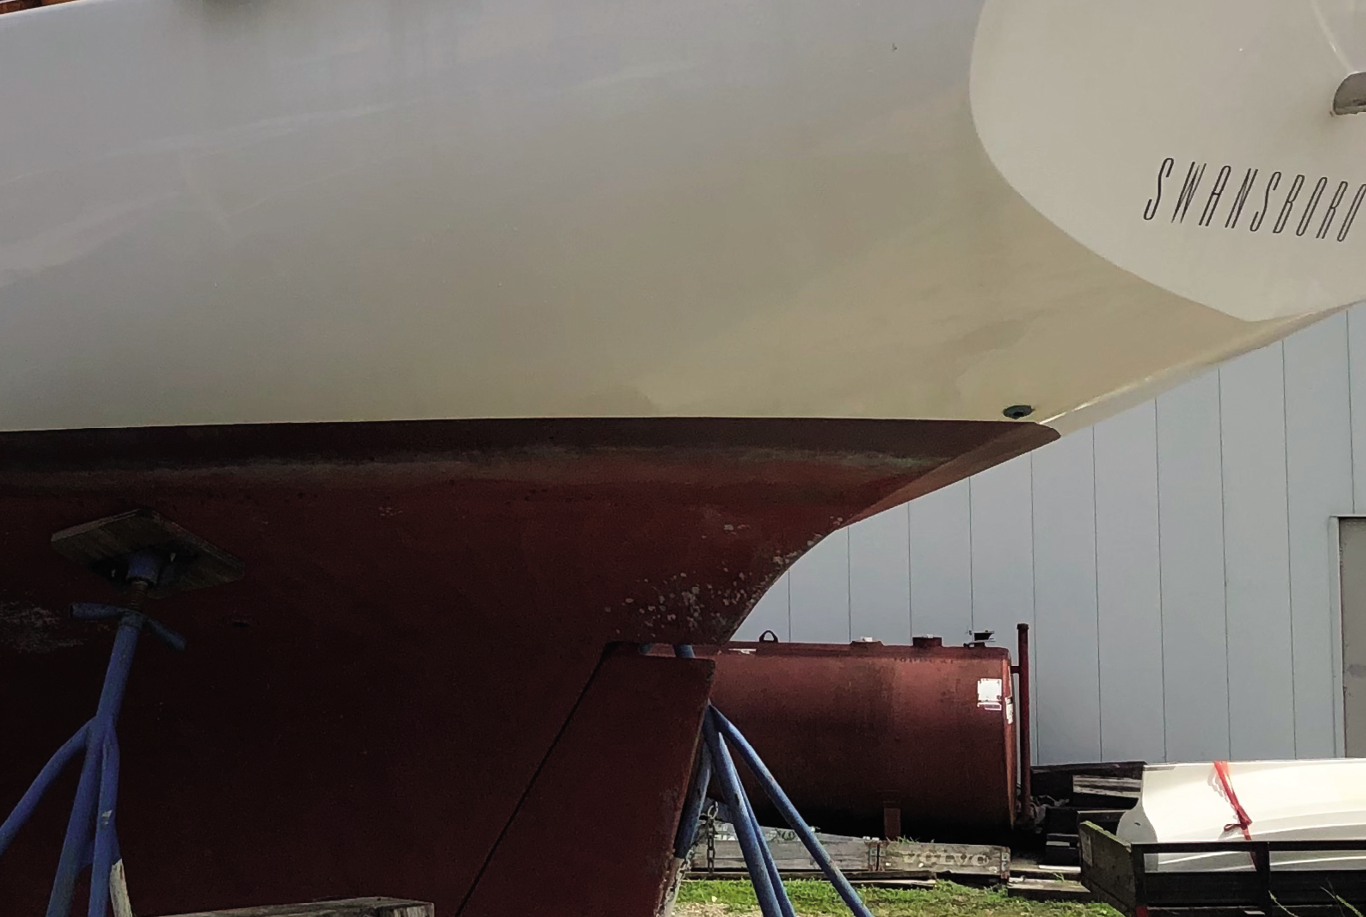
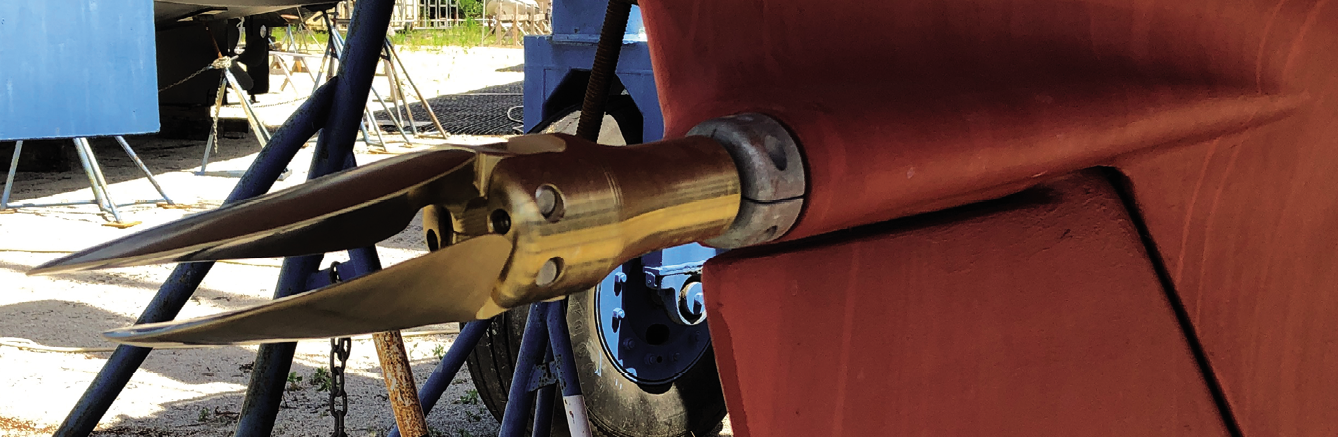
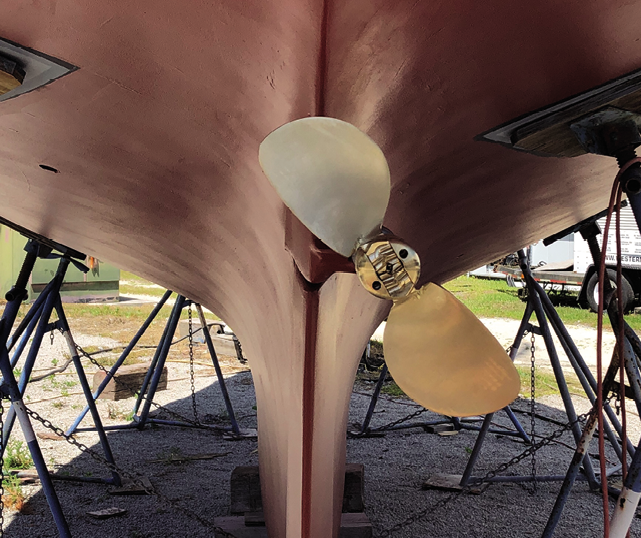
With the initial engine start-up complete, I tackled a few other projects, such as adding a small fairing around the prop zinc to further streamline the shaft log. Then I scraped off the old bottom paint, applied new barrier coat, and rolled on Interlux CSC anti fouling paint. I installed the Flexofold two-blade folding propeller. It looked great. Folded closed, it was very streamlined. Open, it looked substantial. I also topped off the fuel tank by using 5-gallon jugs of fuel, marking my fuel level sounding stick as I filled the tank.
We launched the boat on 9 June 2021 after being on the hard for 22 months. I estimate I had a full year in the project as we had taken considerable time off to travel. But, make no mistake, installing the engine was a big job and a lot of work. Actually, installing the engine was the easy part—the real work was planning, designing, and installing the shaft log, the engine beds, modifying the electrical system and building an engine box, etc.
Before we splashed the boat, I put together a launch day check list that I ran by my trusted advisor. We had plenty of absorbent rags on hand for any oil or fuel leaks:
- Double-check all seacocks and stuffing boxes
- Check oil and coolant levels
- Start engine
- Check exhaust water discharge
- Check closely for fuel and water pump leaks
- Check for oil leaks
- Bring engine up to operating temperature
- Test forward and reverse
- Recheck stuffing box
- Put in gear and check thrust in forward and reverse
- Recheck stuffing box and engine for oil, fuel, and coolant leaks
- Get underway. Recheck stuffing box for leaks.
DIALING IN RPM
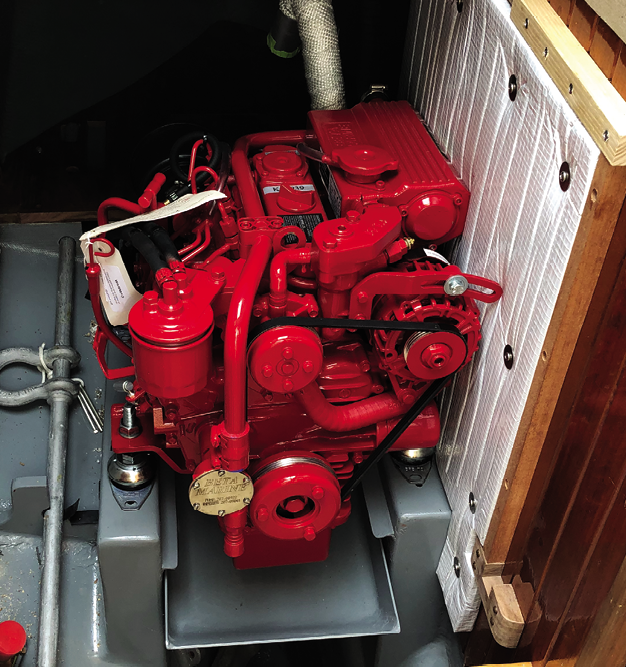
With the boat in the water, the engine fired right up. There were no leaks. We let the engine warm up. I put the transmission into forward and reverse a few times to make sure there were no issues like the control cables connected backwards. We ran through our checklist. We cast off the lines, shifted into gear, advanced the throttle and away we went. Nothing to it. The whole thing was anti-climactic.
The engine was relatively quiet and very smooth. The boat tracked straight. It felt weird but strangely reassuring. It immediately occurred to me I could get used to having an engine. I checked the stuffing box while Gayle steered the boat. It was very warm. I had installed a traditional stuffing box and used Gore GFO packing instead of the traditional flax packing. I did not want a dripless stuffing box as they can be tough to repair if they fail at sea. I backed the stuffing box nut off about a turn until there were a few drips and tightened down the locking nut. It cooled right down. During the rebuild I fabricated and installed a small drip catch under the stuffing box so any drips would be diverted down a ¼” clear vinyl hose and into a gallon jug in the bilge. Over the next month or so I adjusted the stuffing box a few times until it remained completely cool. As I had read in the many testimonials for the Gore packing, eventually there were no drips. I don’t see any advantage to a dripless shaft seal.
We motored seven miles the first day and motored out of the ICW to a quiet spot where we like to anchor. I spent about an hour motoring in circles and getting a feel for how the boat handled at slow speed and especially in reverse. With little to no wind, if I was careful, I had some directional control in reverse which is about all one can expect with a full keel boat. Keep in mind the propeller is behind the rudder on this installation so in reverse, opposite tiller allows a surface for the prop wash to push against. In theory I should be able to use that to my advantage. Time will tell as I gain experience with the engine.
As we completed the trip back to the marina the next day, I ran the engine to max power. We attained 3,000 RPM, well short of the desired 3,600 RPM on the specification sheet for the Beta 25HP running under load. Clearly, we were over propped, meaning we had too aggressive of a pitch or the diameter of the prop was too big, or both.
One of the things I noticed right away is the stopping power of the Flexofold propeller. The boat stopped very quickly going into the slip with about half throttle in reverse. It was a huge improvement over the poor stopping power of the outboard engine even with its four blade prop. No comparison.
I called Farron Peffer, the Beta Marine tech rep I had worked with throughout the project. We discussed the low RPM. The first thing he told me to do was to attempt max RPM at the dock in neutral. He told me to check the specification sheet that accompanied the engine.
On it was the RPM achieved by the factory for the engine, which listed 3,800 RPM, not under load, meaning with the engine in neutral. It also stated the max RPM underload was 3,600 RPM. He explained I should be within 50 RPM or less and a little over was preferable to being under the RPM goal. Anything else was not acceptable. He was 100 percent confident the engine would reach the specified RPM.
I ran the test in neutral and only achieved 3,450 RPM. He told me to go to Harbor Freight and purchase an optical digital tachometer for $35, which I did. I used the included reflective tape and placed a small square on the fan belt hub. At wide open throttle the photo tachometer read 3,789 RPM. This confirmed the unloaded engine was achieving the specified RPM, but the tachometer was off about 340 RPM.
Farron explained the new Beta tachometer was probably not calibrated at the factory. He said he would mail me a small device that plugs into a connection in the back of the tachometer to calibrate it.
While I waited for the calibration device to arrive, Gayle and I took the boat out for a test run. With the engine cover off and the transmission in forward, Gayle ran the throttle to the firewall so we could determine the max RPM underload. This is a crucial test to determine if the prop is correctly matched to the engine in your boat.
I checked the RPM with the photo digital tachometer. It read 3,280 RPM. We were 320 RPM under our goal of 3,600 RPM under load. This indicated the prop pitch and or diameter was not right for our engine/boat combination.
SWAPPING PROP BLADES
I contacted Flexofold and the ever-helpful Nina von Bergan explained that decreasing prop diameter and pitch will increase maximum RPM (and vice versa). She said one-inch change in diameter equates to a change of 250 RPM while a change of one inch of pitch equates to a change of 125-150 RPM.
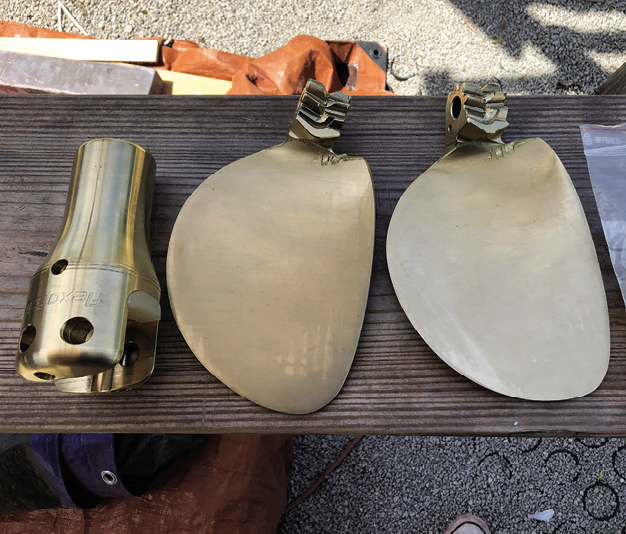
Accordingly, she recommended we change the propeller from a right-hand 16-inch diameter prop with a pitch of 12 (16X12R) to a right-hand 15-inch with a pitch of 11 (15X11R). She told me to leave the hub on the shaft and just mail the blades back to Flexofold.
The water is very murky at the marina. With the alligators no doubt keeping a close watch on me I rented a scuba tank and connected it to my DIY hookah rig and entered the water. I wanted a way to hold my tools and a way to hold onto the blades after I removed them. I tied a submerged bucket with a 5 pound dive weight in it and secured it to the prop shaft. I removed two stainless-steel allen-head bolts and pulled two 12 mm stainless steel pins and the blades came right off. The whole thing took only a few minutes.
I paid $540 for new blades so I did not have to wait for Flexofold to receive my blades before exchanging them. They later refunded the difference after making sure the returned blades were undamaged. Shipping took just five days. I got back into the water and performed the same steps in reverse.
An important note is the (2) allen-head bolts that secure the 12mm pins, which secure the blades to the hub, have a dried thread locker applied by Flexofold (Nina mailed me two new bolts at no charge). You can install these bolts underwater and the thread locker will activate. Though you can use regular threadlocker such as Loctite 243 with the boat on the hard, it will not cure under water. Based on my research it appears Loctite 248 will cure underwater which would be a very handy thing to have on hand. PS has found additional Loctite products that cure underwater (see “Adhesive Test,” PS April 2016).
With the new blades installed, my wife Gayle and I took the boat out on a calm day for another test run. Our goal was 3,600 RPM. Using our photo digital tachometer, we achieved 3,612 RPM. We were dialed in.
We conducted a speed test, using a hand-held Garmin GPS 76 powering the boat across the current with a light wind on the beam. 2,200 RPM gave us 5.2 knots and 2,500 RPM gave us 6.1 knots. Wide open throttle gave us 7.2 knots, which is our theoretical hull speed. My goal was 5 knots at ¾ throttle so it all worked out about right.
A few days later the Beta Marine digital calibrator for the tachometer arrived in the mail. I plugged it into the back of the tachometer. Farron informed me the displayed code should read 10.4. Ours read 11.3. He explained a higher number equates to a lower RPM. With the new code punched in I checked the recalibrated tachometer against our photo digital tachometer. It was dead on.
ALL GOALS MET
As stated in Part I of this series, my project goals were:
1. Attain a target speed of 5 knots cruising speed at ¾ power.
2. Provide a range of 250 nautical miles on flat water.
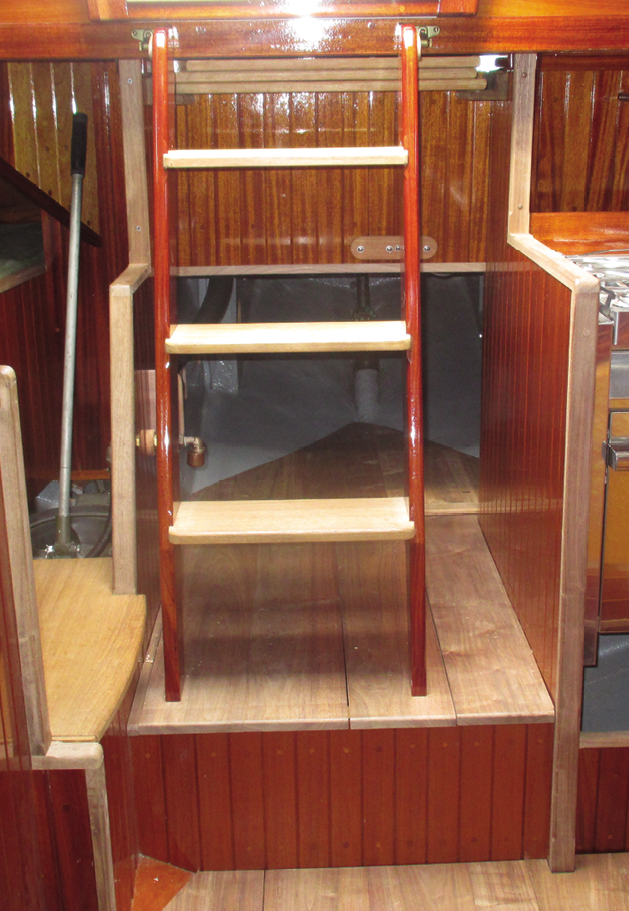
3. Provide maximum access to the engine for maintenance and repair.
4. Minimize loss of valuable storage space so critical on a voyaging sailboat.
5. Prioritize sailing performance over performance under engine power.
Follow-up speed tests indicated 2,200 RPM yields about 5.2 knots. Careful recording of RPM, speed, and fuel usage indicates we burn about 1/3 a gallon per hour at 2,200 RPM. Thus, our theoretical cruising range under power is about 250 nautical miles using 18 of the 19.2 gallons of fuel capacity.
I caddy fuel to the boat in a five-gallon VP Racing jerry jug I store in the port locker. If I start a trip with a full jug of fuel, that gives me a potential max range of 325 nautical miles. So far, I have been more than satisfied with the Flexofold two-blade folding propeller. The boat accelerates quickly from a dead stop and the stopping power with a good way on is impressive. She tracks straight under power slowly steering off course to port if I increase the RPMs above 2,200. It appears my “guess” of 5 degrees of off-center engine alignment was lucky indeed.
With the folding propeller and the extra effort to streamline the shaft log, I sense no change in the boat’s light air sailing performance. She accelerates and tacks just as easily as before in the lightest breeze. Our daily runs offshore remain about the same.
INBOARD CONVENIENCE
The cost of the engine installation was about $13,000 not including fuel driving the truck back and forth between home and the boatyard—a round trip journey of 66 miles. While the boat was on the hard about 22 months, I estimate I had spent about 12-14 months working on the project in various forms of short work days to long ones.
About six months after launching the boat, I singlehanded the now inboard diesel engine equipped Far Reach back to the Virgin Islands in December 2021 and returned home in May 2022. I was able to begin my voyage to the Virgin Islands on a windless day, taking advantage of a short window of opportunity to catch favorable conditions to cross the Gulf Stream and gain separation from the coast before the arrival of a major low pressure system. Without the engine, I might have been harbor-bound 7-10 days waiting for a better weather window. So, the engine proved its usefulness right away.
The support provided by Beta Marine in Oriental, NC was superb. I am especially appreciative of the expertise provided by Farron Peffer.
I was also pleased with the support Flexofold provided to me answering my questions in a timely manner and demonstrating they were as good as their word when it came time to swap out the propeller blades to get the diameter and pitch correct. There was no additional cost to me.
I admit I enjoy the convenience of having the inboard engine rather than the outboard. No doubt about that. Of course, the boat also looks better as her beautiful lines are on full display for me to enjoy as Carl Alberg intended. So, all my goals were met. I am pleased with the quality of the installation. I am immensely grateful to Tim Lackey (www.lackeysailing.com) for guiding me along and answering my many questions and appreciative of the encouragement I received on the Cape Dory Forum. All the skills I developed during the six year rebuild contributed to the engine installation—planning, fiberglassing, fairing, wood milling, cabinet making, electrical, etc.

WHAT WAS LOST
I appreciate most people do not care one whit about my next comment. While the Far Reach remains a very simple boat by modern standards, there is perhaps a small amount of magic lost now that we have an engine. I enjoyed a special kind of thrill when I sailed the boat knowing it was sail or drift. There was an adrenaline addicting stress factor entering a tight anchorage under sail and getting underway the same. It manifested itself as a kind of self-realized, inwardly appreciated, performance art no one else would see but me, but now lost.
For me sailing is a sport, and now that we sailors have GPS navigation, integrated chart-plotters, ice makers, electric winches, auto pilots, and air conditioning, the sport is diminished. Given all the advantages of modernity, I sincerely believe that engineless sailing is perhaps the last great challenge left to 21st century sailors who really want to test themselves.
With regards to the engine project itself, my take away is similar to the boat rebuild–don’t be afraid to tackle major projects on your boat. Know what you want to accomplish. Do your research. Establish reasonable goals. Build a plan. Find a good mentor. Execute ruthlessly. The reward is well worth the effort.
Everything on a cruising boat is a trade-off, and some of the trade-off is intangible. Engineless sailing adds a “P” for plenty to the challenge and fun of sailing.
While I continue to sail on and off the mooring and anchor without the engine, the knowledge of having help instantly available at the turn of a key reduces that slight nagging fear I previously felt but relished. While the skill level remains the same, the knowledge of having the engine available alters the experience—there is a change to the human element.
There were, of course, some more obvious, physical trade-offs:
1. Before the engine installation, we had several cubic feet of storage space under the cockpit.
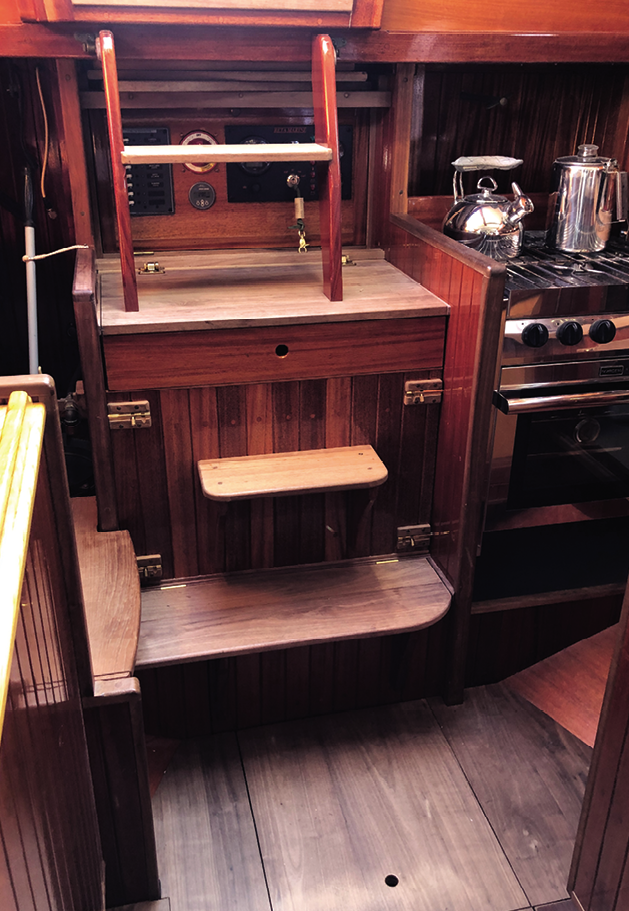
2. Although we did lose some very convenient space where the engine now resides, we have found reasonably accessible storage solutions. As before, nothing is adrift.
3. The space available is a little tight on the port side due to the offset installation, but overall it is good, and there is no interference with routine maintenance. I have easy access to the rear of the engine, transmission, and stuffing box through the port cockpit locker.

1. When folded, the streamlined blades dramatically reduce turbulence and won’t hang up on fish traps. Feathering blades also reduce turbulence but are still vulnerable to traps.
2. Having the offset prop behind the rudder meant that while there was no prop-wash in forward, in theory we can use prop wash to “walk” the stern laterally in reverse.
3. Flexofold said that with in my situation, increasing diameter 1 inch increases RPM by about 250; decreasing pitch by one inch will increase RPM by about 125-150.
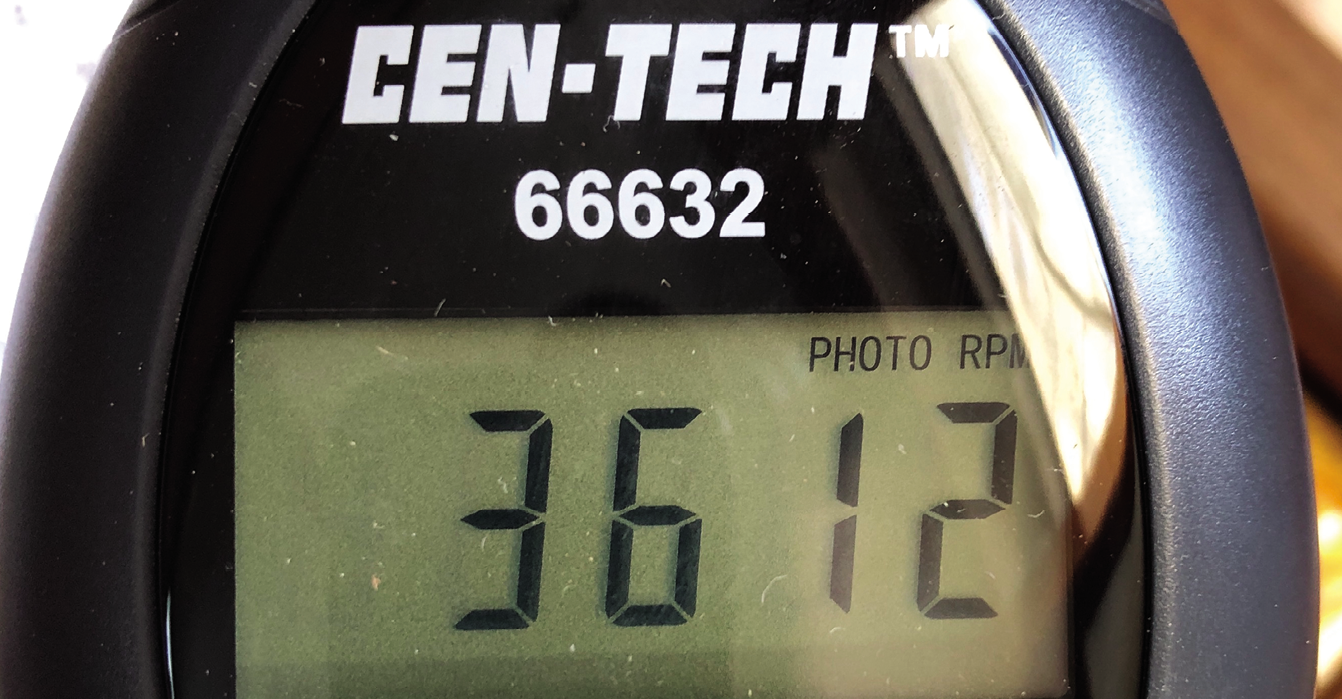
- Our goal was 3,600 RPM. Using our photo digital tachometer, we achieved 3,612 RPM, so we knew our tachometer was inaccurate.


