

Every sailboat occasionally needs to leave the water. Sometimes it’s more of an emergency room visit, caused by a grounding, collision or rigging failure. But more often than not there’s a less traumatic reason for the haulout; bottom painting, a new paint job, or perhaps a cutless bearing replacement and propeller change.
The current trend in boatyards is toward the do-it-for-me (DIFM) operation in which talented craftspersons deliver the needed service and labor rates continue to climb. Owners of older boats and those with tighter budgets often seek more traditional boatyards where a cost effective, do-it-yourself (DIY) ethos still prevails (see PS June 2012, “Do-it-Yourself Boatyards”). Both alternatives should feature a well-maintained lift and a competent boat handling crew (see Inside PS blog post “Pro Tips to Hauling Out”).
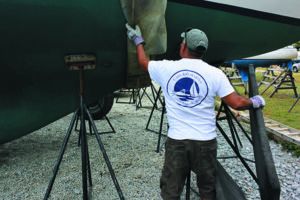
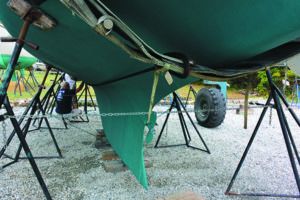
You can tell a lot about the expertise of a boatyard staff by how efficiently they block the foot of your sailboat’s keel, put jackstands into position, and trim the boat fore and aft. Little things like making sure your decks will drain properly become a big deal as your stay in the yard grows longer.
Before you settle on a new yard, look over their equipment, watch the crew in operation, and check the size and type of boats they haul and service. I always look for a few heavier, deeper draft, taller rigged sailboats that have been hauled and blocked up efficiently. What you don’t want to hear is that your boat will be the largest sailboat the yard has ever hauled!
When it comes to boat hoists, I’m a Marine Travel Lift fan, but recognize that things like the structural condition of the lift pier and the maintenance of the equipment are just as important as the brand of the lift itself. The lift slings shouldn’t show signs of ruptured strands, excessive abrasion, or deterioration from years of UV exposure. Nor should the lift be dripping every kind of fluid mentioned in the owner’s manual. An experienced operator is as important as the hardware and their talents include an awareness of your boat’s underbody, prop location, and concern about transducers. Giving the lift operator a picture or profile design drawing is a big help.
Crane hoisting can be a safe and an appropriate method of hauling, but a few rules of geometry and bulkhead engineering come into play. First of all, the further the vessel is from the crane, the longer the lever arm and the more load the crane’s support legs place on the surface near the bulkhead. Slings used to haul the boat should be attached to steel spreader bars in order to minimize the compression load across the deck. There are still some effective marine railways, elevator lifts and hydraulic trailers utilized for hauling sailboats, but the majority of yards have settled on mobile sling lifts and U-shaped lift piers.
Refit report
Last summer I swapped sailing for a two-month stint at Casa Rio. Although this might sound like a resort, the name belongs to a boatyard that’s tucked away in a quiet creek just south of Annapolis, MD. It’s home to sailors who prefer a boatyard that encourages DIY work, and it deserves to be put on an endangered species list, along with those of us who still like to roll up our sleeves and have at it.
Word of mouth had pointed me toward Casa Rio. A couple of friends and industry pros had spoken highly of the operation, and my visit to the yard confirmed what they’d told me. During a brief conversation I had with the yard’s management team, I heard how they catered to both types of owners by providing turn-key service for the DIFM crowd, and still holding out a welcome sign to do-it-yourselfers like me.
By early July, most of Casa Rio’s fleet had been launched, shoreside Maryland was becoming a Mohave Desert with high humidity, and the boatyard was brimming with solitude. This wasn’t all bad, since I’d planned to do some painting, and the hot weather would accelerate the between-coat cure time. So, with extra ice, water and enough sense to always opt for the shadier side of the boat, I began.
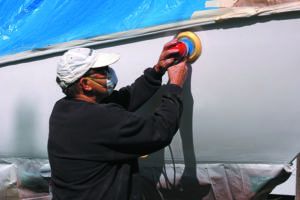
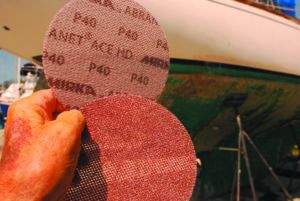
I like to start below the waterline using a range of push and pull scrapers to assault whatever the high pressure washer hasn’t dislodged. Since I wanted to remove all my bottom paint to check the condition of the barrier coat, the next phase of my bottom prep campaign relied upon a Fein vacuum sanding rig (see facing page, “Random Orbit Sander Runs Circles Around Hand-sanding”). It’s the same gear used by the pros at Casa Rio, who also introduced me to the surprisingly effective, 40-grit wire mesh disks.
I followed up the 40-grit bottom-sanding with some 80-grit grooming. The net effect is a smooth surface, free from all antifouling paint. The underlying barrier coat, a 10-year-old test bed of Inetrlux’s Interprotect and a Sherwin Williams epoxy called Sea Guard, was still well adhered. A few blisters needed attention, but careful tapping with a plastic-headed hammer resulted in a solid sounding ring of encouragement—good news to the owner of a 51-year-old sailboat with a solid FRP hull.
The DIY Mindset
There’s a value added linked to being able to maintain and repair your own sailboat. Whether it’s renewing the finish or replacing the rigging, the primary goal may be doing the job cost effectively. But of equal importance is what you learn in the process. Lash the varied jobs together and you start to get a feel for how your boat was built.
The net effect is an increased awareness, a kind of prescience that helps you discern future problems before they arise. This form of “boatwright zen” pays off in fewer breakdowns and an ability to cope with a wide range of technical challenges.
Keep in mind that when you sail offshore, you’re on your own, the cellphone is silent and your credit cards are as useful as a drill with no bits.
Whether it’s a simple job or a complete refit, there are a few boatyard rules of the road that are worth following. First of all, pay heed to the old salts. There was a Maine shipwright who liked to point out that “you can’t say what you don’t know.” What he meant was to be careful with simple tasks such as switch to a new brand of paint, or more complex challenges such as diagnosing the extent of damage linked to a grounding incident.
Fixing symptoms isn’t the same as resolving the problem. A big dent in the lead at the leading edge of the keel is obvious and easy to patch. The damage to the laminate that attaches the ballast to the hull can be harder to detect. Know when to call for help.
Another of these DIY golden rules is the need to be very detailed in estimating how much time it will take to complete a job. Be sure to include set up time, prep and cleanup work and even build in a buffer for minor snafus. If it’s a painting project, make sure that the time involved with preparation (dewaxing, sanding, filling, fairing) has been accurately accounted for. Once you have a list of all the steps and the time it will take to complete each job, multiply by a factor of two and you will likely be closer to reality. Developing a realistic timeline and budget helps put a boatyard estimate/quote into perspective. There are times when choosing the latter may be the right solution.
Any painter will tell you that proper surface preparation is essential for a good finish. Practical Sailor’s step-by-step guide to repainting a hull includes a “Primer on Prep” that covers all the major prep-work steps (see PS August 2009, “DIY Topside Paint Test: Two-part Linear Polyurethanes Face Off”). 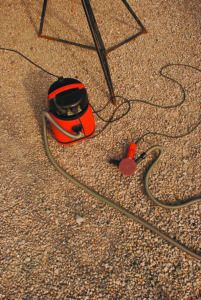 We have also compared the various fairing compounds (see PS August 2017, “DIY Filling and Fairing”).
The random orbital sander spins in an elliptical pattern to minimizes swirl marks. For heavier work, you’ll need a dual action sander or a more aggressive tool
(see PS April 2014, “Digging into Bottom Paint Removal”).
-
- The dual-action sander operates in random orbital mode for fairing and sanding, or in rotary mode for heavier work.
- The Fein vacuum sanding kit is the same used by the professionals at Casa Rio. You can also build your own do-it-yourself vacuum system using an ordi
 nary shop vac, a five-gallon bucket, and a random-orbital sander (see “Dustless Sanding,” April 2016).
 - The yard crew introduced us to the effectiveness of 40-grit wire Mirka Abranet mesh disks. Practical Sailor has conducted a variety of tests on abrasive papers and sponges (see PS July 2006, “Hand Abrasive Round-up”).

Coating Wisdom
Over the years, paint has become a more complex concoction. The discovery of polymerization led to polyester and epoxy-based resins, and urethane and acrylic revamped paint technology. The new chemistry has improved hardness, toughness, flexibility, and gloss retention. These qualities make coatings more durable and increase resistance to weathering.
In the old days, pigments, resin, and oil (tung, linseed, soy, etc.) were mixed with reducers and driers to make a not-so-durable and not-so-long-lasting surface coating. Those days are gone and today’s marine paints range from easy to apply, single-part, modified alkyd enamels to two-part acrylic or polyester urethane coatings that can deliver long lasting, like-new looks (see PS October 2012, “Topside-Paint Endurance Test 3-year Checkup”).
The skills of a boat painter are best acquired one step at a time. Start with a small project such as a dinghy do-over and use a single part paint with a reputation for durability and ease of handling. Over the years I’ve found that Interlux Brightside, Pettit Easypoxy and Epifanes Monourethane deliver these attributes. One of the rules I’ve learned to follow is to stick to the manufacturer’s recommended reducer and the primers they specify, plus follow the between coat sanding regime called out in the directions.
The prep process is a story unto itself and how well it’s executed is the single most important factor in the outcome of any paint job. Poor quality prep means early paint adhesion problems and a sooner rather than later need to remove all of the paint applied.

A lot of able, seaworthy, older fiberglass sailboats are falling on hard times. It’s a topic that keeps resurfacing as more and more of these small to midsize sailboats are unable to be sold. It brings to mind a Bill Tripp 31-foot Seafaer sloop that had been moored near Wind Shadow for a couple of decades. The owner of the Dutch built, fiberglass pocket cruiser couldn’t find a buyer, despite his fire sale pricing. Neither family nor friends were interested in the 40-year-old sloop, so her final voyage was off to a fiberglass chipper.
This is becoming an all too often repeated scenario. Older fiberglass sailboats, with solid hulls and sound rigging, are being crushed and scoured for scrap metal. It may be a sequel to the automotive lifecycle, but it’s a sad ending for a seaworthy sailboat.
A closer look at why good boats are being destroyed spotlights a few significant factors. For many, it’s not the price of the boat that’s prohibitive, it’s the “all-up” cost of boat ownership that derails the deal. Topping the list are items such as slip or mooring fees, insurance premiums, haulout and winter storage costs, plus the ever escalating cost of boatyard labor. In just a few years, these expenses can dwarf the purchase price of many good old boats.
But the final nail in the older sailboat coffin is the shift in owner attitude toward maintenance. The do-it-yourself (DIY) attitude is disappearing and the trend among many sailors is to sidelined the toolbox and forego the development of DIY skills in favor of a do-it-for-me (DIFM) approach to maintenance.
More and more boating problems are being solved with a smartphone and a credit card. It’s convenient but there are downsides to the tactic. One big downside is the statement that arrives at the end of each month. The annual cost of this kind of concierge boating is reminiscent of yachting in the mid-1900s, when an owner annually spent at least 10 percent of the yacht’s purchase price on annual maintenance.
Of course, there are times when the expertise of a well-trained, certified ABYC technician is just what’s needed. But there are also plenty of maintenance tasks that a boat owner can handle and take pride in accomplishing. Working on your own boat won’t replace going sailing, but it can deliver some rewards of its own. And as Kenneth Grahame so aptly put it: “There is nothing — absolutely nothing — half so much worth doing as simply messing about in boats.”
I’ve owned Wind Shadow, an Ericson 41, for 45 years and have been a stereotype a do-it-yourselfer, even during the years I managed a full service boatyard.
One of the most important lessons I’ve learned is that fiberglass is a long lived, DIY maintainable material. My affinity for plastic afloat began when I was building surfboards and testing my new designs on glassy, dawn wave faces before it was time to go to school.
This early trial and error experience with turning a liquid polymer into a solid easily transitioned into some boat project skills. Fortunately, the first thing I grasped was some simple safety measures. These measures included avoiding contact with dust, fumes and the caustic nature of hard-to-pronounce chemicals (see PS April 2018, “Staying Safe in the Boatyard”) .
The phrase, “maintenance-free fiberglass,” must have been coined by someone running for office. It’s true in the short term, but eventually acid rain, exhaust particles and other sources of dust and dirt attack the FRP surface.
Properly applied gelcoat is a durable protective coating. And when kindly treated it delivers a decade or more of gloss and protection. Eventually, most gelcoats becomes porous, crazed, and quite pervious. A new paint job, and probably an epoxy barrier coat, can add years of life, but at a cost (see “Epoxy Barrier Coat Update,” PS September 2019). For the owner who is unprepared to take on these projects and reluctant to pay someone else to do it, it may be time to do some soul-searching.
PS contributing editor Ralph Naranjo documented his trans-oceanic voyages with his family during the 1980s in his book “Windshadow West.”
The goal of the preparation work is two-fold. Firstly, it’s an effort to remove all old, poorly-adhered paint and expose a surface that’s ready to be primed. This may also require filling voids and gouges with a two-part epoxy fairing compound. It’s not a task for a high-density epoxy filler, a material that will make sanding a nightmare. Low-density fillers like West 407 or 410 mixed with West 105/205 resin works well, as does Pettit’s EZ Fair, Interlux’s Interfill 883, System Three Quick Fair, Sea Hawk’s Hawk Filler, and Total Boat’s Total Fair. These are all two-part, premixed, fairing compounds (see PS July 2016, “Epoxy Fairing Compounds: Part One.” If I need to fair below the waterline or fill small blisters I also like Interlux Watertite.
Paint mixing sets the stage for success, and I usually set up a makeshift mixing table with essential tools at the ready. These include a lid lifter rather than a slotted screw driver, and an ice pick to punch holes in the can’s flange so that excess paint that collects on the rim will drain back into the can. When possible, I make use of a commercial paint shaker, a real help when dealing with bottom paint. Otherwise, I patiently use a sturdy hand-stirring stick to make sure the sludge at the bottom is coaxed into suspension. I prefer to pour well-stirred topsides and deck paint trough a paint filter to strain out any debris. This allows me to apply paint from a paper bucket rather than the can itself.
Paint like a pro
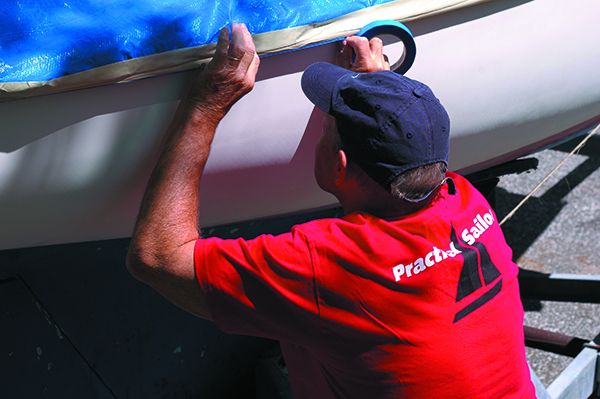
Prior to spreading paint on the surface, I brush off all dust (air spray if available) and wipe the surface with a tack rag. Masking tape is in place and the brushes or rollers I intend to use are ready. I prefer a natural bristle brush that allows me to better control the paint (see PS April 2011, “Things to Know Before You Buy a Bristle Brush”). Sponge brushes are tempting, especially because they don’t require a post-painting clean up. But I find that they hold a lot of paint, and just a small amount of pressure allows too much to flood the surface. However, they are quite useful for “tipping” to remove bubbles created by the roller when rolling-and-tipping a large area. For tipping two-part LPU paints, I frequently swap foam brushes since the solvents can cause the foam to deteriorate. Other pros prefer high-quality bristle brushes for tipping. Some PS readers have been satisfied with DIY two-part paint jobs carried out by rolling alone (see PS Mailport September 2020). I have not tried this myself.
Application is an art form, and with practice comes improvement in performance. Every painter has their own formula for success, but most agree on a few simple rules. First of all, less is more and this means each coat should be on the verge of too little paint rather than too much, especially on vertical surfaces. Overdo it, and the paint will sag and run, too little paint may result in an overly-thin coat but not the calamity of having to sand out numerous sags.
Just before dipping the brush into the bucket, an experienced painter double-checks the viscosity of the paint. If it’s too thick, the paint will be reluctant to flow, retain brush marks and accentuate overlaps. Too thin, and the paint covers poorly and is quicker to sag. The goal is a happy medium that allows the coating to flow out, hiding brush strokes, but that also allows the skin to begin curing before it sags. Follow the recommendations of the manufacturer regarding the type and volume of reducer to use and note the temperature range recommended for a particular reducer.

Ralph's Marine Coatings Cheat Sheet
| ITEM | LOCATION | PRODUCT | MAKER |
|---|---|---|---|
| TOE RAILS | Exterior | Cetol | Sikkens |
| TEAK COAMINGS/HAND RAILS | Exterior | Captains 1015 | Pettit |
| DORADE BOXES | Exterior | Awlwood | Awlgrip |
| HATCH BOARDS | Exterior | Gloss Clear Varnish | Epifanes |
| CABIN SOLE | Interior | Teak Oil and Sealer | Boatlife |
| BULKHEADS/CEILINGS | Interior | Goldspar Satin | Interlux |
| TEAK DECKS | Exterior | Teak Sealer and Protector | Teakdeck Systems |
Brightwork vs. bare wood
Teak decks offer great traction, at least until someone decides to sand the surface and coat it with an oily sealer. Unfortunately, an excessively oily sealer can behave like ice on a sidewalk, increasing your chances of slipping and falling over the side.
Safe teak decks are clean, grey and often remain uncoated. Some of the new teak deck coatings do not rely on an oil-based sealer. Water-based products such as Teakdecking Systems Sealer and Protector delivers good footing and a warm teak color.
Aside from decks, all other trim or structural wood components should be sealed, varnished, or painted. Painting is both protective and practical, but ever since the Vikings began rubbing fish oil on their wooden longboats, the way the rich grain accentuates the twist of a lapstrake plank has held an aesthetic appeal. Nevertheless, a quick scan of the fleet at any sailboat show today reveals less wood than ever before.
Builders save money by eliminating woodwork and buyers save money and time by not having an annual commitment to redoing bright work. Owners of older boats brimming with brightwork either learn to enjoy the annual rejuvenation process, spend a considerable sum for someone else to do it, or let the finish deteriorate, inviting water to invade joints and cause even teak to deteriorate.
Practical Sailor has tested a variety of clear-coat materials that range from traditional tung-oil varnishes to two-part clear LPU coatings (see PS September 2011, “The Best Marine Varnish: Exterior Wood Finish Tests”).
I’m no stranger to sealers and soft finishes and have found a few legitimate shortcuts along the way. I’ve gradually strayed from the traditionalist’s view that every piece of wood, from a spruce mast to match-stick sized piece of trim must have eight coats of spar varnish.
Wood work on a sailboat, even teak, tends to shed clear coatings like a Labrador retriever shakes water off its back. And that’s why I’ve settled on a varnish that has good adhesion, but is flexible and easy to sand. Pettit 1015 Captains Varnish meets that bill. I prep with a scuff sanding and can soon recoat. It’s not arduous, and spot repairs can be feathered in easily.
After 45 years of failed attempts at finding a durable clearcoat that will adhere well to my two mahogany Dorades, Awlgrip’s Awlwood solved the problem. The Awlwood primer proved to be an effective grain filler with great adhesive ability. Once cured and lightly sanded, the one-part acrylic topcoats went on smoothly and needed only a new coat the following spring. It’s been on the nearly three years and the Dorade boxes are still doing well.
Conclusion
Don’t let “perfect” become the arch enemy of a job well done. Perfect has a black hole effect on time and the cost of a job. Admire the work of a true restorationist, especially their ability to attain better-than-new results. But also recognize the cost of such lofty goals and how it can double or triple the time it takes to do a good job. The best way to avoid this particular pitfall is to begin with a clear picture of how much you have to spend on each job and what your priorities are regarding how good a finish—is good enough.
Editor-at-large Ralph Naranjo is the author of The Art of Seamanship. He is a is an adjunct lecturer at the Annapolis School of Seamanship.


“Perfect is the enemy of good” goes hand in hand with the the watch phrase I often repeat in the back my mind: “If I aim for perfect and maintain a workman-like standard and pace, I have a chance at ‘darn good.'”
“Double the time required for the job” – I couldn’t agree more. Between simple things like a weird gnat plague when I was bottom painting one year, and gave me a lovely gnat covered bottom, to simple, but maddening things in DIY yards, like showing up on a Sunday morning with all of your painting supplies, only to discover that your neighbour on one side has just started messily washing his boat with a spray hose, liberally splashing your boat as he works, and the guy on the other side has just started using a bottom sander, without bothering to cover the space between your boats with any kind of a barrier. Sigh. There’s a reason I started taking vacation time during the week for these jobs, and arriving first thing in the morning, so I (usually) had the place to myself. I also like to start working on the boat the moment the snow has melted, and it’s warm enough to paint – you can avoid the mayhem of the weekend before “launch day”.
One factor that surprised me, the first time I used Interlux Interprotect were the problems I encountered with paint rollers. They kept dissolving. I started with cheap, generic ones, went to expensive ones, then ones rated for paints and glues, industrial rollers, etc. Some lasted longer, but pretty soon they’d be hanging in gooey shreds off the roller. In desperation, I finally found one that wouldn’t disintegrate – a nearly zero nap roller designed for coatings on driveways – it wasn’t great, but it was better than nothing, and it got the job done.
I’ve been DIYing my 36 year old Newport 30 for a decade, and while it’s often been been backbreaking and infuriating, there is a solemn pleasure in looking at the job you did, being happy with it, and knowing that you’ve saved yourself a ton of money by not paying someone else to do it.
LanceH. “Great Escape”. Newport 30 – Mk ll, Oakville, Ontario, Canada
Also, if you’re a new sailor, rest assured that almost any job you need to do on a sailboat has a YouTube video of someone doing the same thing. I’ve tackled plenty of jobs outside my comfort range after doing some research and reading, and then watching several YouTube videos on the subject. 😉
Hi, I am interested in trying some of the wire mesh sanding discs that were recommended by Casa Rio. Who makes them and where do you buy them. I live in New England if that helps.