

GORILLA GLUE AND UV
Regarding your report on repairing damaged core panels, “Can Glue Injection Fix Rotten Core?” The problem I have found is that Gorilla Glue becomes brittle and degrades within a year or so. I fixed a badly delaminated cockpit sole using Don Casey’s “This Old Boat” suggestion of cutting several parallel long strips through the top layer with a circular saw. I slightly thinned some epoxy with acetone just enough to aid in flow and wet everything out, and injected epoxy under any delaminated area which was easy to get at by lifting long cuts. Afterwards, I laid wax paper on top, then a wooden board on top of the wax paper and a board under the sole, screwing them tightly together like a big old sandwich. After curing, I removed the screws, boards, wax paper, and then filled screw holes with thickened epoxy, and redid the whole cockpit sole non-skid with KiwiGrip. It came out structurally solid and looking great. After five years, the KiwiGrip got a bit warn, but the sole has remained rock solid.
Paul Eugenio
via PS Online

other glues tested, but it was not exposed to UV.
We used Gorilla Glue (Original formula) on an SUP and a sailing dinghy and they are still rock solid. We have used it a few places on an F-24 sailboat this summer and will be monitoring. In our other tests, UV did make the glue brittle and weak, but in a core repair, it should not see the sun.
VACUUM PUMP CORE REPAIR
There is a way of repairing wet cored hulls that you did not cover in your review. Briefly, a vacuum pump is used to draw dried air into the core to dry it out. Leaks can be located with a small positive pressure. Only 8 psi was used for positive pressure. Some soapy water will show the leaks as the positively pressurized air leaks out. Holes are drilled into the hull to strategically direct dry air to the wet areas. Then the vacuum pump is used to draw the dried air into the core. After the core is dry, the vacuum pump is used to pull epoxy into the voids in the dried core. Foam core does not have to be replaced, only rotten wood core does.
Calvin Smith
Catalina 30
Ventura County, CA
For drying, we’ve also used a blow drier with good results (see “Boat Clinic: Minor Repair to Cored Decks,” PS Online).” For some repairs, replacing the core might be easier than engineering a suction or pumping approach (see “Step-by-Step Core Repair,” PS August 2020).
GREASE GUN CORE REPAIR
Having injected both hulls and decks with core problems, and then had the opportunity to disassemble them to see how I had done, I offer the following comments.
Wet plywood is a problem as flow paths for repair materials within the plywood are very limited. If the skins are delaminated from the core any repair adhesive may have a chance to spread further and bond them back down—at least for a while.
Water, and resulting rot, often flows through the unfilled kerfs between contour-cut balsa or foam core blocks. Unfilled kerfs also contribute to skin delamination even when no water is present. Drilling into a core block will be ineffective in connecting to the kerf (canal) system between the skins. The kerfs are usually use easier to spot from below.
Once tied into the kerf system, getting the epoxy — and I suspect Gorilla Glue — to travel far is difficult unless you use a cheap disposable automotive grease gun. They can easily generate 1-3,000 psi — so it is possible to blow the skins off the core with too much pressure. Purge the gun and hose with solvent before using. I have not tried this with method with Gorilla Glue.
Drill the right size pilot hole in the skin for self-tapping Zerk fittings. Available from McMaster Carr, these are equipped with one-way ball valves, and can easily be threaded into the laminate and connected to the grease gun for injection. Be sure to always have an open hole ahead of the injection site. When liquid appears in the open hole seal it with another Zerk and start injecting in that one.
With thin ungelcoated skins, where the kerfs are visible, tinting the injection resin may make it easier to follow its flow paths. Keep a watch on both sides of the panel to avoid blowing off either skin.
Final thoughts. If you use this method with epoxy or other resins that heat up during cure, when you are done, give the grease gun a few hours to cool down before throwing it in the dumpster.
Bruce Pfund
Pfund Special Projects
EXTRA STORAGE FEES FOR MAST UP?
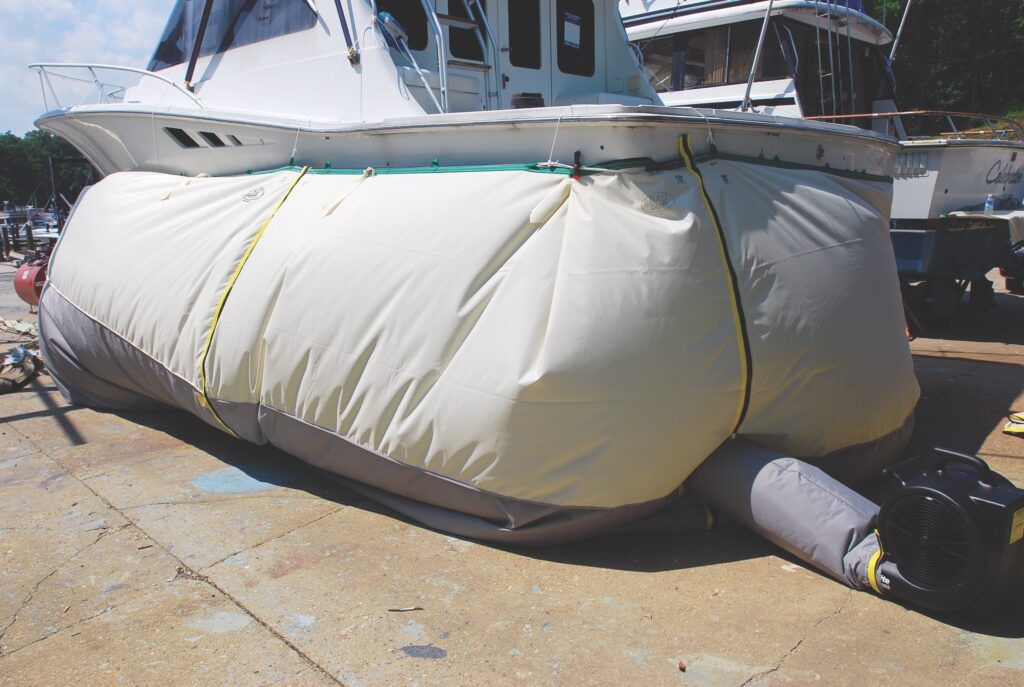
Regarding your recent blog post on winter mast storage, “The Pros and Cons of Leaving Your Mast Up for Winter,” I winter at a Safe Harbor marina (of which there are 100 or so, including the former Brewer’s Marinas.) My marina charges $7.10 per square foot on a boat with its mast still stepped [36 percent more than with it unstepped]. I do not understand why, but that’s what they do. The total bill for storing my cutter, unstepping the mast, and restepping it would come to about $2,700. Also, my winter cover ($3,000) is designed for keeping the mast in place.
Al Sugarman
Baba 43
Greenport, CT
We’ve yet to reach out for comment from Safe Harbor, but will. We suspect the reason for this policy has to do with liability. Although it is rare for a sailboat to tumble off its jackstands in mild conditions, we have heard of boats with headsails that unfurled going down. Some yards require that all sails be removed from the boat when being hauled—a sound requirement to make, considering the consequences.
Spring may still seem like a long way off, but the spring launch season will be upon our northern brethren before they know it. Don’t wait until the last minute to take care of maintenance chores or upgrades you’ve been putting off.
SAIL CLEANING
Before you raise the mast this season, it’s a good time to clean your sails and topside canvas. It’s also the ideal time to upgrade any masthead-mounted electronics, like wind-reading instruments.
For tips and product recommendations regarding sail cleaning, check out the “Dealing with Dirty Sails” Inside PS blog post and the April 15, 2002 PS Advisor in our online archive.
You’ll also find articles on canvas care (February 2014 issue) in the online archive, and head-to-head product tests of mildew treatments and stain removers (November 2013 issue). If you’re the DIY type, the blog post “Homemade Mildew Preventers that Really Work” offers a recipe for an effective, homemade mildew preventer.
SYSTEM UPGRADES
If you’re adding or upgrading a wind-sensing system, our three-part series on wind instruments and a review of the Maretron ultrasonic wind sensors are must-reads. The series launched in the March 2014 issue, and Part 2 looked at data displays and user interface (May 2014 issue). Part 3 (August 2014) focused on the best system combinations, while PS March 2015 focused on ultrasonic products.
Pre-season housekeeping is also a good time to give check your sanitation system. How are your joker valves holding up (see July 2013 online)? Is the holding tank stench unbearable (see March 2012 and December 2013 online)? Or is it time for a new throne? Check out our tests of electric-flush toilets (February 2011), vacuum-flush toilets (August 2011), and composting toilets (November 15, 2002). If you prefer to have all our sanitation system reports in one place, you’ll like the “Marine Sanitation Systems” two-part ebook series, which is available in the PS online bookstore. Part 1 looks at toilets, while Part 2 examines holding tanks, plumbing, and odor control.

BOATYARD BLUES
If you are one of those poor souls who are spending the summer in the boatyard rather than on the water, here are some product tests and tips articles for a DIY bottom job: estimating the costs of DIY paint removal (October 2011); sodablasting your hull (October 2011); chemical strippers and other and DIY paint removal methods (October 2011); removing an epoxy barrier coat (March 2009); repairing hull blisters (July 15, 2001); and top-bottom paints by region (March 2014). We also have two fairing compound tests premixed (July 2016), and mix-it-yourself (August 2017).

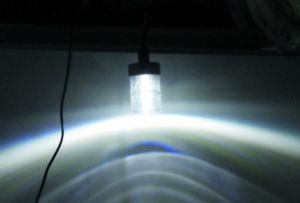
Last year wrote a positive report on an older Davis Mega-Light model (see “Extra Anchor Light,” PS October 2021) that was quite different from our more recent experience with a newer model. The older model uses an incandescent bulb, and though not USCG approved as an anchor light, we found it to be good enough for an emergency anchor light. The LED Mega-Light still comes with the original incandescent bulb (0.3 amps), and with that lamp installed, performs the same as it did in prior testing. We measured the bright beam width at +/- 8 degrees, and long distance visibility seemed enough to meet the standard.
However, on the newer lights, with a factory-installed LED bulb, the center of the bright beam is about 30 degrees above the horizon if mounted with the base down (and 30 degrees below the horizon if suspended from the base). In the areas outside this narrow bright band of light (within +/- 5 degrees of the horizon), the light is less than 10 percent of the required brightness. Although quite bright, the LED emits upwards instead of radially like the incandescent lamp does.
The LED also sits about 1/4-inch lower in the housing. When tilted 30 degrees, the lamp aligns with the fresnel lens and becomes much brighter. In practice this means that if it is suspended as suggested by the maker, the light is really only visible within 50-100 feet of the boat, with most of the beam being directed skyward.
Our experience offers an important lesson for DIY sailors looking to save some amps by swapping to a different bulb than the one specified. Navigation lights are only approved with the specific lamp that was used for approval testing—no changes allowed. The Davis Mega-Light is a clear example of why this matters. If the emitting portion of the lamp is not correctly aligned with the magnifying lens, the result is a much dimmer light. The light may look bright when turned on, but it might fail to meet the requirements for long distance visibility within the required angles. If you want to switch to an LED navigation light, replace the entire fixture with a USCG certified unit. The old one is probably corroded and soon to become unreliable anyway.
According to the response from Davis Marine (below) the company is exploring ways to improve the Mega-Light, and there are other, potentially better fitting, LED lights for the housing.
Response from Davis Marine.
We intentionally switched to LED bulbs since our customers really wanted a low-current-draw and long-life bulb that did not drain the battery. They wanted a light that could be left on for days, with an automatic daytime off-switch sensor to further save battery charge.
We now include a “brighter” LED bulb that draws 320 milliamps and also a “less bright” LED bulb that draws less than 23 milliamps, lasting up to 10,000 hours. We balanced the advantages and disadvantages between incandescent and LED and then chose the bulbs that are included. So far, our customers seem to be happy about the new bulbs, although I agree with you that it would be nice for the bulbs to stand higher from the socket. We’ll keep searching for an LED bulb that does this. Also worth noting is that other manufacturers sell “Mega Light compatible” LED bulbs that some customers like – they’re usually ultra-bright and more expensive, so additional lighting options are available.
Disaster is narrowly averted thanks to dockmates and mighty sump pump.
Recently I suffered a significant tear in the hose that surrounds the propeller shaft between the packing gland and the hull (I’ll spare you the gory details of how it happened). Fortunately I was in my slip at the time. The tear was so large that my automatic bilge pump was unable to keep up with the flow. My dock neighbor was on his boat and heard my desperate calls for help. With the help of my neighbor and marina staff, we were able to slow the flow using waterproof tape.
However, my auto bilge pump still wasn’t able to keep up. To supplement the auto pump, I used my built in manual bilge pump. To my horror, the handle on the manual pump broke off after about 5 minutes of use. After purchasing a submersible sump pump from a local hardware store, I was able to get ahead of the leak and with more help from dock neighbors move my boat to the haul out dock before it sank.
I was extremely lucky that this all occurred while I was in my slip with helpful neighbors, AC power available, and a hardware store only a few minutes away. I hate to think what the results would have been if I had been out on the lake, or worse yet, off shore.
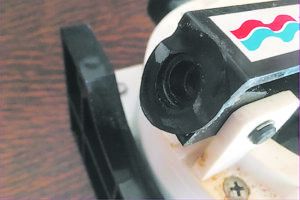
I have since removed the manual bilge pump and have a new one on order. I’m quite sure the pump is original equipment and has probably never been used before. I purchased my boat a couple of years ago from the original owner who always kept it on Lake Guntersville here in Alabama. The brand of the pump is Rule and I can’t find a model number anywhere on the pump. The piece that broke is the plastic lever that the handle fits into.
What I find most disturbing is the poor quality of the material used on a very vital piece of emergency equipment. I don’t know what a person can do to “test” this equipment. It worked fine for a few minutes and then totally failed. A visual inspection would have been very difficult, and I doubt it would have revealed any weaknesses.
When I started looking into a replacement, I was disappointed to see that some of the pumps only offered a one year warranty. Are these pumps supposed to be replaced annually? The one I’ve purchased has a five year warranty – still far short of what I would expect of such a crucial piece of equipment.
I’m not sure what the ultimate solution is, but clearly, we can’t rely on a manual bilge pump in an emergency.
John Streatfeild
Hunter 335 Comprador
Lake Guntersville, AL
As you point out, there is a big difference between a bilge pump designed to remove water from momentary down-flooding or small leaks, and an emergency bilge pump meant to pump water when the boat is holed. In the world of manual bilge pumps, the Edson 30—also available in a portable version—still ranks best for high capacity. For small capacity, the Whale Gusher Urchin was our champ in the last test.
Autonomous options include a high-capacity 12-volt pump, an engine-driven pump, a high capacity AC pump (with adequate power supply), and a fuel-powered pump. Be careful when comparing specifications since the stated flow rates doesn’t include the usual factors that impact pumping capacity. You’ll want to know the total dynamic head in your plumbing, which includes the amount of lift and friction in the hose run. (Several online calculators can help you do this www.marchpump.com/blog/how-tocalculate- total-dynamic-head-for-industrial-pump/)
Here are a just a few of the related PS reports:
• Inside PS blog post: “Bilge Pump Installation and Maintenance Tips,”
• PS August 2000, “Whale Urchin and Edson 30 Most Efficient Bilge Pumps.”
• PS November 2014 “Backup Bilge Pumps”
• PS September 2010 “High Capacity Electric Bilge Pump Test”
• PS August 2010 “Fast Flow Pump: The Name Says it All”
PS is collecting information for an upcoming report on high-capacity emergency pumps and would be interested in hearing from readers at [email protected].


